Você está no 3DFinder
Buscamos em Thingiverse, MakerWorld e Printables ao mesmo tempo para te dar o melhor de cada uma.
Descrição
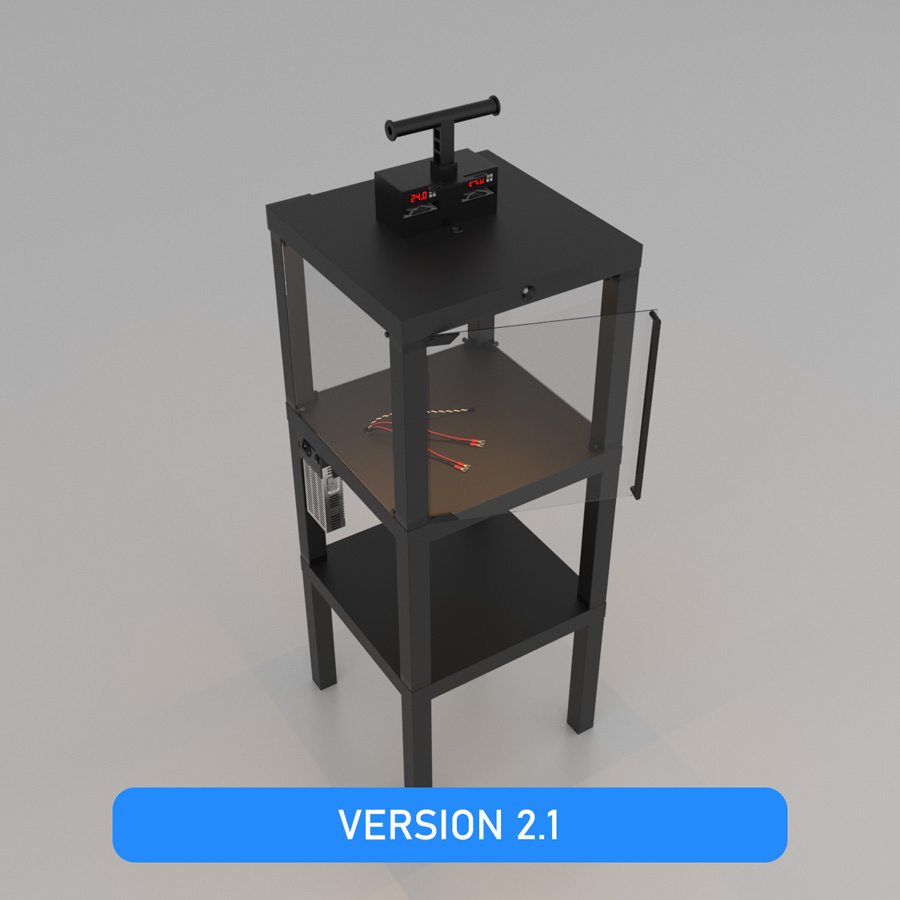
Jocys.com Temperature Controlled Enclosure with Motion Sensor LED Lights
INTRO
Below you will find parts and tools, which will help you to assemble enclosure. If you noticed mistakes, have questions or suggestions, please write to info@jocys.com • Project page: Jocys.com/enclosure
Maximum temperature inside enclosure depends on temperature of the room and heated 3D printer bed. Stable higher temperature inside enclosure reduces warping and detaching of bigger parts from the plate. Control precision is 1°C. HOW IT WORKS: If temperature rises +1°C above set limit (for example, set limit is +40°C and temperature rises to +41°C), two “MH1210A” controllers start fans (ventilation) and drop temperature to +40°C. Tested temperature limit inside enclosure +46°C (room +28°C, heated bed +85°C, extruder +240°C). In order to achieve even higher temperatures inside enclosure, insulation must be added to windows and door. All enclosure parts (cut perspex sheets, ~2kg PETG filament (20% infill), bottle of Windex, smoke alarm, cables, controllers, etc.) cost me about €260 (tools are not included).
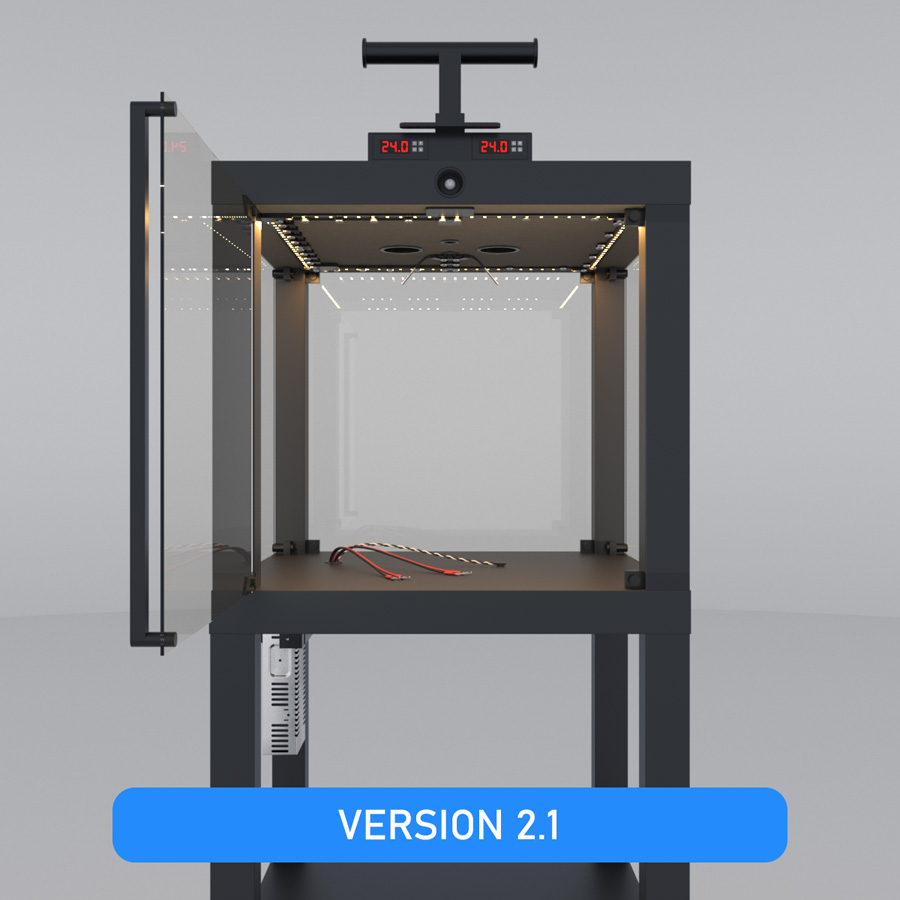
E3D V6 HotEnd is rated to 40°C ambient operating temperature. As you approach that temperature, cooling efficiency is reduced, allowing more heat up past the heatbreak. This can cause low temperature filament to soften in the mechanism to cause feed problems. Therefore, for PETG filament, I set both enclosure fans to keep 35°C inside enclosure.
E3D V6 HotEnd is rated to 40°C ambient operating temperature. As you approach that temperature, cooling efficiency is reduced, allowing more heat up past the heatbreak. This can cause low temperature filament to soften in the mechanism to cause feed problems. Therefore, for PETG filament, I set both enclosure fans to keep 35°C inside enclosure.
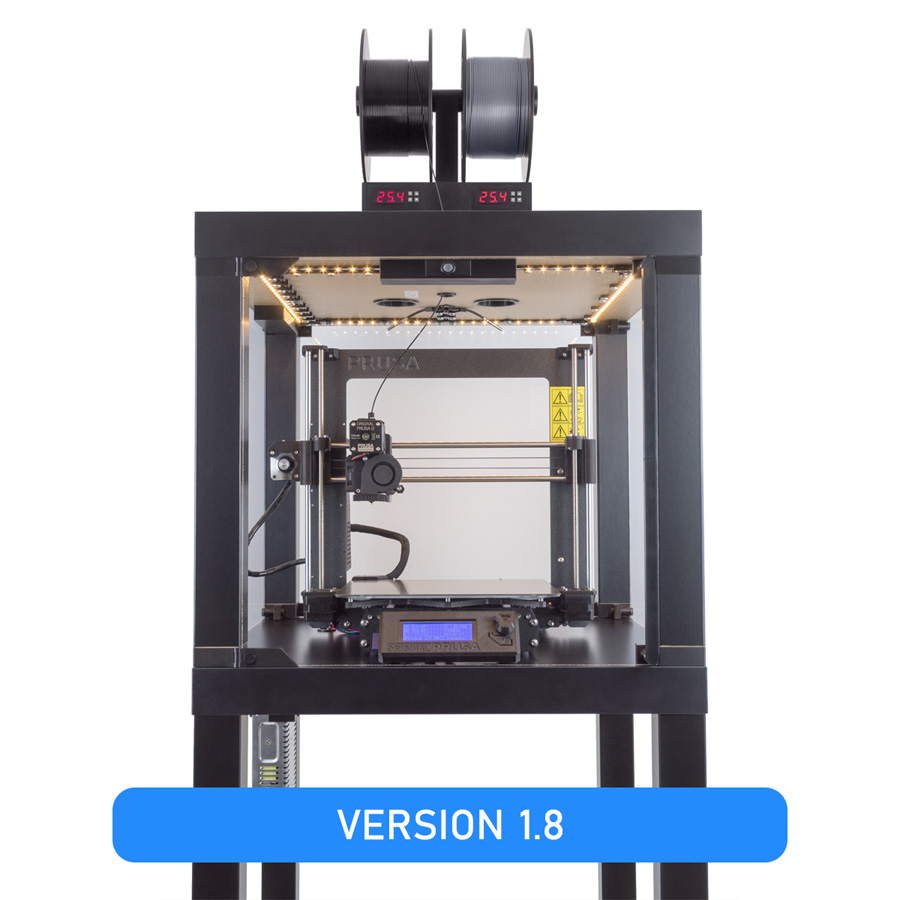
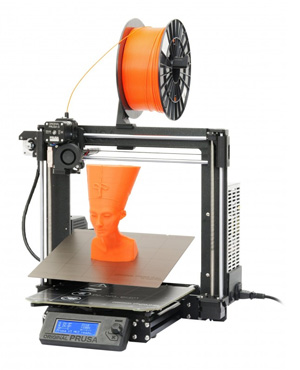
Parts were printed from PETG with Prusa3D i3 MK3 Printer.
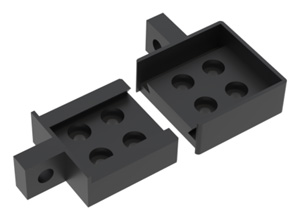
If your printer is not precise enough, printed parts may not fit into each other. To test, if your printer is precise enough, you can print and try to fit into each other these two parts from “Table_3_Leg_Top_Ends.STL” file. Spaces between some parts are 0.1mm only.
1mm spaces between perspex sheets and table are for even ventilation.
2 temperature controller-fan sets are for safety, in case one set malfunctions.
2 temperature controller-fan sets are for safety, in case one set malfunctions.
If you made your own updates or (file) changes, related to this project, please send me a link. I will add this link to your work on this page.
UPDATES
|
2.1 (2020-02-25) • Filament Guide for Filament Holder added. Filament Guide for Prusa3D Filament Holder updated. 2.0 (2019-03-12) • Internal cable connection boxes removed. Motion sensor moved from tabletop bottom to front. 1.9 (2019-02-19) • Controller slots, front panels and stoppers changed - easier to insert controllers. 0.1 (2018-07-04) • ... |
PARTS
|
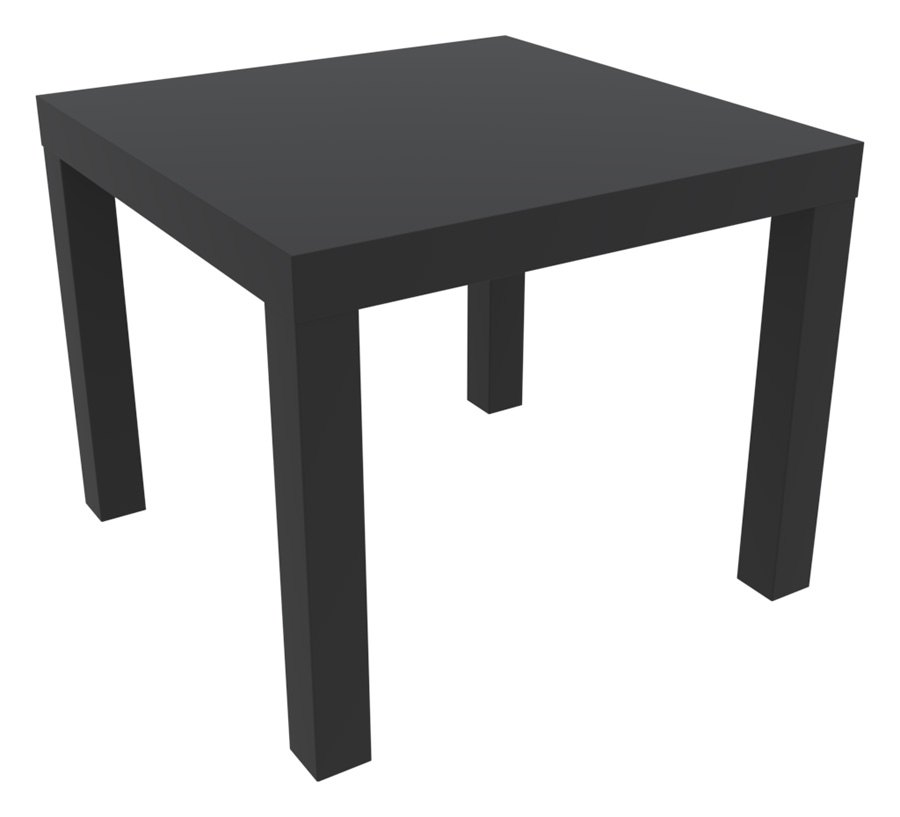
3 x Ikea LACK table
Article no: 200.114.08
Length: 75 cm Width: 55 cm Height: 5 cm |
|
|
4 x Window/door sheet (with 4 corner holes)
Cutting done for my order was not very precise (±1mm). You may try other company with more precise equipment for cutting and drilling plastic.
Hole Size: 8mm
Hole (edge) Distance (from sheet edge): 5mm Clear Perspex 000 Shape: Rectangle Thickness: 3 mm Length: 444 mm Width: 438 mm Finish: Polished & Buffed |
|
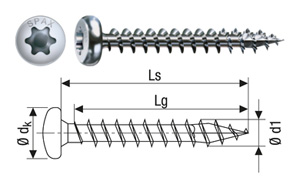
1 x Box with 200 screws
EAN: 4003530166303
SPAX-No.: 0201010500253 Thread diameter d1: 5 mm Length total Ls: 25 mm Head diameter dk: 9,9 mm Partial thread length LgT: 22 mm BIT size T: 20 |
|
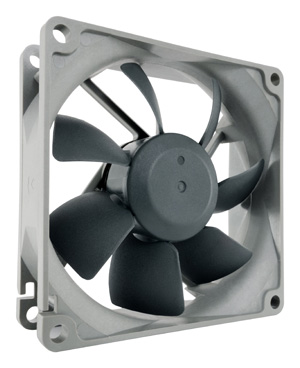
2 x Noctua NF-R8 redux-1800
This fan has 3-pin connector. ("PWM" fan models have 4-pin connectors.)
Size: 80x80x25 mm
Mounting hole spacing: 71,5x71,5 mm Connector: 3-pin Bearing: SSO-Bearing Rotational Speed: (+/- 10%) 1800 RPM Airflow: 53,3 m³/h Acoustical Noise: 17,1 dB(A) Voltage: 12 V |
|
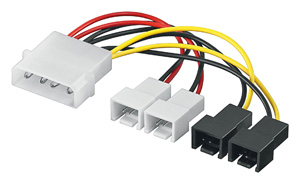
1 x Molex cable to cut and connect fans to MH1210A temperature controllers.
4-pin LP4 to 3-pin TX3 Fan Power Adapter Converter Cable.
Simultaneous connection of 4 fans with 3-pin connector (CPU fan, case fan etc.) direct to the power supply. |
|
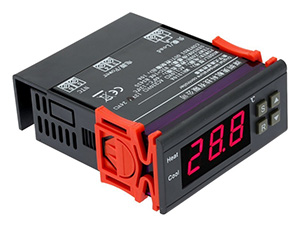
2 x MH1210A 12V temperature controller
I bought and used "KKmoon version" from Amazon.co.uk [https://www.amazon.co.uk/gp/product/B00HC6PDAW/](https://www.amazon.co.uk/gp/product/B00HC6PDAW/) Model: MH1210A 1 x Temperature Controller 1 x Temperature Sensor 1 x Instruction Manual
Working voltage: 12V ±10%
Rated current: 10A Power consumption: ≤3W Measurement range: -40~120 °C Measurement precision: 0.1 °C Measurement error: ±0.5 °C Control range: -40~120 °C Control precision: 1 °C Working temperature: -20~70 °C Item size: 8.5x7.5x3.5cm |
|
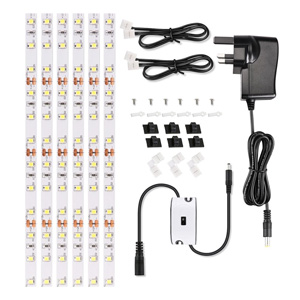
1 x Ustellar LED light set - 8mm width.
This LED stripe can be cut into 40cm pieces for 3D printed LED stripe holder. 1 x LED power adapter connected to: temperature controller, fan, motion sensor, LED stripe.
Model: UT666006-WW-UK
1 x LED Light Strip 1 x Power Adapter 1 x Hand Wave Switch 3 x L-shape Connector 2 x 0.5m Cable Connector 6 x Screw Clip (for strip light) 6 x Cable Clip (for black cable) Wattage: 12W Output Voltage: 12V DC Input Voltage: 100-240V AC Luminous Flux: 1500lm Lifespan: 50,000 hours Colour Temperature: 3000K (Warm White) Switch Type: Hand Wave Activated Control |
|
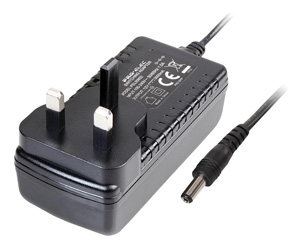
1 x Power adapter connected to: temperature controller, fan.
|
|
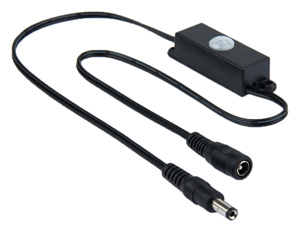
1 x TDL-2024 motion sensor switch
I didn't want to turn on-off lights manually, so I used motions sensor.
Model: TDL-2024
Operating voltage: 5V-24V DC Operating temperature: -20 °C ~ +50 °C Wiring: Male and female pin (input / output) Output mode: Sensor Output Delay Range: The factory setting 15 seconds Induction way: Passive Induction angle: 120-degree cone angle Detecting distance:>3M Dimension: 63x19.5x18.5mm |
|
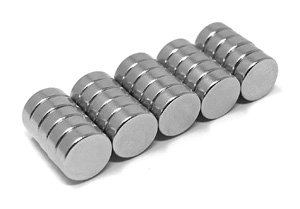
8 x Magnet for enclosure door.
Glass holders can be modified and replaced in the future by adding strong magnets at their ends, so acoustic panels could be easily attached or detached to enclosure, when necessary, to reduce printing noise. Magnets, holding acoustic panels in place, would not be necessary with glass holders endings having |V| shape.
Model: F362-25
6mm diameter x 2mm thick. +/-0.1mm tolerance. |
|
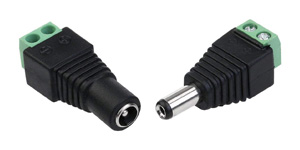
4 x Female connectors
3 x Male connectors
Model: QAA-90105
Internal diameter of the plug: 2.1mm External diameter of the plug: 5.5mm Pair (Male connector and Female connector) |
|
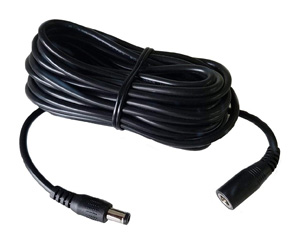
1 x Cable for cutting and wiring
Model: FX-DC7ME
Suitable for all DC voltages 0-36V Connector type: 2.1mm DC Socket to Plug Approx. power capability: 5A (eg. approx. 50W @ 12v) Connector Type A: 2.1mm DC Socket, Connector Type B: 2.1mm DC Plug |
|
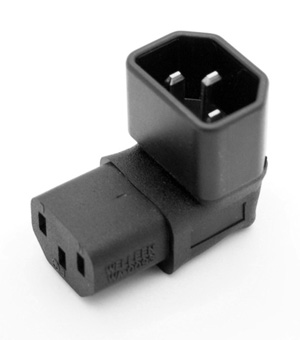
1 x 90 degree adapter for PSU.
Model: WA-0093
IEC 320 C14 Male to IEC 320 C13 female. The adapter is right angled, and Down angled forward. |
|
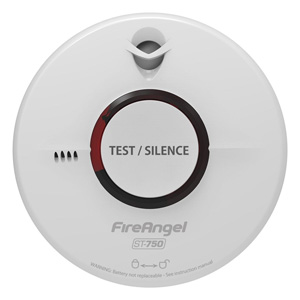
If smoke alarm is mounted inside enclosure, keep in mind alarm's recommended operating temperature 4-38°C.
Supply voltage: 3V DC
Battery: 10 year sealed for life Panasonic battery Technology: Thermoptek Alarm sound level: 85dB(A) at 3m (minimum) Installation positions: Ceiling / Wall Operating temperature: +4°C to+38°C Warranty: 10 years Certified to: BS EN 14604: 2005+AC:2008 |
|
I was able to get rid of a lot of noise by making and adding four 1 cm height (5 cm diameter, 18 grams) pads, under printer legs.
|
TOOLS
|
• Print technology: Fused Filament Fabrication (FFF) / Fused Deposition Modeling (FDM).
• 0.4mm nozzle (easy changeable) for 1.75 mm filament. • Build volume 11,025 cm3 (25 x 21 x 21 cm). • Layer height (resolution) from 0.05 mm (50 microns). • Accuracy: 0.01 x 0.01 x 0.005 mm (10 x 10 x 5 microns). • Max extruder temperature: 280 °C. • Max heated bed temperature: 120 °C. • Supported materials: PLA, ABS, PET, HIPS, Flex PP, Ninjaflex, Laywood, Laybrick, Nylon, Bamboofill, Bronzefill, ASA, T-Glase, Carbon-fibers enhanced filaments, Polycarbonates... |
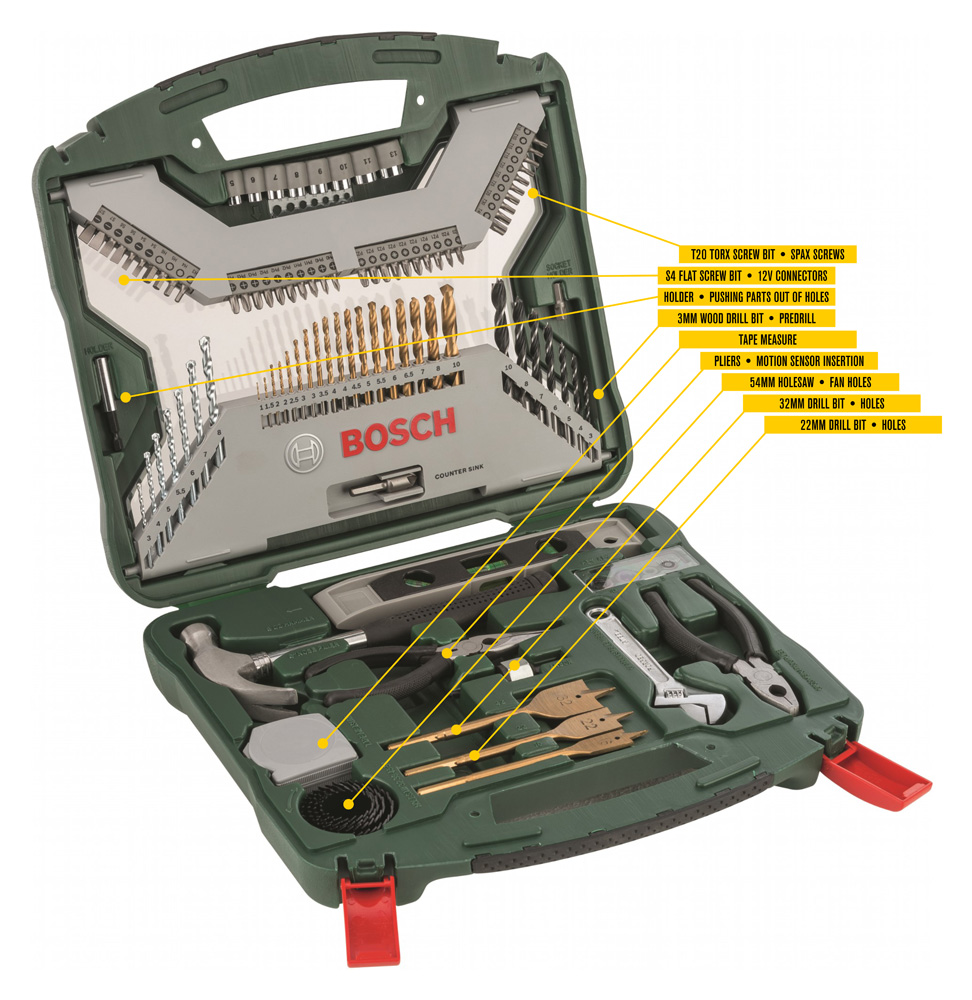 |
Click on "Bosch X103Ti" image to zoom.
18 HSS-TiN metal drill bits, diameter 1-10 mm
7 TC masonry drill bits, diameter 3-8 mm 7 wood drill bits, diameter 3-10 mm • 3mm bit for SPaX screw predrills 3 spade bits, Titanium, diameter 16/22/32 mm • 22mm and 32mm bits for tabletop holes 4 depth stops, diameter 3/5/8/10 mm 40 screwdriver bits: L = 25 mm PH 0/0/1/1/2/2/2/3/3/3 PZ 0/0/1/1/2/2/2/3/3/3 S 4/4/6/6/7/7 • S4 bit for 5.5mm x 2.1mm connectors HEX 3/4/5/6 T 10/10/15/15/20/20/25/25/30/40 • T20 bit for SPaX screws 8 nutsetters, diameter 5/6/7/8/9/10/11/13 mm 4 HCS holesaws, diameter 32/38/45/54 mm • 54mm holesaw for 2 tabletop fan holes 1 diameter gauge 1 countersink 1 tape measure • for finding tabletop center (275mm) 1 spirit level 1 Allen key 1 universal holder, magnetic • for pushing out small parts from their holes if needed 1 adapter for nutsetters 1 adapter for holesaws 1 hammer • for pushing some parts into each other if needed 1 adjustable spanner 1 pair of long nose pliers • for motion sensor insertion 1 pair of combination pliers |
 |
Bosch • GSR 12V-35 FC Professional (06019H3000) For holes and screws. |
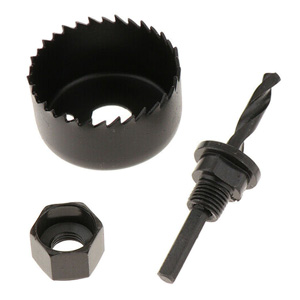
|
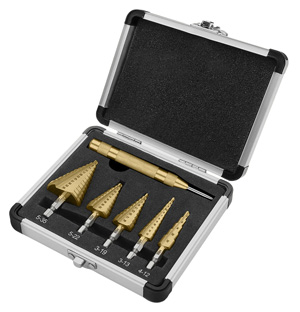
For drilling 8mm holder holes in windows and door. Smallest drill bit has higher steps
TackLife drill bits are not very precise. For example 10mm part diameters: 9.84mm, 9.50mm, 9.94mm
To drill holes in perspex, you can buy specialised drill bits for plastic.
#1: 4 6 8 10 12mm
#2: 3 5 7 9 11 13 15 17 19mm #3: 5 7 10 12 14 16 18 20 22mm #4: 3 4 5 5.5 6 7 8 9 10 11 12 13mm #5: 8 11 14 17 20 22 25 27 30 32 35mm Automatic center punch |
|
Helpful Video by "Arcade Repair Tips" on how to drilling holes in plexiglass
|
|
|
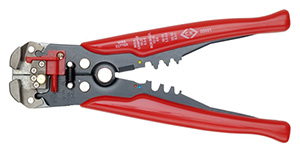
Stripping: 0.2 - 6.0mm²;
Cutting: HRC 40 - 50; Crimping: 0.5 - 6.0mm² insulated and non-insulated terminals |
 |
C.K Tools • Wire Stripping Pliers T3894 For safe and damage-free stripping of fine, insulated solid wires. Suitable for cutting soft copper wires. Stripping capacities mm: 0.4, 0.5, 0.6, 0.8, 1.0, 1.3 Stripping capacities AWG: 26, 24, 22, 20, 18, 16 |
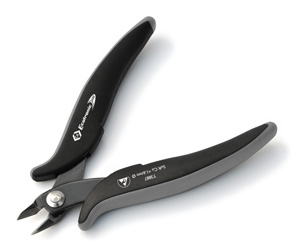 |
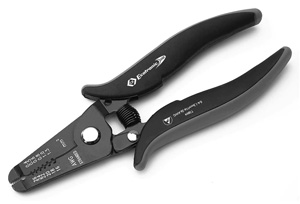
C.K Tools • Side Cutters T3887 Precision side cutters. Suitable for cutting soft copper wires of up to 1.6mmØ / 14AWG. |
|
• Full metal body
• Lead hardness grade indicator for rapid identification • Sliding sleeve provides a high level of break resistance and an unimpeded view of the page |
PETG FILAMENT
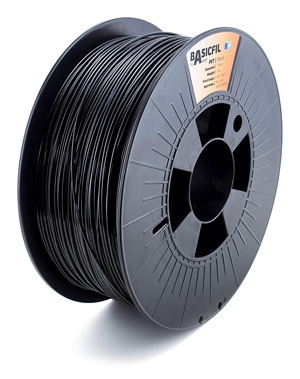 |
I had no problems with these filaments: Prusa3D • Jet Black Prusament PETG 1.75 MCPP • BasicFil Black PETG 1.75 Amazon • AmazonBasics Black PETG 1.75 |
 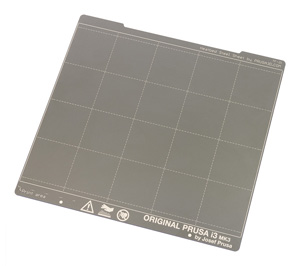 |
PC Johnson • Windex Original Glass Cleaner For preparing-cleaning heated printer bed... Spring Steel Sheet with Smooth Double-sided PEI before printing with PETG filament. Water: Water Cleaning Agent: 2-Hexoxyethanol, Isopropanolamine, Ammonium Hydroxide Wetting Agent: Lauryl Dimethyl Amine Oxide, Sodium Dodecylbenzene Sulfonate Fragrance: Fragrance Dye: Liquitint® Sky Blue Dye |
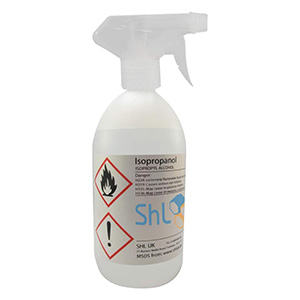 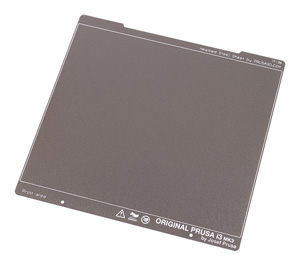 |
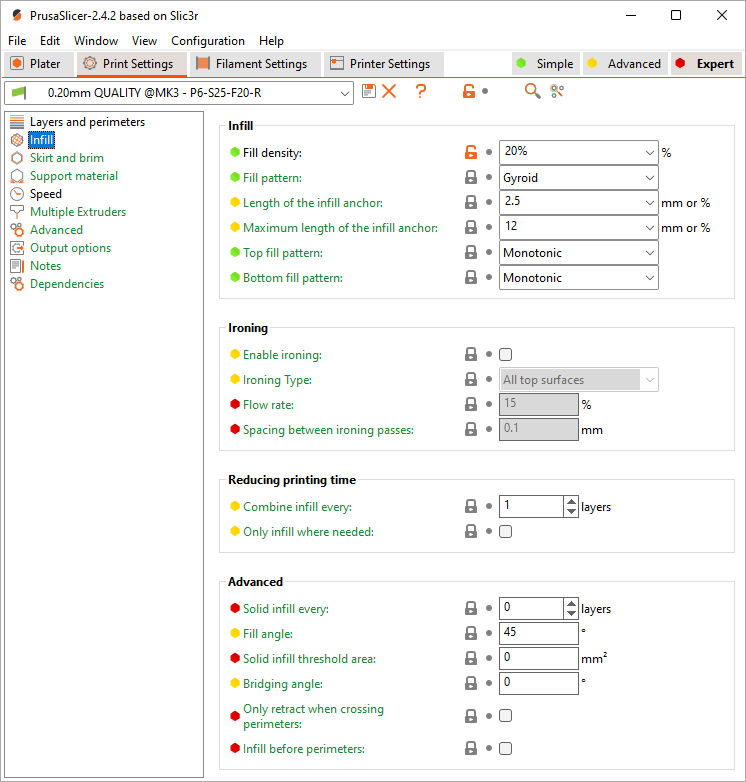
SHL • Isopropanol / Isopropyl Alcohol / IPA NOTE: I didn't test-print parts for this project on Textured PEI Powder-coated Spring Steel Sheet. For preparing-cleaning heated printer bed... Double-sided Textured PEI Powder-coated Spring Steel Sheet before printing with PETG filament. For thin parts to stick correctly, you may need to adjust height of first layer perfectly and to reduce "Elephant foot compensation" from default value 0.2mm... to 0.1mm.  Modified settings: PrusaSlicer > Print Settings > 0.20 QUALITY MK3 > Advanced > Slicing... Modified settings: PrusaSlicer > Print Settings > 0.20 QUALITY MK3 > Advanced > Slicing...
Isopropanol 99.9% / Isopropyl Alcohol / IPA Manufacturer Part Number: 1000-ISO-TRIGGER Child Proof Cap Natural Trigger spray cap for bottles with a 28mm neck (OFF, Spray, Stream) 1 Litre |
 |
Kleenex • Ultra Soft Pocket Tissues For preparing-cleaning heated printer bed. |
PRINTING SETTINGS
<div>
<small>
<b>
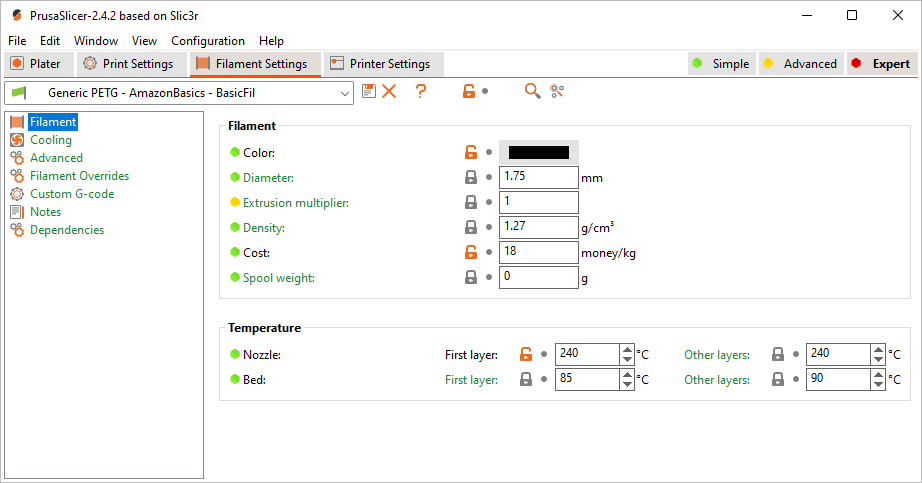
Printing Settings for MCPP BasicFil or AmazonBasics PETG Filament on PrusaSlicer<br />
...for Spring Steel Sheet with <u>Smooth</u> Double-sided PEI
</b>
</small>
</div>
For BIG parts to stick on TEXTURED PEI Powder-coated Spring Steel Sheet sheet, I increased recommended bed temperature from 60-80°C (for AmazonBasic and MCPP BasicFill PETG filaments) to 85°C (First layer) and 90°C (Other layers). I printed BIG parts in already partly assembled Temperature Controlled Enclosure. Temperature inside enclosure was 35°C with these bed settings. E3D V6 HotEnd is rated to 40°C ambient operating temperature. As you approach that temperature, cooling efficiency is reduced, allowing more heat up past the heatbreak. This can cause low temperature filament to soften in the mechanism to cause feed problems.
| Prusa3D • PrusaSlicer |
• "Extruder: 240°C".
• "Bed: 85°C / 90°C".
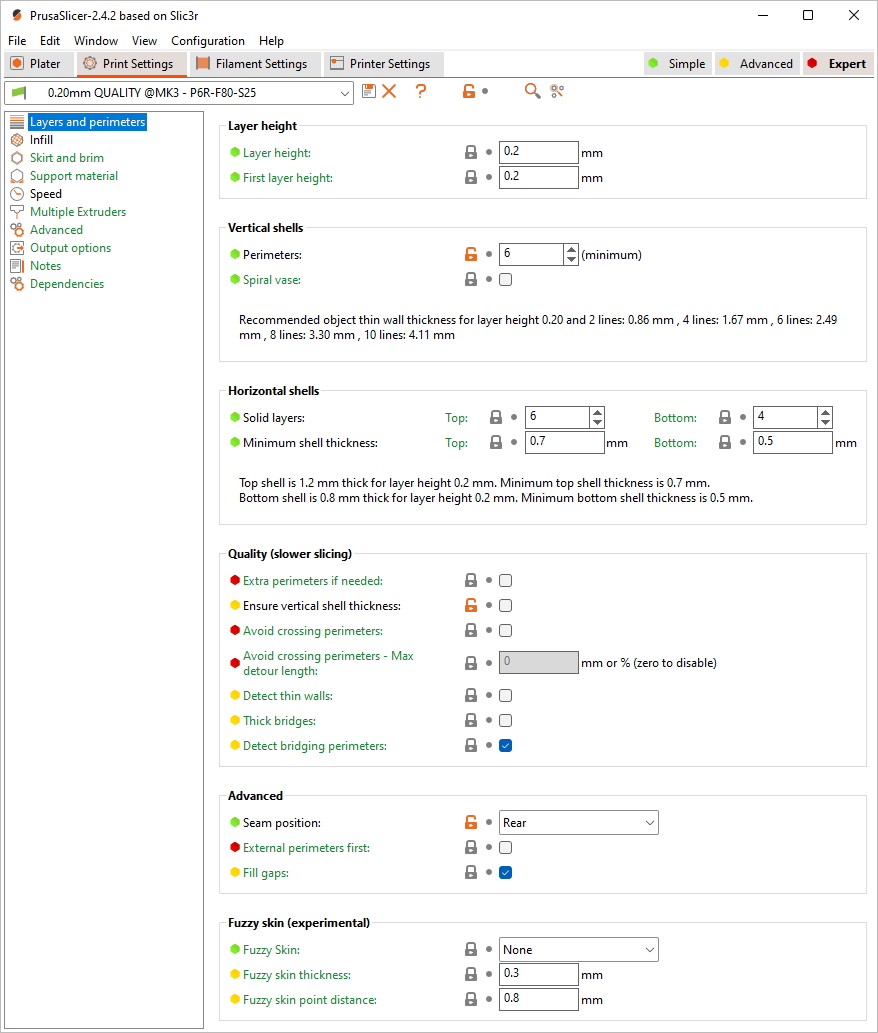
• "Ensure vertical shell thickness: disabled" - I had problems with thin 45° hanging angles when it was enabled.
• "Perimeters: 6" - infill pattern is less visible on surface.
• "Seam position: Rear" - created line at the back of the parts, but front and side surfaces were perfectly smooth.
• "Fill density: 20%".
• "Fill density: 60%" - for door and windows holding parts.
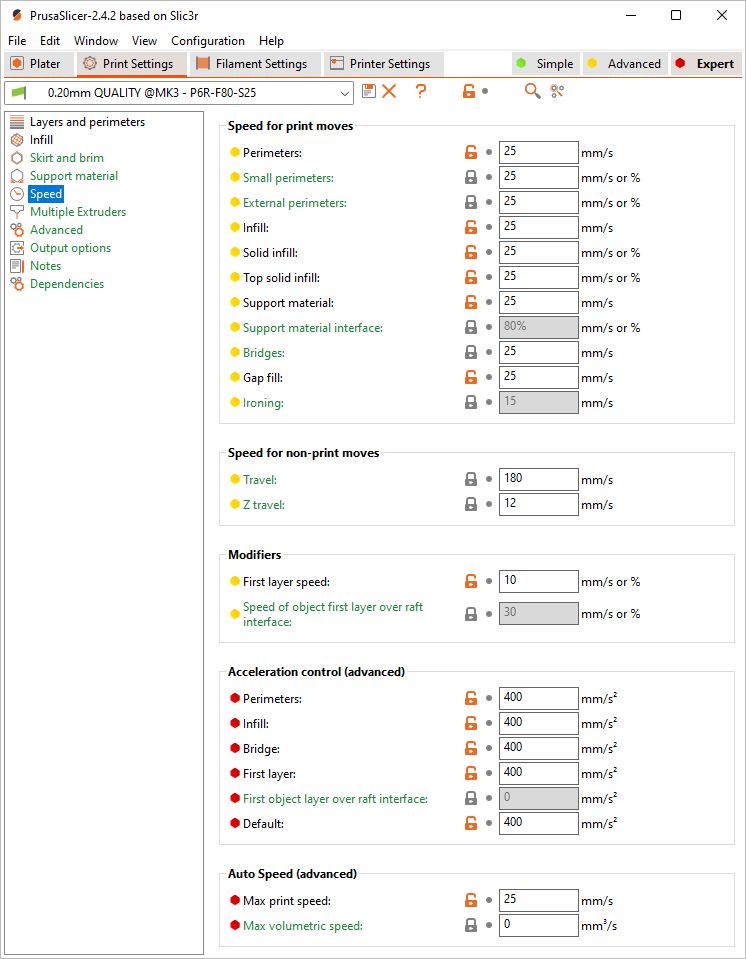
• Reduced printing speeds (10-20-180-400). Slower speeds results in smoother and glossier surfaces without matte areas, reduces printing noise with vibrations... lesser probability for corners of big parts to unstick from heated bed, because of shrinking.
• "Travel: 180" - low speeds (like 20) creates surface blobs after long travel distances.
• "First layer speed: 10" - for better adhesion.
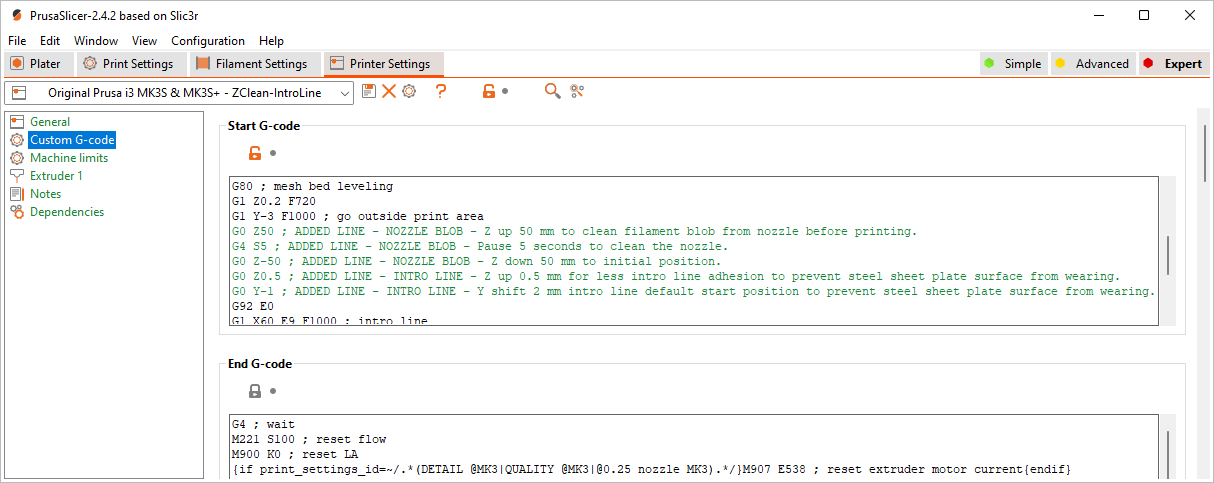
• I added few lines to G-code to remove filament blob on nozzle right before printing starts and raised intro line to reduce wearing of steel sheet plate surface.
G0 Z50 ; ADDED LINE - NOZZLE BLOB - Z up 50 mm to clean filament blob from nozzle before printing.
G4 S5 ; ADDED LINE - NOZZLE BLOB - Pause 5 seconds to clean the nozzle.
G0 Z-50 ; ADDED LINE - NOZZLE BLOB - Z down 50 mm to initial position.
G0 Z0.5 ; ADDED LINE - INTRO LINE - Z up 0.5 mm for less intro line adhesion to prevent steel sheet plate surface from wearing.
G0 Y-1 ; ADDED LINE - INTRO LINE - Y shift 2 mm intro line default start position to prevent steel sheet plate surface from wearing.
STL FILES
|
To split group and to remove some parts: 1. Open “*.STL” file in PrusaSlicer Edition. 2. Click on [ Split to objects ] button. 3. Select parts one by one, which you don't want to print. 4. Press [ Del ] key on keyboard. |
| You can edit STL files with free and open source 3D creation suite Blender. | |
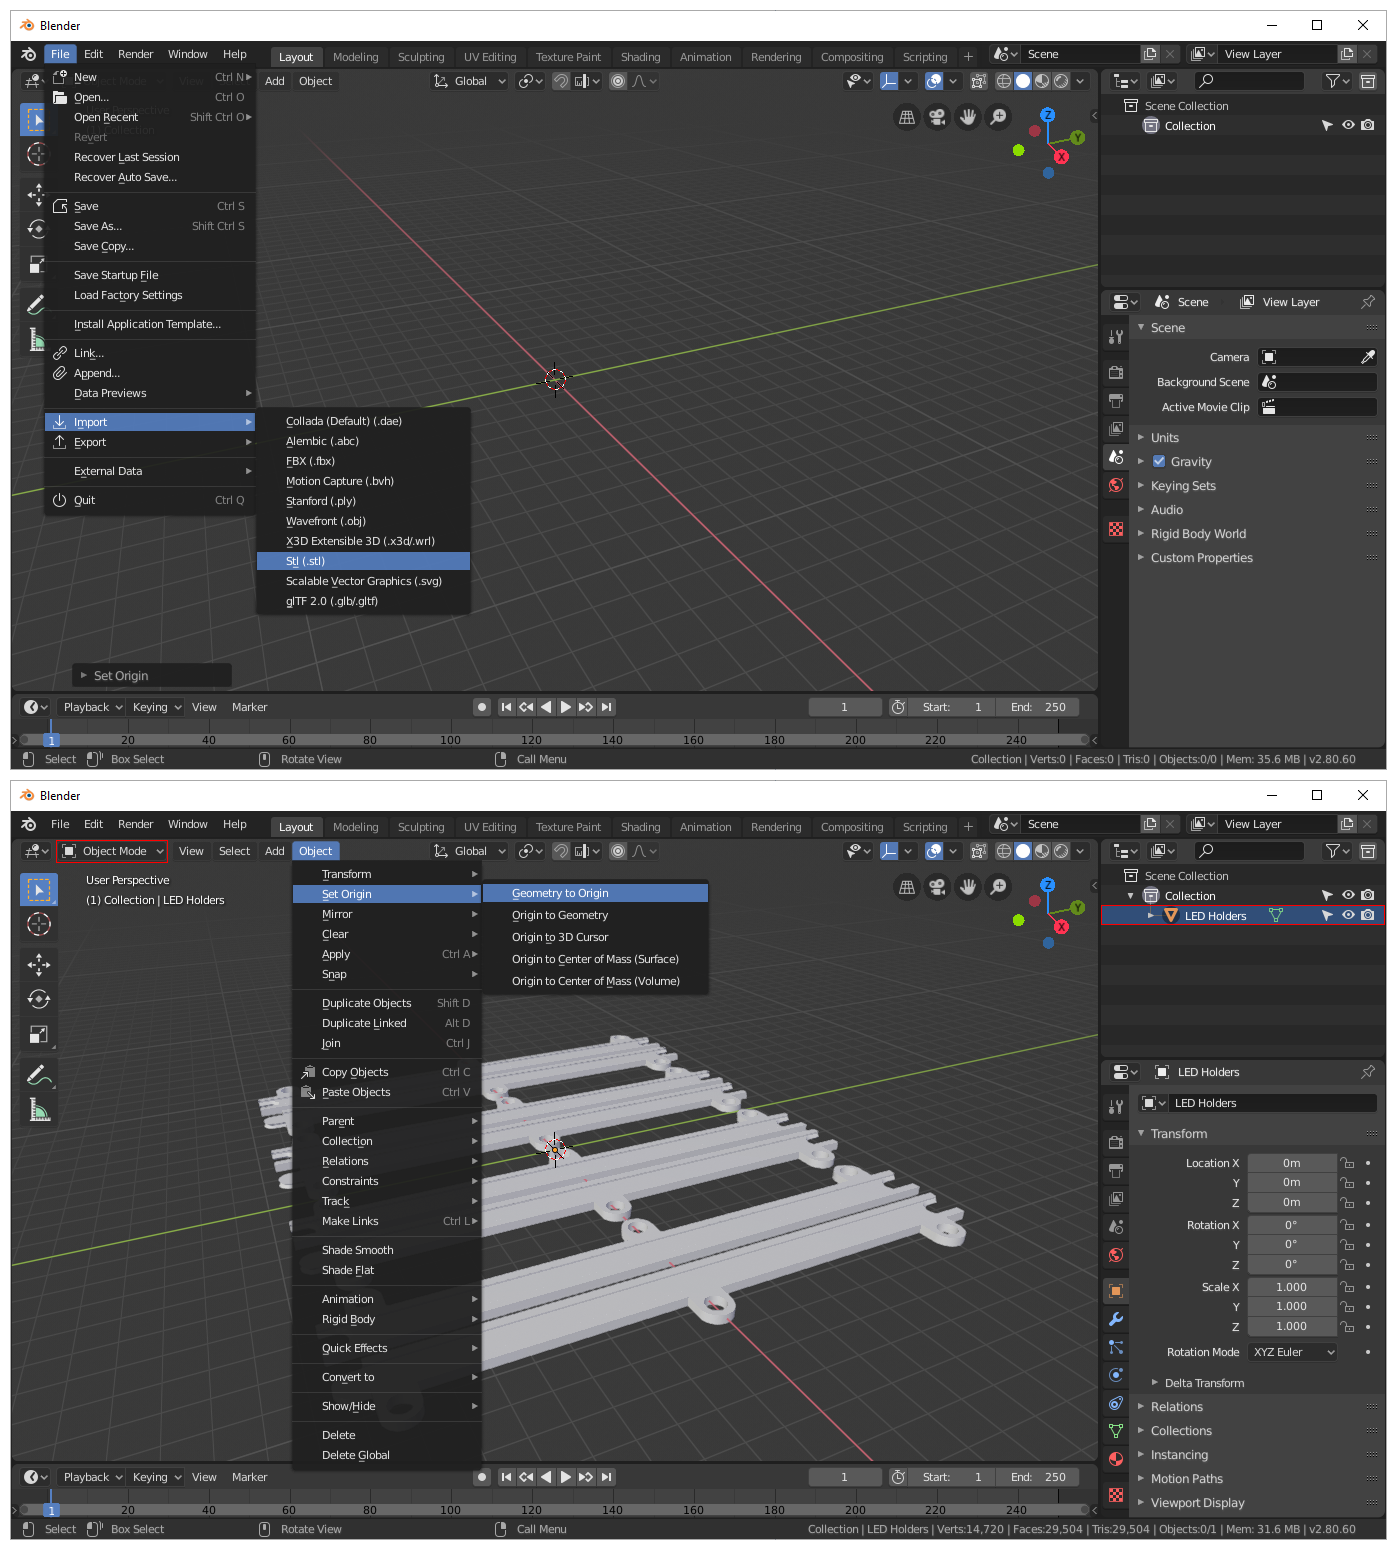 |
Import “*.STL” file: 1. Blender 2.8 > File > Import > Stl (.stl). If imported STL object is not visible: 1. Select imported object in “Scene Collection” list (top-right panel). 2. In “Object Mode“ (top-left drop-down) > Object > Set Origin > Geometry to Origin. |
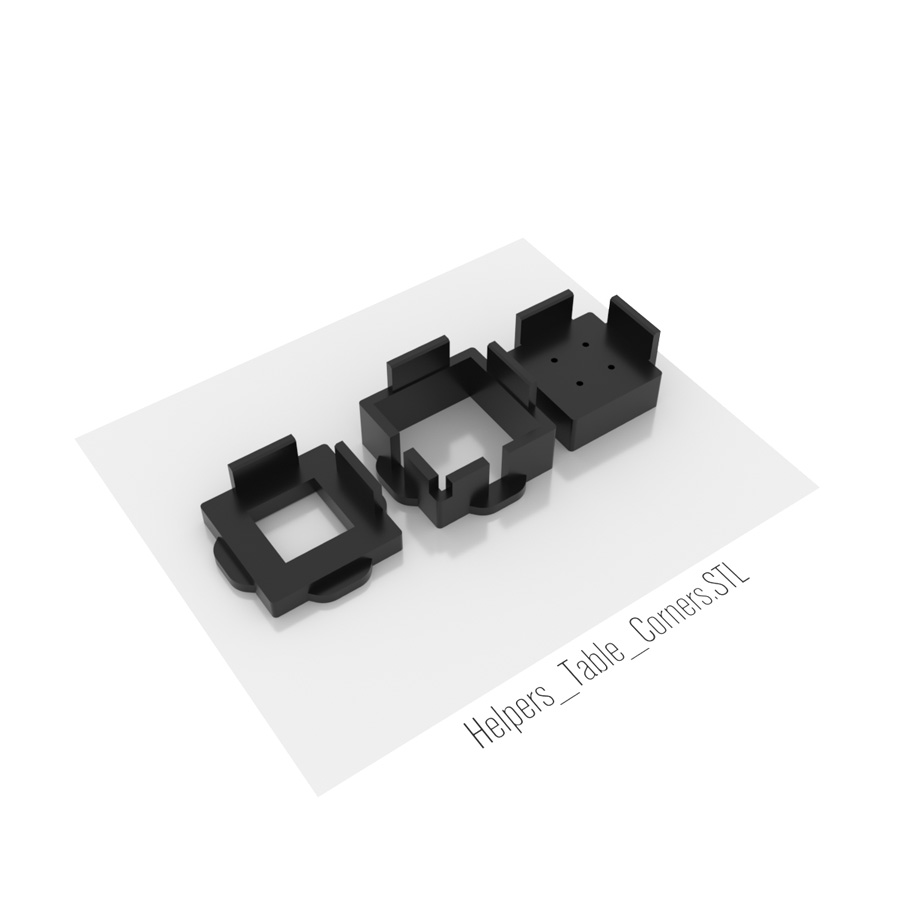 |
Helpers_Table_Corner.STL
1 x Corner screw predrill helper (3mm drill)
1 x Corner leg end alignment helper 1 x Corner leg holder alignment helper |
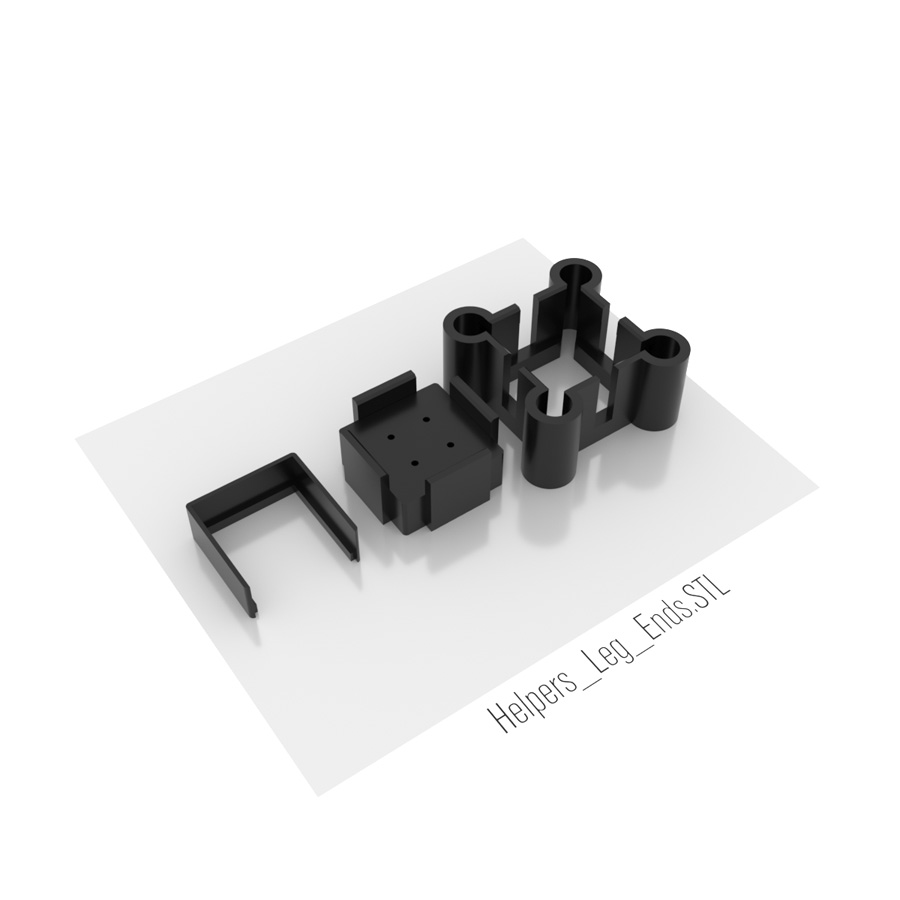 |
Helpers_Leg_Ends.STL
1 x Leg end predrill helper (3mm drill)
1 x Leg end alignment helper 1 x Leg end alignment helper spacer |
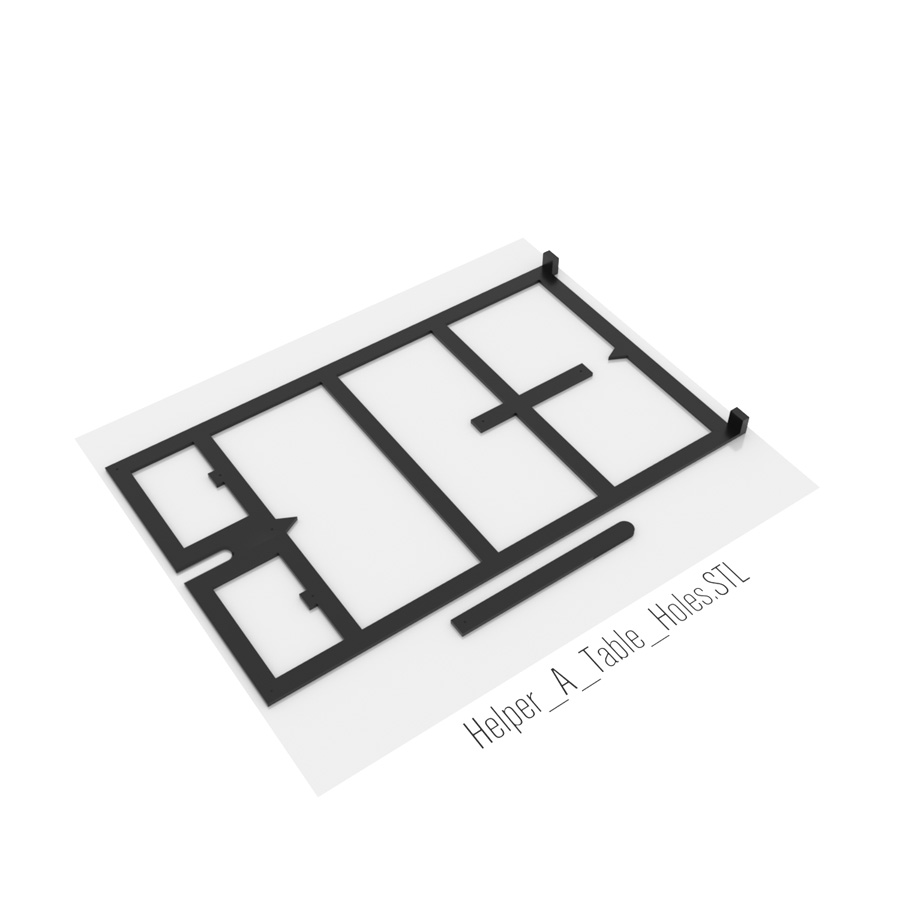 |
Helper_A_Table_Holes.STL
1 x Helper A
|
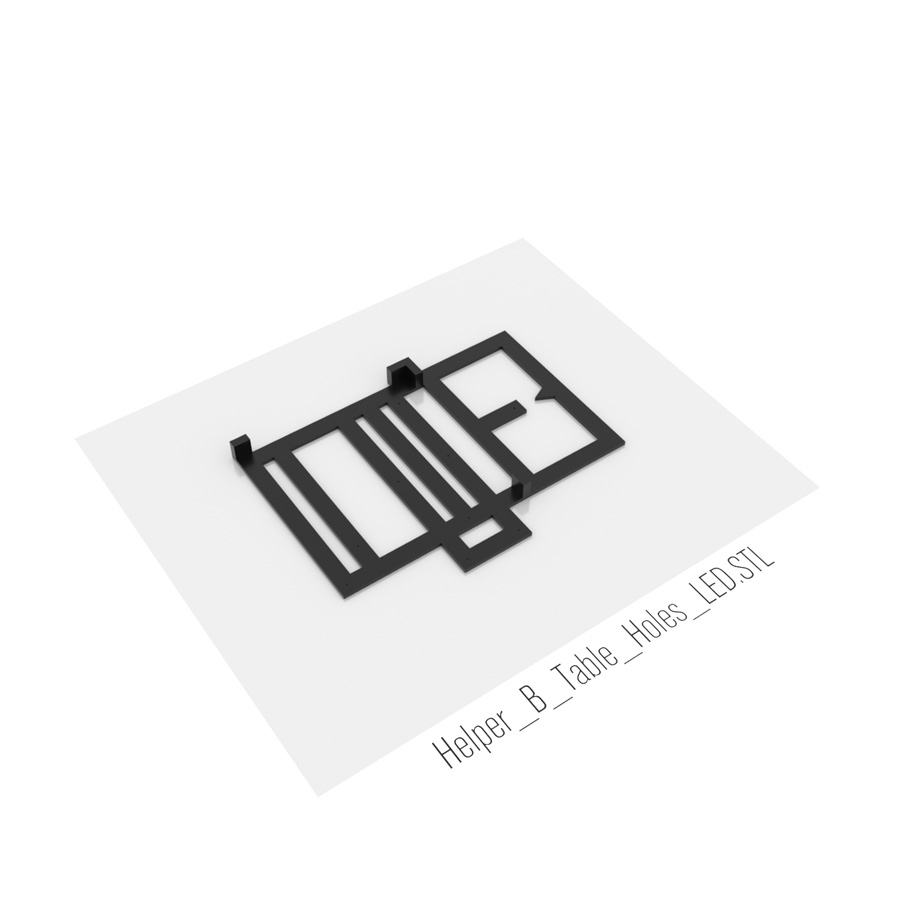 |
Helper_B_Table_Holes_LED.STL
1 x Helper B
|
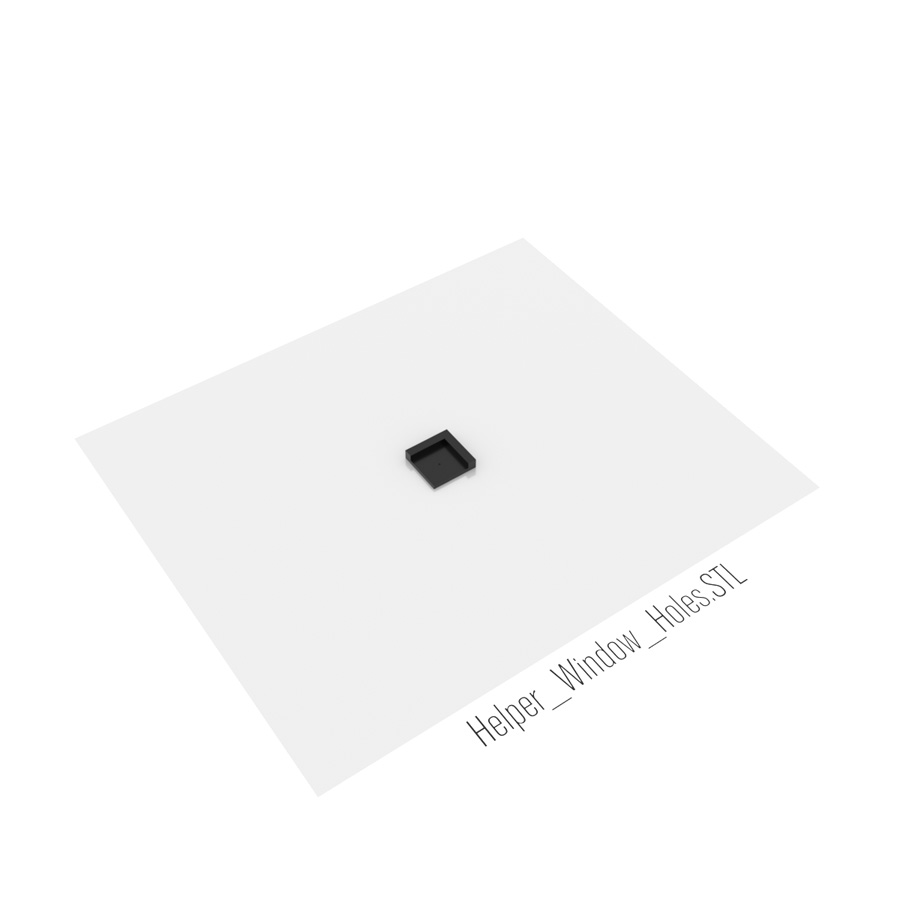 |
Helpers_Window_Holes.STL
1 x Windows 8mm holes helper
|
 |
Helpers_Window_Holes.STL
4 x Leg holder for bottom table tabletop
4 x Leg holder for middle table tabletop 1 x Leg holder for middle table tabletop ±1mm (door) - if door is not aligned perfectly |
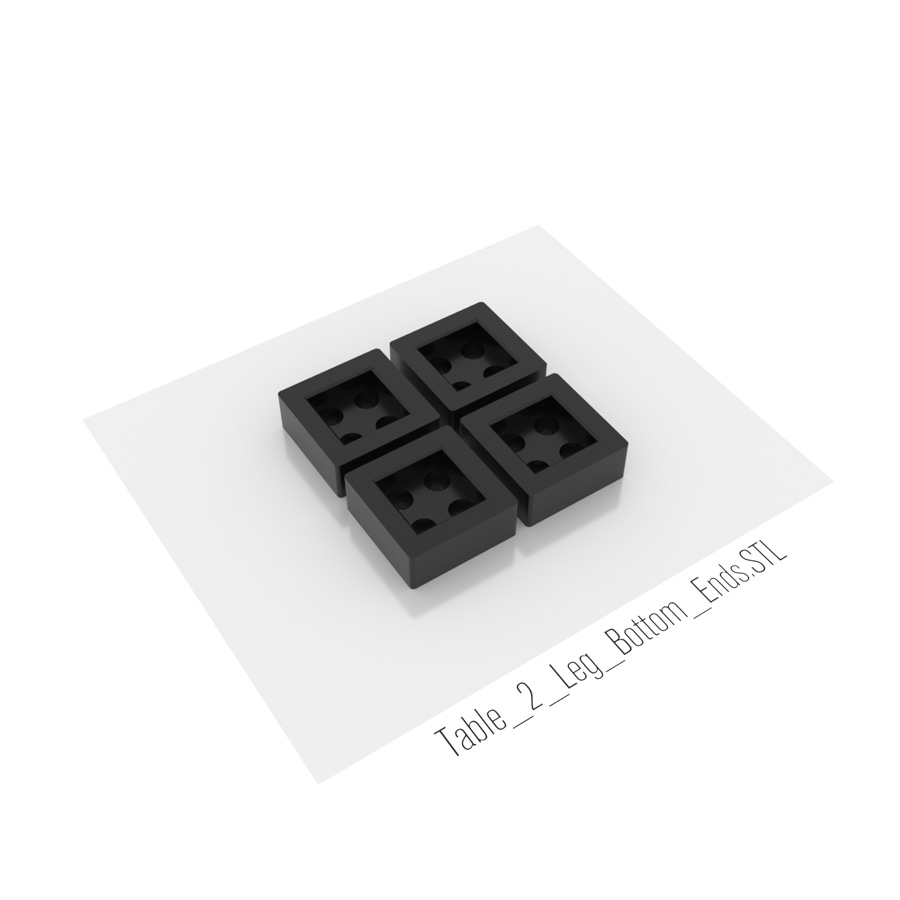 |
Table_2_Leg_Bottom_Ends.STL
4 x Table 2 (middle) leg bottom end
|
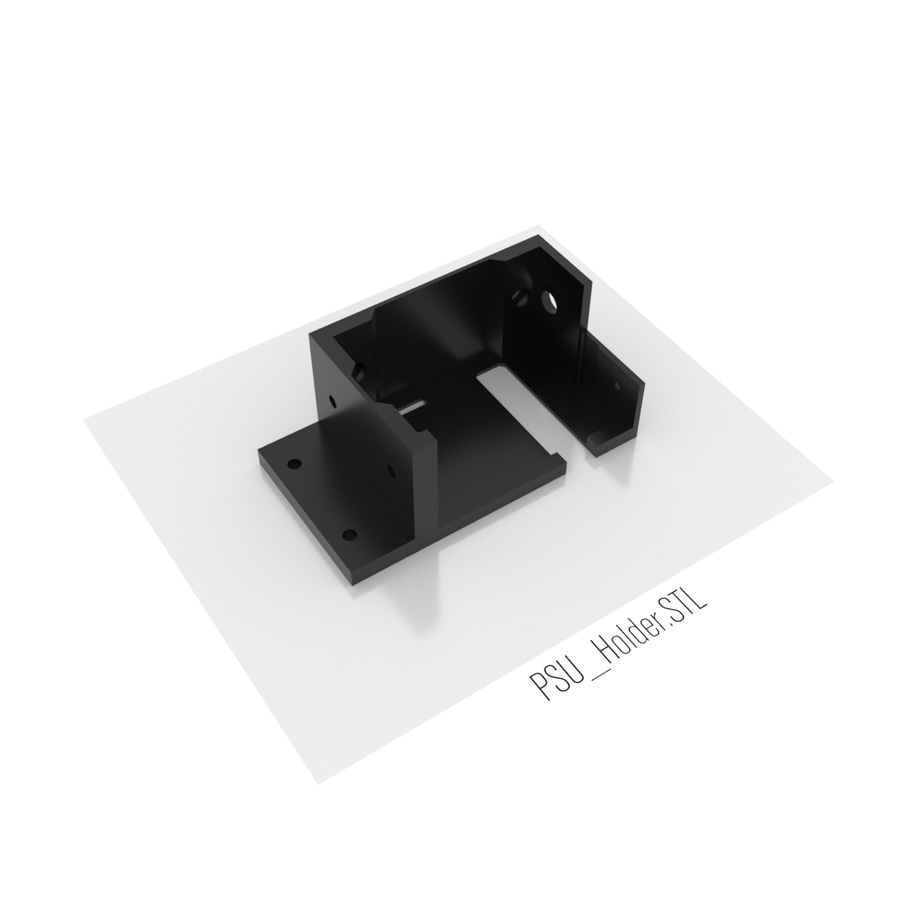 |
PSU_Holder.STL
1 x Prusa3D i3 MK3 printer PSU holder
|
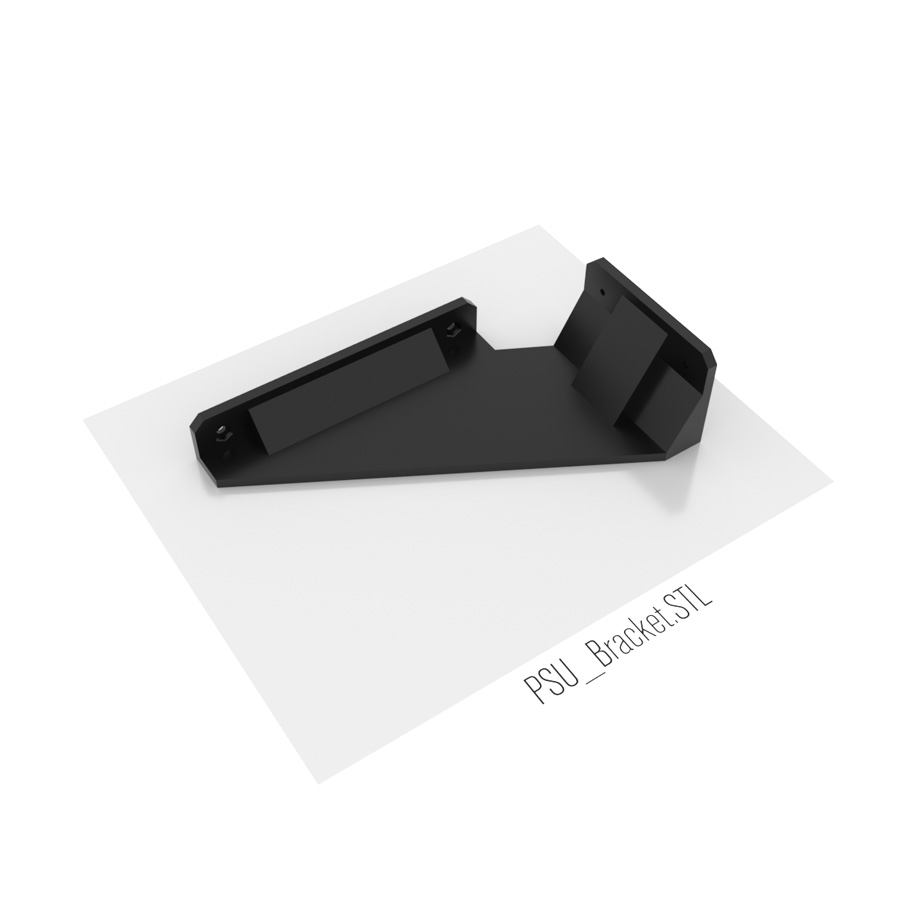 |
PSU_Bracket.STL
1 x Prusa3D i3 MK3 printer PSU bracket
|
 |
Prusa_i3_MK3_Heatbed_Cable_Cover_Small.STL
Replaces original Prusa i3 MK3 heatbed cable cover and changes orientation of heatbed cable, so it does not crash into back window of Ikea LACK enclosure. This is reinforced version of Prusa i3 MK3 Angled Heatbed Cable Cover STL by FlyingProf.
1 x Prusa i3 MK3 Heatbed Cable Cover Top 1 x Prusa i3 MK3 Heatbed Cable Cover Top |
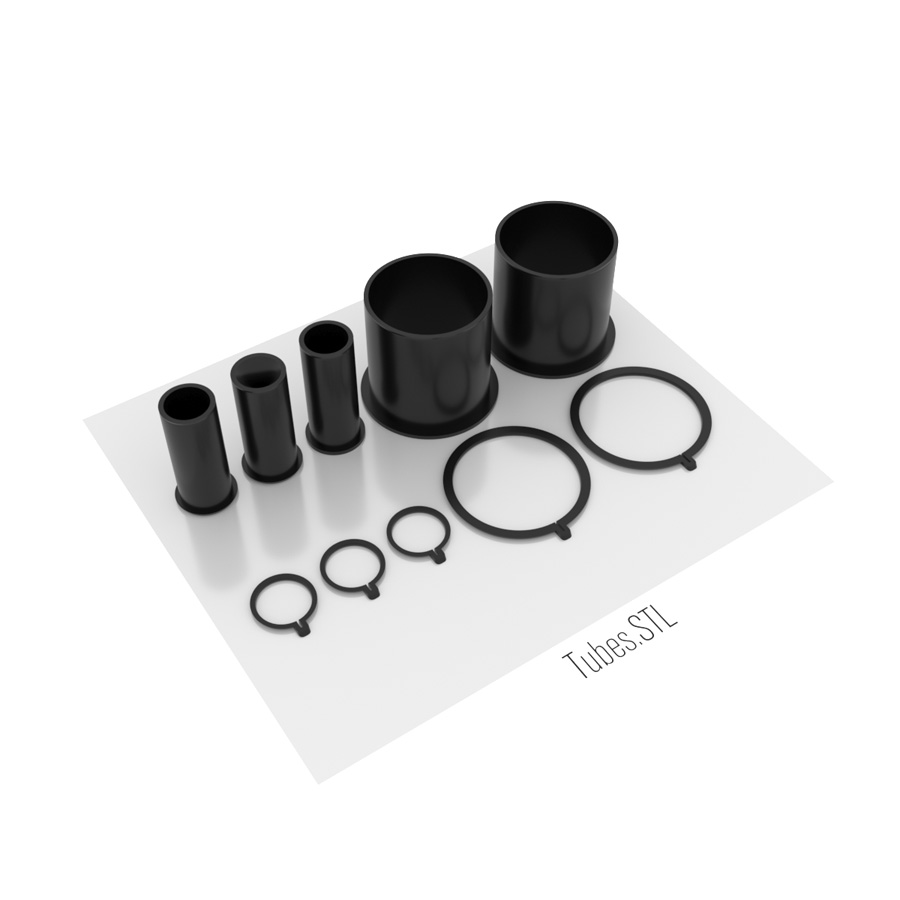 |
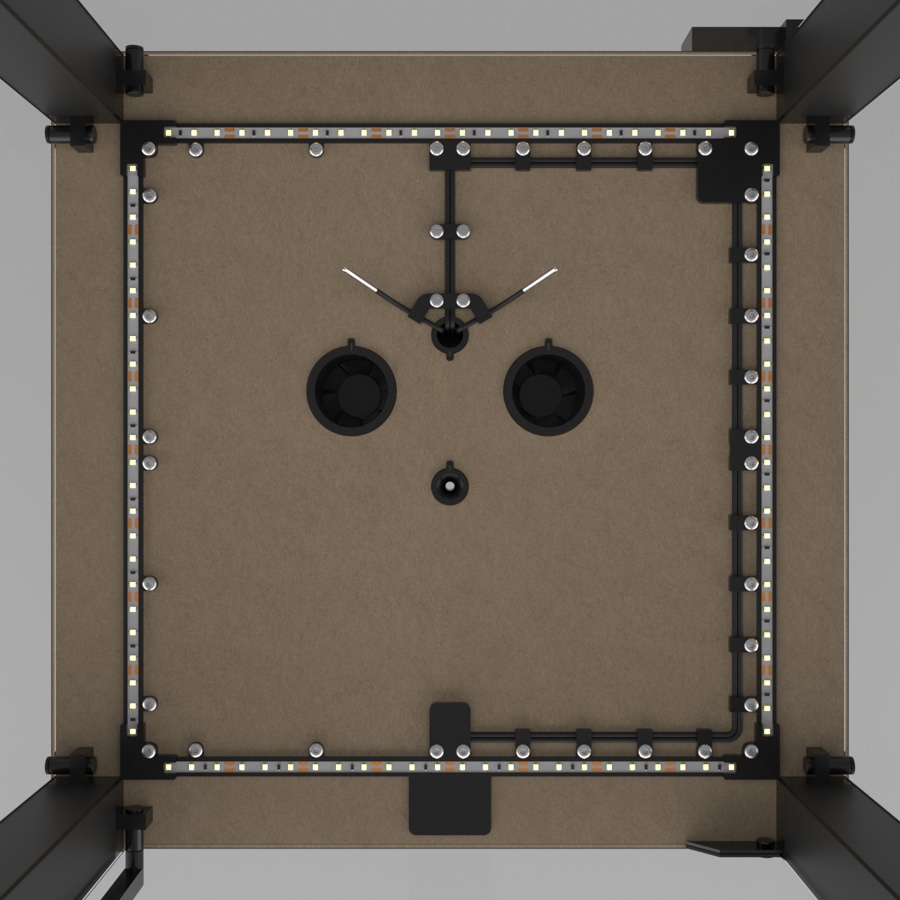
Tubes.STL
2 x 54mm fan tube
2 x 54mm tube clip 1 x 22mm filament tube 1 x 22mm PSU power cable tube 1 x 22mm controller power cable / temperature sensor tube 3 x 22mm tube clip Use 54mm holesaw drill bit (kit) for 54mm holes. Other drilling tools may not be precise enough. |
|
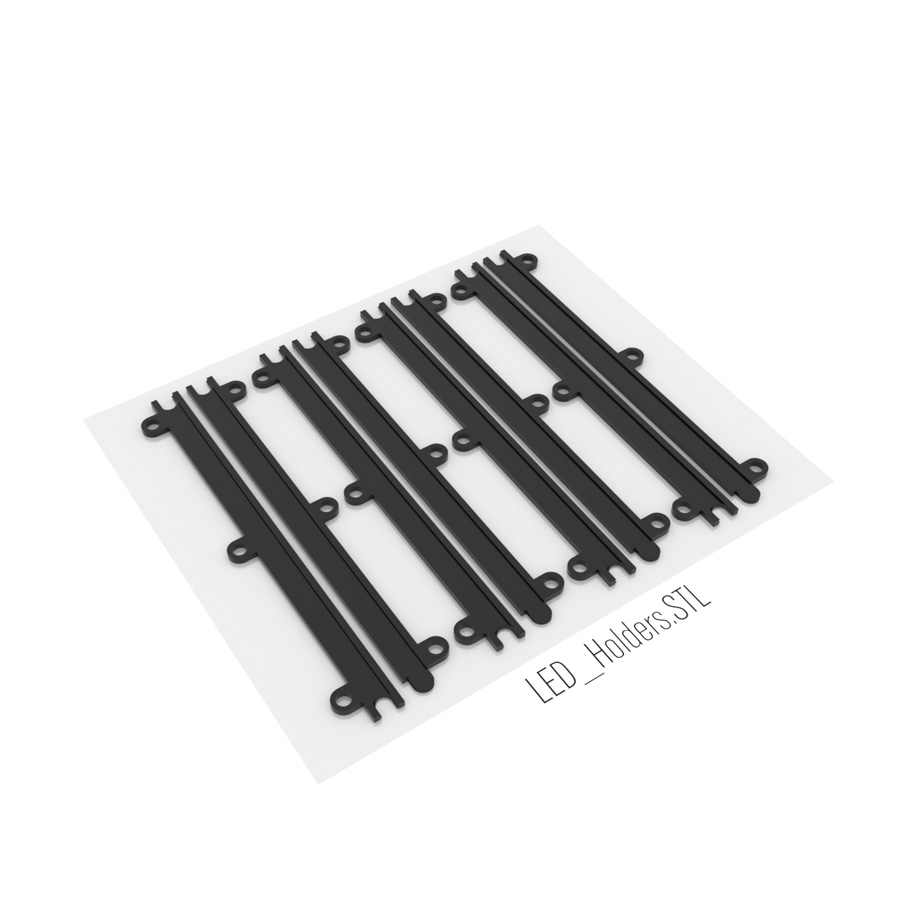 |
LED_Holders.STL
For 8mm width LED stripes, cutted to 40cm length pieces.
!!!DON’T peel off self-adhesive backing’s protective covering. LED stripes slides into holders, not sticks on them.
4 x LED stripe (in-in)
4 x LED stripe (in-out) |
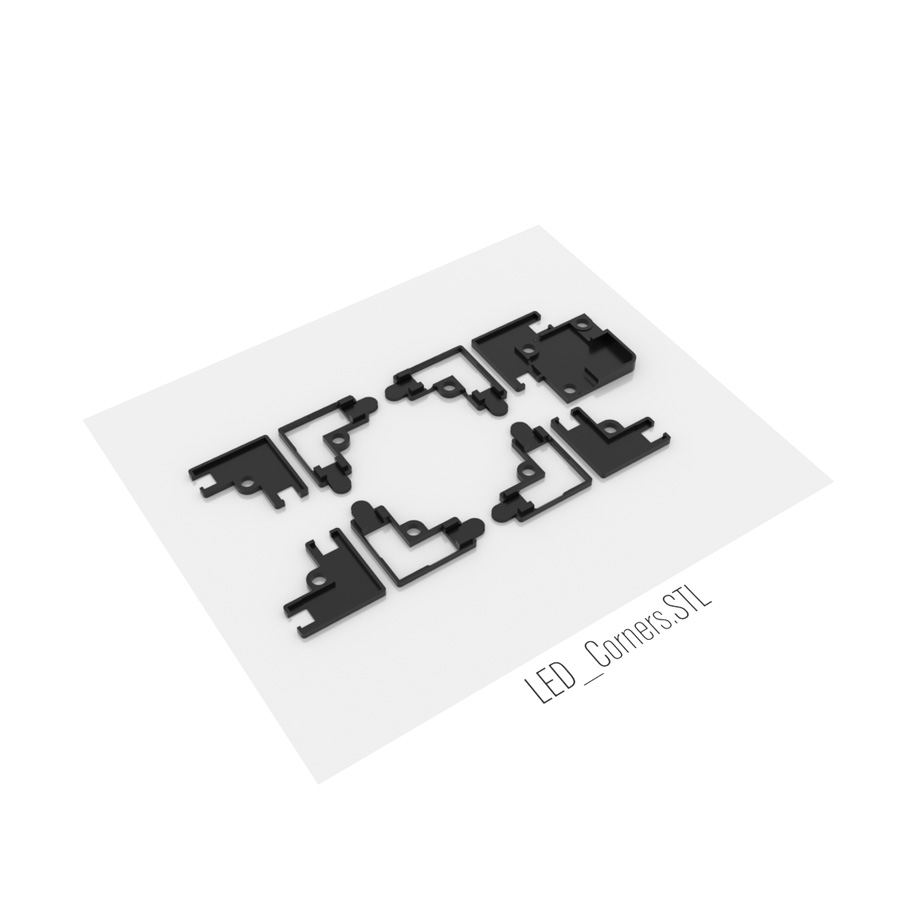 |
LED_Corners.STL
For 8mm width LED stripes.
3 x LED corner
3 x LED corner cover 1 x LED corner (cable) 1 x LED corner cover (cable) |
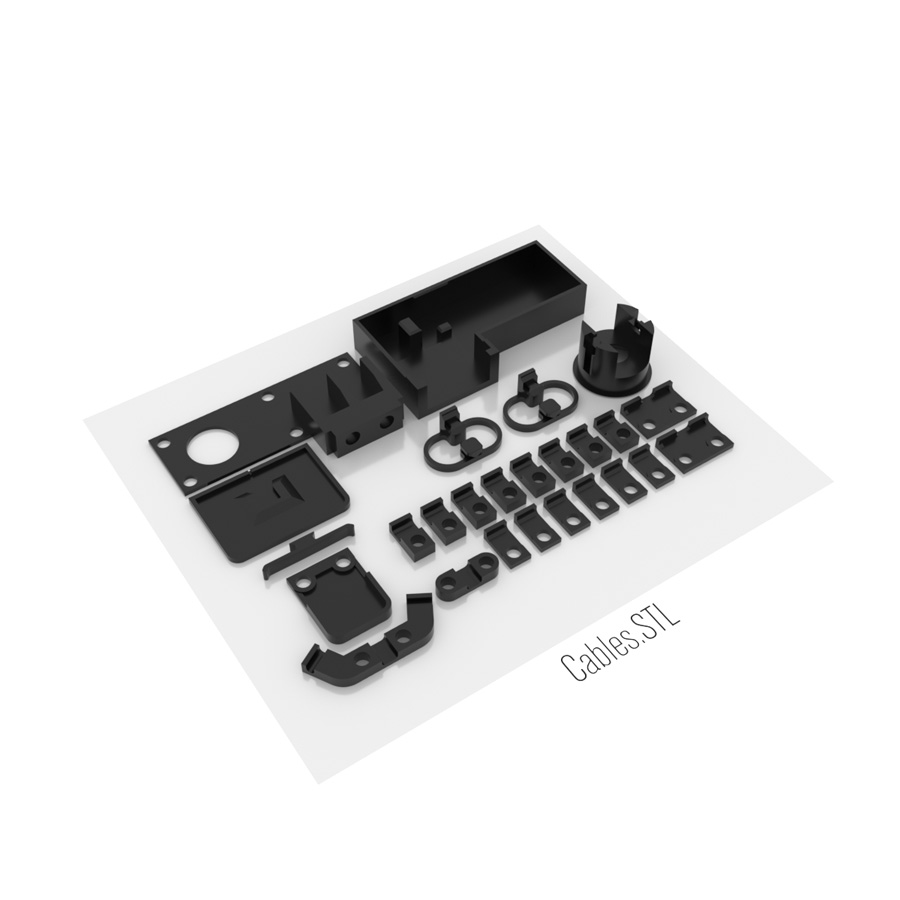 |
Cables.STL
1 x Power connection box
1 x Power connection box cover 1 x 22mm motion sensor cable hole cover 1 x 32mm motion sensor cable hole cover 1 x 32mm motion sensor cable hole cover holder 1 x Motion sensor holder 2 x Motion sensor holder clips 8 x Cable holder 3.5x7mm 8 x Cable holder 3.5x7mm (for LED holder holes) 2 x Cable holder 3.5x7mm (for LED holder holes) (center) 1 x Cable holder 3.5x7mm (center) 1 x Cable holder 3.5x7mm / temperature sensor holder 2 x 3.5x3.5mm |
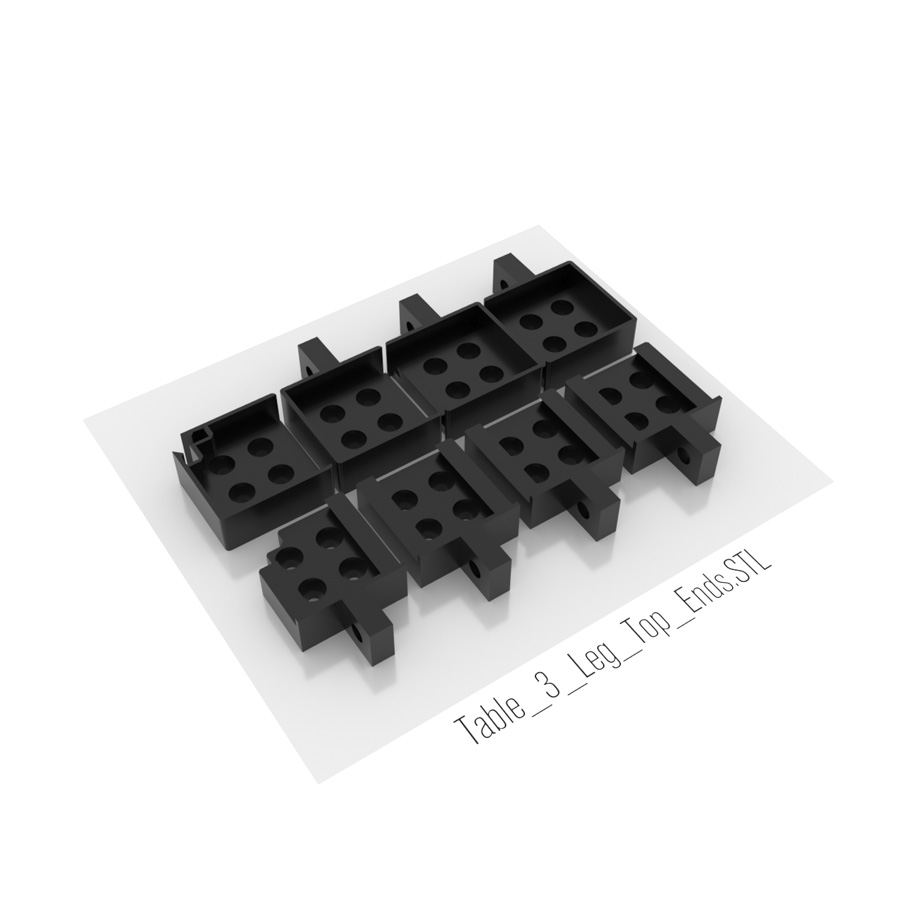 |
Table_3_Leg_Top_Ends.STL
1 x Leg end (door)
1 x Leg end (magnet) 1 x Leg end (back-left) 1 x Leg end (back-right) 1 x Table corner leg holder (door) 1 x Table corner leg holder (magnet) 1 x Table corner leg holder (back-left) 1 x Table corner leg holder (back-right) |
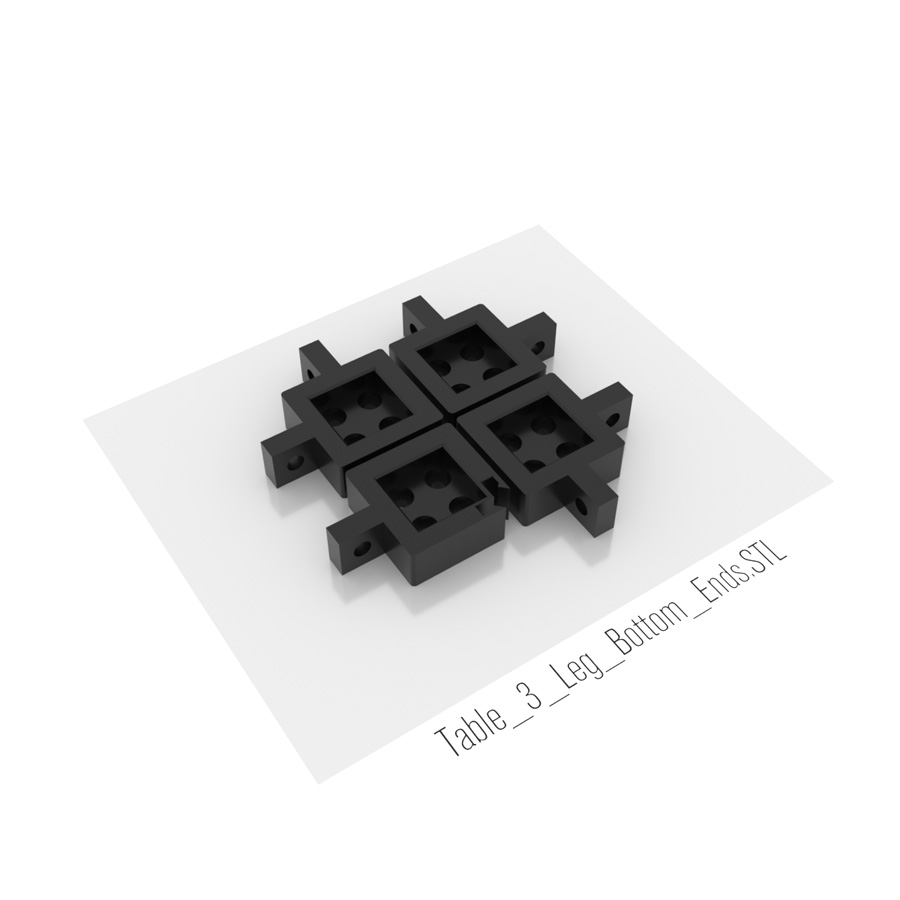 |
Table_3_Leg_Bottom_Ends.STL
1 x Leg end (door)
3 x Leg end |
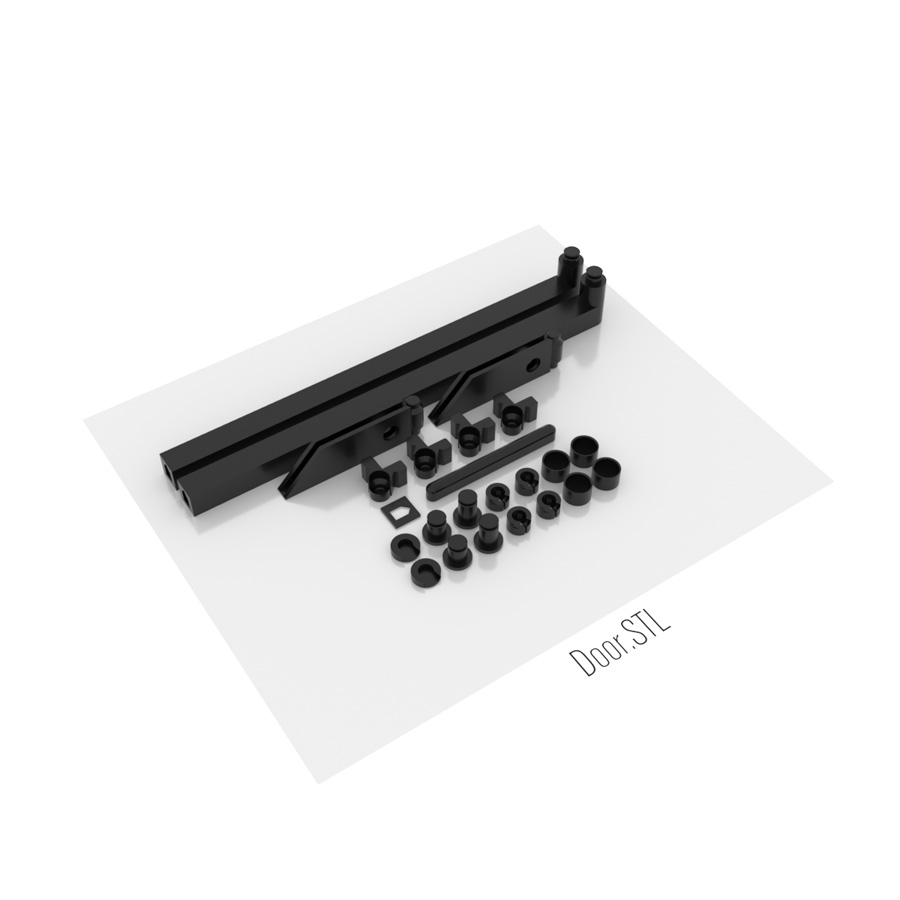 |
Door.STL
2 x Door handle
1 x Door handle spacer - door handle in file is 216mm, but printed (shrunk) 215mm. Added spacer. 1 x Door handle connector 2 x Door hinge 4 x Door hinge holder 2 x Door holder 2 x Door holder clip 2 x Magnet insert holder 4 x Magnet insert 4 x Magnet insert cover |
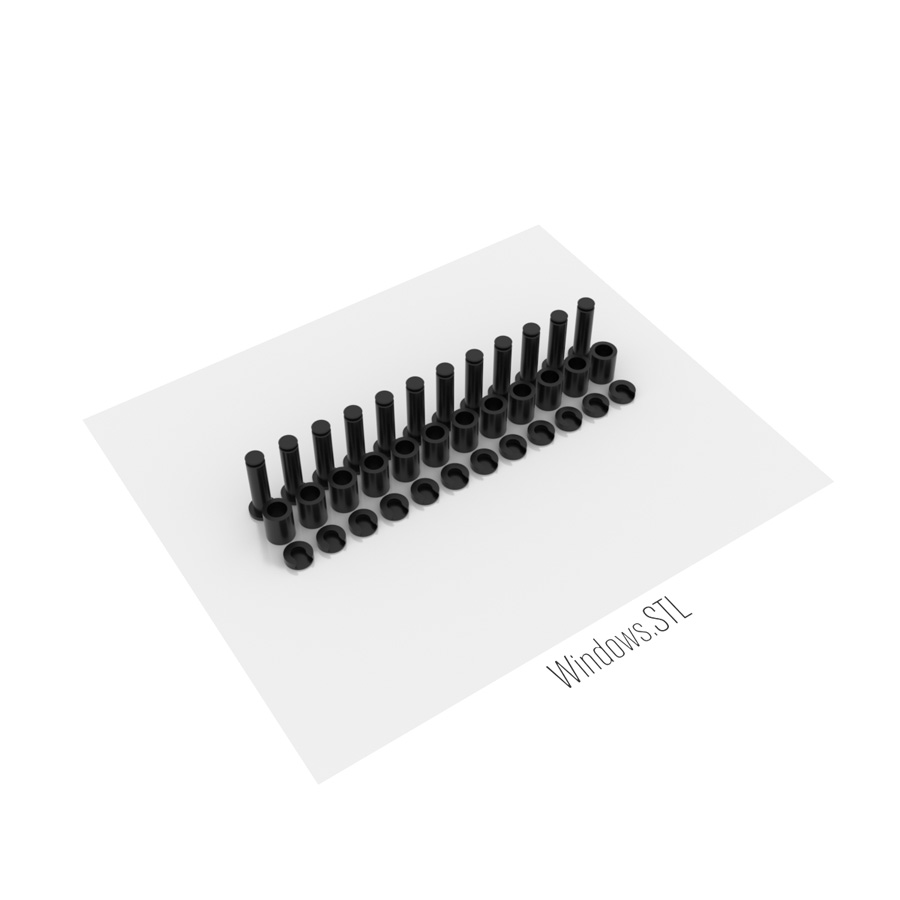 |
Windows.STL
12 x Window holder
12 x Window holder spacer 12 x Window holder clip |
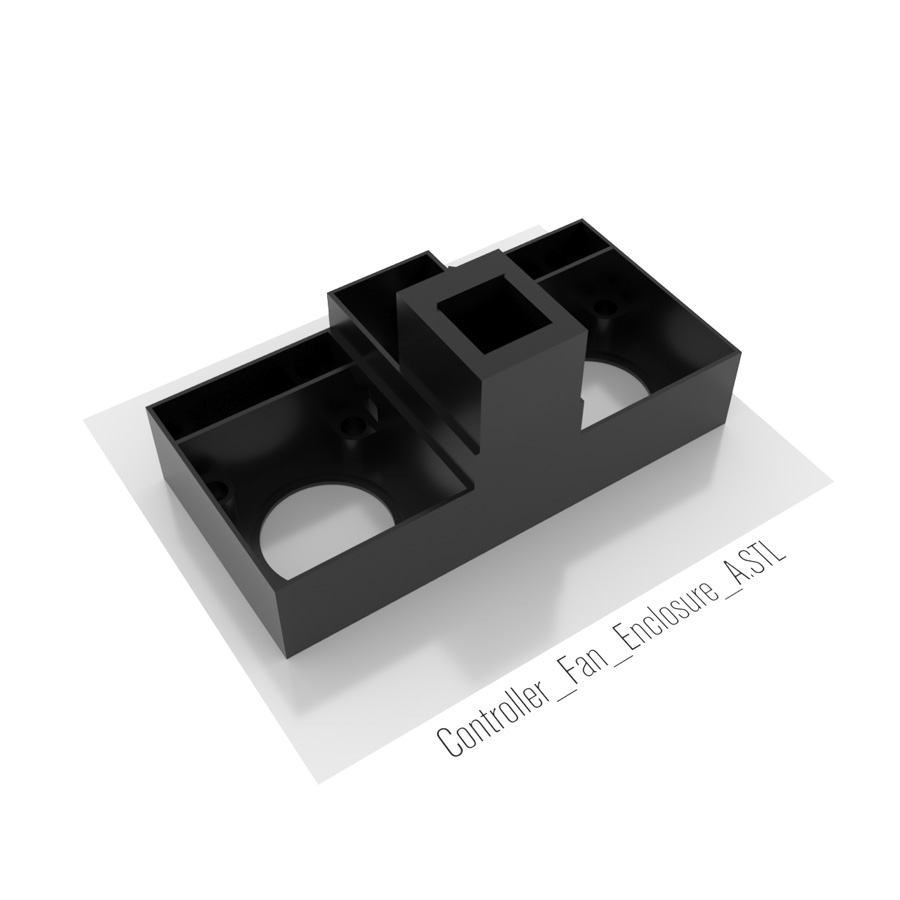 |
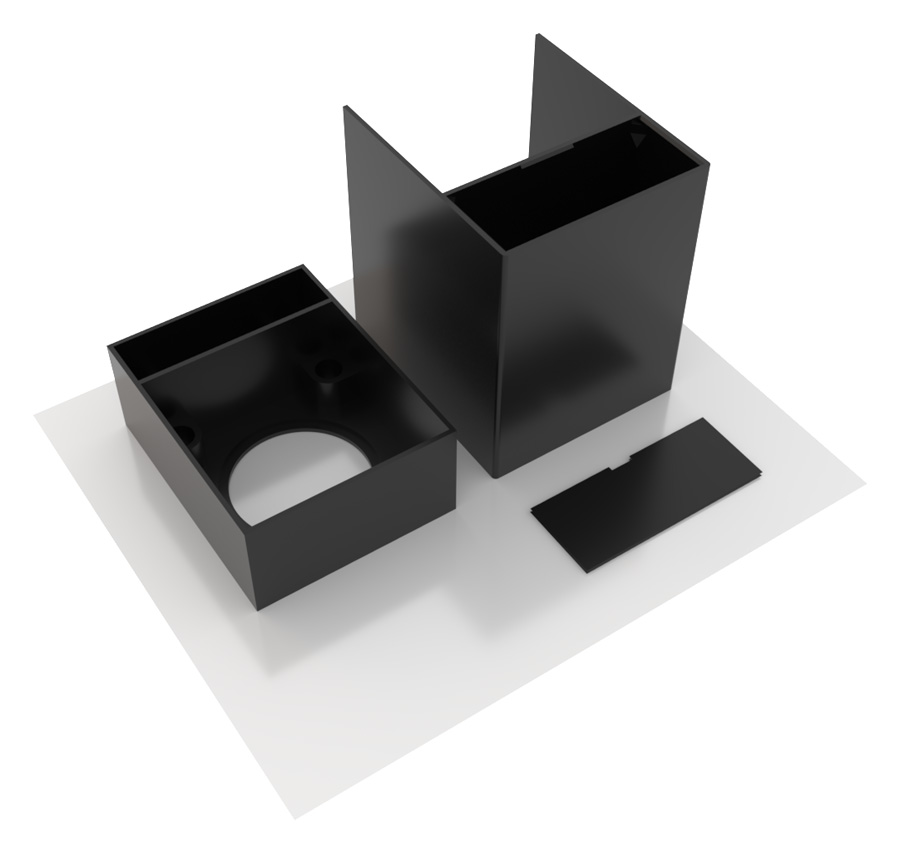
Controller_Fan_Enclosure_A.STL
1 x Controller and fan enclosure part A
|
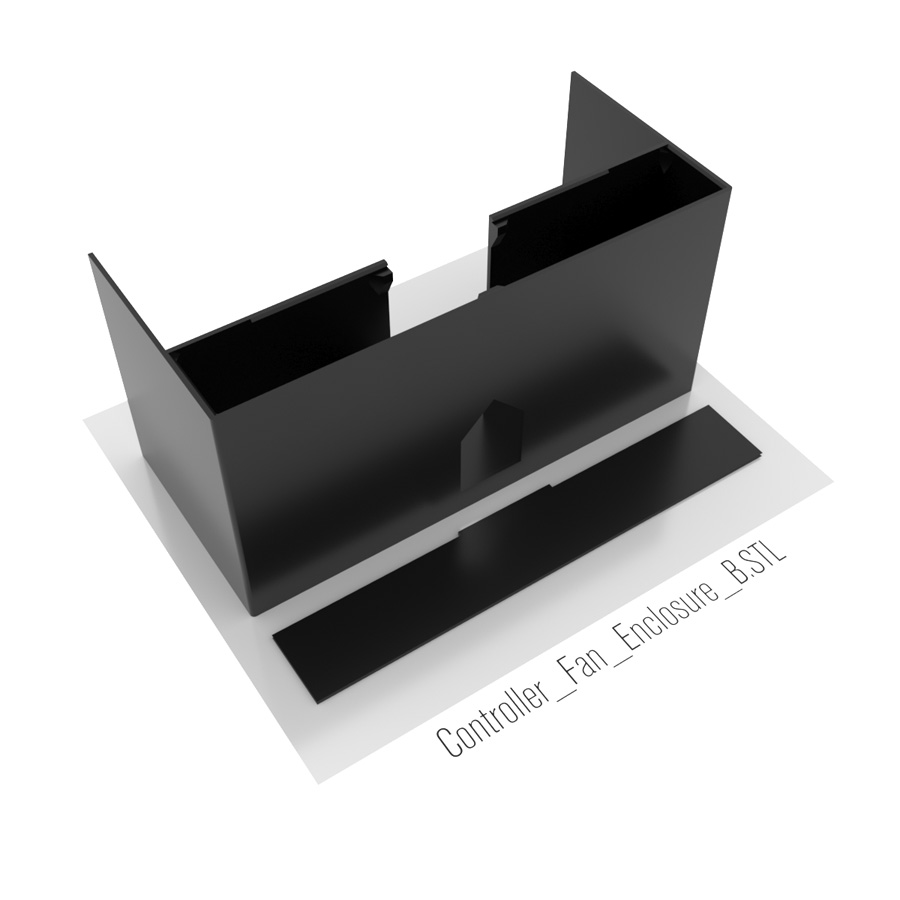 |
Controller_Fan_Enclosure_B.STL
1 x Controller and fan enclosure part B
1 x Controller and fan enclosure part B cable cover |
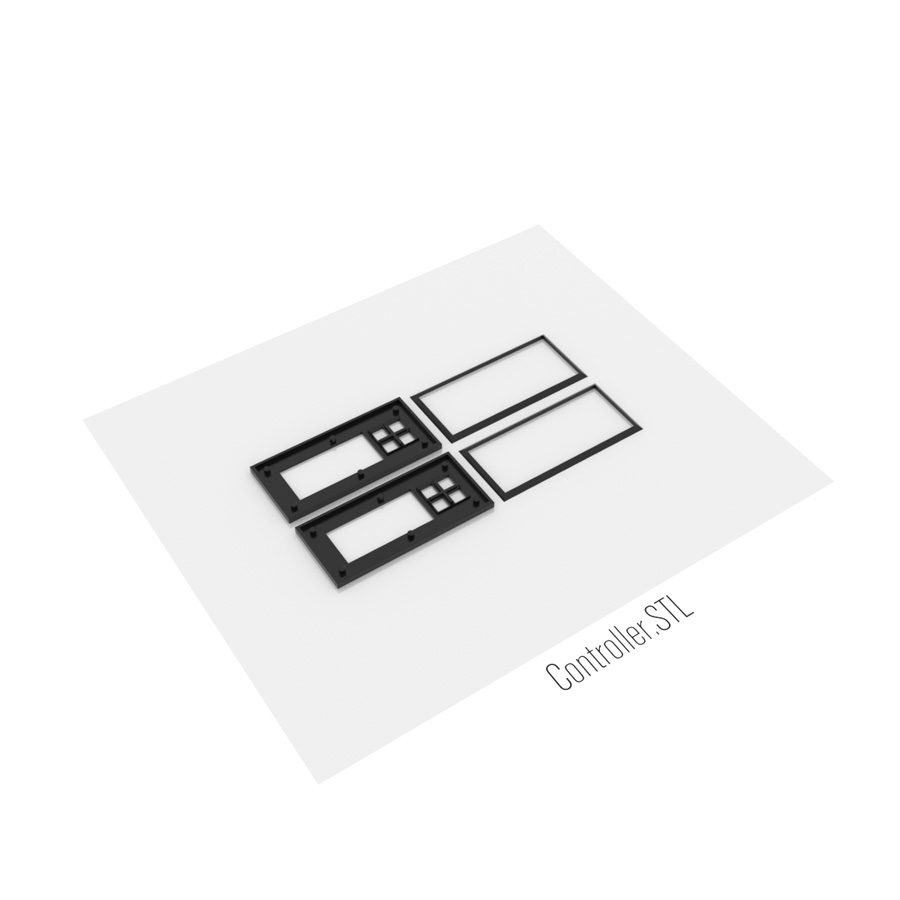 |
Controller.STL
2 x Controller front panel
2 x Controller stopper |
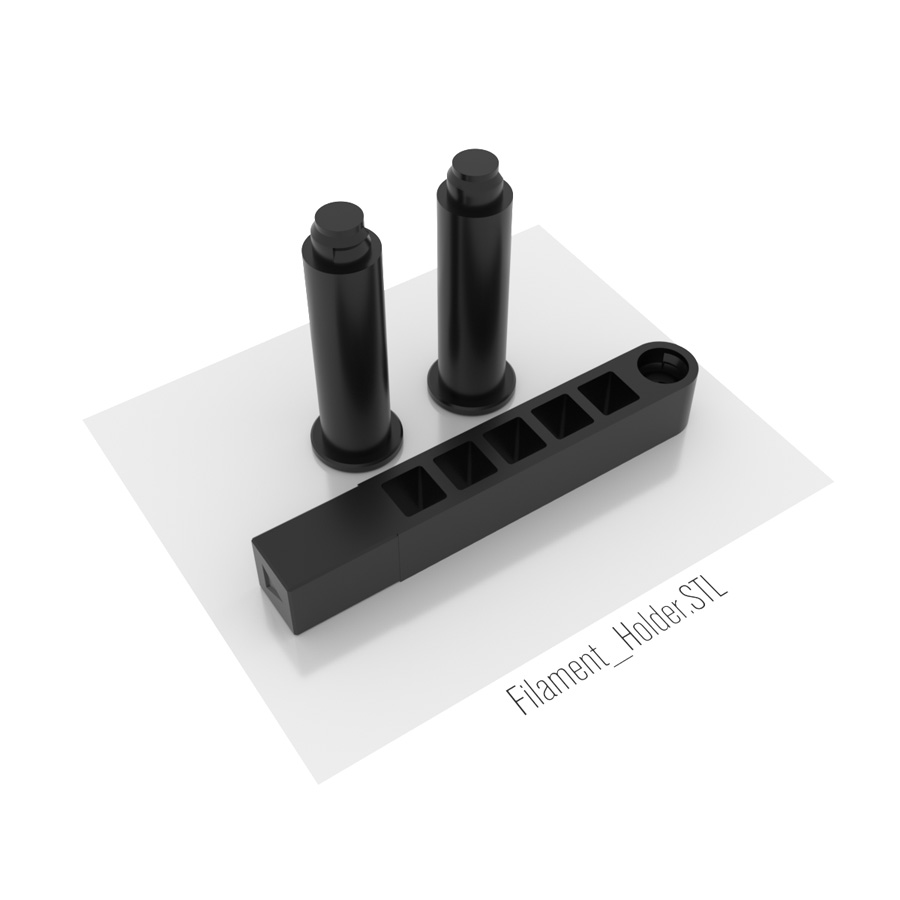 |
Filament_Holder.STL
1 x Filament Holder Connector
1 x Filament Holder Left 1 x Filament Holder Right |
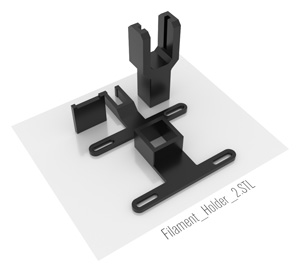 |
Filament_Holder_2.STL
1 x Filament Guide for Filament Holder Connector
1 x Filament Holder for Prusa3D Filament Holder (Optional) 1 x Filament Holder Plate for Prusa3D Filament Holder (Optional) 1 x Filament Guide for Prusa3D Filament Holder (Optional) |
STL FILES (OPTIONAL)
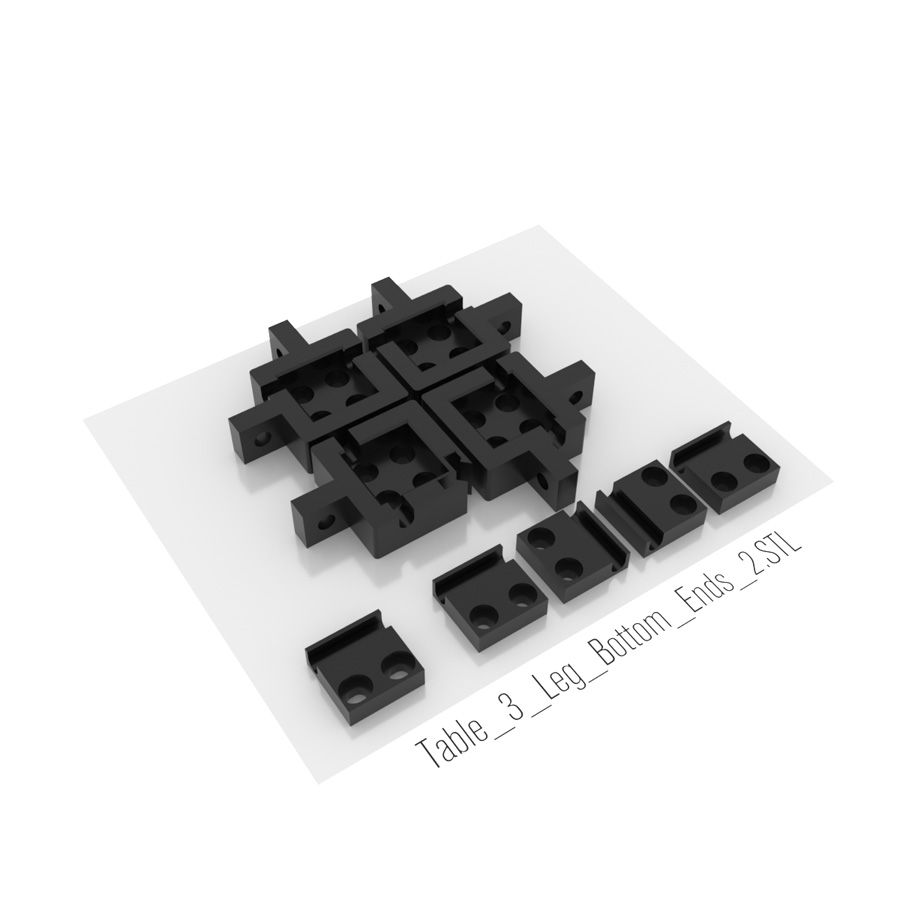 |
Table_3_Leg_Bottom_Ends_Cables.STL
Parts if you need additional holes for cables.
1 x Leg end (door)
3 x Leg end 1 x Leg holder ±1mm (door) - if door is not aligned perfectly 4 x Leg holder |
FILES FOR EDITING (OPTIONAL)
 |
Thingiverse
Temperature Controlled Enclosure With Motion Sensor LED Lights

847
Curtidas
0
Downloads
1,408
Coleções
2
Impressões
Tags
3d printer enclosure
controlled
diy
enclosure
ikea
jocys
jocyscom
lack
light
motion
printer
Printer Enclosure
sensor
temperature
temperature control
Ventilation
Licença
Creative Commons - Attribution - Share Alike
Arquivos (25)