Você está no 3DFinder
Buscamos em Thingiverse, MakerWorld e Printables ao mesmo tempo para te dar o melhor de cada uma.
Descrição

Introduction
I liked the idea and the look of Oogway´s Speedometer Clock but i don´t liked the printed watch face, because i don´t get it printed nicely.
So i decided to make a remix for a plotted watch face.
The idea was to create a transparent diffusor with a plotted black matte foil, to get a nice illuminated watch face with a crisp and clear appearance.
I designed the parts, that there is no need for support.
Printed parts
Base, Front
Material: colorFabb PLA Semi-Matte Black
Layer height: 0.2mm
Infill: 15%
Diffusor
Material: Prusament PETG Clear
Layer height: 0.2mm
Infill: 100%
Needle
Material: eSun ABS Red
Layer height: 0.15mm
Infill: 100%
Needle cap, button
Material: colorFabb PLA Semi-Matte Black
Layer height: 0.15mm
Infill: 100%
Hardware
i used following parts:
- 1x Node MCU
[https://www.amazon.de/gp/product/B07V4KL8CW/](https://www.amazon.de/gp/product/B07V4KL8CW/) - 2x Servo 300°
[https://www.tme.eu/at/details/df-ser0053/servomechanismen/dfrobot/ser0053/](https://www.tme.eu/at/details/df-ser0053/servomechanismen/dfrobot/ser0053/) - 1x MicroUSB breakout
[https://www.amazon.de/gp/product/B07W13X3TD/](https://www.amazon.de/gp/product/B07W13X3TD/) - 1x RGB Ledstrip
[https://www.amazon.de/gp/product/B07TKHMZHS/](https://www.amazon.de/gp/product/B07TKHMZHS/) - 6x M3 thread insert
- 6x M3x12 Screw
Assembly
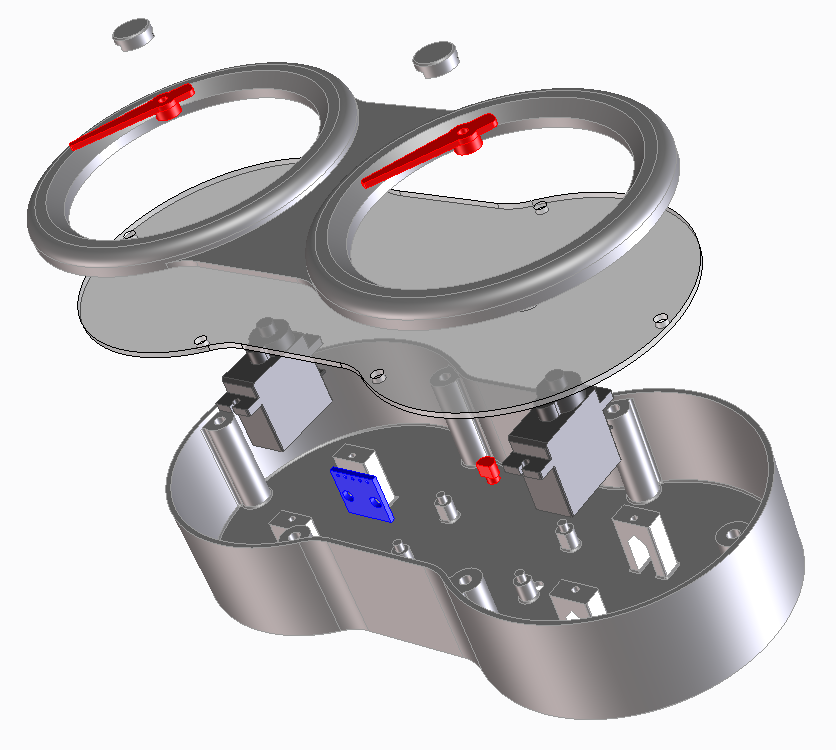
In the base, the Node Mcu and the MircoUSB breakout board are held in place by pins, which were melted with a soldering iron. The button is hold in place from the Node Mcu.
The RGB Ledstrip is self adhesive and i placed them around the servos.
I also made a little pcb for a easier power distribution and to not have to cut off the plugs of the servos. The Servos were held in place with the enclosed screws.

In the front, the M3 thread insert were placed with a soldering iron.
The front is relatively thin, so the inserts should not be longer than 4.5mm.

I plotted the watch face for the hours and minutes in once, so the positioning is easy and the risk of a twisted scale is barely there. The diffusor is symmetrical, so i sticked the foil on the nice side with the structure of the satin print sheet.
I used Silhouette Studio for design the watch face and uploaded the .studio3 and also as a converted .svg for other plotter software.

Software
Before you screw in the Servos, you have to setup the NodeMCU.
I recommend, that you test all functions before you screw together the case and attach the needles with the screw.
For the Arduino sketch you need some more libraries, wich are documented with a link to the repository in the sketch. For an easy integration in your wifi, i used the wifimanager library, wich allows you to setup your SSID and password with a smartphone or tablet.
How it works is also documented on GitHub - the generated AP is “Clock-AP” without a password. You only need to configure your wifi once.
Maybe you have to modify some parameters directly in the sketch, e.g.: servo positions and timezone.
Settings
The clock is operated by a small button on the back.
Once it has a wifi connection, you can switch threw the rgb colors, with a short click.
With a longer press you come into "setup brightness" mode.
The hour needle moves to 1 and the minute needle represents the actual LEDStrip brightness. You can change the brightness by short click the button.
With another longer press, you change to “setup summertime" mode.
The minute needle moves to 0 and the hour needle represents the daylight saving time shift.
With a short click on the button, you change the summertime from 1 (GMT+1) to 2 (GMT+2).
With another longer press, you come back to the clock mode and the settings were saved.
To zero the needles, i recommend, to go to the Summertime Mode and press on the needles at exactly 1, respectively 0 at the minute needle.
I experienced, that the Servo is not linear, so it is possible, that you have to correct the servo positions in the array.
Final Steps
After everything works as expected, fix the needles with the enclosed servo screw and screw together the case.
Final the needle caps should snap on, or can be secured with a small amount of glue.
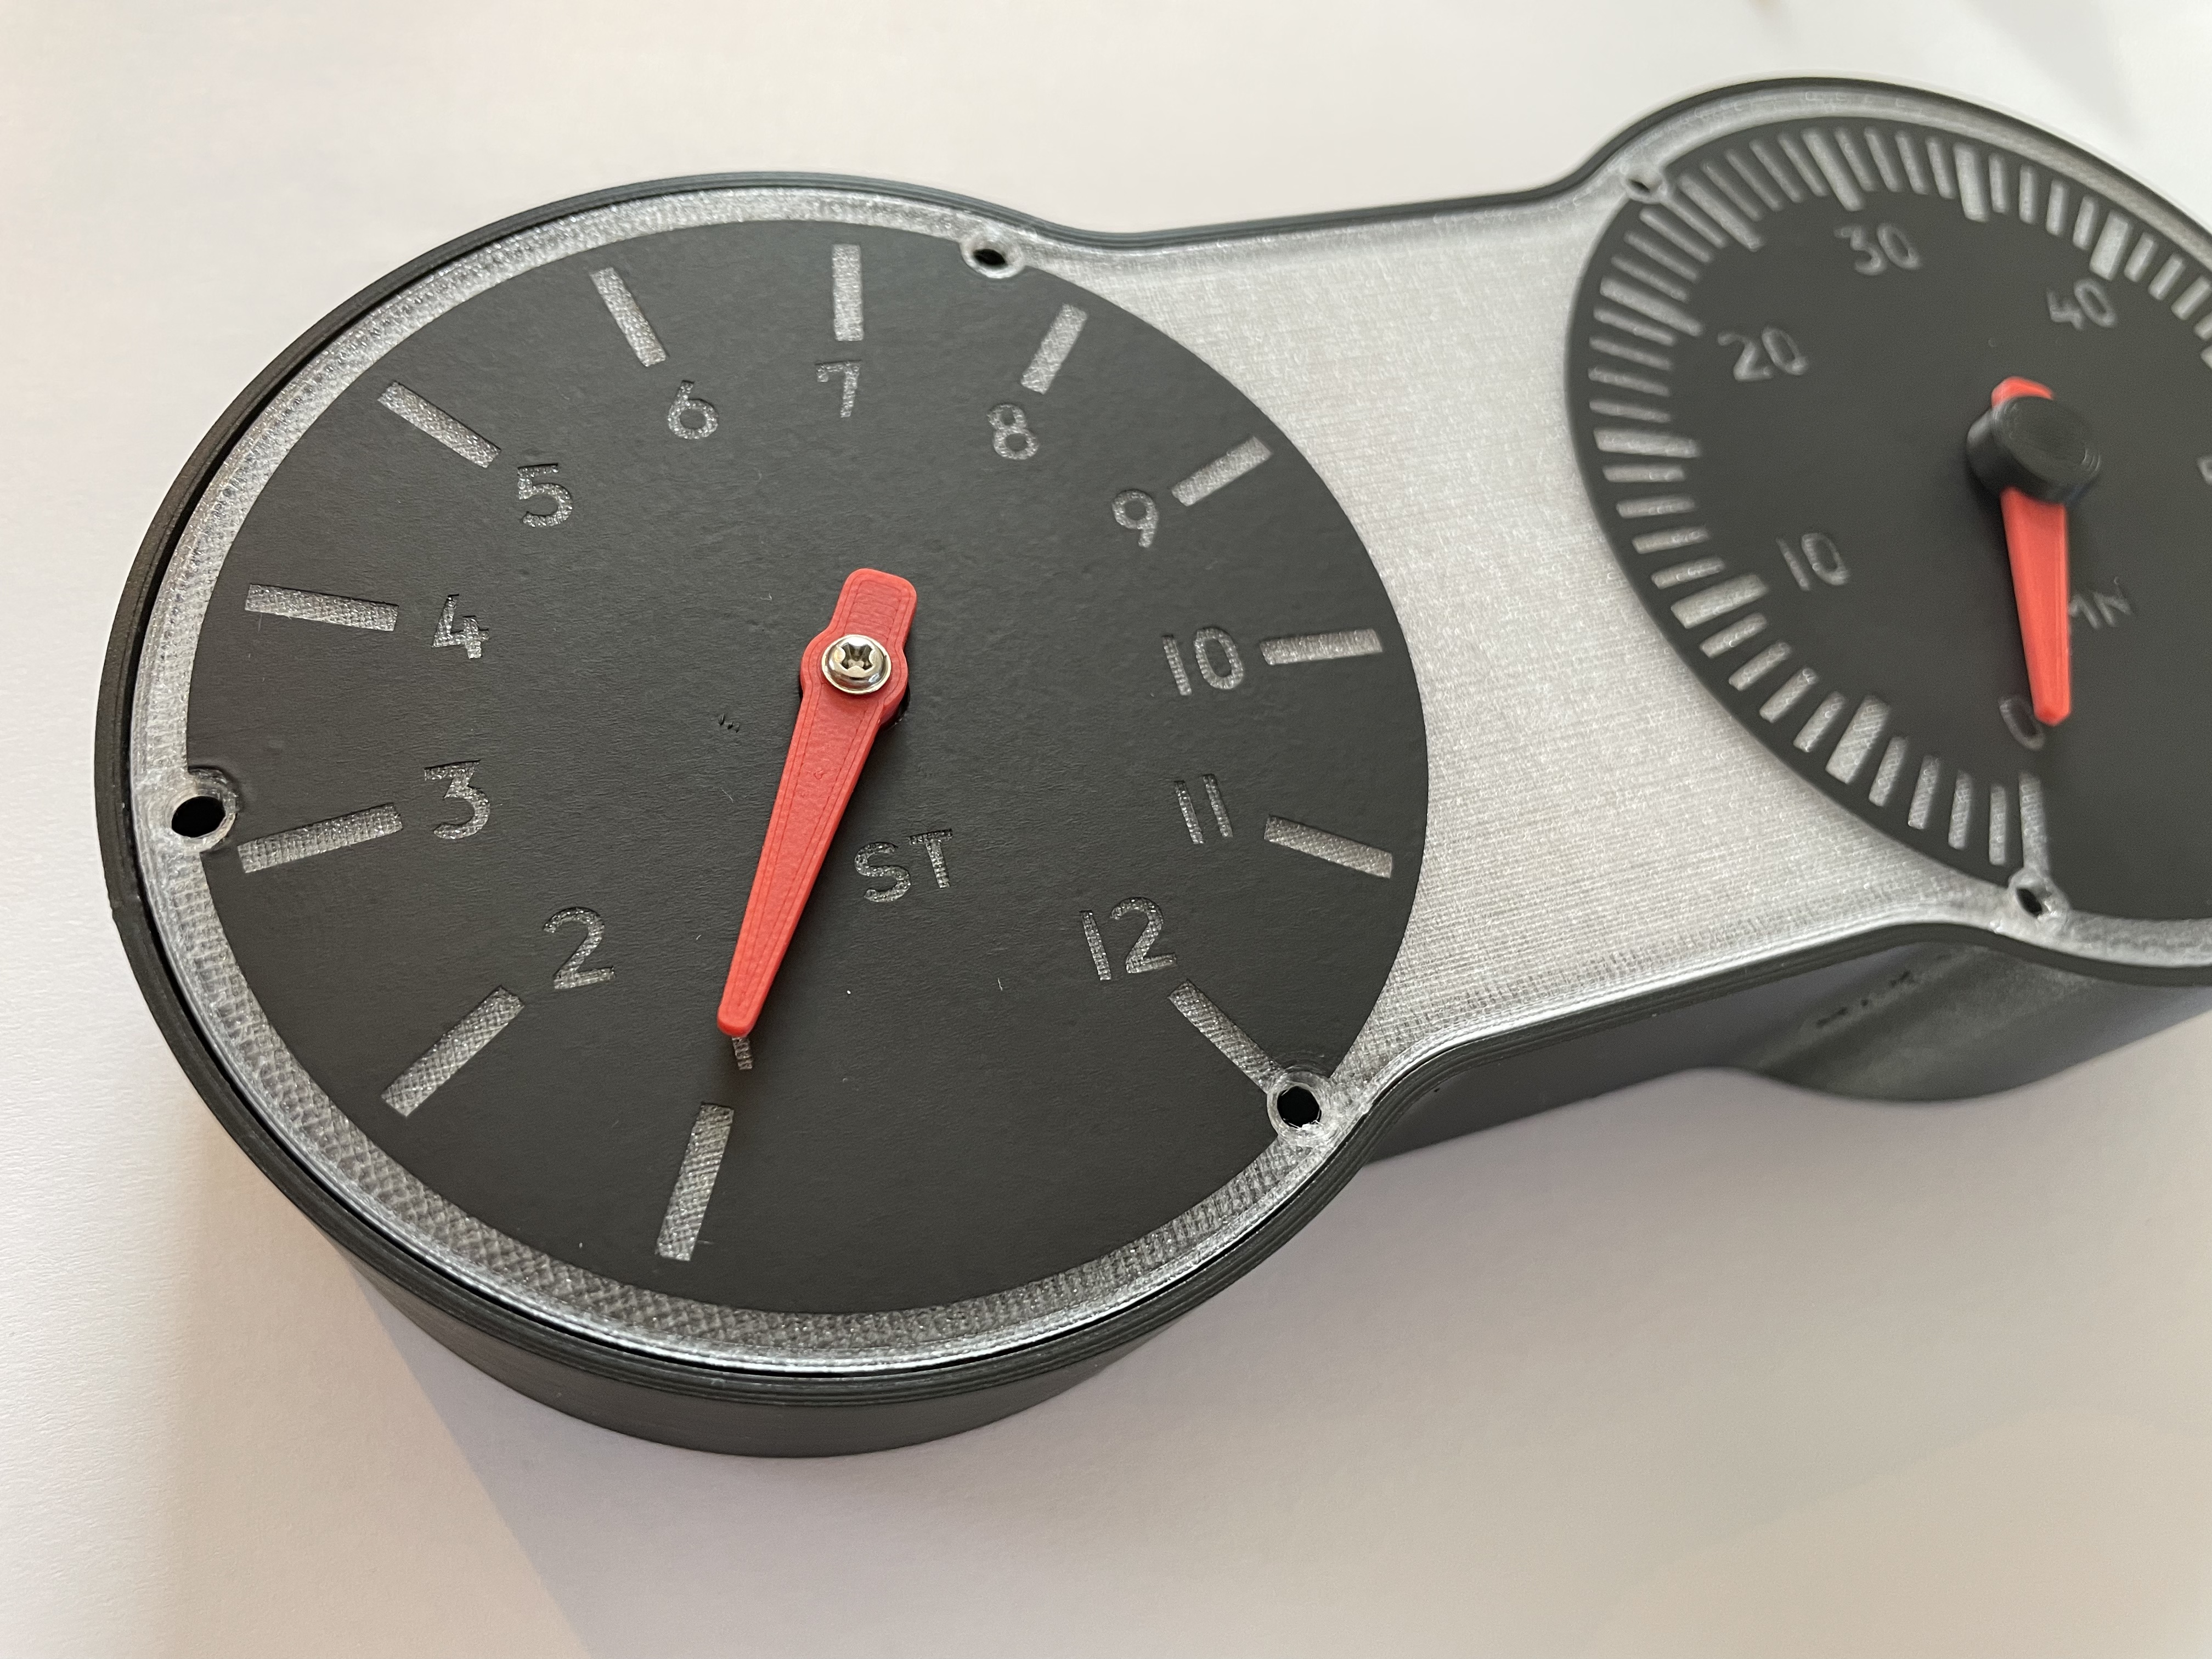
Complete Clock
Tip: With a small bend on the micro USB cable, you get a nice angled view!
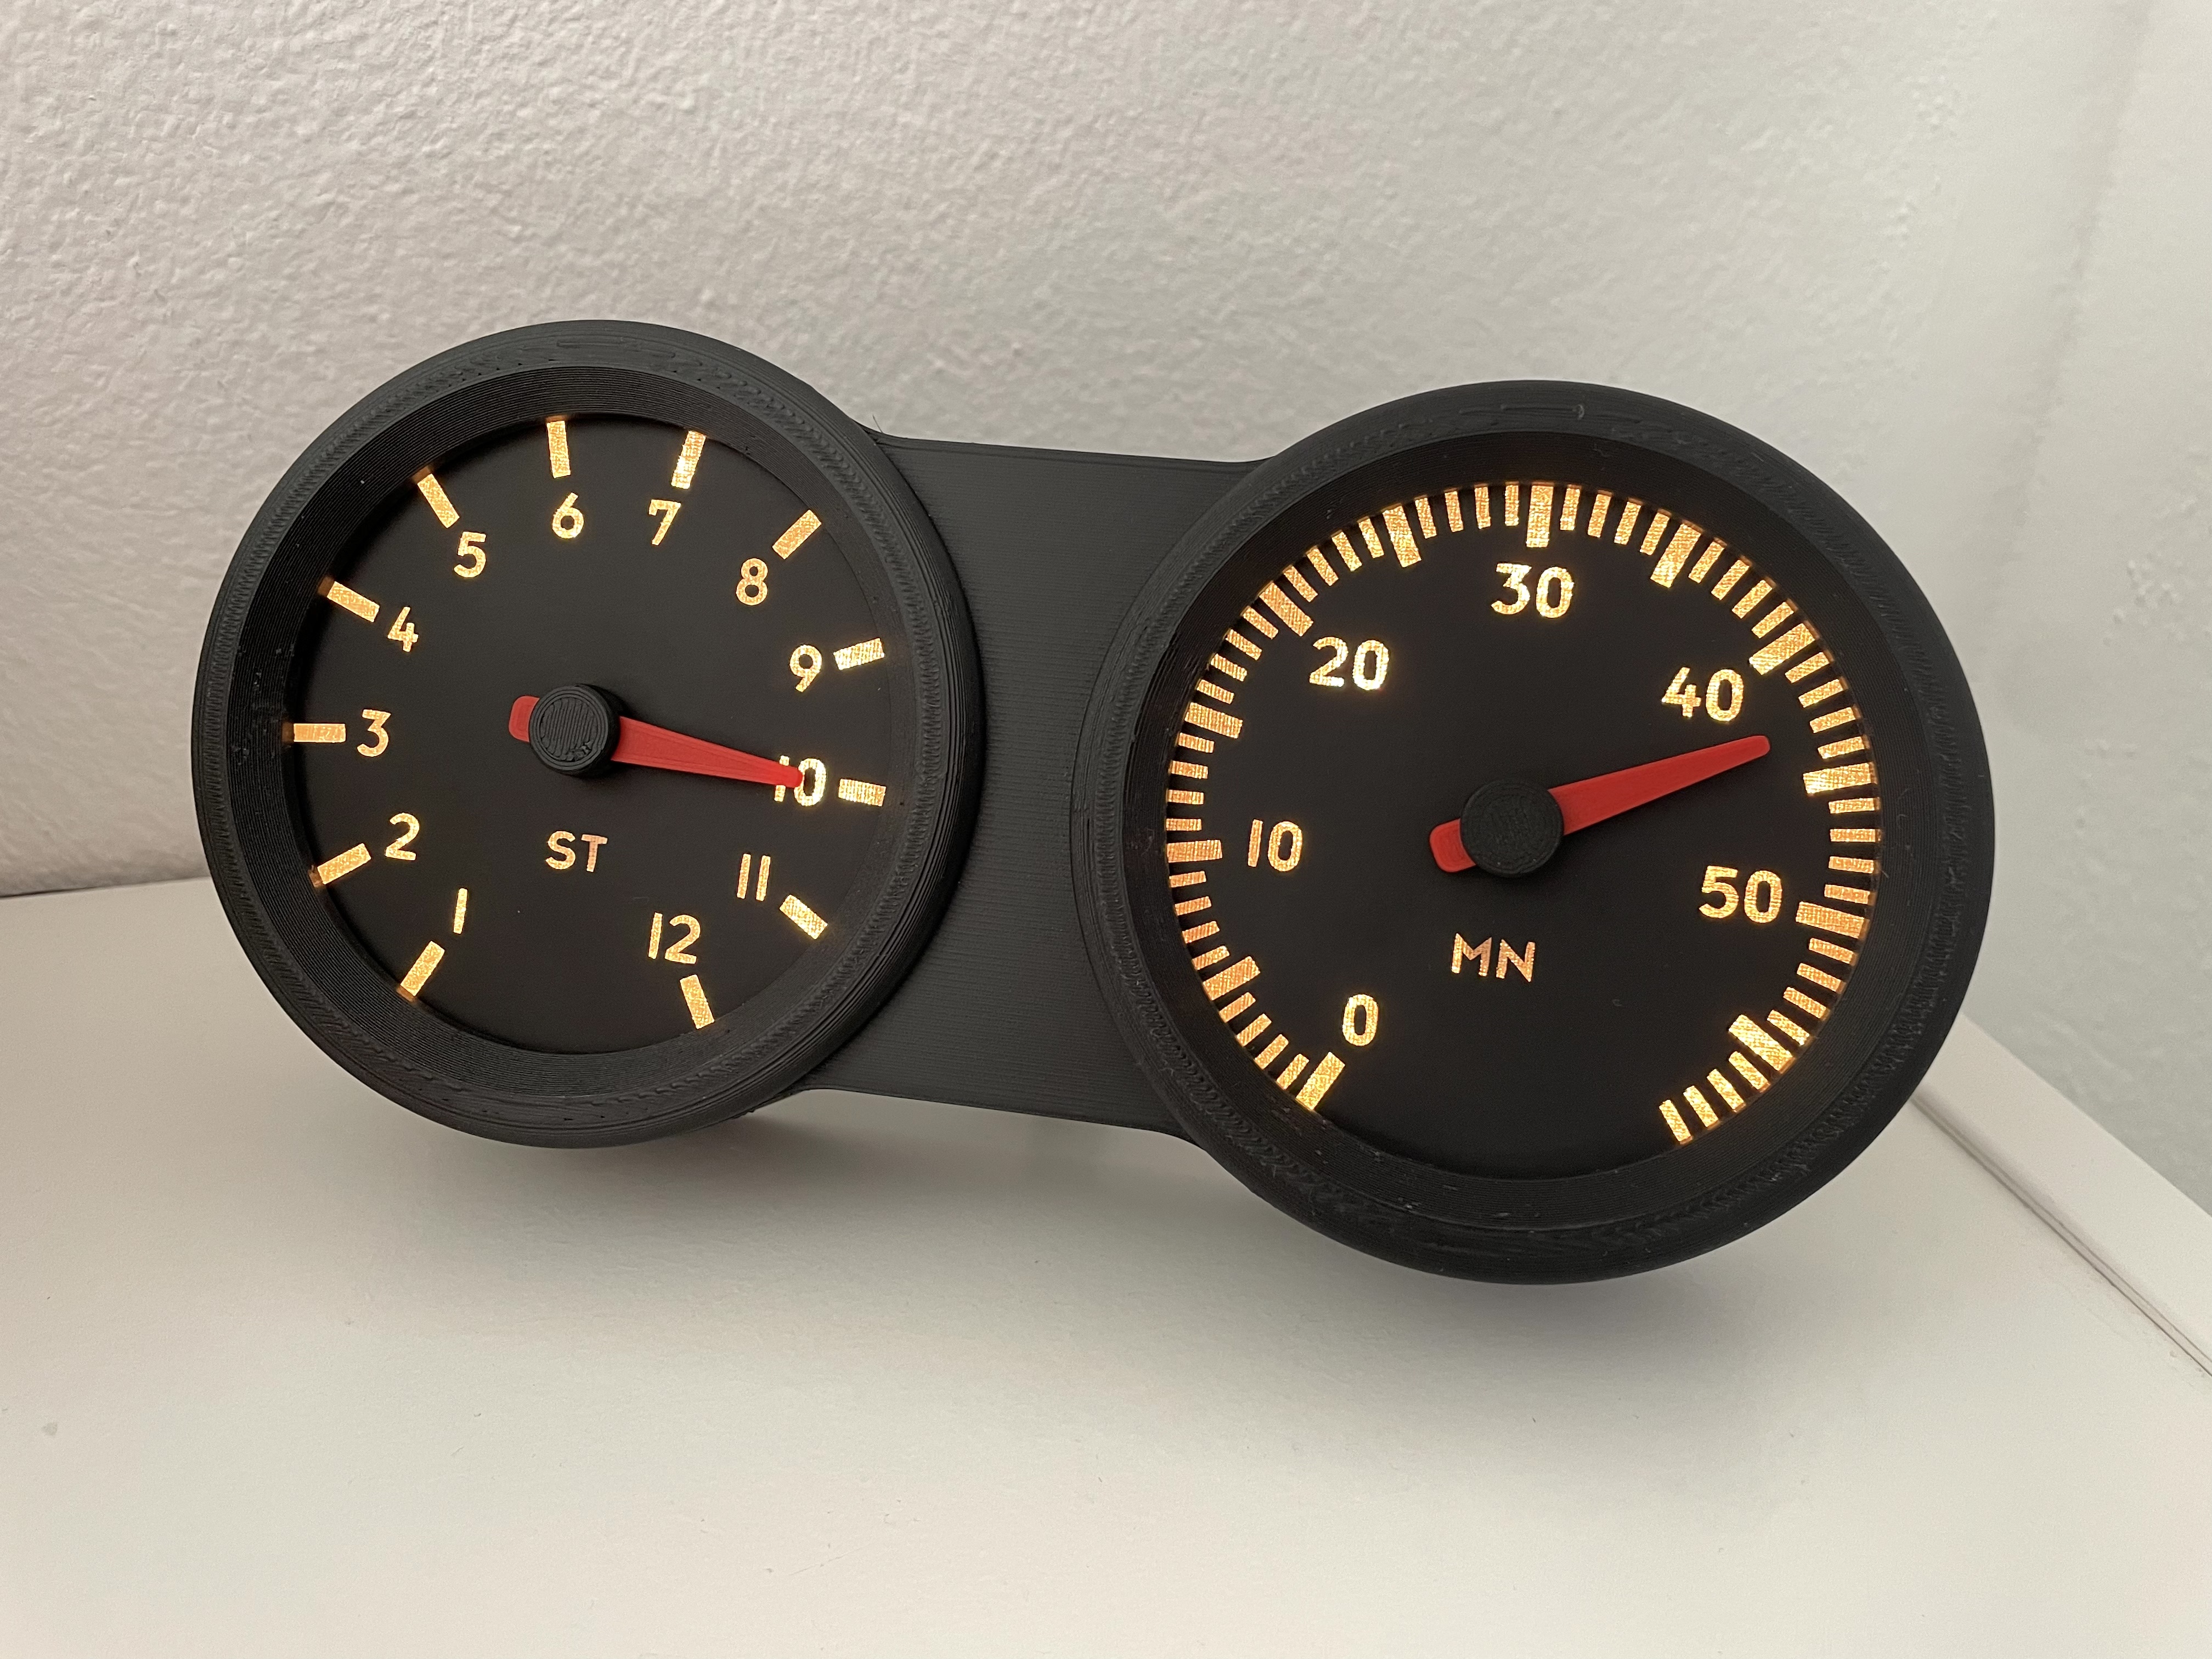
Speedometer Clock with plotted watch face

Publicado em 17 de dez de 2021
Gostou deste modelo? Crie uma conta grátis para salvar seus favoritos e voltar a eles depois.
Criar conta