Você está no 3DFinder
Buscamos em Thingiverse, MakerWorld e Printables ao mesmo tempo para te dar o melhor de cada uma.
Descrição
A modern MP3 player in a vintage package
I started this model to solve a very real and common problem in all of our lives: there aren't any functioning Walkmans on Printables. Hence a modernised take on the calssic music players of the 80s and 90s.
Variants
There are 2 different variants:
- Display variant
- Vanilla variant
The only difference is that the Display variant has a cutout on the top for a 0.91" display. If you want a more retro look, I would definately recommend against this one.
The display variant leans into this being a modern take on the original piece, but it might look a bit strange to some people.
PLEASE KEEP IN MIND, THAT THIS MODEL INVOLVES SOLDERING TO USB DEVICES. IF DONE INCORRECTLY, THIS HAS THE POTENTIAL OF DESTROYING THE USB PORT OR EVEN FRYING THE MOTHERBOARD ON ANY COMPUTER ITS PLUGGED INTO. ONLY PROCEED IF YOU KNOW WHAT YOU ARE DOING
Software
It uses a simple Micropython script that controls the player using UART. Here are some useful links for it, my code is a mess and I would have to disassemble the Walkman for it, but if enough people want it I can clean it up a bit and post it here as well.
[https://github.com/mannbro/Kidsplayer](https://github.com/mannbro/Kidsplayer)
[https://github.com/mannbro/PicoDFPlayer](https://github.com/mannbro/PicoDFPlayer)
2024/09/27 Update - Github
I have created a Github repository for this project, where you can download the code for it. It is not under active development, but on request I can look into improving the code here and there.
Materials needed
I made this model from parts I mostly already had access to, so a lot of these parts are exchangeable for similar parts. The parts needed:
- Electronics:
- Raspberry Pi Pico or similar
- DFPlayer mini or similar
- TP-4056 charger circuit (USB C)
- 3mm LED bulb
- 2x JC114 3.5mm Jack socket or similar
- 330 Ohm resistor
- 4x BS-800 switches
- 3x DM-03-S-7P switches
- 2x USB sicks for every cassette (they will get destroyed so I tried to find old ones)
- OPTIONAL 0.91" OLED for the Display variant
- 3x AA Battery holder
- 2x 6x1 female jumper connector for each cassette
- 6x1 male jumper connector
- OPTIONAL some AMP circuit, the DFPlayer is servicable but not the best
- Mechanical parts:
- M3 screws (14x 8mm long countersunk, 1x 10mm hex socket head)
- M3 threaded inserts
- ⌀1x105mm axile (I used the red tube off a can of WD40)
- 3x ~ ⌀2mm springs (I used pen springs)
Assembly
Let me start off by saying the assembly is a pain for everyone involved so brace yourselves. The order of operations is not optimized in any way, the following is just how I've done it.
Assembling the window:
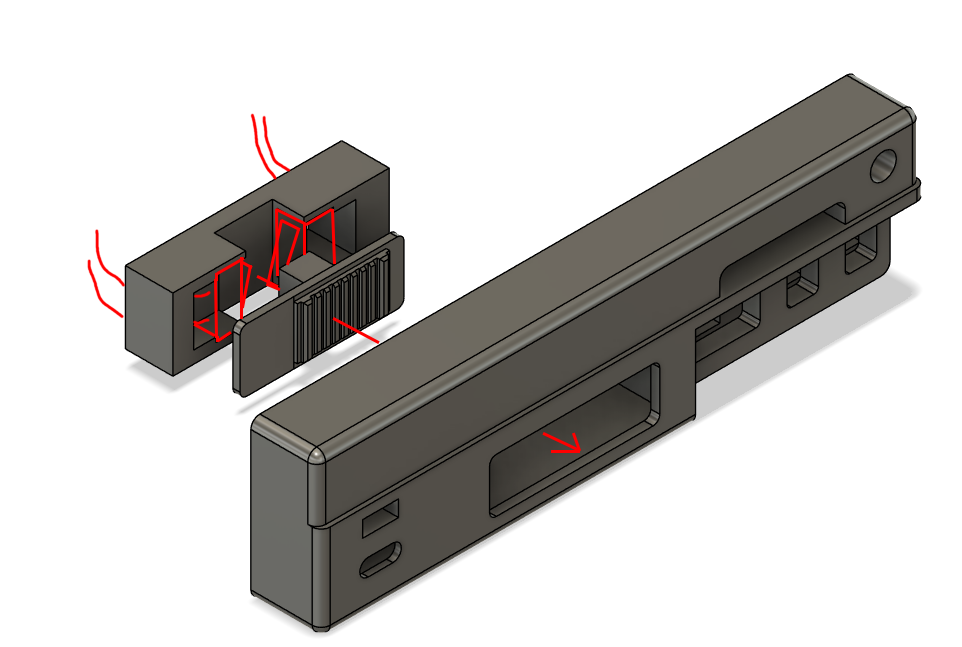
For the assembly of the window start by soldering wires to the male jumper connector and feeding it through the cutout as shown below
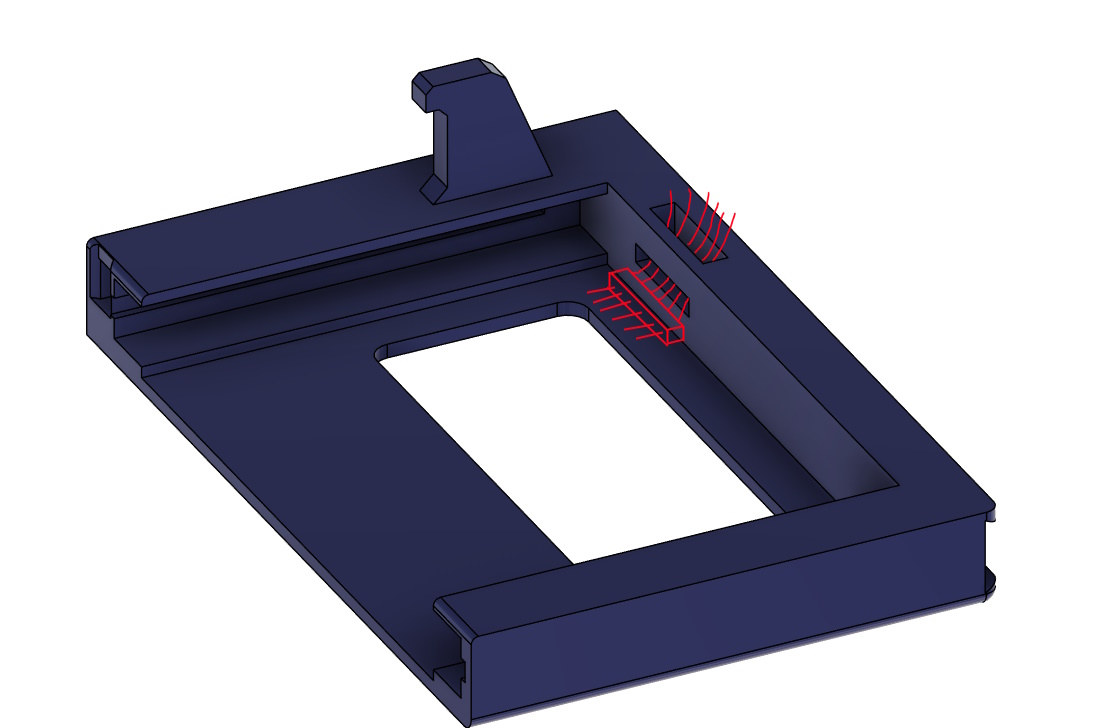
Hot glue the part jumper connector to the housing, making sure it's flush and the contacts are intact.
Put the retention pin, a spring and the plug in the long cutout on the side as shown below and while applying pressure and move on to the next part.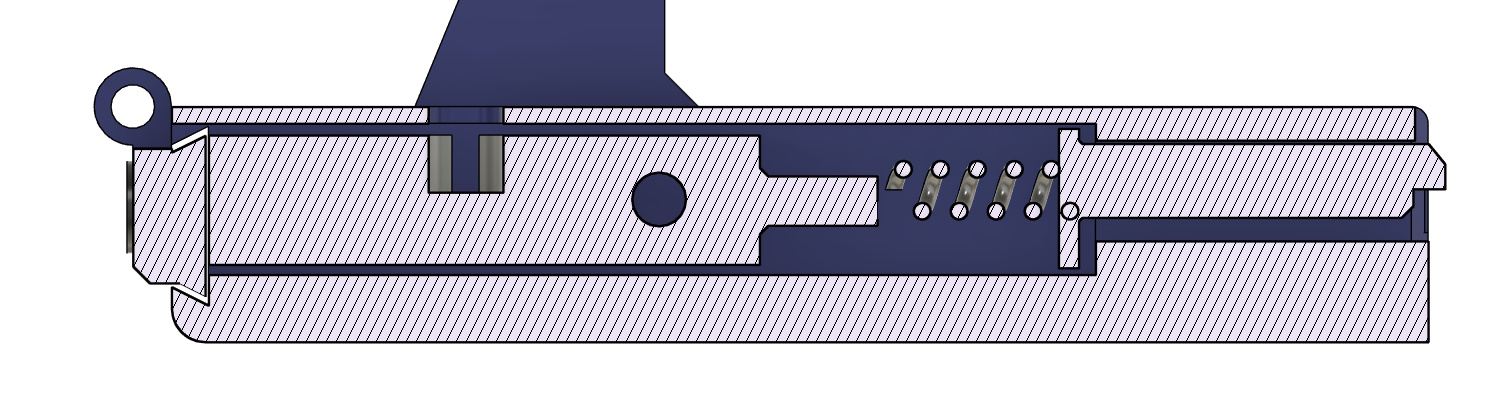
Next, fit the window hinges on the back side and secure it with 3 countersunk M3 4mm screws. The screws are only fastened in the plastic so they may loosen over time.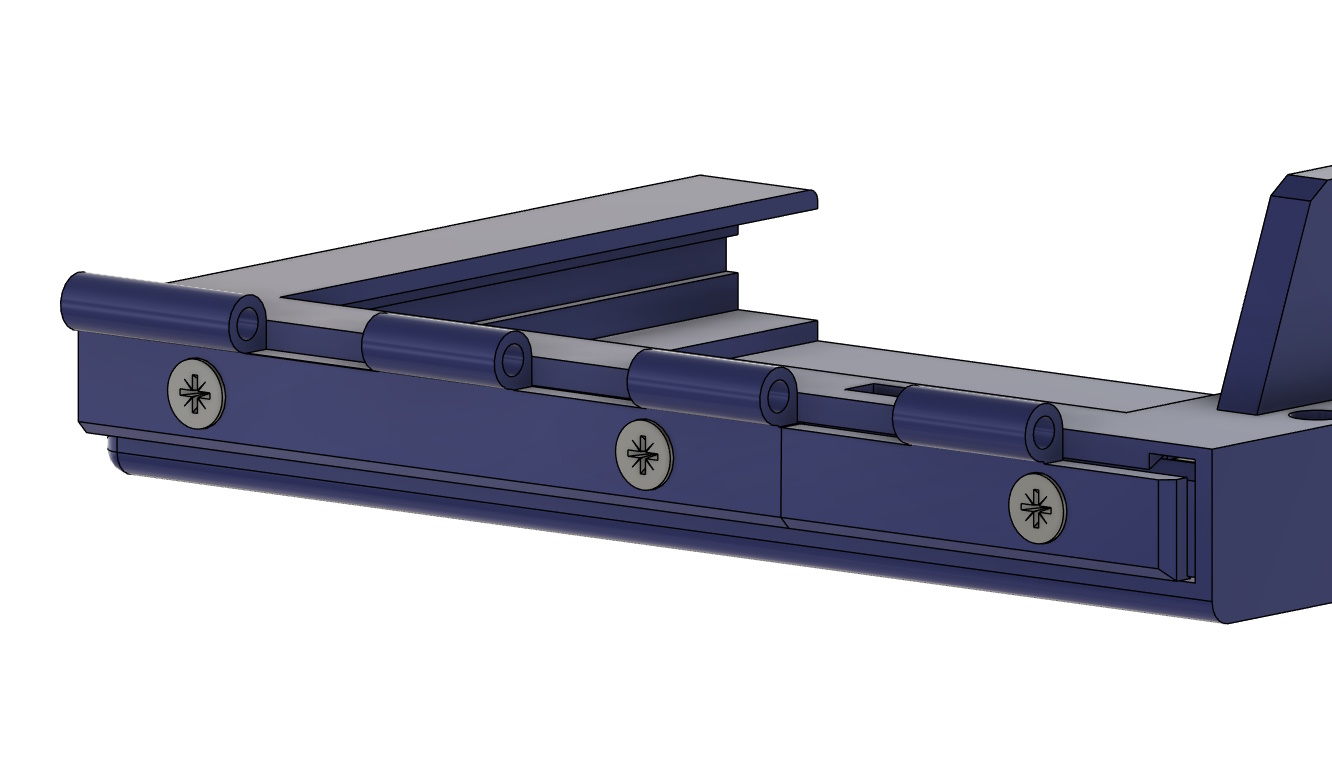
Assembling the base:
For the body, first solder wires to the square, 8x8mm buttons, the jack sockets and the LED, and insert them into the body. The 3 buttons on the side should stick out around 3mm and can also be inserted after the next step with the side part. If you have the display variant also insert that.
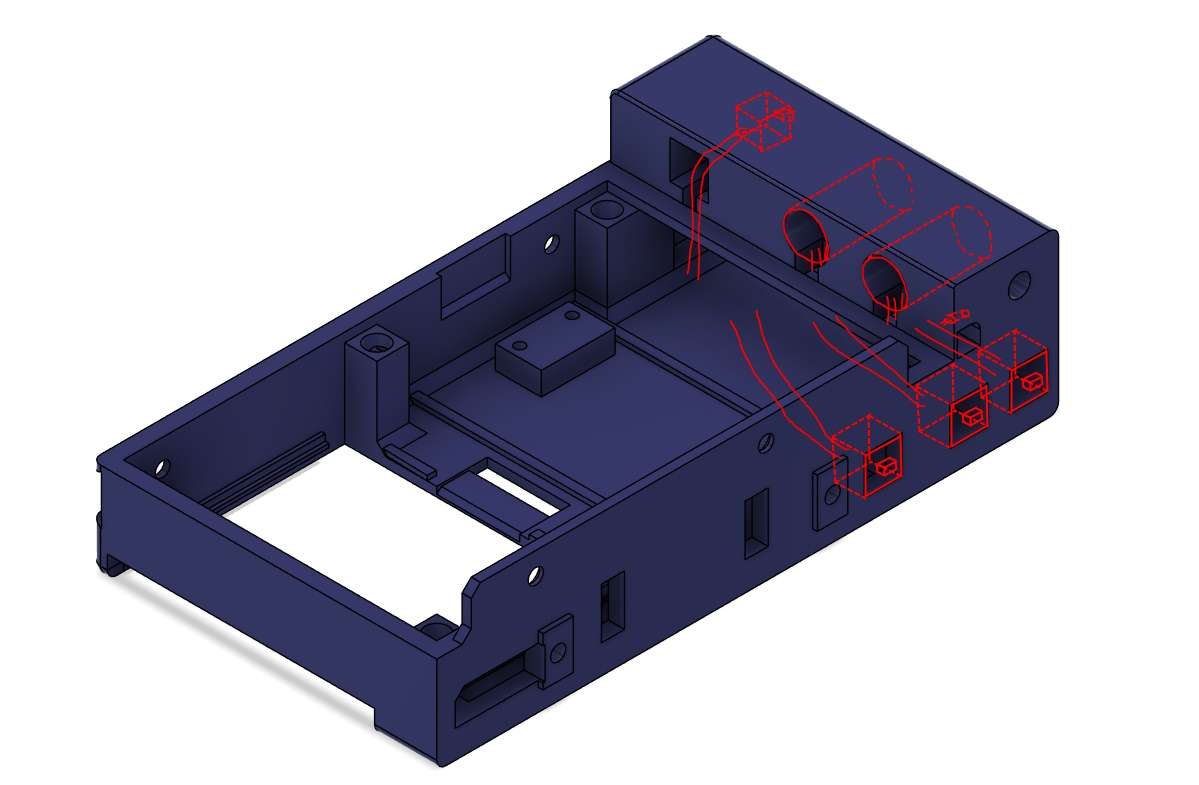
Next, take Volume Support part and insert two DM-03-S-7P switches into their position. The Volume Rocker part fits inbetween the switches. Next, slide these 4 parts into the side and try it out to make sure the volume rocker has enugh room to slide up and down.
The next part is tricky, as the Eject Button has to slide into its place with a spring as well.
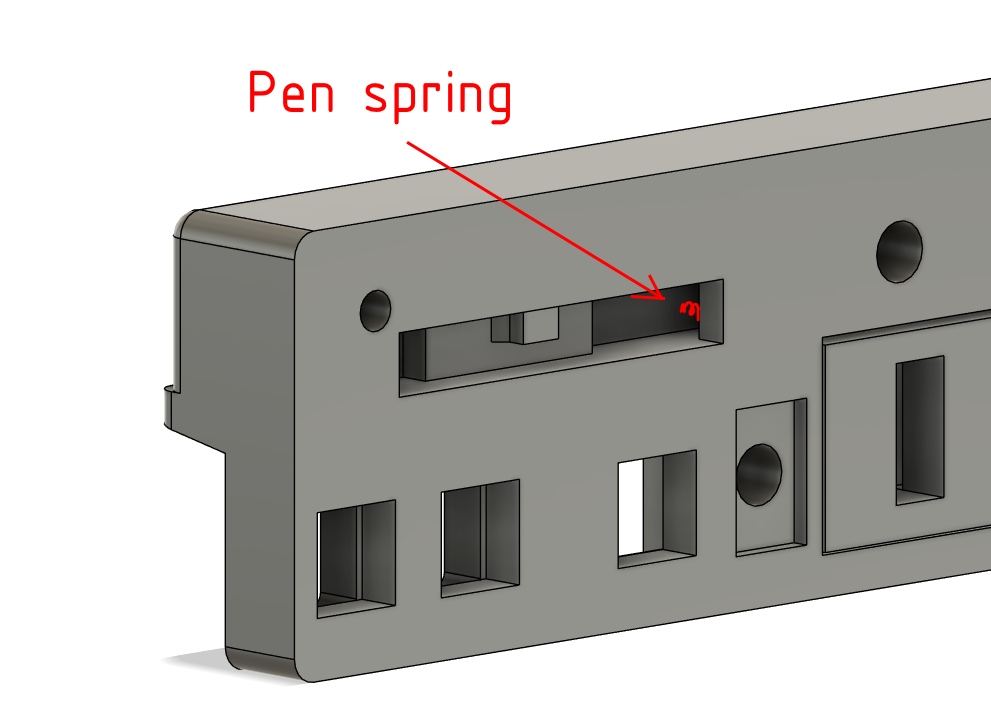
At this point use a solderng iron to put the threaded inserts into their appropriate holes. THe whole construction should screw together nicely. The other side of the Eject Buton also needs a spring, but this part is much easier to insert.
The main switch should also be glued into its appropriate place, because it becomes unaccessable after screwing the parts together.
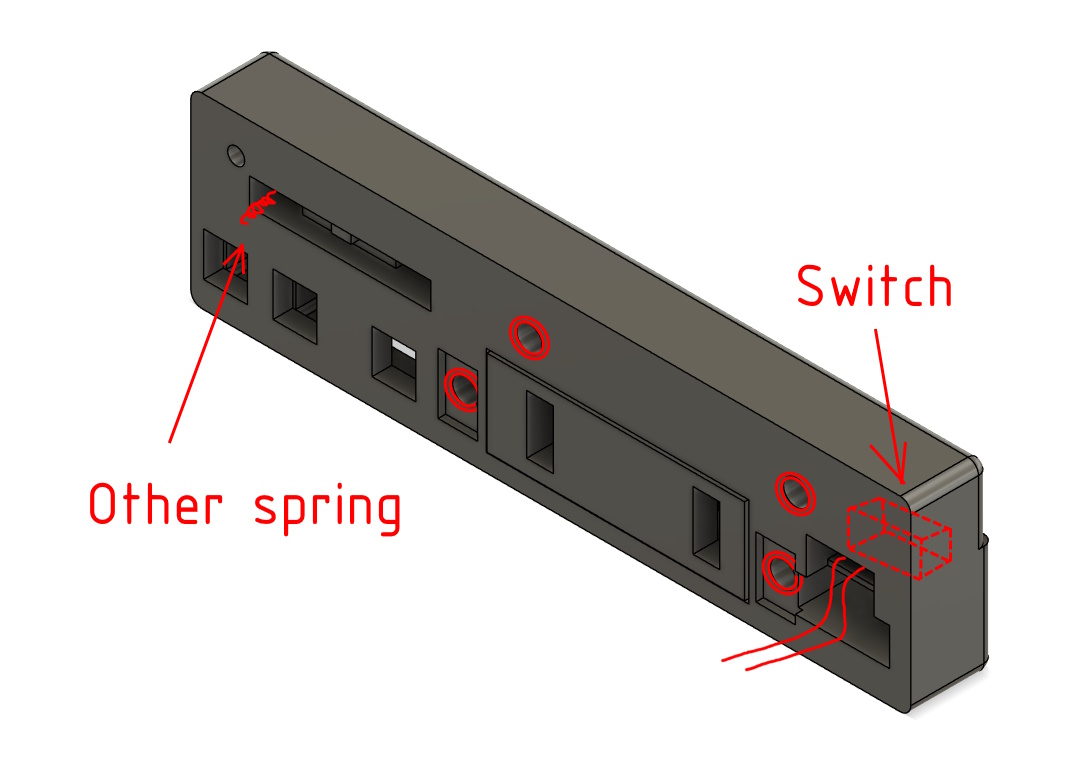
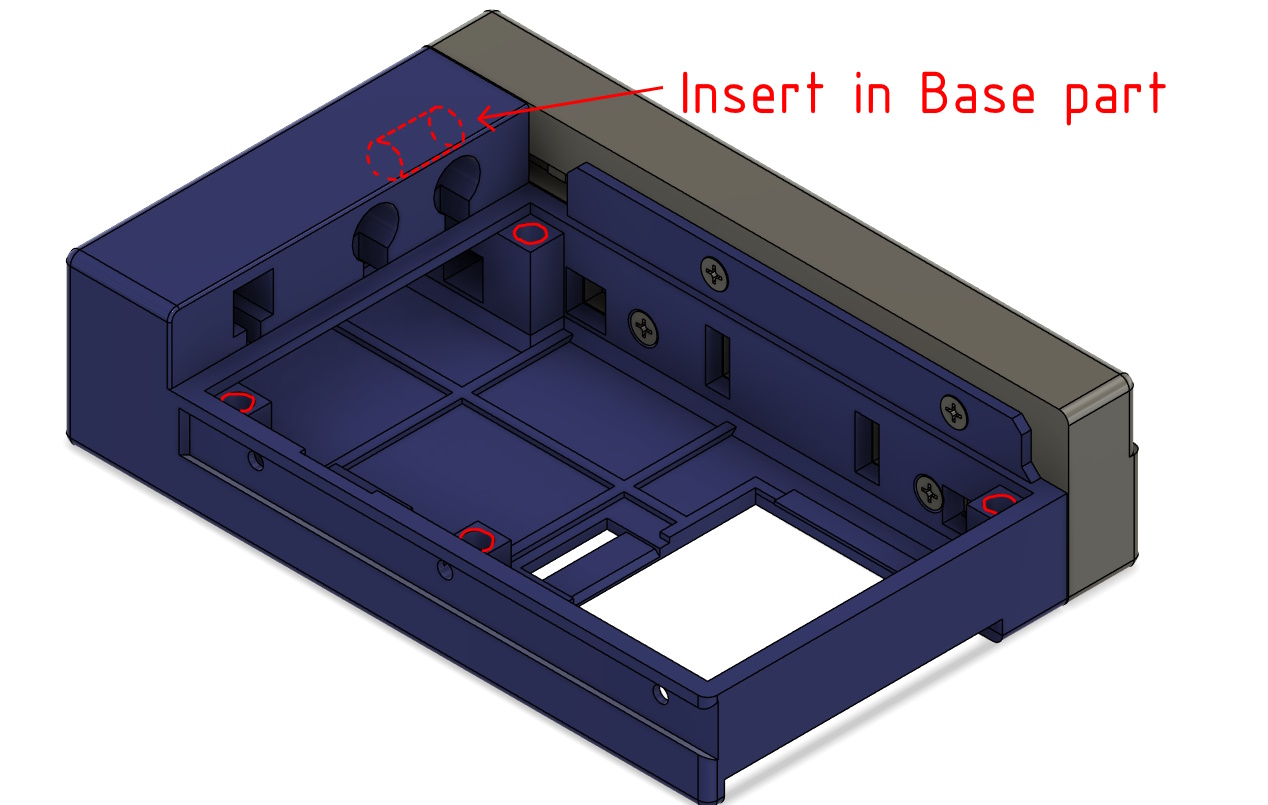
After this, screw the two parts together using countersunk and hex socket head M3 screws. Continuee by putting threaded inserts in the vertical holes in the Base like this:
Next, do the wiring of the charger and battery unit:
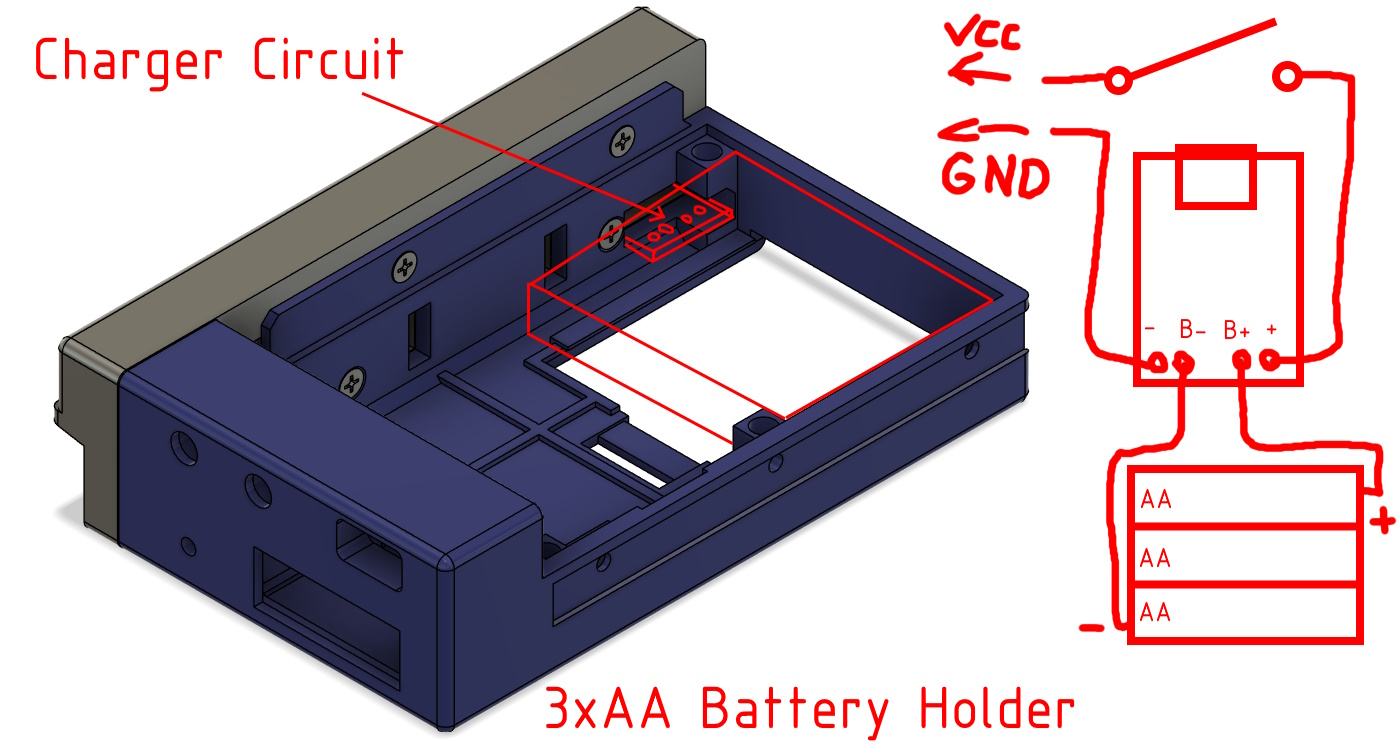
The VCC and GND should go into the remaining DM-03-S-7P switch, which will detect when the case is opened and cut power from the microcontroller. Glue the switch to the base, so it fits in the cutout of the Plate. Make sure to position it about 0.5 mm under the line of the Plate, otherwise the switch will stick out. See image below for the placement. The wiring of all the buttons, LEDs, Jacks and the display should also be done now. Look at the documentation of the DFPlayer for instructions on how to wire the USB connections. I you are using a Rasberry Pi Pico, you can mount it on the small cube with the 2 holes, however I found it wasn't really needed becouse of how many wires I had to use in the build.
You should solder the wires from the window on your DFPlayer as well, so the Plate can sit around them. Screw on the Plate, and the Hinges as well. Your construction should look like this:
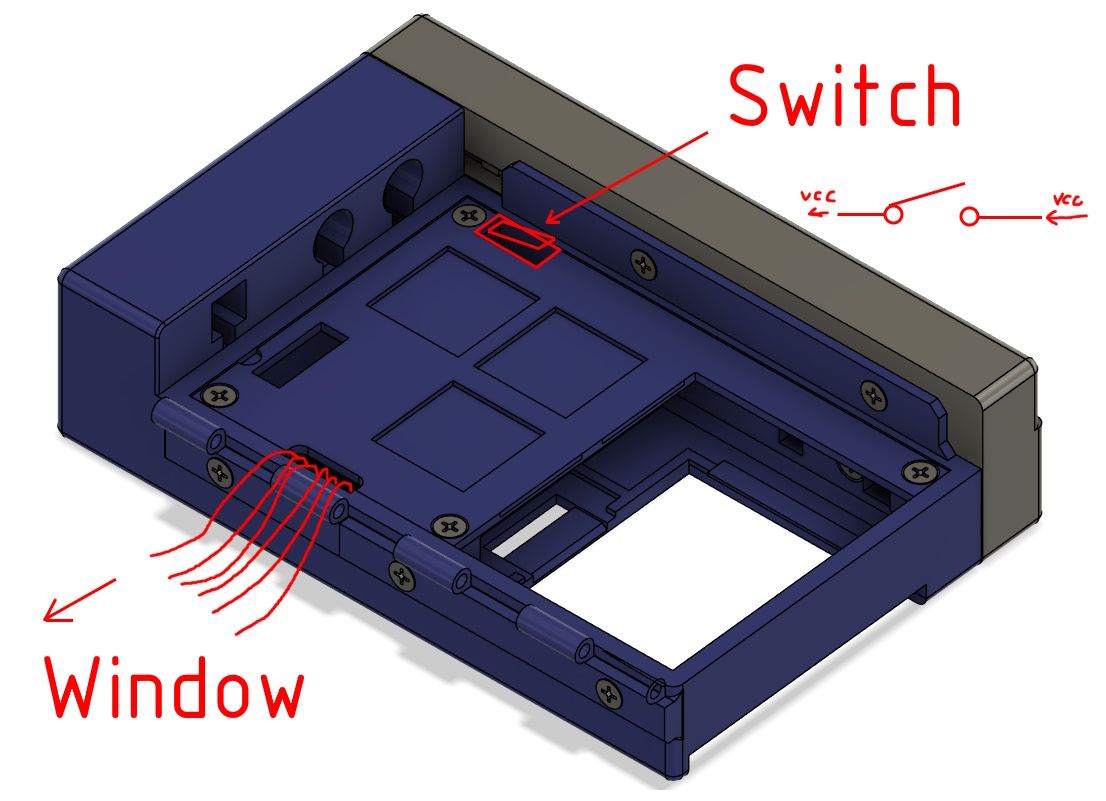
Insert the window in vertically, so its latch slips trough its designated hole. Use your axile to fasten the two bigger parts together. Using glue, put on the various buttons as well.
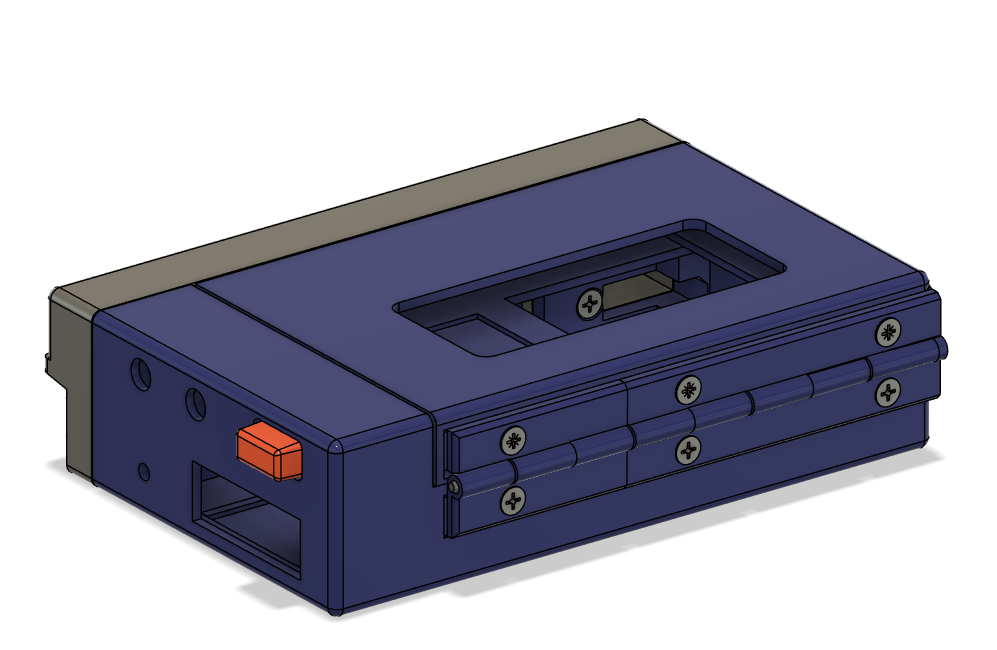
Assembling the cassette:
The USB drives containing the songs are located in the cassette. The 6 pins on the Window part are to connect to the cassette and give feedback on which of the 2 sides of the cassette is being played. Look out for the wiring on these as well.
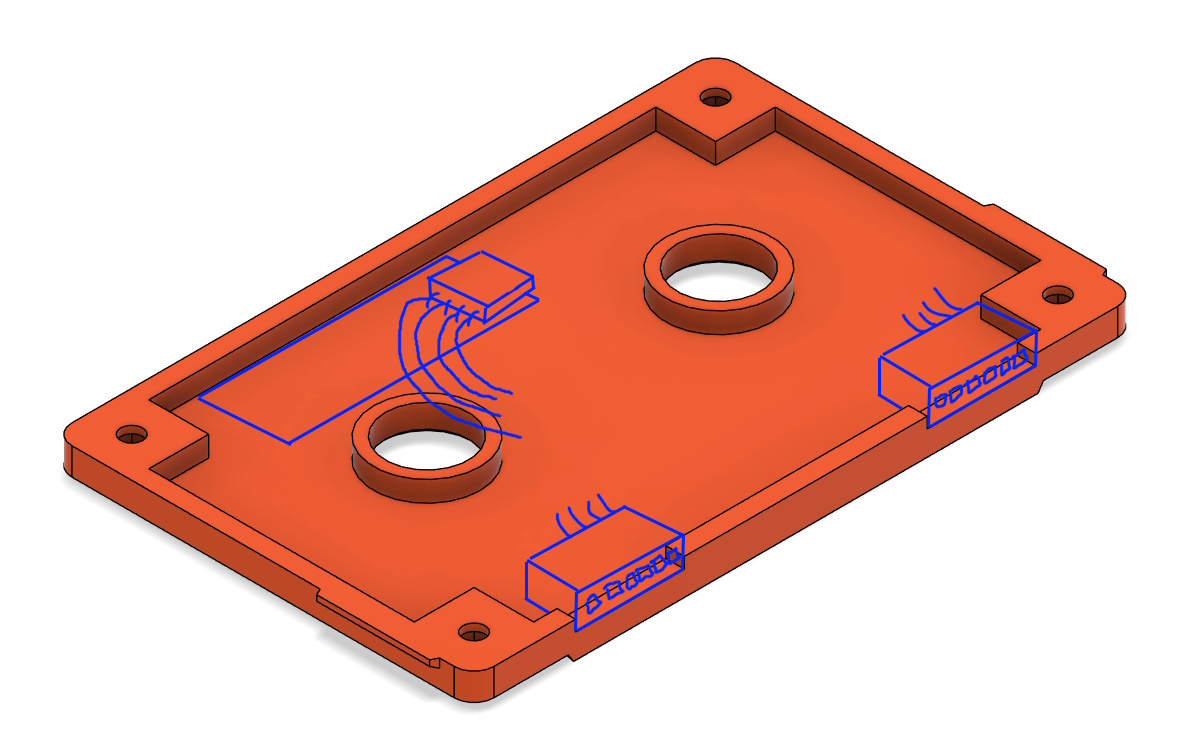
My construction relies on soldering onto the USB drive, which is very much bad practice for any serious application because of timing issues, but it works for our purpuses. Pay attantion to the order fo the wires I used the extra 2 pins on the connectors to short one of them out. This can be detected on your microcontroller to tell yu which side you are listening to.
ONCE AGAIN DISCLAIMER: ONLY DO THIS IF YOU KNOW WHAT YOU ARE DOING. IF PLUGGED INTO A COMPUTER, IT COULD GET SERIOUSLY DAMAGED IF THE SOLDERING WASN'T DONE CORRECTLY. ALWAYS USE CAUTION WHEN SOLDERING, ESPECIALLY WITH SERIAL DEVICES
Screw the cassette together.

If everything was done correctly, you should have a working cassette player.
Good luck with this project, I know there are lots of things that could be changed for the better, so any ideas or recommendations are welcome.

Gostou deste modelo? Crie uma conta grátis para salvar seus favoritos e voltar a eles depois.
Criar conta