Você está no 3DFinder
Buscamos em Thingiverse, MakerWorld e Printables ao mesmo tempo para te dar o melhor de cada uma.
Descrição
Print your own advent calendar with a stylish hexagon-look and add some 3d-printed flair to the holiday season! Perfectly sized for a daily dose of a small chocolate treat (I ended up using Lindor Truffles).
I've added all the files to print the version I prepared, however feel free to customize it if you want a different arrangement of cubby-heights, numbering order, or color pattern!

Requirements for this project:
- Filament of choice, approximately 900g in total
- 50 Small Magnets, I used 5x3mm cylinder magnets however the design can be changed to accommodate a large magnet.
Here's a step-by-step guide:
Step 1: Pick your heights
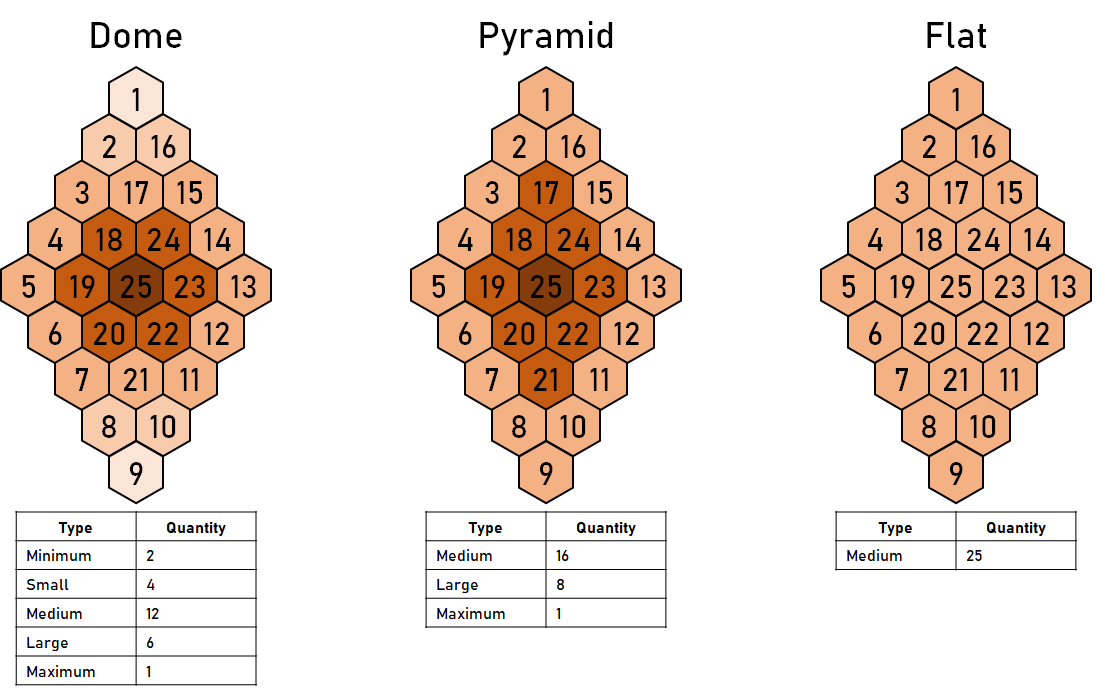
I've designed the hexagon-modules to come in five differing heights, each staggered by 5mm. You'll want to pick a layout, and then figure out how many of each height you need.
Here are some examples, I've used the “Dome” pattern in my build.
Step 2: Pick your colors
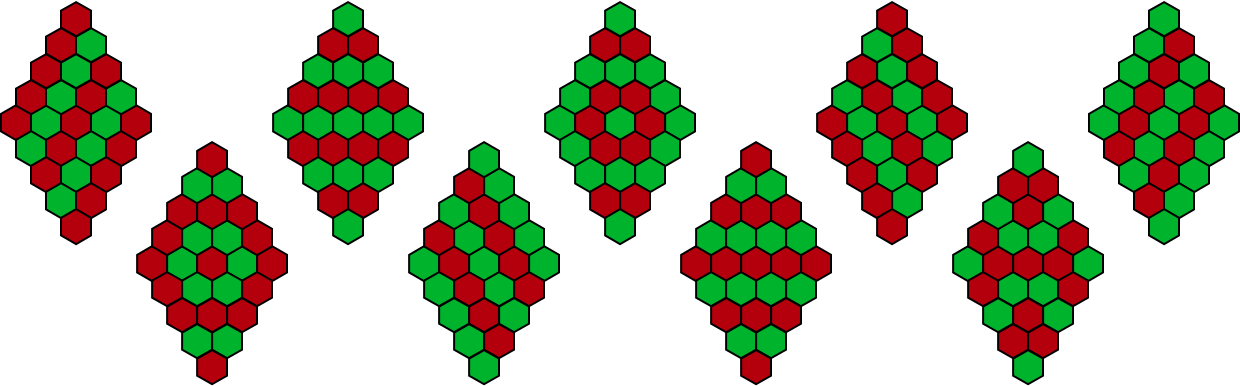
Obviously, I've chosen red and green as they're integral to the holiday cheer, however there are many different possible ways to arrange your chosen colors:
Step 3: Prepare your print-list
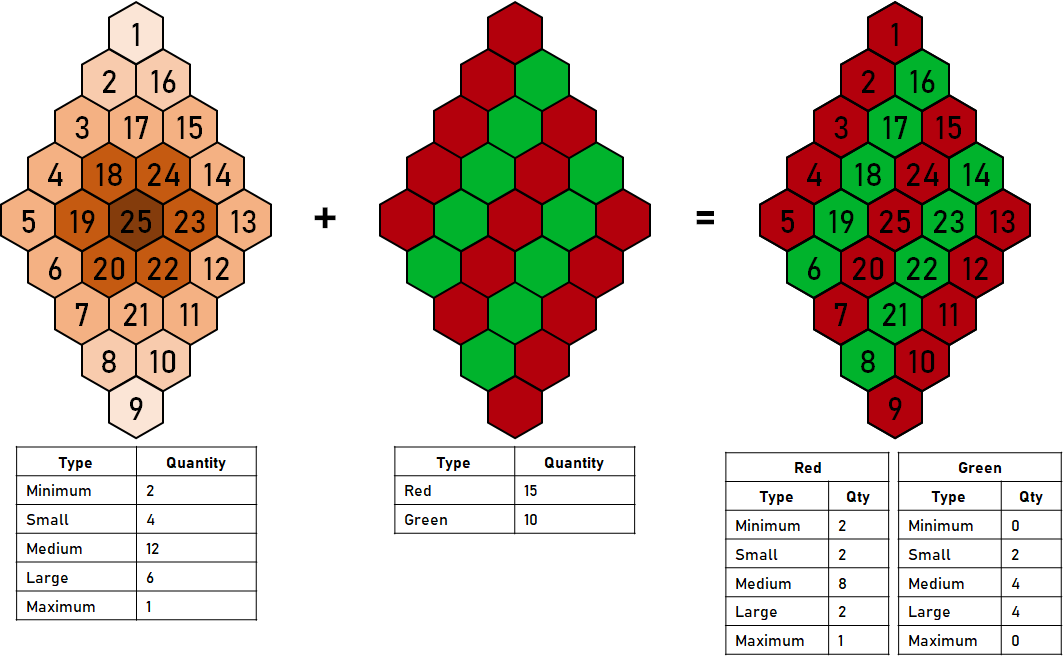
Overlay your color pattern on to your height-pattern and determine the final counts of how-many-of-each-type-and-of-each-color you will need:
Step 4 (optional): Adjust models
The length of the box can be changed by adjusting this extrusion in the parametric file:

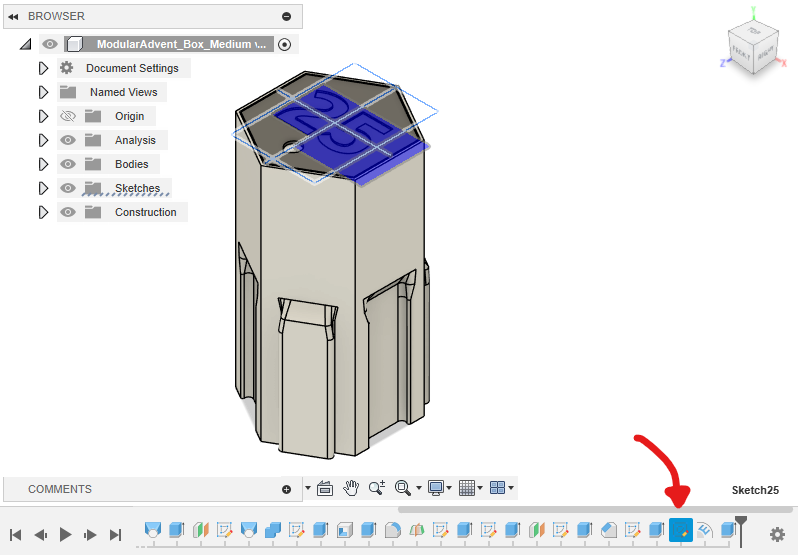
Similarly, the text on the face of the drawer can be changed by editing the text in this sketch, and the Emboss Feature will automatically inset it into the face:
Step 5: Slice
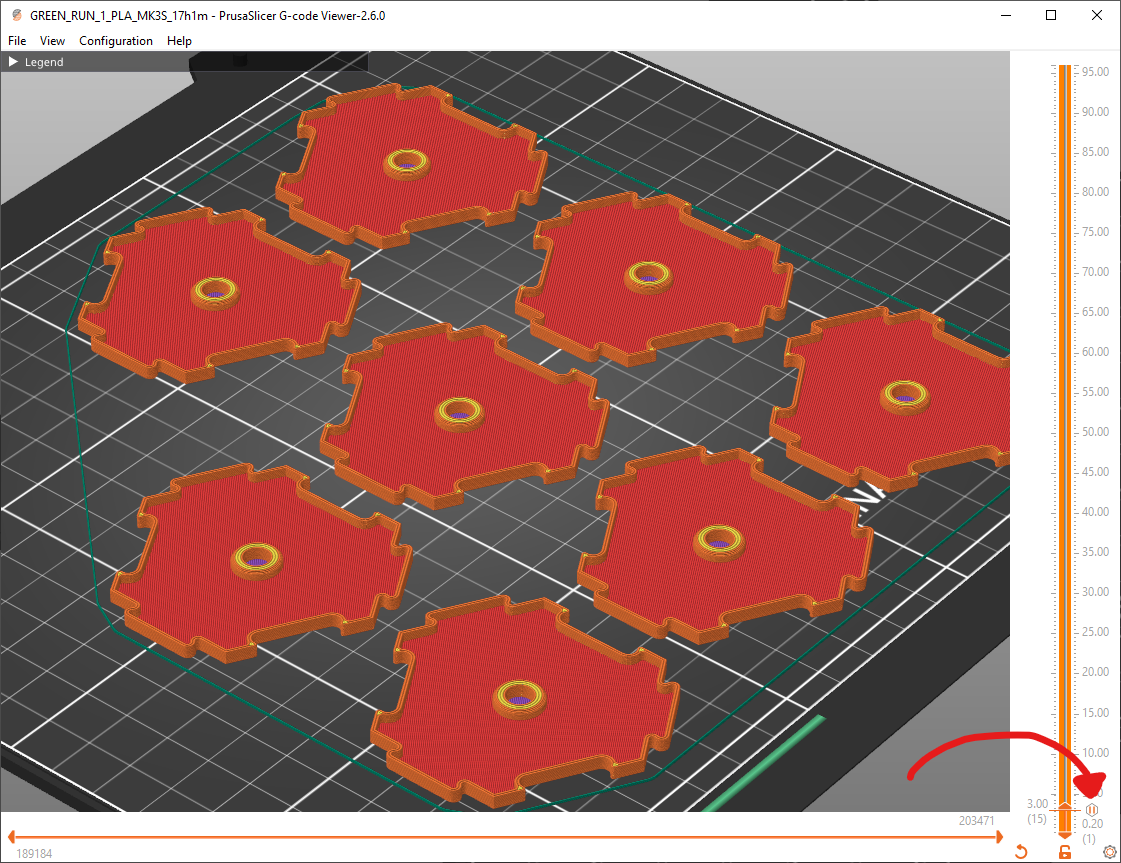
Add the models to PrusaSlicer and Slice away. I used .30mm layer height “Draft” profile. None of the models were designed to need any supports. Make sure to add “Pauses” where you can insert the magnets, as shown in this image:
Step 6: Print!
Group by color and ambition, and get printing! I've added some of the G-Code files that I used, however I recommend you slice your own as some of these were looong prints.
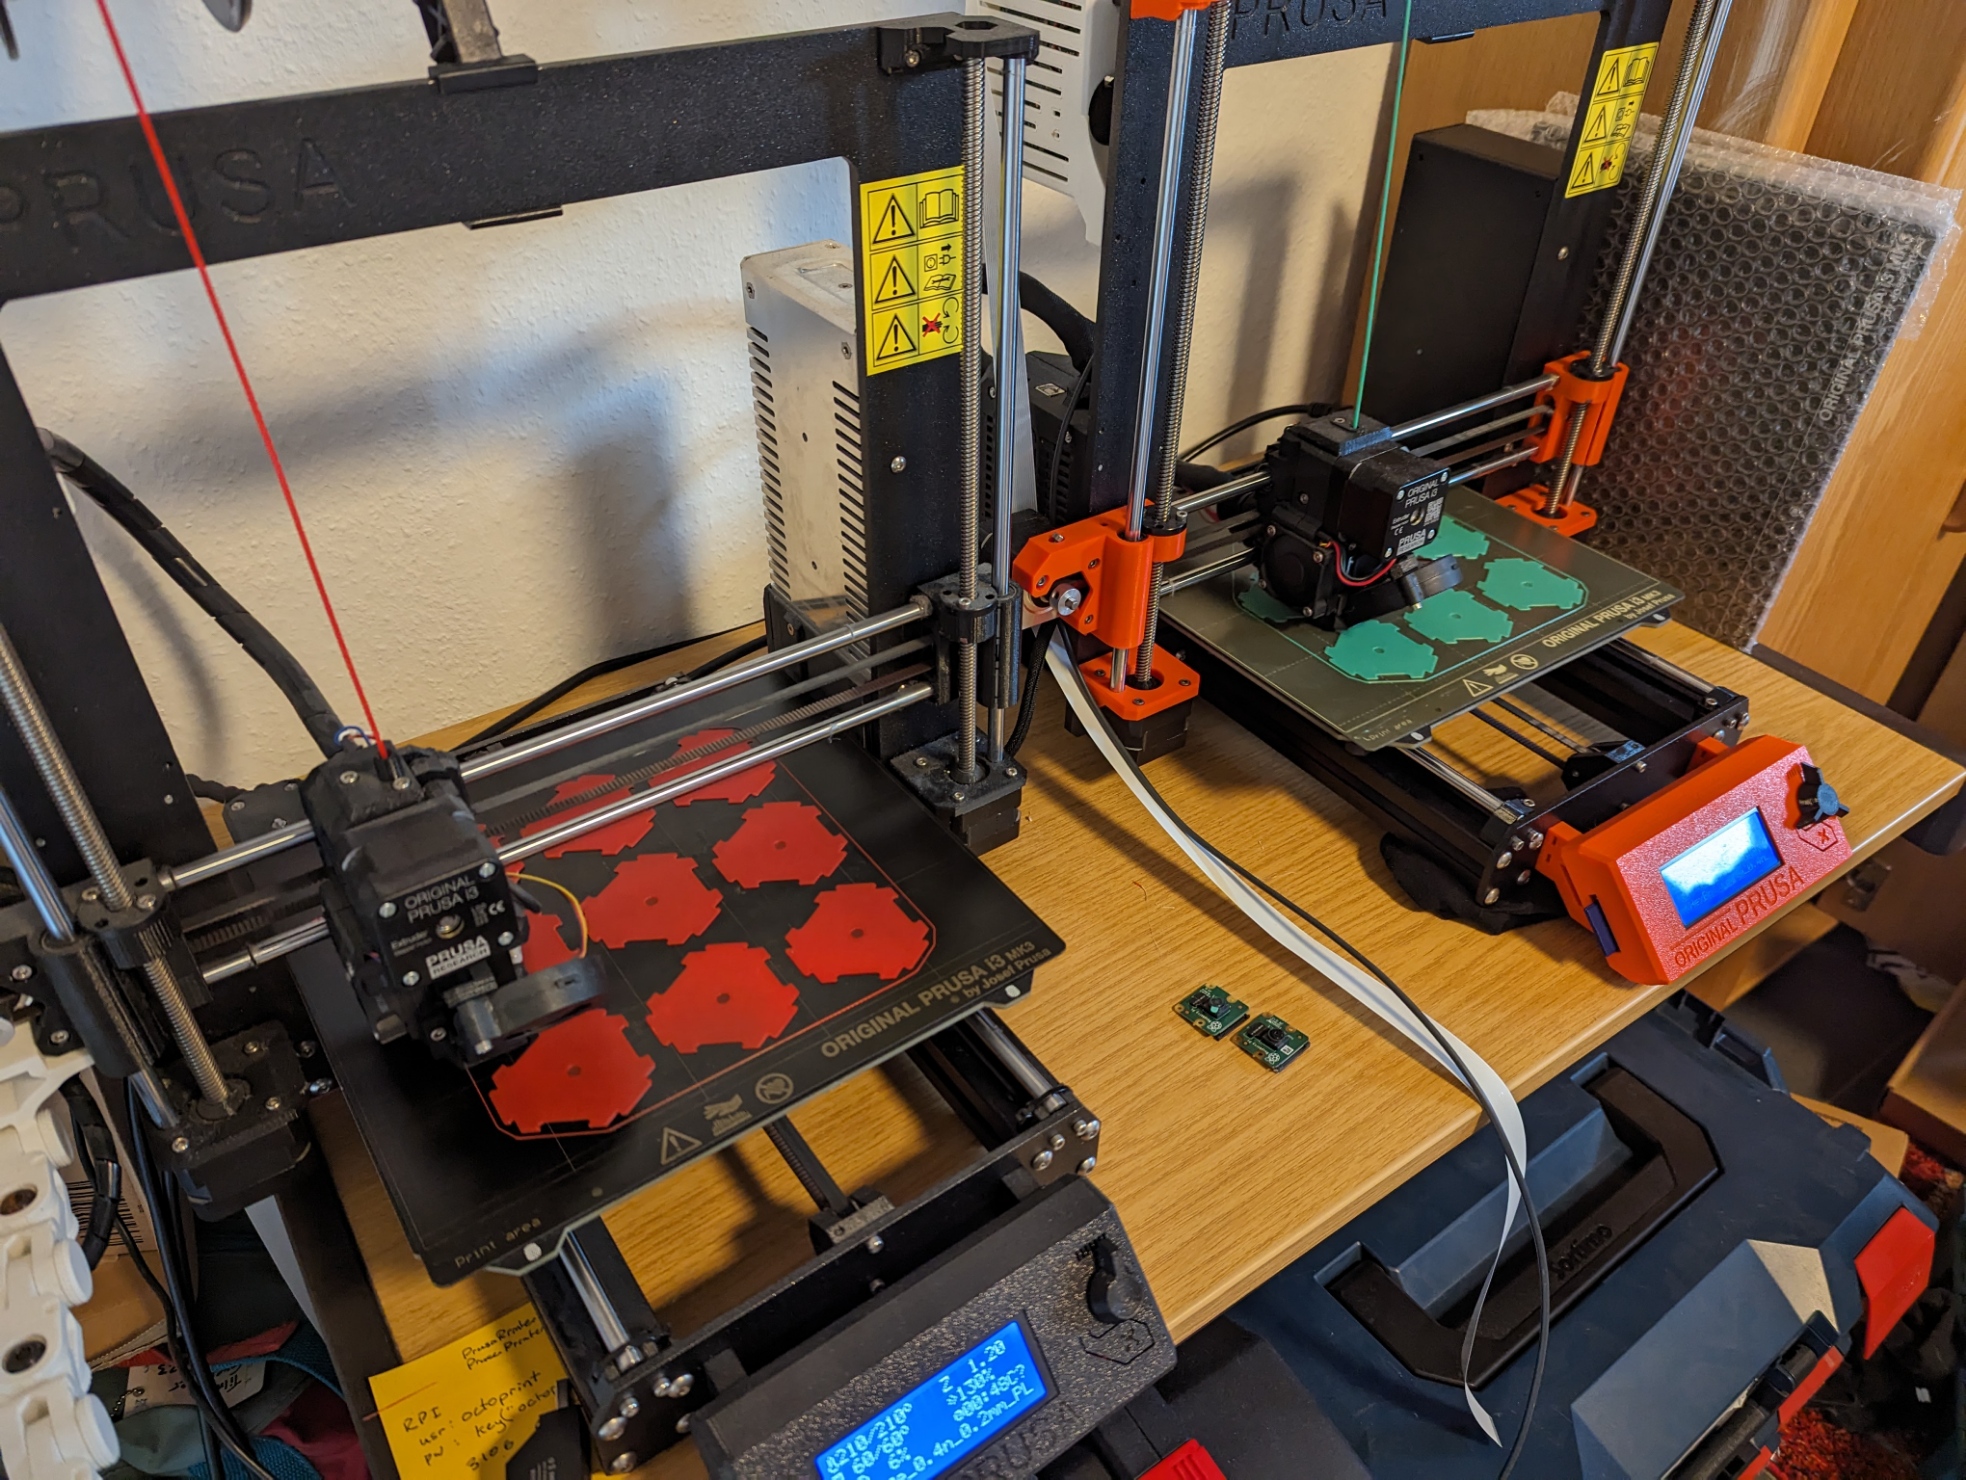 Getting Started… |  Magnets Placed! |
 Progress! |  Handle Interlude |
 Printing this many at once not necessarily advised, I had to reprint two failures |  Depending on magnet-tolerances, may require some “persuasion” to insert magnets during pause |
Step 6.5: Put in magnets
This step is a bit tricky, because you need to be careful to maintain the same magnet orientation for all the boxes and then the same (but flipped) orientation for the magnets in the drawers. I recommend keeping the magnets as an oriented stack, so that you can easily “dispense” the magnets into the pockets in their correct orientations.
An additional word of warning for the magnets on the drawers: if the fit isn't snug, they will jump out of their holes and magnetize to the extruder. Make sure the tolerance is snug-fit-tight or add a dot of superglue before placing the magnets and wait for it to dry before resuming the print.

Step 7: Assemble
This part is rather straight-forward. The modules snap-fit together, and while the handles are a bit difficult to press in, they sit snug once placed. I recommend “hooking” the pointy-part of the handle into the pointed part of the drawer-hole, and then pressing down against a table or hard surface.
Another tip is to put a single layer of packing tape onto the back of the assembled drawers--this massively increases rigidity of the whole assemblage.


Commercial Use:
If you'd like to print this model to sell, let's talk!
Interlocking Hexagon Advent Calendar

Publicado em 22 de nov de 2023
Gostou deste modelo? Crie uma conta grátis para salvar seus favoritos e voltar a eles depois.
Criar conta