Você está no 3DFinder
Buscamos em Thingiverse, MakerWorld e Printables ao mesmo tempo para te dar o melhor de cada uma.
Descrição
This is a stand for the SteamDeck, including charging for the Deck and RGB-Led lighting.
The stand is only intended to charge and display the steam deck while not in use. While the deck is in the stand, it cannot be used!
Print Instructions:
Print all the included STLs, except the LED-Diffusor, in whatever color you like. Print the Diffusor with a white Filament.
The Print-Material and Setting doesn't really matter. All the Parts are designed in such a way that they are printable without any supports.
Parts needed:
- 1x all included STLs
- 10x M3-Nuts
- 4x M3-12 socket head cap screw
- 2x M3-14 socket head cap screw
- 4x M3-16 socket head cap screw
- ~30cm of Led-Strip (ALI-Express-Link) (choose “Black PCB, WS2812B, 1m 144 IP30” option)
- 1x Wemos D1 mini (ALI-Express-Link)(Both USB-C and Micro-USB should theoretically fit, but i only tested Micro-USB)
- 1x Female Barrel Plug (ALI-Express-Link)
- 1x 5V Power supply (for example one of those ALI-Express-Link)
Building Instructions:
LED-Mounting:
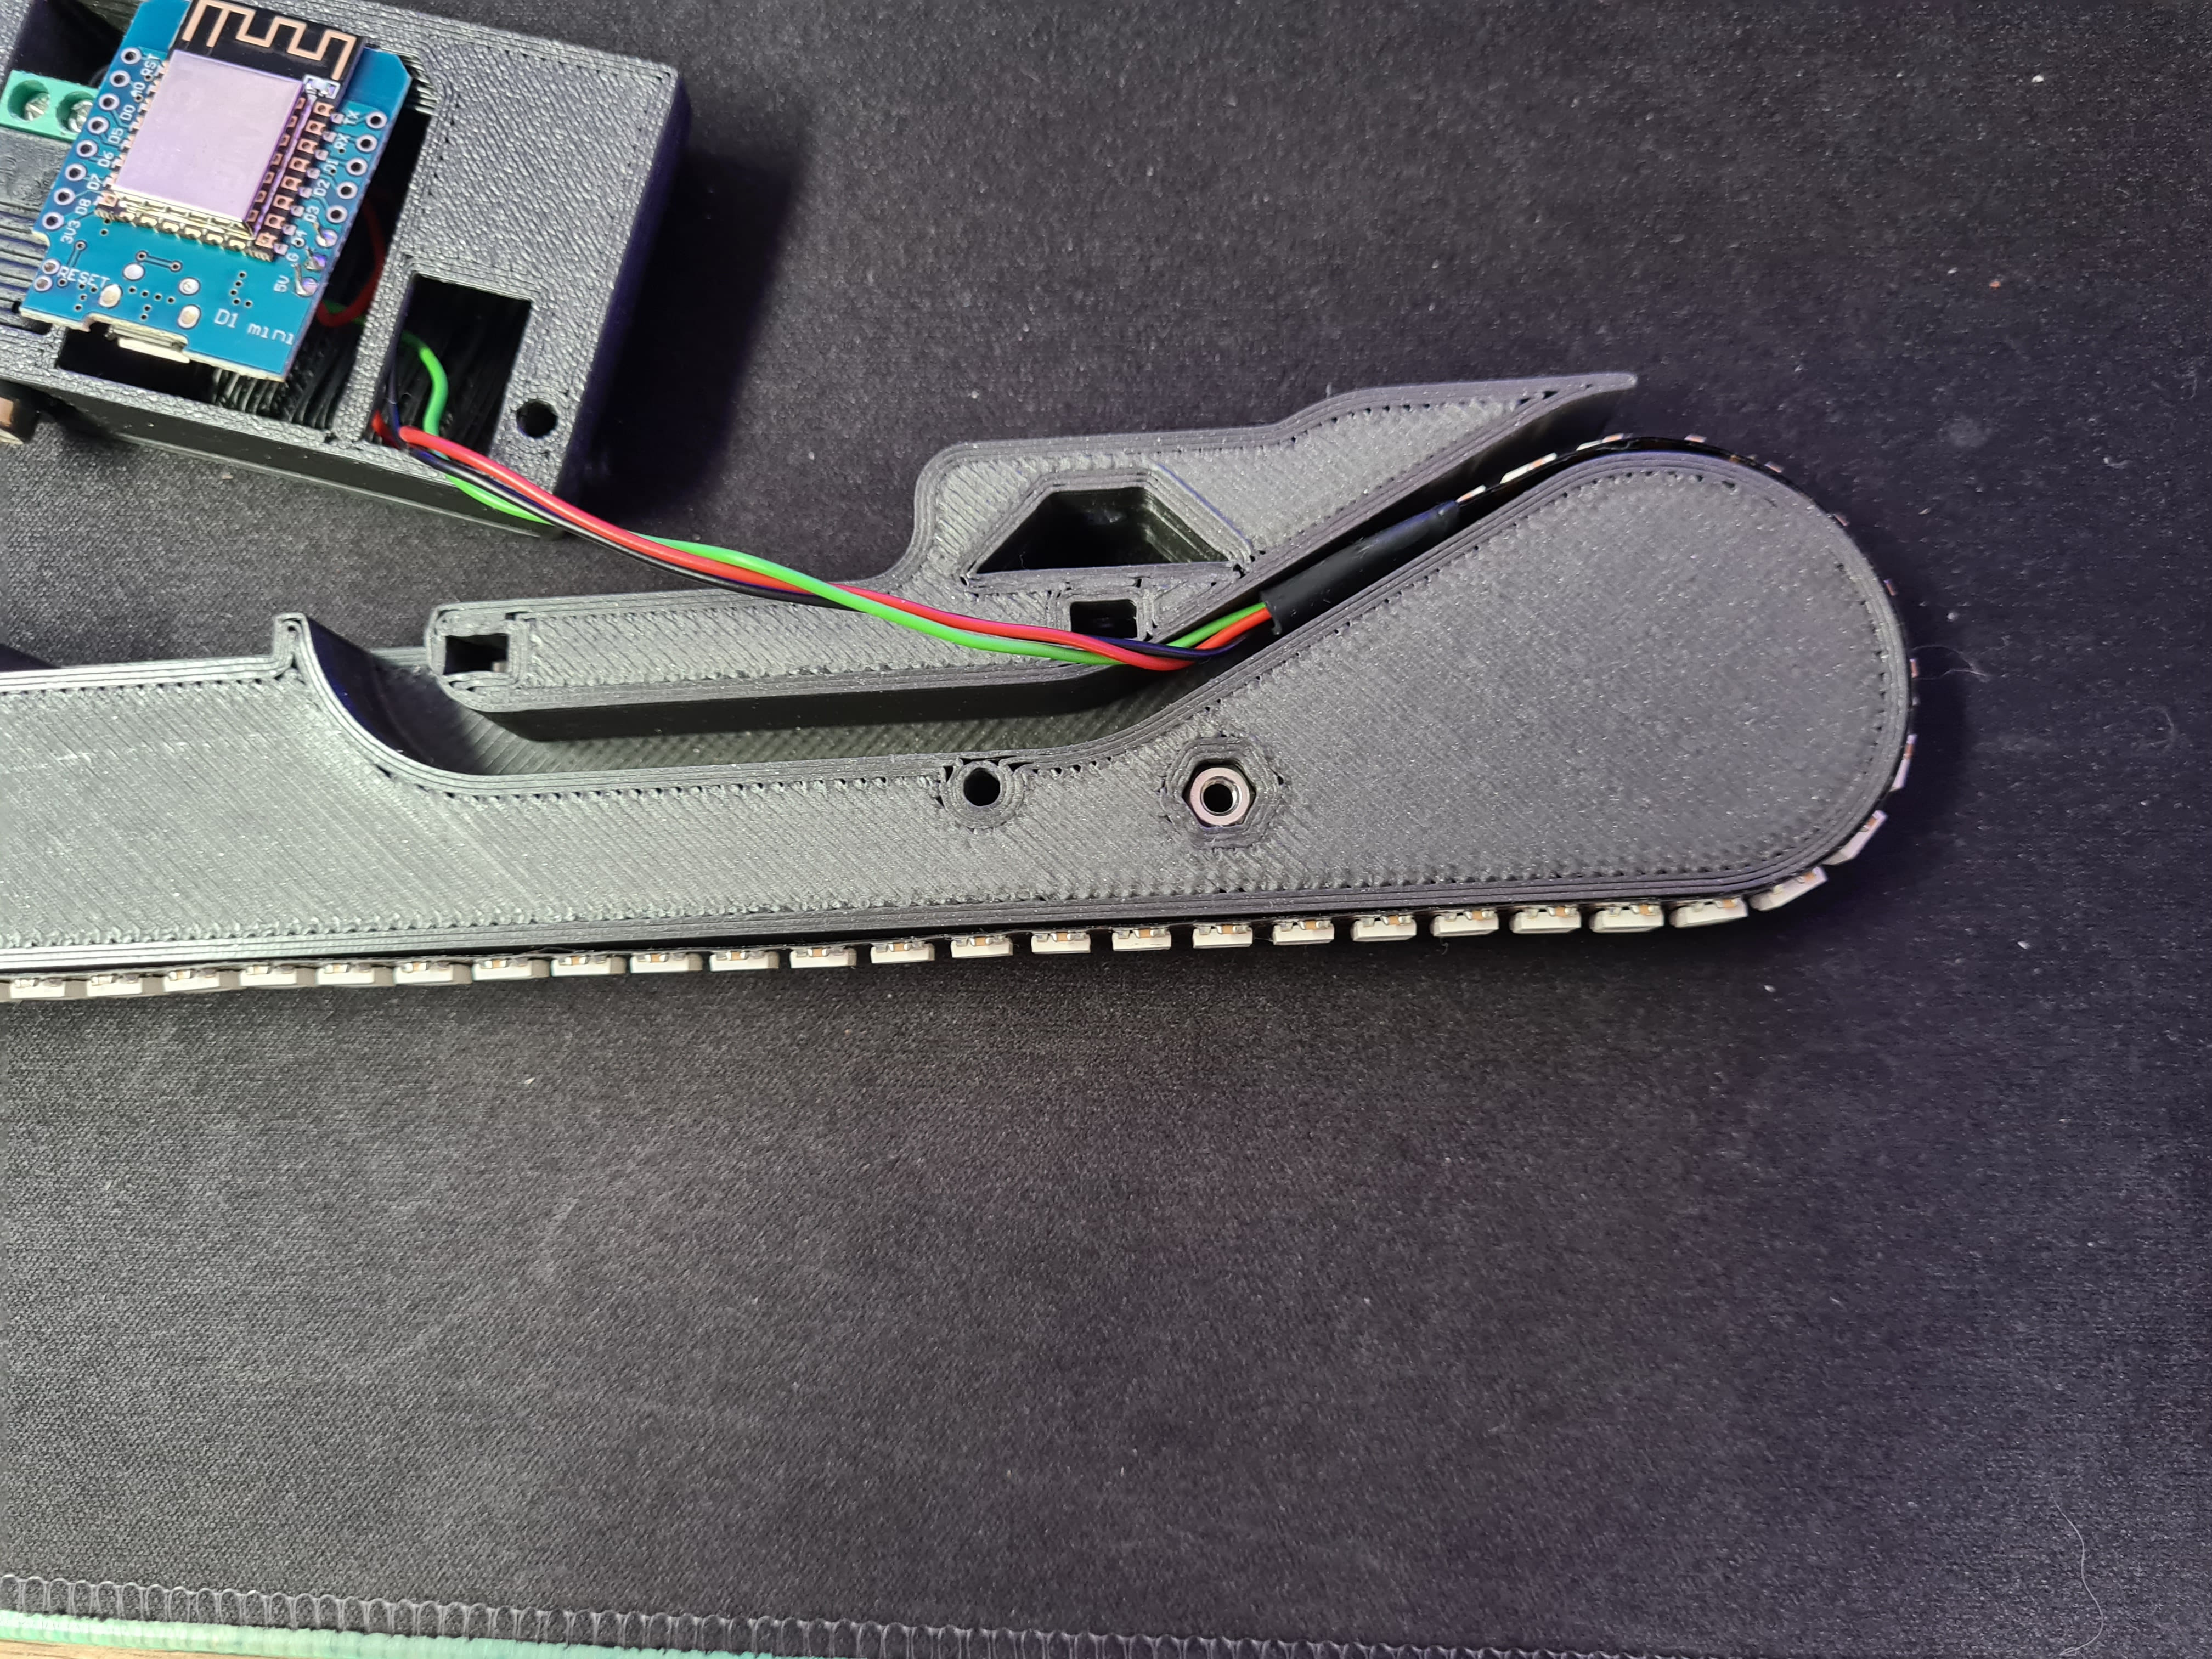
Start with putting the Leds on to the “LED Mount”-Part. I've used these Led-Strips from Ali-Express with 144-leds/m for the best lighting in the end. The Strip comes with double sided tape on the back, so you can just stick it directly on to the LED Mount. Remember to solder the 5V-, GND- and Data-Wire on to the Strip before gluing it to the Mount.


Electronics:
To control the Leds i've used a Wemos D1 mini with the WLED software. To install it onto the controller you can just use this tool. If you're having any trouble setting up the software there are many good tutorials on how to use WLED.
Once your setup of the controller is done, solder the Led-Data pin to one of the digital pins of the controller. I've used P4.
IMPORTANT: Put the wires through the “Wemos Cover”-Part before you solder them onto the board.

Solder two more wires, to the 5V and GND Pins of the controller. Then put them together with the 5V and GND wires of the LED-Strip into a female barrel plug.
Note that the cables must be fed through the hole in the cover before they are plugged into the connector.
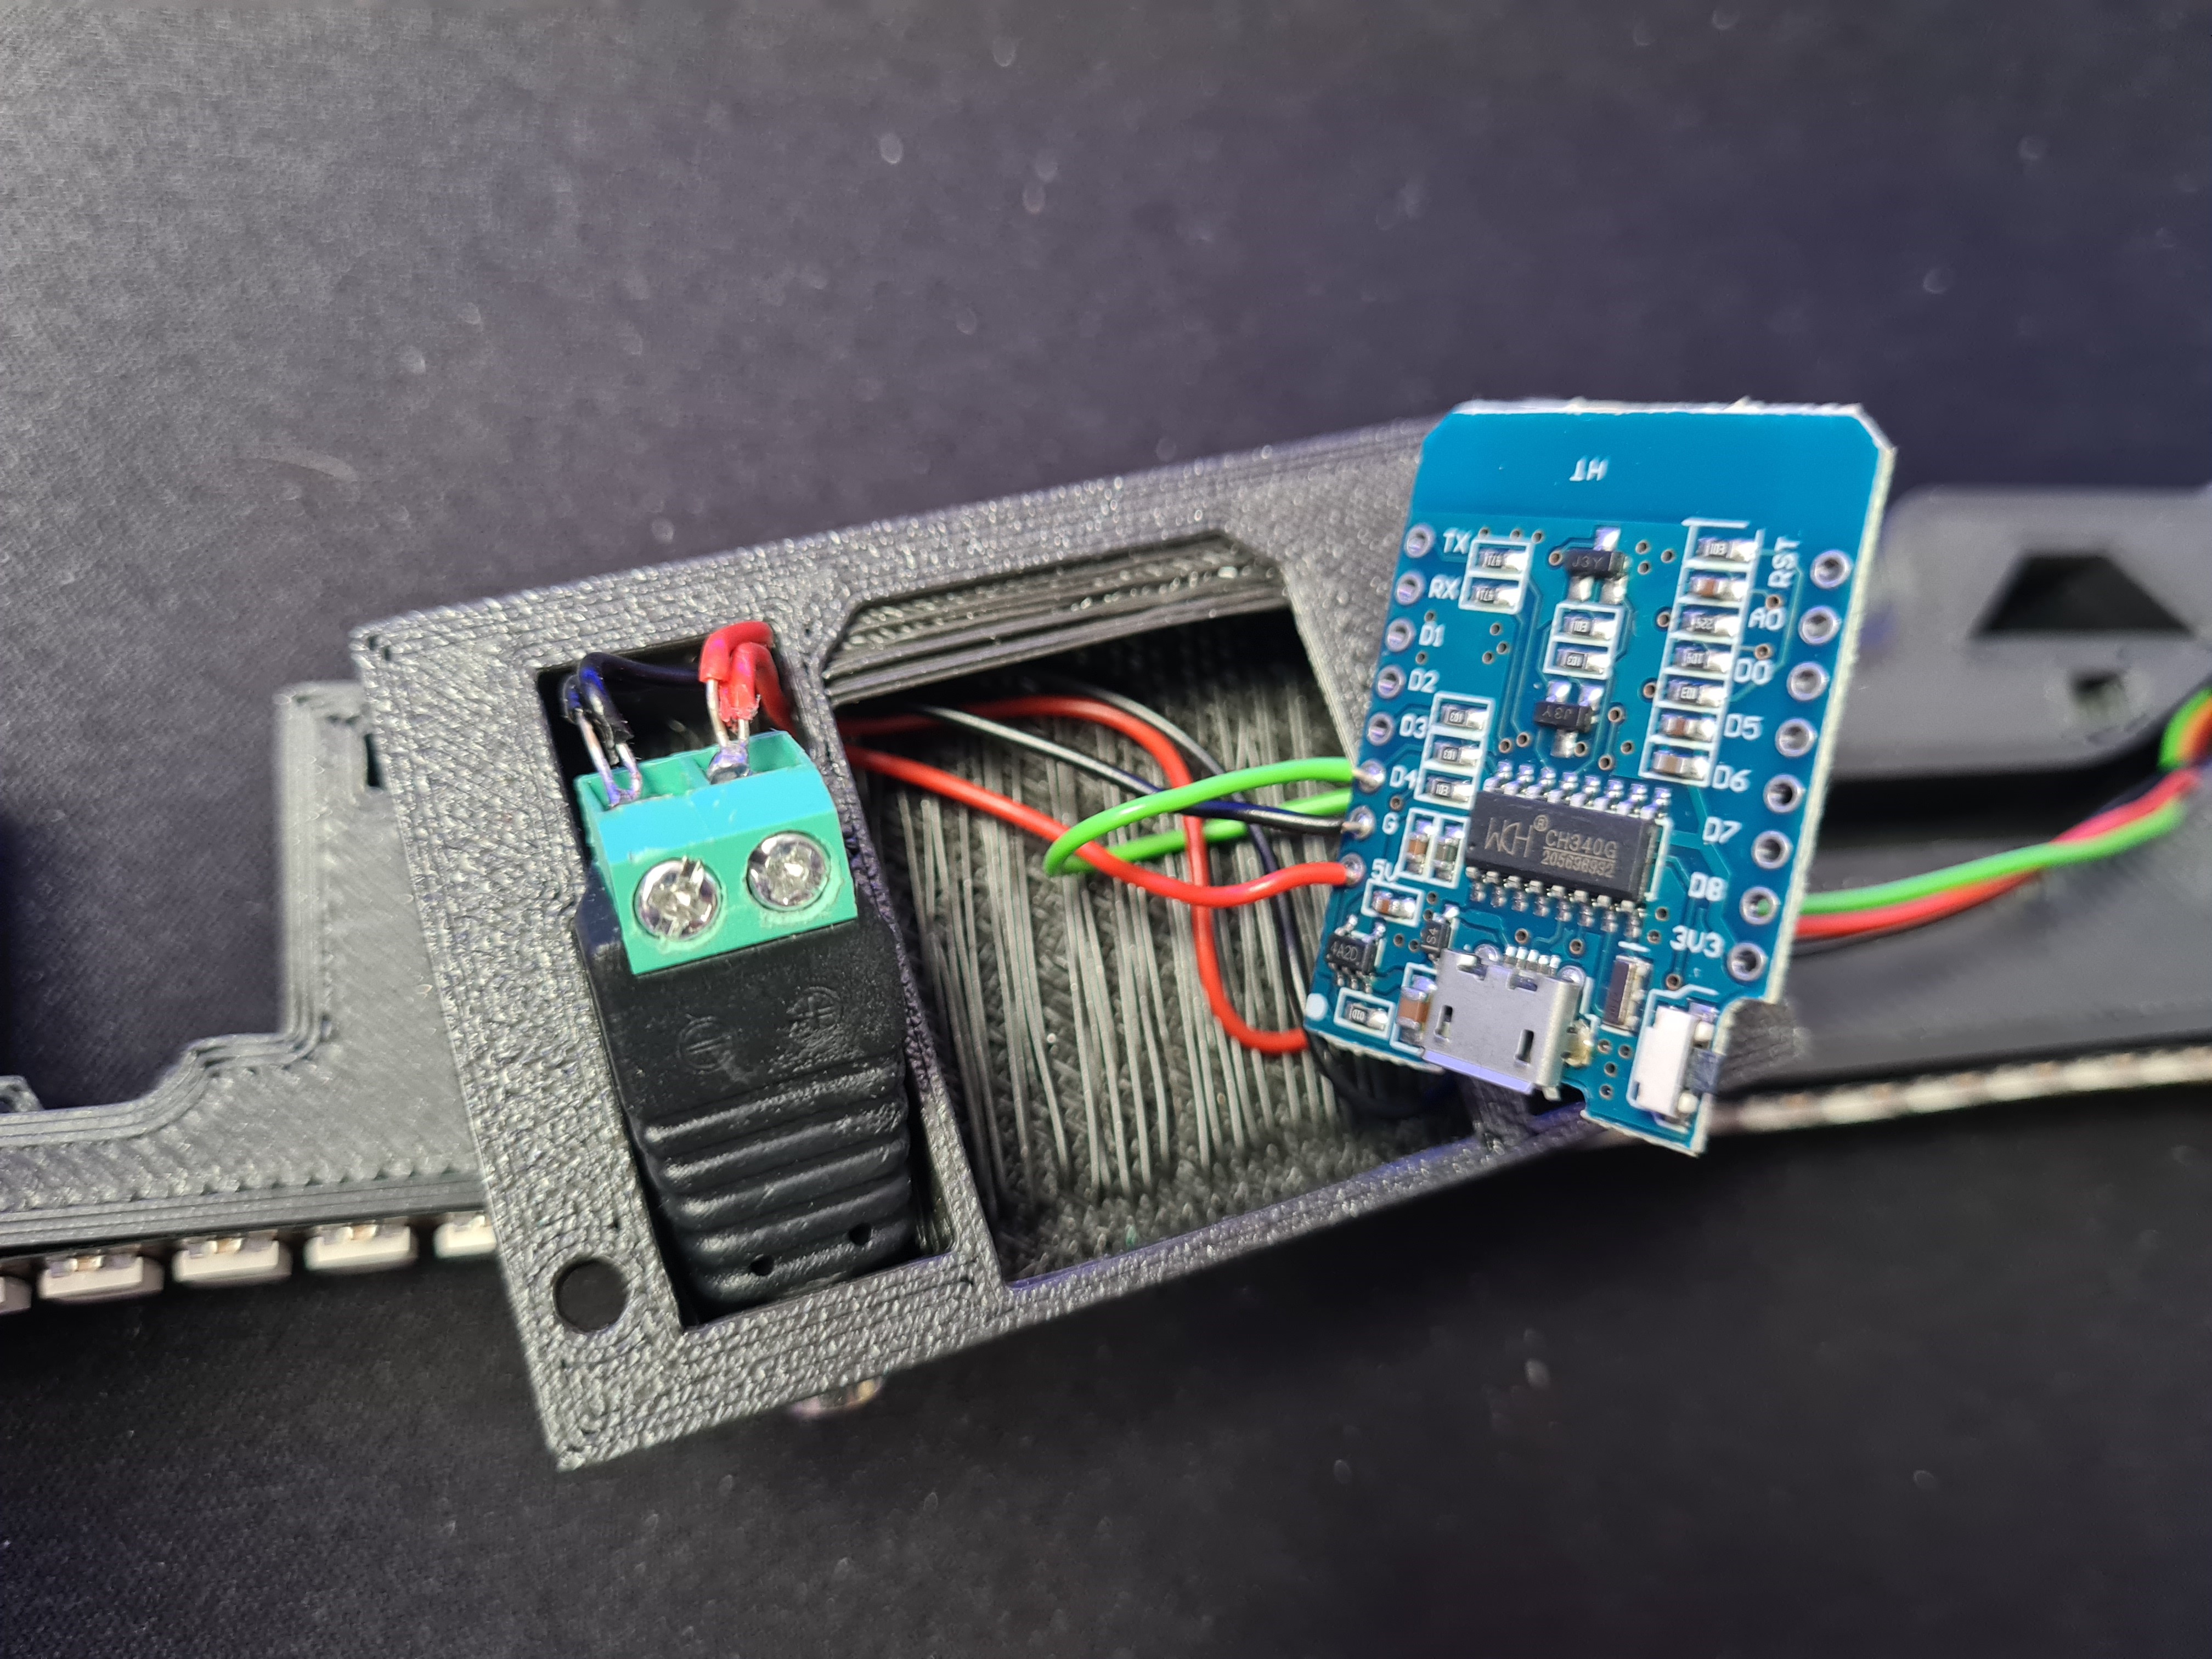
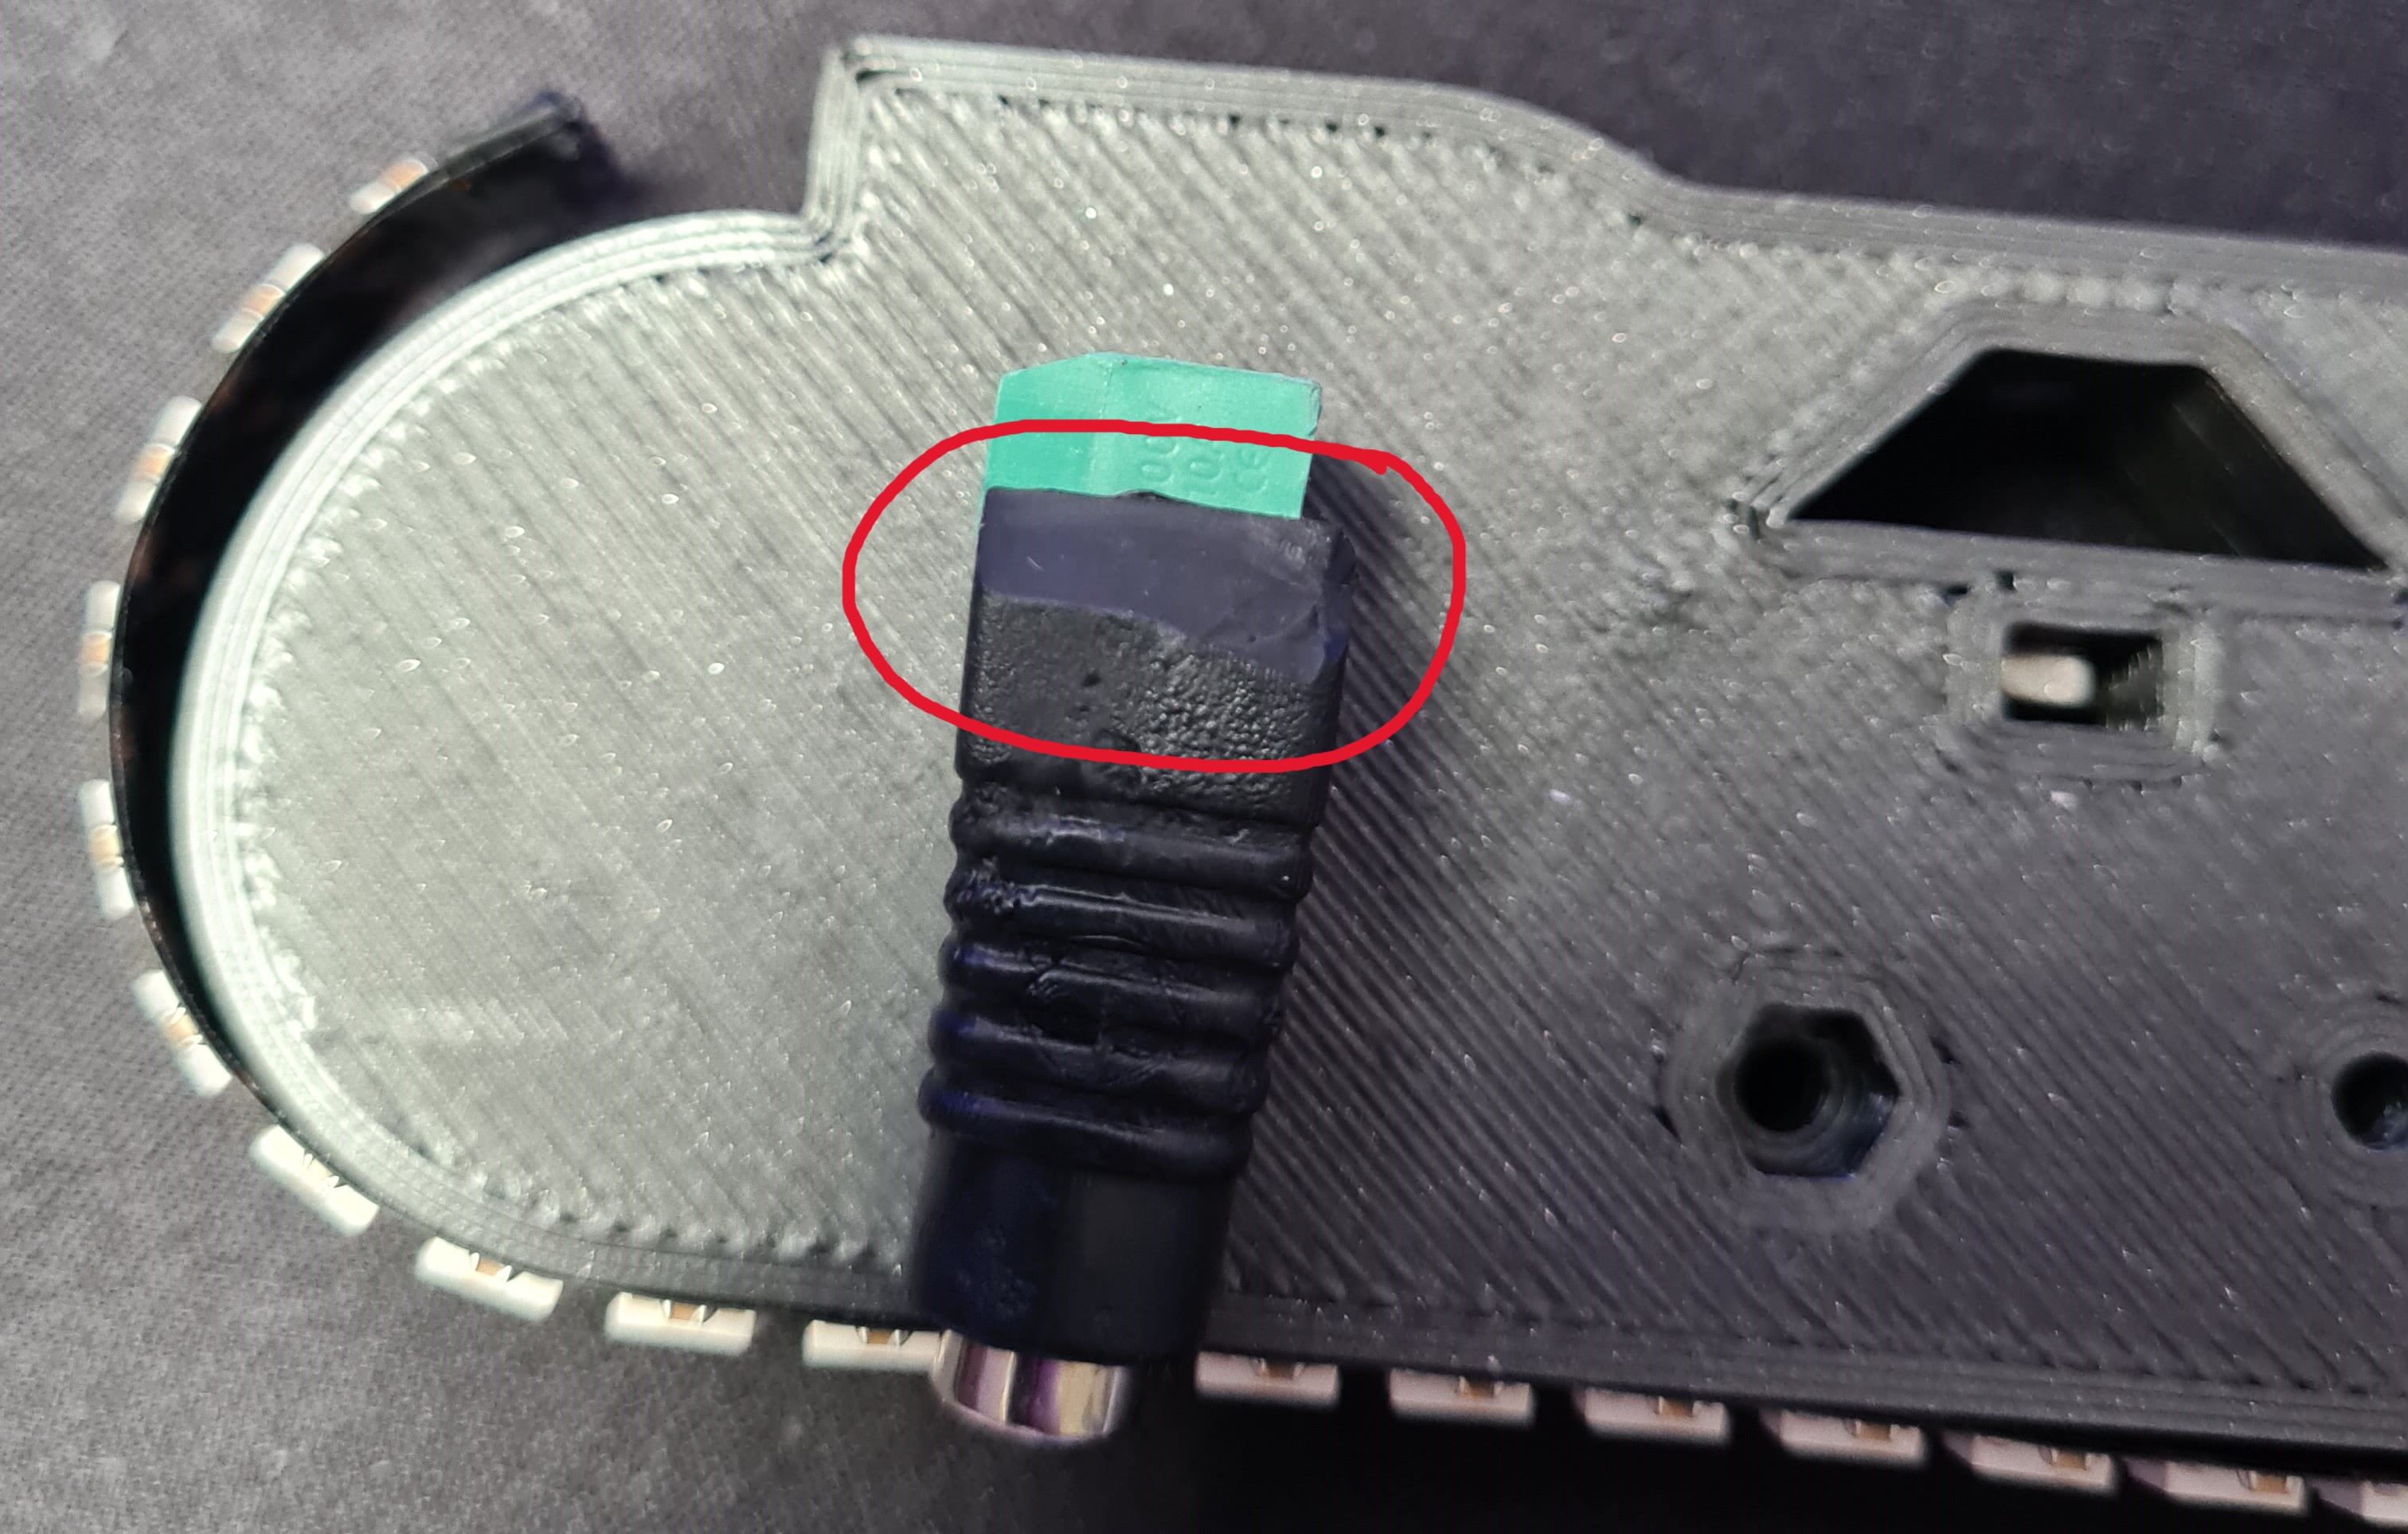
Then push the connector into the cover, till it sits flush with the top of the part. If you can't push the connector into the hole, you might need to cut a bit of the black plastics from the connector, like shown in the next picture.
Mounting the Led-Diffusor:
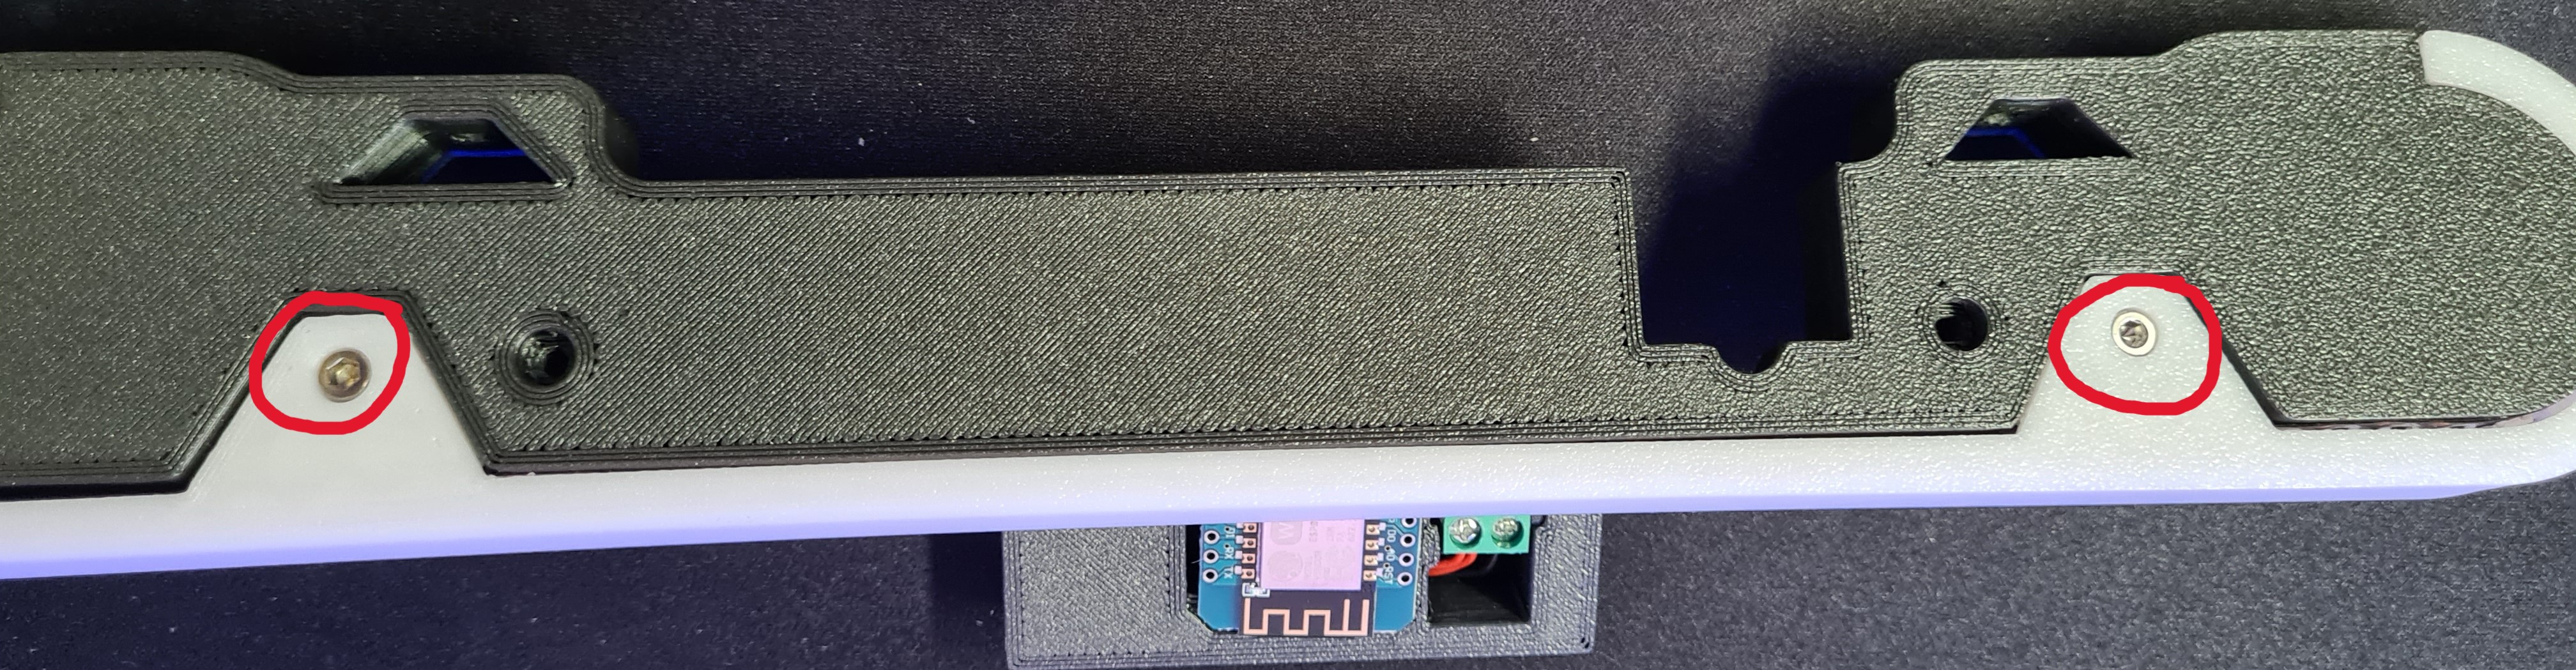
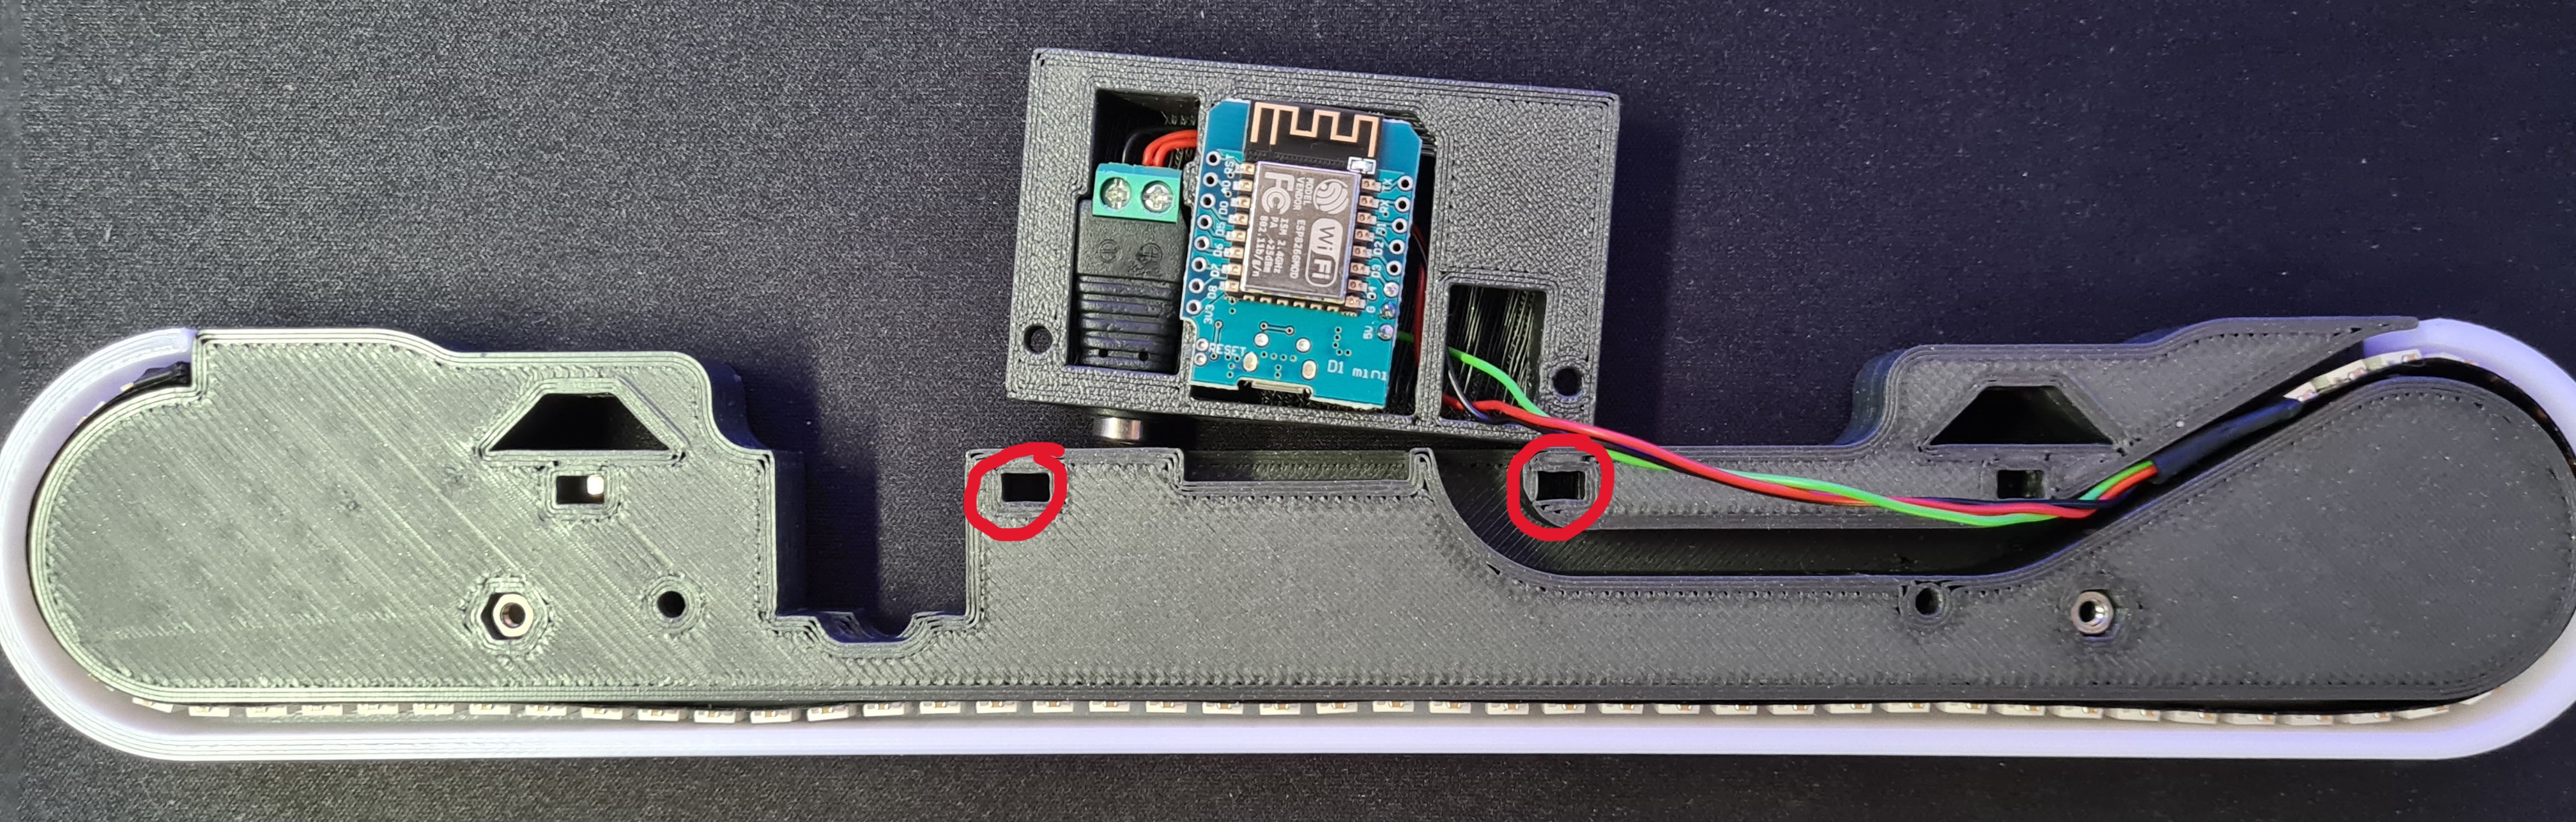
To mount the Led-Diffusor put a M3-Nut into the marked holes.

Then Flip around the Part, fit the “Led-Diffusor”-Part and secure it with two M3x12 screws.
Mounting the Wemos-Cover:
Flip around the Assembly and put a M3 nut into each of the marked holes. Then screw in the “Wemos Cover”-Part with two M3x12 screws.
Mounting the Main-Body:
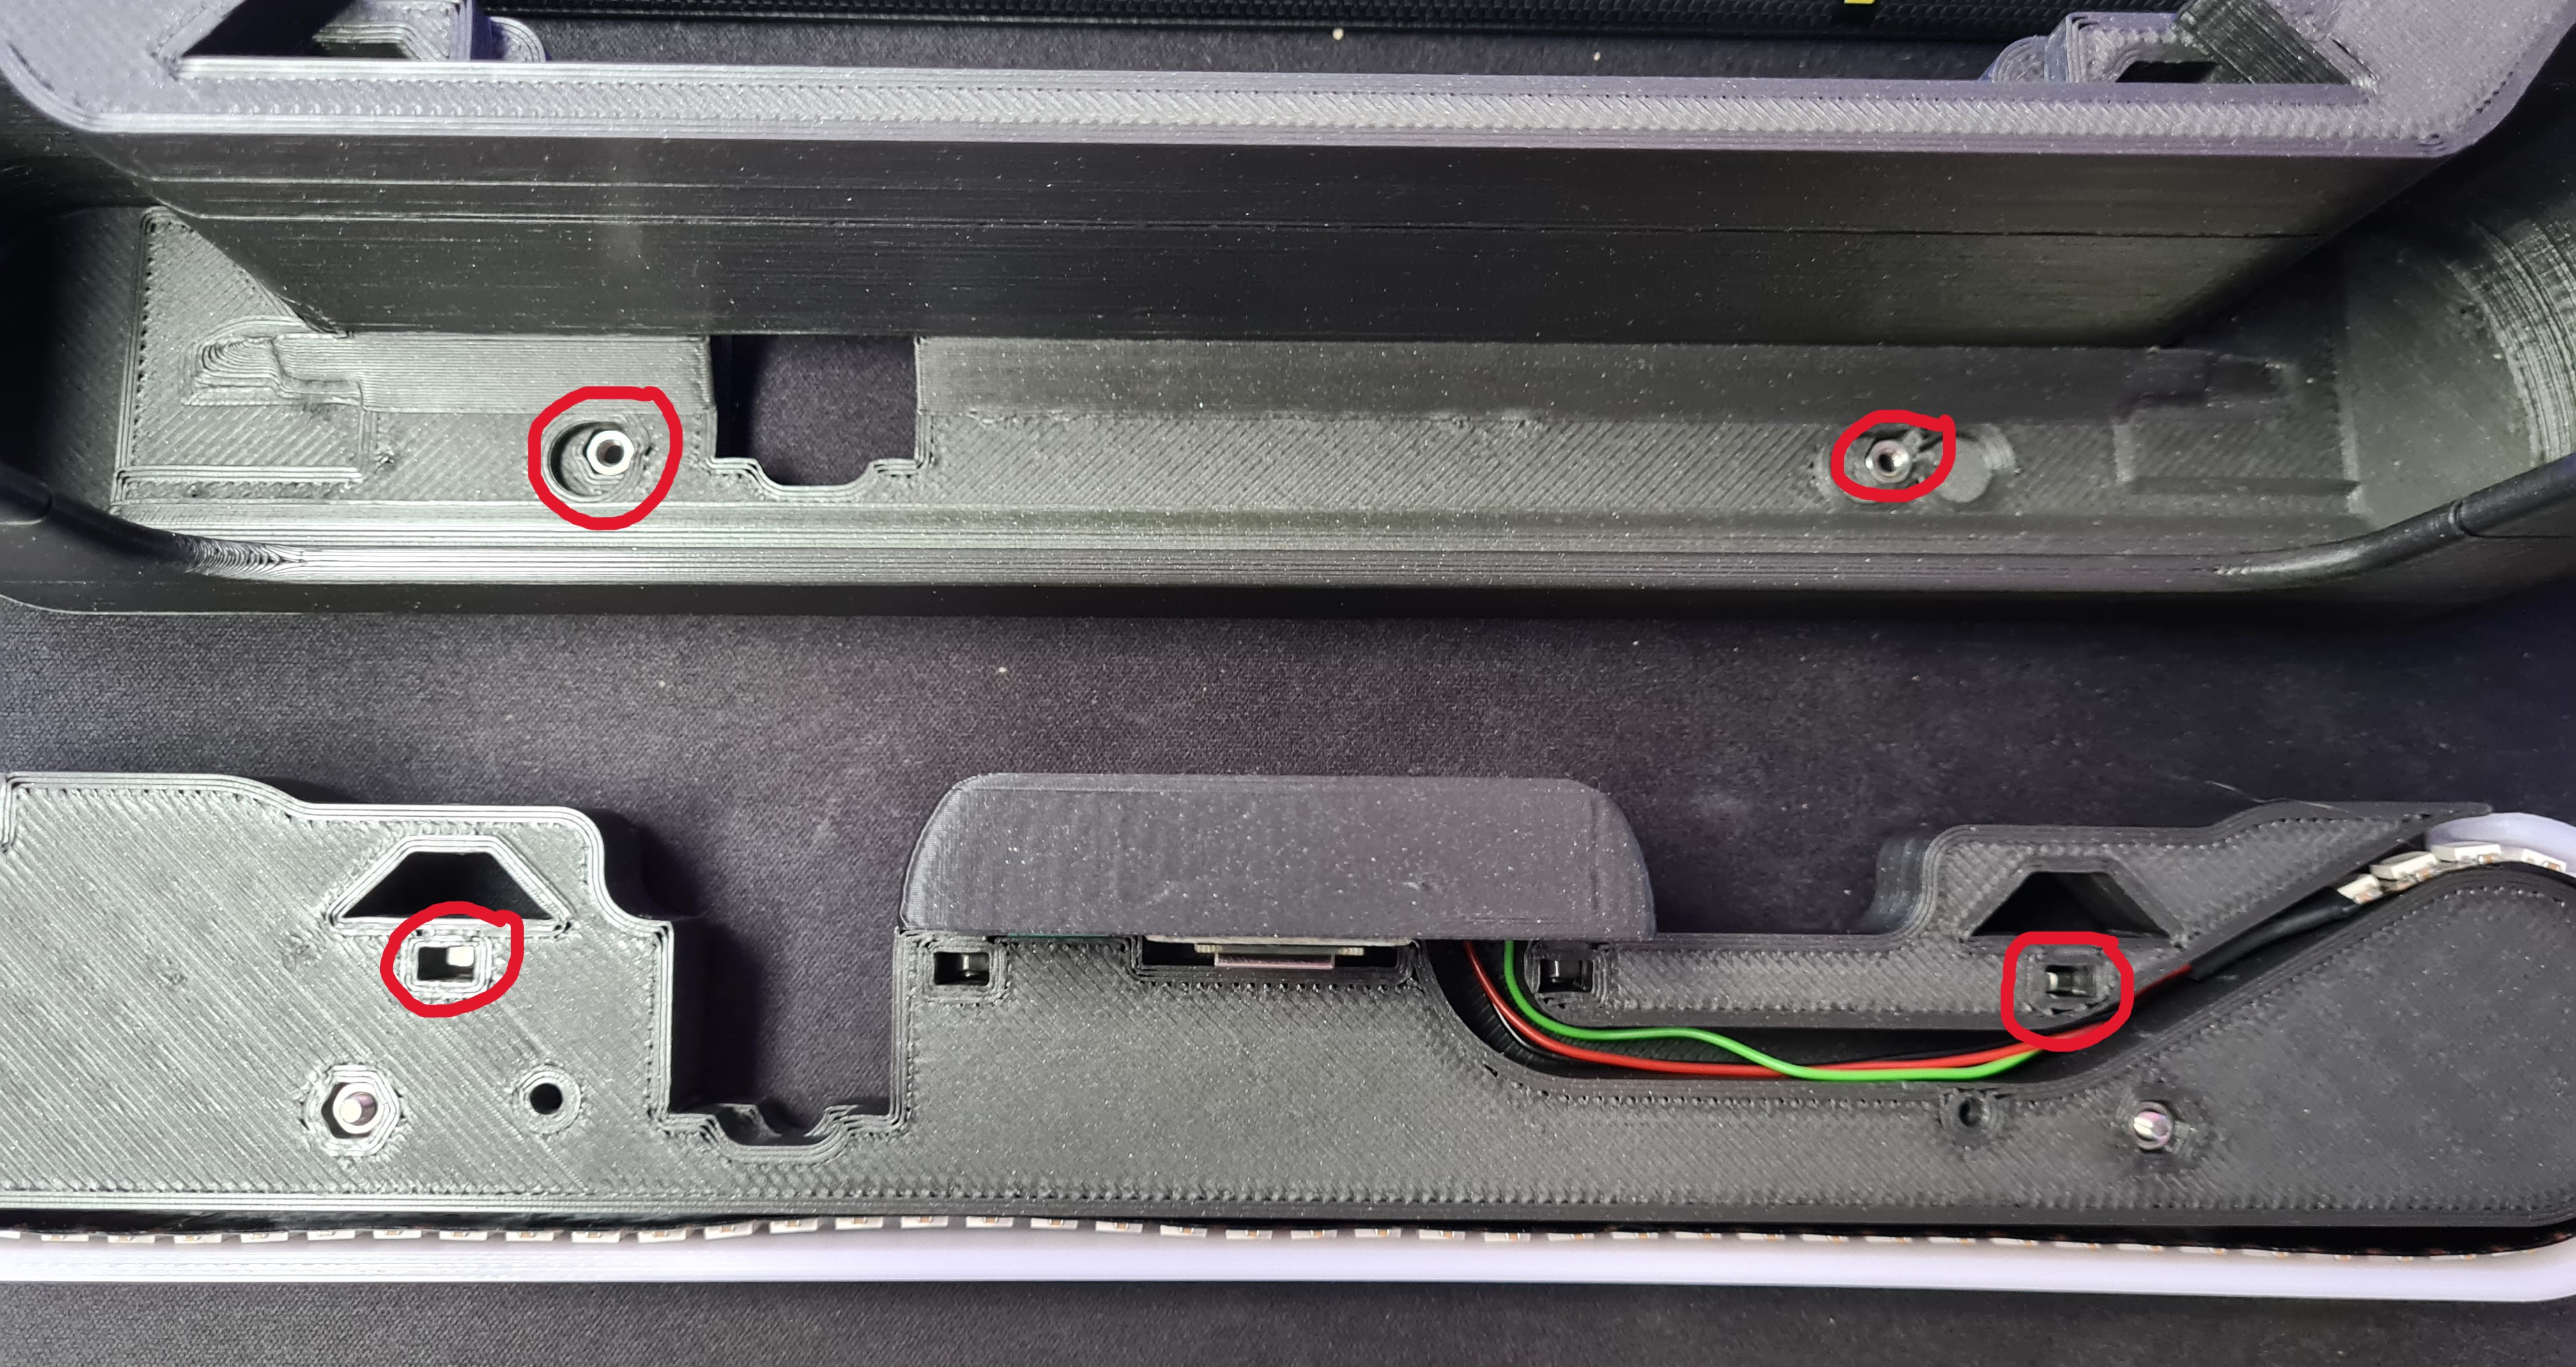
Put M3-Nuts into each of the marked holes in the “Main-Body”-Part as well as into the bottom assembly.
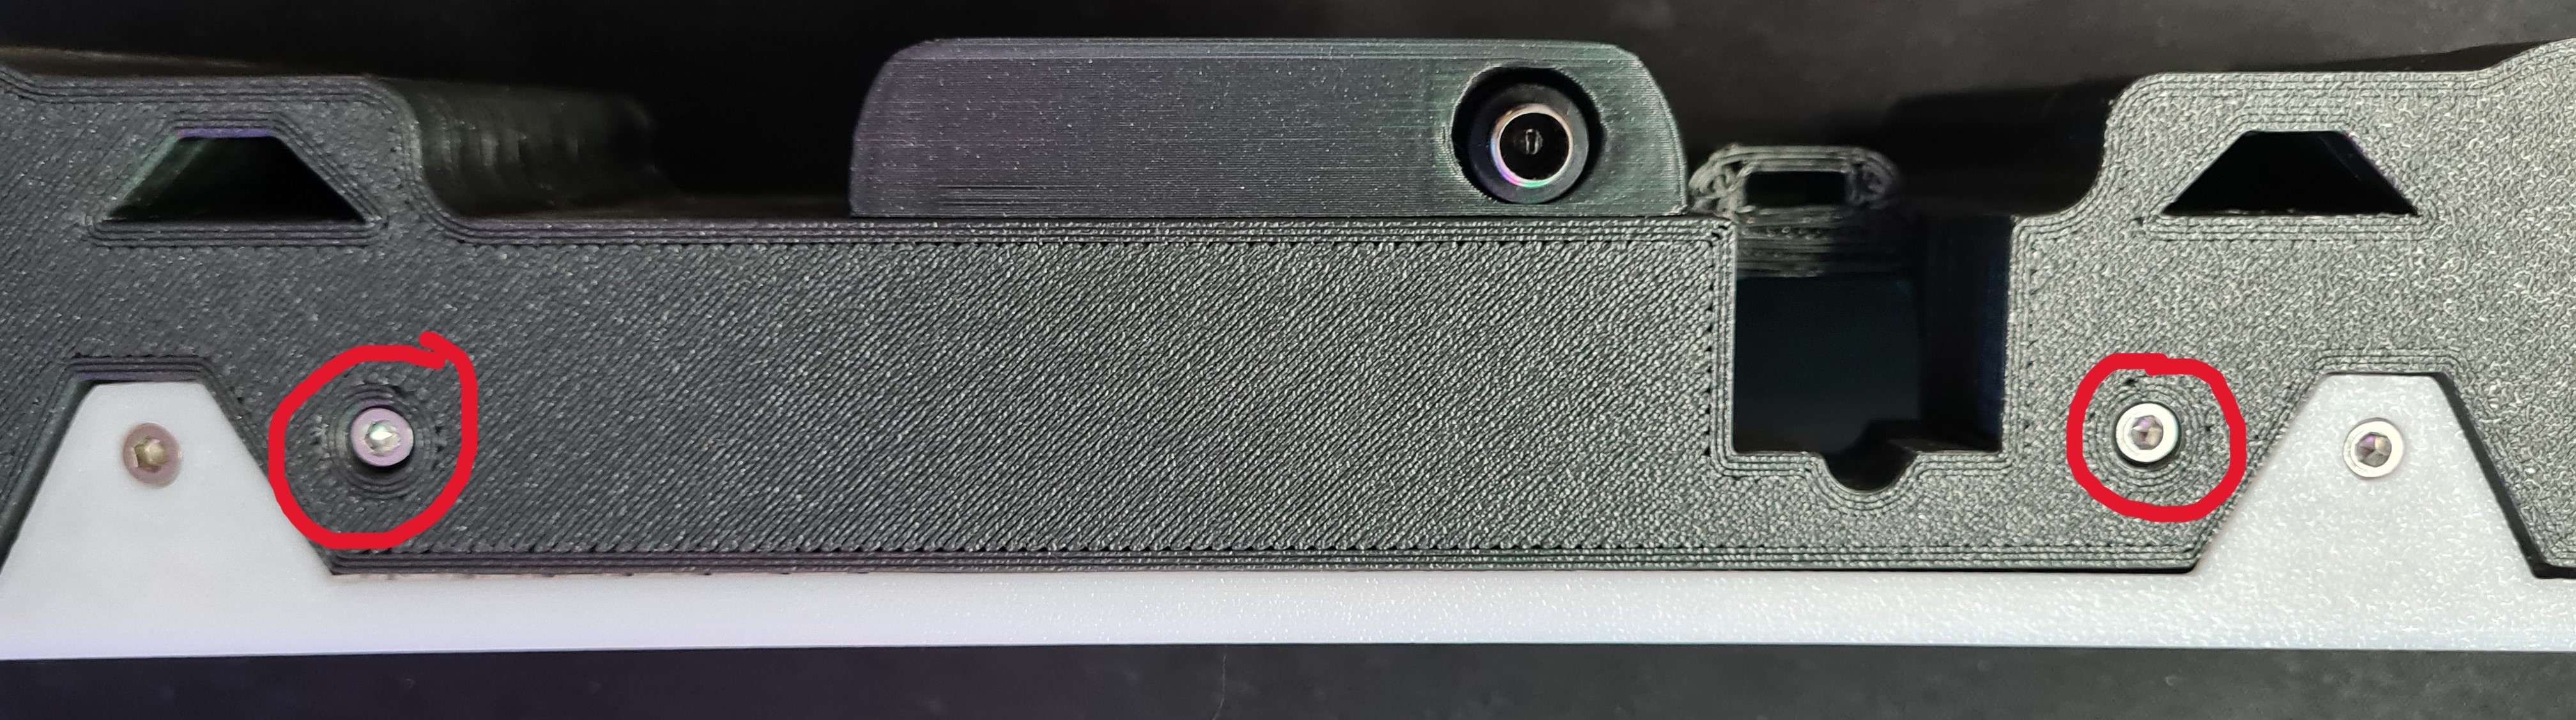
Then put the “Main-Body”-Part onto the bottom assembly flip everything around and screw them together with two M3x16 screws.
Mounting the Hooks:
Since different hooks are needed for each cabinet, table or shelf I have uploaded the CAD files for these parts as well.
In the next section I explain the assembly of these parts exemplary on my fastening hooks.
Put a M3-Nut in each of the “Body-Mount”-Parts. Then screw the right body mount to the right hook and the left body mount to the left hook, using a M3x14 screw.

Then insert the hook assembly's into the main body and secure each of them with a M3x16 screw.


Fitting the charging cable for the SteamDeck:
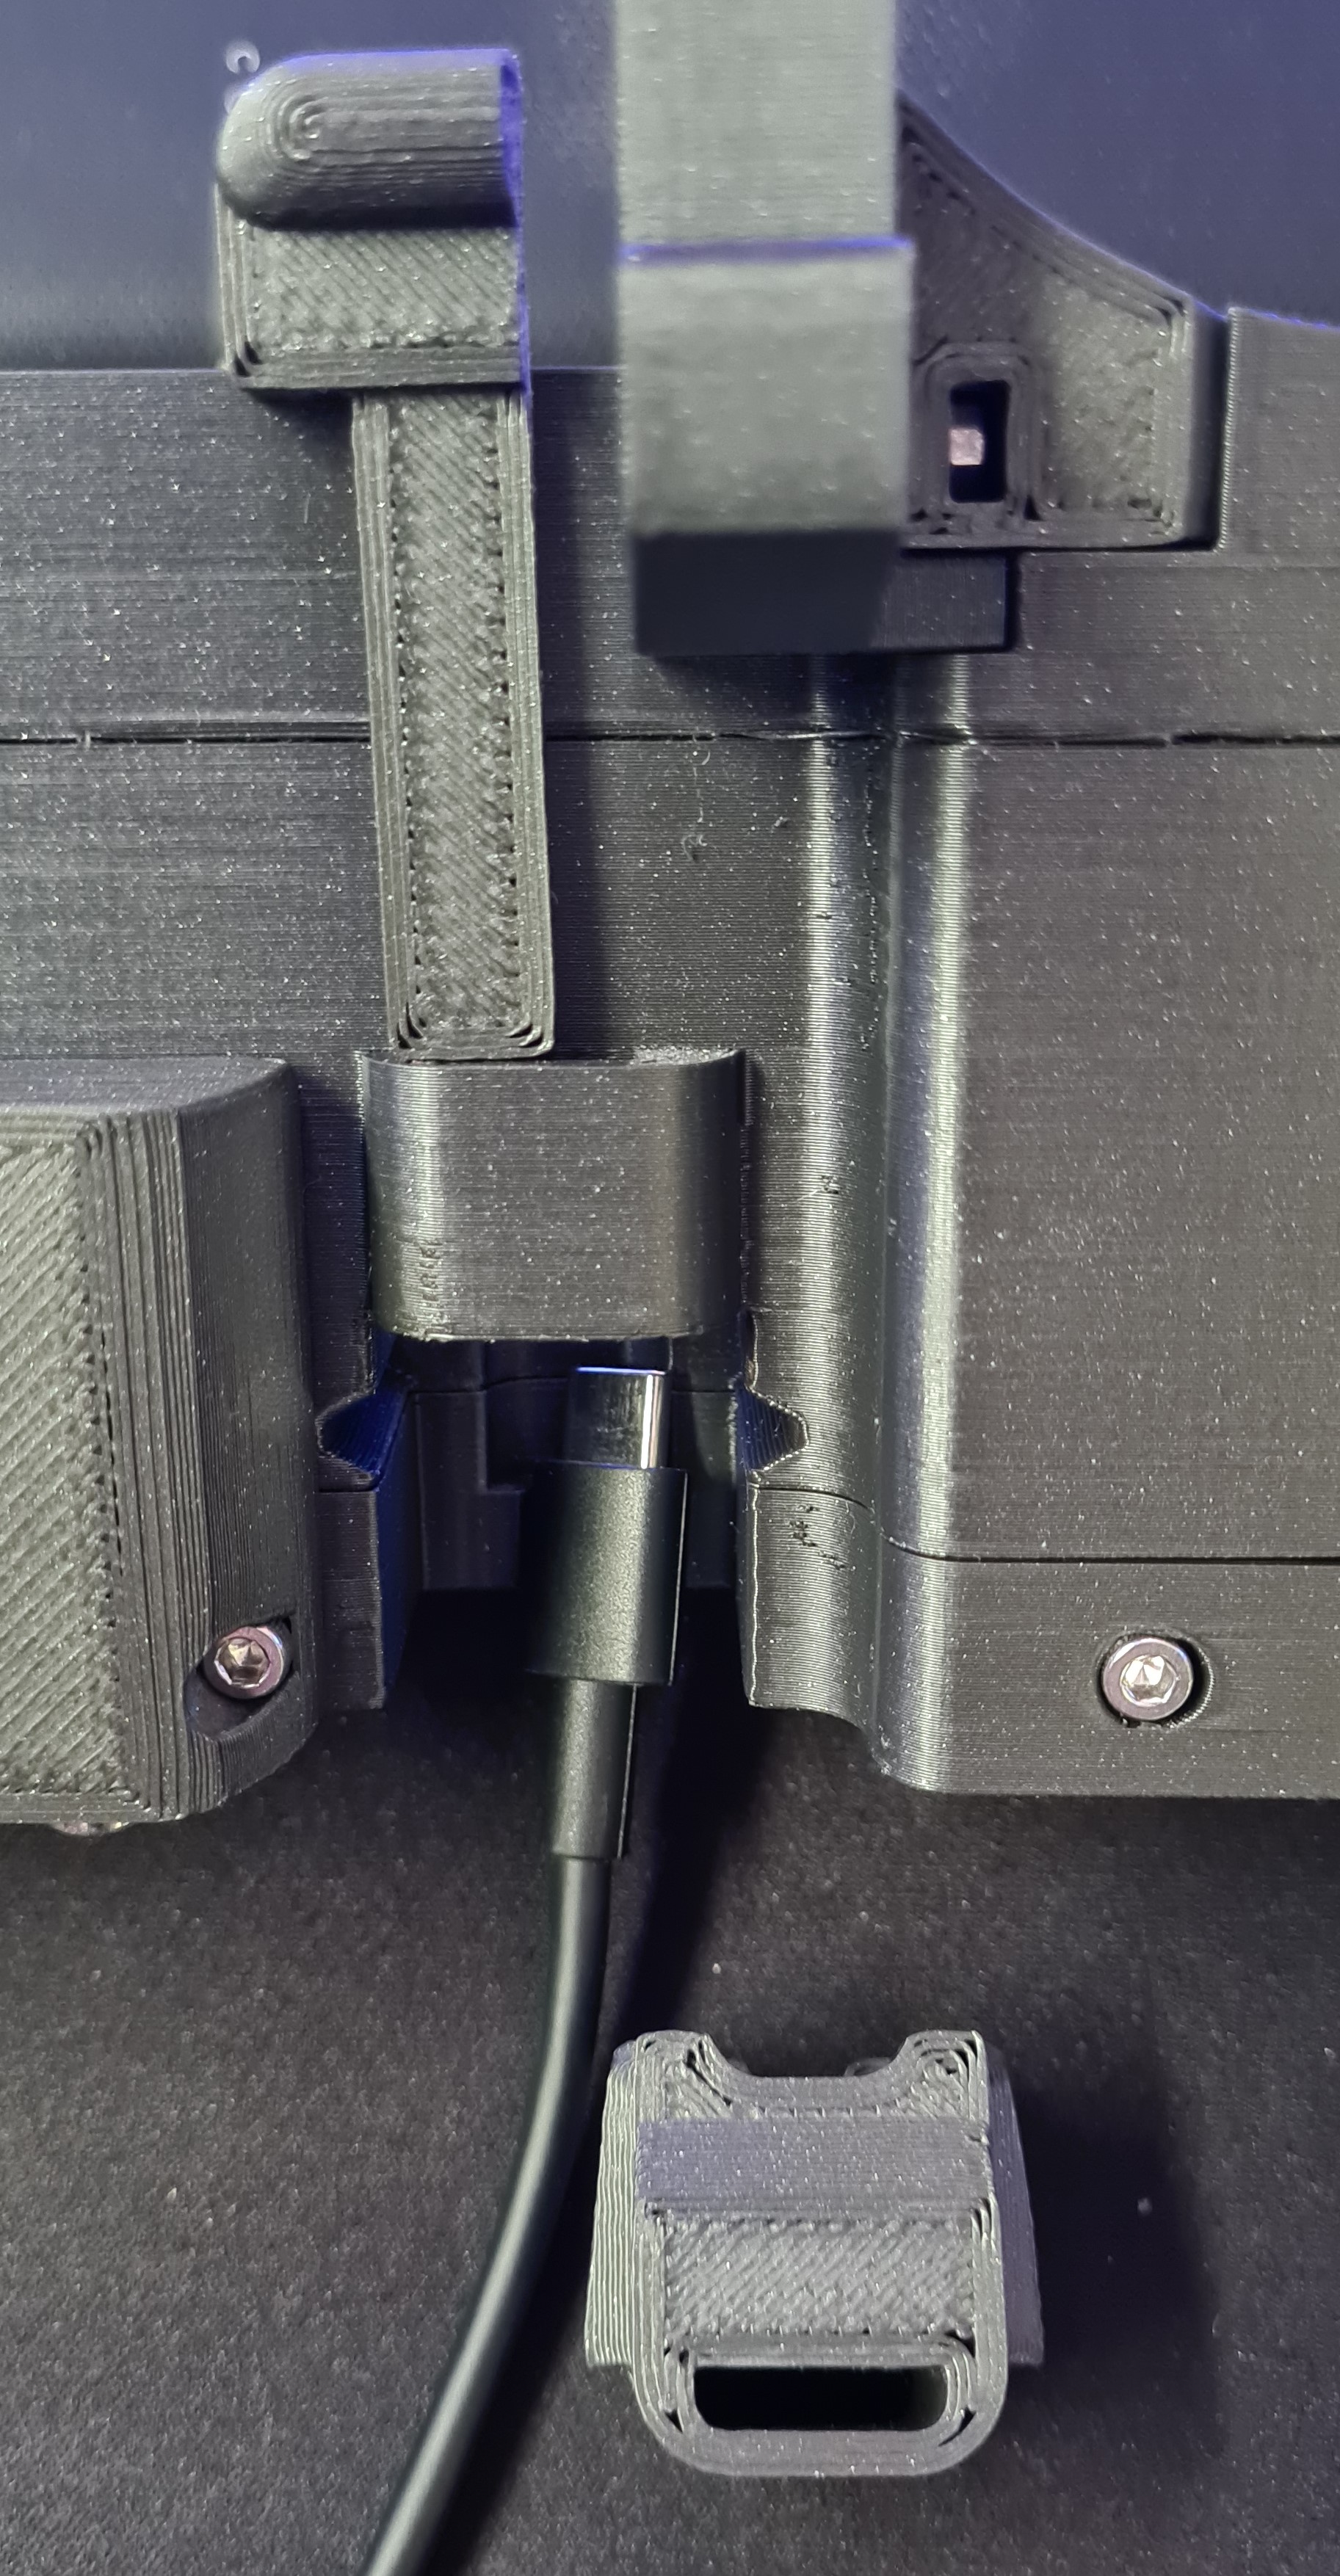
To charge the SteamDeck I'm using the standard cable that comes with the Deck. It can be inserted into the stand for charging while the Deck is not in use. The cable can be removed from the stand while the stand is mounted, so don't worry if you sometimes need to charge your Deck at a different location.
The charging cable is meant to go into the stand like shown in the following pictures. put in the cable, slide the “Cable-Retention”-Part in, and secure it with the “Slider”-Part.


Congratulations !!
You finished assembly of your very own SteamDeck Stand.
If you're having any trouble with the assembly, find a mistake in this documentation or having any other questions feel free to ask them in the comments.
A Like and review is very much appreciated.
If you're feeling generous feel free to send me a donation over my linked Paypal 😊
Thank you so much and Happy Printing!
SteamDeck Stand with LED-Lighting

Publicado em 29 de out de 2023
Gostou deste modelo? Crie uma conta grátis para salvar seus favoritos e voltar a eles depois.
Criar conta