Você está no 3DFinder
Buscamos em Thingiverse, MakerWorld e Printables ao mesmo tempo para te dar o melhor de cada uma.
Descrição
I am still working on the software for this project, the 3D model is ready.
More information, instructions, fotos and video will be added “soon”.
I have printed most of the parts in PETG with 0.2mm layer size, only the white parts are printed with 0.15mm (my first layer still is 0.2mm though)
ps: this project is reusing (my own) wemos D1 mini holder, see: [https://www.printables.com/model/607124-wemos-d1-mini-holder](https://www.printables.com/model/607124-wemos-d1-mini-holder)
Total size : 18.5cm x 50cm
Bill of Material:
- Wemos D1 mini
- LEDstrip WS2812B 60leds/m (86 leds needed)
- M4 threaded rod (you need +/- 42cm)
- M4 nuts (32x)
- Power socket
- LDR (I used GL5539) + 100k resistor
- Wire (I used 22 AWG solid core : red, black, green and some flexible 22 AWG)
- 3D prints in black, white and gray (I have used PETG)
- 2 bolts for wall mounting
What to print:
| filename | nb | color | layer height | Remarks |
|---|---|---|---|---|
| bottom_left.stl | 1x | black | 0.2mm | |
| bottom_mid.stl | 2x | black | 0.2mm | |
| bottom_right.stl | 1x | black | 0.2mm | is actually same as bottom_left.stl |
| top_frame.stl | 4x | black | 0.2mm | |
| top_leddot_frame.stl | 2x | black | 0.2mm | |
| top_segment.stl | 28x | white | 0.15mm | Check there are 2 layers at the bottom after slicing |
| leddot_top.stl | 2x | white | 0.15mm | |
| bottom_power_box.stl | 1x | gray | 0.2mm | |
| bottom_wemos.stl | 1x | gray | 0.2mm | |
| top_power_box.stl | 1x | gray | 0.2mm | Updated: top_wemos_v2.stl |
| top_wemos.stl | 1x | gray | 0.2mm | Updated: top_power_box_v2.stl |
| bottom_connection_1.stl | 2x | gray | 0.2mm | |
| bottom_connection_2.stl | 2x | gray | 0.2mm | |
| top_connection_block.stl | 4x | gray | 0.2mm | |
| led_support.stl | 2x | gray | 0.2mm |
Instructions:
1. Cut the ledstrip : 28 pieces with 3 LEDs and 2 pieces with one LED each
2. Add some solder to each connection pad of those pieces
3. Glue the pieces into the bottom_xxx printed parts, check for the correct orientation !
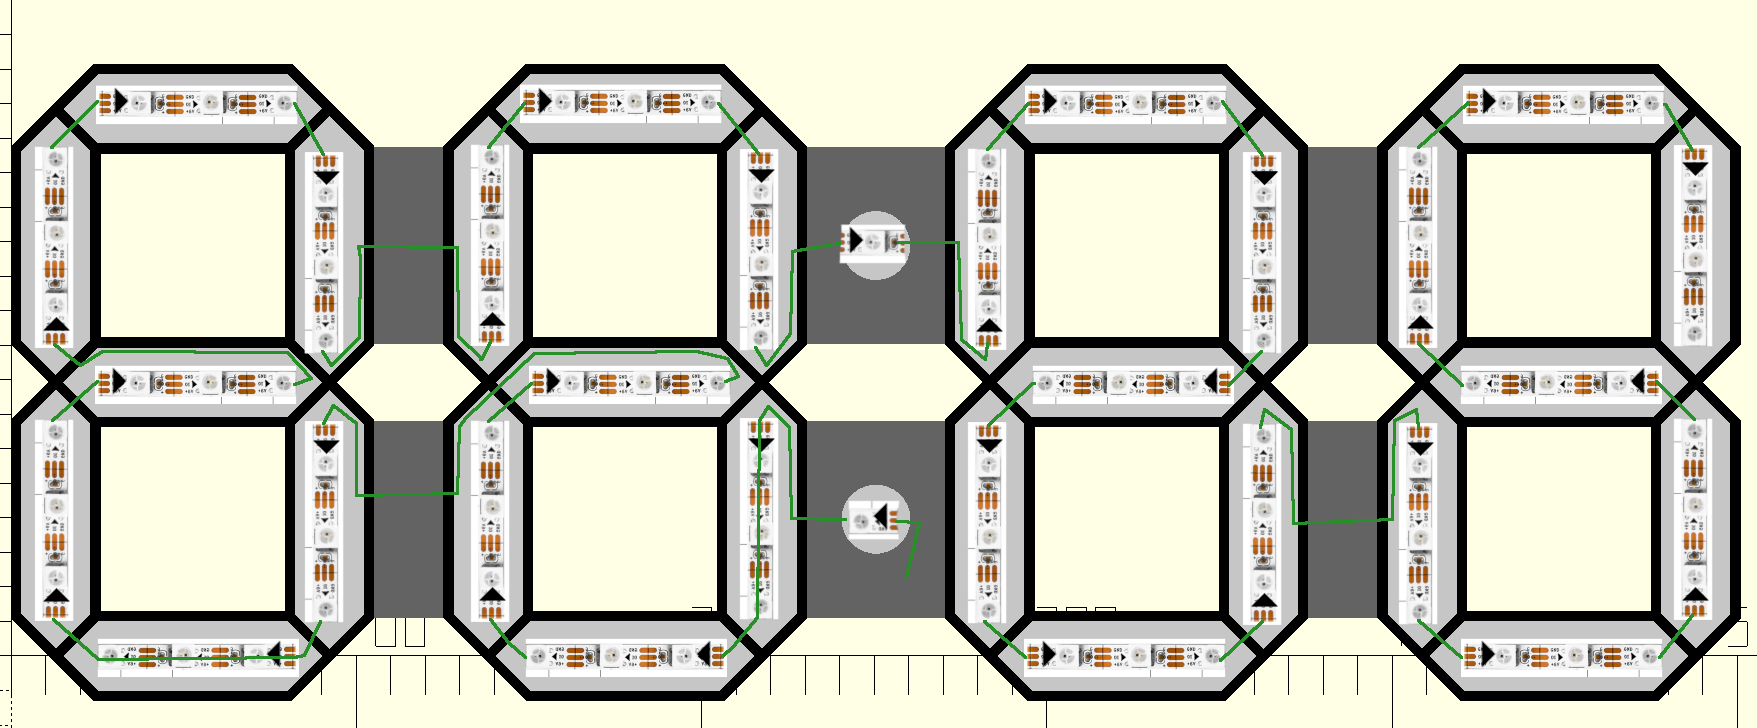
4. Solder and connect as much wires as possible (it is easier when the pieces are not yet connected) For the green (data-line) see picture above. Also connect the power and ground.
5. Cut the threaded rod: 8 pieces of 34mm, 8 pieces of 13mm
6. Check that the wemos D1 mini fits inside “bottom_wemos”
7. used threaded rods to connect the bottom_wemos and bottom_power boxes to digit 2
8. Connect the power and ground of the power connection to the ledstrip.
9. Connect the LDR and resistor and connect wires from the wemos (3.3V and A0)
10. Connect the single LEDs on top of the "led_support" (one for the power box, one for the wemos box). I used flexible wire for these connections
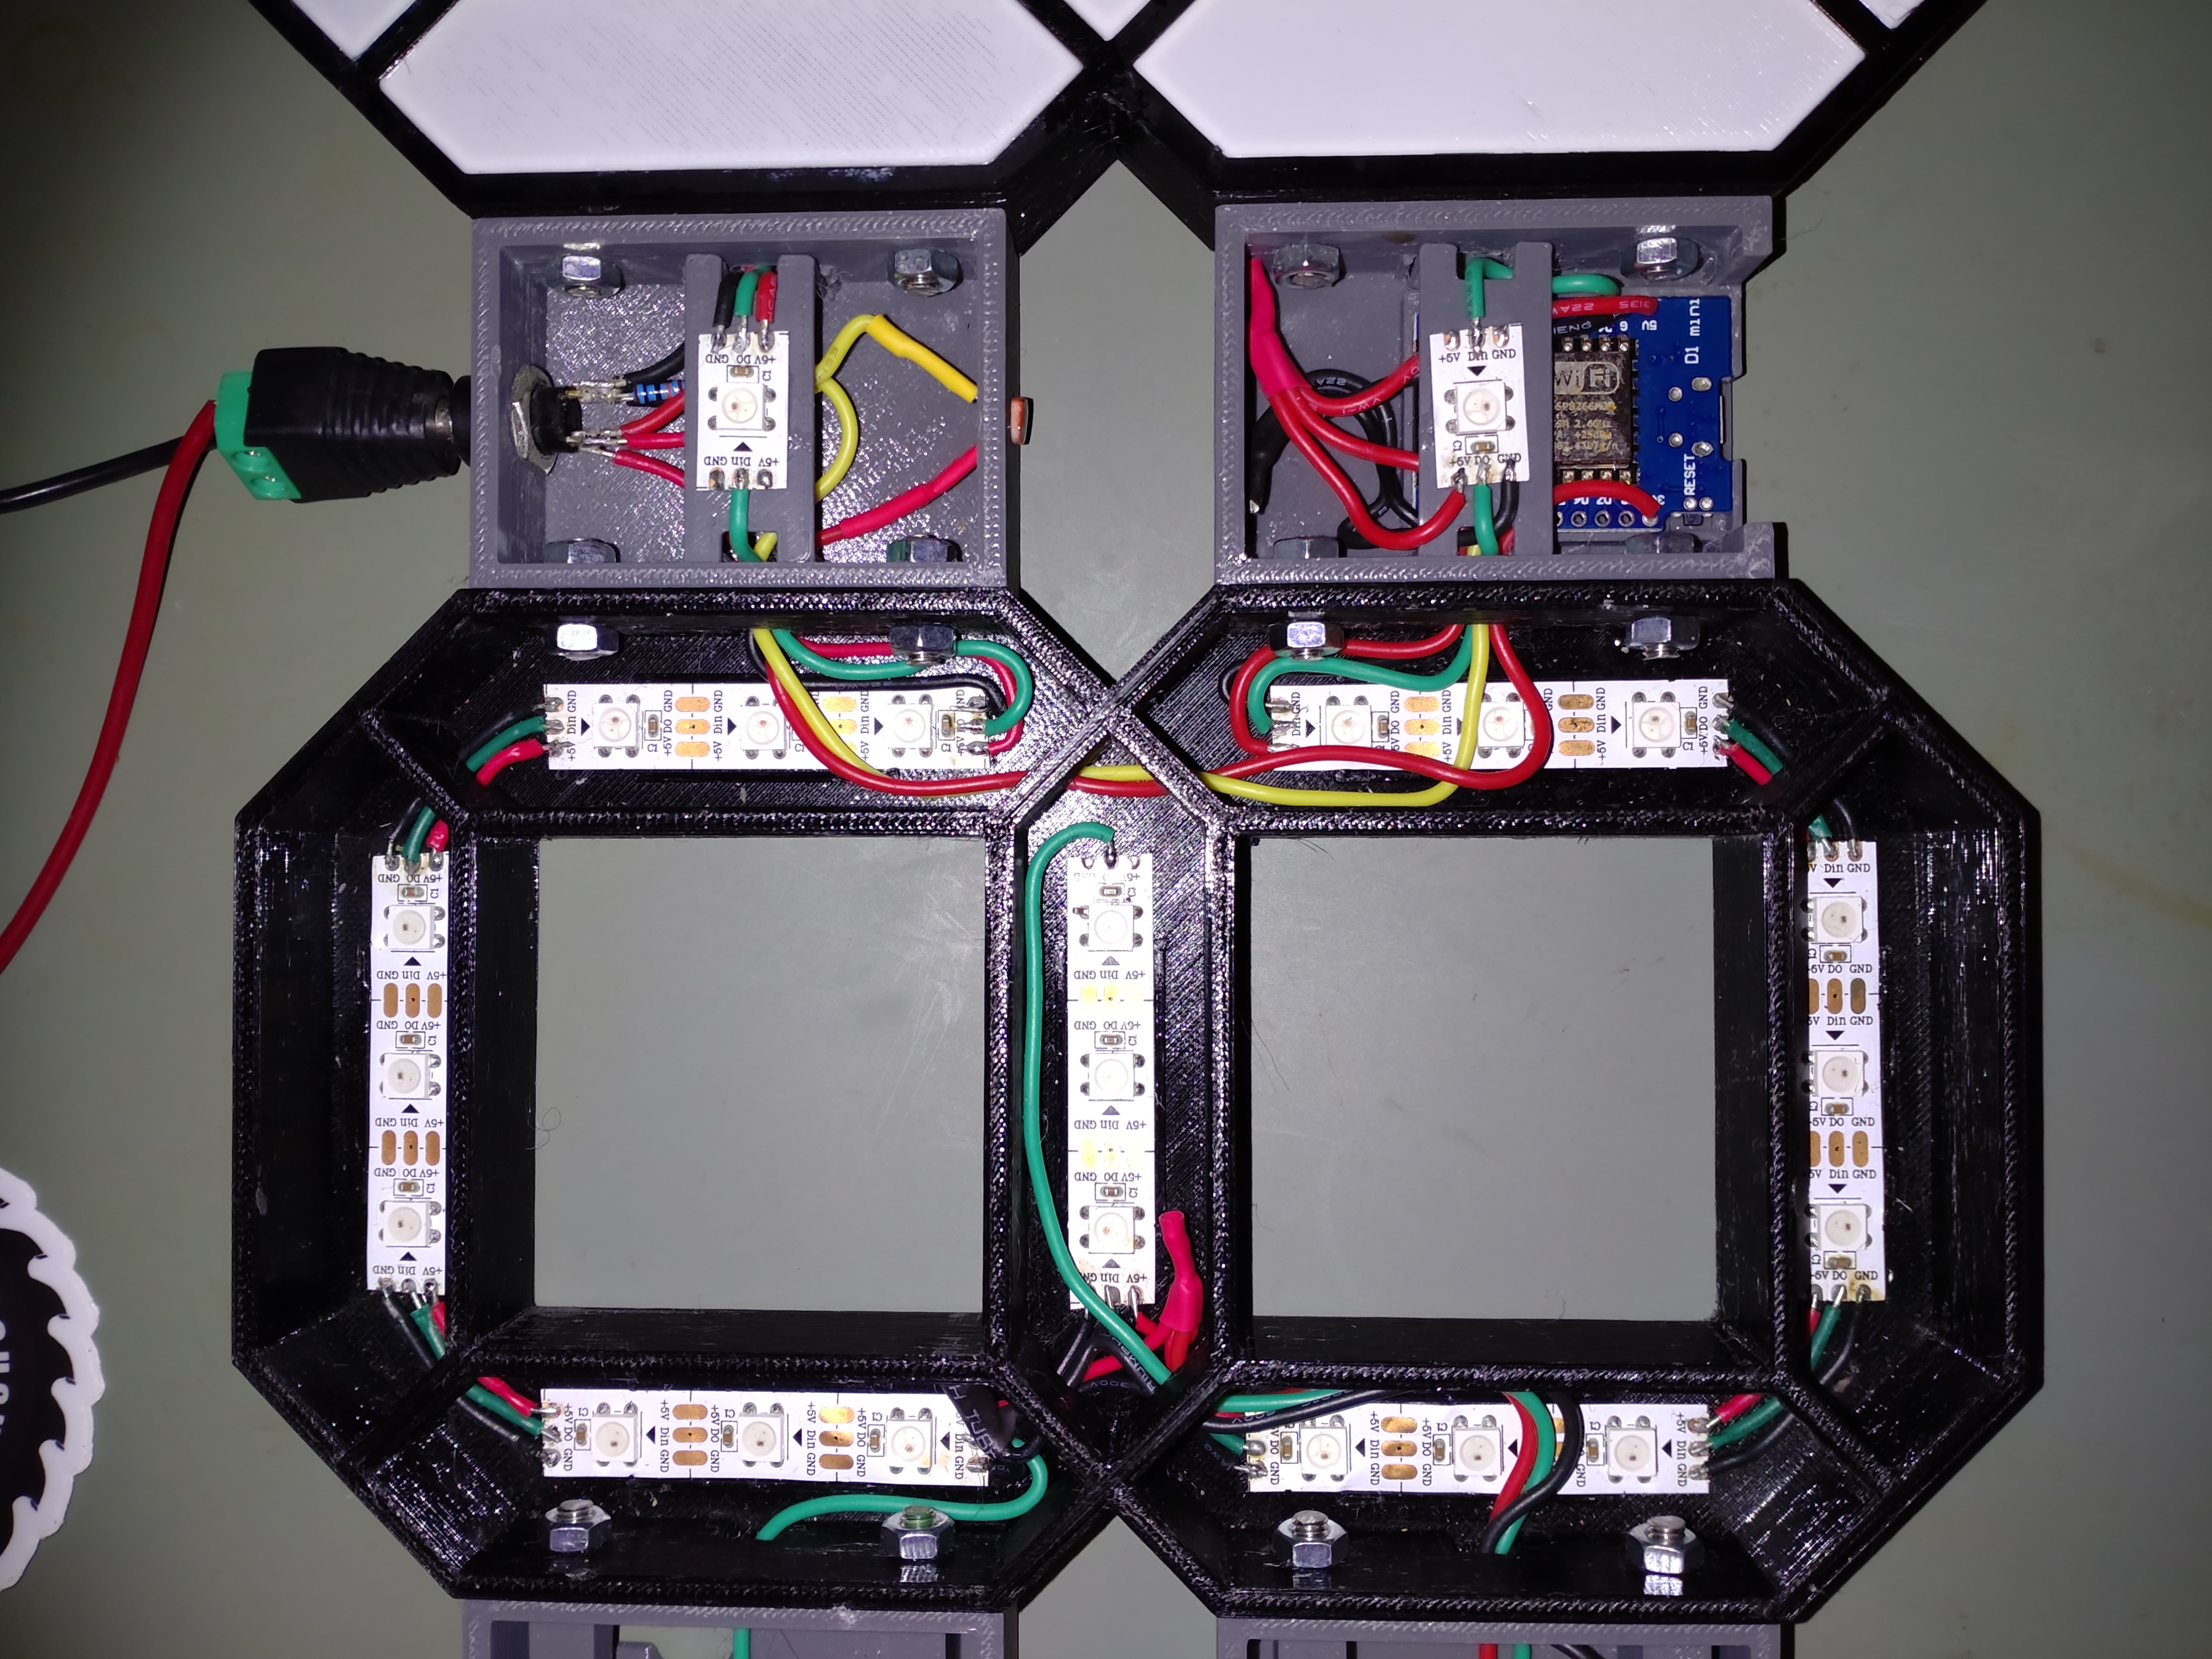
11. Connect the third digit to the power and wemos box (and the wires)
12. Connect the first digit to the second digit, with bottom_connection_1 and bottom_connection_2 in between.
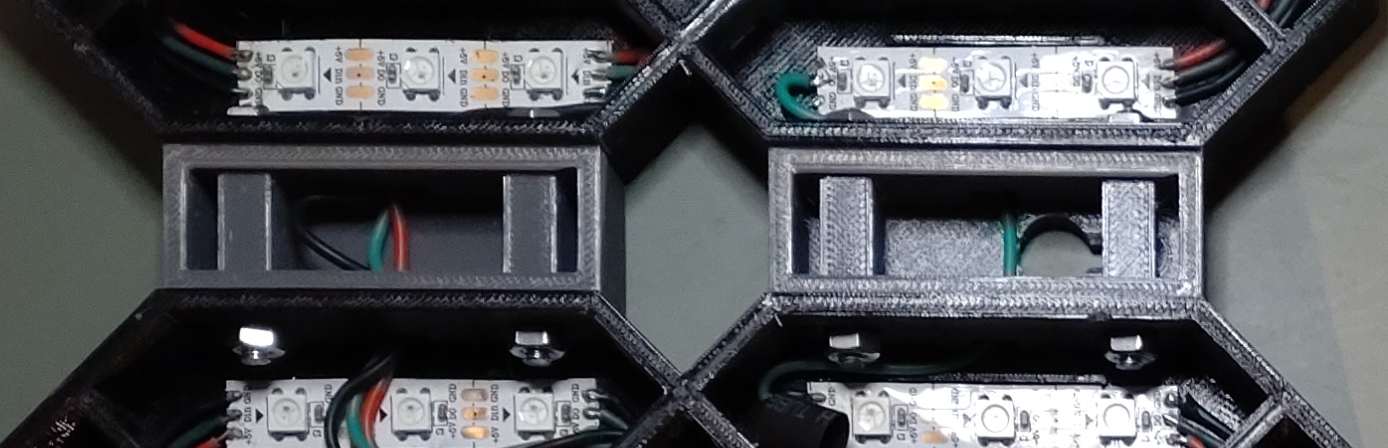
13. Connect digit 4 in the same way to digit3
14. Glue the white top_segments to the top_frame (put the visible side on baking paper)

15. Put the leddot_top inside the top_leddot_frame (I did not had to use glue for this)
Firmware:
A first version of the software can be found at: [https://github.com/gvtienen/7_segment_LED_clock](https://github.com/gvtienen/7_segment_LED_clock)
Big wall mounted 7-segment LED clock

Publicado em 6 de fev de 2024
Gostou deste modelo? Crie uma conta grátis para salvar seus favoritos e voltar a eles depois.
Criar conta