Você está no 3DFinder
Buscamos em Thingiverse, MakerWorld e Printables ao mesmo tempo para te dar o melhor de cada uma.
Descrição
Intro
I designed a needle threader which can also be used as a versatile handle for small tools (mini chisels, cutters, scrapers, etc.).
Thanks for visiting!
Once you've printed the handle, you'll need to perform some additional assembly steps.
I've included reference steps below, but feel free to explore alternative approaches for assembly, mating, etc. depending on your tools and preferences.
I wanted a handle that was comfortable for both fine movements and more forceful pulling/pushing. Its octagonal shape prevents it from rolling around.
- Easy to print
- Designed for PETG
- No supports required
- Just review dimensions and postprocess with drill bits, etc. as needed
- Each layer is fully connected. You can completely eliminate stringing by enabling combing in Cura (or a similar setting), since for this model the nozzle never needs to cross air gaps. More info: [https://all3dp.com/2/combing-mode-cura-simply-explained/](https://all3dp.com/2/combing-mode-cura-simply-explained/)
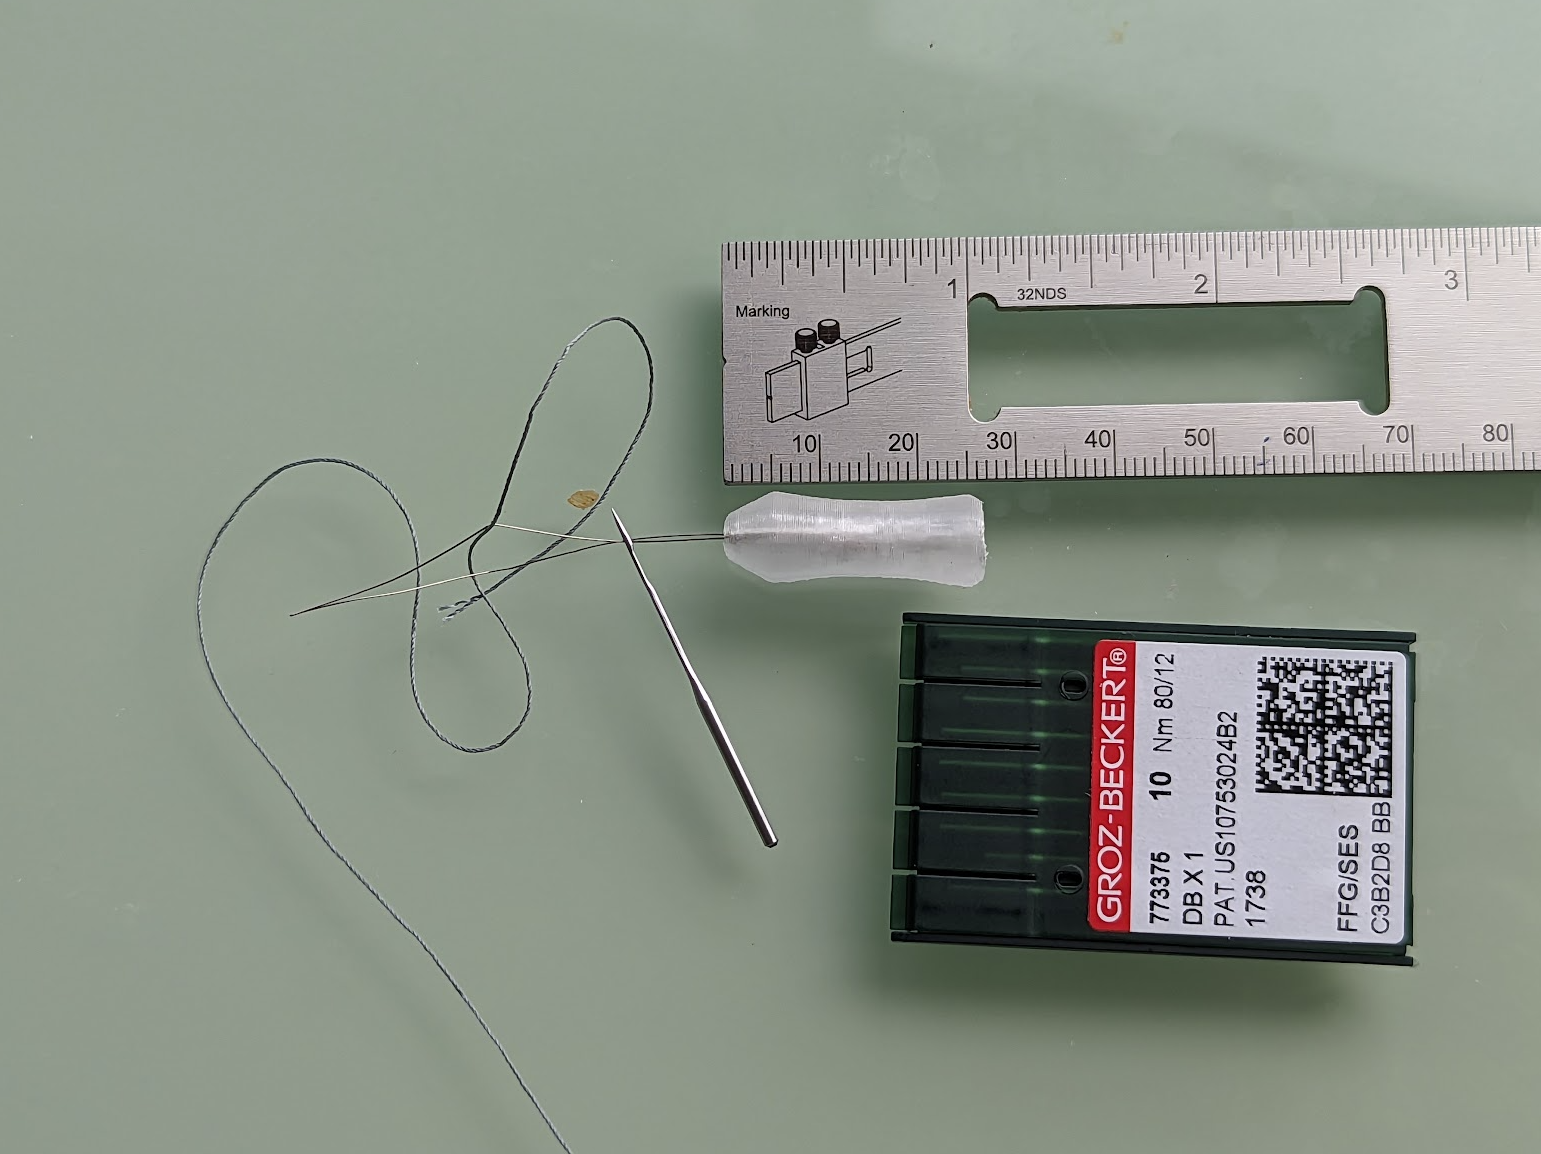
Below: needle threader with other things for scale
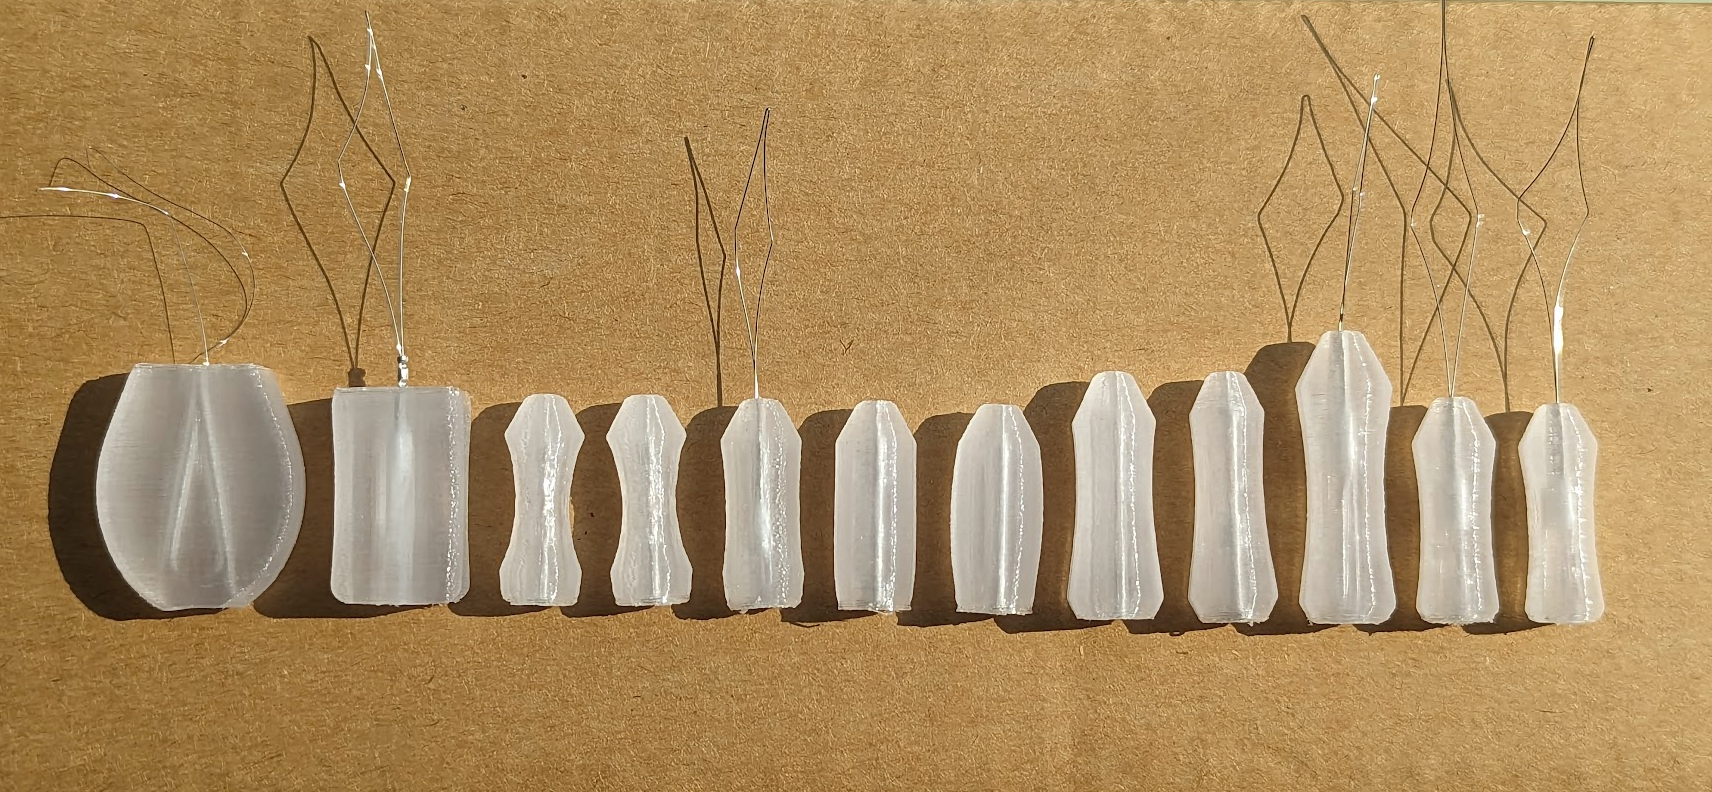
Below: various prototypes (rightmost is current model)
Reference print
I like printing fairly clear and dense PETG (“glass-like”).
- Printer: Weedo Tina 2 basic (aka Weefun Tina 2 / Monoprice MP Cadet) – a very cheap printer
- Filament: Overture PETG clear, stored at ~30-40% RH
- Temperature: 245C, heated bed not available
- Nozzle: 0.4mm printing 0.44mm width, 0.20mm height
- Print speed: 12mm/s
- Infill: N/A -- Solid shape with only walls and top/bottom
- Minimum layer time: 25s
- Cooling: 0% -- Printer doesn't have a separate cooling fan, but I modded the print head to not blow air onto the print
- Top/bottom: lines with directions [45, 45, -45, -45] -- Alternating AABB pattern that still packs very tightly (a key requirement for clear PETG) but hopefully provides better xy strength distribution and reduces nozzle buildup compared to fully aligned rectilinear.
Reference assembly
- Create a loop using hardened steel wire and insert both ends into a crimp ferrule (actually used for electrical wiring). I used 0.20mm wire here. 0.10mm or 0.15mm can also work, with tradeoffs in strength vs versatility. I recommend something around 0.15-0.20mm. The ferrule tip is roughly 1.5mm OD by 8mm long.
The model is designed so that the ferrule slides snugly inside afterwards. I suspect most people won't have ferrules on hand. Hence my note to please adjust things as needed to make things work. E.g., twist the wires together and insert them directly without a ferrule.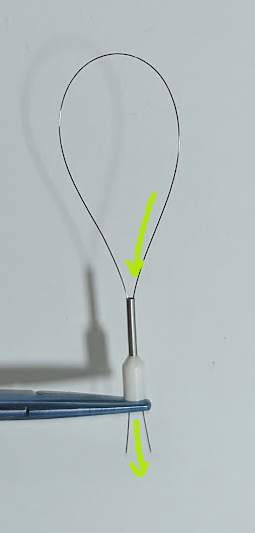
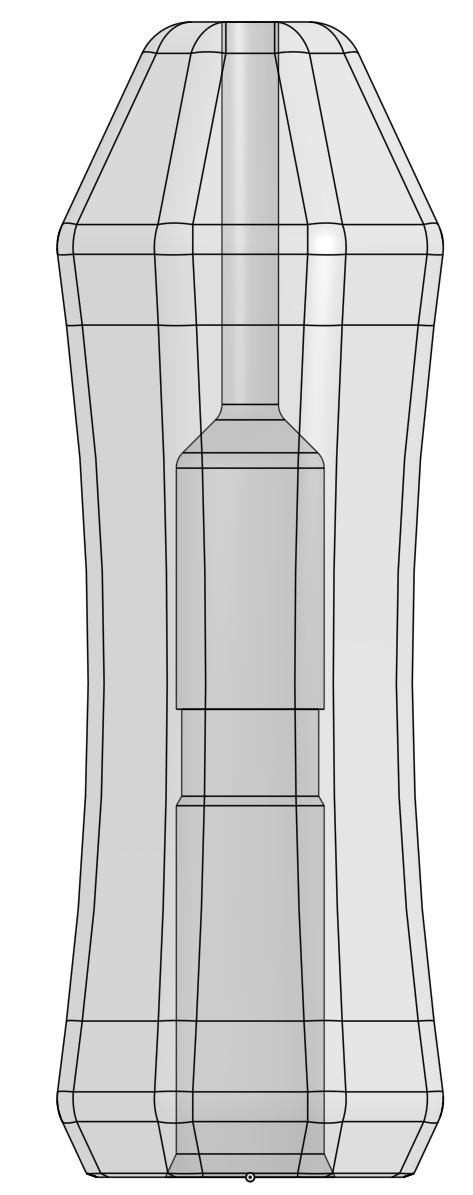
- Since the ferrule is much wider than the wires, bend the wires over themselves for a tighter fit
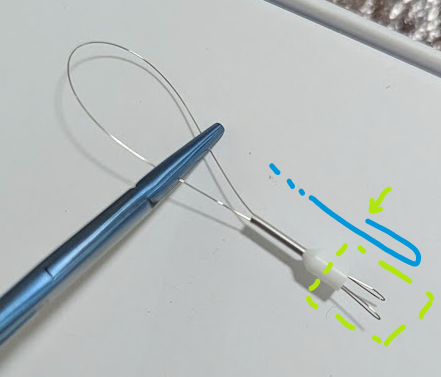
- Add 90 degree bends at the tips to prevent the wire from pulling out
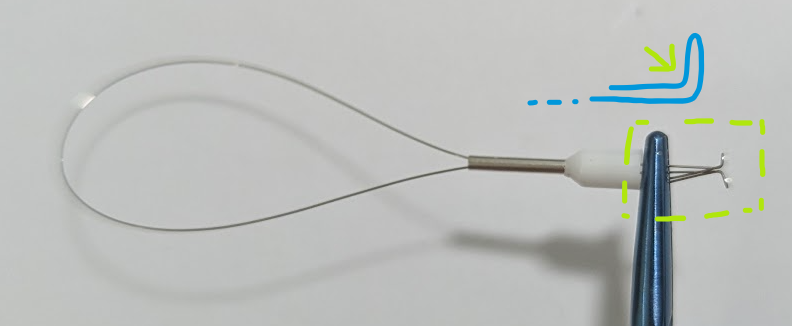
- Pull the wire into the sleeve, then crimp. Make sure the crimper jaws don't accidentally damage the wire loop on the other end.
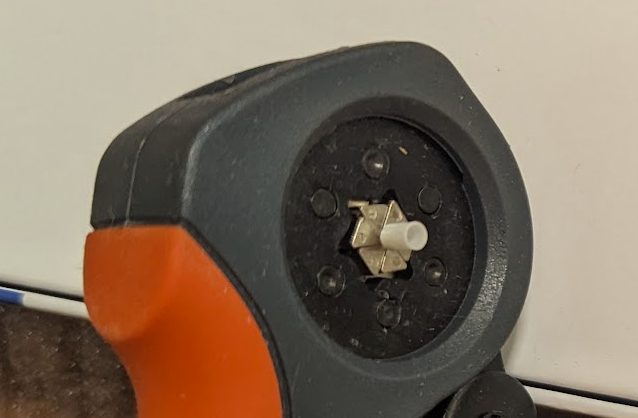
- Run your finger along the wire to begin shaping the tip
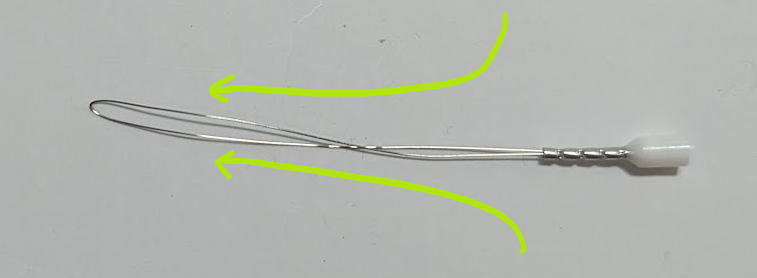
- Test fit the handle by inserting the ferrule in reverse. Use a drill bit to widen/clean the hole as necessary.
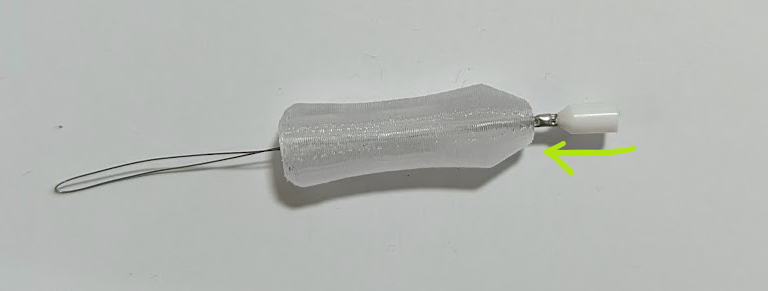
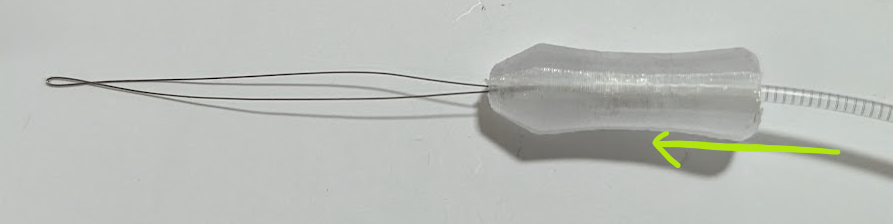
- Now insert the ferrule properly. I used some scrap filament to push it in tightly. In the current design, the tip of the ferrule is ~1mm recessed within the handle.
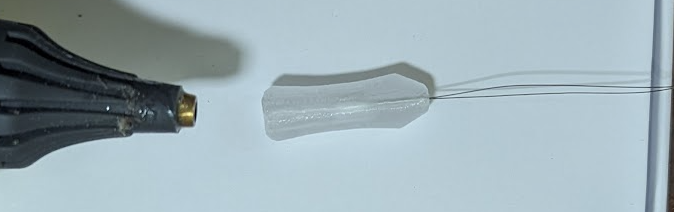
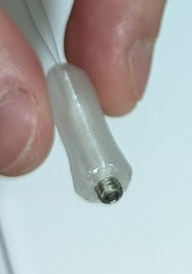
- To seal the end, I've had good results with either hot glue or set screws (M4 x 3mm length pictured). You can also pad bits of scrap filament so that the glue etc doesn't need to be injected as deeply.

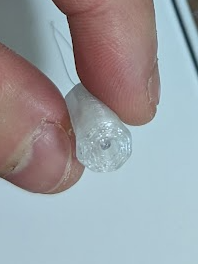
- Finish shaping the wire loop, and you're done!
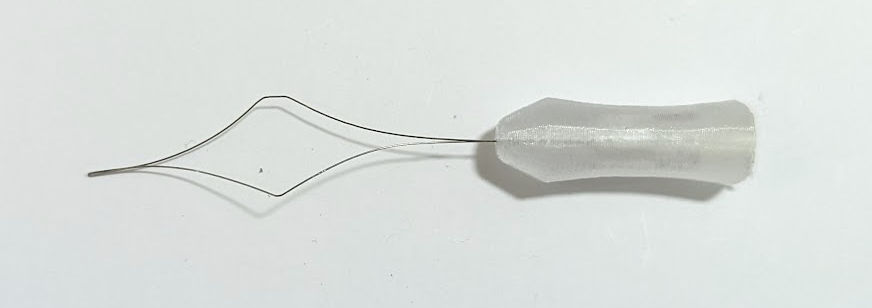
Needle threader / small tool handle

Publicado em 21 de set de 2023
Gostou deste modelo? Crie uma conta grátis para salvar seus favoritos e voltar a eles depois.
Criar conta