Você está no 3DFinder
Buscamos em Thingiverse, MakerWorld e Printables ao mesmo tempo para te dar o melhor de cada uma.
Descrição
This is a two piece mug hook with hidden hardware. You can use the included layout jig to get the mounts placed evenly on the underside of your shelf.
Straight from the printer the parts will fit very loose. When mounted, The two pieces should slide together relatively easily, and interlock with a dimple. A gentle tap against the backside of the hanger will pop them back apart if you need to remove the hidden mount. Interface tightness can be tweaked by slightly adjusting the screws in the mount .
The hidden mount is designed to use #8 or #6 wood screws
Printing instructions:
- The hanger includes and integrated brim which is easily removed with a razor blade.
- Standard PLA profiles will give good results, with no supports required.
- Use variable layer height to get nice smooth surfaces, but a standard .2 layer height gives good overall results
- infill at %15
Tips For Using the Layout Jig
- The layout jig is much easier to use if you remove the shelf from your cupboard
- The jig is best used for drilling your location holes directly
- You will need a drill, a 3/32 drill bit (2.4mm) and a clamp
- For standard size mugs, I would not make any holes closer than 1.25" (31.75mm) to the edge of your cupboard
- Double check you are happy with your position before drilling any holes
- Positions 2 & 4 are 175mm apart. Position 3 is offset forward by 87.5mm
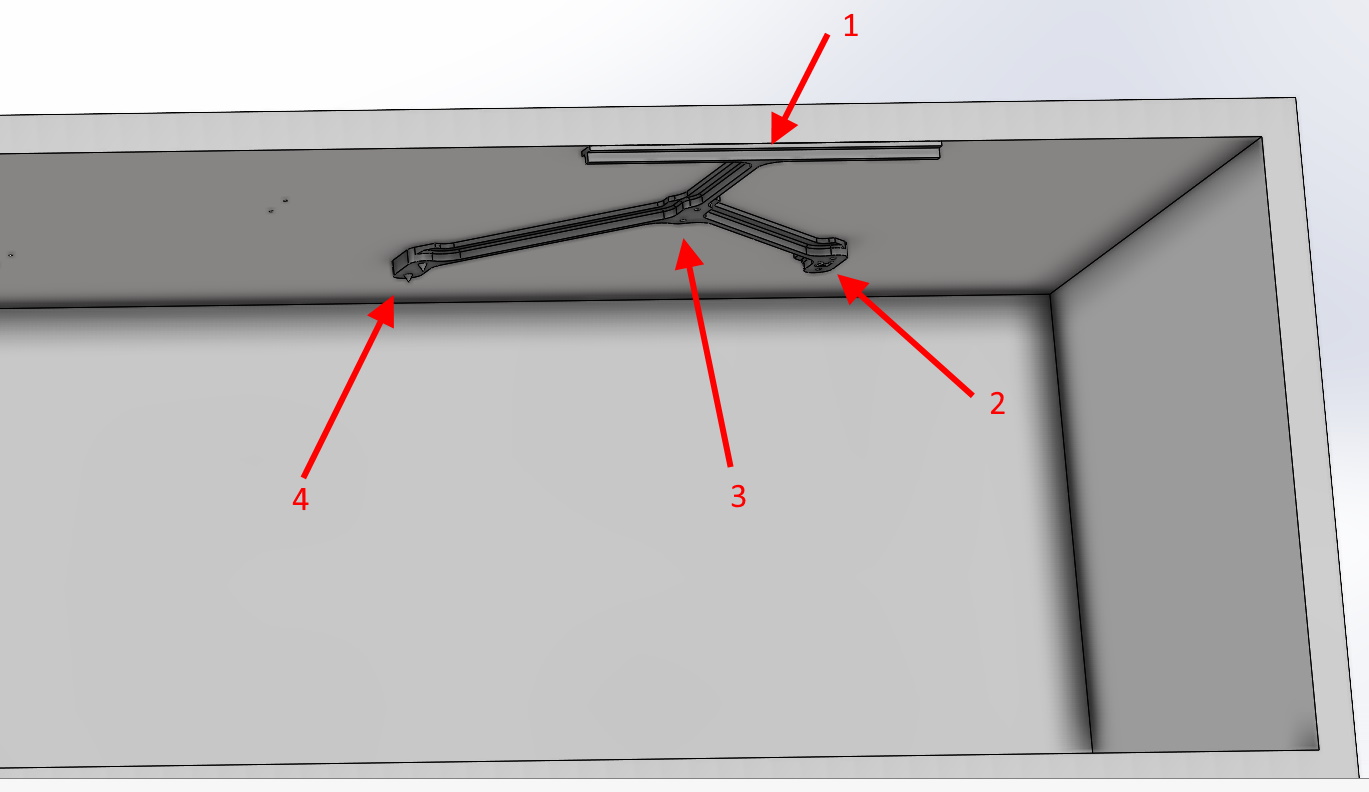
- With the ‘R’ at the right edge of your shelf, align the straight edge to the front of edge of your cupboard and clamp in place
- Drill pilot holes at positions 2 & 3
- remove your clamp, and flip the jig over
- Place the points into the holes drilled at position 2 and clamp the jig in place again
- You can now drill the third set of holes
- Continue by shifting the jig over, placing the points into the holes drilled in step 5

Gostou deste modelo? Crie uma conta grátis para salvar seus favoritos e voltar a eles depois.
Criar conta