Você está no 3DFinder
Buscamos em Thingiverse, MakerWorld e Printables ao mesmo tempo para te dar o melhor de cada uma.
Descrição
Joseph De Oliveira 01/13/2023
Lesson Plan and Activity: The challenge for this project was to make a tensegrity structure that had some character to it while collaborating with a partner to be able to work in a teamwork environment.
Parts List:
| File Name | Quantity of the Part | Color |
| DOE_Triangle | 16x | Trans Red |
| DOE_Arch | 2x | Black |
| DOE_Base1 | 1x | Black |
| DOE_Base2 | 1x | Black |
Assembly/Construction Instructions Section:
Modeling Instructions for constructing the base
- On the front plane create a constraint box that is 15cm x 15cm with the origin in the center
- Draw a construction circle centered on the origin with a radius of 5cm
- Draw a horizontal and vertical construction line of symmetry that goes through the origin
- Draw 4 more construction lines that go through the origin
- Draw construction lines between the anchor points of each line going through the origin for the top half of the circle
- Make these new lines equal so the arcs are evenly spaced
- Draw construction lines starting from the edge of the circle that is perpendicular to the circle and are 2cm in length
- Connect lines from the top of the extruding construction lines to the points adjacent to the circle resulting in 6 triangles
- Use the 3-point-arc tool to draw an arc between the points of two triangles next to each other
- Make the radius of the arc 1.35cm
- Repeat around the circle leaving you with 6 arcs pointing toward the center
- Extrude the sketch by 1cm
- In a new sketch but on the same front plane, draw a construction line from the tip of one triangle to the end of the triangle opposite to it
- Draw one construction line centered on the origin with a length of 9cm and another one with a length of 7cm
- Draw a 1.03 cm x 1.03 cm square centered on these new anchor points on the construction line
Modeling Instructions for Constructing the Arch of the Structure
- Create a constraint box that is 15cm x 15cm with the origin in the center
- Use the CenterPoint arch tool to draw an arc with a radius of 4.5cm
- Then use the 3-point arch tool to draw an arch with a radius of 3.5
- Then make a 1cm x 1cm box down from each side of the arch using the line tool
- Then extrude the arch 1cm by using the extrude tool
- Then make an engraving of your name onto the arch by using the Sketch text tool, after typing the desired name put it on the arch
- After selecting the Name and using the Cut-Extrude tool, cut the piece by 0.5cm
Construction Instructions of the Tensegrity Structure
Use a screwdriver tip to poke a pilot hole/divot into the spots where the hooks will go. Don’t forget to put hooks on the arcs as well. You may need to use something heavy to hammer it in a bit to create a big enough divot.


- Screw the hooks in with pliers or fingers
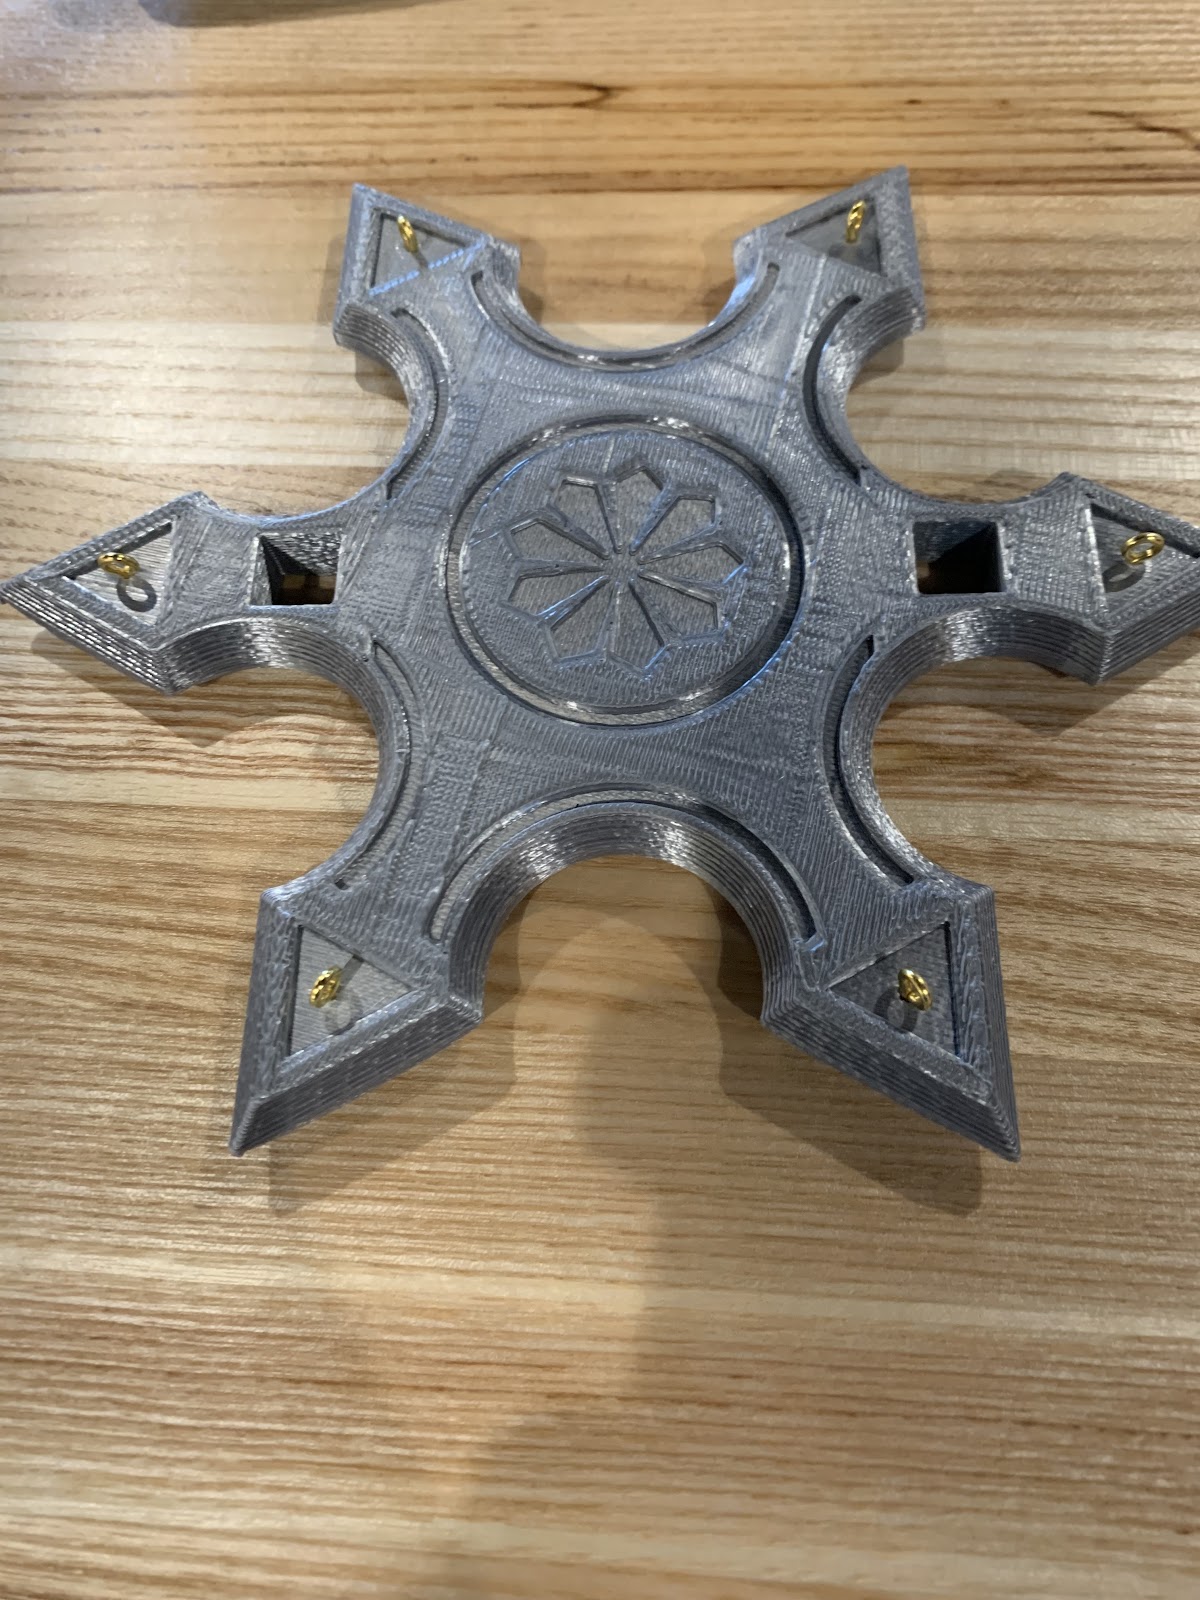

- Tie a string with a square knot connecting the hooks of the arcs together so they interlock. Make sure they are close enough that the top of each arc won’t interfere with the bases when put together.

- Tie a string of medium length to each of the six hooks on one of the bases. The string should hang loose at one end.

- Connect the arcs to their bases by placing the peg in the corresponding hole of each base with a friction fit.


- One by one, tie the hanging end of each string to the corresponding hook on the other base. The tension in the strings should cause the base to stand flat/horizontally.

- Cut off the excess string from each knot.

- Celebrate your Tensegrity Structure

Design Choices: (This is probably the most important part)
The first step in our design process was to find out what the shape of our bases and arch were going to look like

After some quick brainstorming we came up with a ninja star design for the bases and to have overlapping arches to be the supports
After getting this design approved we then started working out the dimensions on our parts in a rough sketch.

We then sketched out our designs inside a 15cmx15cm square which is double the size of the actual figure. We did this just to have some extra breathing room while designing the 2 separate parts.

Originally the shuriken base was too small,l so we then re-designed it so it would cover up more space inside the square.
After we got our final sketches done we had to get them approved by our teacher to make sure that they looked the best that they could be. He eventually approved our designs for the shuriken base and of the simple arch to make the tensegrity structure. Immediately after this, we went straight to Solidworks to start working on our 3D models. We then made a step-by-step instruction list to follow, so it would make the #D designing process easier


I worked on the arch, which was very simple to model.

While I was working on my arch my partner was working on the shuriken base.
When we completed the bases of the models we had to put some designs on the bases to make it seem less plain.


We later decided that the arch was a bit too short so we extended the arch’s shape to ore of a parabola.

We also put some designs on the parabola to make the design less plain.

When all the parts were finished we added all the parts together in an assembly in solidworks

Once we had all of the parts together we emulated the strings and added hooks

After this step we had all of the parts printed


We followed all of our construction instructions and our first tensegrity structure was complete.

Building the first tensegrity structure had major problems with inserting the hooks in on the parabola arches, so we had to put hot glue in the hole to reinforce the holes.


The other issue that we had was that our structure couldn't handle much weight being put in it, so we had our string start to warp.
The last problem we had was due to the outer support strings. Originally, the structure was designed to stand where the arches were perpendicular to each other; therefore, the bases would be slightly off-kilter from each other. Due to there only being six blades on each base, the strings would have to reach at a diagonal from the top hook to the bottom hook.
On the other hand, the dimensions of the tensegrity structure forced the strings to be upright so it made the arches, not at a perpendicular angle.
In order to prevent the inner string from stretching, we changed the knot on the inside to a square knot which helped on supporting the weight of objects on top of the structure.
After realizing what needed to be changed my partner and I wrote down some things that needed to be changed on a google doc and then we made these changes in Solidworks. One of these changes was to change the base to have more spikes and slim down the base to make it seem more like a shuriken.

Our following change came from how our hooks kept on slipping out, so in order to prevent this from happening we designed a triangle to fit into each arm of the shuriken. These triangles have 100% infill to make sure the hooks would not slip.


There were two modifications made to the arches. Firstly, we changed the shape slightly so there was a horizontal on the inner part of the peak. This allowed the hook a flat surface to screw into compared to a curved one as before. We also stretched the arch a bit to make the structure taller and sleeker.
The base was slimmed down from 1.00cm to 0.75cm for a slimmer design.

We also made designs on both sides of the bases so there wouldn’t be any empty space on the shurikens.
The last change to the design was changing the colors from grey to Trans Red and Black.
Once these new parts were printed, we followed our improved construction instructions and put together the 2.0 structure.


Gostou deste modelo? Crie uma conta grátis para salvar seus favoritos e voltar a eles depois.
Criar conta