Você está no 3DFinder
Buscamos em Thingiverse, MakerWorld e Printables ao mesmo tempo para te dar o melhor de cada uma.
Descrição
The Yarn Winder is a manually operated tool for creating center-pull yarn cakes from yarn hanks. It works best together with a yarn swift (not part of this model).
The goal was to design a model that requires only a few additional, non-printable parts and is reasonably easy to assemble. The general concept is inspired by Matthew LaBerge's Printable Wool Winder.
Printed parts
- 2 Wheel
- 1 Angle
- 1 Rotating_base
- 1 Spool_rod
- 3 Shaft_cap
- 1 Knob
- 1 Base_spool
- 1 Base_handwheel
Additional parts
- 6 Ball bearings 686-ZZ (6x13x5 mm)
- 4 Cylindrical pins ⌀6x50 mm, tolerance h8
- 1 M4x8 mm hex socket screw
- 1 M4 nut
- 5 o-rings 6x1 mm
- 1 o-ring 95x3 mm
- 1 o-ring 200x3 mm or similar size
- Board for the base plate
- M4 screws and nuts for mounting parts on the base plate
- Counterweight opposing the spool (e.g. magnets or nuts)
Equipment required for assembly and operation
- Allen wrench
- 4.5 mm drill for drilling holes in base plate
- Screw clamp(s) for attaching base plate to table
- Hand press or similar tool for pressing in ball bearings
Suggested printing equipment, material, and settings
- Nozzle: 0.4 mm
- Material: PETG
- Layer height: 0.2 mm
- Infill: At least 15%
- Support on build plate only
- Top contact Z distance for support material: 0.1 mm
- Print orientation: Z-axis up*
Printer used for prototyping: Prusa i3 MK3S
*Print orientation is very important because of the bearing seats and shaft fixtures. If the parts are printed in any other orientation, these features might not work properly.
Assembly instructions
Bearings
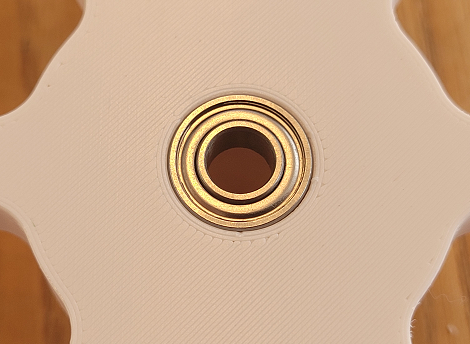
Using a hand press or similar tool, press a ball bearing into each of the two bearing seats of the Rotating_base and the two Wheels.
Spool assembly
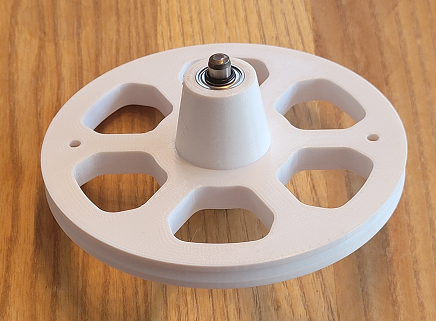
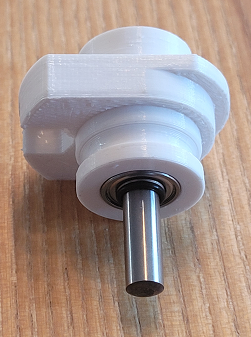
1. Push a cylindrical pin through both bearings of one of the Wheels. It is a tight fit and it will require some force to push it in. The pin should stick out by about 6 mm as shown in the picture below. Put an o-ring on that side of the pin.
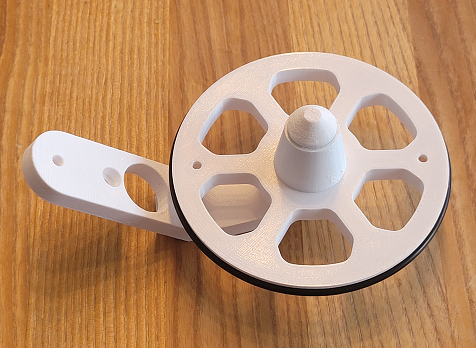
2. Press the other side of the pin into the whole on the Angle (Do NOT put an o-ring there). Put a Shaft_cap on top of the pin. Put the 95x3 mm o-ring in the groove of the Wheel.
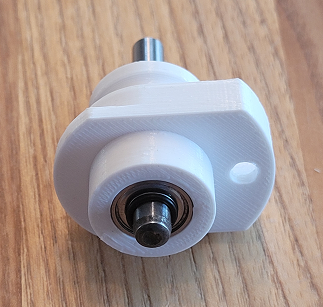
3. Push a cylindrical pin through both bearings of the Rotating_base. The pin should stick out by about 6 mm as shown in the picture below. Put an o-ring on the pin.
4. Also put an o-ring on the other side of the pin and press the pin into the Base_spool. Put a Shaft_cap on top.
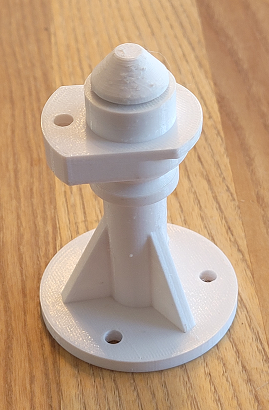
5. Put the Angle on top of the Rotating_base and turn it by 90°. Then fix it with the M4 screw and nut.
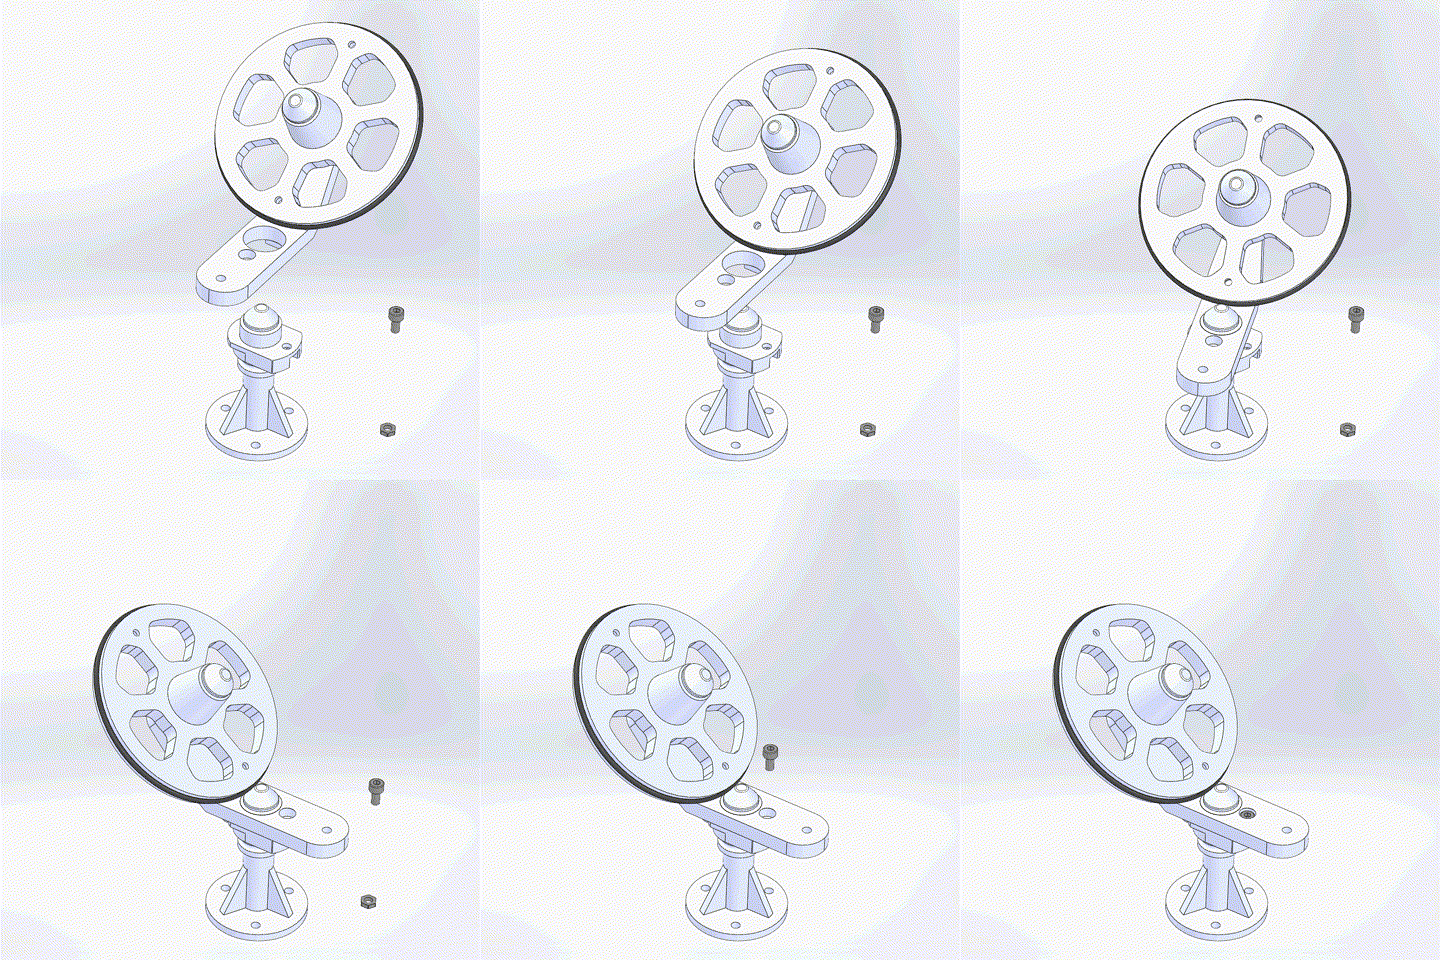
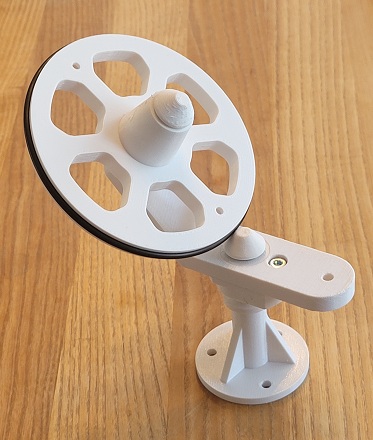
6. Attach a counterweight to the Angle, on the opposite side of the spool wheel. Anything goes, as long as it does not interfere with the o-ring transmission or the yarn thread. Use for example magnets, nuts, or washers. Aim for about 60 to 70 g when using printed parts with 15% infill.
Handwheel assembly
1. Push a cylindrical pin through both bearings of the remaining Wheel. The pin should stick out by about 6 mm as shown in the picture below. Note that it is not on the same side as before with the spool assembly. Put an o-ring on that side of the pin.
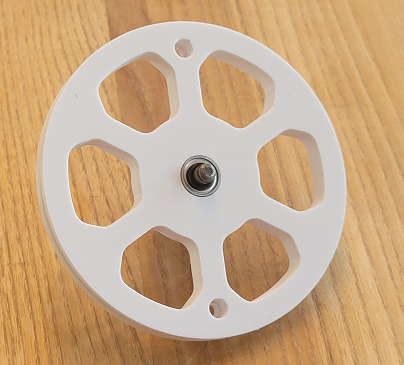
2. Also put an o-ring on the other side of the pin and press the pin into the Base_handwheel. Put a Shaft_cap on top.
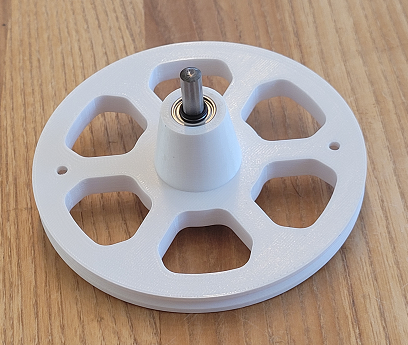
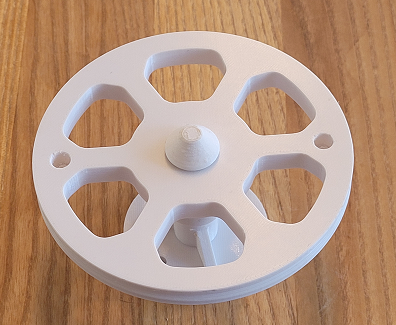
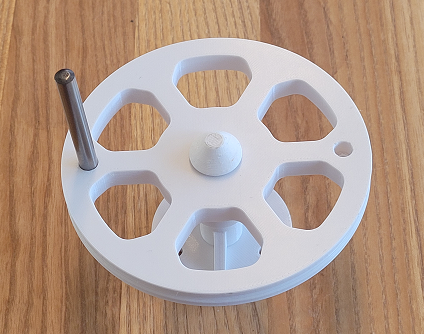
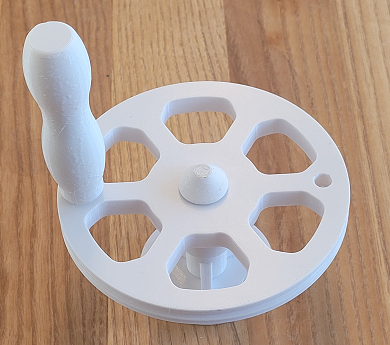
3. Press another cylindrical pin into one of the holes of the Wheel. Put the Knob over the pin.
Base Plate
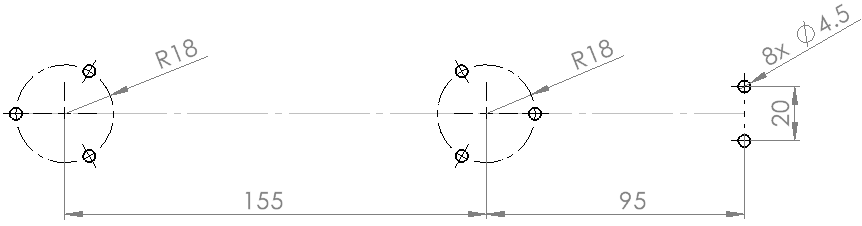
Drill holes in into a sufficiently large board according to the drawing below. Dimensions are given in millimeters. If using a different size for the big o-ring, adjust the distance between the two shaft bases accordingly.
Final Assembly
Mount the spool assembly, handwheel assembly, and Yarn_guide on the base plate using M4 screws. Press the Spool_rod onto the Wheel of the spool_assembly. The Spool_rood will stay in place due to the friction between the two conical surfaces. Clamp the base plate down onto something rigid when using the Yarn Winder.

Gostou deste modelo? Crie uma conta grátis para salvar seus favoritos e voltar a eles depois.
Criar conta