Você está no 3DFinder
Buscamos em Thingiverse, MakerWorld e Printables ao mesmo tempo para te dar o melhor de cada uma.
Descrição
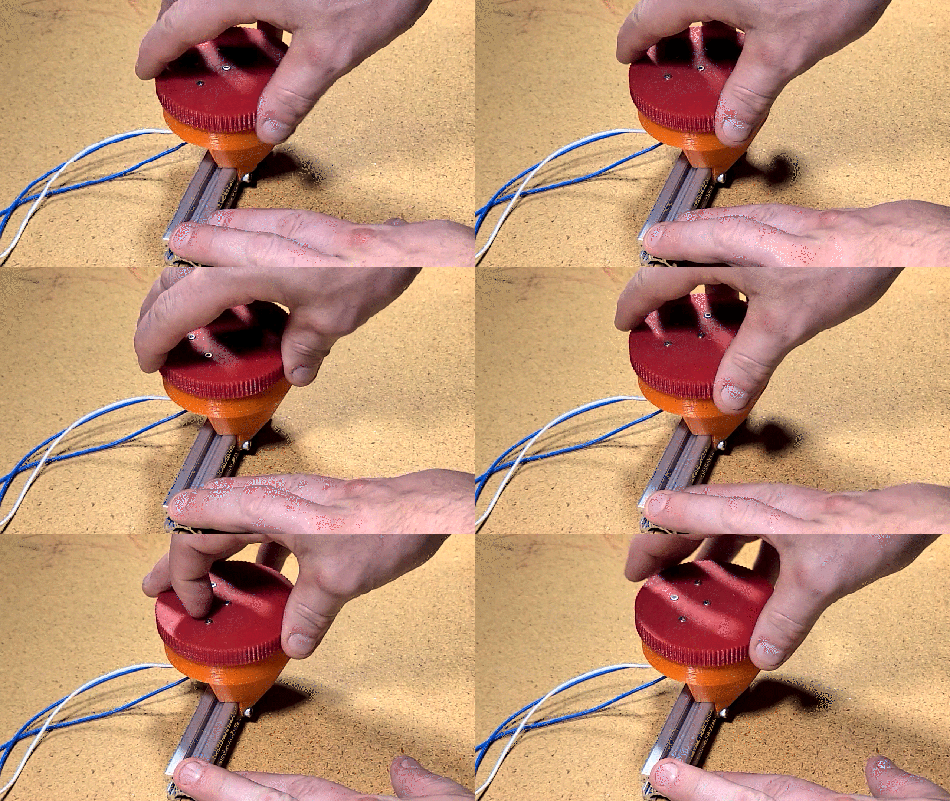
Bi-Directional, Rotating Digital Controller
Here we have a 3D-Printed Bi-Direction/1-Axis Disc Controller I made for my Arcade Prototype Controller. I've only used it for Stage/Unit select in games so far, but it also could be used in 2D platformers or autorunner games. You also could also create a second one to have two axes controlled with independent hands.
Tool Requirements
- 3D Printer
- Driver or allen keys appropriate for the M2.5 and M4 Bolts used
- Soldering Iron (if soldering directly to Limit Switches)
- Crimping Tool (if using connectors; I just use pliers for most crimp profiles)
- Something to stretch the Centering Mechanism between the Button and the Housing (e.g.- Tweezers)
Components
Prints
The Controller has three printed parts, with the lower two pieces available as a combined print requiring supports.
Button- I call it the “button” because it presses the limit switches (i.e.- a button), but it could also be called the disc. It rotates on top of the Housing, is bolted through the Housing to the Extrusion Mount, uses 2, opposing bolts to trigger the limit switches, and holds one end of the centering mechanism.
Housing- The center section where the limit switches are mounted. It also holds the opposing end of the centering mechanism.
Extrusion Mount- The bottom section. It is bolted to the Button to keep the Button from lifting off and fastens the whole assembly to 2020 Extrusion using two M4 Bolts and T-Nuts.
(Alternative) Combined Housing/Mount- I opted to design the controller so all faces could be printed cleanly without supports, but if you don't mind the rough surface under the supports you can save about 6 grams of material (accounting for support material) to print the Housing and Extrusion Mount as a single model. (This also allows you to use slightly shorter bolts.) I have not personally printed this model yet, but I don't see any reason why it shouldn't be a drop-in replacement; post a make and comment letting me know how the Combined Model goes.
Hardware
Bolts
- 1x M2.5x25 which attaches the Button to the Extrusion Mount (passing through the Housing without rubbing)
- 4x M2.5x16 for mounting the limit switches. My limit switches are just over 6mm thick, so if yours are thicker you will need compensate with the bolt length
- 1x M2.5x14 for the Button's half of Centering Mechanism
- 2x M2.5x14 attached to the Button for triggering the Limit Switches
- 1x M2.5x16 for the Housing's half of the Centering Mechanism
- Each of the above bolts also has a corresponding Nut
- Note- If using the Combined Housing/Mount, the bolts going through the Housing and Mounting can be 4mm shorter. I have about 2mm of stickout on the 25mm Thru Bolt, so a 20mm might work on that one
- 2x M4x8 Bolts with T-Nuts for attaching to the 2020 Extrusion
Electronics
2x Limit Switches- Note that these are limit switches and not Arcade Microswitches. They should have a lever on them and the 2.5mm mounting hole spacing should be about 9.25mm (that's what I got when I measured mine but looking at others online I'm guessing 9.5mm is the nominal spacing). I'm considering doing a remix that would be larger and allow for fullsize Microswitches to be used.
Wiring- Whatever you can get to work. I use AWG 22-gauge but you could use smaller.
Connectors- I soldered directly to the limit switches. I'm currently using a generic Arcade USB Encoder, so the other end requires JST-XH connectors in my case.
Other
Centering Mechanism- You'll need to attach something stretchy from the Button's Bolt to the Housing's Bolt. I'm using a rubberband and tension it with my Rubberband Wedge. I considered winding an extension spring instead but figured the rubberband was good enough.
Assembly
- After printing all components, prepare the prints as necessary (remove excess material, make sure bolt holes are the appropriate size)
- Connect/Solder wire to Limit Switches. If your setup supports it, wire the commons together so only need 3 wires.
- Bolt Limit Switches through Housing into captured nuts in the Extrusion Mount so their levers are slanted towards the center and facing the square hole in the Housing.
- Screw the Housing's half of the Centering Mechanism all the way through the Extrusion Mount and Housing's captured nut.
- Run Limit Switch Wiring through the Round Hole behind the Limit Switches.
- Screw the two Bolts for triggering the Limit Switches and one Bolt for the Centering Mechanism through the top of the Button into the captured nuts on the inside of the Button.
- Depending on your clearance, now may be the best time to attach the Centering Mechanism. Put the Button on top of the Housing (all Bolts should be on the Lever side of the Limit Switches in the housing) and turn the assembly upside down so you can see the square window.
- Retract the Button just far enough to get your Rubberband/Spring through the Square Hole onto the Button's half of the mechanism and stretch it over the Housing's half. Tweezers (or the like) are recommended.
- Once the Centering Mechanism is attached and tensioned well, make sure the Button is pressed back down against the rest of the assembly and run the thru bolt from the top of the Button through to the captured nut on the underside of the Extrusion Mount. Tighten it just enough to take out any slop while keeping it loose enough that the Button spins freely and snaps back to center when released.
- Attach to 2020 Extrusion with M4 bolts and T-Nuts through holes at the bottom of the Extrusion Mount.
- Connect wiring to whatever inputs you're using and enjoy!
Additional Information
As usual, I did most of this design on stream, starting with a slightly different version here. Unlike a lot of other projects, though, I did the redesigns off stream and explained them across two different Project Update Compilation videos here and here.
So far I've used this Print for menu navigation in Muse Dash, and unit selection in Tooth and Tail.
Bi-Directional, Rotating Digital Controller

Publicado em 17 de out de 2022
Gostou deste modelo? Crie uma conta grátis para salvar seus favoritos e voltar a eles depois.
Criar conta