Você está no 3DFinder
Buscamos em Thingiverse, MakerWorld e Printables ao mesmo tempo para te dar o melhor de cada uma.
Descrição
Description
You would like to have a Ring Light but you lack money, maybe motivation, or you just want to use the potential of your 3d printer?
Then I have here for you the first 100% printable Ring Light with Tripod!
*of course, the light source cannot be printed
Before you start
Although the product is fully printable the LED lighting cannot be printed. So you need to buy LED strip and power supply. The ring has an opening for the cable at the back. If you are interested in how the product is assembled, see the Assembly chapter.
To buy an LED strip and a power supply, I suggest the following link:
- More expensive and better version (I use this one):
[https://www.amazon.de/dp/B07K38KYB9/ref=cm_sw_r_apa_i_A5XBCYYCGG4YY4NZ0MPP_0?th=1](https://www.amazon.de/dp/B07K38KYB9/ref=cm_sw_r_apa_i_A5XBCYYCGG4YY4NZ0MPP_0?th=1)
- Cheaper version:
[https://www.ebay.com/itm/124739509864?mkcid=16&mkevt=1&mkrid=711-127632-2357-0&ssspo=4vubfd_srrm&sssrc=2349624&ssuid=&var=&widget_ver=artemis&media=EMAIL](https://www.ebay.com/itm/124739509864?mkcid=16&mkevt=1&mkrid=711-127632-2357-0&ssspo=4vubfd_srrm&sssrc=2349624&ssuid=&var=&widget_ver=artemis&media=EMAIL)
Of course, you can choose any other LED strip you want.
Dimensions
- Folded: 28 x 19,5 cm
- Unfolded and fully exstended: 73 X 19,5 cm
Material
The product is designed for printing with PLA.
PETG works as well.
For the entire print you will need about 600g of filament, and it will print in 30 hours.
With the MK3s, you will be able to print everything in just tree rounds.
The entire stand costs only around 20€.
Assembly

Stand assembly pieces
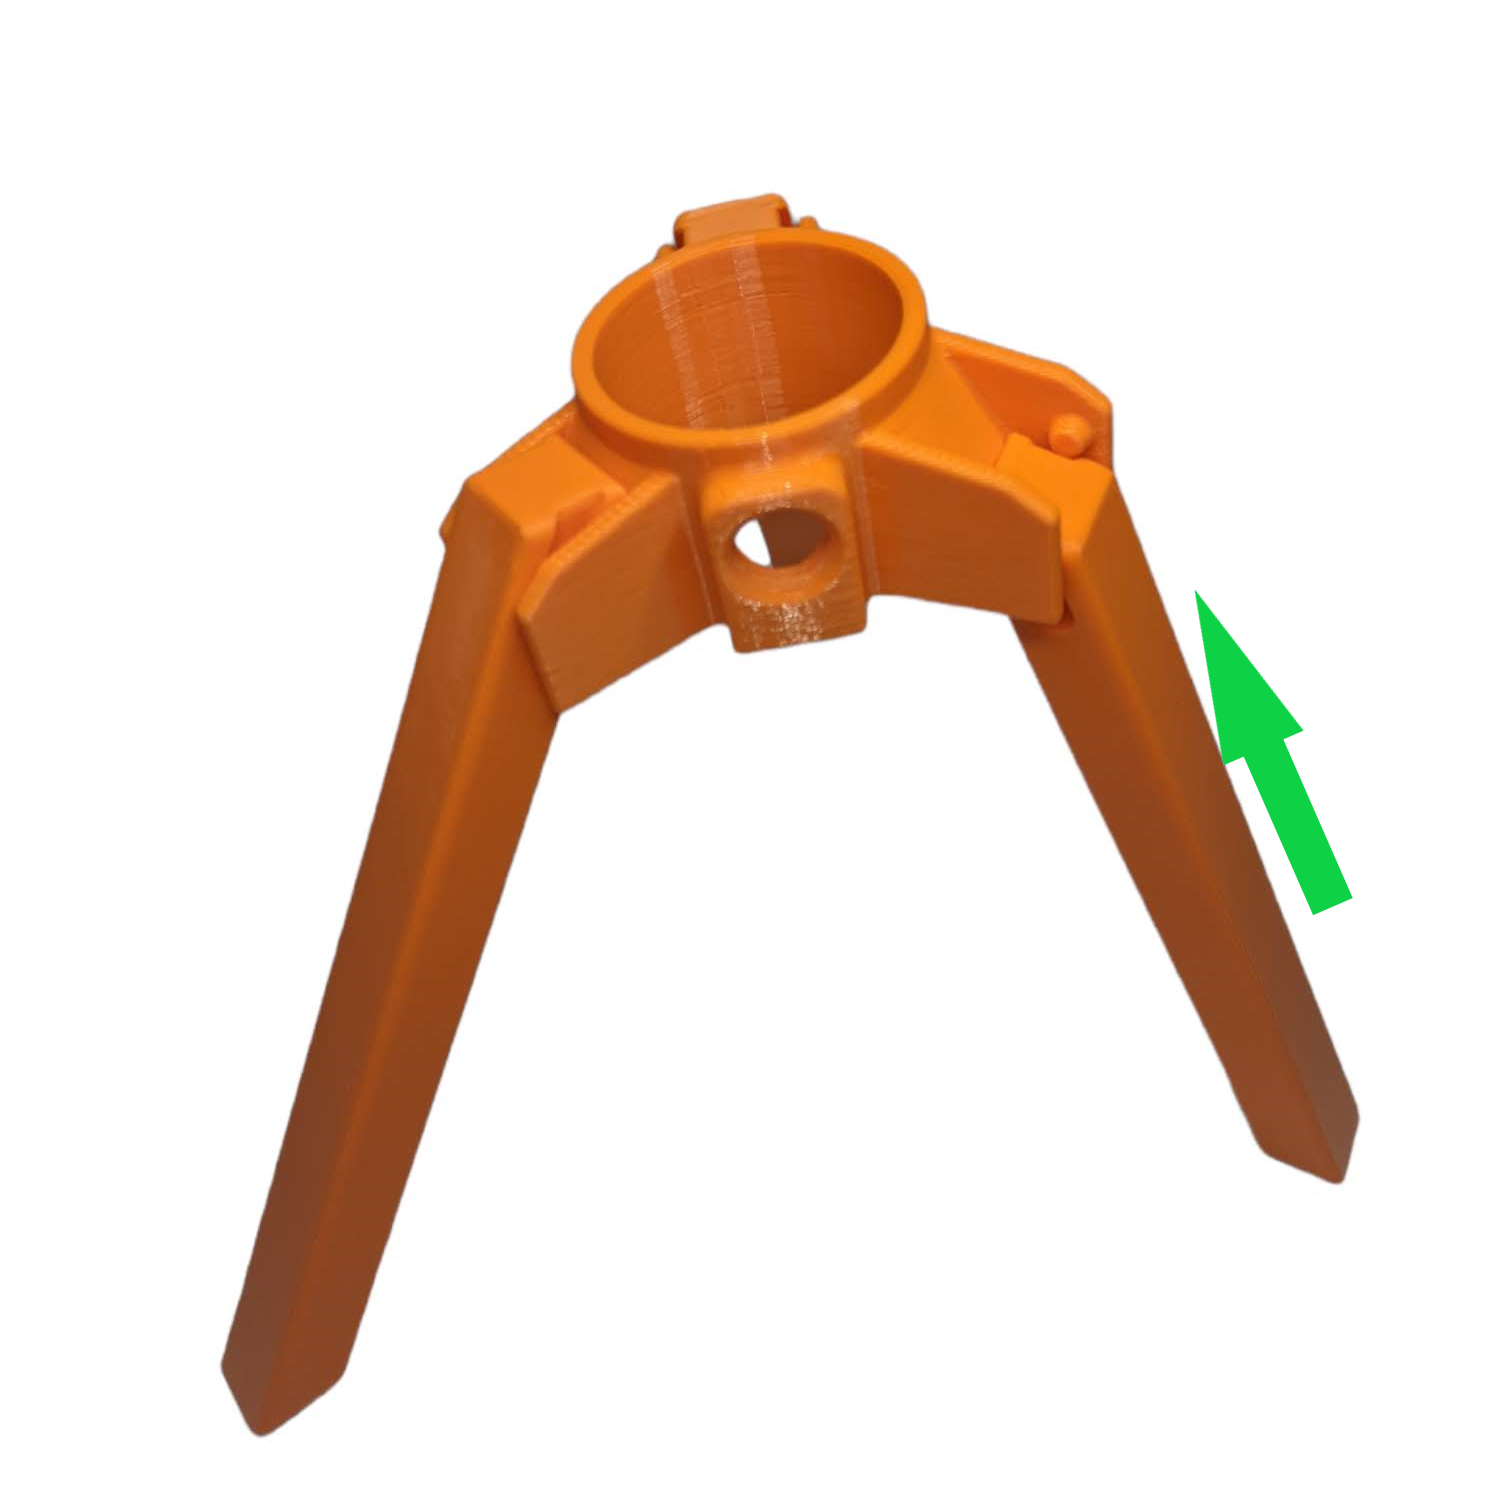
Step 1:
|
Take the Legs and assemble them together with the Base.
Step2:
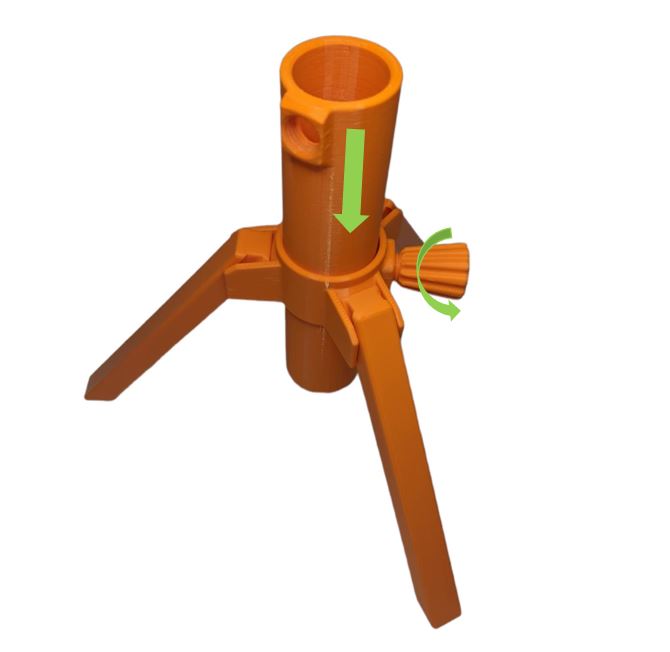 |
Insert Extension_1 into Base and tighten them with Base_Screw.
Step3:
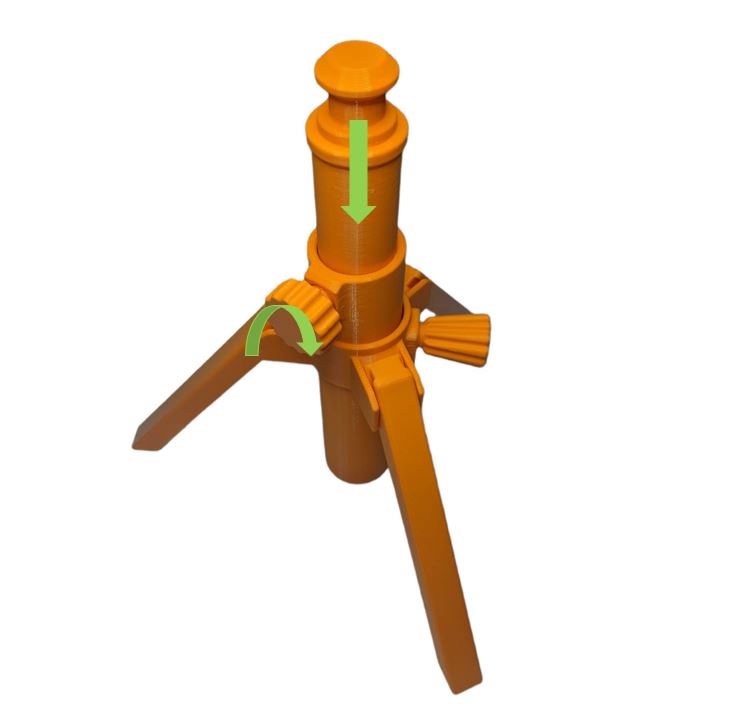 |
Insert Extension_2 into Extension_1 and screw them with Extension_1_Screw.
Step4:
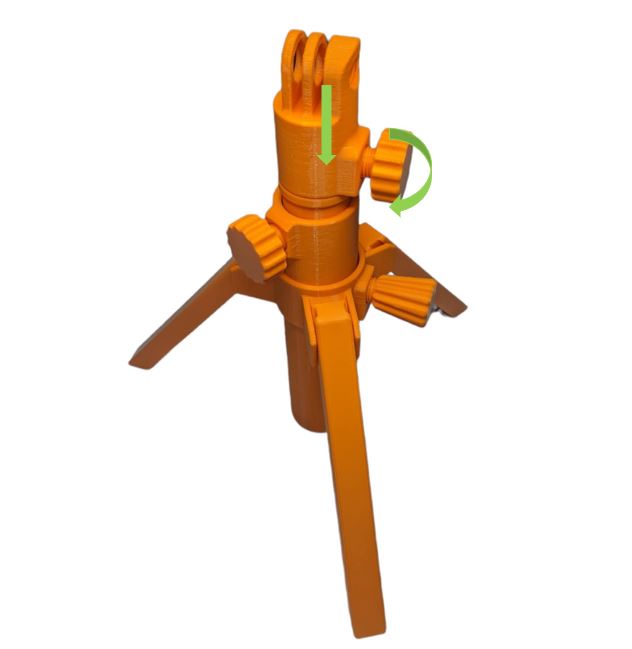 |
Place the Swivel_Base on Extension_2 and fasten them with the Swivel_Base_screw.
Step5:
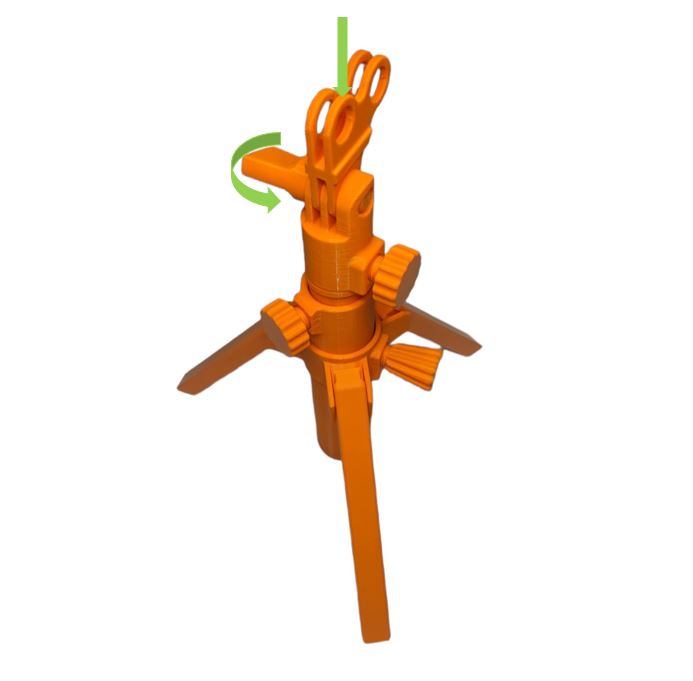 |
Place the Adapter_Mount on the Swivel_Base and fasten them with the Adapter_Mount_Screws (pay attention to the orientationof the Adapter_Mount part).
Step6:
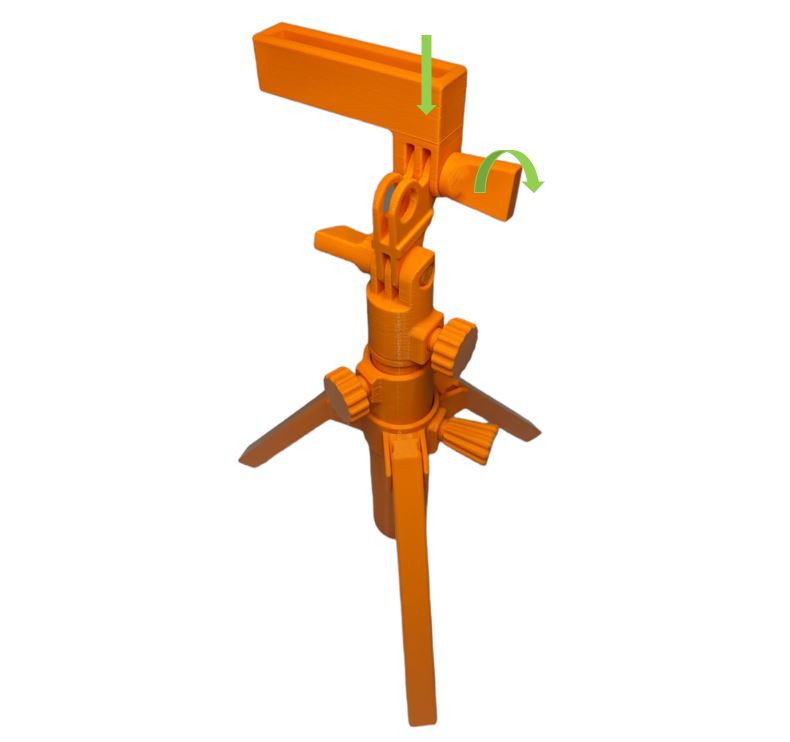 |
Place Phone_Stand on Adapter_Mount and fasten them with the Adapter_Mount_Screws.
Step7:
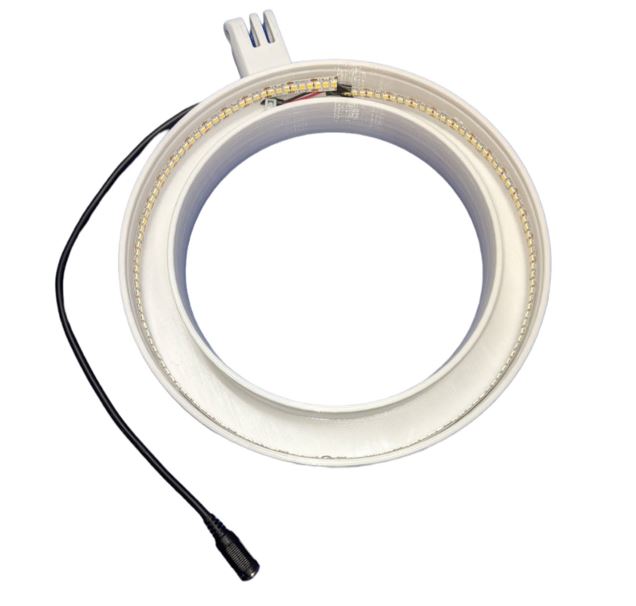 | 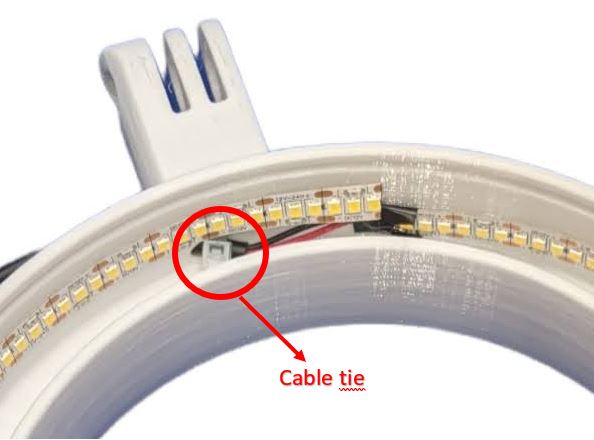 |
Take the Ring part and stick the LED strip into it. You need to cut the strip to 60 cm for one turn (one turn will be enough for powerful LED lights). Glue it to the outer inner edge. Add a small tie to the cable inside the ring so you don't accidentally pull the cable out of the ring.
Now check if the LED strip works. If it works, then proceed to the next step.
Step8:
 |
Put Cover_for_Ring_Transparent on Ring. With a little effort, you will succeed.
Cover_for_Ring_Transparent must be transparent!
Step9:
 |
Place assembled Ring and Phone_Stand (optional) on Adapter_Mount and fasten them with the Adapter_Mount_Screws.
Step10:
Enjoy!!
Want an update?
I know that there is always room for improvement so let me know :)

Gostou deste modelo? Crie uma conta grátis para salvar seus favoritos e voltar a eles depois.
Criar conta