Você está no 3DFinder
Buscamos em Thingiverse, MakerWorld e Printables ao mesmo tempo para te dar o melhor de cada uma.
Descrição
Originally published here: Gravity Falls vanes by tato_713 - Thingiverse. For the more detailed models clic here.
This is, as accurate as I can do it, the vane that appears in the Gravity Falls intro, and through the whole series as well. A big wooden question mark decorated with the letters "W H A T" in the place of the Cardinals. In the last 3 episodes, or the mini tv-movie, the vane was replaced by one shaped like the character Bill Cipher, bearing the letters "B I L L" instead. I added also a cheaper vane based on a monochromatic shape of Bill pointing to one side.
The models here are the free and flat version of these vanes, for the more detailed, carved with a false relief of wood, clic the here to go to the Cults page, where you can buy that model.
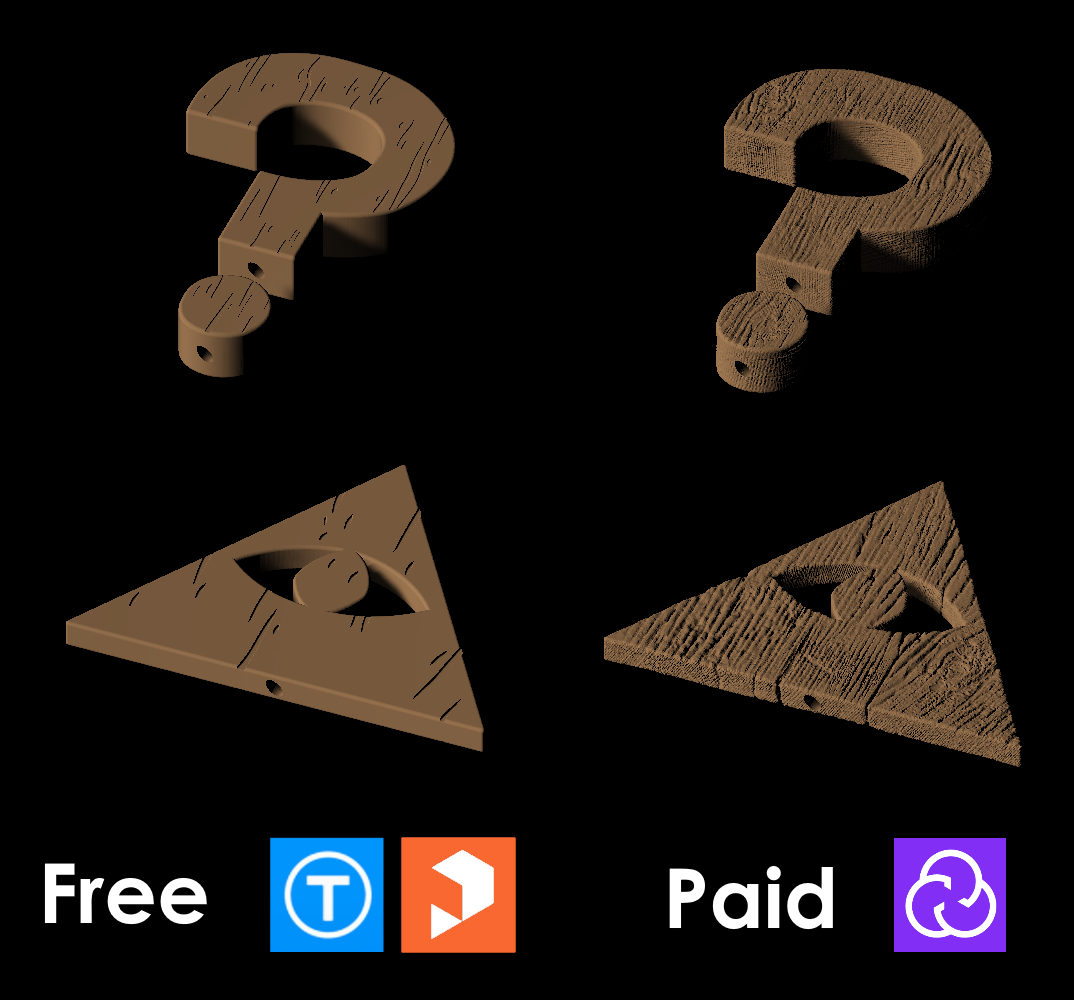 |
| Differences between the models here and the paid model on Cults |
Of the models I designed here, none of them is meant to work as a proper vane, just to spin randomly with some wind.
Currently, I cannot afford to make any of the big models, so that I used a print-screen of a rendered model for the thumbnail image. If anyone want to print any of these I will be happy to share the results.
The axis assembly is the same for any of the three versions. These are the common parts:
- Base: "base.stl" or "base_2.stl" alternatively, but not both. This is used to to attach to the roof where you want to place it, and hold the smooth rod bar up.
- A steel smooth chromed 8mm rod: this is a required part you need to have/buy. It's a standard rod for CNC or 3D printing like this one. You can use it in various lengths, but I think the minimum should be 30cm. The rod works as an axis, and the chromed surface has minimal friction with the upper parts. I scrapped out one from an old printer.
- Bushing: This part supports the vane over the rod, standing in the minimal contact points with it, smoothing the movement as much as possible without bearings. Every bushing length I did with a"_i_7cm" version; which stands for "internal 7cm". That means that its hole for the rod is 7cm deep, making the vane taller, but a little less stable.
WHAT vane
The "vane_1" models. This is the vane standing the whole serie on the top of the smallest roof of the Mystery Shack. I divided the model in parts that enters in a standard 20x20cm bed printer. You can print each part in halves or in one piece as long as the previous needed parts:
- vane_1_p1_h1.stl
- vane_1_p1_h2.stl
- vane_1_p2_h1.stl
- vane_1_p2_h2.stl
- vane_1_p3_h1.stl
- vane_1_p3_h2.stl
- vane_1_p4_h1.stl
- vane_1_p4_h2.stl
- letters_base.stl
- letters_bar.stl (can be replaced by a 5mm threaded rod)
- W.stl
- H.stl
- A.stl
- T.stl
 |
| Parts assemble diagram. |
BILL vane
The "bill_2" models. The standard WHAT vane is replaced by this one in the final episodes (Weirdmageddon). I divided the model in parts that fit within a standard 20x20cm bed as well.
- bill_2_p1.stl
- bill_2_p2.stl
- bill_2_p3.stl
- bill_2_p4.stl
- bill_2_p5.stl
- bill_2_p6.stl
- letters_base.stl
- letters_bar.stl (can be replaced by a 5mm threaded rod)
- B.stl
- I.stl
- L1.stl
- L2.stl
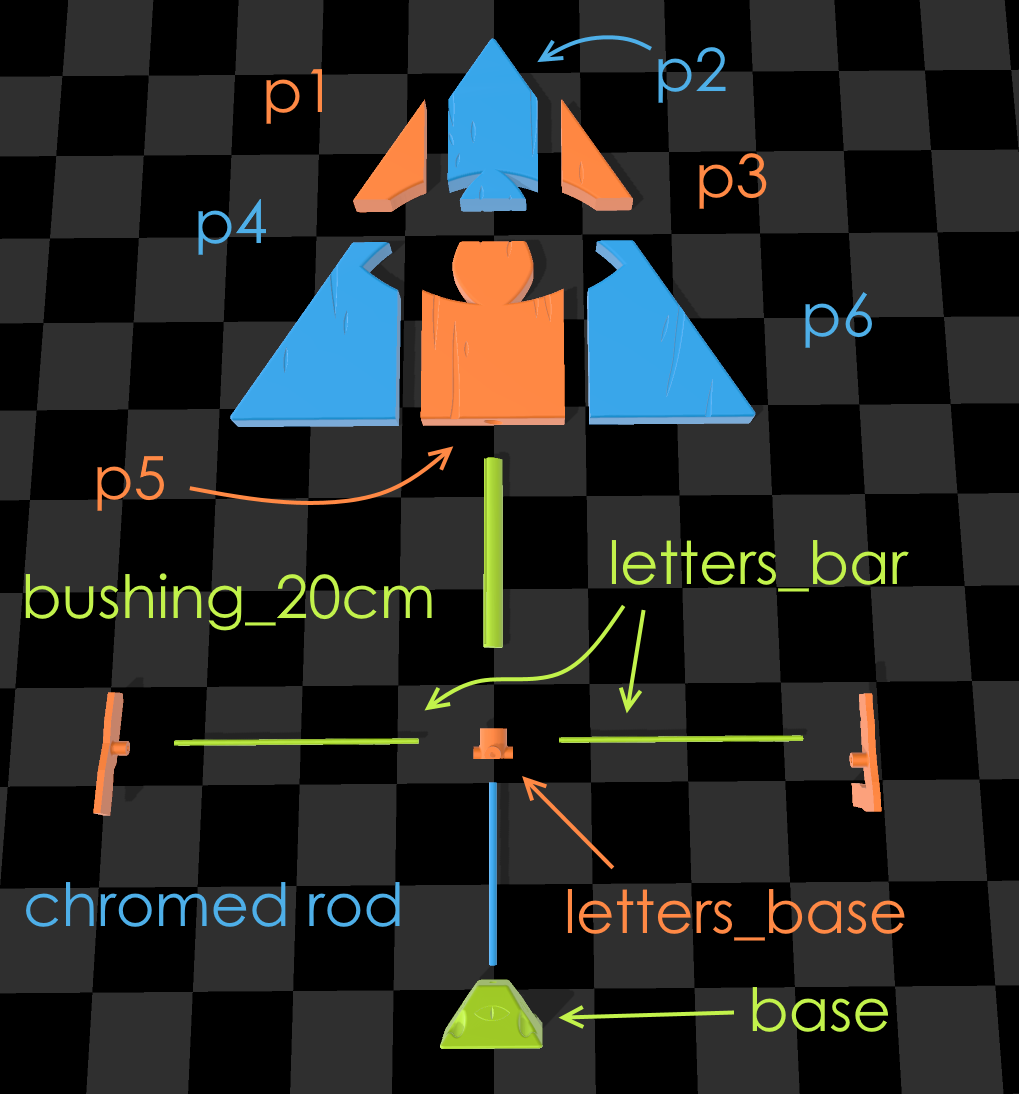 |
| Parts assemble diagram. |
Flat Bill vane
The "bill_1" models. This model does not represent a vane from the cartoon. This was the first I designed, and the only one printed and installed yet. It is also the cheapest, because it's just a 3mm sheet. I divided the model in parts that enters in a standard 20x20cm bed printer. I also uploaded the dxf file for CNC milling or laser cut, in the paid version.
- bill_1_p1.stl
- bill_1_p2.stl
- bill_1_p3.stl
- letters_base.stl
- letters_bar.stl (can be replaced by a 5mm threaded rod)
 |
| Parts assemble diagram. |
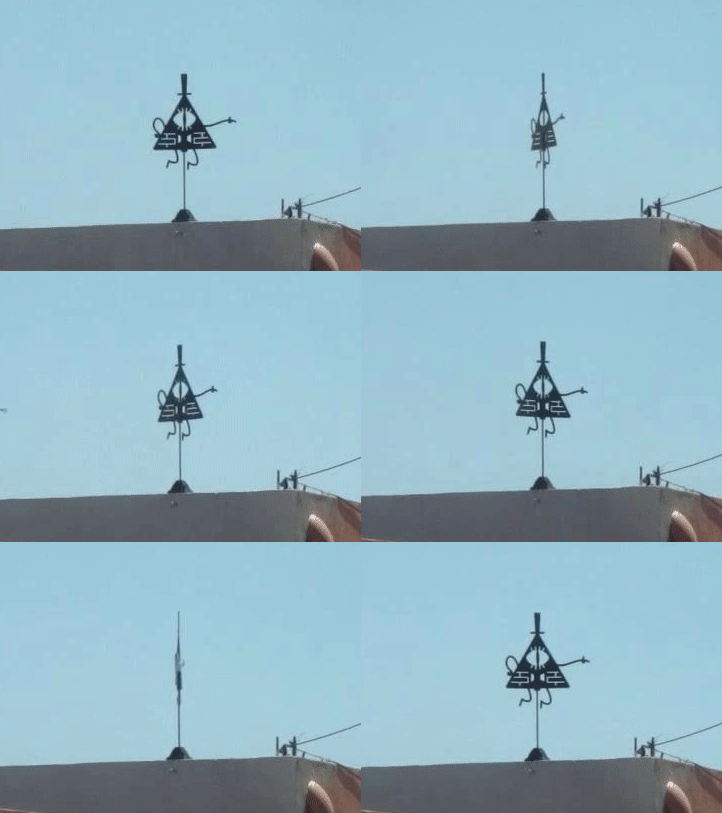 |
| Mounted vane. |
Gostou deste modelo? Crie uma conta grátis para salvar seus favoritos e voltar a eles depois.
Criar conta