Você está no 3DFinder
Buscamos em Thingiverse, MakerWorld e Printables ao mesmo tempo para te dar o melhor de cada uma.
Descrição
This is not required for MK3S fw 3.13 and MMU2 fw 3.0 and above or MMU3 as you can now disable the MMU via the printer's menu.
----
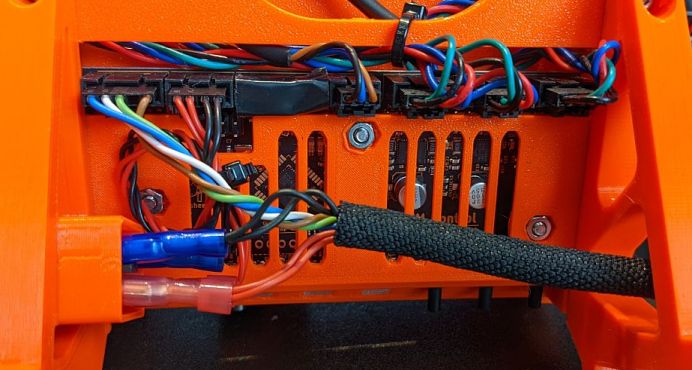
I often bypass my MMU2s with a direct filament feed, but it is annoying to have to disconnect and reconnect the power cable. To make it easier, I have added a DPST switch inline with the power and ground wires. As a place to mount the switch, I have added an area to my 22.5 degree MMU2 brackets where a switch can be inserted.
Mounting the switch in the bracket works best with the underslung control panel. If you decide to use my brackets and add a switch to an MMU with the electronics in the original position, please post a picture showing how you routed the cables and if you had to add any extension.
Since the MMU2 was not designed for a power switch, proceed with this mod at your own risk and do not turn the MMU on or off while the printer is powered on.
Update Feb 2022: There is information in the comments about switching the data lines instead of the 12v power lines. I think that is probably be safer but I haven't had a chance to look into it yet.
Required Parts
- DPST (Double Pole, Single Throw) switch to fit a 13mm x 19mm opening.
For reference, I am using a KCD1-104 from Amazon.
- Unused MMU2 power cable from kit.
The MMU2 kit comes with two power cables, one for the MK3/S and one for the MK2.5. To keep the cable length as long as possible, I used the spare to go from my switch to the MMU2s, keeping the original cable as long as possible.
- Terminal connectors to fit your switch so the cable can be disconnected for MMU2 removal.
Instructions
Ensure power is fully disconnected from the printer and MMU or removed the MMU and cables while modifying.
- Cut the MMU2 connector off all 4 wires in your power cable, close to he connector.
- Twist the two red (positive) together and attach a terminal connector for the switch.
- Twist the two black (negative) wires together and attach to a terminal connector. It is best to use different colours for positive and negative.
- Connect your spare power cable to the MMU2 to determine the length required to reach the switch with some slack.
- Cut the non-MMU2 end off the spare cable and attach terminal connectors the same as steps 1. and 2.
- Connect as shown, and follow your switch's wiring diagram to ensure you are connected hot to hot and ground to ground.
Notes
I prefer the switch on the right side of my printer, so the model is oriented to print for the right side. If you prefer it on the left, it can be mirrored in Prusa Slicer before printing.

Gostou deste modelo? Crie uma conta grátis para salvar seus favoritos e voltar a eles depois.
Criar conta