Você está no 3DFinder
Buscamos em Thingiverse, MakerWorld e Printables ao mesmo tempo para te dar o melhor de cada uma.
Descrição
This is designed to hold 3x 18650 Li-ion batteries, 3x 110x60mm solar panels, an MPPT solar charge controller, and a LoRa radio for Meshtastic or Meshcore.
I've only tested it with an NRF52-based radio (Heltec T114) but it's possible with the PowerSaving firmware for MeshCore and a good, sun-rich deployment, that an ESP32-based radio could work too!
By request, I've also made a variant with a less-vertical solar panel angle - 30° from vertical vs 15° in the original. It's much wider as a result, and I have not printed a test piece, but I expect it will print and assemble just fine. Might even assemble easier with more space inside ;)
All pictures in this build page are from prints from the "Original" design from the downloads tab.
My final build of this is now complete and outside - it survived the rain, snow, and is now up a tree - everything has been positive. The relatively steep angles of the panels keep snow clear, and the battery level has been consistently rising, even with overcast days and being in a position to receive, at most, 6hr of New England winter sun.

Features
Strong rope tie-off point on top, relying on layer line strength (rather than inter-layer adhesion if the attachment point was raised above the top)
Drainage holes to ensure water does not collect in the cavity, and either seep into the enclosure or start to rot the rope used to hang it!
Three cradles internally for 18650 batteries, with zip-tie channels if you don't trust adhesive in the outdoor heat
The solar panel mounting recess is slightly deeper than the solar panels are thick, so if you put the completed print face down on a table, the solar panel won't touch and get scratched up
The bottom plate has a ton of zip-tie channels to secure your radio, RF cable, other wires, etc.
The bottom plate sits a few mm recessed from the bottom edge of the main body - this helps to reduce water ingress, and also gives a lip if you wish to silicone caulk the two parts together.
Two versions of the bottom plate exist, one for an N-type female bulkhead and the other for SMA.
The SMA version is 3mm thick at the connector - ensure that the bulkhead connector you buy can accept a “panel thickness” of at least 3mm (just under 1/8" or 0.125")
Mounting location on bottom lid for a “Contact Info” tag.
Printing Tips
Print with ASA for outdoor usage.
Printed with “Strength” settings at 0.2mm layer height. The outer walls should be all walls, no infill.
Use a brim! Especially with the main body, but a brim can be helpful with the bottom cap too
The main body needs to be printed on its “top”, with the inside of the enclosure facing up as it's printing.
Supports are needed only touching build plate, only for the rope attachment point area.
Your slicer may want to also add supports for the drainage hole edge, that's fine too.
Some slicers may want to add really tall supports for the slight overhang caused by the solar panel indentation. That support was 100% not needed in my experience.
The bottom cap needs to be printed with the zip tie openings touching the build plate.
Before you assemble! A tip:
Unless you have tiny hands, the space inside is quite tight. It's possible to do wiring and zip-ties when the solar panels are already installed, but it's MUCH easier to take care of as much as possible before installing all of the solar panels.
I've done it both ways -- I highly prefer waiting to install the solar panels until the end!
Rough BOM
Solar panels: Amazon 10pc 5V 200mA Epoxy Solar Panel Kit - 110mmx60mm:
[https://www.amazon.com/dp/B0B51HZ9D9](https://www.amazon.com/dp/B0B51HZ9D9)
Qty 1 of - Charge Controller: AliExpress CN3791 6V MPPT Solar Panel Regulator Controller Charger:
[https://www.aliexpress.us/item/3256806206336159.html](https://www.aliexpress.us/item/3256806206336159.html)
MAKE SURE YOU CHOOSE THE 6V VARIANT (or find one specifically for 5V somewhere else)
Qty 3 of - Ideal Diode (for solar panels in parallel): AliExpress XL0401 Ideal Diode Module 3V-26V 5.5mΩ:
[https://www.aliexpress.us/item/3256809348516068.html](https://www.aliexpress.us/item/3256809348516068.html)
Batteries: Panasonic NCR18650B 3400mAh 4.9A Battery (or similar):
[https://www.18650batterystore.com/products/panasonic-ncr18650b](https://www.18650batterystore.com/products/panasonic-ncr18650b)
BMS: Any 1S 18650 battery BMS should work. I used:
[https://www.aliexpress.us/item/3256810467076760.html](https://www.aliexpress.us/item/3256810467076760.html)
To mount bottom to main body, quantity three of each:
M3x5x4 “VORON” Heat Set inserts: [https://www.amazon.com/dp/B0CDH36ZMX?th=1](https://www.amazon.com/dp/B0CDH36ZMX?th=1)
M3x8mm Stainless steel hex socket cap machine screws: [https://www.amazon.com/dp/B0DJQGLY9J?th=1](https://www.amazon.com/dp/B0DJQGLY9J?th=1)
Tag for contact info: Amazon “StayMax Anodized Aluminum Engraving Blanks Tags Stamping Blank Dog Tags with 2 Holes 25 Pack (Black)”: [https://www.amazon.com/dp/B0B86XJFP9?th=1](https://www.amazon.com/dp/B0B86XJFP9?th=1)
To mount “contact info” tag: qty. 2 of M3 x (5 or 6mm long) self-tapping screws: [https://www.amazon.com/dp/B07ZH9GJWP](https://www.amazon.com/dp/B07ZH9GJWP)

Stuff you need - screws, extra wire, and heatshrink not shown
Build instructions
Print out main body & your choice of bottom cap
Install three M3 heat set inserts into the Core bell from the bottom, one for each inside lip
Take a JST cable that comes with your radio and solder an additional length of wire to each leg (if needed) so they are about 12" long.
Solder/connect this modified cable to the output of the MPPT charging module (labelled BAT)
This cable will power your radio, and needs to be long enough so the MPPT charging module can be installed on the top of the Corebell, while your radio can be installed on the bottom lid.
Since the 18650 batteries are also connected to the output of the MPPT charging module, the batteries will still be connected to the radio even if the charging module is not getting any input from the solar panels
Solder about 6-8" of wire to the "Solar Input" holes on the MPPT charging module.
This cable will eventually be used to connect to one solar panel
The other end of these cables will be left dangling, for now.

Prep the batteries
Standard disclaimer - working with Li-ion batteries can be dangerous. I'm not holding your hand here. I highly encourage the use of a BMS.
Ensure the wires from the batteries are long enough that when the batteries are installed, the wires to the MPPT charging module allow it to be mounted to the top of the Corebell, as well as have enough slack so the MPPT module can hang out the bottom of the Corebell while you're still constructing it.
Make the wires be as tall as the Corebell, as a good starting point.
Safely connect all three 18650 batteries to the OUTPUT of the MPPT charging module.
The module I purchased has both JST headers and standard 0.1" pitch header locations for connecting the batteries. Your choice of how you terminate the battery leads and connect to the MPPT charging module. I had to make a "Y" cable for two batteries to connect to one of the JST connectors on the charging module.
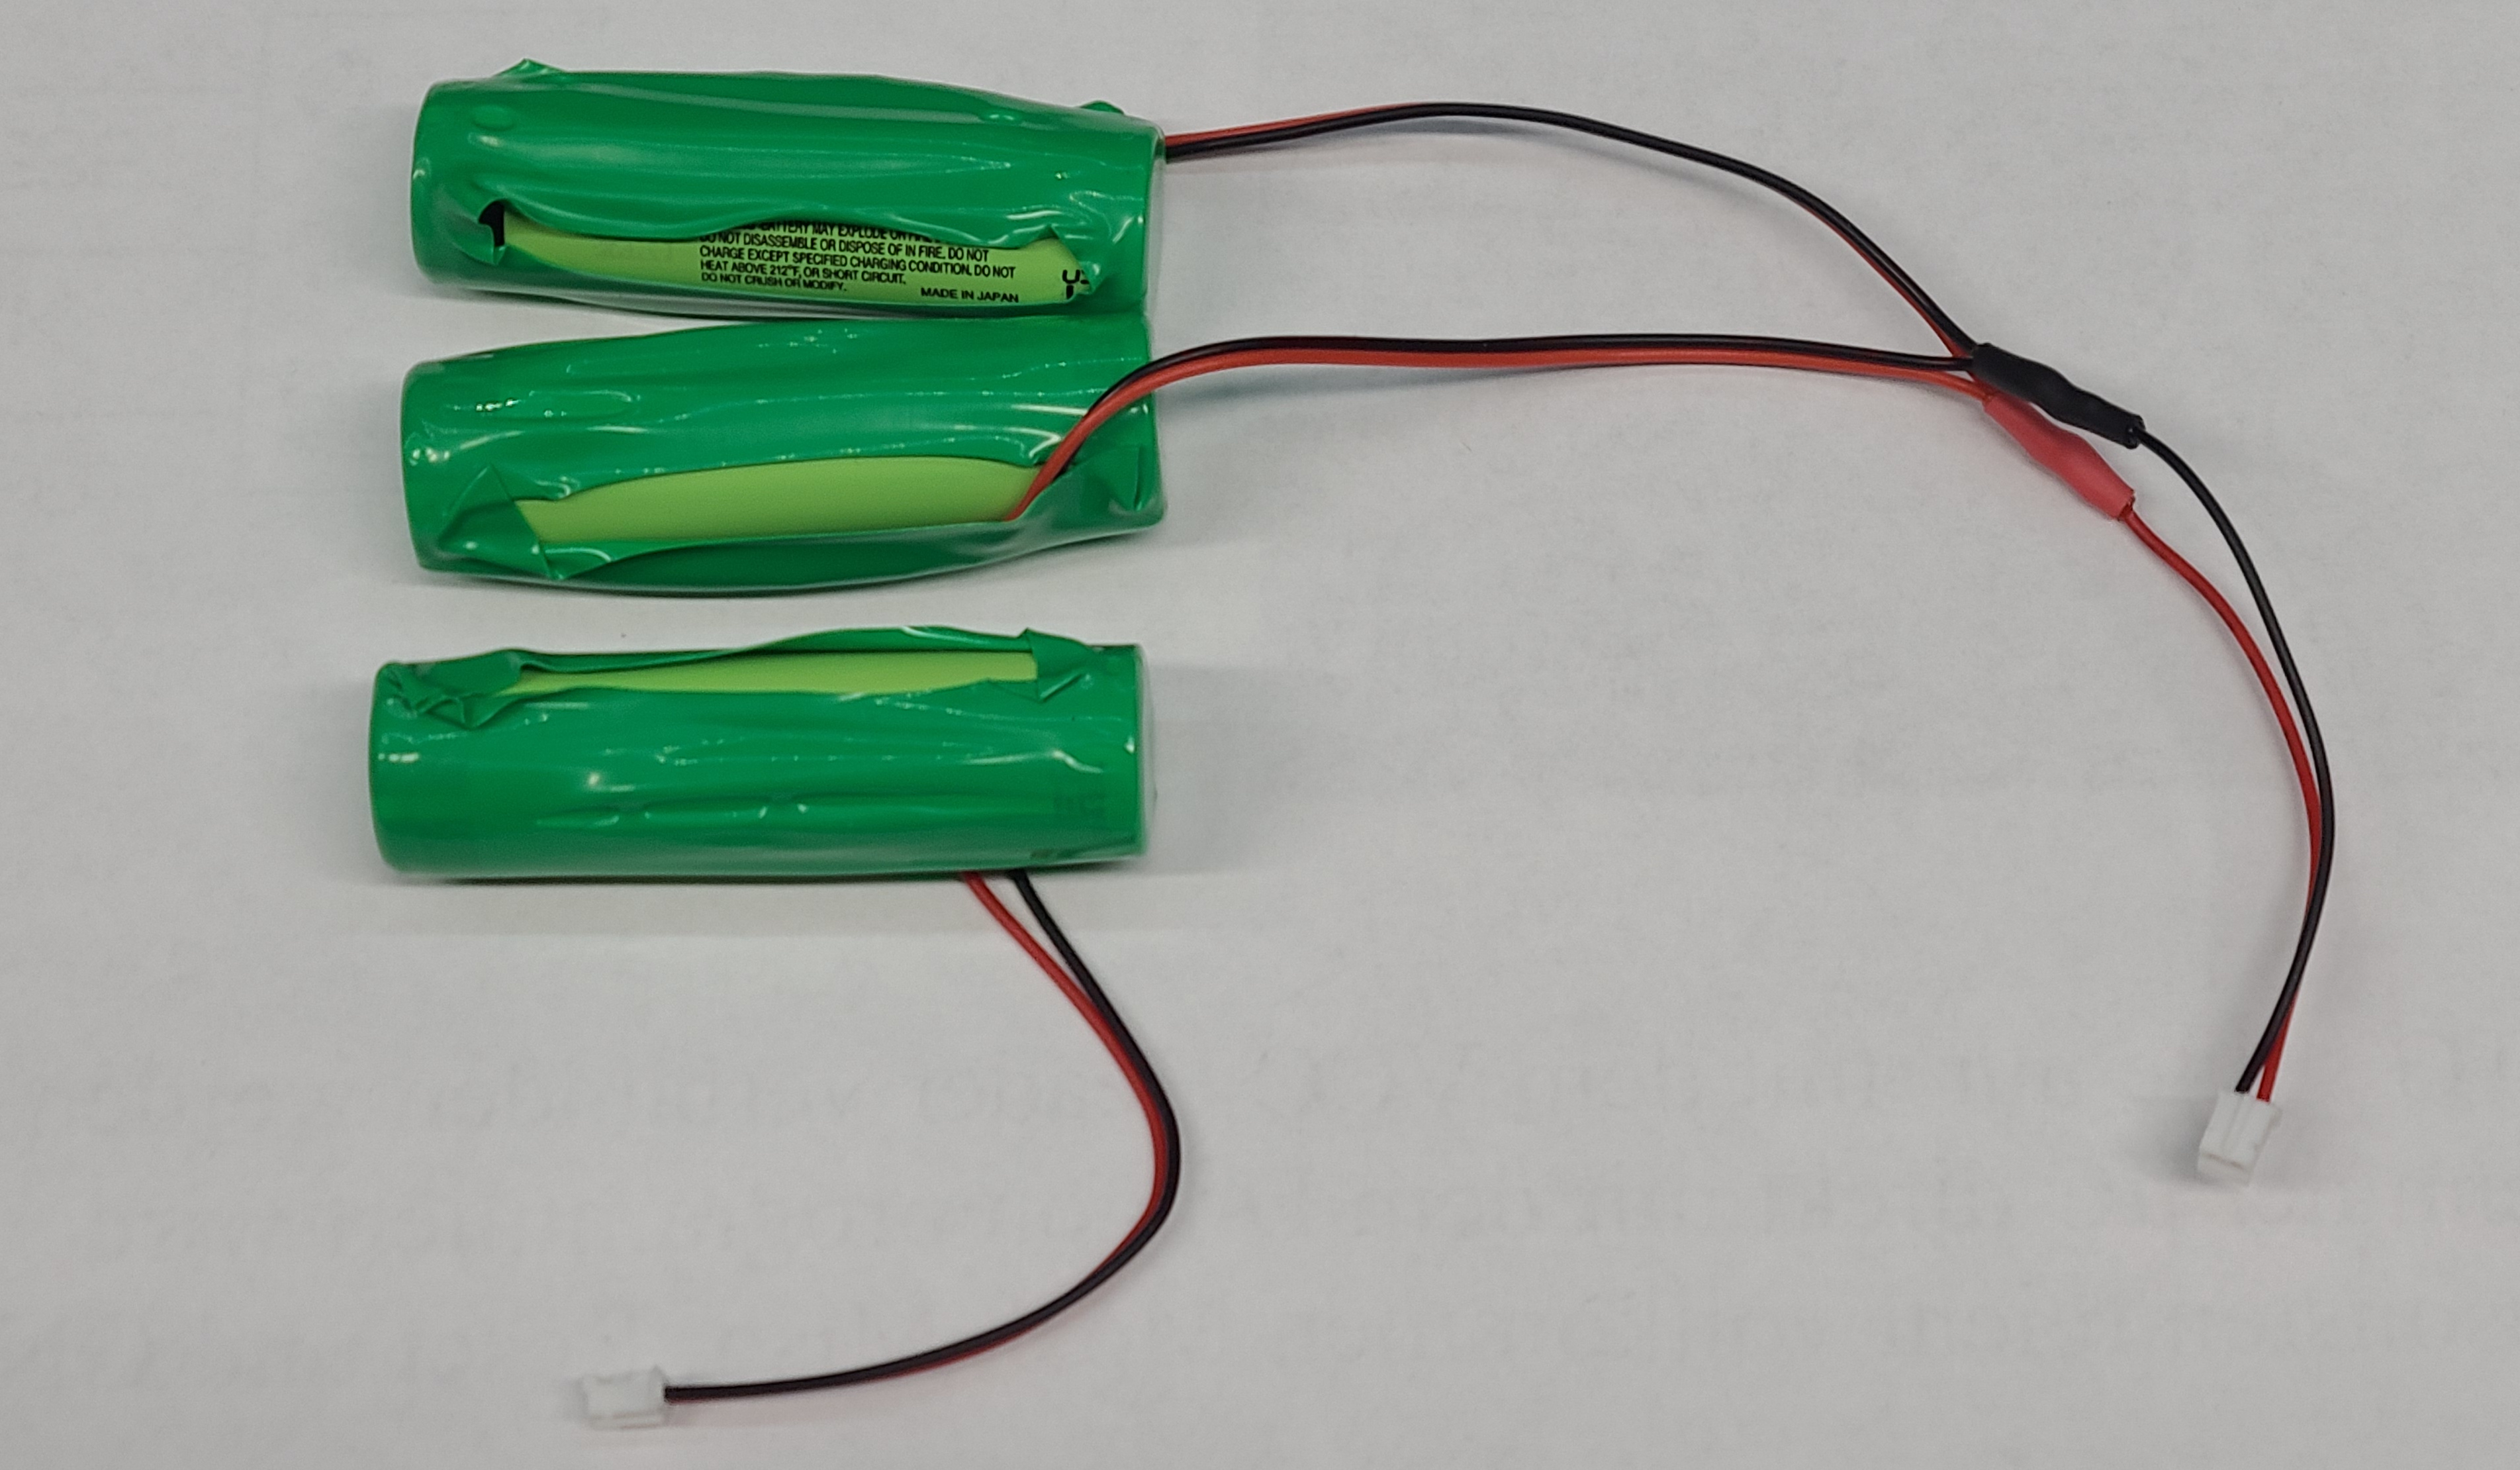
Using zipties and/or hot glue (or epoxy, other favorite adhesive, etc) - mount the 18650 batteries in their mounts inside the Corebell. Don't mount the MPPT charging module yet, even though it is connected to the batteries.
Set aside
Checkpoint 1

You should now have a main Corebell body with three 18650 batteries installed, connected to the MPPT charging module, and two long wires from the module freely hanging. All of the wires should be able to be tucked inside the Corebell (aka, you didn't run any wires through the holes where the solar panels mount).
Prep your solar panels
Connect + and - of a solar panel to the Input side of the ideal diode module
Repeat twice more, for a total of three solar panels connected to three separate ideal diode modules
You can either use wires to connect (easiest) or solder the modules pads directly to the pads of the solar panels. For the panels and modules I purchased, the spacing is perfect for this. You just have to ensure your soldering iron can deliver enough heat to transfer through the module and melt the solder on the solar panel pad:

Take a cable that came with your MPPT charger and cut it exactly in half. Solder each cable to the output side on a solar panel assembly (VOUT and GND in the picture above).
Pass the long wire soldered directly to the MPPT module (earlier) through a pass-through hole and solder to the last solar panel assembly.

Connect the JST side of the cables on the first two panels to the MPPT charger module (currently floating around freely inside the Corebell)
Checkpoint 2

You should now have all the batteries installed in the Corebell, the MPPT module hanging in a nest of wires, with three solar panel assemblies connected to the MPPT module via wires going through the pass-through holes. If you dry-fit the final product by holding all three solar panels in their final positions, no wires should be outside the Corebell.
Finalize main body
Pass a zip-tie through the tunnel at the top of the Corebell (the holes printed into the part, specifically for passing zip ties through), and use it to secure the MPPT charging module in its final position at the top.
Hopefully you didn't rush ahead and affix the solar panels yet! This step is far easier if you can stick your fingers through the solar panel pass-through holes :) don't ask me how I know
You should now only have a single cable with a JST plug (for the radio!) on the end of it that is freely dangling in the Corebell. Make sure it's not cinched down to anything and will still be able to reach out to the bottom lid to plug into the radio
Use outdoor rated silicone, construction adhesive, hot glue, epoxy, etc to affix the solar panels to their locations.

MAKE SURE YOU GET A NICE BEAD OF YOUR ADHESIVE TO COMPLETELY SURROUND THE PASS-THROUGH HOLE
THIS IS WHAT MAKES THE FINAL PRODUCT WATER TIGHT
If you want to be double-sure, once your main adhesive is set, run a bead of outdoor silicone (window/siding type) around the outside edges of the solar panels to seal them
Finalize everything
On the bottom lid, if you are using a name tag to provide identification (or whatever) to your Corebell, affix that now with 2x self-tapping M3 x 5-6mm screws.
Secure your antenna to the bottom lid, then connect the u.FL to your radio.
Use the zip-tie mounting tunnels to secure both the radio and the RF cable so the cable is not pulling on the relatively weak u.FL connector of your radio. I sometimes also put a dab of hot glue on this connector.
If you decide to mount your radio with the power connector on the bottom, make sure you know which connector is the "battery" input vs the "solar" input!
On the T114, the connector right under the "USER" button is the BAT input connector
Connect the remaining power cable from the MPPT controller to the power input of your radio.

Use three M3x8mm socket cap hex screws to affix the bottom lid to the main body of the Corebell
(Very optional) Add a bead of silicone in the lip created between the main body and the bottom lid, if you are paranoid about water ingress.
Fin
The Corebell - A Meshcore/Meshtastic Solar Node

Publicado em 11 de mai de 2026
Gostou deste modelo? Crie uma conta grátis para salvar seus favoritos e voltar a eles depois.
Criar conta