Você está no 3DFinder
Buscamos em Thingiverse, MakerWorld e Printables ao mesmo tempo para te dar o melhor de cada uma.
Descrição
Educational Clock - from simple to less so
This is a project for a friend of mine who didn't want to buy a whole set of toy clocks for her class. The base design is intended to be as simple as possible. The attachment mechanism doesn't raise the back of the clock so without it, it will lay on the table flat as a board.
Base design:
The base design is just the clock dial and the two hands. The minute hand clips into the dial first. The cliping mechanism here is a little stiff. I pressed it in by using a pair of pliers and compressing the clips a little before inserting. Thats pretty tough on the layers, so for strength i recommend to print the hands at a 0.1mm layer height and in a more flexible material like petg. After that the hour hand is inserted into the minute hand in the same manner.
Simple Mechanism:
If you want the clock hands to set themselfes when you turn the minute hand (the hour hand is to stiff to turn), you need to print the case, the transmission, the minute axle and the hour axle. After assembly of the base design, assemble the case as seen in the picture.

Its important to align the keying on top of the axles as seen in the image so the hands fit in the correct way. Set the base design to 12:00 and set it on top of the mechanism. Push in the middle until the axles key into the hands. This can get a little fiddely. Some fidgeting and jiggeling might be required. After that push the clips into the holes on the back of the dial. They should click into place.
Less simple Mechanism:
In case the clock is intended as a whole project or is supposed to be a regular functioning clock, assemble the simple mechanism like described above and insert the other gears in the following order:
Place the gear named ReductionMotor2 like this:

Place the gear named ReductionMotor1 like this:
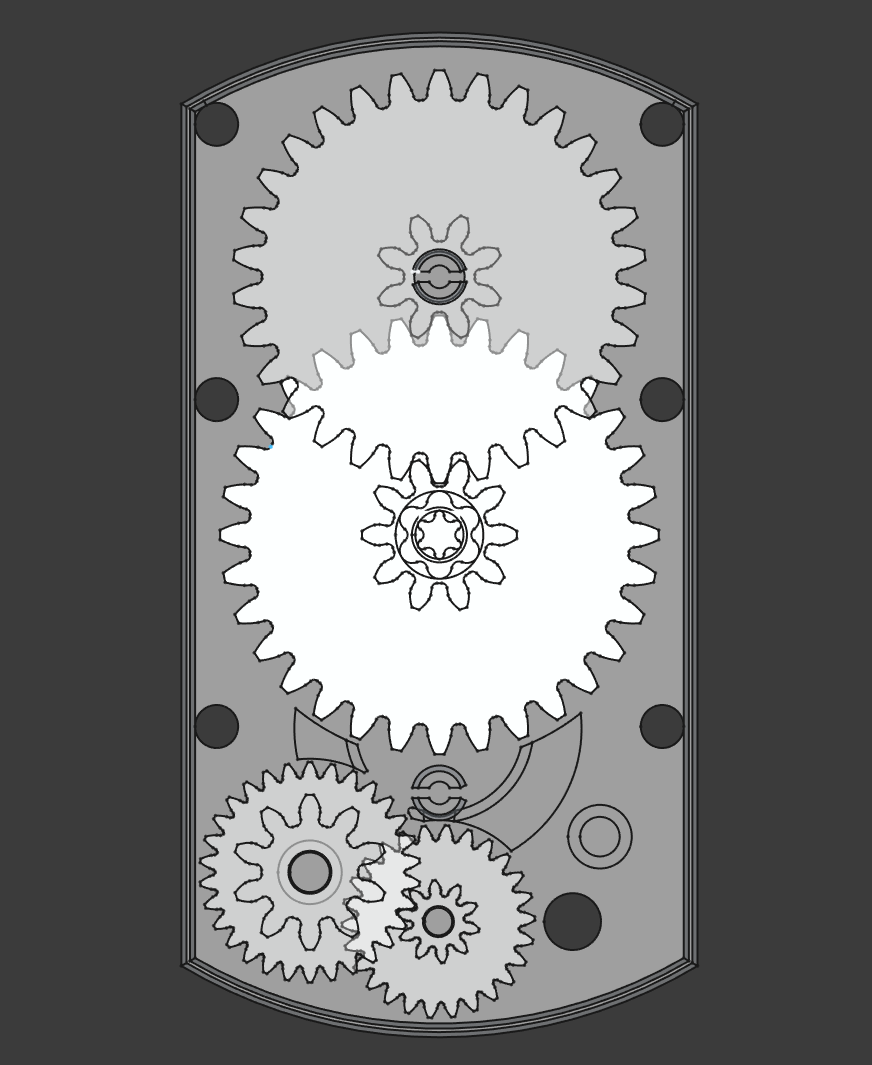
Place the gear named OuterShaft like this:
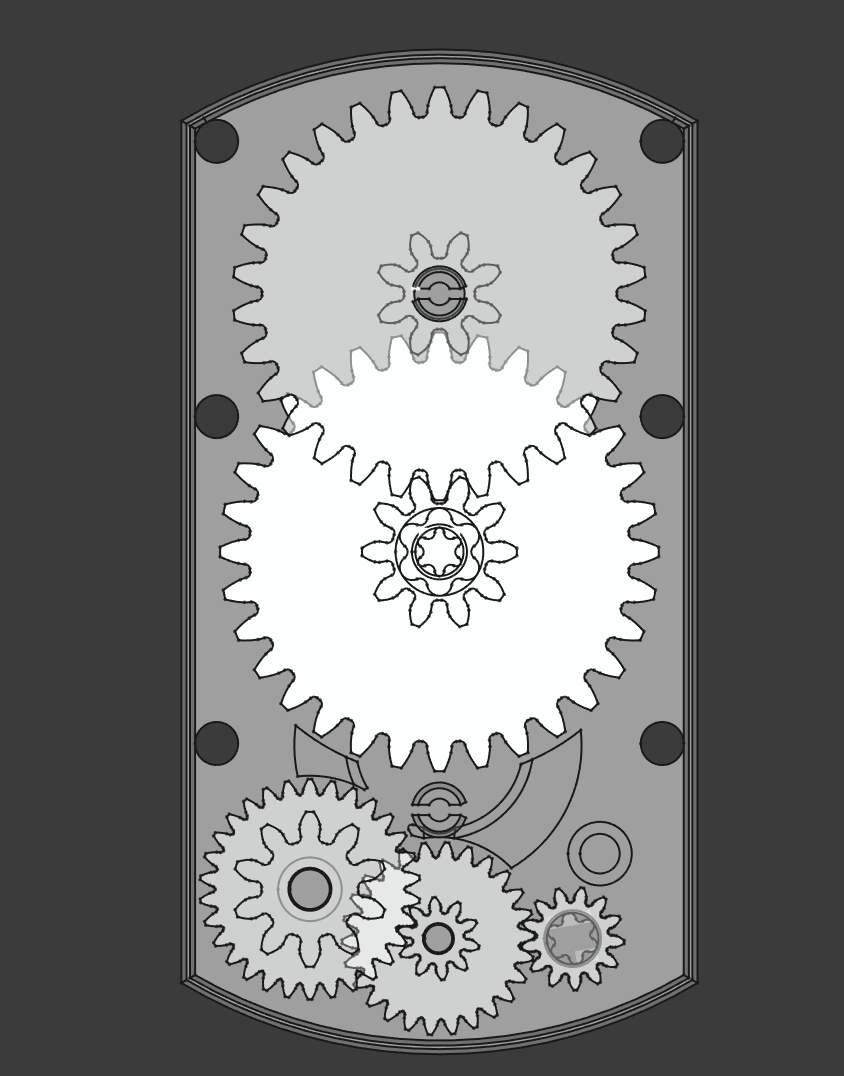
It will protrude a little out the back. To have it sit flush put the whole thing on a table so it hangs over the edge a little. Take the gear named OuterGear and key it onto the back of the OuterShaft:
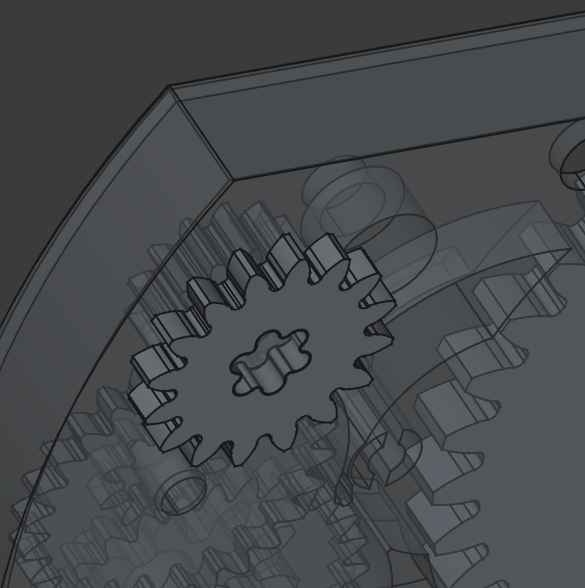
Now take the HoldingGear and the RingGear and insert as depicted:

Finally add the base design as described in the section “Simple Mechanism”. The extra holes in the case are meant to attach any self designed mechanism to drive the clock with the outer gear.
Additum
- The outer gear drives the minute hand with a 1:6 reduction
- The outer gear has a module of 1 mm and 16 teeth
- I printed everything with a .4mm nozzle and petg
Simple educational Clock with optional Mechanism

Publicado em 7 de set de 2025
Gostou deste modelo? Crie uma conta grátis para salvar seus favoritos e voltar a eles depois.
Criar conta