Você está no 3DFinder
Buscamos em Thingiverse, MakerWorld e Printables ao mesmo tempo para te dar o melhor de cada uma.
Descrição
Currently this is a WIP, so it will be updated from time to time…
Be sure to flash the Wemos before connecting the stepper motor or you run the risk of overheating it, the firmware turns of the power to the stepper motor when not in use, without this the motor will be powered and with the risk of overheating.
My first version is still available at Thingiverse: [https://www.thingiverse.com/thing:4889111](https://www.thingiverse.com/thing:4889111)
Simple BOM:
| 1 | Printed PCB |
| 1 | DC-005 (DC Female 5.5*2.1mm) |
| 1 | Wemos D1 mini (check pin layout) |
| 1 | A4988 (stepper driver) |
| 1 | DC-DC Step down module |
| 1 | 28byj-48 5 or 12v (stepper motor) |
| 2 | M3 threaded inserts or nuts (To secure the stepper motor) |
| 2 | M3 short bolts if you use threaded inserts or 20mm in length if using nuts (about 0.87 inches) (To secure the stepper motor) |
| 1 | 9v Power Supply or more, depending on stepper motor of choice |
| 4 | 4x 8 pins in a row (male header pins) |
| 1 | 4 pins in a row (male header pins) |
| 1 | 2 pins in a row (male header pins) (optional) |
| 1 | Female Dupont cable (optional) |
| 1 | Paper clip thickness of 1mm (about 0.04 inches) (optional) |
If you want to socket all components you also need the same amount of female headers as male header pins listed above.
I'd recommend going with socketed, makes it easy to swap something if broken.
Parts needed, in more detail and with links
Printed PCB can be found at my GitHub repo:
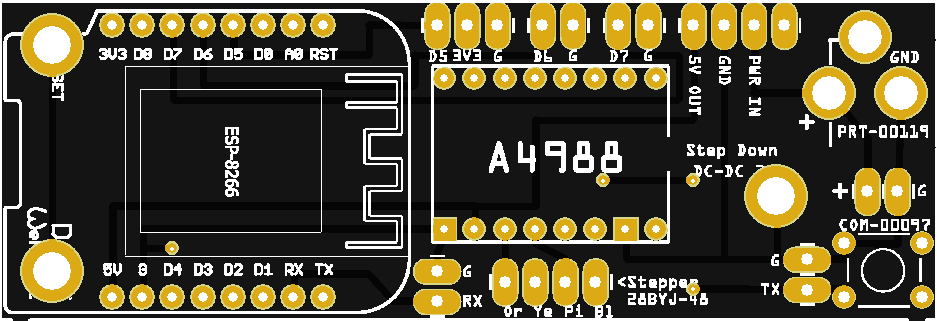
[https://github.com/R34LiAM/HA-Roller](https://github.com/R34LiAM/HA-Roller)
The Gerber files actually contains 3 PCB's as one PCB, saves a bit of money when ordering, just separate them using a side cutter…
DC-005 5.5 X 2.1mm Dc Power Female Jack Connector Socket Mount
Wemos D1 mini / clone
DC-DC 12-24V To 5V 3A Step Down
A4988 Driver Module for Stepper motor
28byj-48 12v stepper motor or 28byj-48 5v stepper motor
I've ordered both 5V and 12V steppers and strangely most of the 5V steppers have more torque, so be aware that some suppliers sell low quality steppers, your mileage may vary…
Power Supply 5.5 X 2.1mm Dc Power Male Jack Connector
Polarity should be: outside=negative, pin=positive.
A 7V - 12V power supply should be enough.
I use old 7.2V 300ma power supplies that came with a cheap IKEA screwdriver, they work great (they were actually the cheapest CE branded power supplies I could find) I like my house so I'm happy to pay extra for the CE classification.
I also use "USB Step up converters" like this one: [https://www.aliexpress.com/item/1005007341759767.html?spm=a2g0o.order_list.order_list_main.5.78a91802RcNIYG](https://www.aliexpress.com/item/1005007341759767.html?spm=a2g0o.order_list.order_list_main.5.78a91802RcNIYG)
Togheter with any USB charger 5v 1A.
+ a bunch of pin headers…
Often comes supplied with the microcontroller and the driver module, but you'll need:
4 with 8 pins
1 with 4 pins
1 with 2 pins
also, though optional, depending if you want to be able to manually operate your roller blind…
A paper clip.
A female Dupont cable (~10cm) that can be cut in half and soldered to the "action" button.
One or two rubber bands (preferably of silicone so they don't dry out).
A piece of nylon string of desired length.
A small weight (end knob) that keeps the string hanging straight.
3D Printing a case
Minimum parts needed to print are in the “Roller Blind Fridans Parts” folder, but a case is always nice.
If you solder the male pin headers directly to the PCB you can use the slimmer "PCB Component Box Body".
If you want to use female pin headers to socket all components (easier to swap if something needs replacing or test new components but adds ~3-4mm (about 0.16 inches) to the thickness) print “PCB Component Box Body (female header support)”.
Print orientation and support
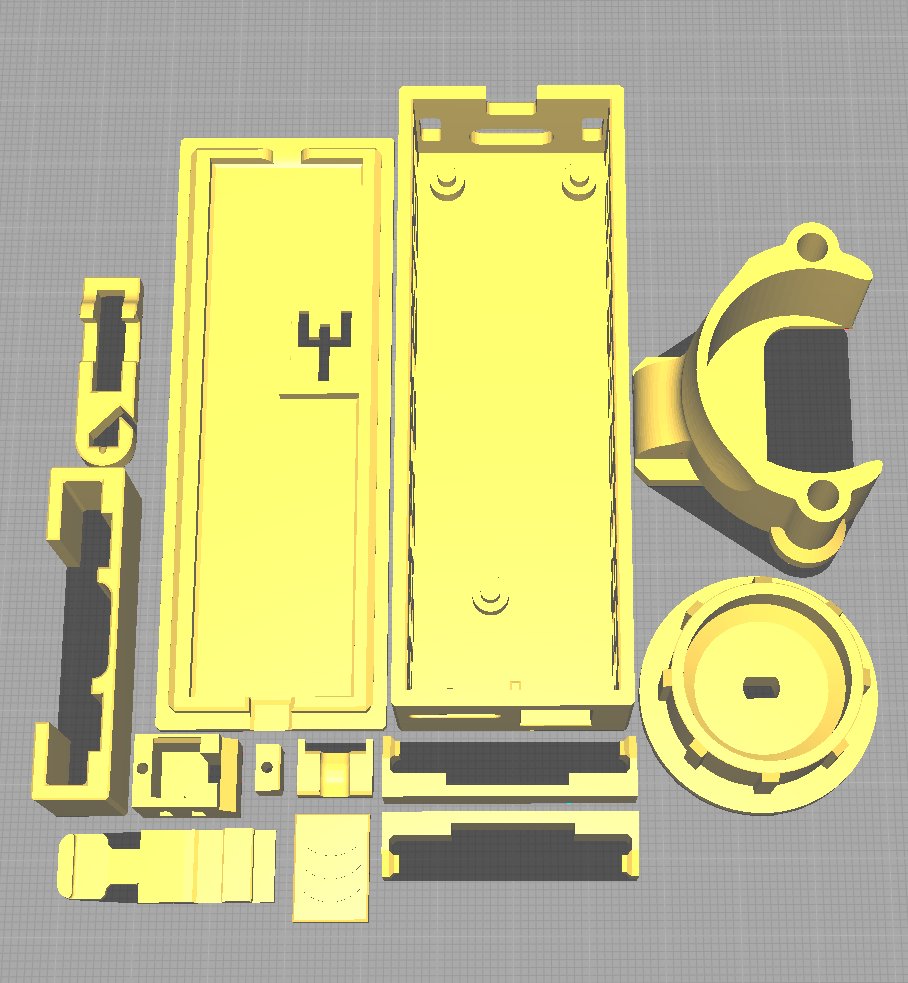
The only part that needs to be printed with support is "Roller Blind Fridans Stepper Body.stl", (upper right part in the image below). All the other parts prints well laying flat/as pictured.
Controlling your roller blind
Your newly built roller blind can be controlled using various home automation solutions. I use Home Assistant. But I also like to have an option of controlling it manually.
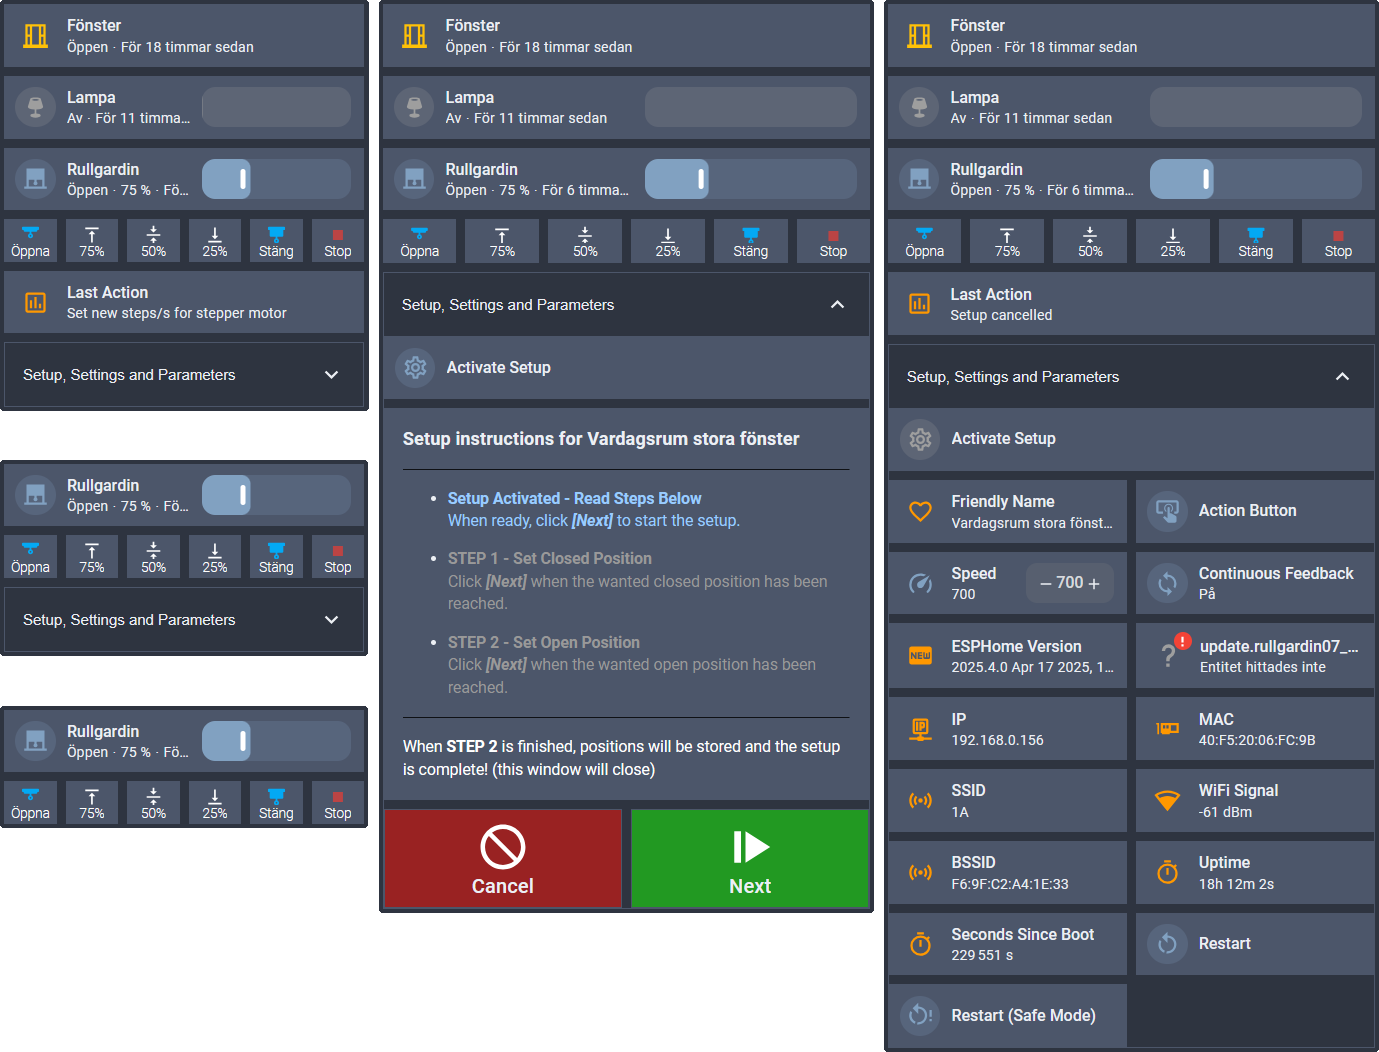
Home Assistant Cards showing possible variations of exposed controls and configuration of the roller blinds.
If you need a way to manually control the roller blind you might need to print some extra parts.
* use a wired button/touch sensor
* use a pull string to press the button
* using the power cord as a “pull string”
* using a wireless button/buttons (connected through your home automation, like a zigbee button)
and more…
Almost done… Flash the microcontroller (Wemos)
Download and flash the latest firmware “HA-Roller.yaml” using ESPHome, from my GitHub repo: [https://github.com/R34LiAM/HA-Roller](https://github.com/R34LiAM/HA-Roller)
Open the “HA-Roller.yaml” for further instructions and configuration not covered here.
Only connect the USB cable to your computer and the microcontroller after you have removed any other means of power, no power supply should be connected, when doing your initial programming, all subsequent flashes can be done OTA (over the air).

Gostou deste modelo? Crie uma conta grátis para salvar seus favoritos e voltar a eles depois.
Criar conta