Você está no 3DFinder
Buscamos em Thingiverse, MakerWorld e Printables ao mesmo tempo para te dar o melhor de cada uma.
Descrição
3D-Printed Rotating Table Display
The 3D-printed rotating table display is an innovative and customizable platform that combines DIY engineering with practical functionality. Whether you're a hobbyist, maker, or collector, this project allows you to highlight your items with smooth, controlled rotation.
With JST connectors you can create a wire harness and drive multiples ones with a 5v power supply.
Mechanism
The display operates using a simple yet effective setup:
- RC Servo Motor: Provides the rotational force. Micro servo with 5.8 mm shaft.
- Servo Tester Controller: Enables speed and direction adjustments. For the tall model we used the Multi Servo Tester 3CH ECS Consistency Speed Controler. For the Shallow Model we used Small Servo Motor Regulator Tester PWM.
- JST Connectors: For reliable and easy electrical connections.
- Ball Bearing: 625zz 16mm x 5mm x 5mm
Design
Two variations are available, catering to different needs:
Shallow Model
- Features: Sleek, low-profile design for minimal visual impact.
- Assembly: Easy to put together, making it ideal for beginners.
- Operation: Supports ball bearings or printed discs (ball bearings recommended for smoother rotation).
Tall Model
- Features: Sturdy build with enhanced mechanical force for heavier displays.
- Operation: Designed with a belt-driven mechanism for more efficient power transfer.
- Customization: Includes a V-groove servo wheel and DIY elastic-band belt system.
- Operation: Supports ball bearings or printed discs (ball bearings recommended for smoother rotation).
Assembly Guide
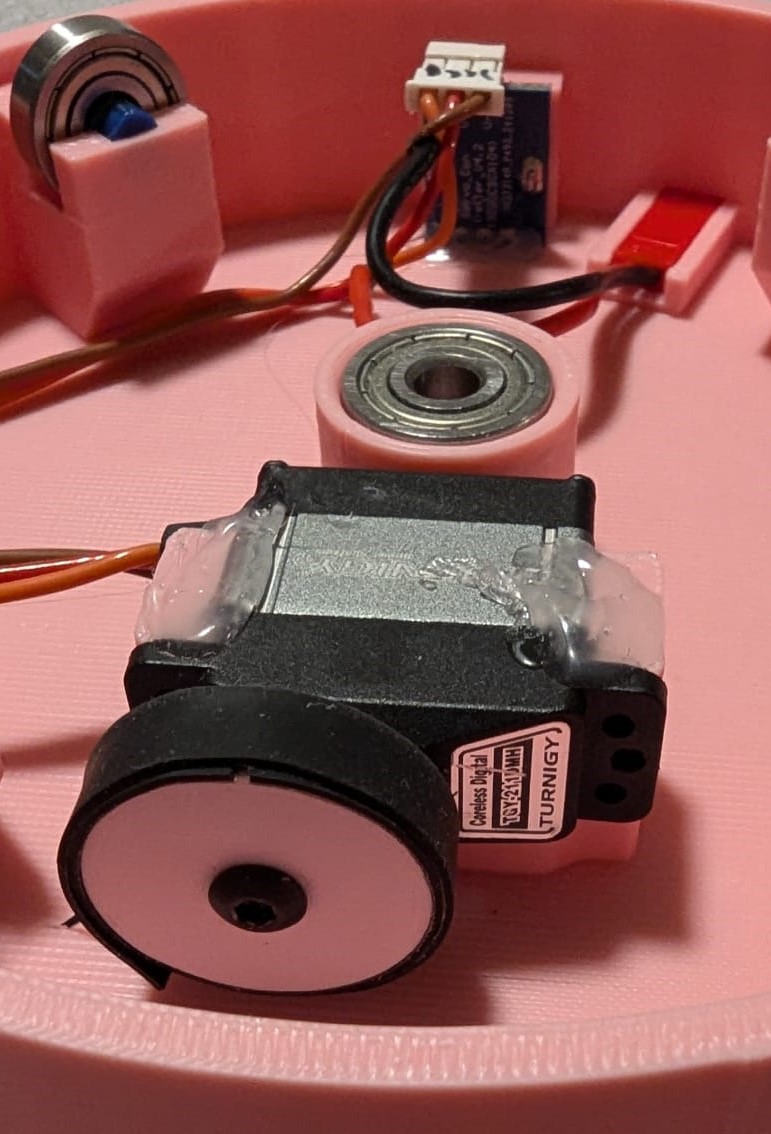
For the Shallow Model
- Apply hot glue to secure the servo and tester controller in place.
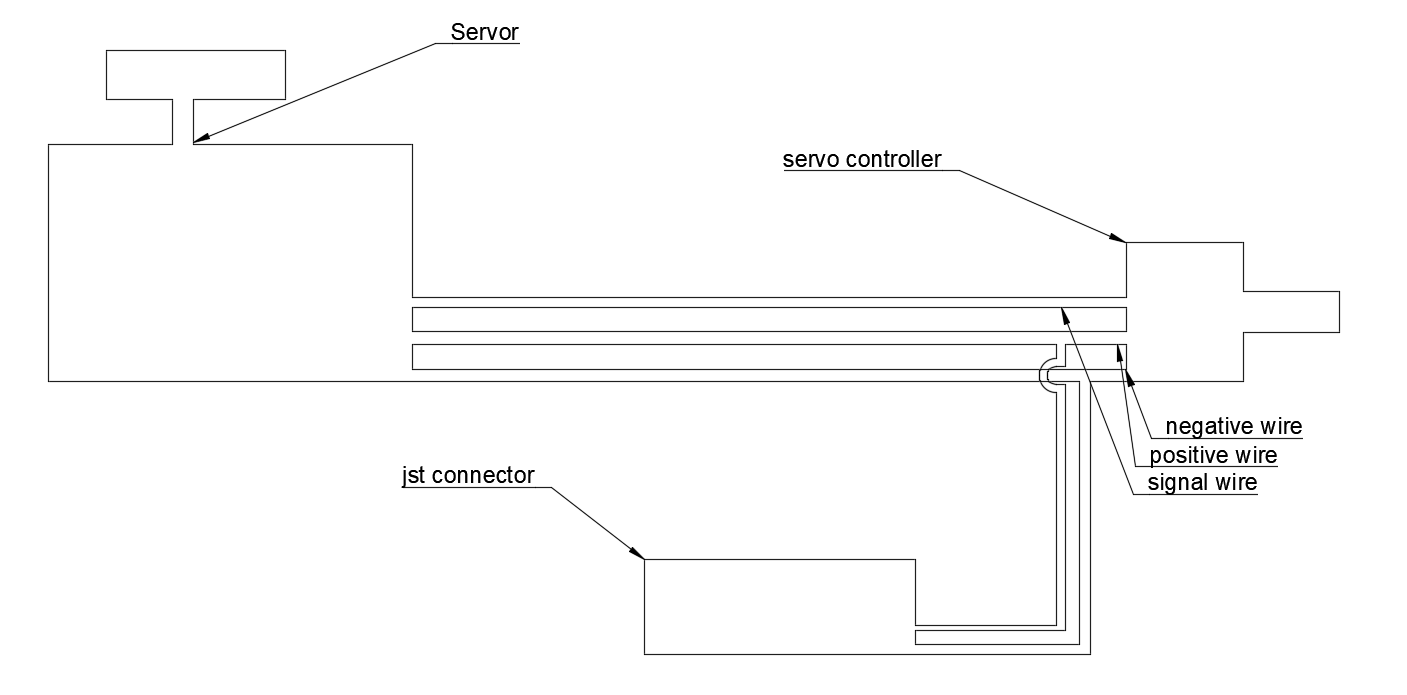
- Connect the wires following the provided diagram.
- Install the ball bearing on the printed axle (recommended for smoother operation).
- Attach the servo wheel and wrap an elastic band around it for added grip.
- We need a elastic band to give more grip on the lid, cut a 59.55mm and attach with some glue.
- Close the lid to complete the assembly.

For the Tall Model
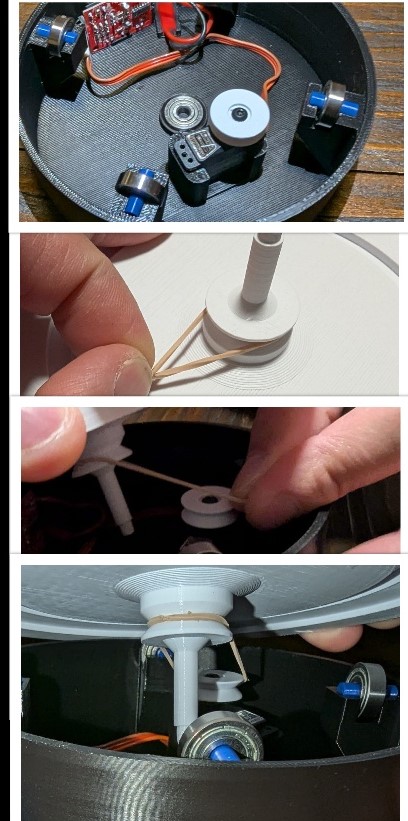
- Secure the servo and tester controller with hot glue.
- Solder the input wires to the controller and connect the servo.
- Install the ball bearing on the printed axle.
- Attach the V-groove servo wheel.
- Create a belt off 34.5mm using elastic bands, and loop it around the lid axle. Insert the servo wheel into the belt.
- Close the lid for a finished, sturdy display.
Wires diagram
3D-Printed Rotating Table Display ( Turn Table )
Publicado em 21 de jan de 2025
Gostou deste modelo? Crie uma conta grátis para salvar seus favoritos e voltar a eles depois.
Criar conta