Você está no 3DFinder
Buscamos em Thingiverse, MakerWorld e Printables ao mesmo tempo para te dar o melhor de cada uma.
Descrição
Teaching Time: A Fun and Interactive Clock Model for Kids
Inspiration:
As a parent, I found myself looking for a fun and effective way to teach my daughter how to read a clock. The process of explaining how to tell time can be a bit abstract for young children, especially when distinguishing between the "past" and "to" times. That’s when I came up with the idea to design a clock model that visually demonstrates both aspects. My daughter’s interest in learning grew immensely as the model made the concept easy to understand, and the process became a fun activity for both of us.
This clock model is now available to all parents as a simple, hands-on educational tool to help their children learn how to tell time. It not only teaches kids the basics of reading a clock, but also enhances their understanding of the "past" and "to" time conventions in a visual and interactive way.
Model Overview
The clock model is composed of three main parts, each designed for a specific educational purpose. These parts can be easily printed and assembled without screws, thanks to an interlocking mechanism.
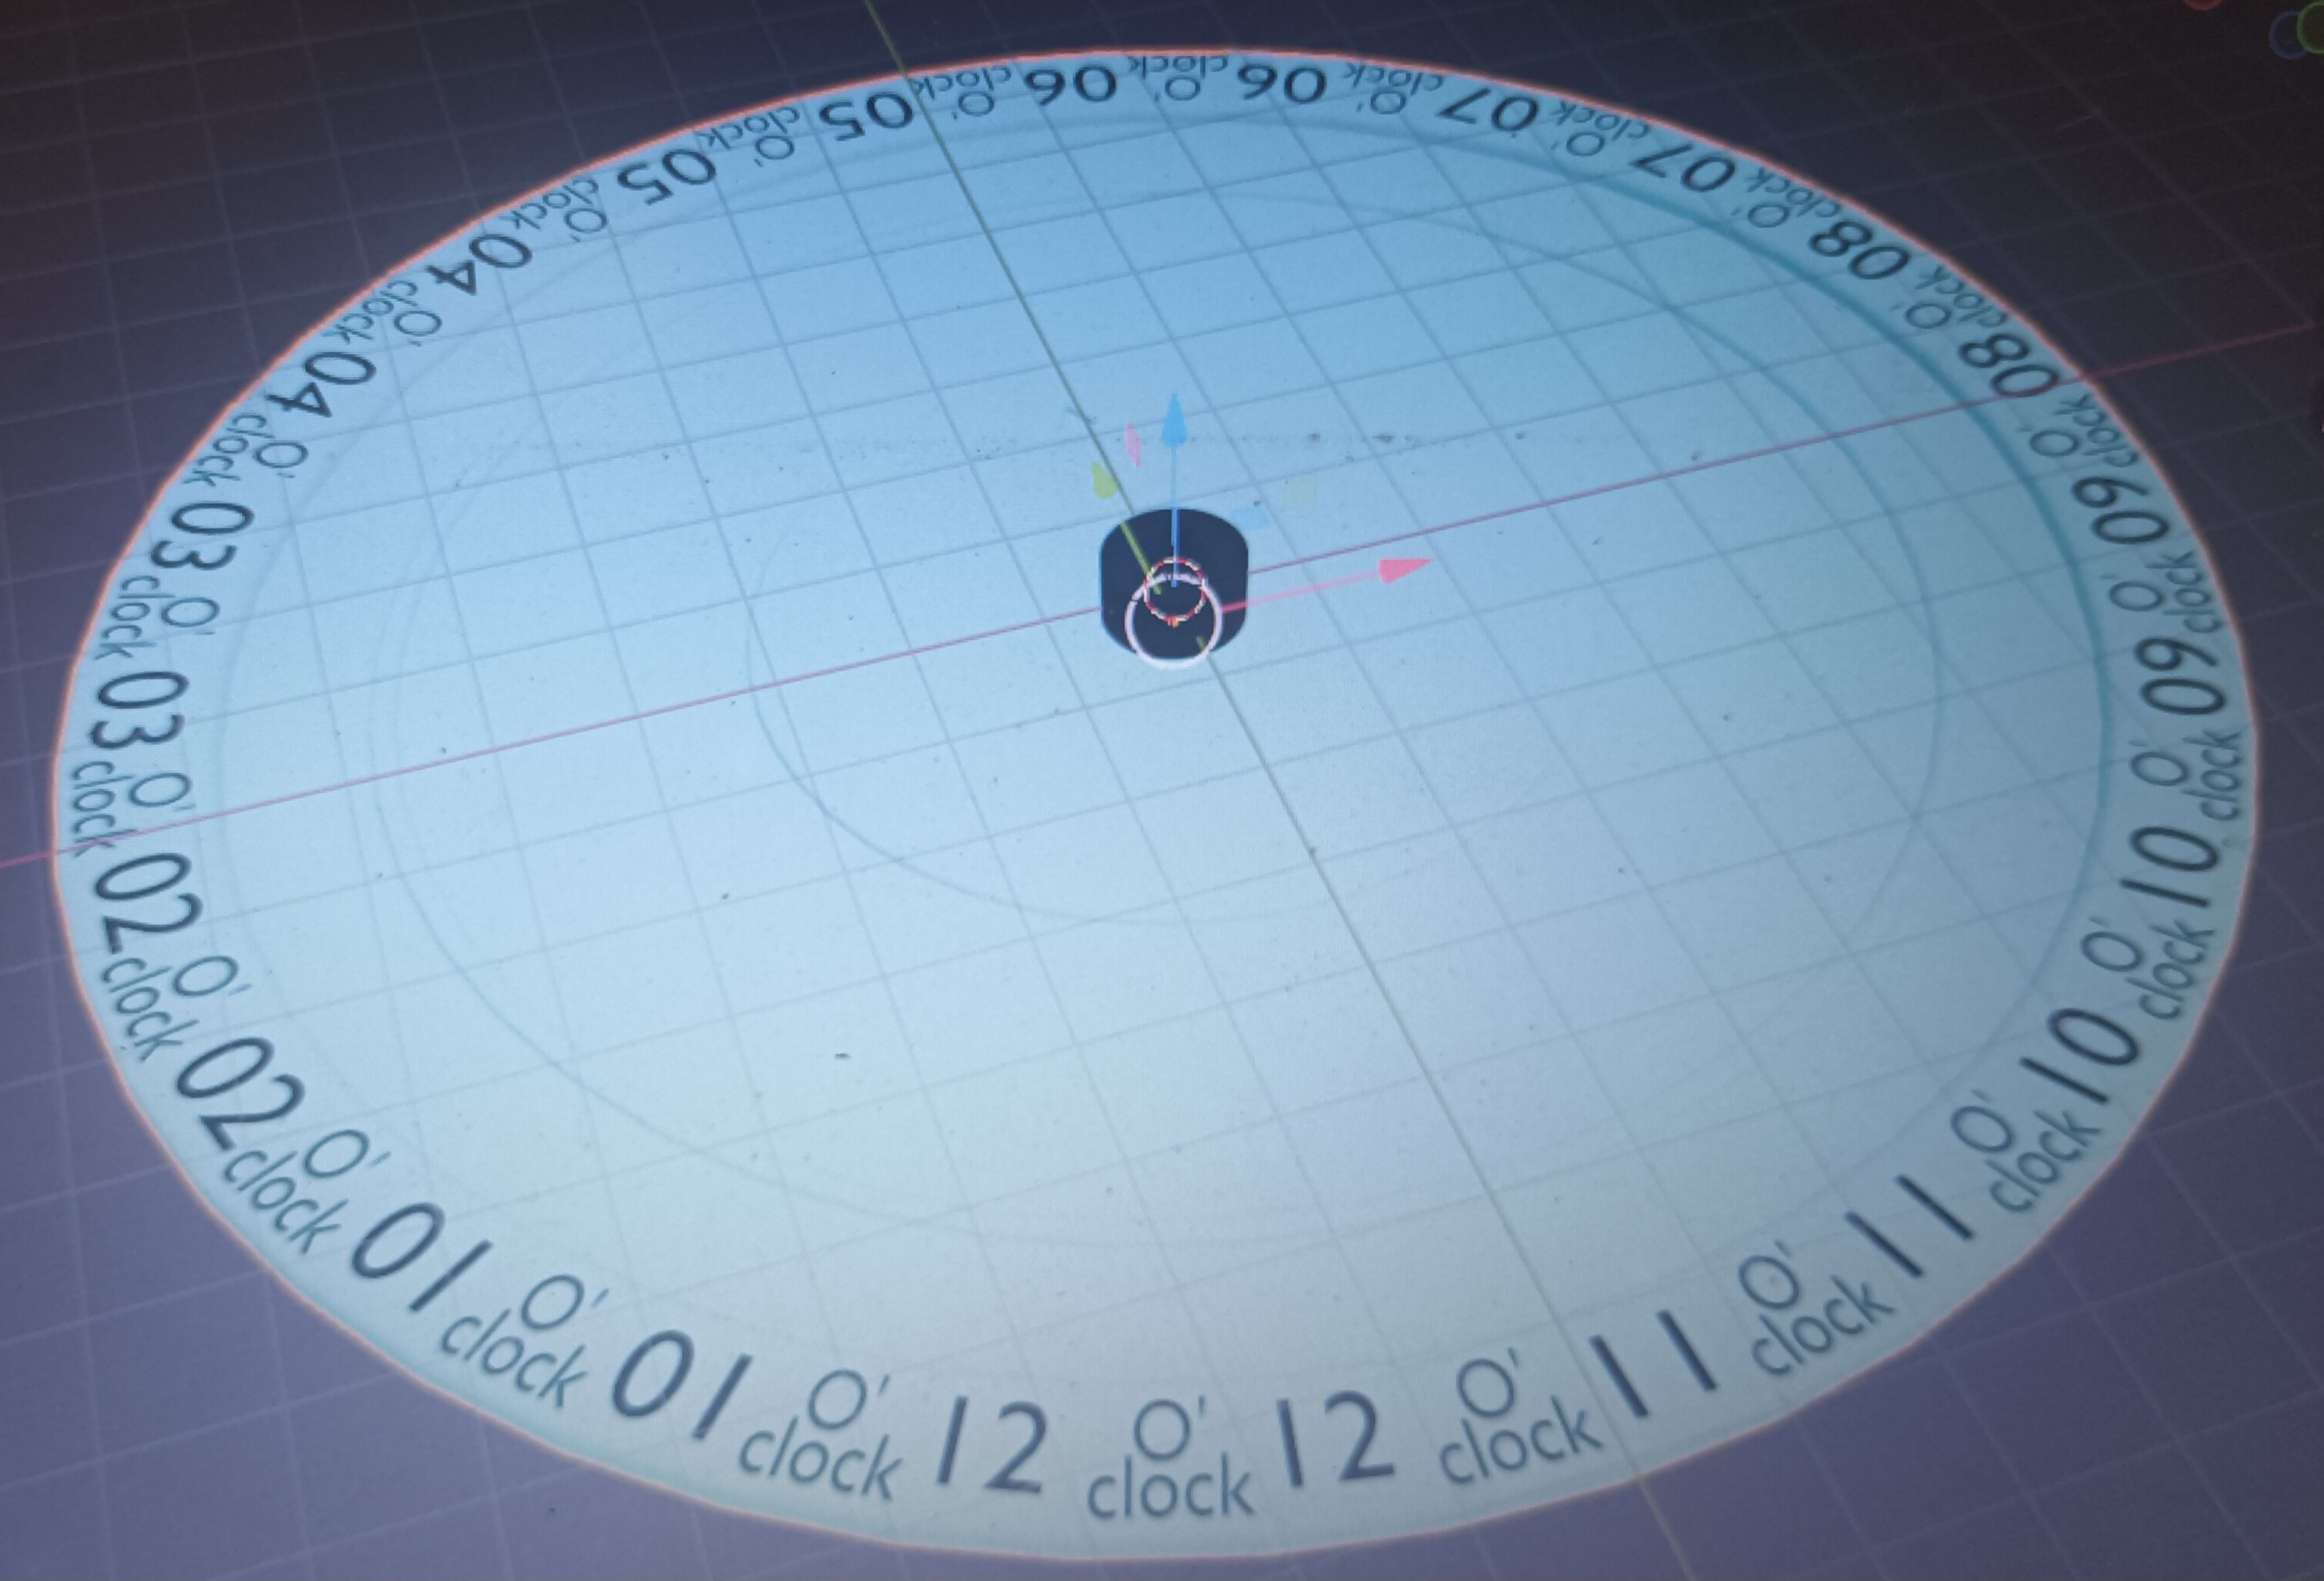
1. Hour Circle: This layer of the model shows the position of the small (hour) hand. It is the foundation upon which the other parts are built.
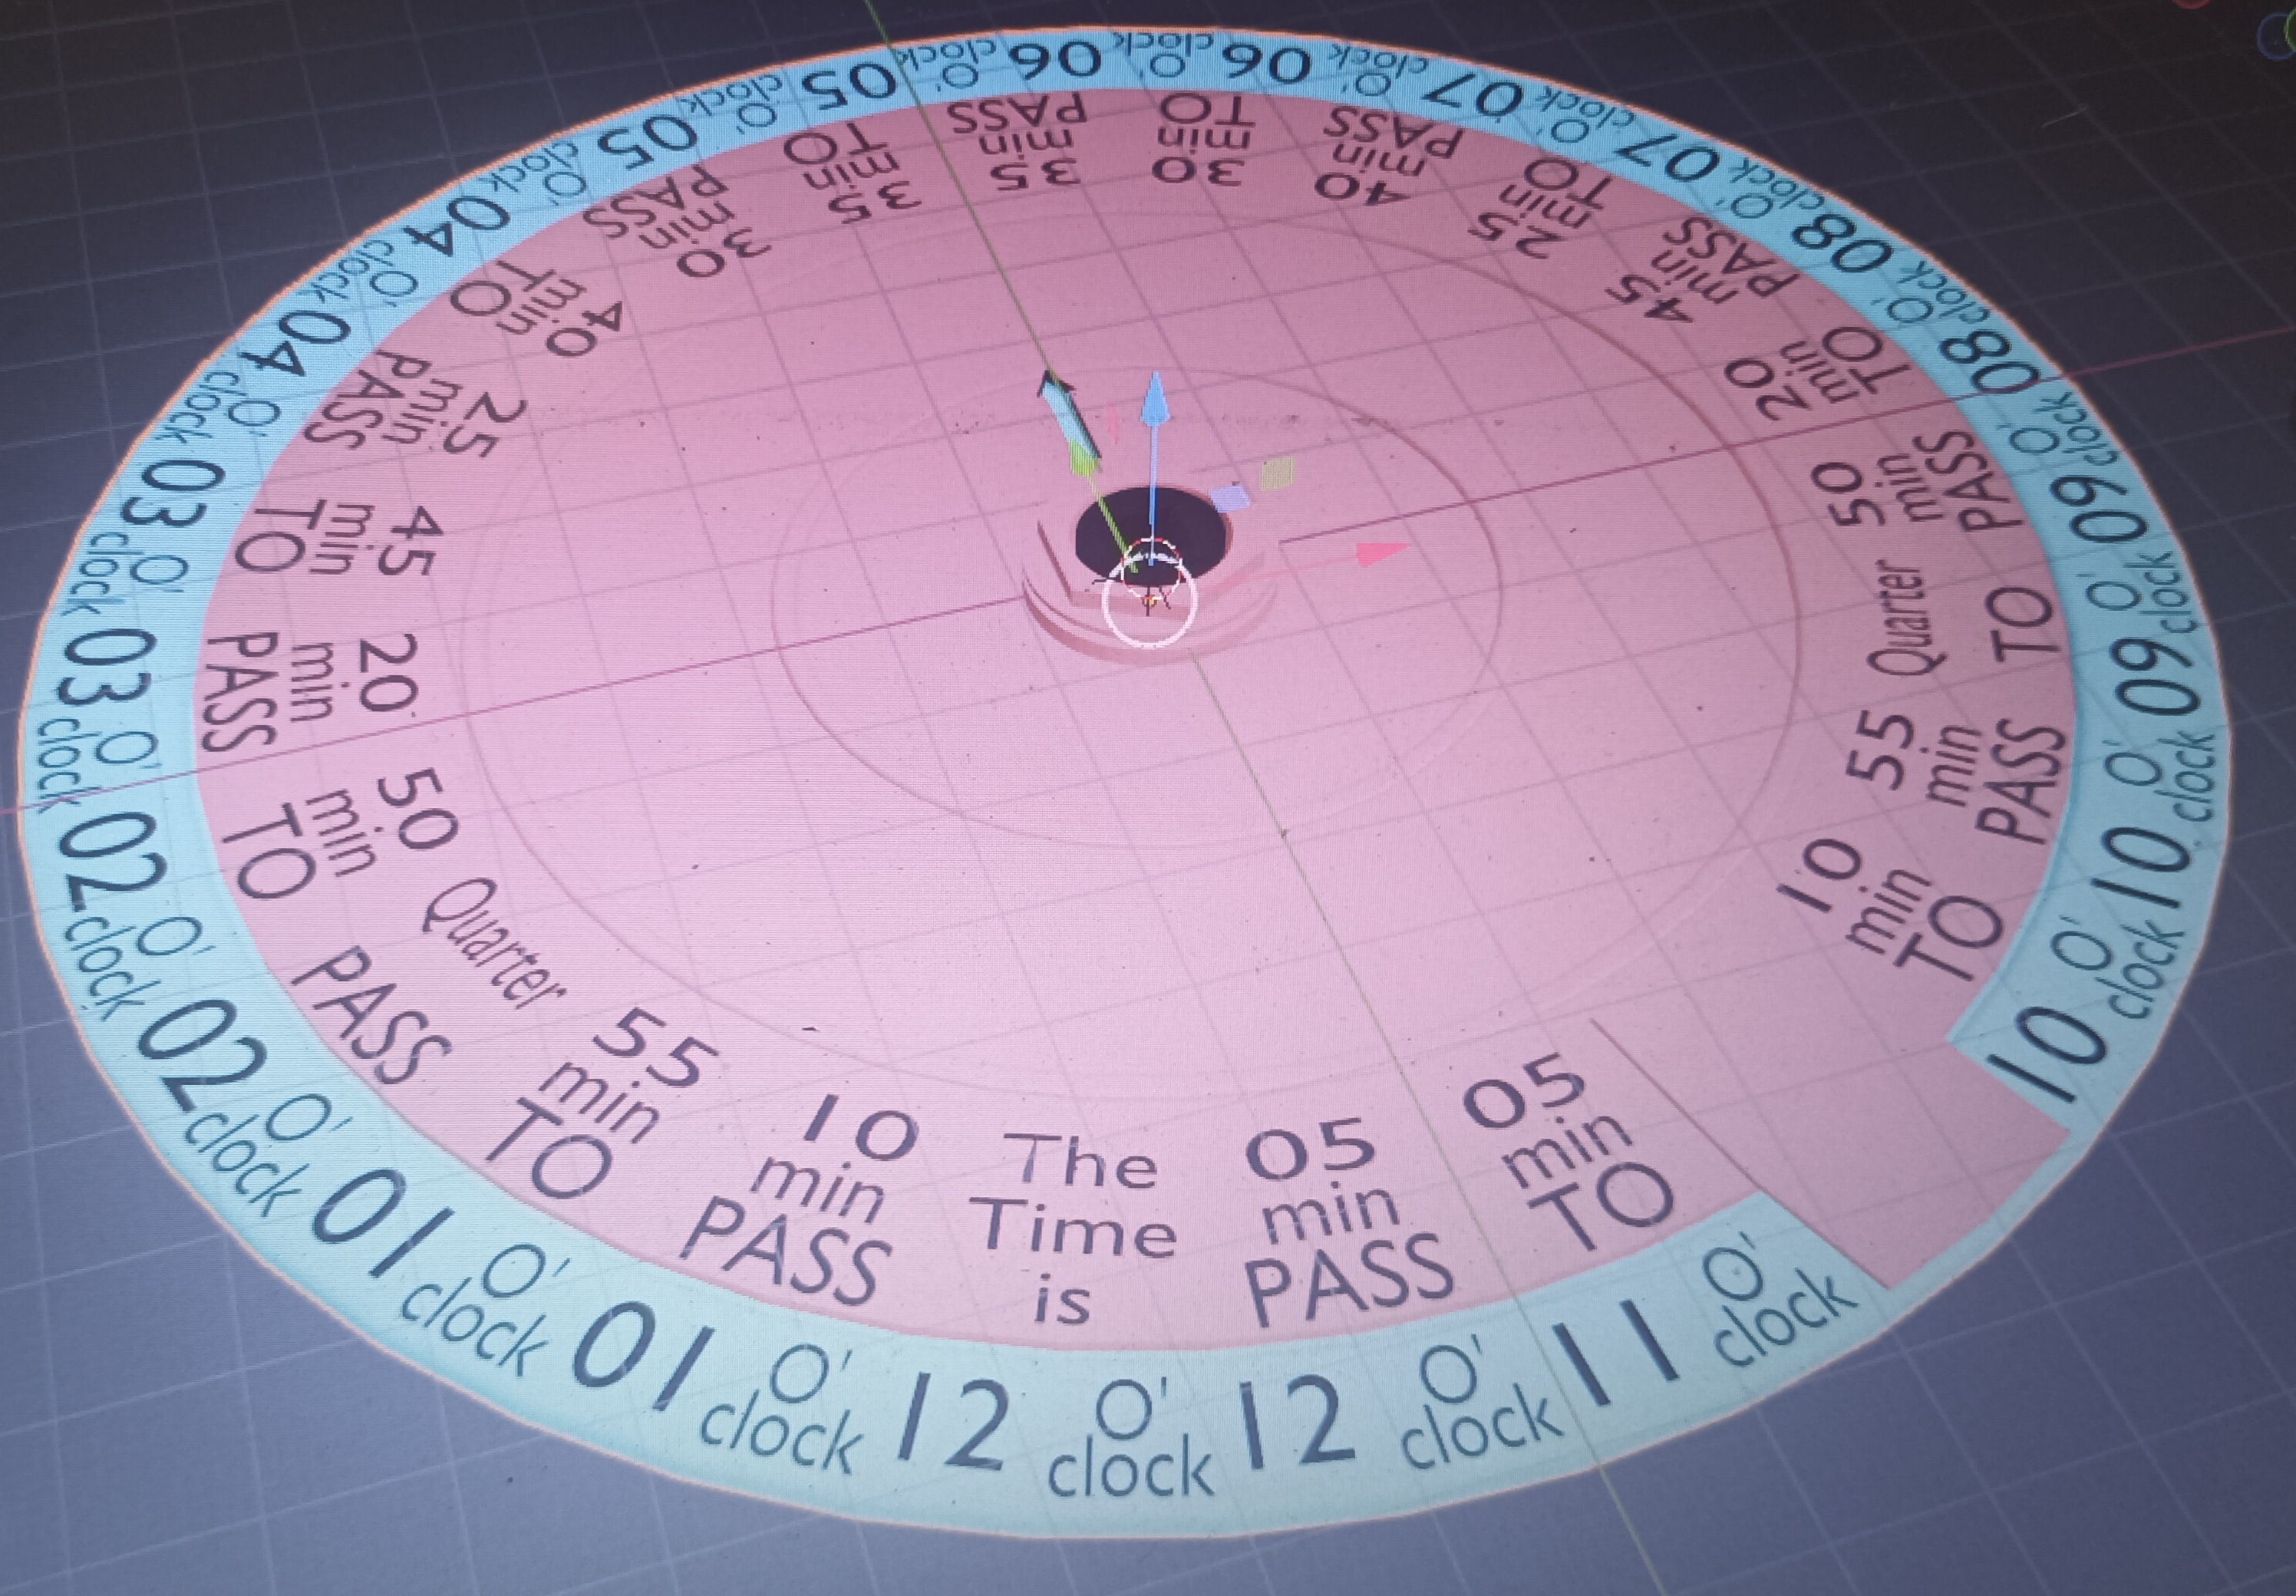
2. Minutes Circle: The second layer displays the position of the long (minute) hand. It interacts with the hour circle to provide a clearer understanding of how minutes correlate to the hour.
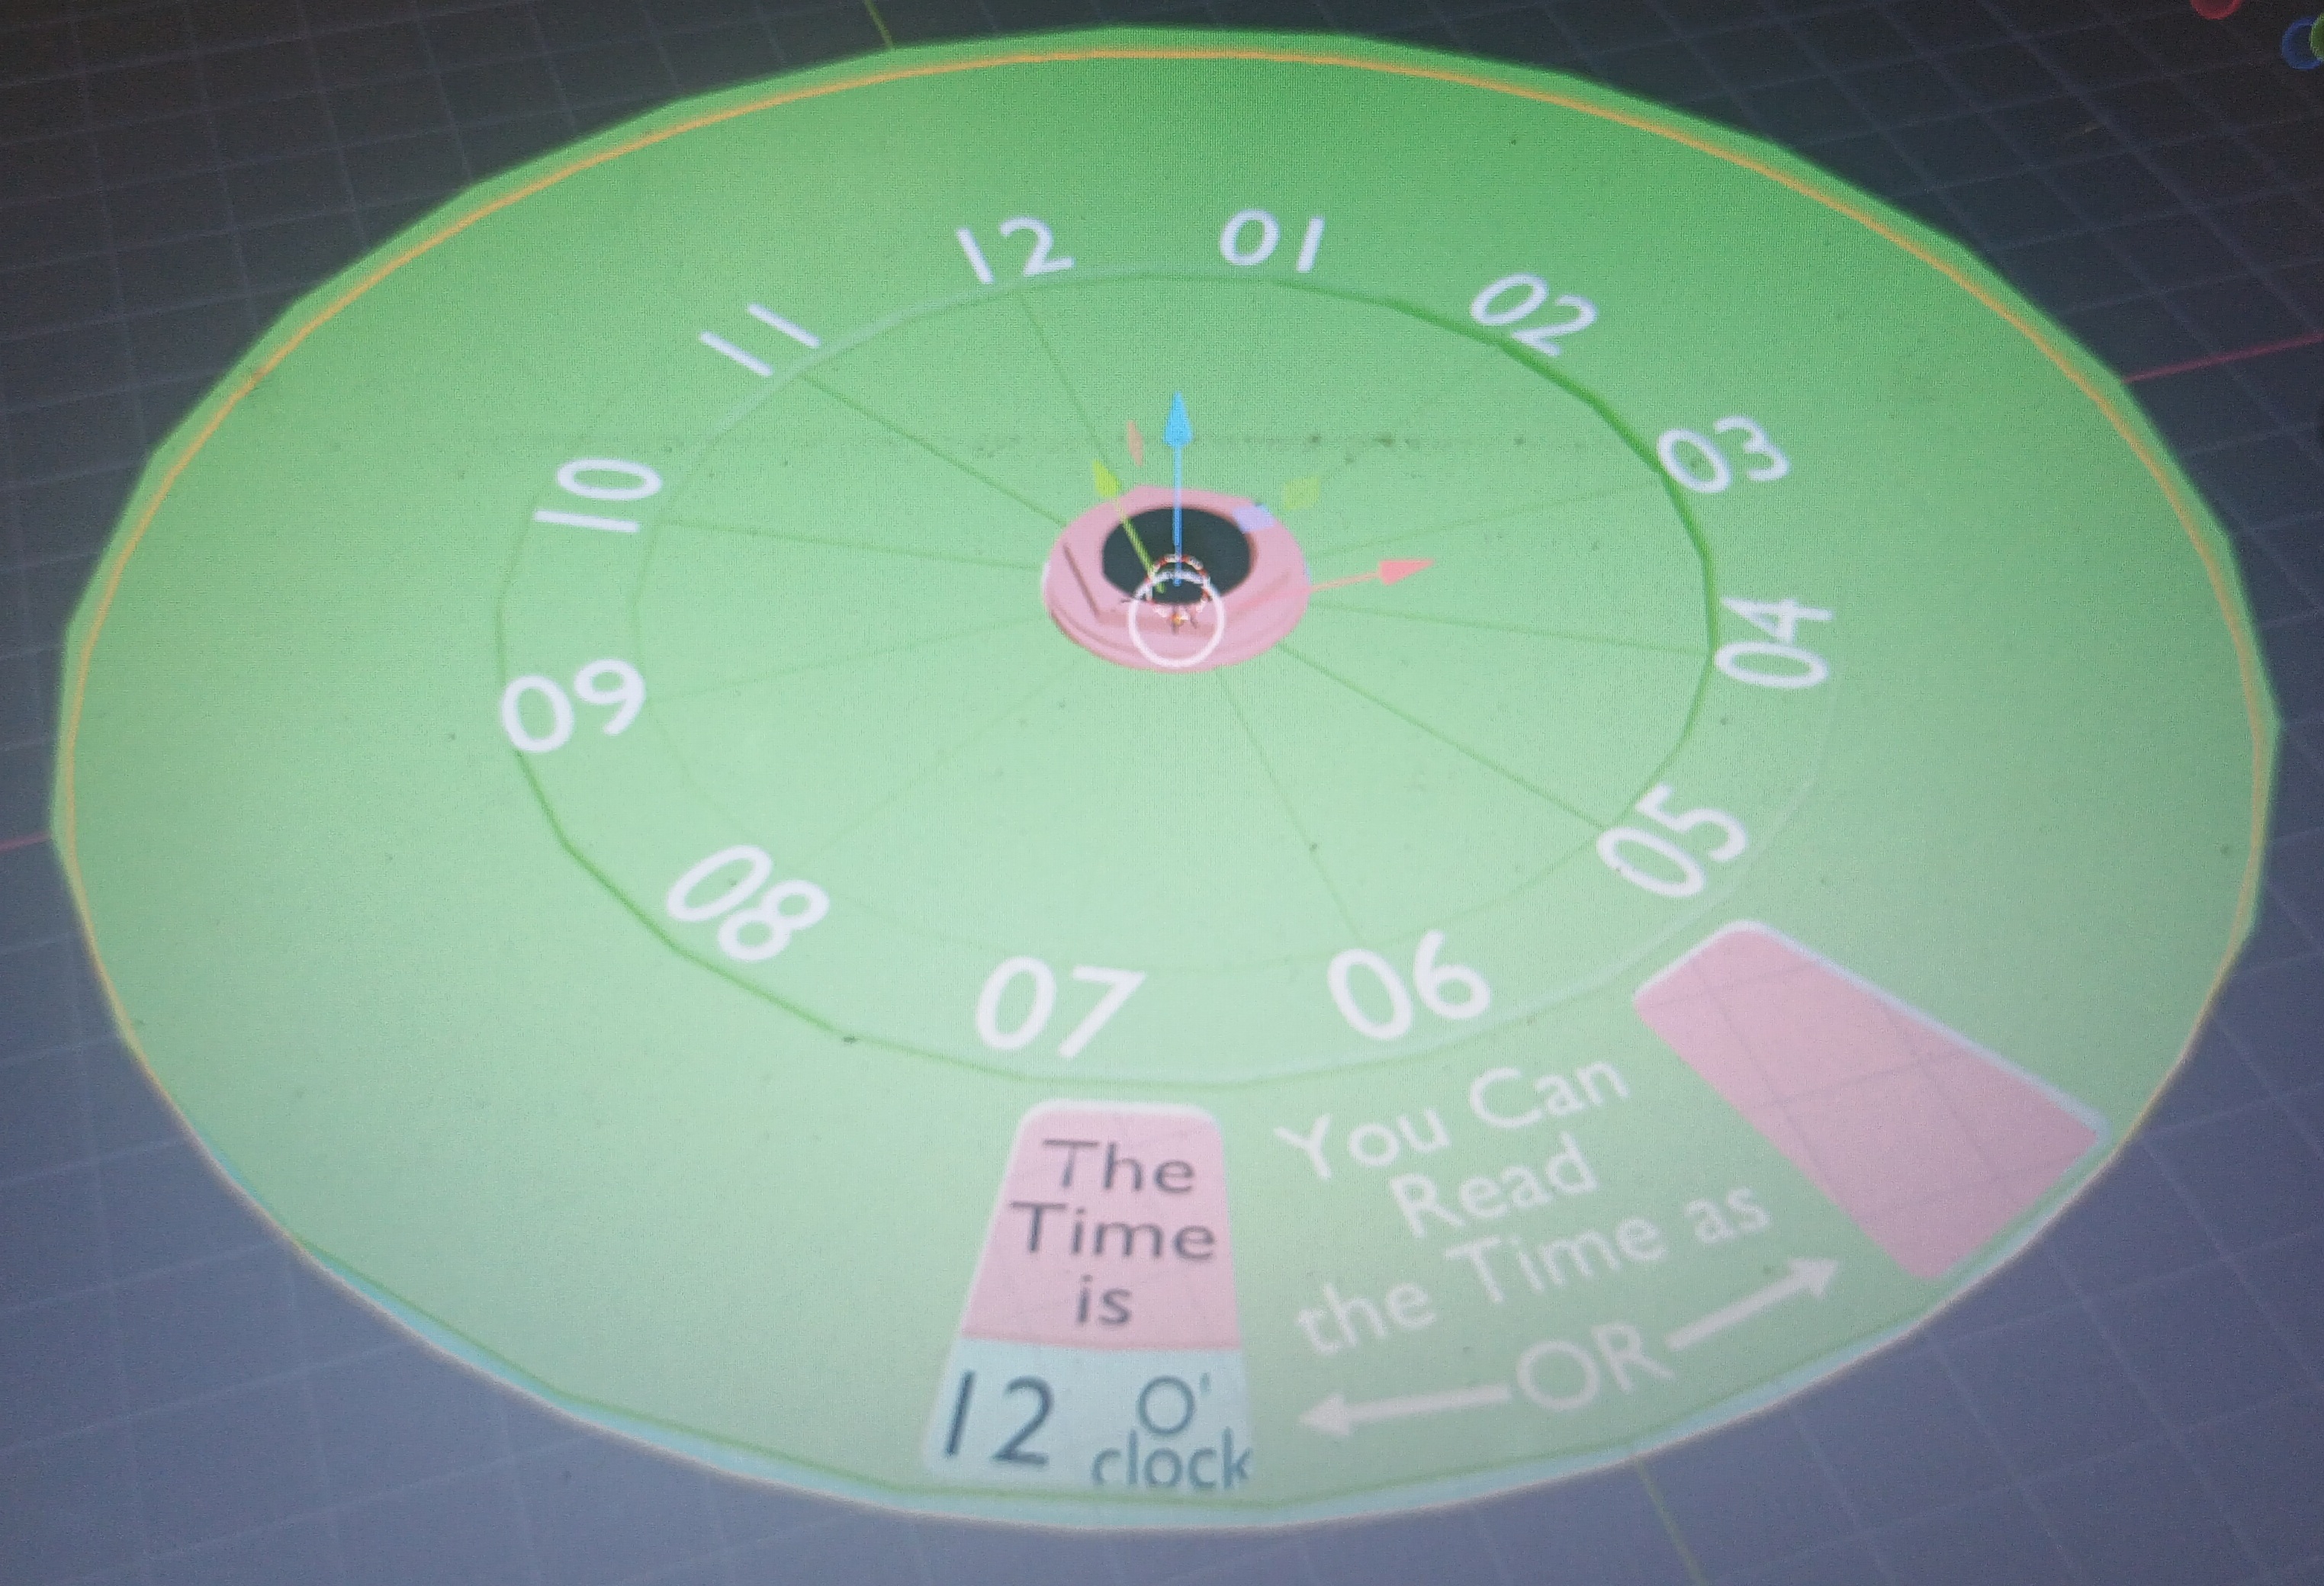
3. Top Circle with Two Windows: This final layer represents a standard clock face with two windows. One window displays the "pass" time (e.g., “25 minutes past 6 o’clock”), while the other shows the "to" time (e.g., “35 minutes to 7 o’clock”). This helps children understand the concept of how many minutes have passed since the hour, and how many minutes are left until the next hour.
The clock hands are printed separately and are designed to move freely, allowing children to physically adjust the time and see the result through the windows.
How to Print the Model
To ensure a smooth and easy print, I’ve optimized the design for 3D printing. Here's a breakdown of the recommended print settings for all parts
- Layer Height: 0.24mm
- Infill: 20% (for durability)
- Supports: Not required
- Material: PLA for strength and ease of printing
Assembly
The assembly process is simple, with no screws or adhesives required. Each of the three parts has interlocking features that make it easy to stack and secure them together.
1. Step 1: Start by placing the Hour Circle on a flat surface with 12 o'clock and 11 o'clock at the base. This forms the base of the clock and aligns with the small hour hand.
2. Step 2: Align the Minutes Circle on top of the Hour Circle such that “5 min” text is at the base. These two circles should snap together effortlessly, creating a solid base for the top layer.
3. Step 3: Place the Top Circle (With Windows) on top of the Minutes Circle. Ensure that the two windows are positioned correctly to show “The time is 12 o'clock” on left window and blank plate on right window.
4. Step 4: Insert the clock hands into the center of the circles both pointing 12, ensuring that they can move freely to show different times.
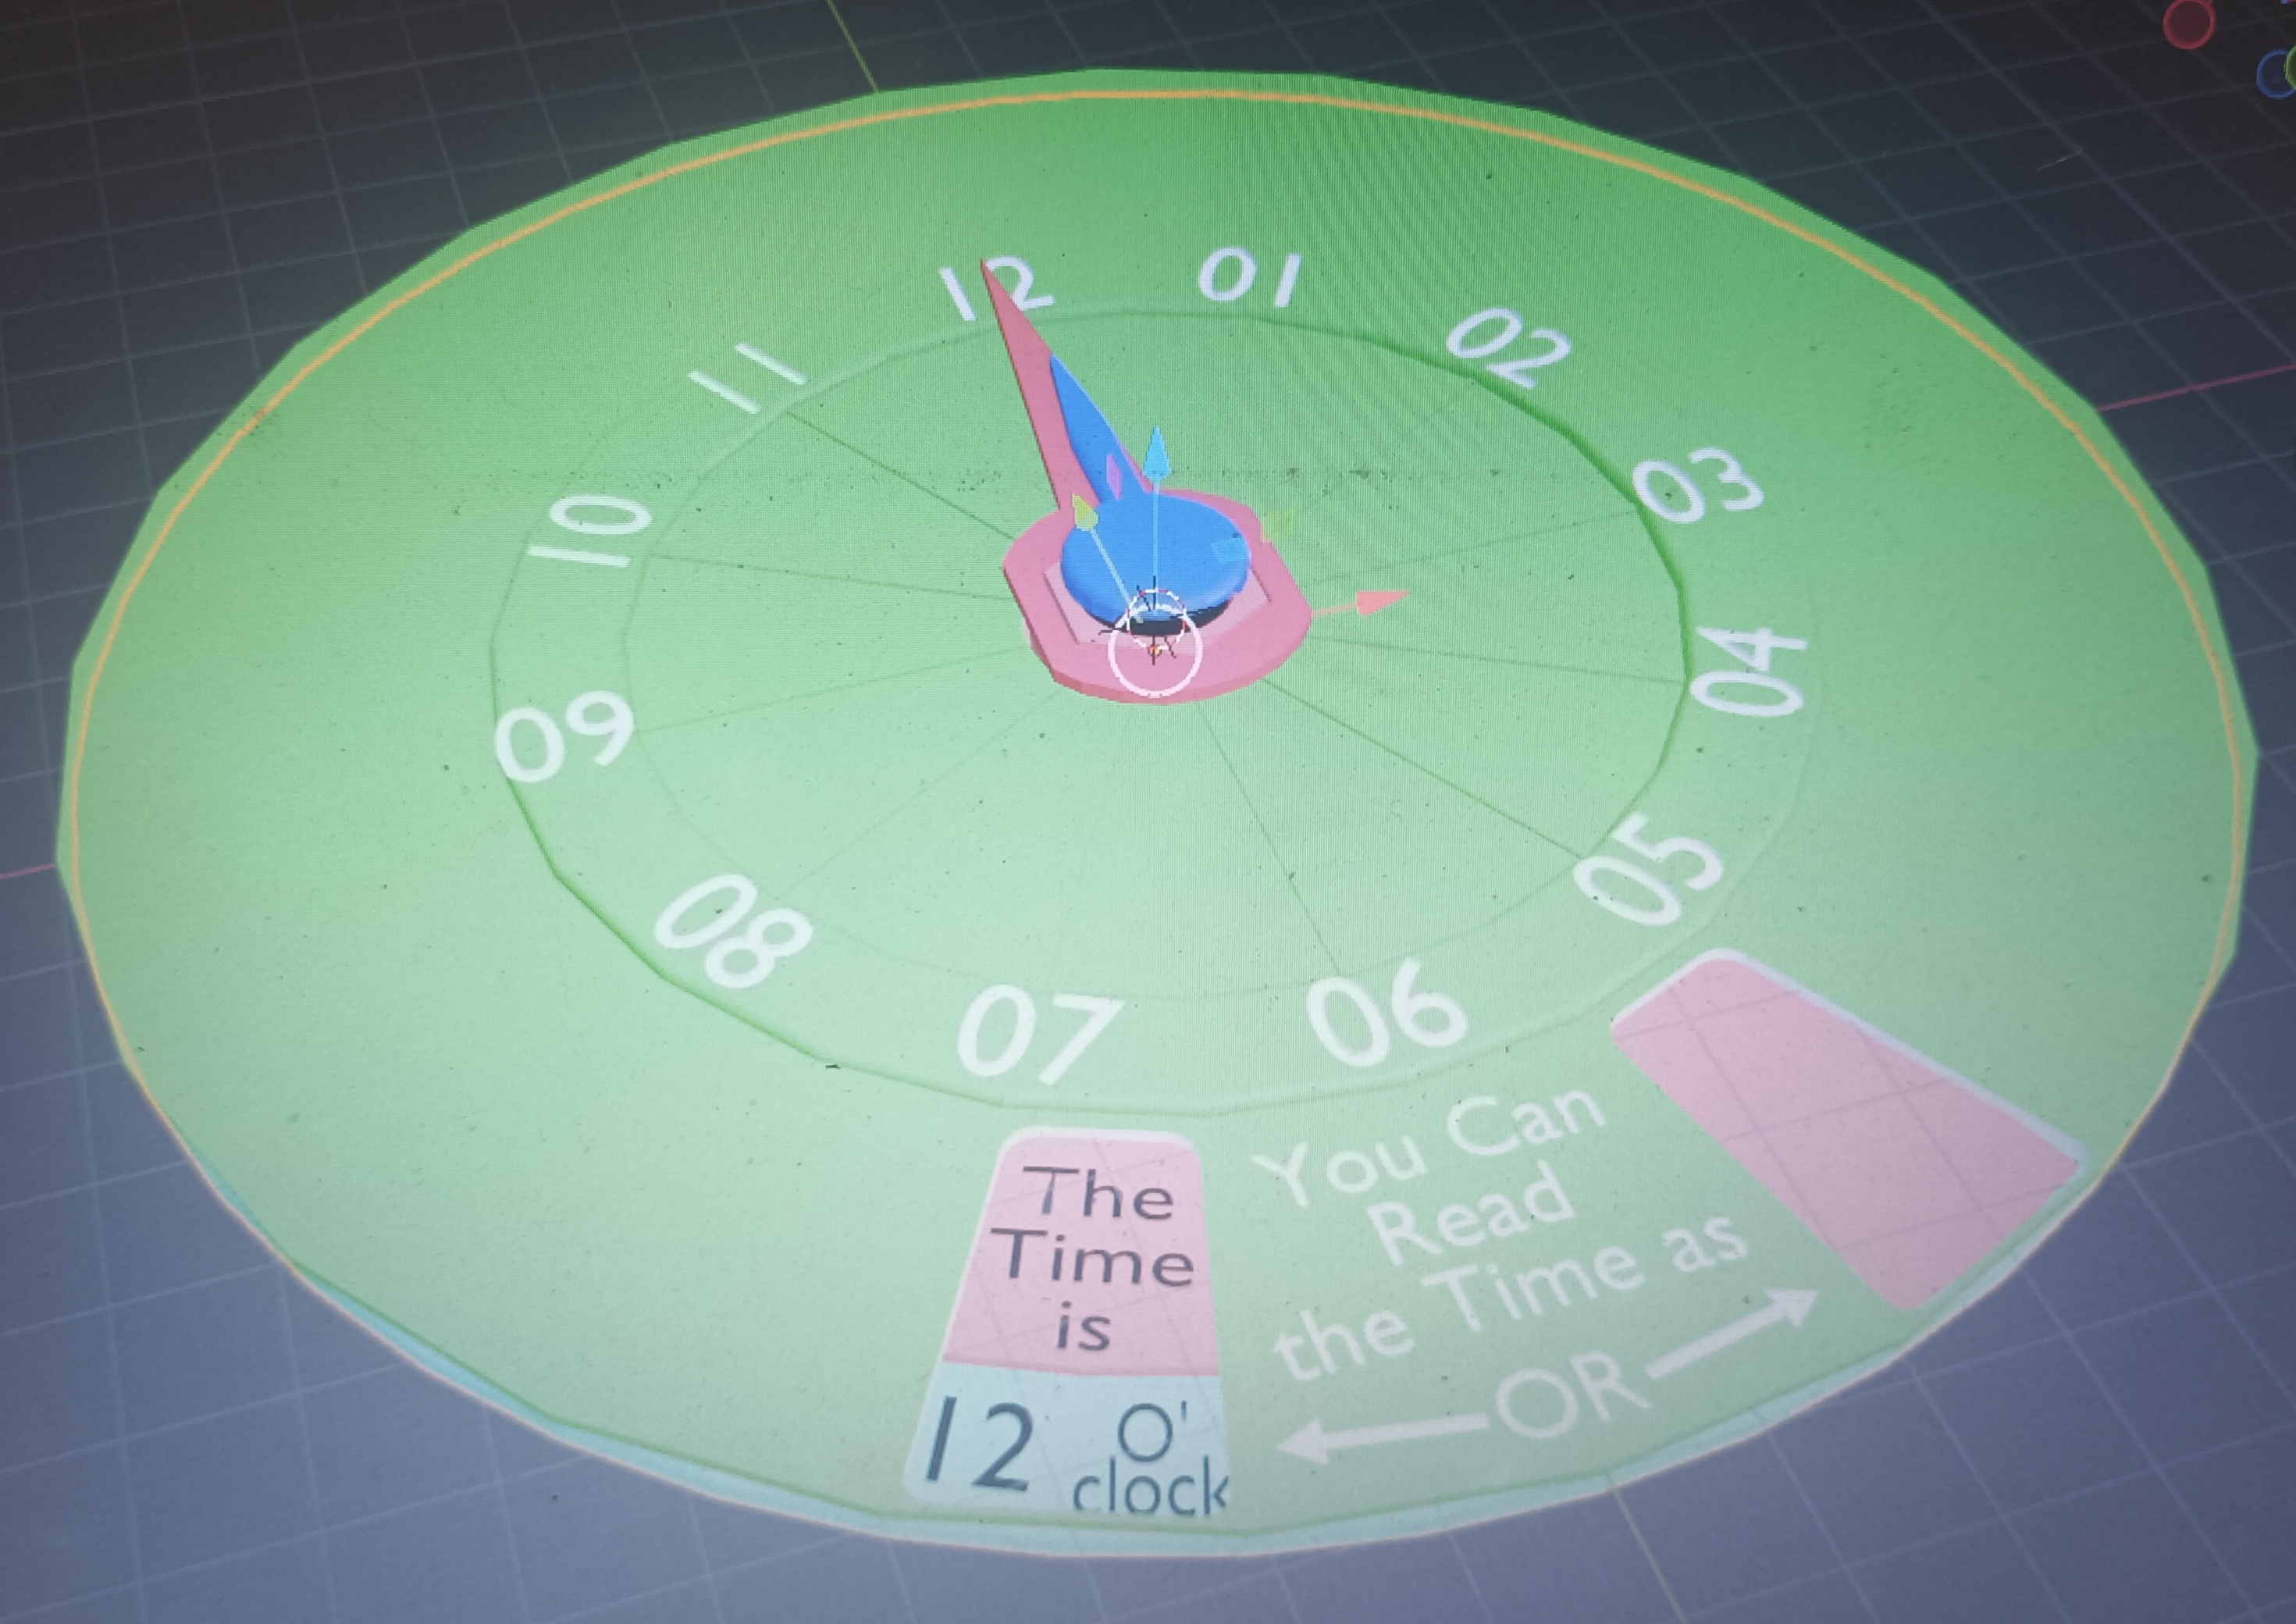
Once assembled, the model creates a fully functional teaching clock. The hands can be rotated manually, and the windows will display the corresponding "past" and "to" times, helping children better understand the passage of time.
How to Use the Model
The clock is designed to be a practical and engaging teaching tool for parents and educators alike. Here’s how you can use it to teach your child to tell time:
1. Introduce the Concept of Time: Start by explaining the basics of the clock, how the hour hand shows the hours, and how the minute hand indicates the minutes. Show them how the clock face is divided into 12 hours, and each hour is divided into 60 minutes.
2. Explaining "Past" Time: Move the clock hands to a random time, such as 25 minutes past 6. Show your child the window that says "25 minutes past 6 o’clock," and explain that this means 25 minutes have passed since 6 o’clock.
3. Explaining "To" Time: Then, show them the other window that says "35 minutes to 7 o’clock." This teaches them that the same point in time can also be described as being 35 minutes until the next hour (7 o’clock).
4. Practice Together: Rotate the hands to different times and ask your child to read both the "past" and "to" times. Encourage them to adjust the hands themselves and describe what they see in both windows.
This interactive approach not only makes learning to tell time easier but also fun and engaging for children. As they physically move the clock hands and see the results, they quickly grasp the concept of time.
Conclusion
This educational clock model was inspired by my personal journey of teaching my daughter how to read a clock. It’s a tool designed with both functionality and fun in mind, allowing children to explore the concept of time in an engaging way. I believe this model will be a great asset to parents and educators around the world, providing a hands-on approach to teaching time that children will enjoy.
By making this model available on Printable, I hope to help other parents in their journey to teach their kids how to tell time. The design is simple to print, easy to assemble, and offers a comprehensive way to understand both the "past" and "to" aspects of timekeeping.
Happy printing, and I hope this clock model brings joy and learning to your home!
Easy Time - Educational Clock for Children
Publicado em 20 de out de 2024
Gostou deste modelo? Crie uma conta grátis para salvar seus favoritos e voltar a eles depois.
Criar conta