Você está no 3DFinder
Buscamos em Thingiverse, MakerWorld e Printables ao mesmo tempo para te dar o melhor de cada uma.
Descrição
Open-design, modular wind tunnel
Disclaimer: Also check out the masterpieces by @Jerrodh and @pobriant.
Description:
I present an open-design, modular wind tunnel that you can use to explore the behavior of airflow around different obstacles.
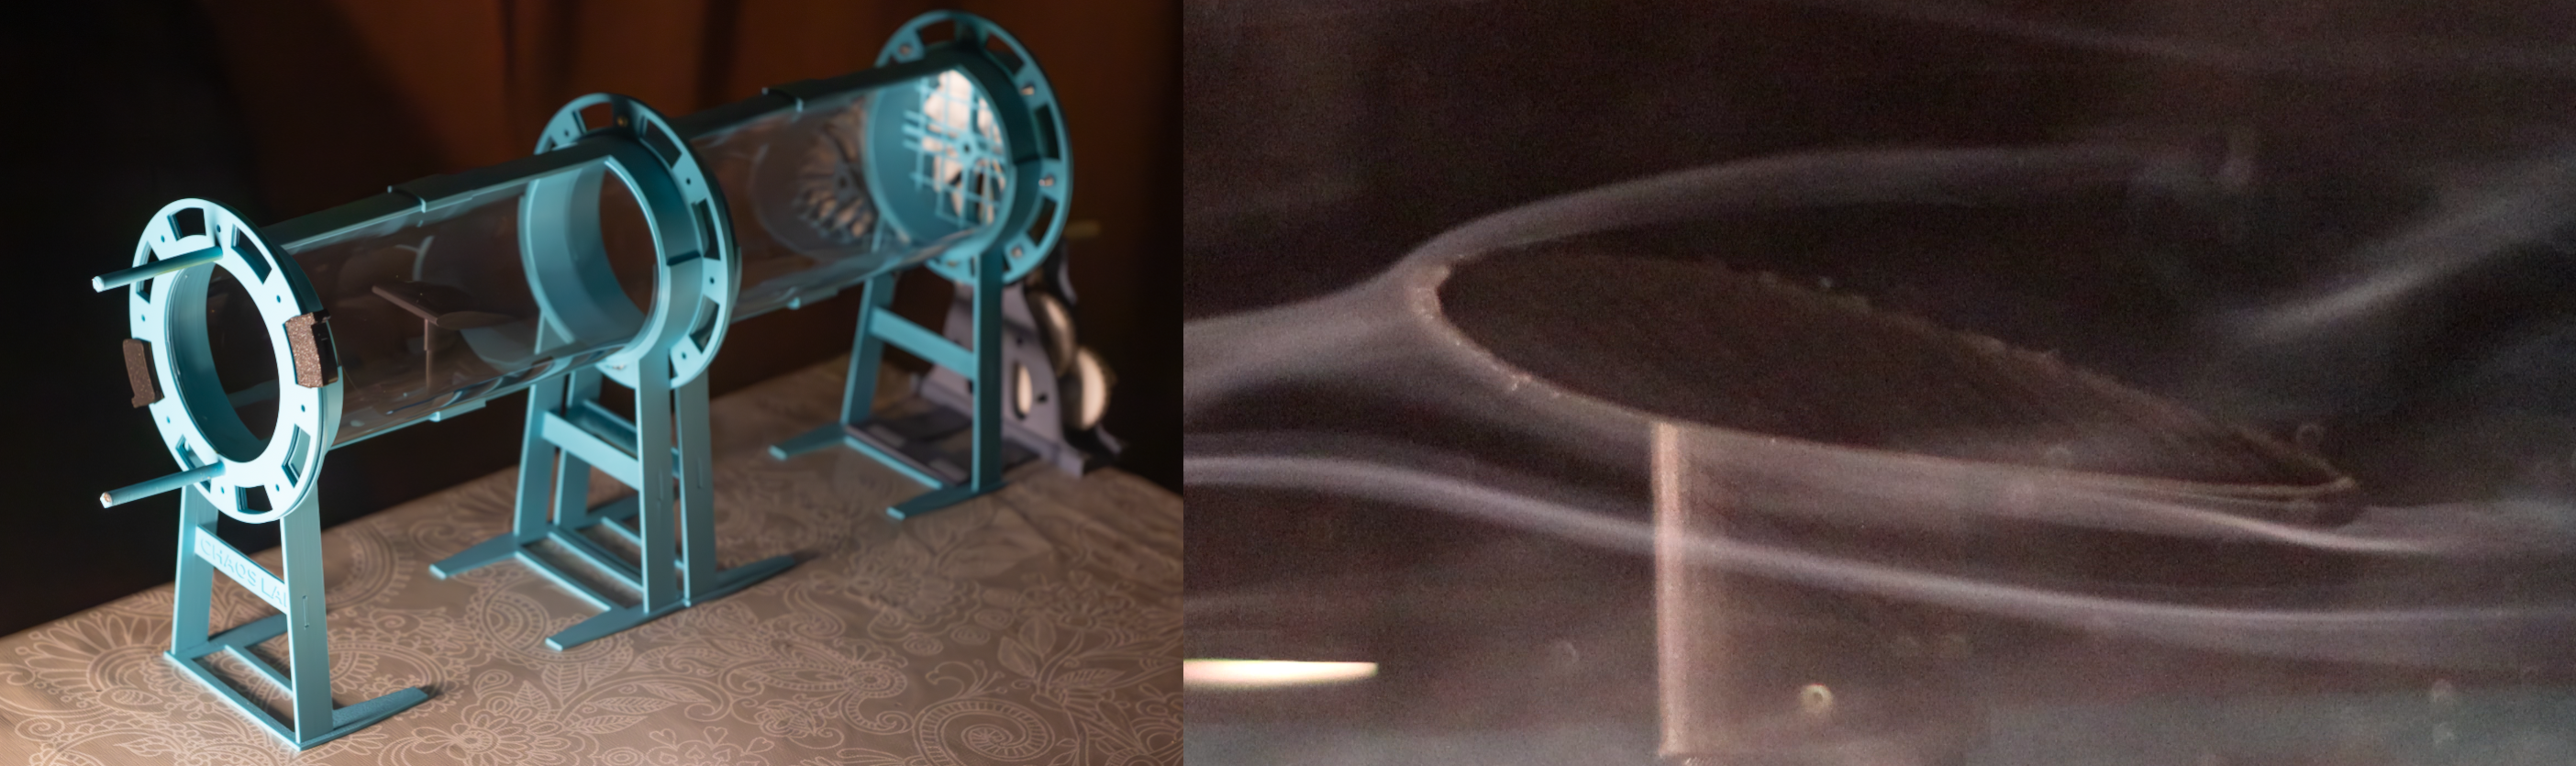
Benefits:
- Affordable and easy to print and assemble
- Requires minimal additional materials
- Open design, allowing you to create and customize your own modules
Disadvantages:
- Airflow is not perfectly stable
- Produces a significant amount of smoke
Filaments used:
- PLA basic and PLA matte
- PETG
- TPU (Optional if you want to use manual gearbox)
Additional Materials:
- Transparent A4 plastic sheets: Used for constructing the tunnel walls. The required amount depends on how long you want to build your wind tunnel.
- 4x12x4 mm bearings (604-zz): You’ll need 2 to 13 bearings, depending on whether you want to include a basic manual gearbox to power the fan blade.
- Paper and machine oil: For smoke generation. I recommend sticker paper, as it comes in the perfect size for use in the wind tunnel. Machine oil is preferred because it produces dense, consistent smoke when the paper is soaked and ignited.
- M3 bolts and nuts: For a more secure connection between the parts, I recommend using M3 bolts and nuts. It's optional but provides extra stability.
How to Assemble the Main Frame of the Tunnel:
Each basic section of the tunnel consists of two identical parts (Plate 1). To assemble one section:
- Print Parts:
- Print Plate 1 twice for each section.
- Insert the Plastic Sheet:
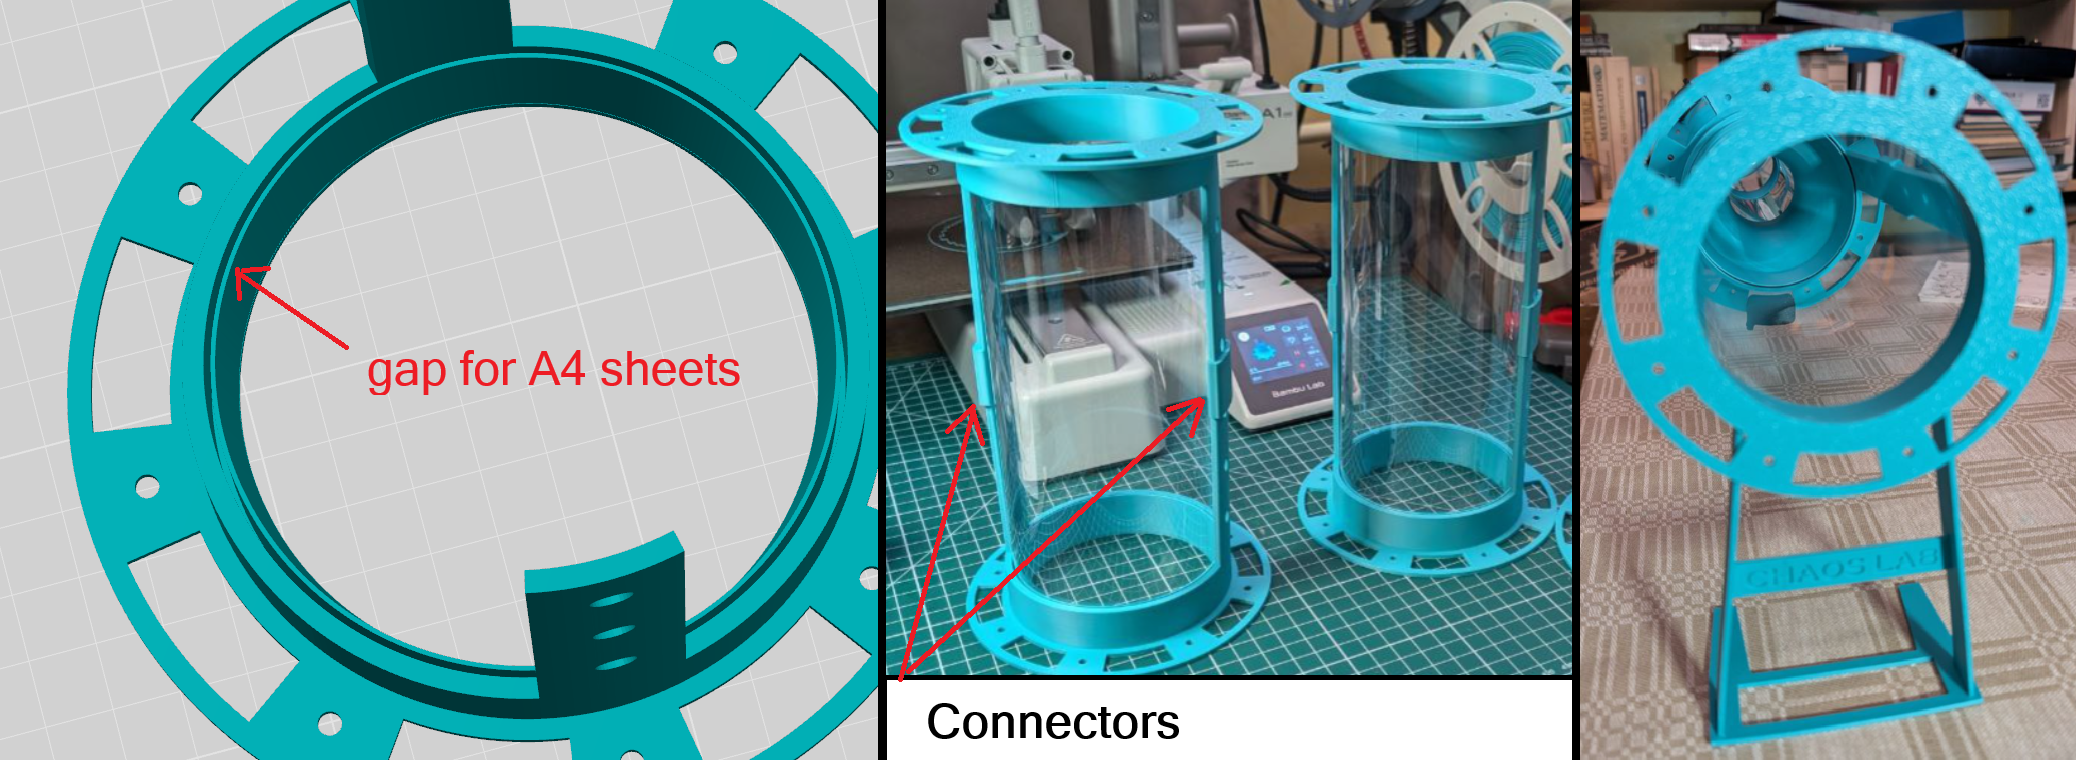
- Each printed part has a small gap designed to secure the A4 transparent plastic sheet.
- Insert the plastic sheet into the gap of one printed part. Then, attach the second printed part to the opposite end of the sheet, ensuring it’s held firmly in place.
- Secure with Connectors:
- Use connectors from Plate 4 to hold the structure together securely.
- Add Stands:
- To place the section on a table, print and glue pipe stands from Plate 3 to the section.
- Each section requires two stands for stability.
How to Connect the Sections of the Wind Tunnel:
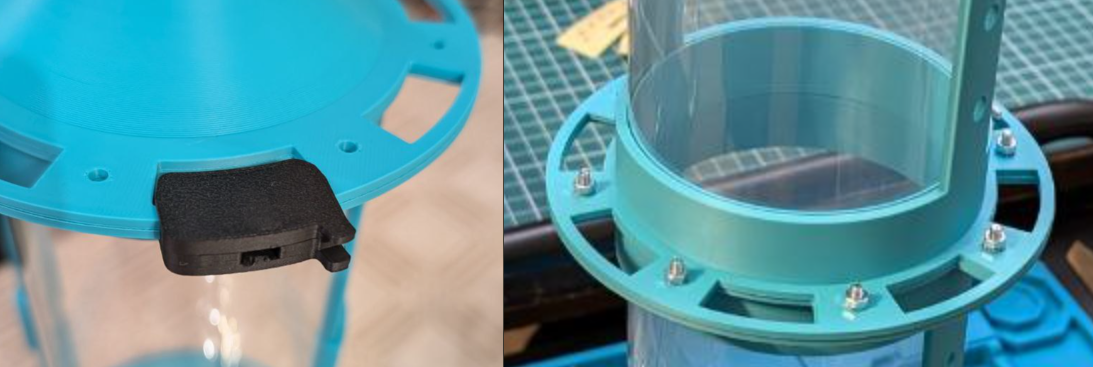
To connect the sections of the wind tunnel, I recommend using M3 bolts and nuts, as shown in the image below. However, if you only need to connect the parts temporarily, you can use the quick connection clips from Plate 5 instead.
How to Attach the Fan to the Wind Tunnel:
- Parts to Print:
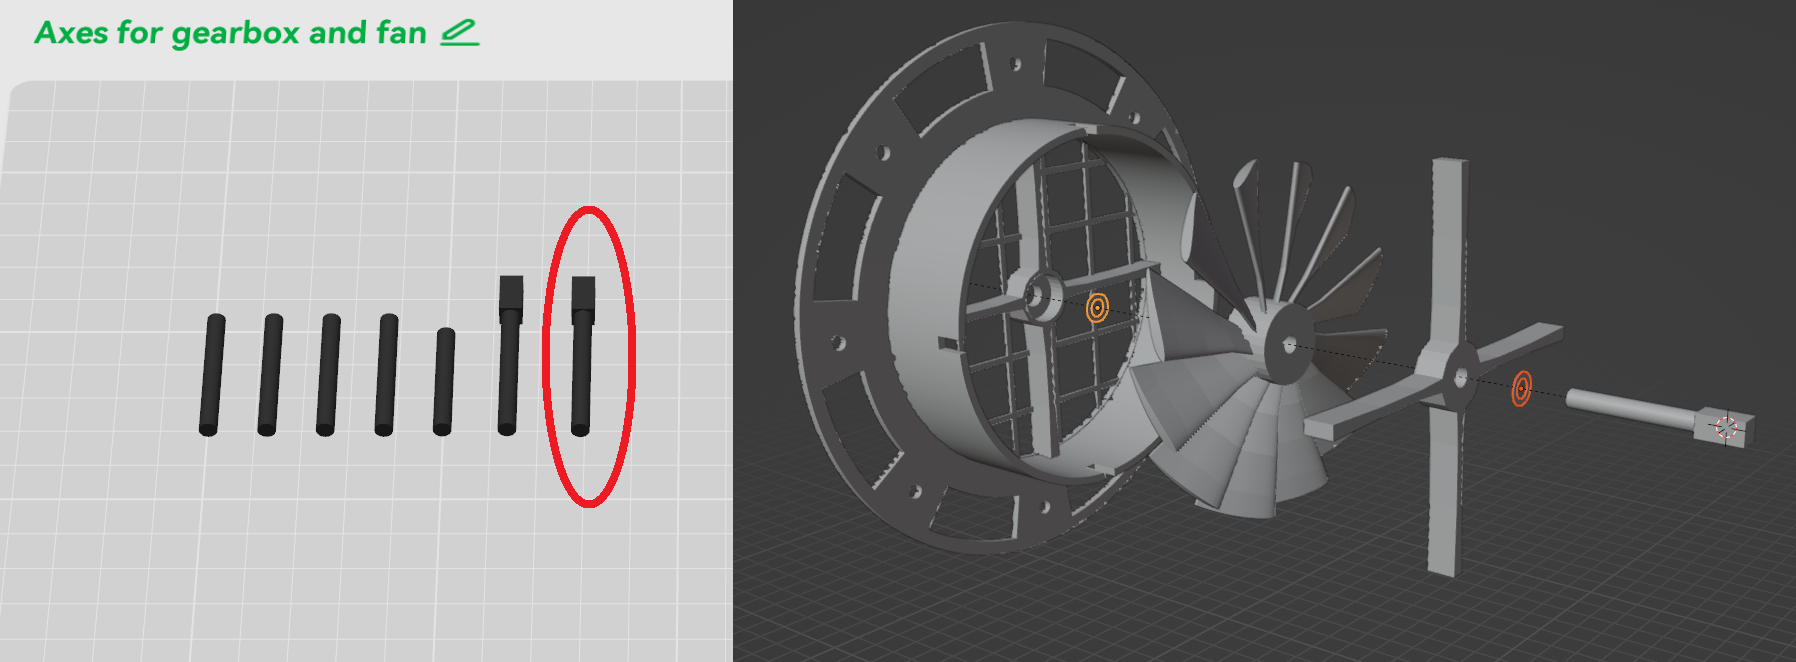
Print Plates 6, 7, 8, and 9.- If you won’t be using the basic manual gearbox (reductor), you will only need the part from Plate 9 that is circled in the image.
- If you're not using the manual gearbox, be sure to delete all other parts on Plate 9.
- Assembling the Fan Mechanism:
- Plates 7 and 8 contain holes for the bearings, which will be needed for proper assembly.
- I recommend using a couple of washers from Plate 21 to improve stability.
- Assembly:
- Assemble all the components as shown in the image below.
- Once assembled, connect the fan mechanism to the wind tunnel using either M3 bolts or the quick connection clips.
How to Run the Fan:
There are two main options for running the fan (unless you design your own custom fan module):
Option 1: Use the Default Gearbox (Plates 10 to 14)
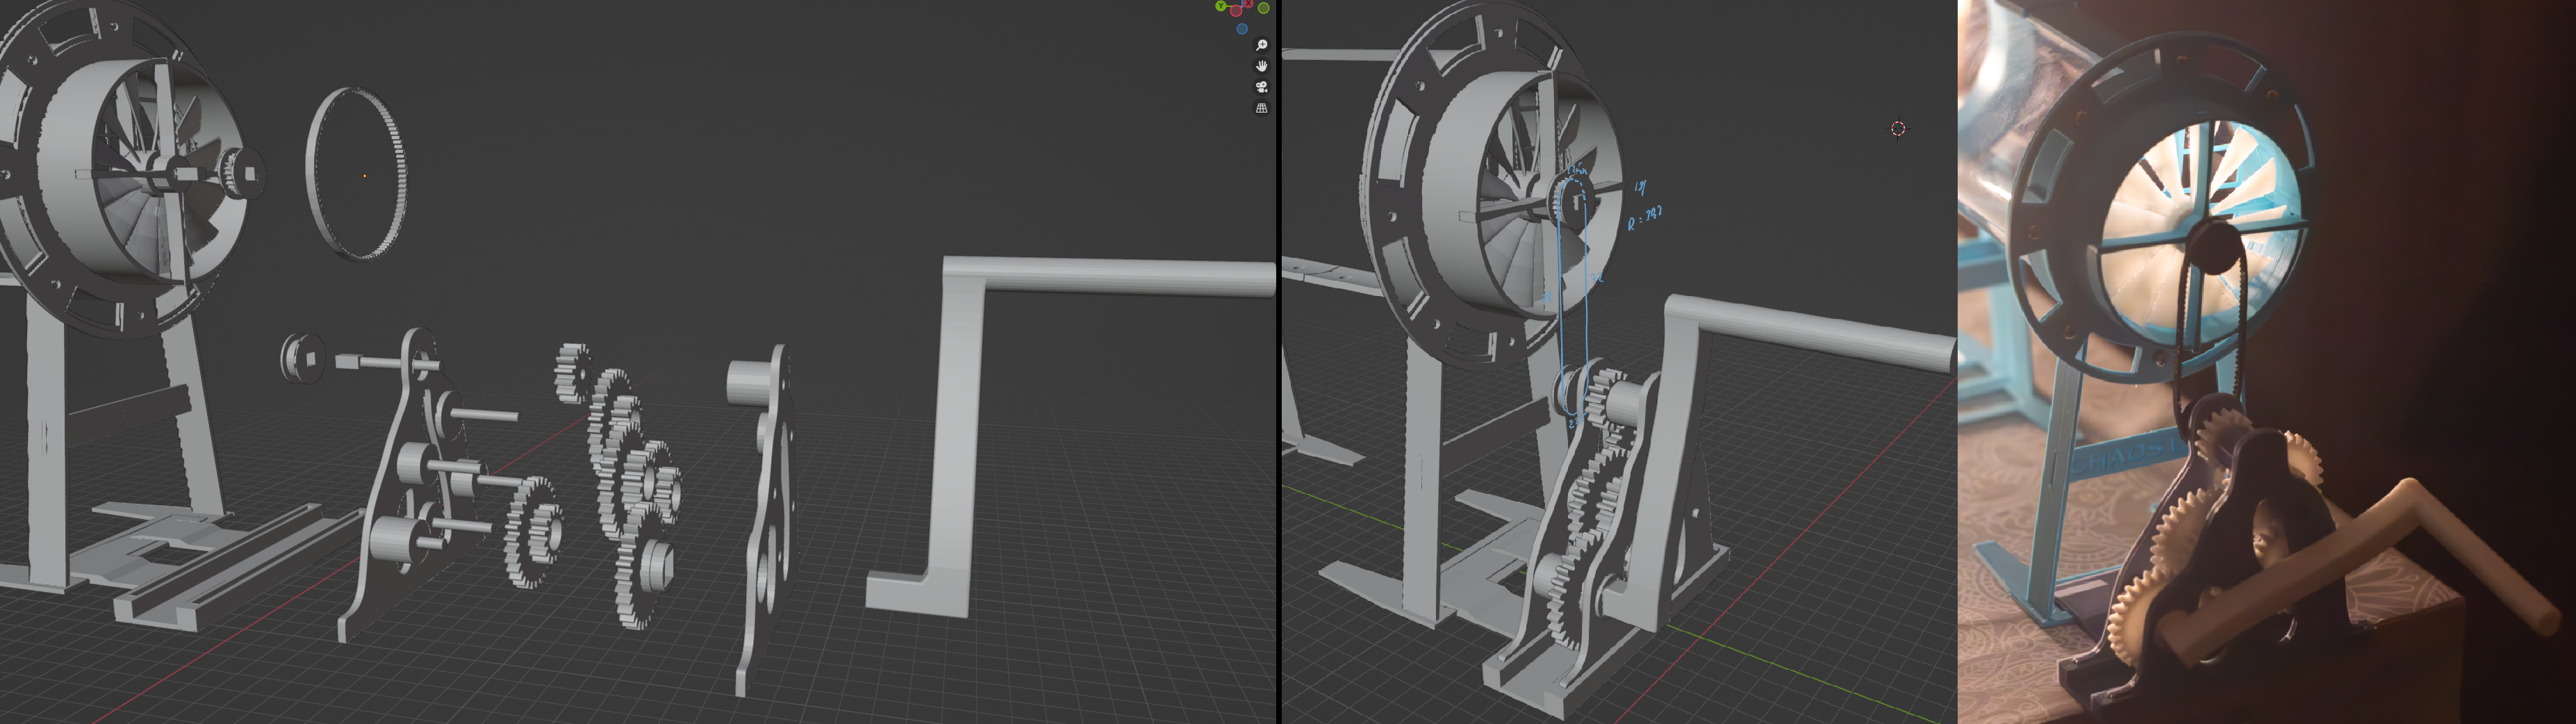
- To assemble the gearbox, follow the schematic below or explore the model gearbox in the raw files. Details contain holes for the bearings, which will be needed for proper assembly. Use washers from plate 21 to separate rotating details.
- WARNING: You will need a TPU filament to print the toothed belt!!!
Option 2: Accelerate the Fan Blade Using Your Vacuum Cleaner
- Personally, I prefer using a vacuum cleaner because it provides a more stable airflow. You can achieve a decent flow with the manual gearbox, it may take some time to master a stable rotation using only your hand.
How to Produce Smoke for the Wind Tunnel:
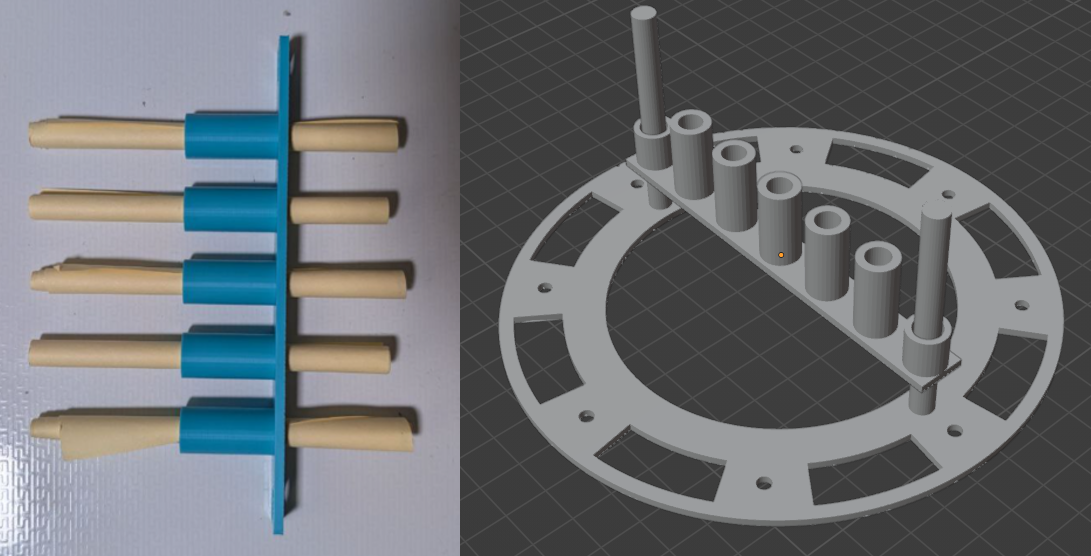
- Print a simple smoke generation module (Plate 15).
- Attach the module to the wind tunnel using M3 bolts or fast connection clips (Plate 6).
- Prepare the smoke generator:
- Roll pieces of paper and insert them into the tubes of the smoke generator module, as shown in the image below.
- For better results, soak the paper in oil (I recommend machine oil, as it generates dense smoke).
- Light the paper and then extinguish the flame to create smoke.
- Position the module:
- Place the part with tubes onto the rods attached to the wind tunnel. Ensure the smoking paper is positioned right next to the wind tunnel’s inlet.
Now, simply print some models you’d like to experiment with and enjoy the process! Plates 16 - 19 will provide you with a great starting point. :)

Some Extra Options:
Option 1:
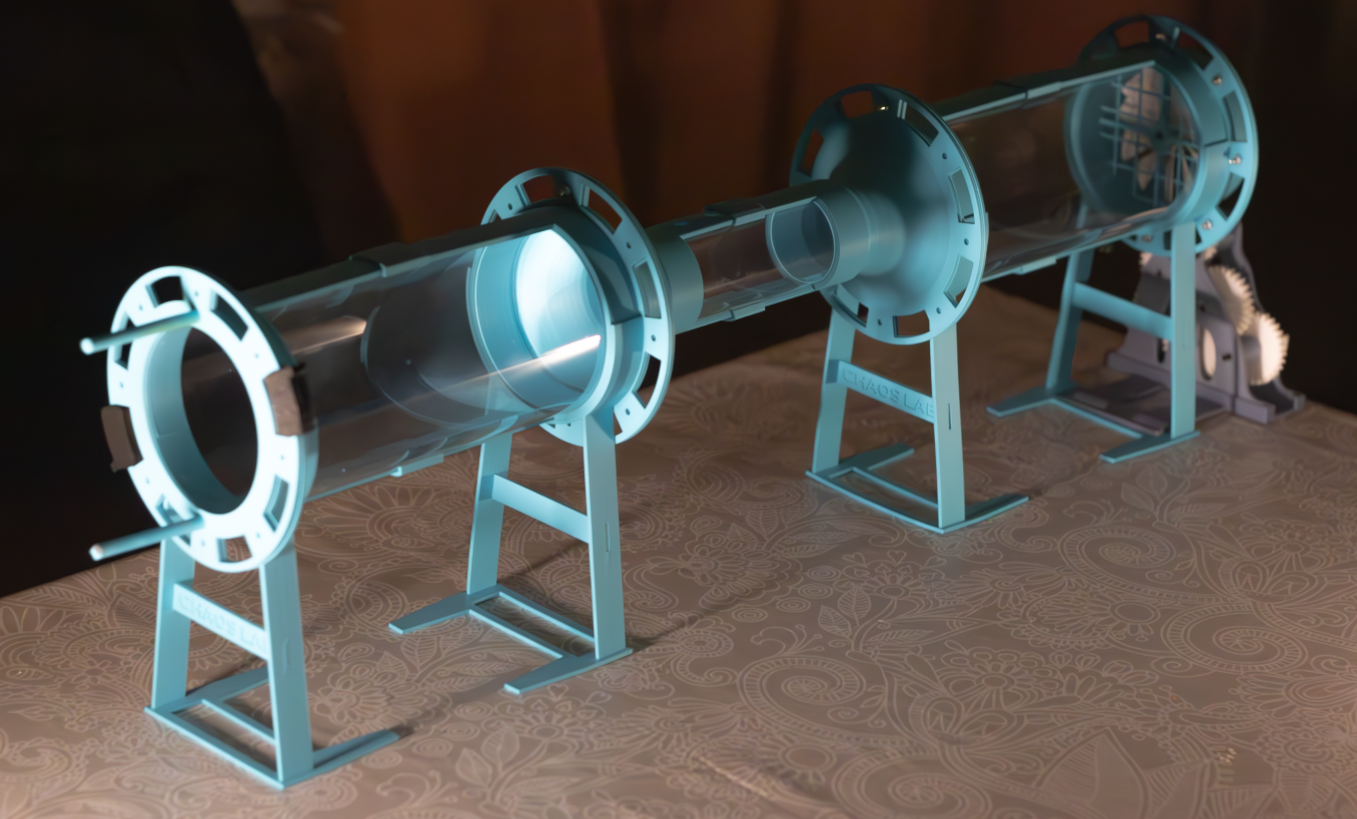
You can design and print any module you want. Simply use the default connection file “default_connection.stl” or “default_connection.blend” and attach any components you wish. For example, a thinner tube is available on Plate 2, which you can use to experiment with flow in a tube with a variable diameter.
Option 2:
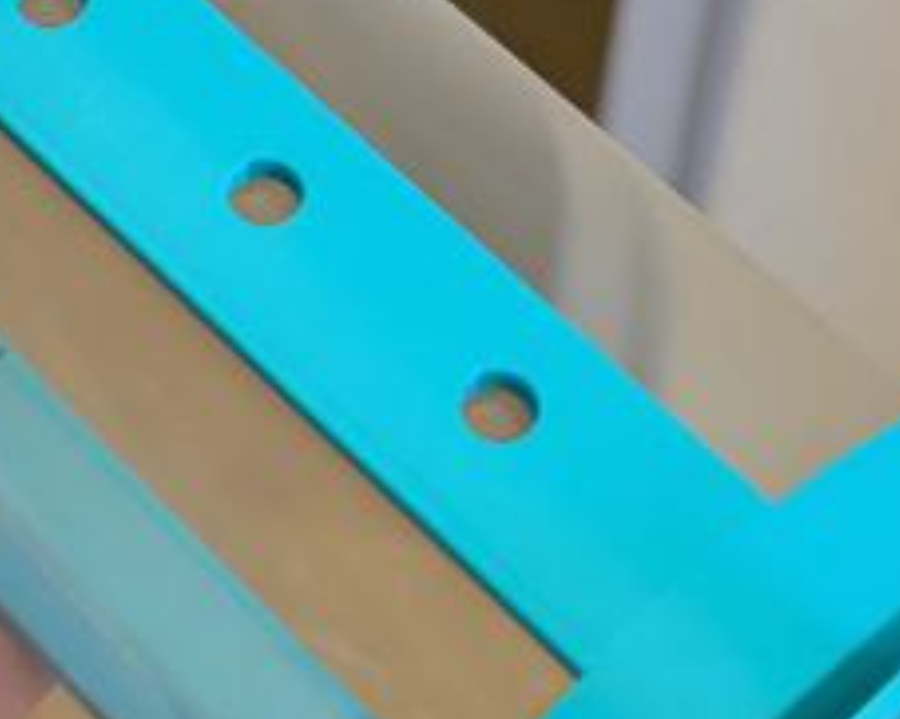
There are small holes on the frame of the pipes that you can use to secure models or even move or rotate them within the flow. Since you’ll need to cut holes in the plastic to use these, Plate 20 includes stubs that can be used to seal the holes when they are not in use.
Open-design, modular wind tunnel

Publicado em 15 de jan de 2025
Gostou deste modelo? Crie uma conta grátis para salvar seus favoritos e voltar a eles depois.
Criar conta