Você está no 3DFinder
Buscamos em Thingiverse, MakerWorld e Printables ao mesmo tempo para te dar o melhor de cada uma.
Descrição
Celebrate your New Years with this Ball Drop Gravity Timer which slowly drops the ball over a period of 30 seconds (give or take 1 or 2 seconds).
Most 3D printed clocks require metal rods, bearings, and screws because they need to be precise. However, since this project only really needs to last for 30 seconds, I was able to design a basic timer with no rods, bearings, or screws, you just need a 3d printer.
This design is based on a design of a gravity clock. Most people are aware of the standard pendulum grandfather clock which relies on a weight on a string to power it. This design is based on a much older and less reliable version called the Sawtooth Clock or an Anno Clock, instead of using a weight on a string, it uses its own weight to provide it constant power. This is what moves the timer downwards but it requires a rewind much like every gravity clock.
Due to the limitations of the sawtooth design coupled with a pendulum, this timer is susceptible to rocking which causes it to be inaccurate to a range of 1 to 2 seconds. If you rig a way to keep the tip of the sawtooth stand fixed, then your accuracy will improve drastically. This design consists of 3 major parts which can be printed and assembled. The timer portion, the sawtooth stand, and the geodesic ball. All these parts print flat and do not require any supports and are easy to assemble.
Designer note: This is my first time working with gears and clock systems and while I tried to design it the best I can, it still has issues I have yet to fix. Unfortunately, the lack of metal rods, bearings and screws also comes to a cost of the accuracy of this timer. This timer and its mechanism have an accuracy range of + or – 2 seconds in my test. Please be aware of this before you print! For all those who are clock experts, please take it easy on me because I am absolutely sure there is a better way to design this project, I just haven’t found it yet!
Printing details:
- Unfortunately, this project cannot fit on an A1 Mini due to the size requirements of the Geodesic Ball.
- Prior to printing, it is highly recommended to go through the flow rate calibration either manual or automatic to ensure the best and smoothest top layers. You want to avoid any friction if you want this to work ok.
- Because every printer and filament have a different output, your results may vary depending on the printing and material quality! I recommend you stick with standard PLA, PLA+ or PETG for the timer and sawtooth stand. Any other material may cause more issues than I’ve tested for. The Geodesic ball can remain as silk or any pla.
The Timer
Consists of the gears, escapement system, and box which pass through the sawtooth stand and holds the gears. It also has designs to minimize friction if you do not have the best top layers, but design can only do so much. Make sure to calibrate your top layers! Designed with a 0.3mm tolerance.
The Sawtooth Stand
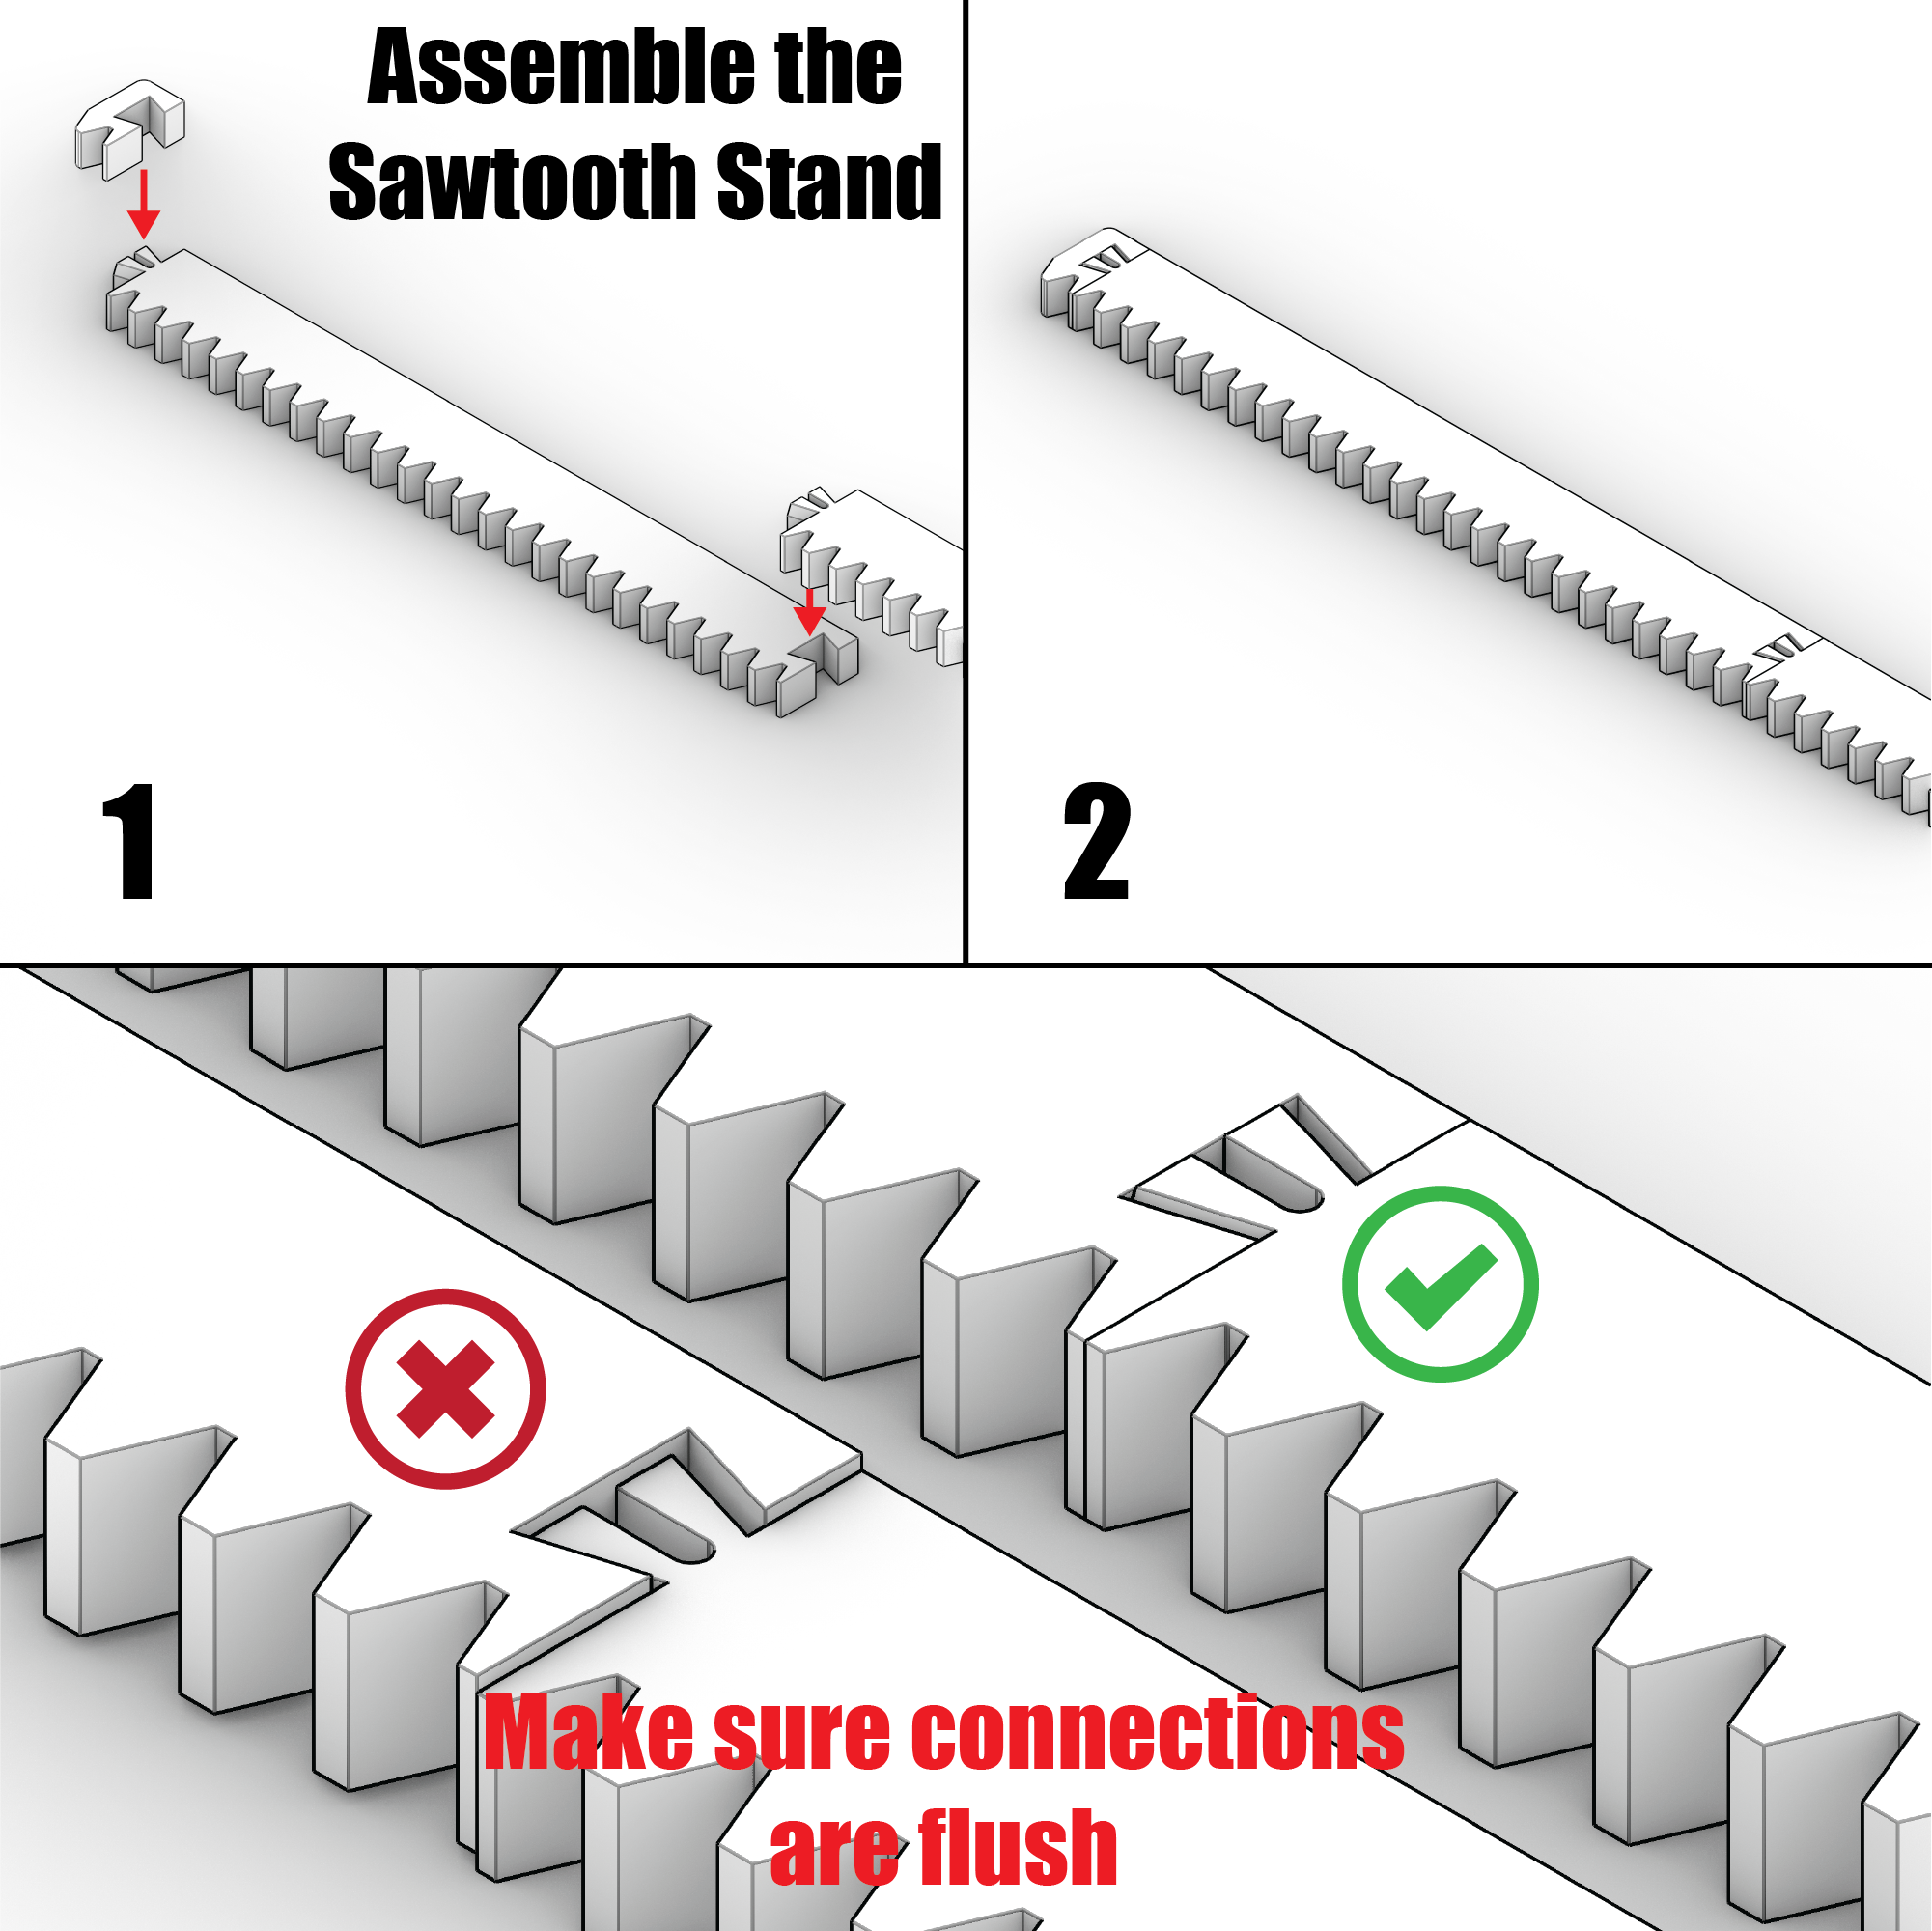
This design has a tight fit, you will need to use a hard surface and force the prongs into the holes by using your palm or a soft mallet. This tolerance is required to minimize the vibrations, but as you will see, it is still present despite my best efforts. You will need 3 rail parts and one cap as well as one base to complete the assembly. When assembling, it is important to make sure there are no ridges and minimal bumps on the connections or your timer may jam.
The Geodesic Sphere
Optional, but it’s really the only thing making this design look like a ball drop. Without it, the timer goes much slower too.
I recommend silk PLA for shiny results, needs to be printed in Vase mode at 0.8 mm outer wall thickness. I’ve tested it with 72g of weight as the weight will affect how fast it goes.
Consider using my print profiles, I have tested them thoroughly!
- If you are slicing them yourselves, make sure you have the following settings:
- For all models except for the Geodesic Ball, print with 3 walls and around 15% infill Gyroid for best strength
- For the Timer model, you must slice the models with the Arachne wall generator to have more accurate gears and minor details that help to reduce friction.
- For the pendulum only, it must be 8-10 walls or loops thick to allow proper weight so it falls slowly enough. You can experiment with less walls but do note that will affect the speed.
- For the Geodesic Ball, you must slice it in Vase mode with an outer wall thickness of 0.8mm. Reduce the speed of the outer wall to 40mm/s if you are printing with silk per Bambu Lab’s recommendations: [https://wiki.bambulab.com/en/x1/manual/printing-with-silk-filaments](https://wiki.bambulab.com/en/x1/manual/printing-with-silk-filaments)
- You will need to print two Bracket clamps, two C clamps, and three stand rails. Otherwise one of everything else.
How to Assemble:
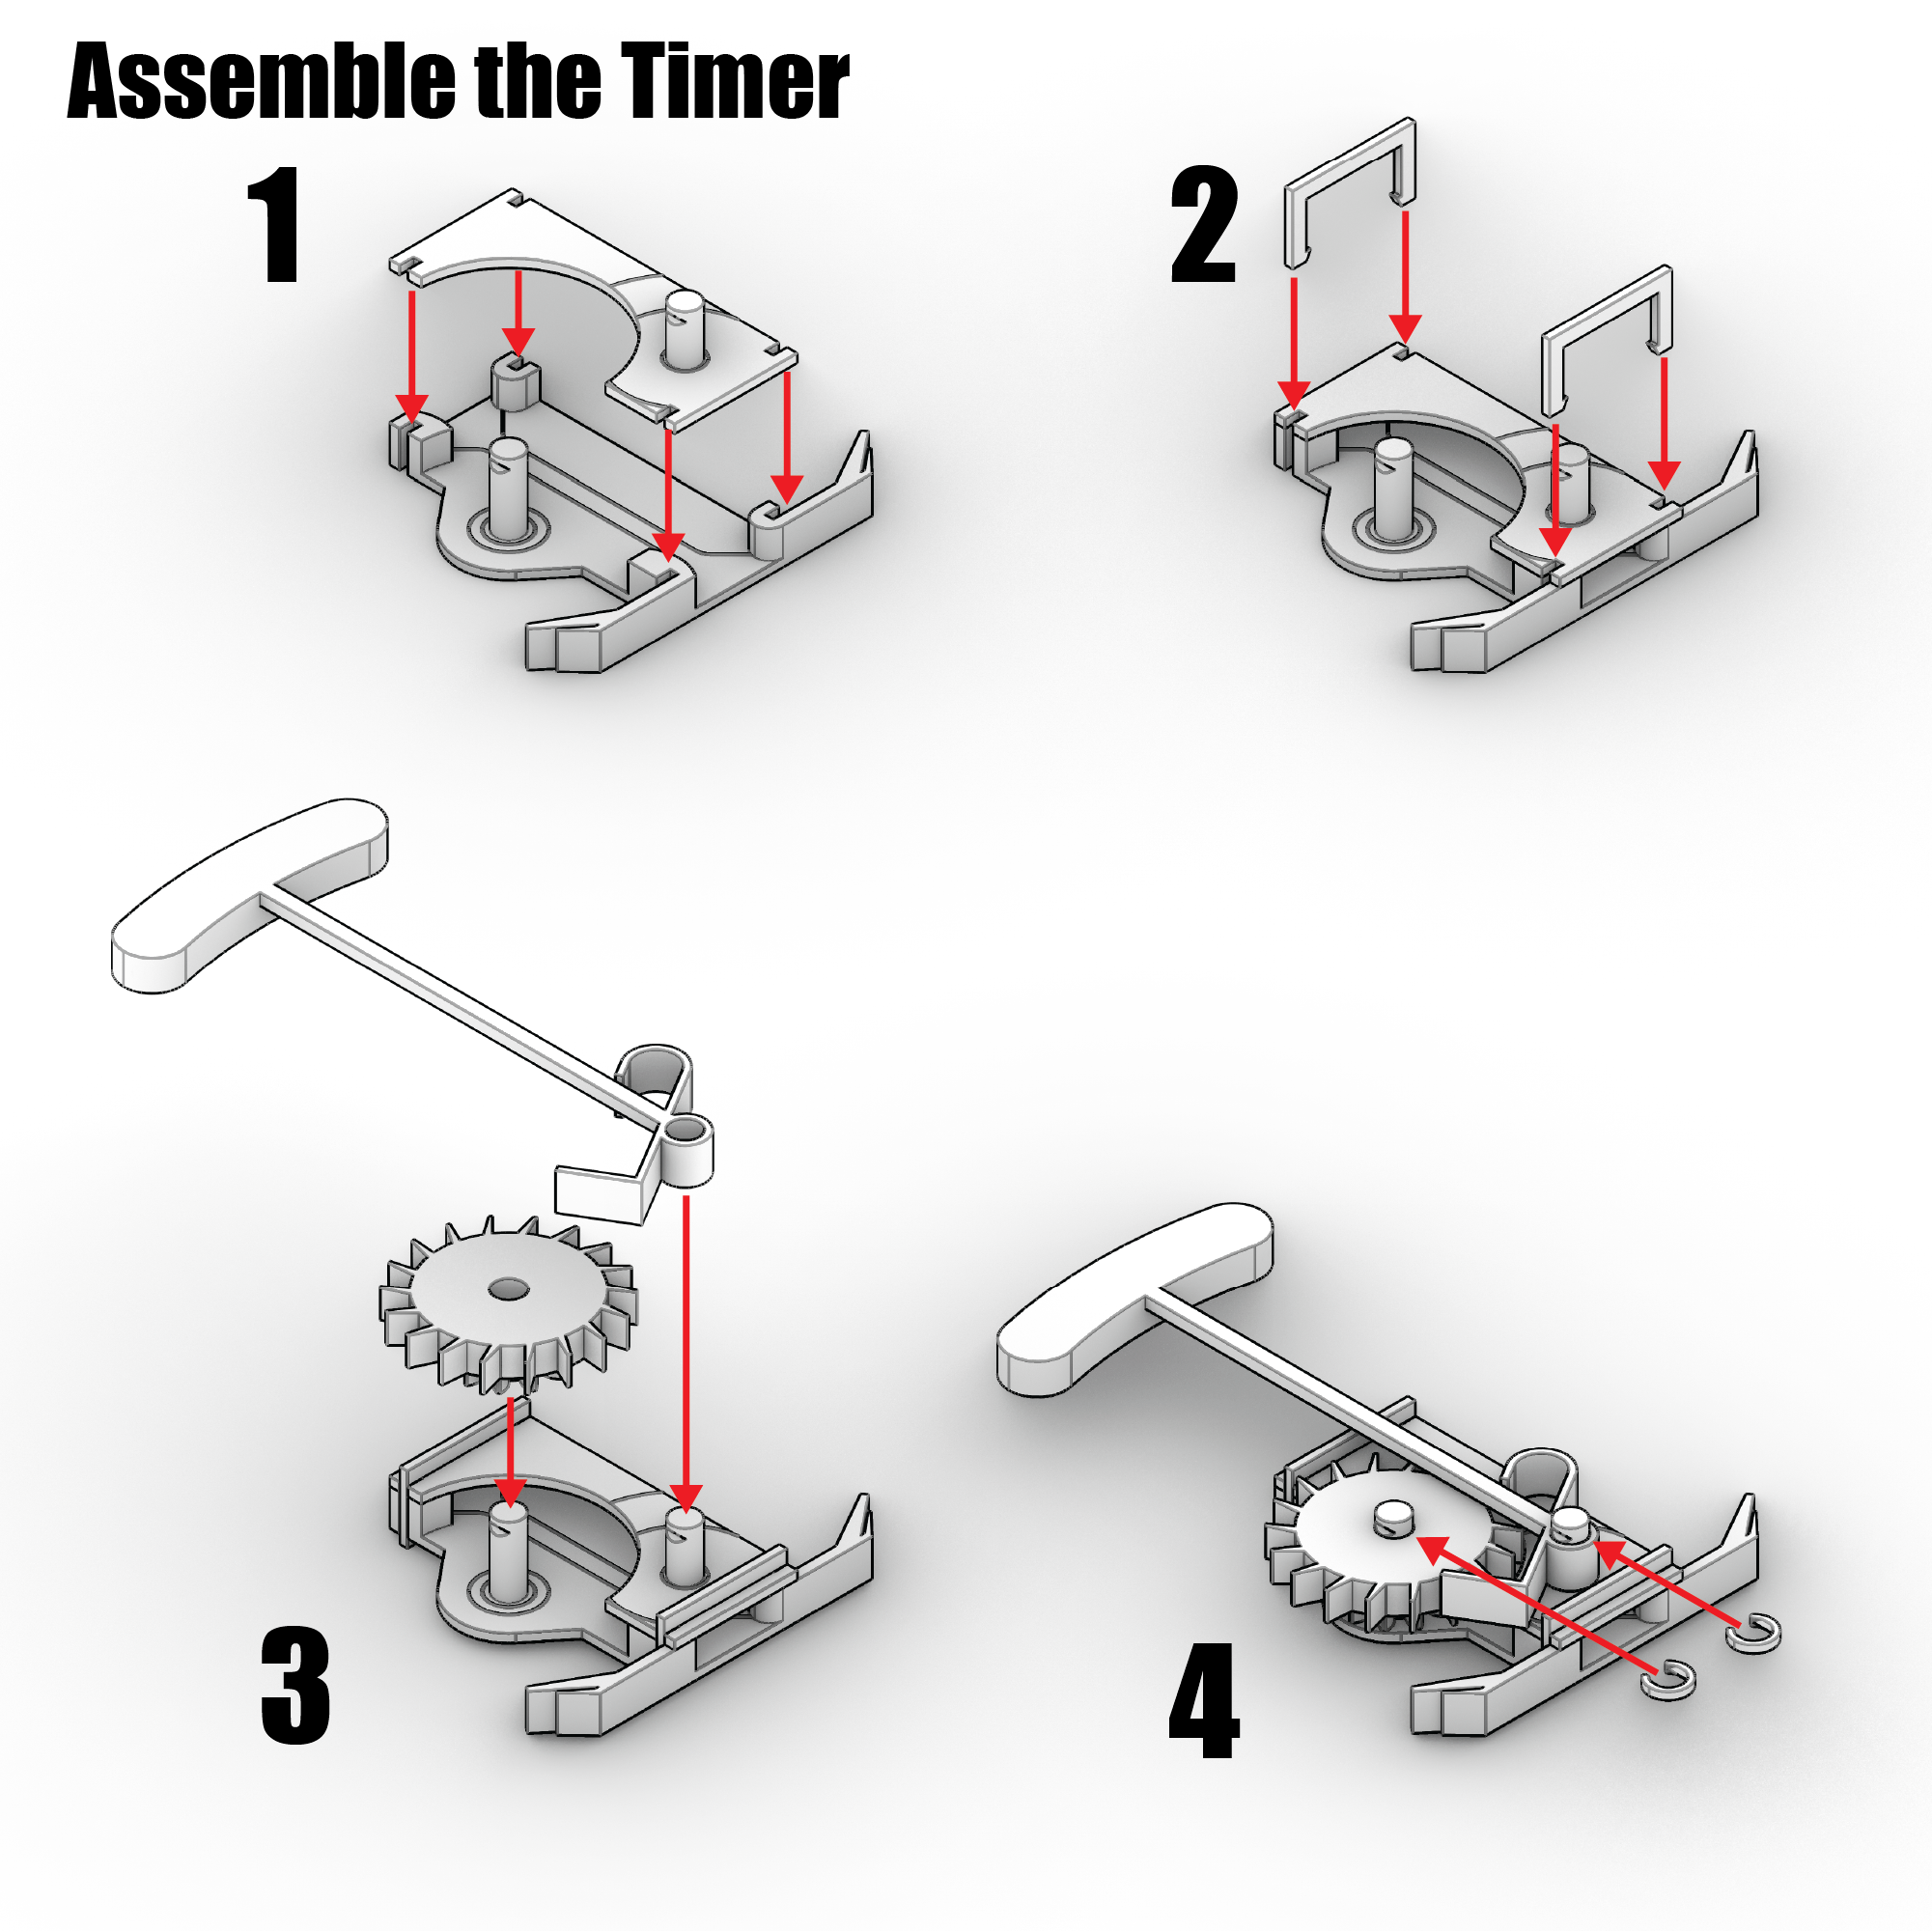
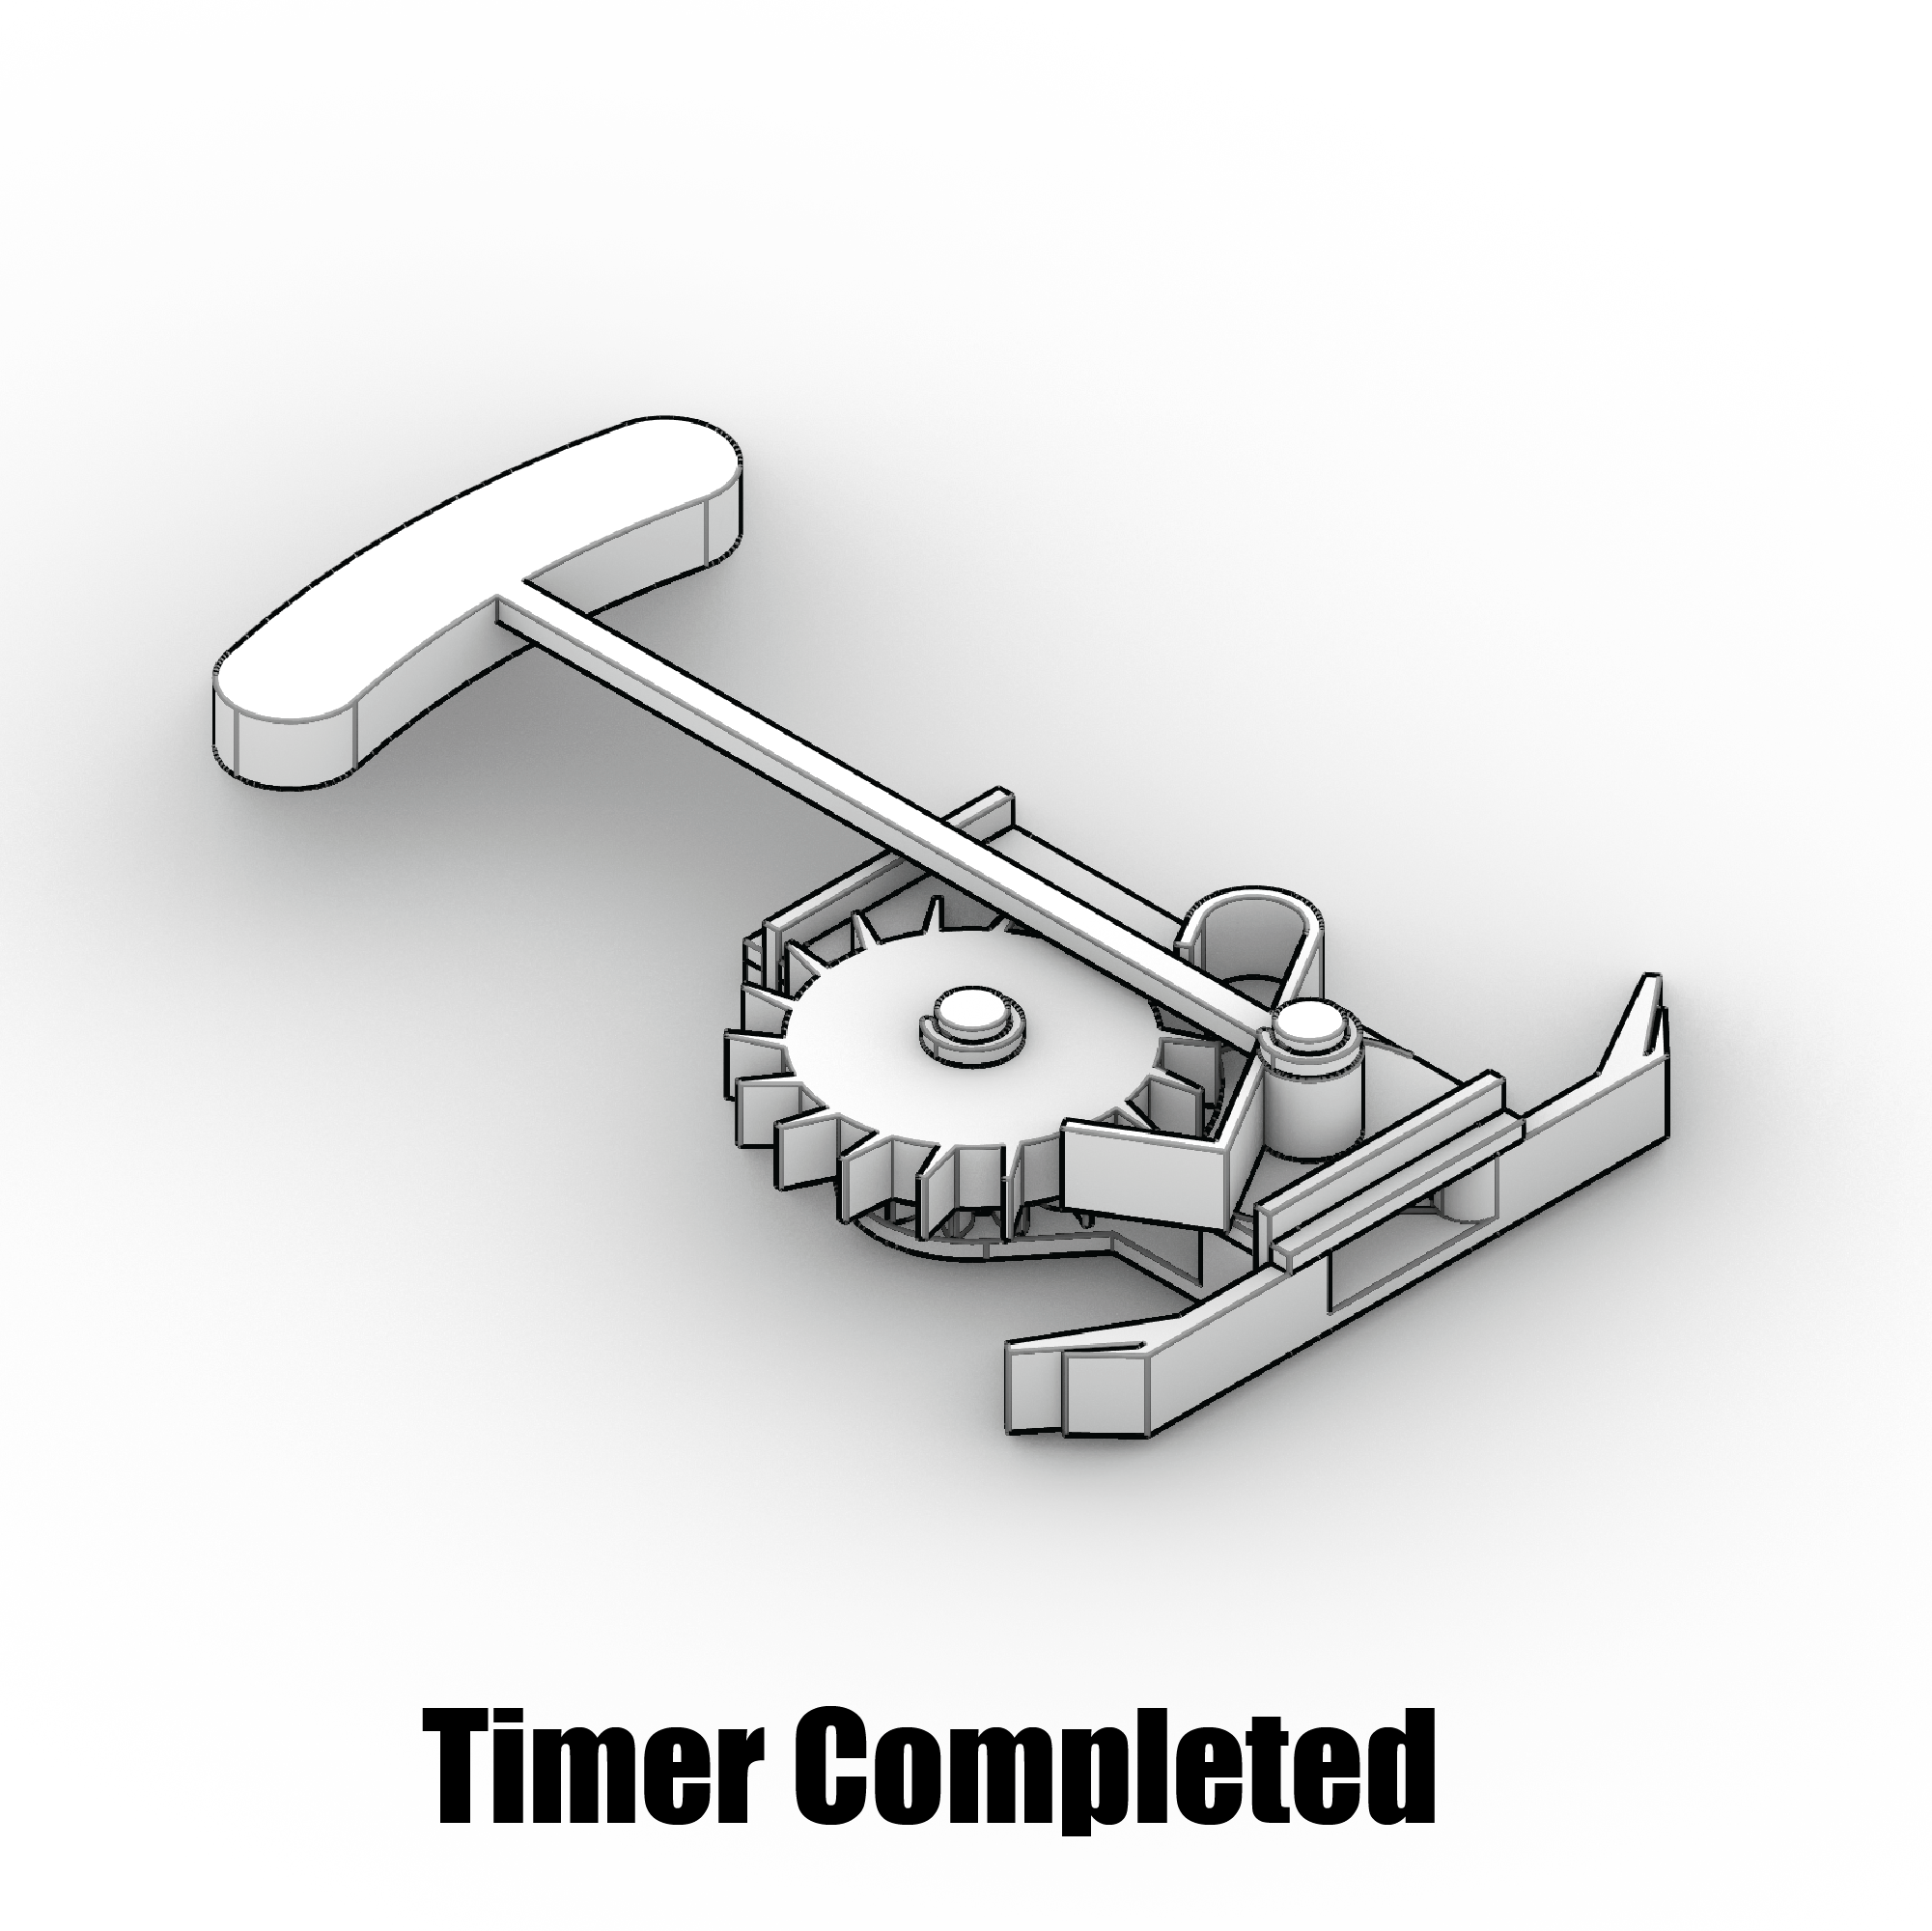
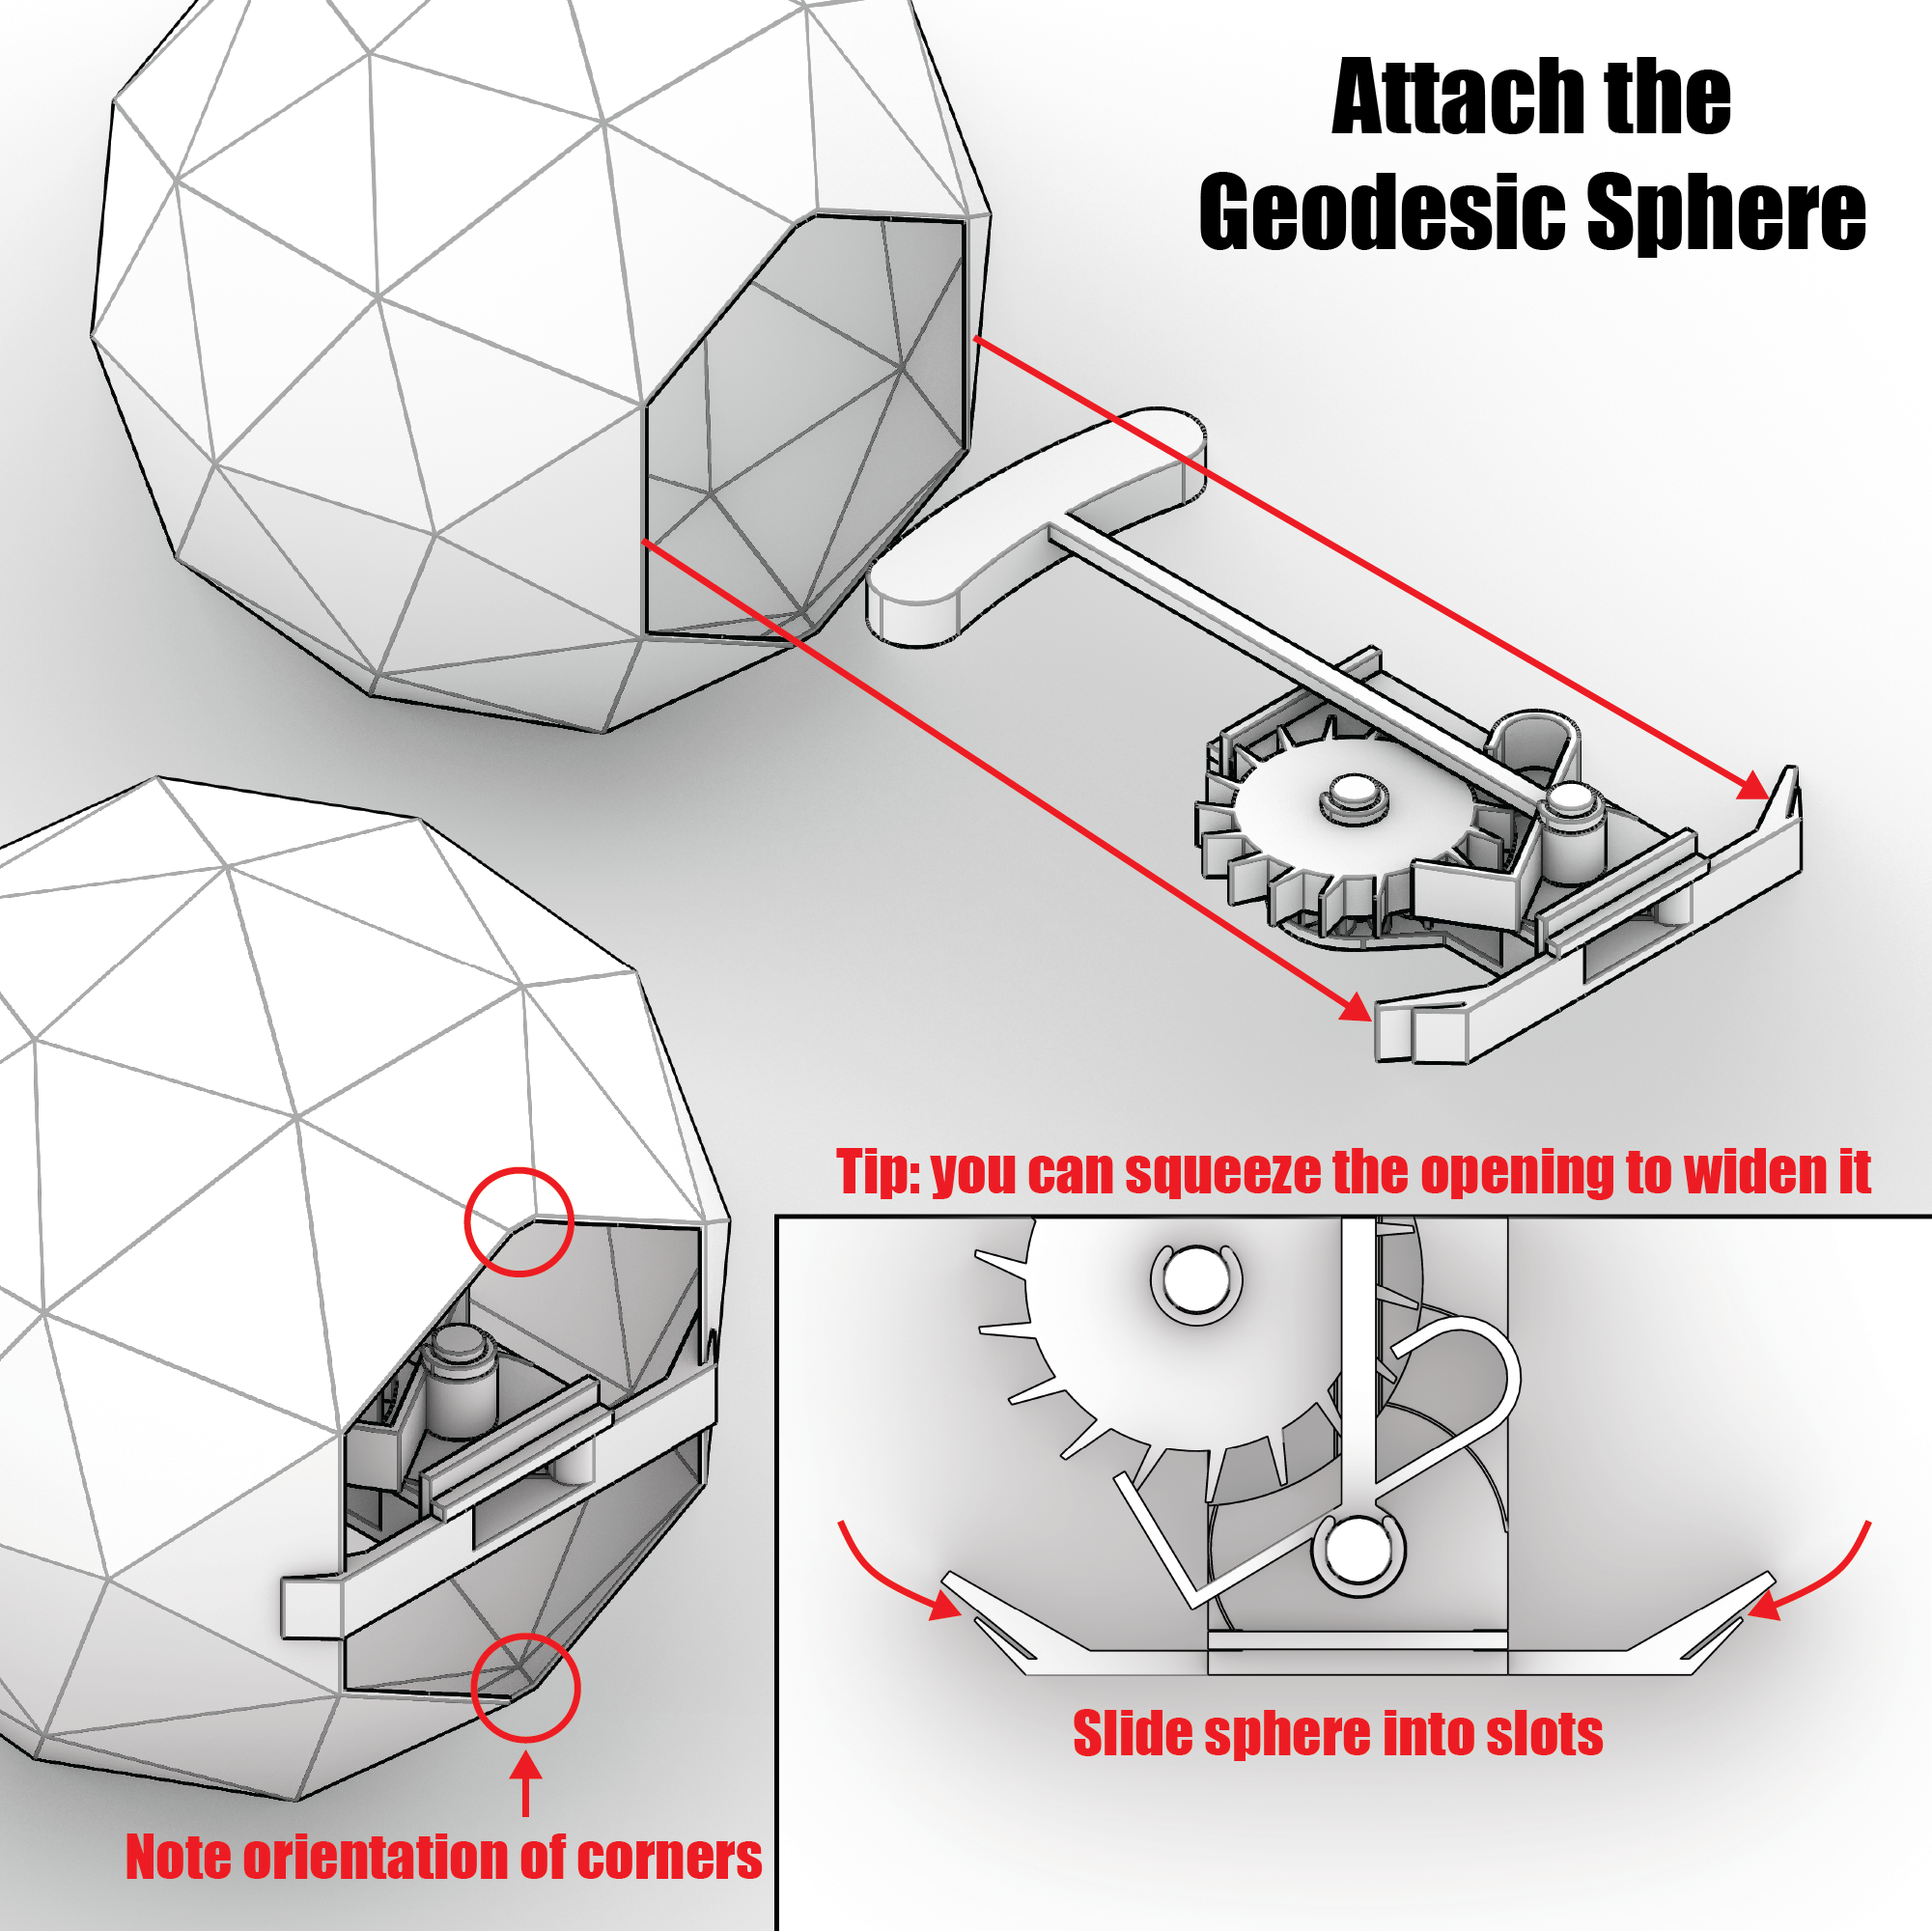
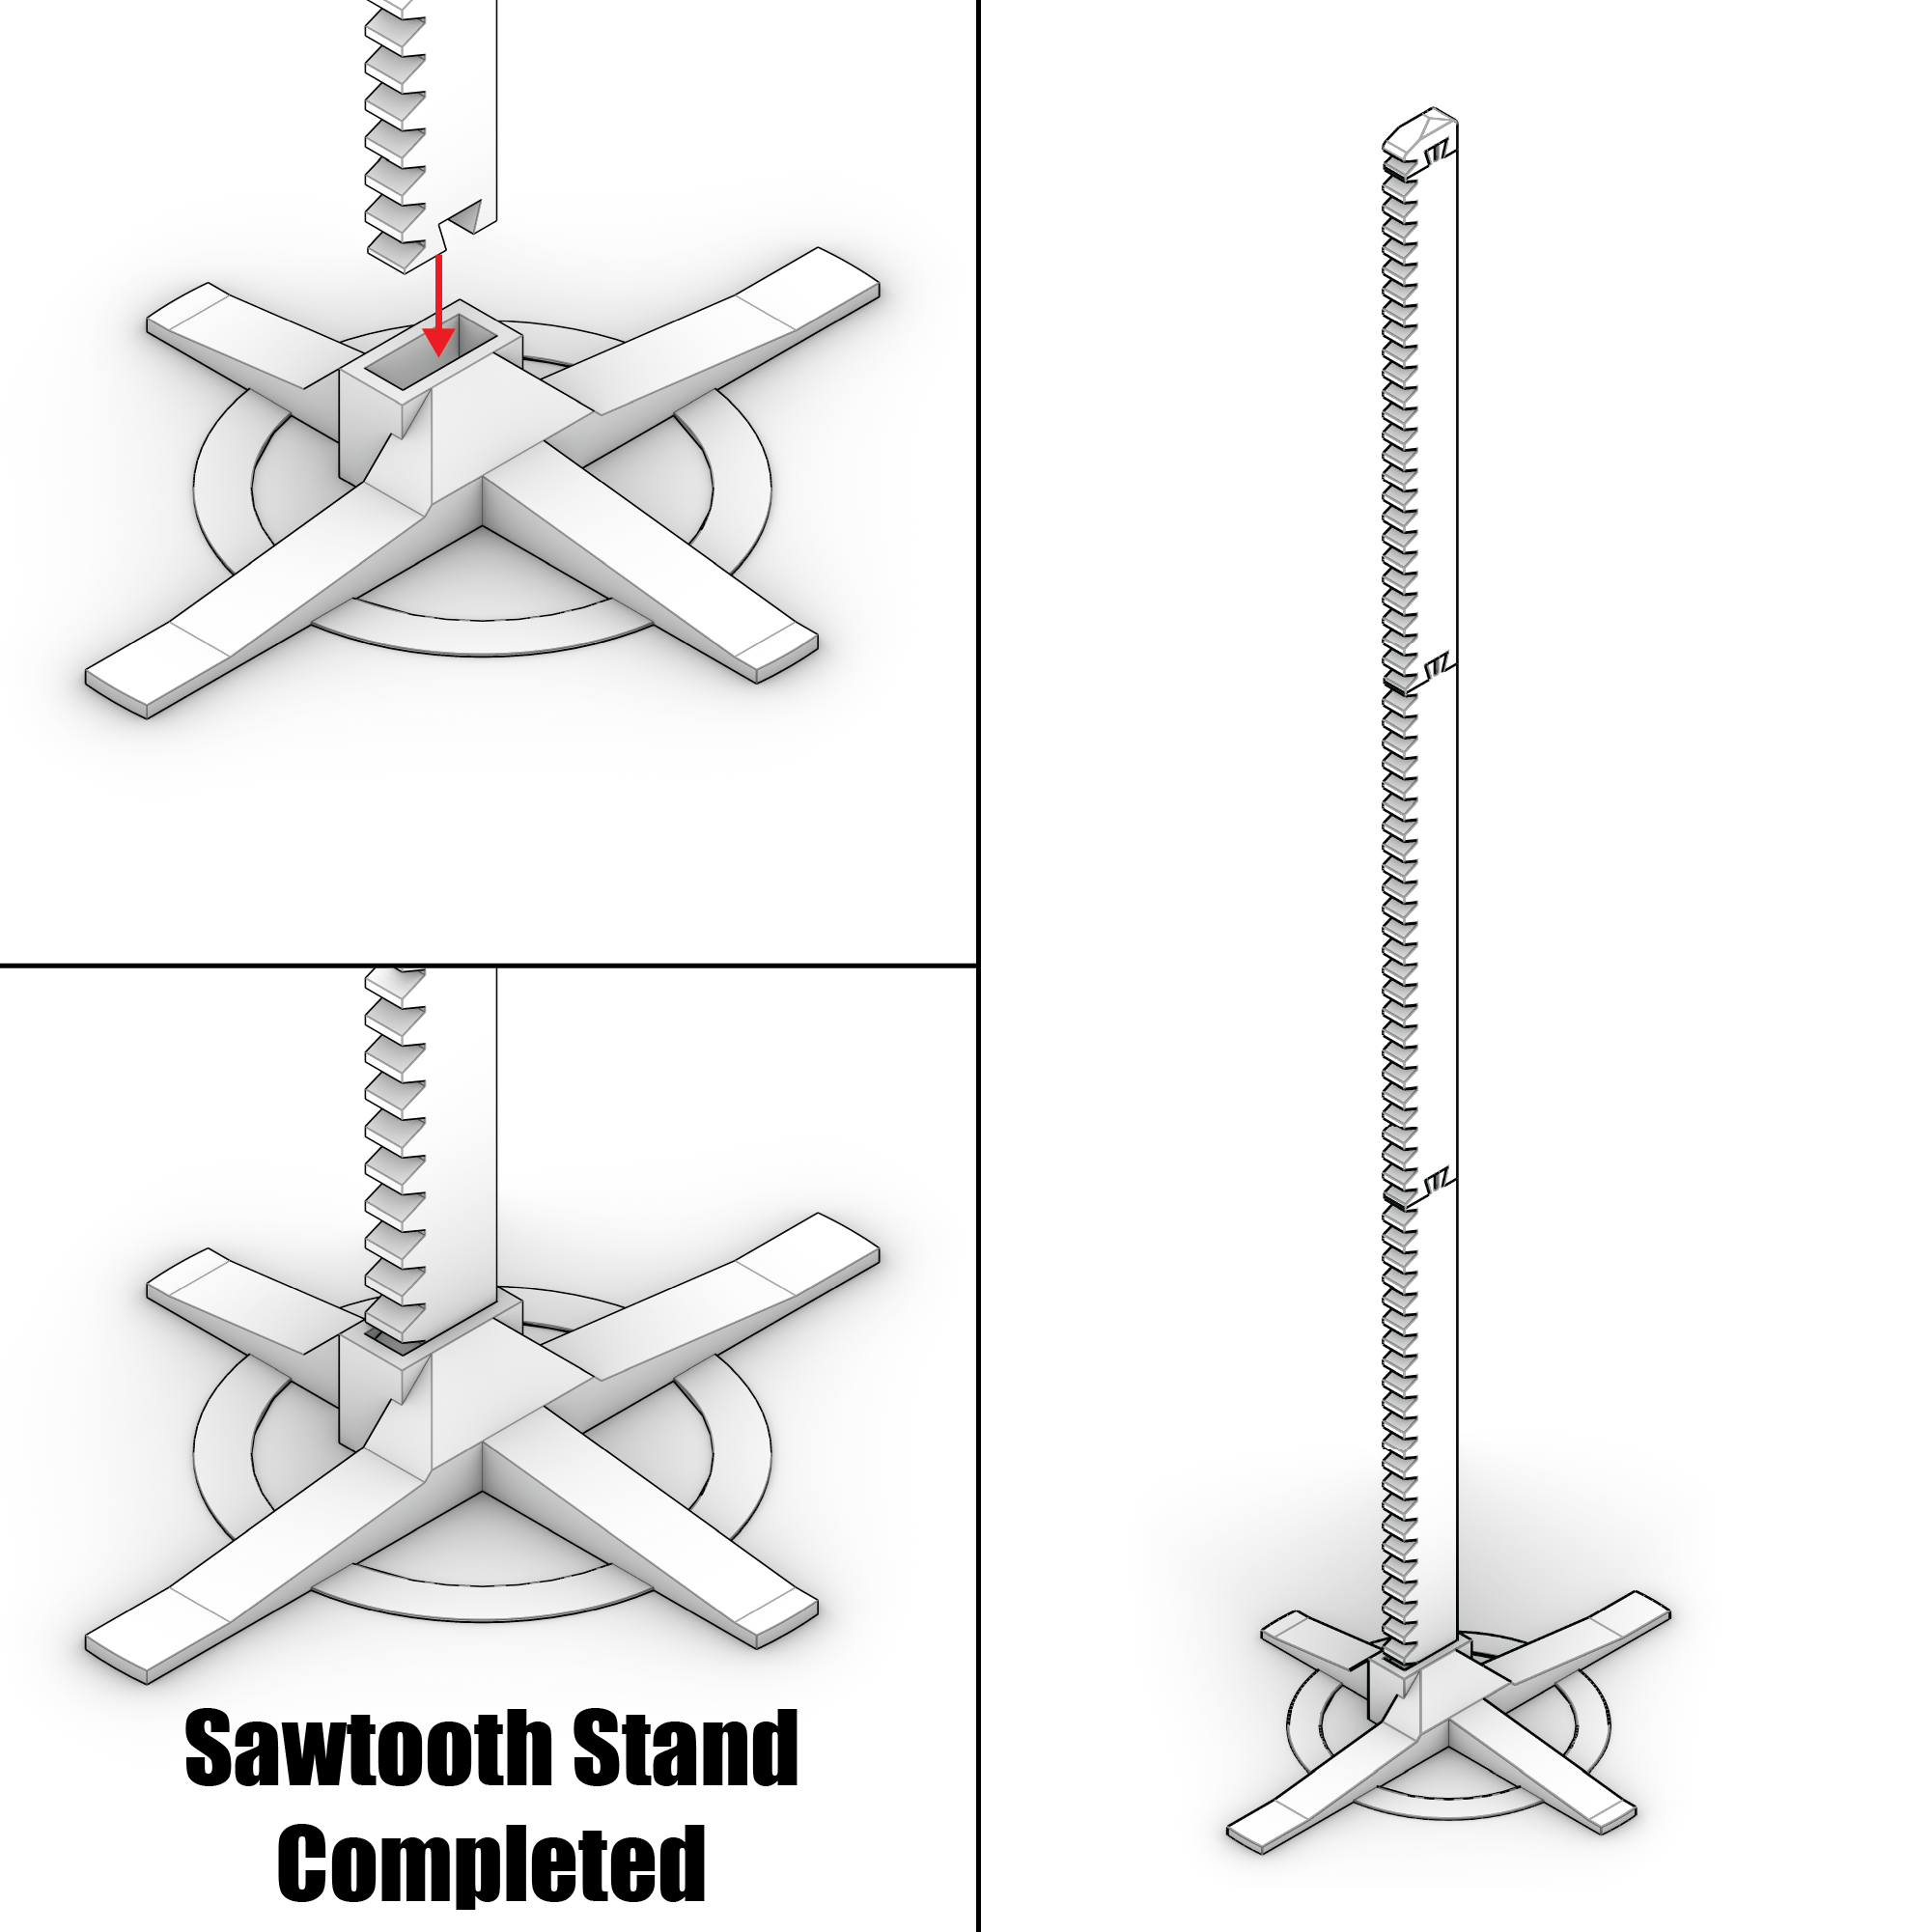
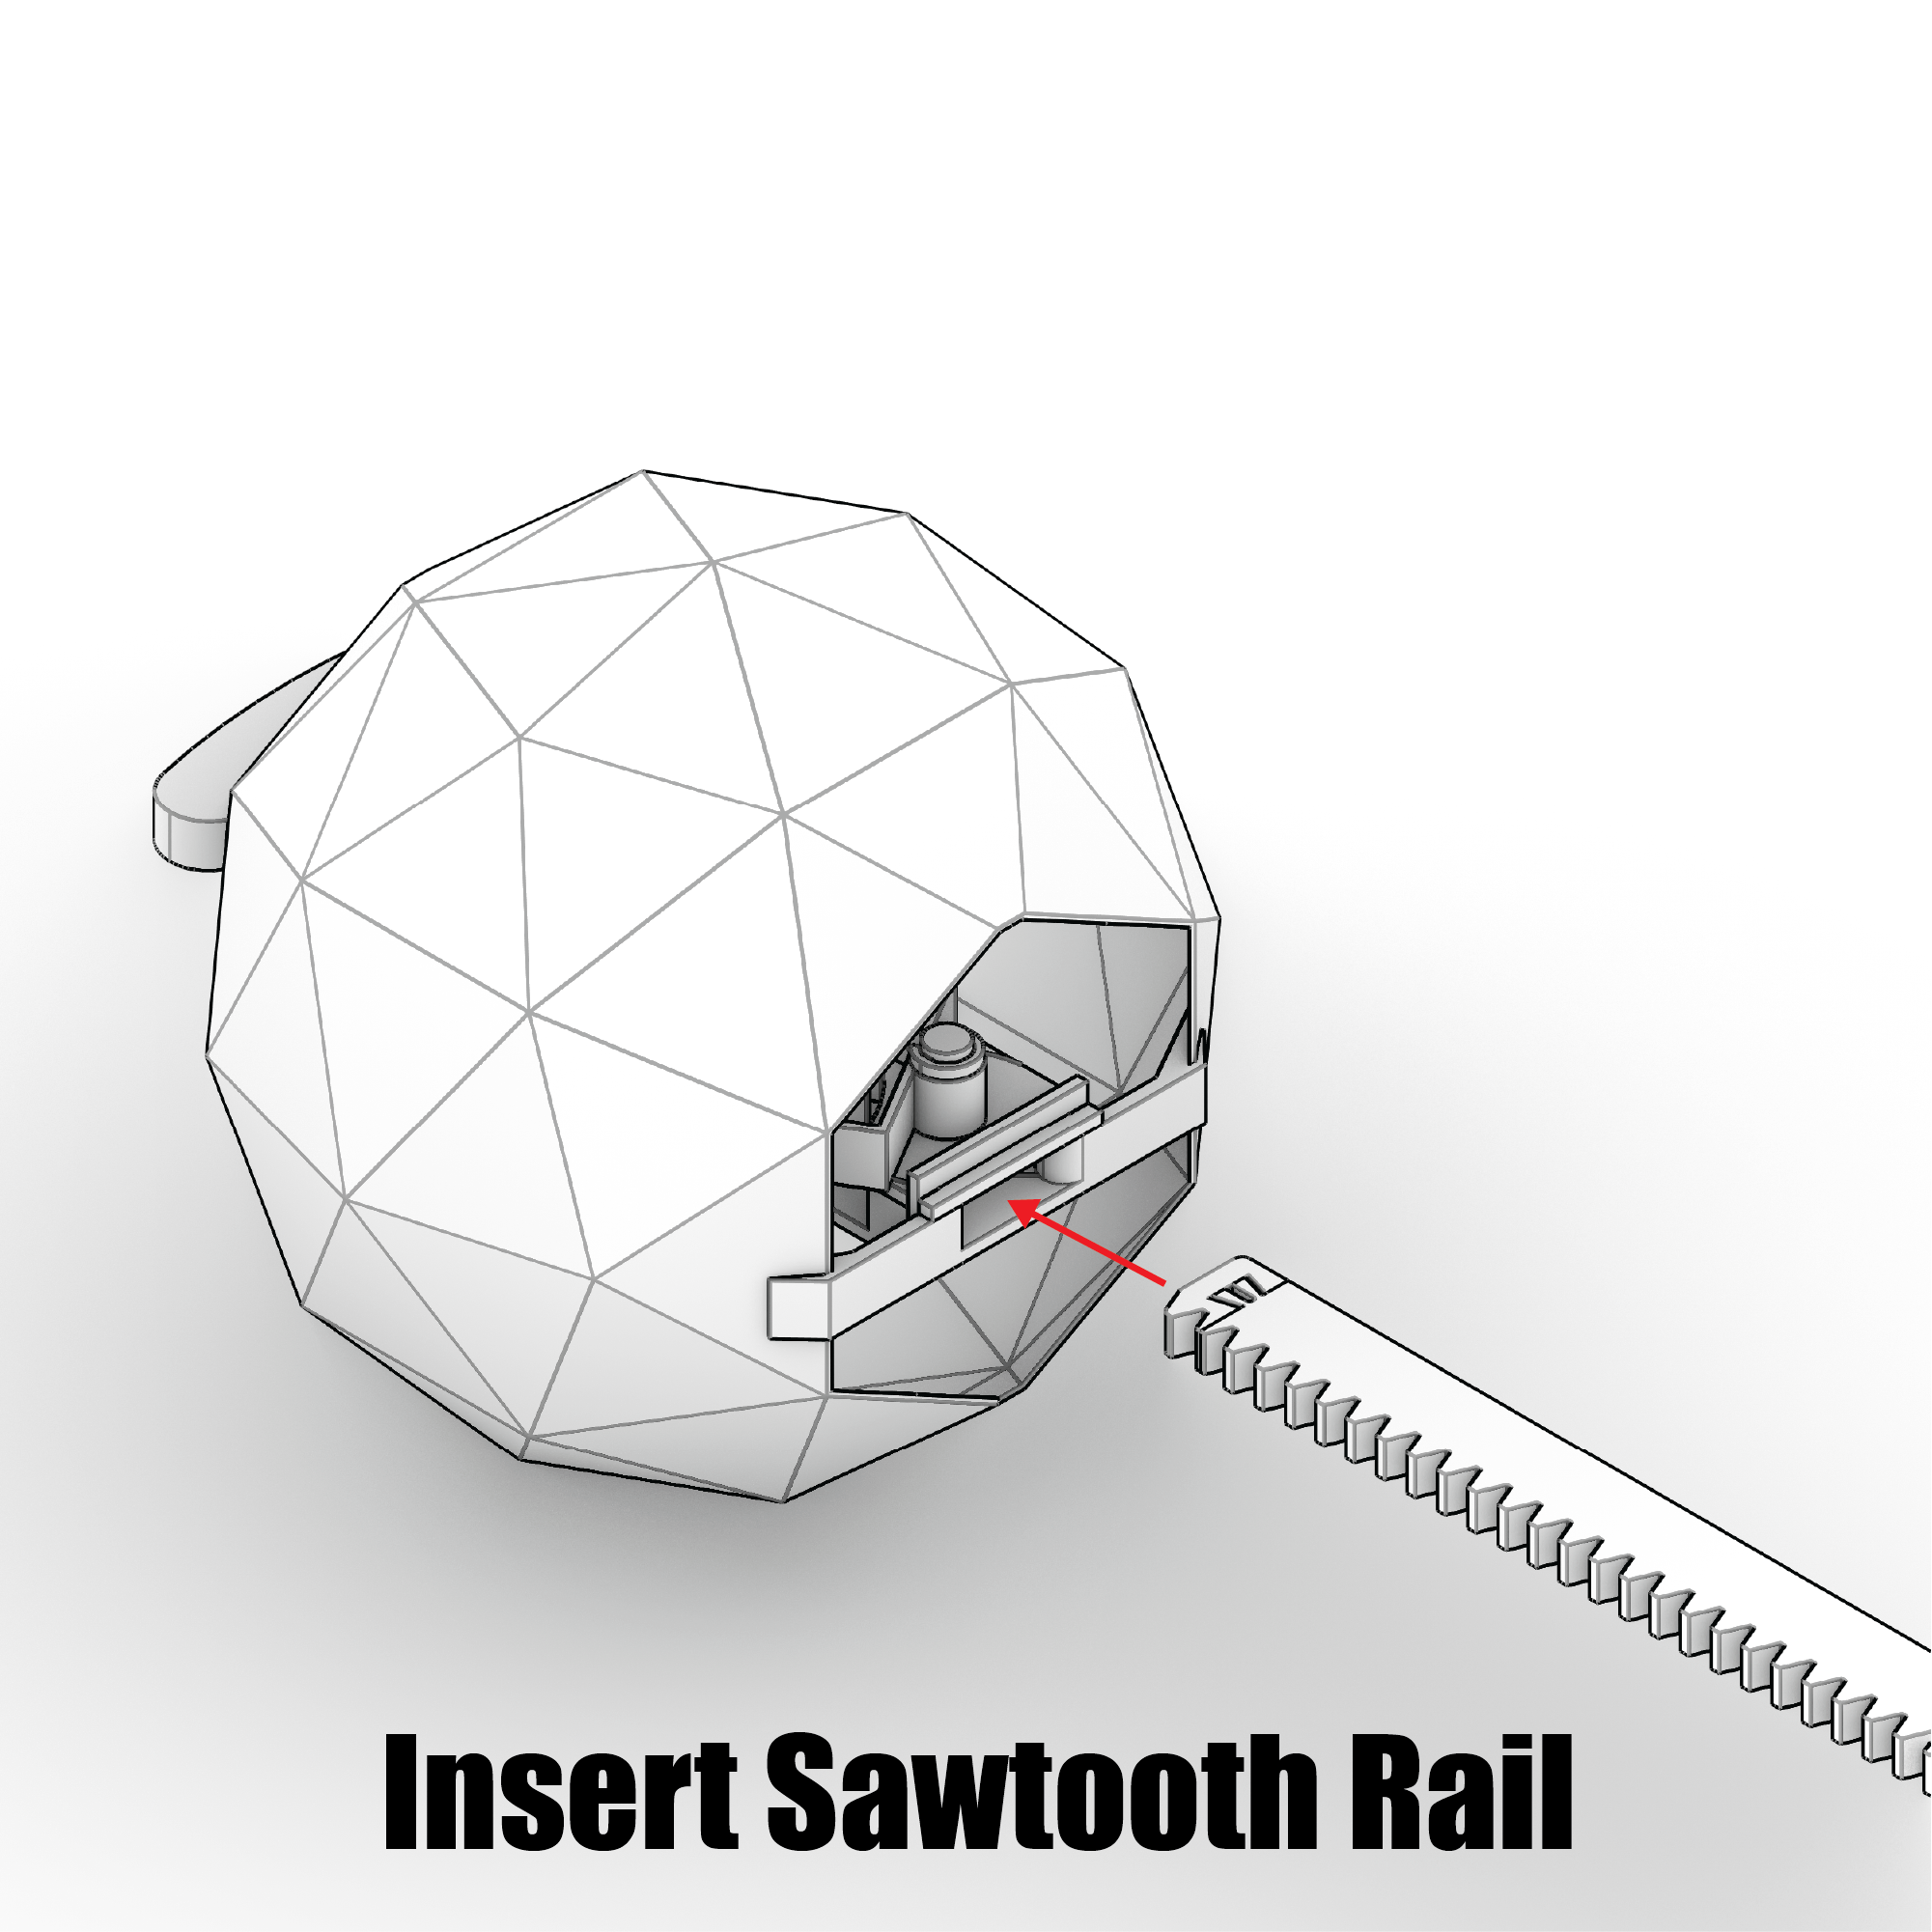
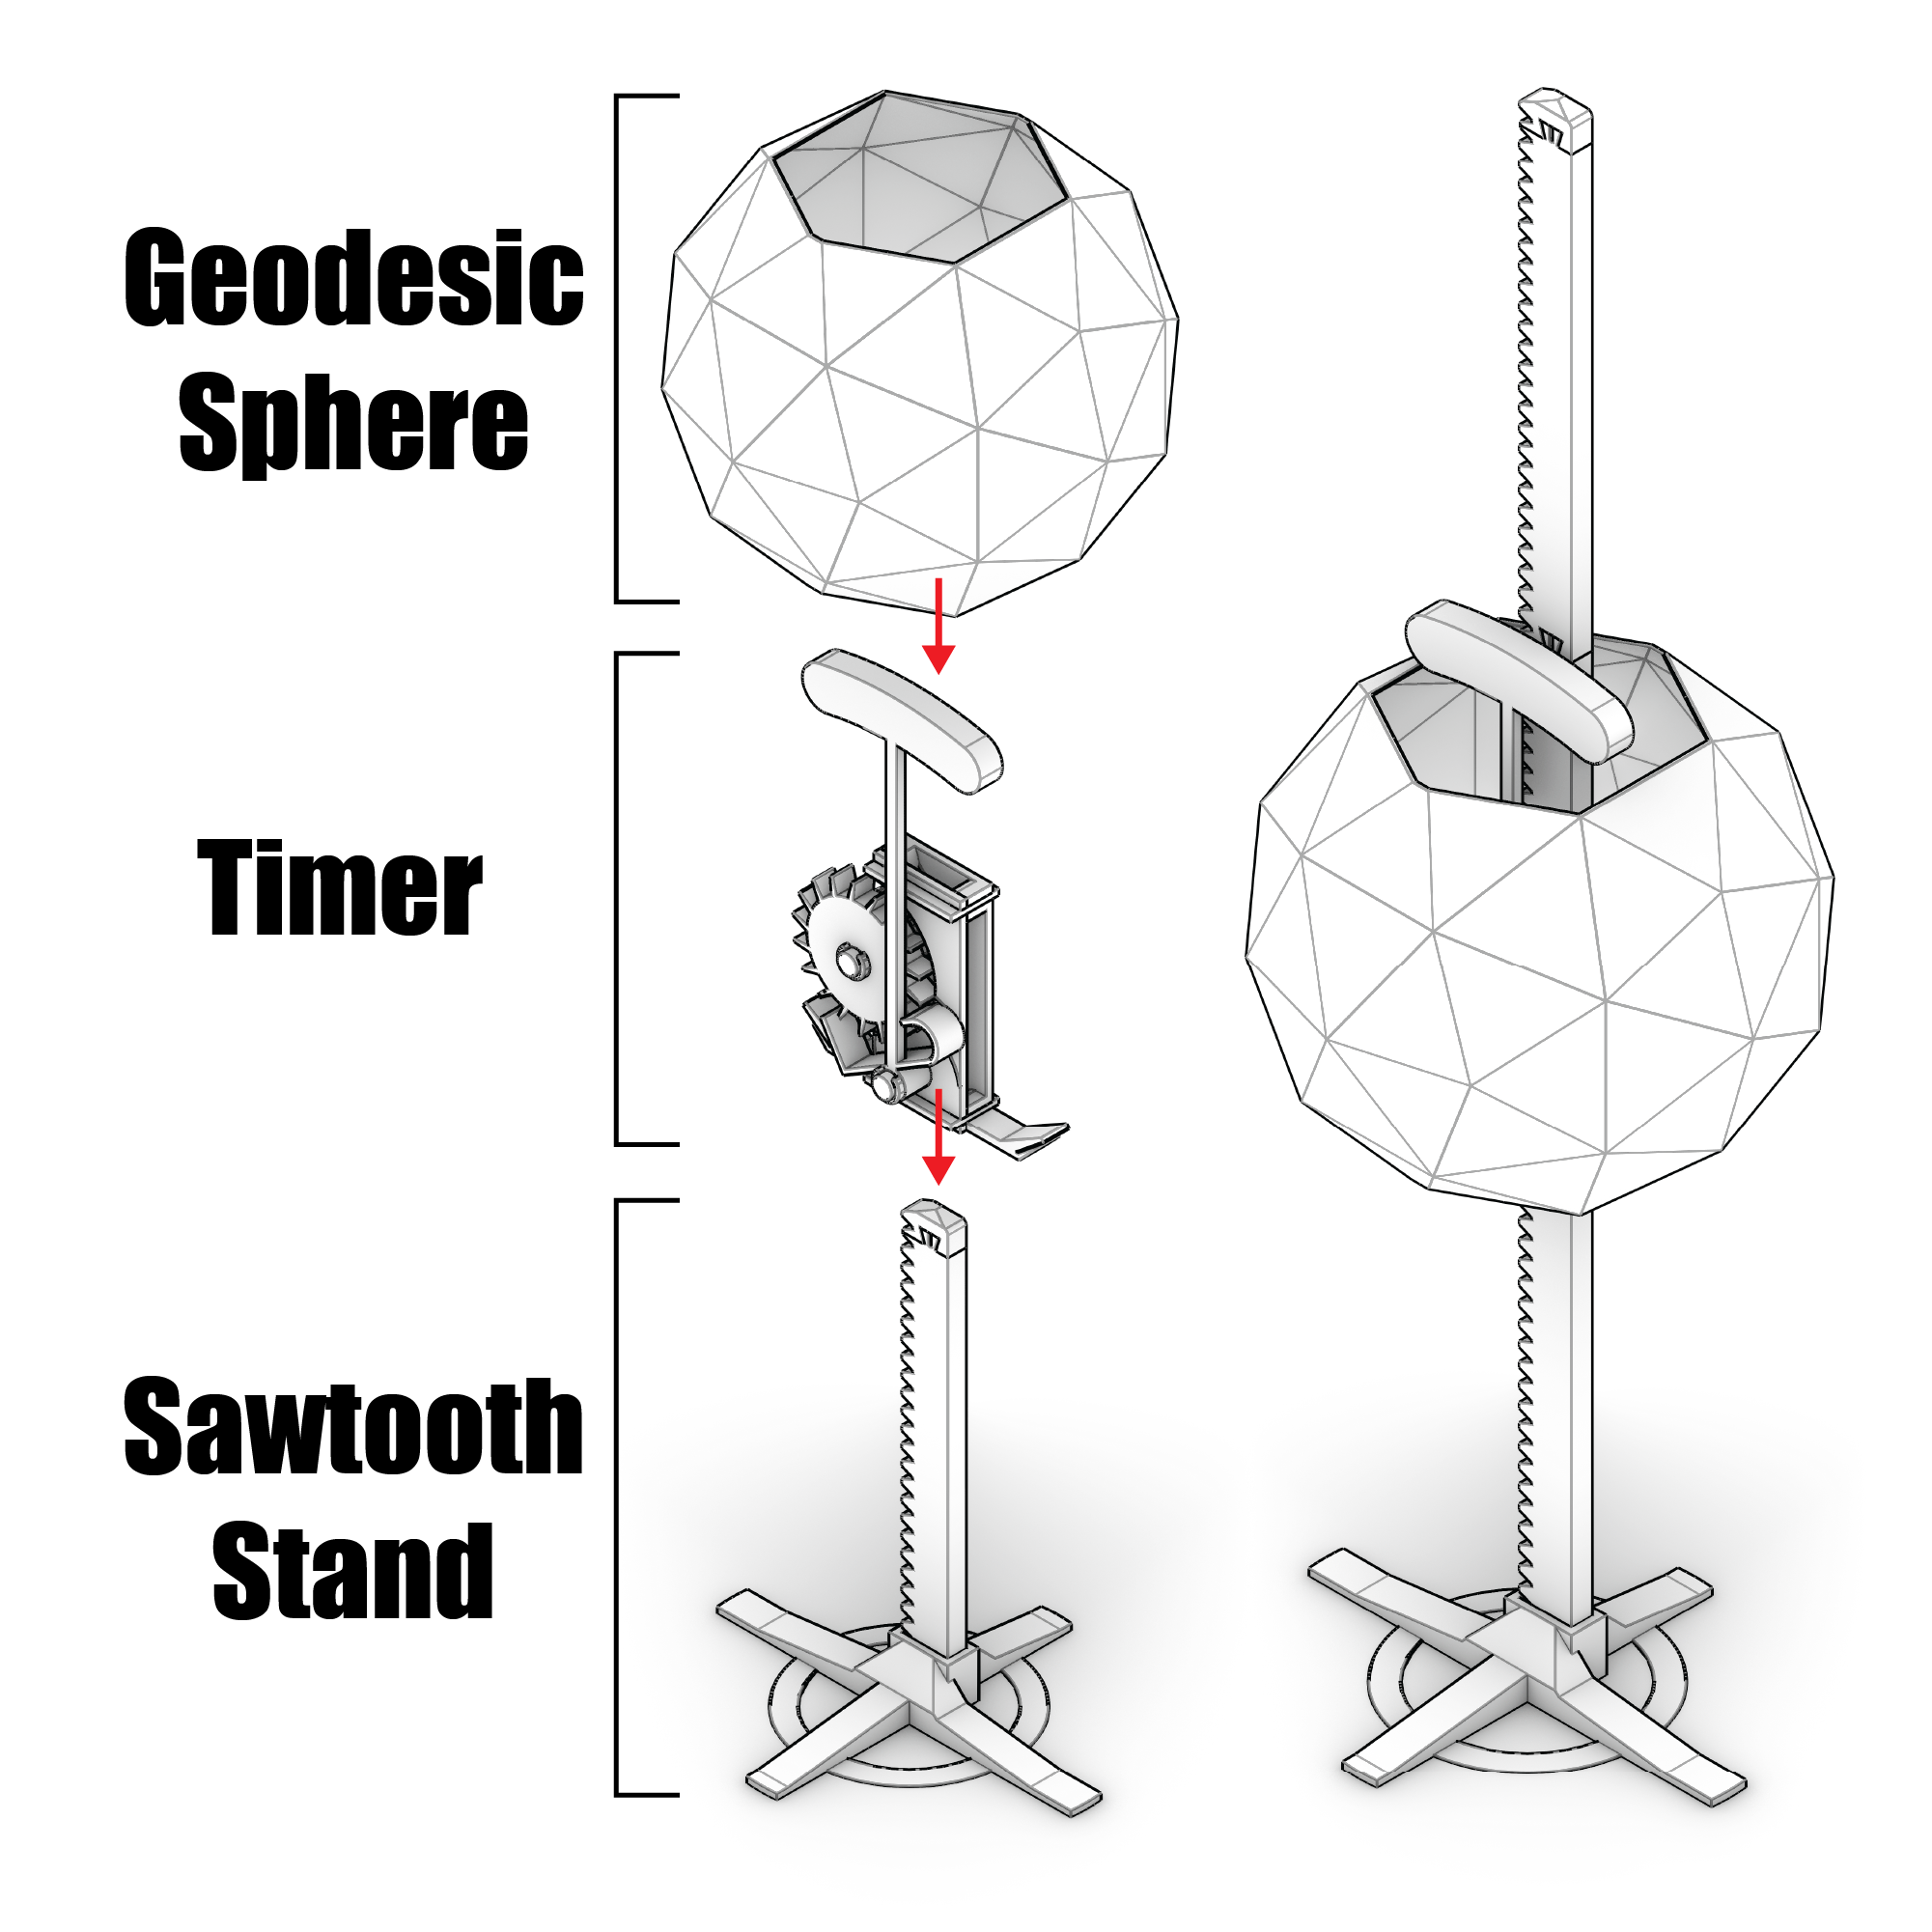
How to Use:
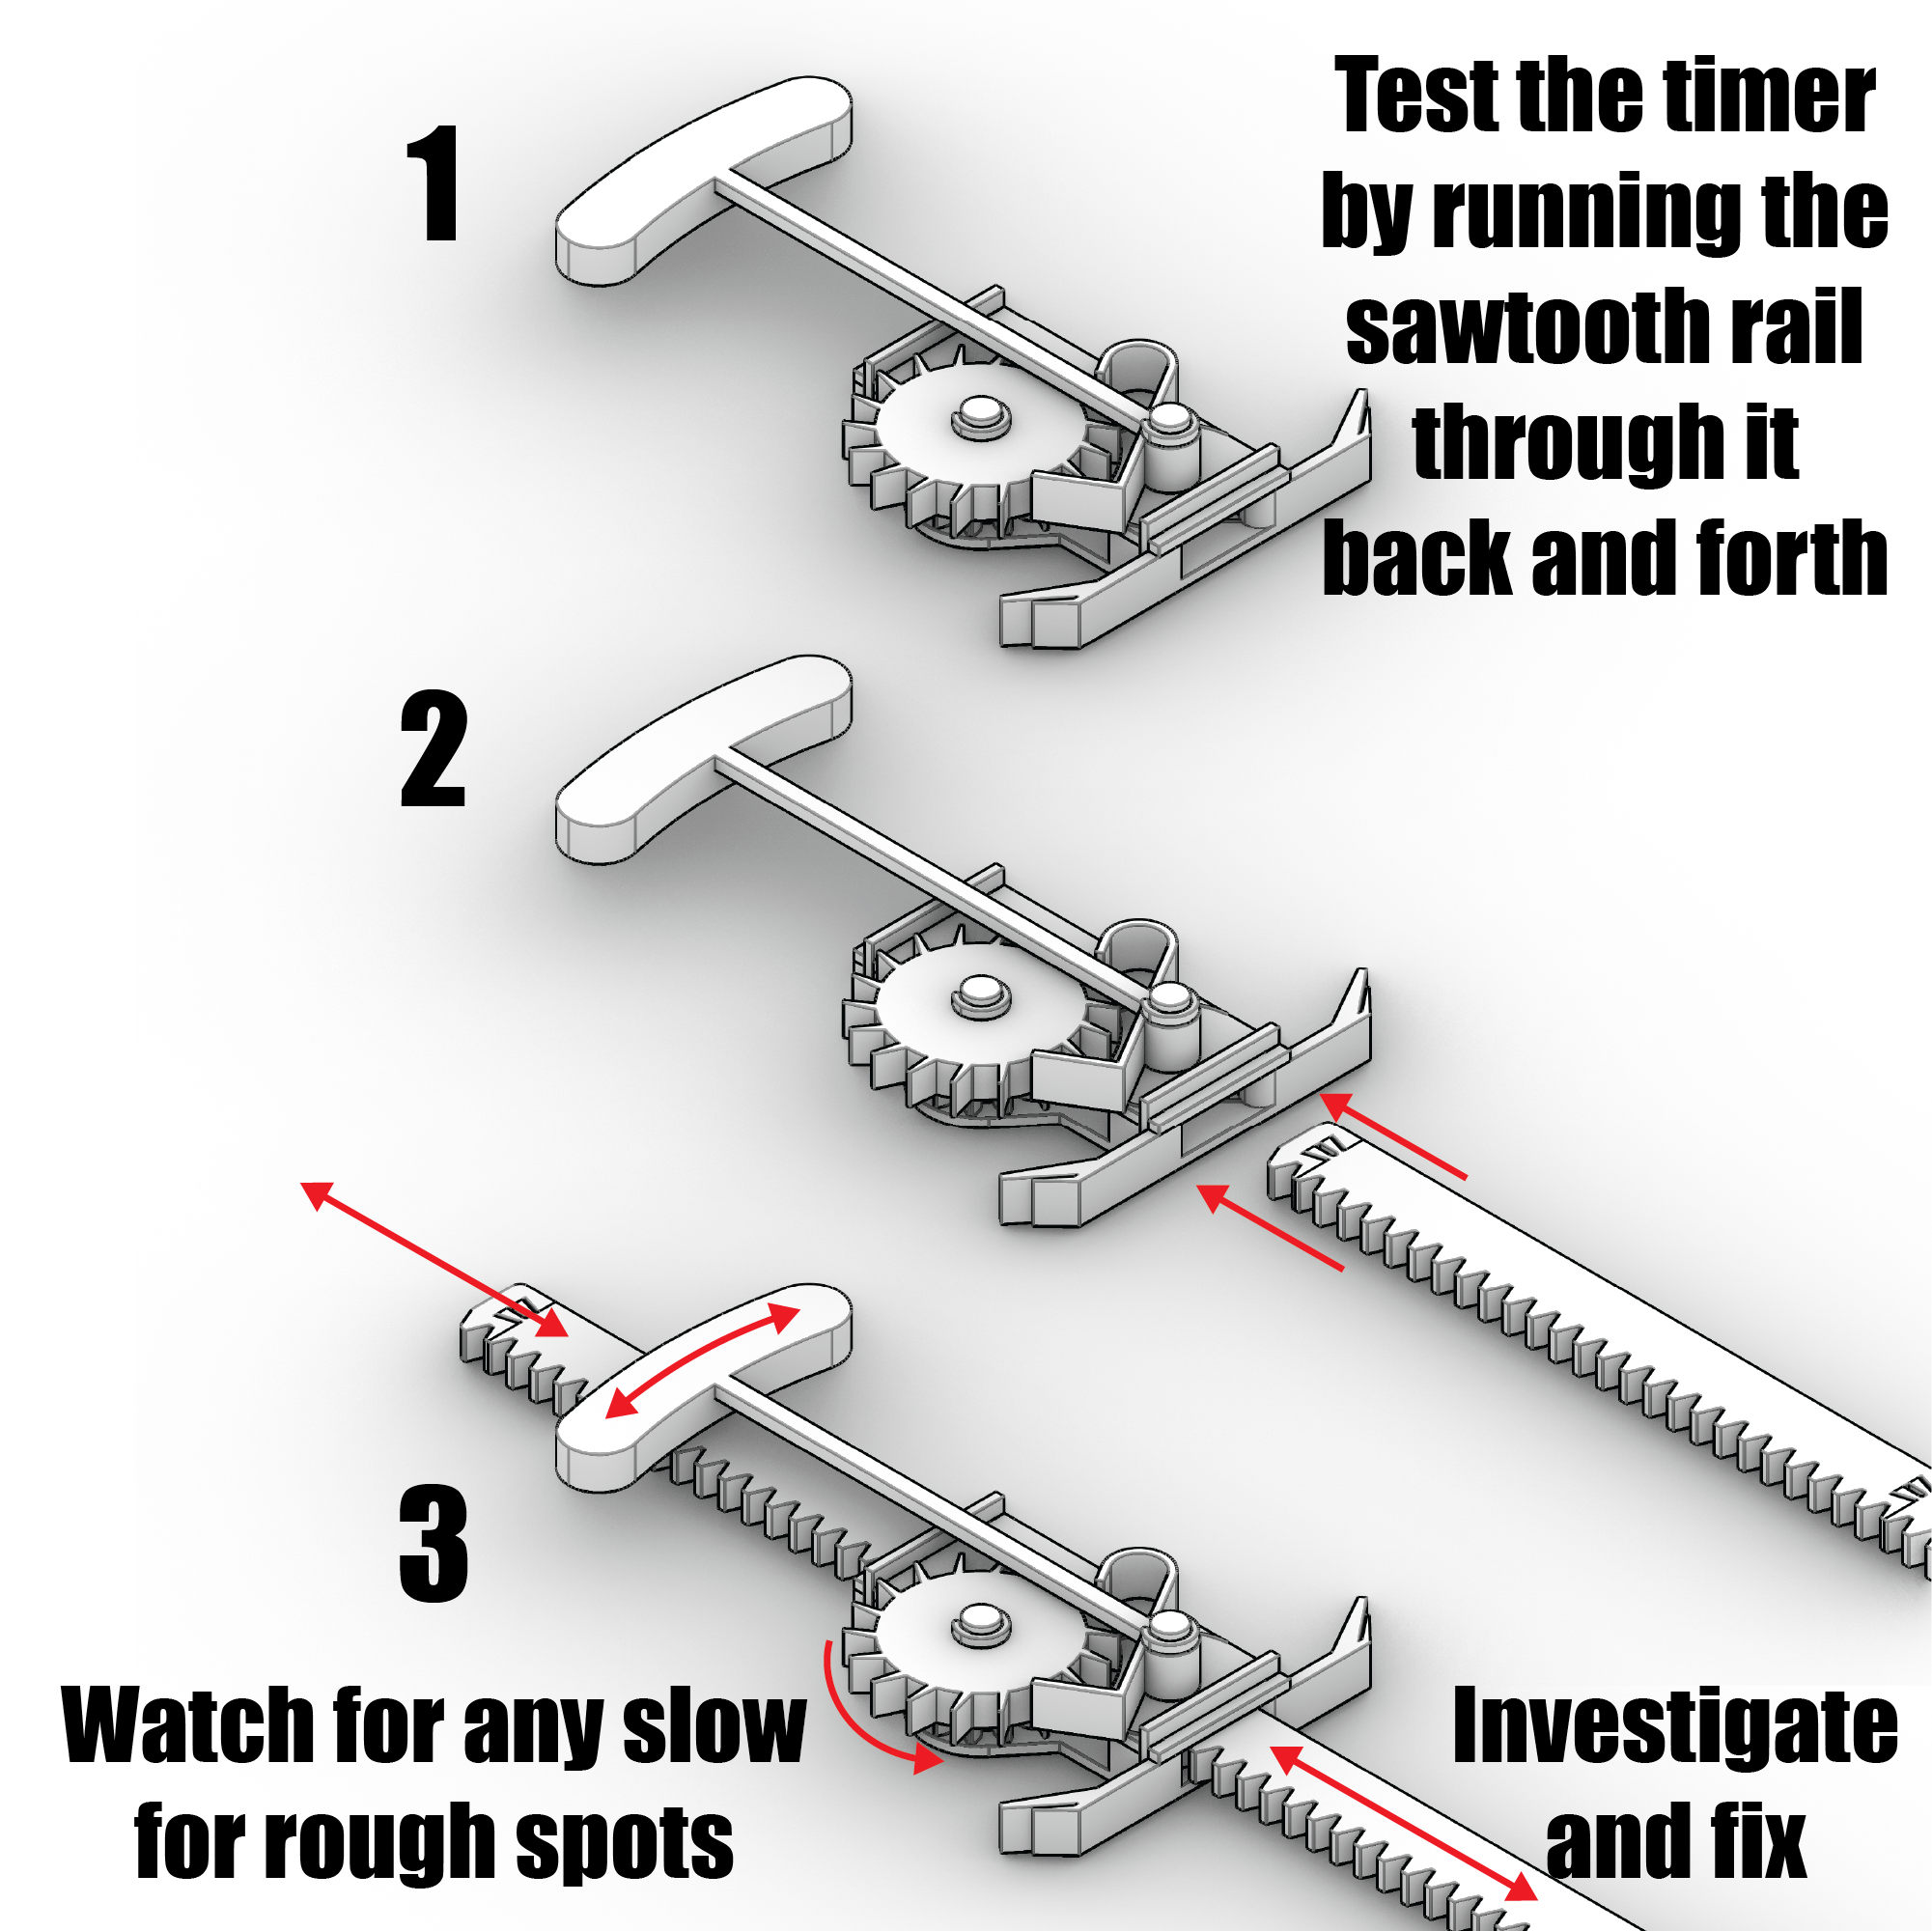
Feed the timer to the rail and let it go. I recommend you anchor the base by taping it down to the table to putting something heavy on it. The sawtooth rail will rock back and forth the higher the timer is due to the pendulum. This is unfortunately a side effect of printing the rail in sections. Celebrate when it hits the bottom!
How to Rewind:
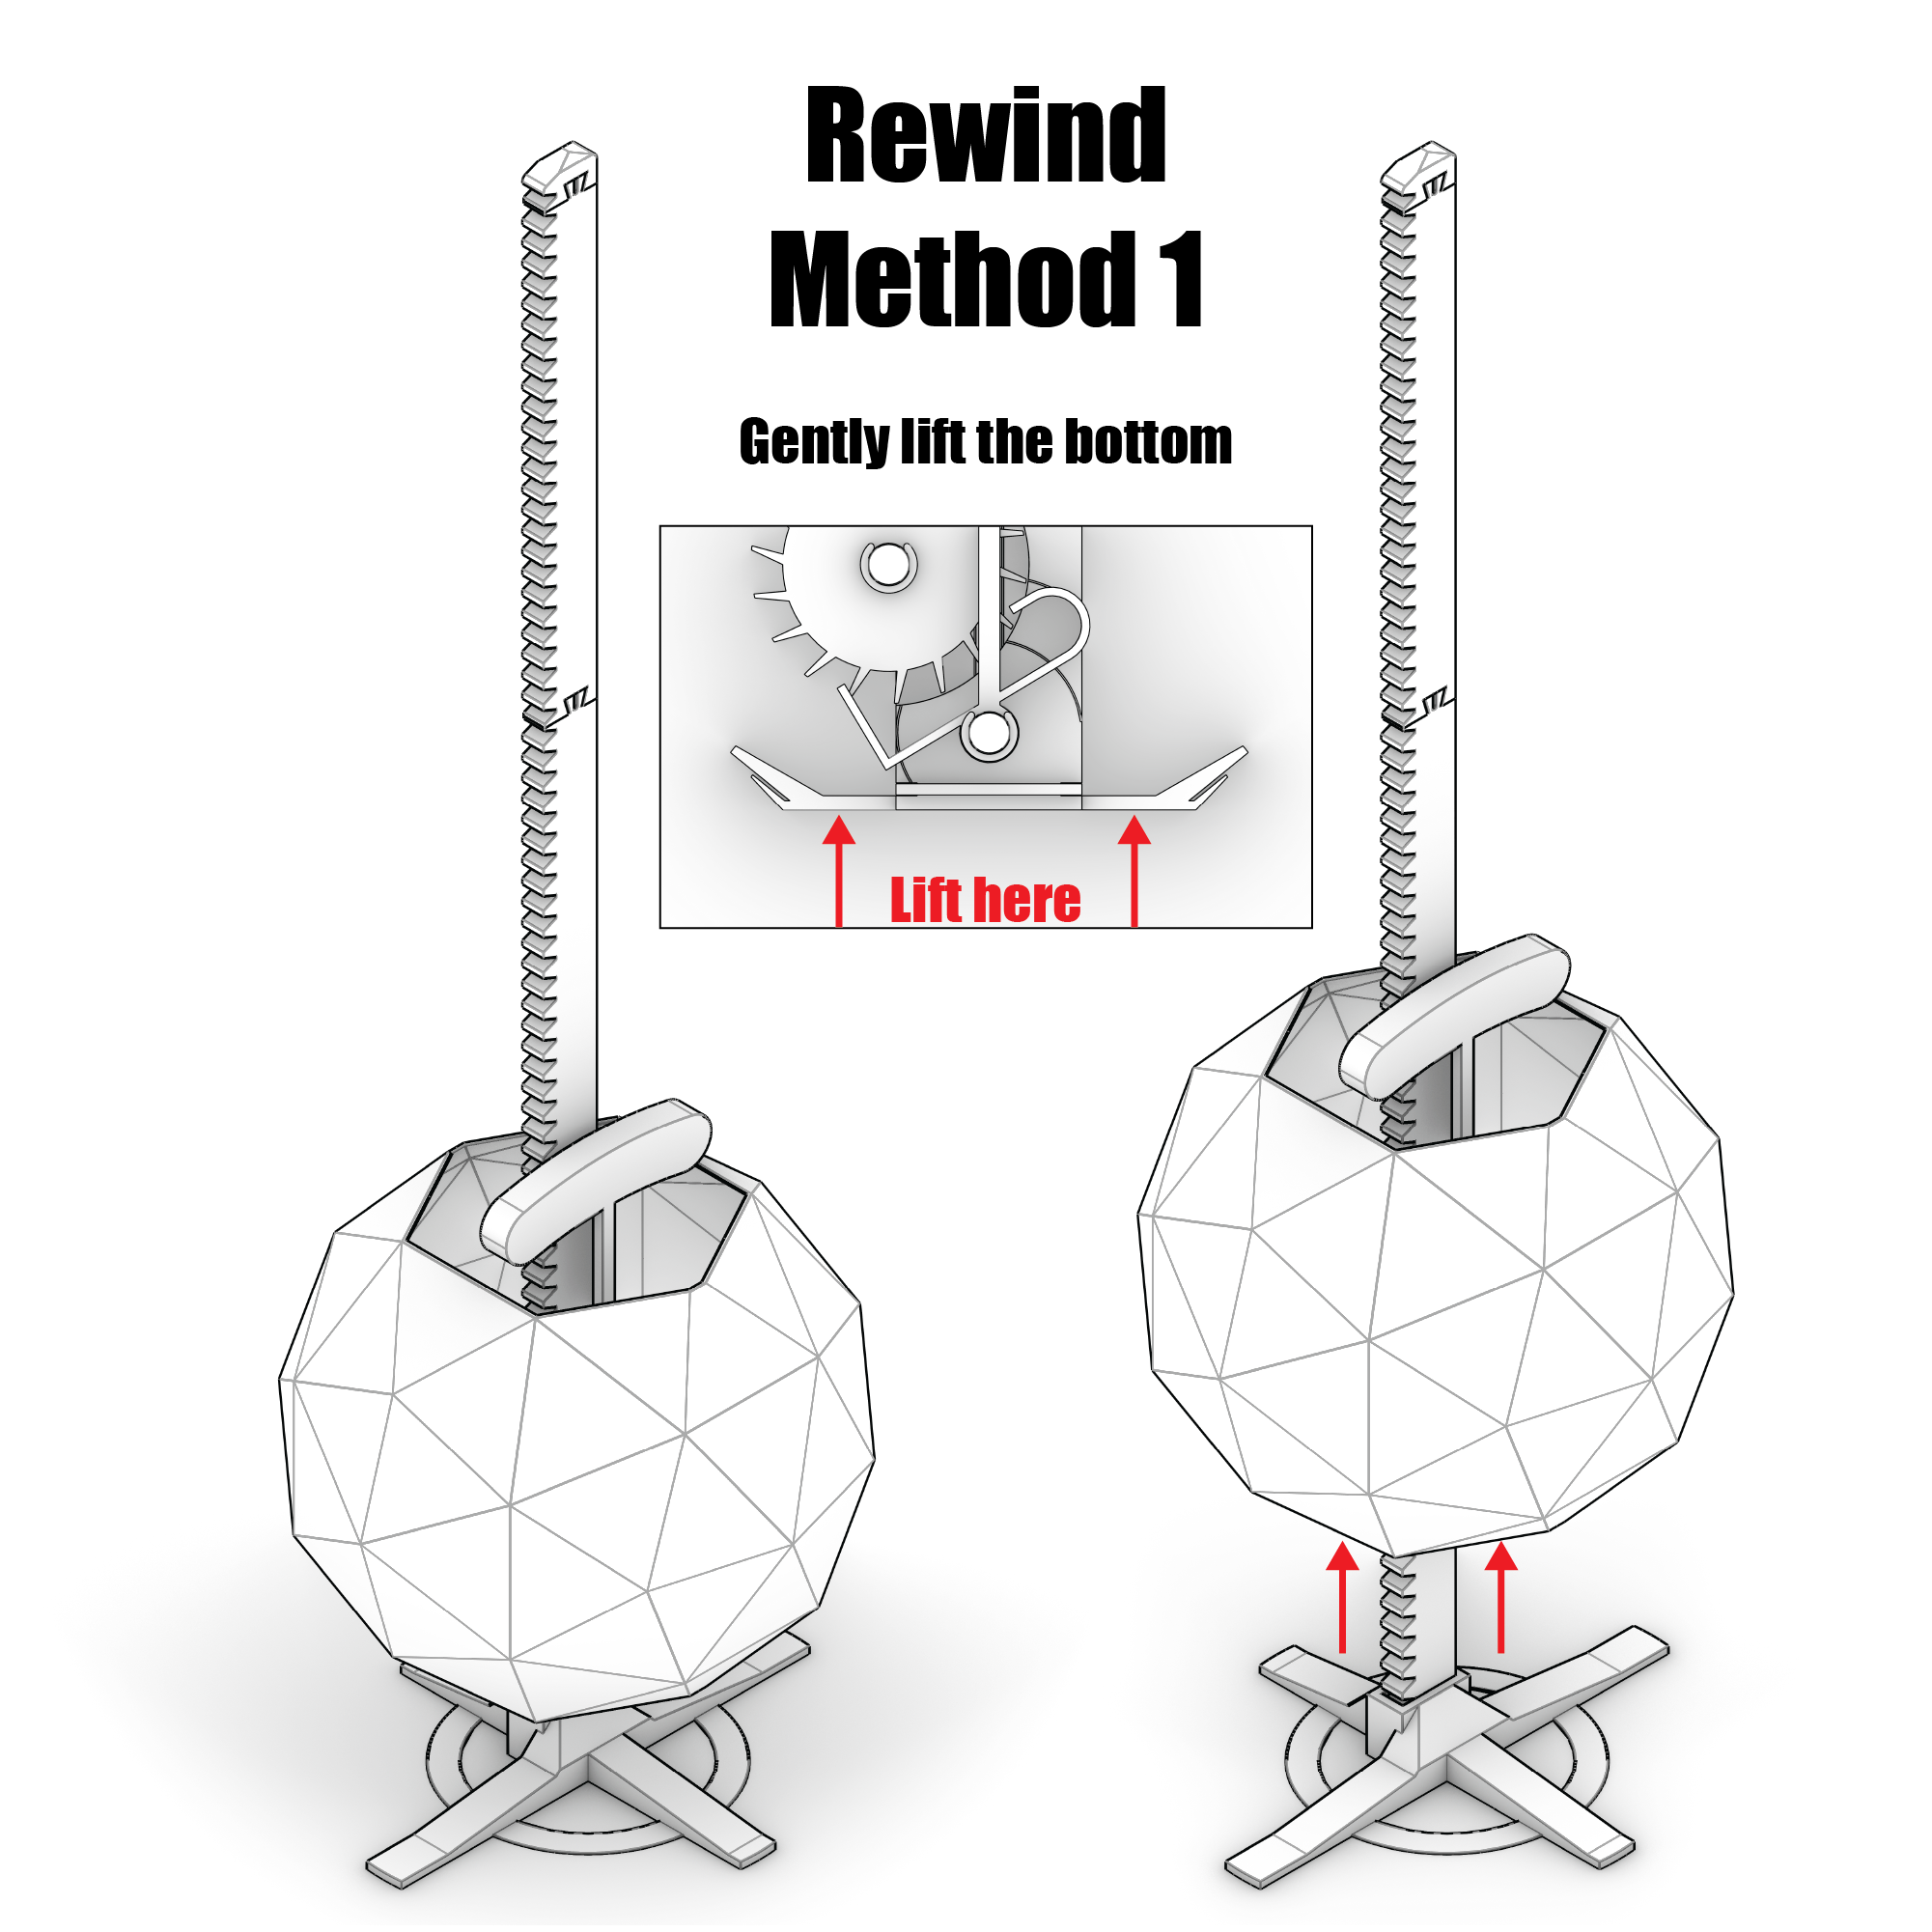
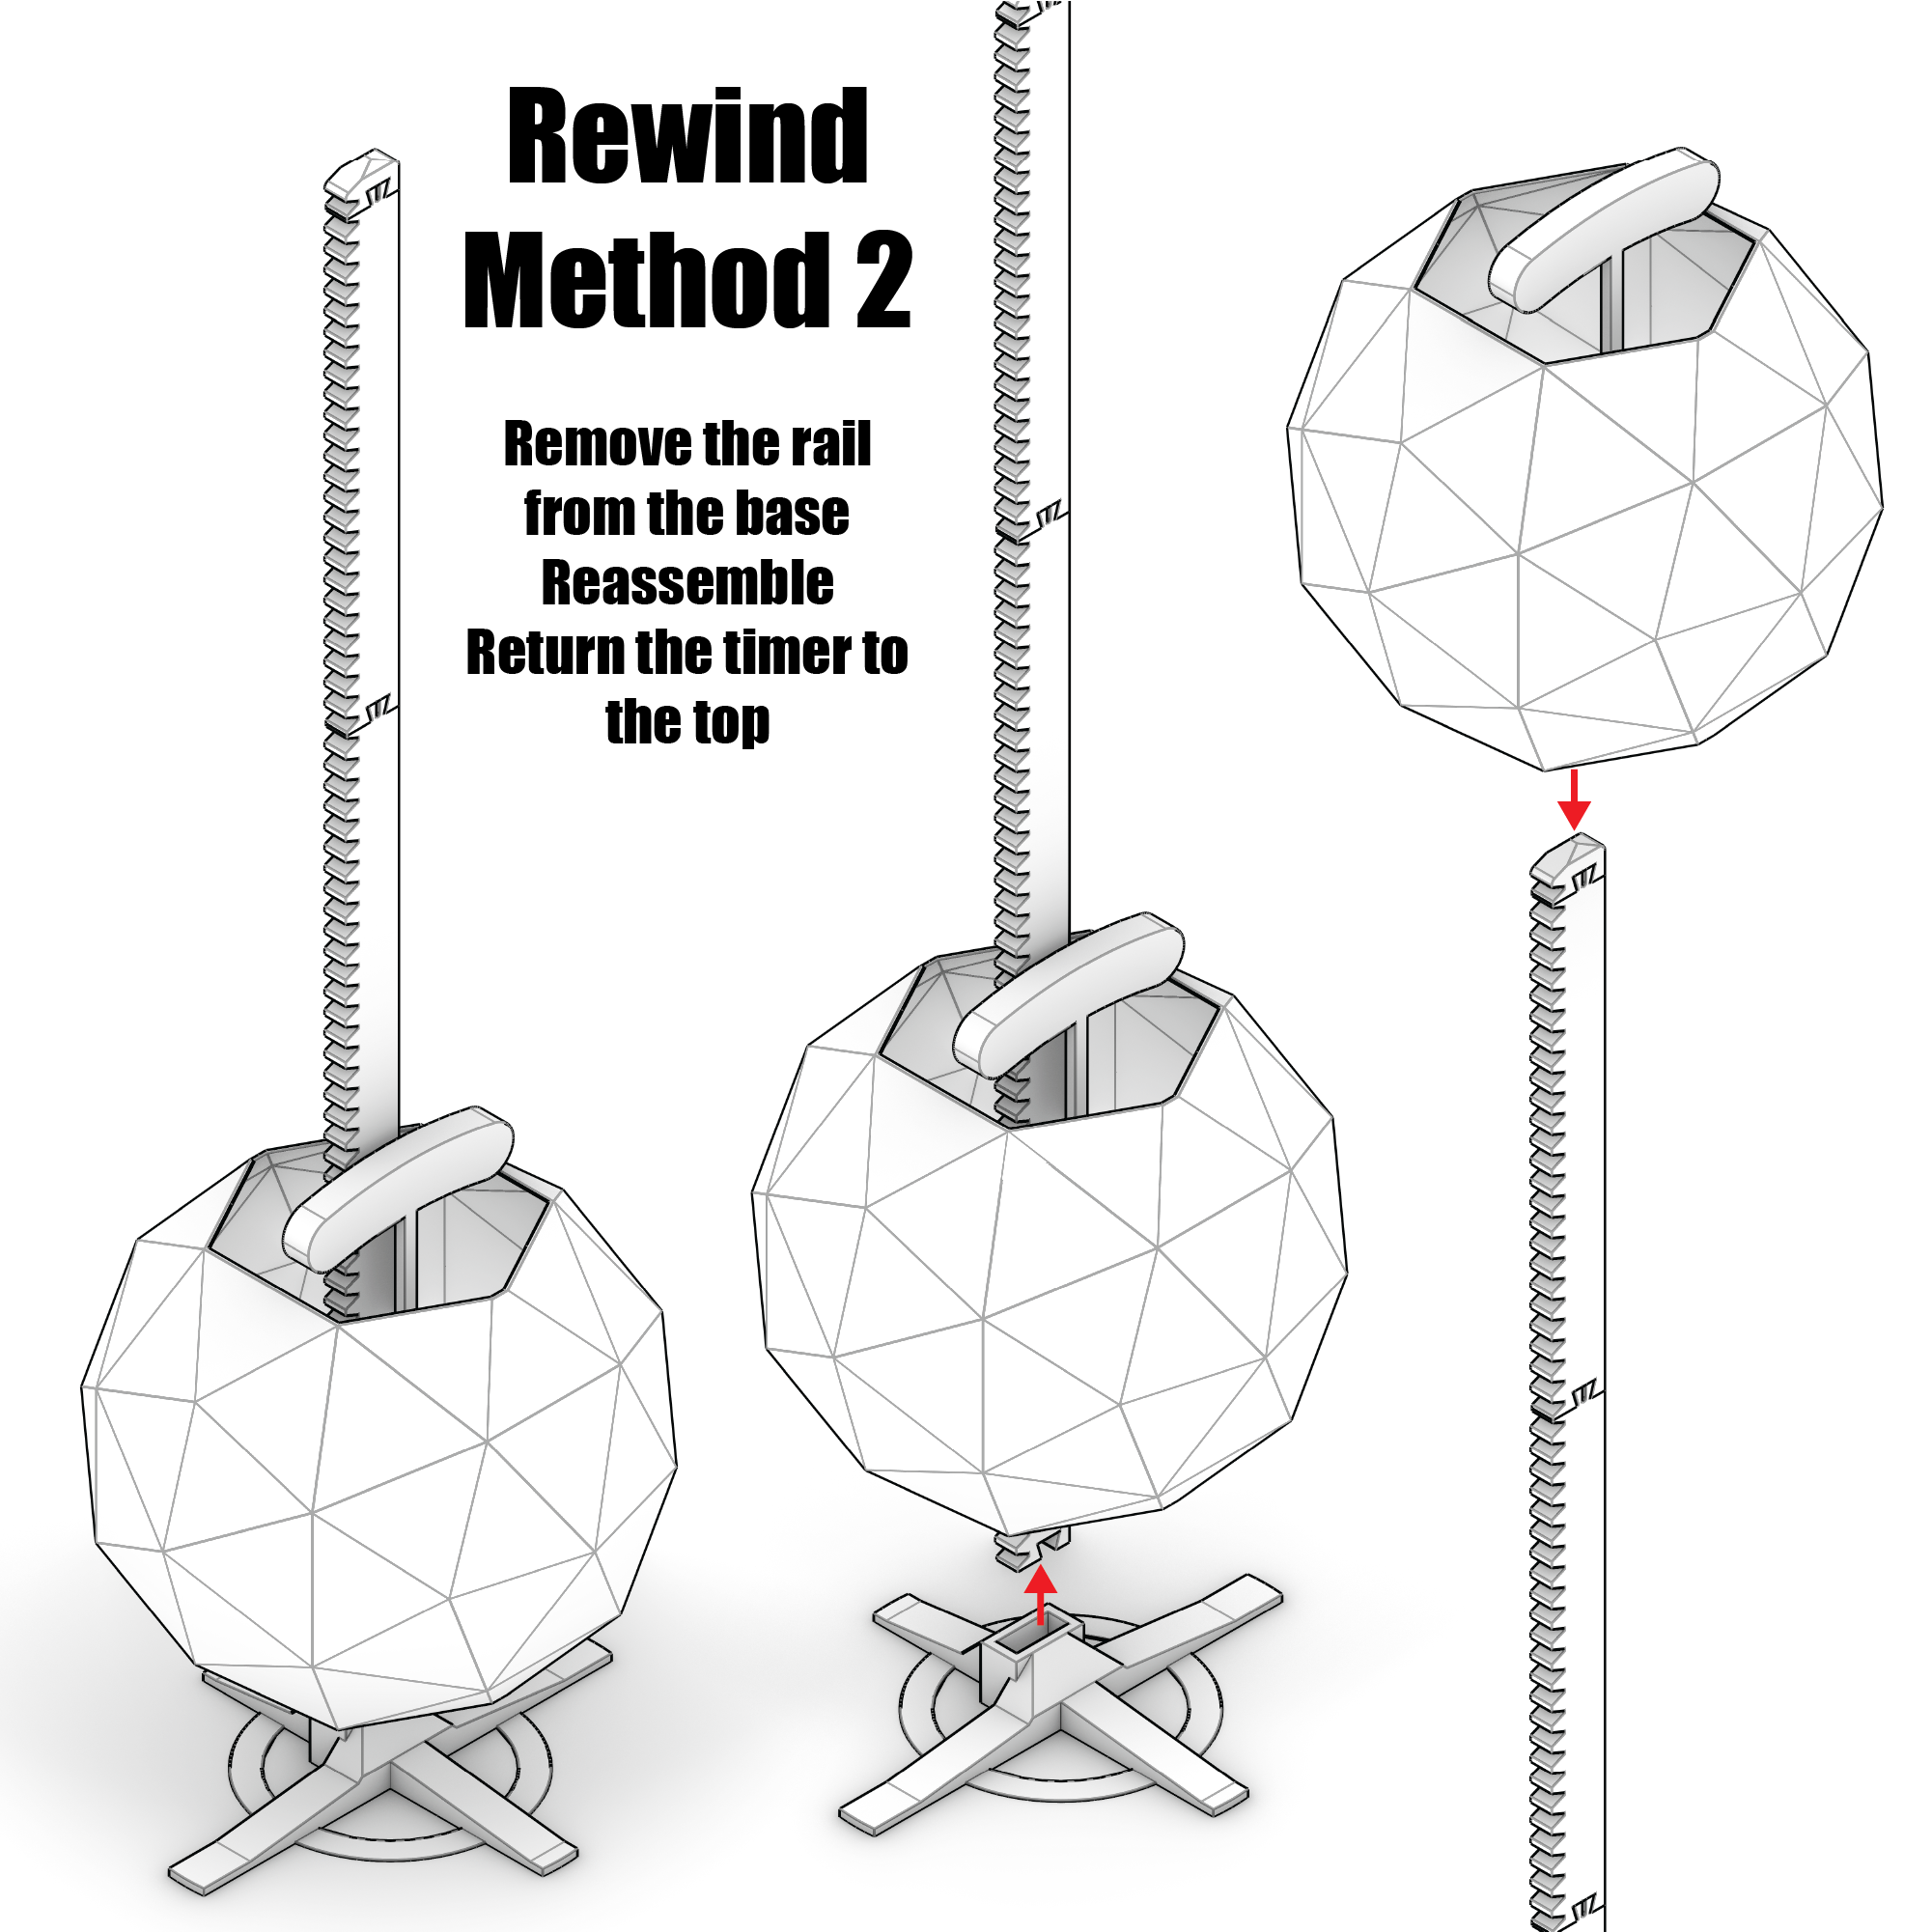
How to Calibrate:
Set up a timer for 30 seconds and set your timer to the top of the sawtooth rail. Start your timer and let go of the timer base at the same time. Note where the top of your timer is at the 30 second start and compare that distance to the top of the timer when it stops at the bottom of the rail. Then subtract that amount from the top by starting your timer at a lower height. Repeat until you can get pretty close to 30 seconds every time. Mark that starting height with a marker so you remember when you start it!
I welcome any feedback and feel free to remix this if you have better solutions!
NYE Ball Drop Gravity Timer

Publicado em 19 de dez de 2023