Você está no 3DFinder
Buscamos em Thingiverse, MakerWorld e Printables ao mesmo tempo para te dar o melhor de cada uma.
Descrição
This is a box for TTRPG dice, or any small items. Featuring an aperture-inspired twist-to-open lid ,this piece offers a creative and fun way to store and display your dice, gaming tokens, or small personal items.
The top shell includes 3 design, geometric spiral patterns, hexagon patterns, and sundial patter . With a blank one if you wanted to add your own debossed text!
Designed with versatility in mind, the Aperture Dice Box comes in two variants:
- Compartmented Version: Ideal for securely holding dice sets, tokens, or other small gaming essentials.
- Open Storage Version: Perfect for stashing personal items, keepsakes, or anything that fits your style.
Whether you’re a gamer looking for a stylish dice case or someone seeking a neat storage solution, the Aperture Dice Box is both practical and eye-catching!~
Print Settings Info:
The Bambu 3MF file features all of the models. The 4 top shell variants, and the 2 bottom holder variants. Choose one variant for the top shell, and one variant for the bottom holder.
Top Shell:
The print orientation is as such so the top is smooth and the rings overhang is properly supported with minimal supports.
Increased the bottom shell layers count to make the color pop more. (less color bleed.)
The top shell has a support blocker in the center ring to prevent support scarring. Instead I made use of the “Variable layer height" feature in BambuStudio to help with the curve.
Each top shell has a design on it that can be colored via the Bambu Studio Color Painting feature along with an AMS unit. The design will not show unless it is colored.
The blank shell can be used to add your own text. Make sure the Text thickness is a very small number like .001 so that it's flush with the surface. Embed the text 0.5mm. Color it via Color painting.
If you wish to deboss the text, you can by making use of the BambuStudio TextShape tool making sure to make the embedded depth at is least 0.5mm. After, go to your objects, find the text_shape, right click it and change the type to a negative part. This will give you a debossed text. Be sure to slow down you bridging to around 25mm/s and the bridge flow to 0.9-0.8.
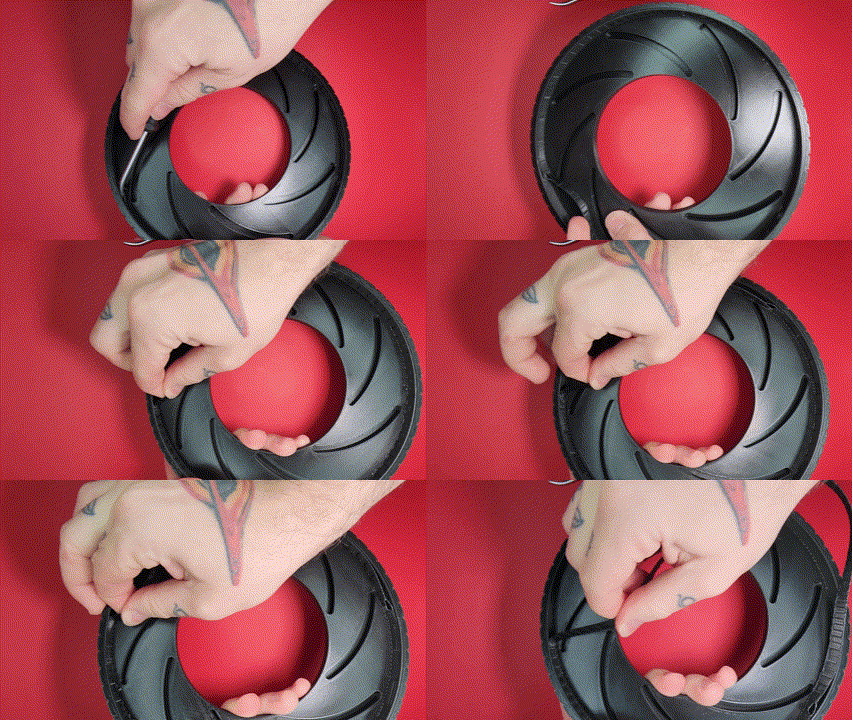
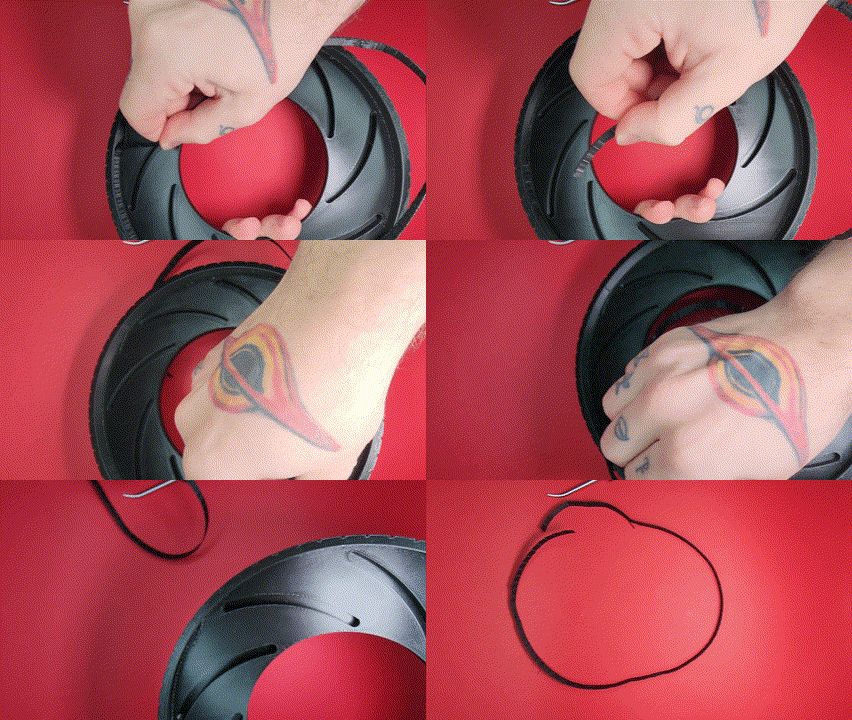
The supports will sometimes be a pain to remove, use a flat tool to get under it and pry it away from the wall, it'll mostly come out as one big ring as shown.
Lower body:
There is a circular lip that the top shell will snap into that needs to be supported. I used Tree supports on the build plate only. They are still an absolute pain to remove. Use a small tool to pry out all the support material from the channel. The channel needs to be clean so the rotating action works smoothly.
- Added a support blocker for the very bottom of the part since it wants to add a very thin support at the bottom.
Diaphragm and Pin Segments:
- I disabled support on diaphragm and relied on bridging to form the holes the pins will go in.
- Thick bridges, slowed bridging down to 25mm/s and put the flow to .8 and it came out perfect.
The pins might be hit or miss with printing. They might not stick to the plate. You can use a brim on them to help, just make sure you completely remove the brim and there is no burr left on the pin or the sliding action will not be smooth.
Assembly:
Diaphragms:
Take the pins, dab them with a bit of glue (I recommend Loctite Super Glue Gel) and push them into the Diaphragm holes, let it cure.
If you find that the printed pins are not to your liking, M4x8 dowel pins will work. They will just be a bit looser when going into the hole which won't matter once its glued in.
Lower body:
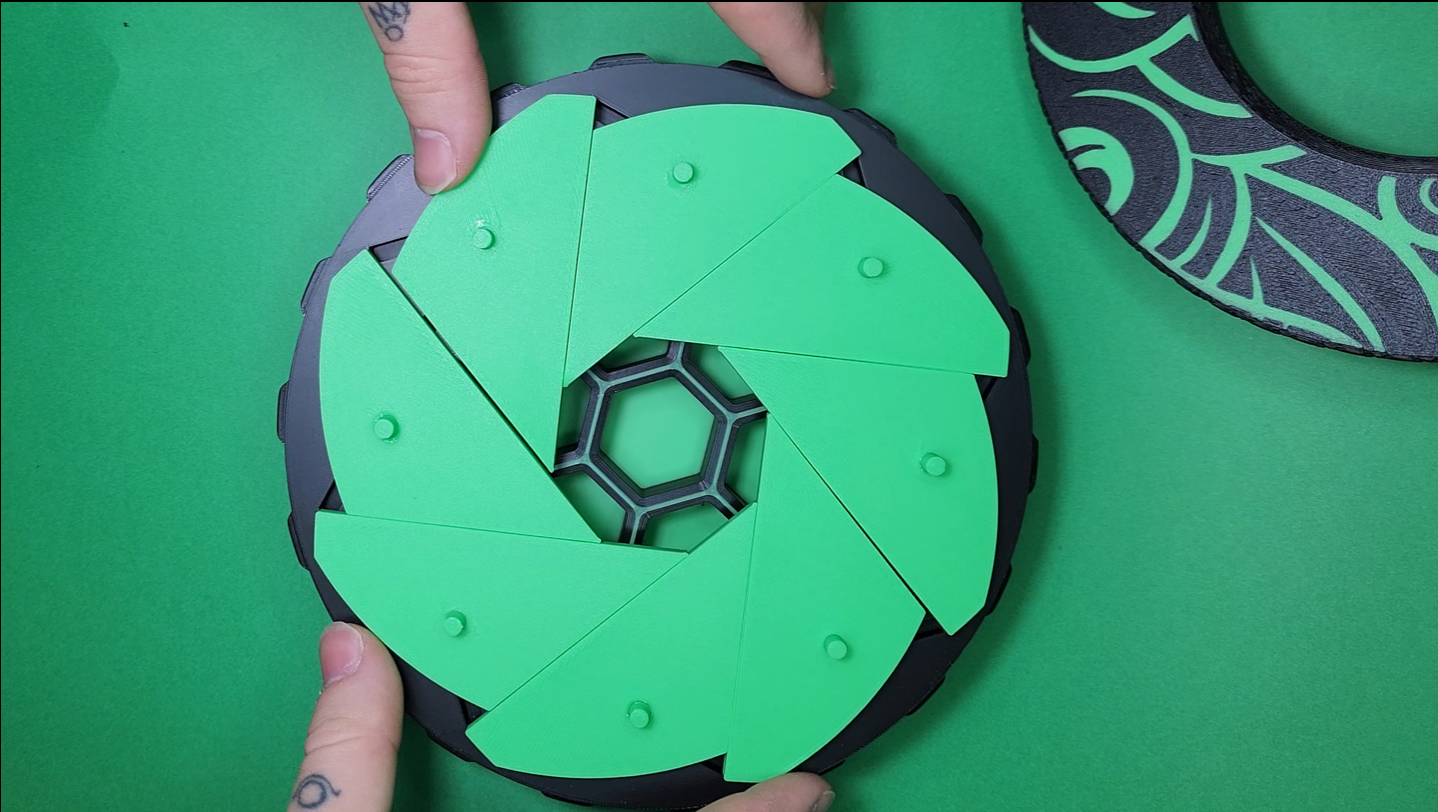
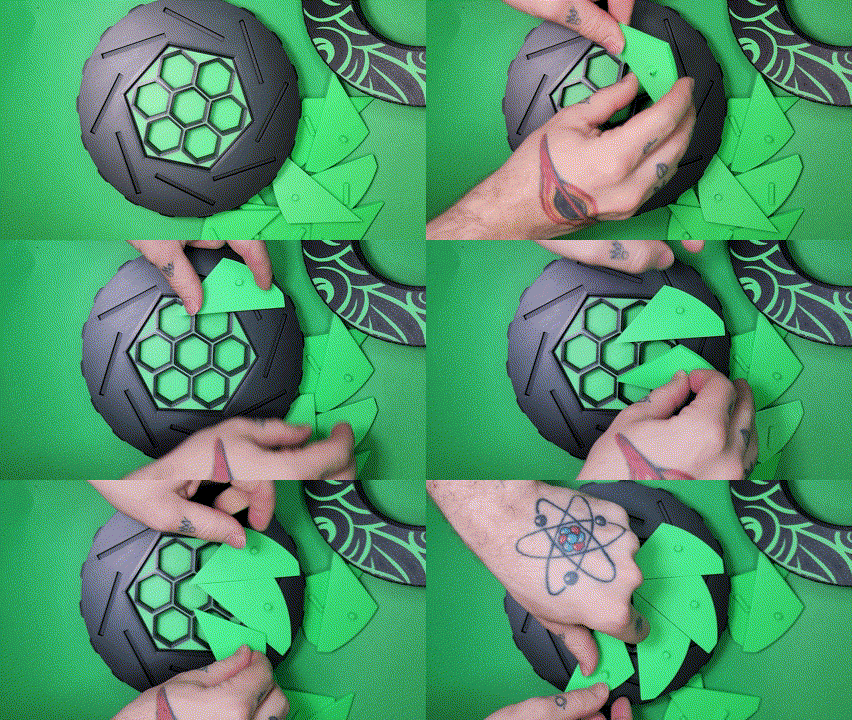
Take the diaphragm's and align the rectangular slots with the ones on the lower body. Push them all into position of the aperture.
Top shell:
Align the top shell so its on top of the diaphragms.
Rotate the top shell so the pins align with the slots. Do not force the top shell on until the pins are aligned, you run the risk of snapping the pins.
GENTLY snap the top shell onto the lipped edge of the lower body. A bit of force is needed. A bit of flex in the top shell to get it around the lower body lip is okay. I found that that starting on one end of the circle and working your way around made it snap into place easier.
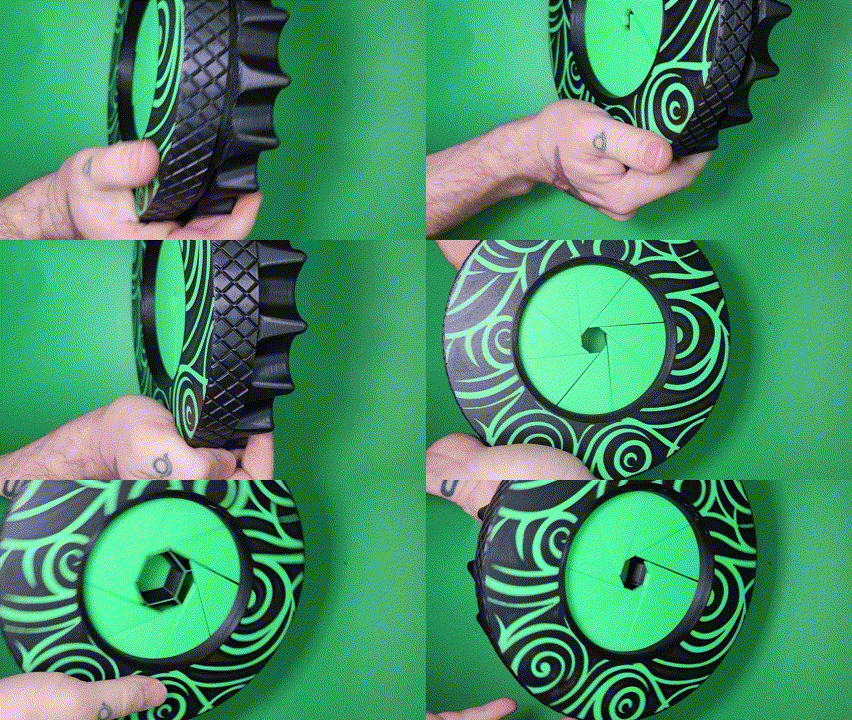
Keep working the aperture opened and closed until the action become smooth.
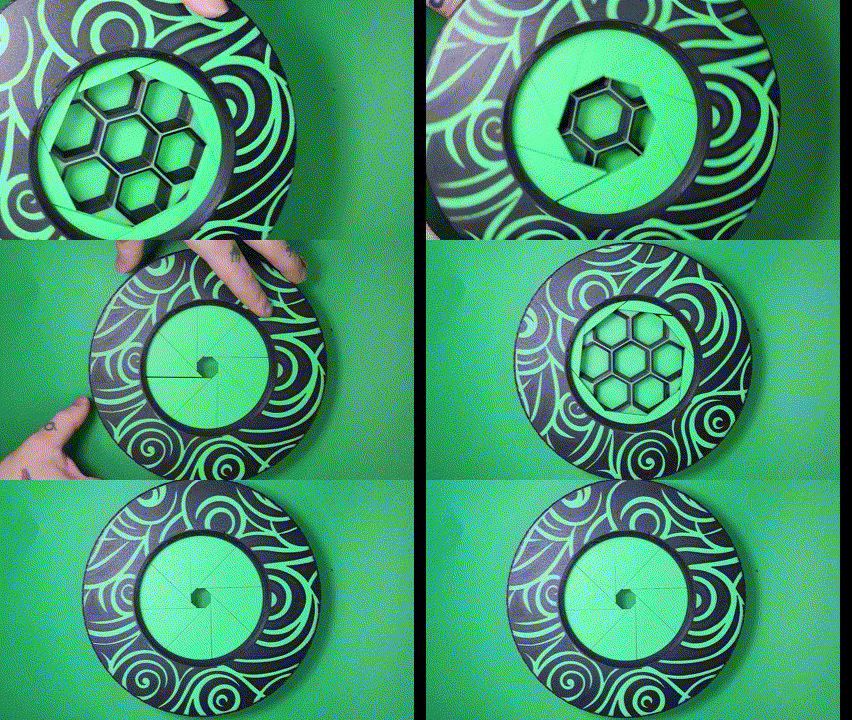
I hope you enjoy this model as much as I enjoyed designing/making it!
If you like my work, why not buy me a cup of coffee? :) buymeacoffee.com/FletchFormStudios
Aperture Box / Dice Box

Publicado em 12 de jan de 2025
Gostou deste modelo? Crie uma conta grátis para salvar seus favoritos e voltar a eles depois.
Criar conta