Você está no 3DFinder
Buscamos em Thingiverse, MakerWorld e Printables ao mesmo tempo para te dar o melhor de cada uma.
Descrição
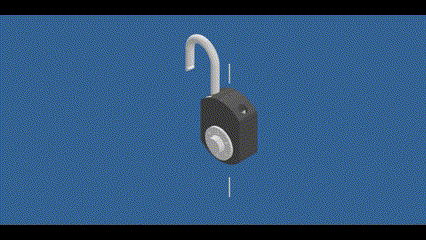
Dial combination lock
USE MY PRINT PROFILE FOR GOOD TOLERANCE
This is a working dial combination lock.
It does not need any screws or bolts!
You can change the code to 2200 different combinations!
It took me al lot of time to desing this but in the end it worked great.
Assembly
You will need 2 things:
- A spring out of a pen.
A little bit of glue.
Below you see the names of the printer parts, use this for assembly. (This is how you see it on the printbed after printing.)


Step 1
For the first step you need:
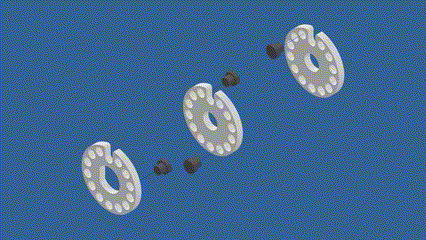
- 2x - Lock ring 1
- 1x - Lock ring 2
- 4x - Lock points
Press the lock points in the different holes in the lock rings.
Lock ring 2 needs only 1 lock point.
The middle ring (Lock ring 1) needs 2 lock points and the back ring (Lock ring 1) needs 1 lock point.
This will be your combination.
Step 2
For the second step you need:
- 1x - Lock ring 2 (with the lock point in it)
- 1x - Axle
- 1x - Ring 2
Press lock ring 2 on to the axle with the lock point pointing towords the outside.
This could be a bit hard, if so sand the axle a little bit.
Press ring 2 on to the axle.

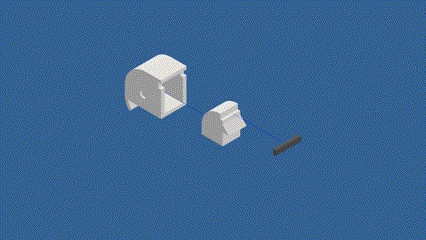
Step 3
For the third step you need:
- 1x - The part from step 2
- 1x - Front plate
- 1x - Code ring
- 1x - Ring 3
- 1x - Shackle holder
Slide the shackle holder in to the front plate. Make sure it is smooth, if not sand the shackle holder a bit until it slides smooth.
Press ring 3 on to the part from step 2.
Ring 3 will perfectly fit in the front plate.
Put the complete part in to the front plate and press the code ring on to the oudside.
This could be a bit hard, if so sand the axle a little bit.
Test if the code ring turns smooth. If you turn the code ring, ring 2 should turn as well.

Step 4
For the fourth step you need:
- 1x - Lock block
- 1x - Lock block slider
- 1x - Lock block beam
- Spring from a pen
- A little bit of glue
Put the spring over the post you see inside of the lock block.
Then slide the lock block slider in to the lock block. The hole of the lock block slider should go over the spring.
Gleu the lock block beam on to the lock block.
Make sure the lock block slider can still move!
Step 5
For the fifth step you need:
- 1x - Base
- 2x - Lock ring 1 (with the lock point in it)
- 3x - Ring 1
- 1x - The part of step 4
Assemble everything like you see in the video below.
The lock rings need te be a bit stiff on to the pole in the base.
Make sure that the firt lock point is pointing to the outside of the base.
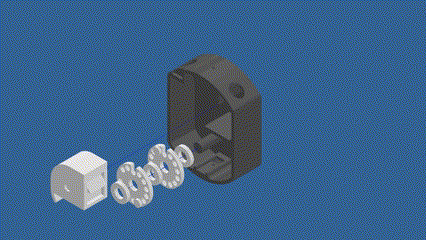
Step 6
For the six step you need:
- 1x - The part of step 5
- 1x - The part of step 3
- 1x - Shackle
Put the shackle in the base.
Now you need to lock the part of step 3 in to the hole body.
While you do this make sure the shackle holder snaps on to the shackle. You can see it if you look through the seam.
If by this step one of the front plates snapping pins snap off, no problem. It should still close with only one of them.

Step 7
For the seventh step you need:
- 1x - The part of step 6
- 1x - Front plate filling
Press the front plate filling in to the front plate.
Now your dial combitation lock is ready!
Remove the front plate so you can change the combination
If you need to remove the front plate. Push 2 bits of fillament in to the hole on the top and bottom. while pressing down you can pull the front plate off. That way you can make an new combination by changing the position of the lock points.
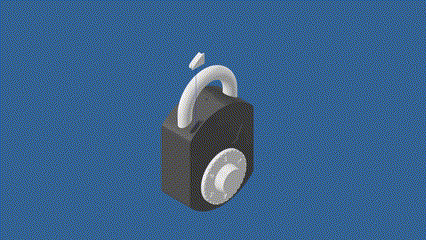
Opening the lock
By turning the front disk you can allign the slots on the lock rings so the shackle can open.

Closing the lock
If you press the shackle back down the lock will close automatically.
I hope you enjoy this print. If you have any questions or suggestions leave them below in the comments!
*Working* Dial combination lock

Publicado em 11 de jan de 2025