Você está no 3DFinder
Buscamos em Thingiverse, MakerWorld e Printables ao mesmo tempo para te dar o melhor de cada uma.
Descrição
21/06/2026 - Edit 2: CHECK OUT THE NEWER BETTER MODEL (extensive changes): [https://makerworld.com/en/models/2959612-raspberry-pi-4-5-server-rack-cluster-jetkvm-nvme#profileId-3317293](https://makerworld.com/en/models/2959612-raspberry-pi-4-5-server-rack-cluster-jetkvm-nvme#profileId-3317293)
19/02/2025 - Edit: If you are interested for V2 to have the following: nvme support, sd card access, more rigid back panel, let me know in the comments!
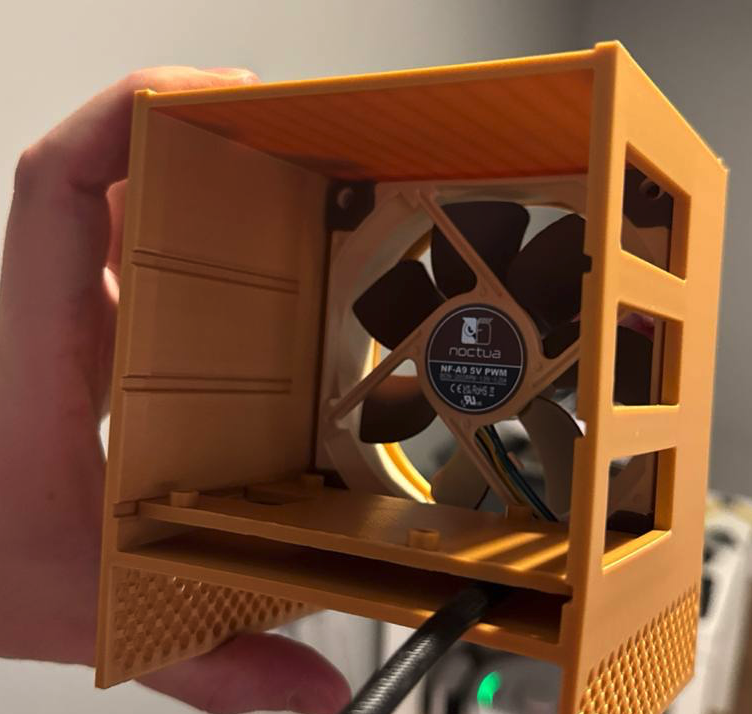
Welcome to the ULTIMATE TINY Raspberry Pi 4/5 Server RACK Cluster project, designed to be budget friendly, silent and prints easily! Also, looks slick!
with stainless steel 0.4mm nozzle.
I used Coolplate SuperTrack Sheet (recommended but shouldn't be necessary ) for bed adhesion.
For all server loving people out there, enjoy!
BOM with Purchase Links (UK)
- 3 x Raspberry Pi 4/5s
- 3 x Raspberry Pi USB C Power Supply (I used original)
1 x Noctua NF-A9 5V PWM (I used Brown version) [https://www.amazon.co.uk/dp/B07DXTN515](https://www.amazon.co.uk/dp/B07DXTN515)
The package comes with 4 additional screws don't lose them!
1 x PATIKIL 92mm Computer Dust Fan Filter Grill [https://www.amazon.co.uk/dp/B0CXPXSRNF](https://www.amazon.co.uk/dp/B0CXPXSRNF)
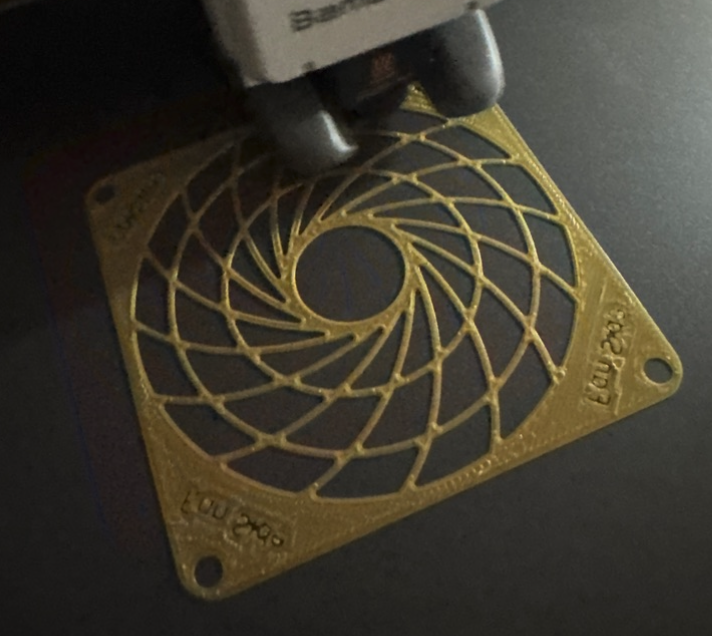
Alternative: You can print a fan guard by using this model as shown in pictures: [https://www.printables.com/model/1121336-high-efficiency-noctua-92mm-fan-grill](https://www.printables.com/model/1121336-high-efficiency-noctua-92mm-fan-grill)
- 1 x TP-Link TL-SG105S (I bought one back in 2022) (https://www.amazon.co.uk/dp/B07HP5TN4S)
- 4 x Ethernet Cables
- 3 x SD Cards
- 12 x A2-70 DIN912 M3*8mm (Although, I think it is better to use M2.5 for tolerances working with RPis)
(You can buy this set: [https://www.amazon.co.uk/dp/B093GNHWKR](https://www.amazon.co.uk/dp/B093GNHWKR) )
Optional, for proper fan control:
- 3 x Female - Male Jumper Cables for PWM control of the Noctua with a RPi5
Instructions:
-1. Make sure you have all of the materials!
0. Make sure your Raspberry Pis are all okay and working. (Don't forget to attach their sd cards.)
1. Print all the parts with your favorite colors (I used PLA):
- 3 x Base Plates for Raspberry Pi(s)
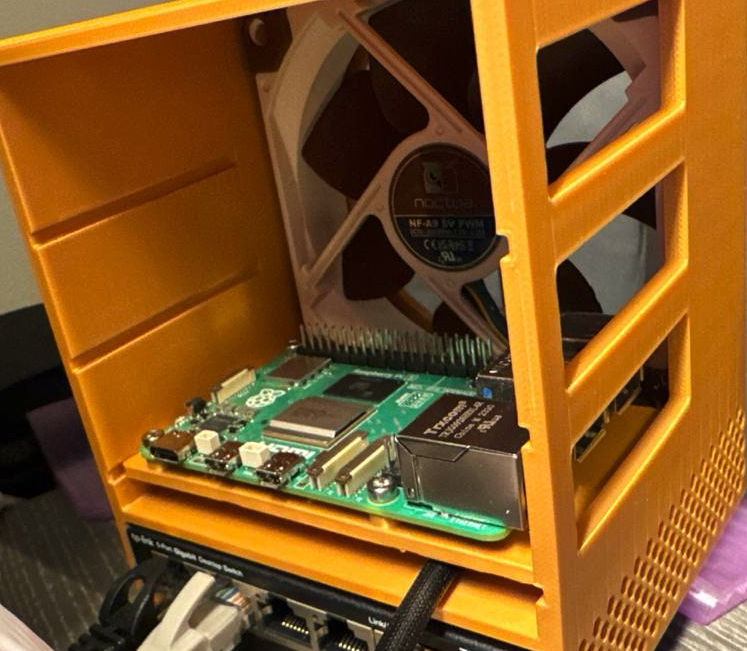
- 1 x Unibody Enclosure
- 1 x Back Door Piece

If you couldn't find a dust fan filter for 92mm, you can print this fan guard:
- 1 x Fan Guard (https://www.printables.com/model/1121336-high-efficiency-noctua-92mm-fan-grill)
2. Assemble all Raspberry Pis with Base Plates using 4 x M3*8MM bolts

3. Place Noctua NF-A9 inside the unibody and screw it in with the dust fan filter or the guard.
4. Insert 2 of the assembled baseplates from bottom to top.
5. Fan Control:
Use the remaining Raspberry Pi for the fan:
- Without PWM
- Easy:
Just plug in the USB adapter that comes with Noctua Fan (Loud)
- Medium:
Use the jumper wires to attach to Raspberry Pi, accordingly
- +5V (Yellow) -> 3v3 Power (Pin 1) (https://pinout.xyz/pinout/3v3_power)
- GND (Black) -> Ground (Pin 6) (https://pinout.xyz/pinout/ground)
- With PWM (Hard, requires some technical knowledge)
- Take a look at Noctua's PWM specification:
- [https://noctua.at/pub/media/wysiwyg/Noctua_PWM_specifications_white_paper.pdf](https://noctua.at/pub/media/wysiwyg/Noctua_PWM_specifications_white_paper.pdf)
- Use the jumper wires to attach PWM Signal, +5V and GND to Raspbery Pi, accordingly:
- PWM Signal (Blue) -> GPIO 18 (Pin 12) [https://pinout.xyz/pinout/pin12_gpio18/](https://pinout.xyz/pinout/pin12_gpio18/)
- +5V (Yellow) -> 3v3 Power (Pin 1) [https://pinout.xyz/pinout/3v3_power](https://pinout.xyz/pinout/3v3_power)
- GND (Black) -> Ground (Pin 6) [https://pinout.xyz/pinout/ground](https://pinout.xyz/pinout/ground)
More details on the connectivity (Don't follow the instructions on PWM control for RPi5):
- [https://raspberrypi.stackexchange.com/questions/118235/can-i-control-a-4-pin-fan-with-a-raspberry-pi-without-adding-more-circuitry](https://raspberrypi.stackexchange.com/questions/118235/can-i-control-a-4-pin-fan-with-a-raspberry-pi-without-adding-more-circuitry)
Follow this guide to get PWM control: [https://gist.github.com/Gadgetoid/b92ad3db06ff8c264eef2abf0e09d569](https://gist.github.com/Gadgetoid/b92ad3db06ff8c264eef2abf0e09d569)
- Once the steps are done, use the given script with these parameters: `script.sh 18 40000 20000`
6. ENJOY YOUR CLUSTER!

Some Known Issues:
Tolerances:
1. TP-Link TL-SG105S snaps to the unibody in a way that it gets bent slightly. (Need to work on tolerances for a better fit.)
2. Backplates' width is slightly more, and need to be reduced.
It's not a bug, but it's a feature, sort of:
1. You can not remove the back door completely, without unplugging the power.
Disclamer:
This project is provided for educational and informational purposes only. For commercial opportunities, please contact me via direct message!
You should exercise caution when handling electronic components and ensure all safety protocols are followed. I am not responsible for any damages, injuries, or malfunctions that may arise from the use or misuse of this project. Always consult a professional for guidance if unsure about any aspect of the project. Use at your own risk.
ULTIMATE TINY Raspberry Pi 4/5 Server RACK Cluster
Publicado em 6 de jan de 2025