Você está no 3DFinder
Buscamos em Thingiverse, MakerWorld e Printables ao mesmo tempo para te dar o melhor de cada uma.
Descrição
Massive dual track marble run with screw lift system that uses a standard “TT motor”. The system includes a lift system along with two loops of track. Works with standard 16mm glass marbles. Maximum marble size is 16.5mm. The second loop is optional.
Video
The columns shown with the track are optional, they can be replaced with regular bricks (a combination of 2x2 and 2x4 bricks can be used). Also the 2x4 plate files can be removed if you have your own.
Instructions to build the lift:
Before starting check that there are no defects at the very top of the base. If there are any that need to be fixed first (sand or cut off). Insert the exit of lift onto the top of the base (it should face the side with the motor mount). Push it straight onto the base making sure the bottom of the base is supported on a solid surface. Work it down evenly a few layers at a time. Make sure it is seated on the bosses:

Add the feet to the base making sure the rounded end goes up (the 2 little feet go on the other side):

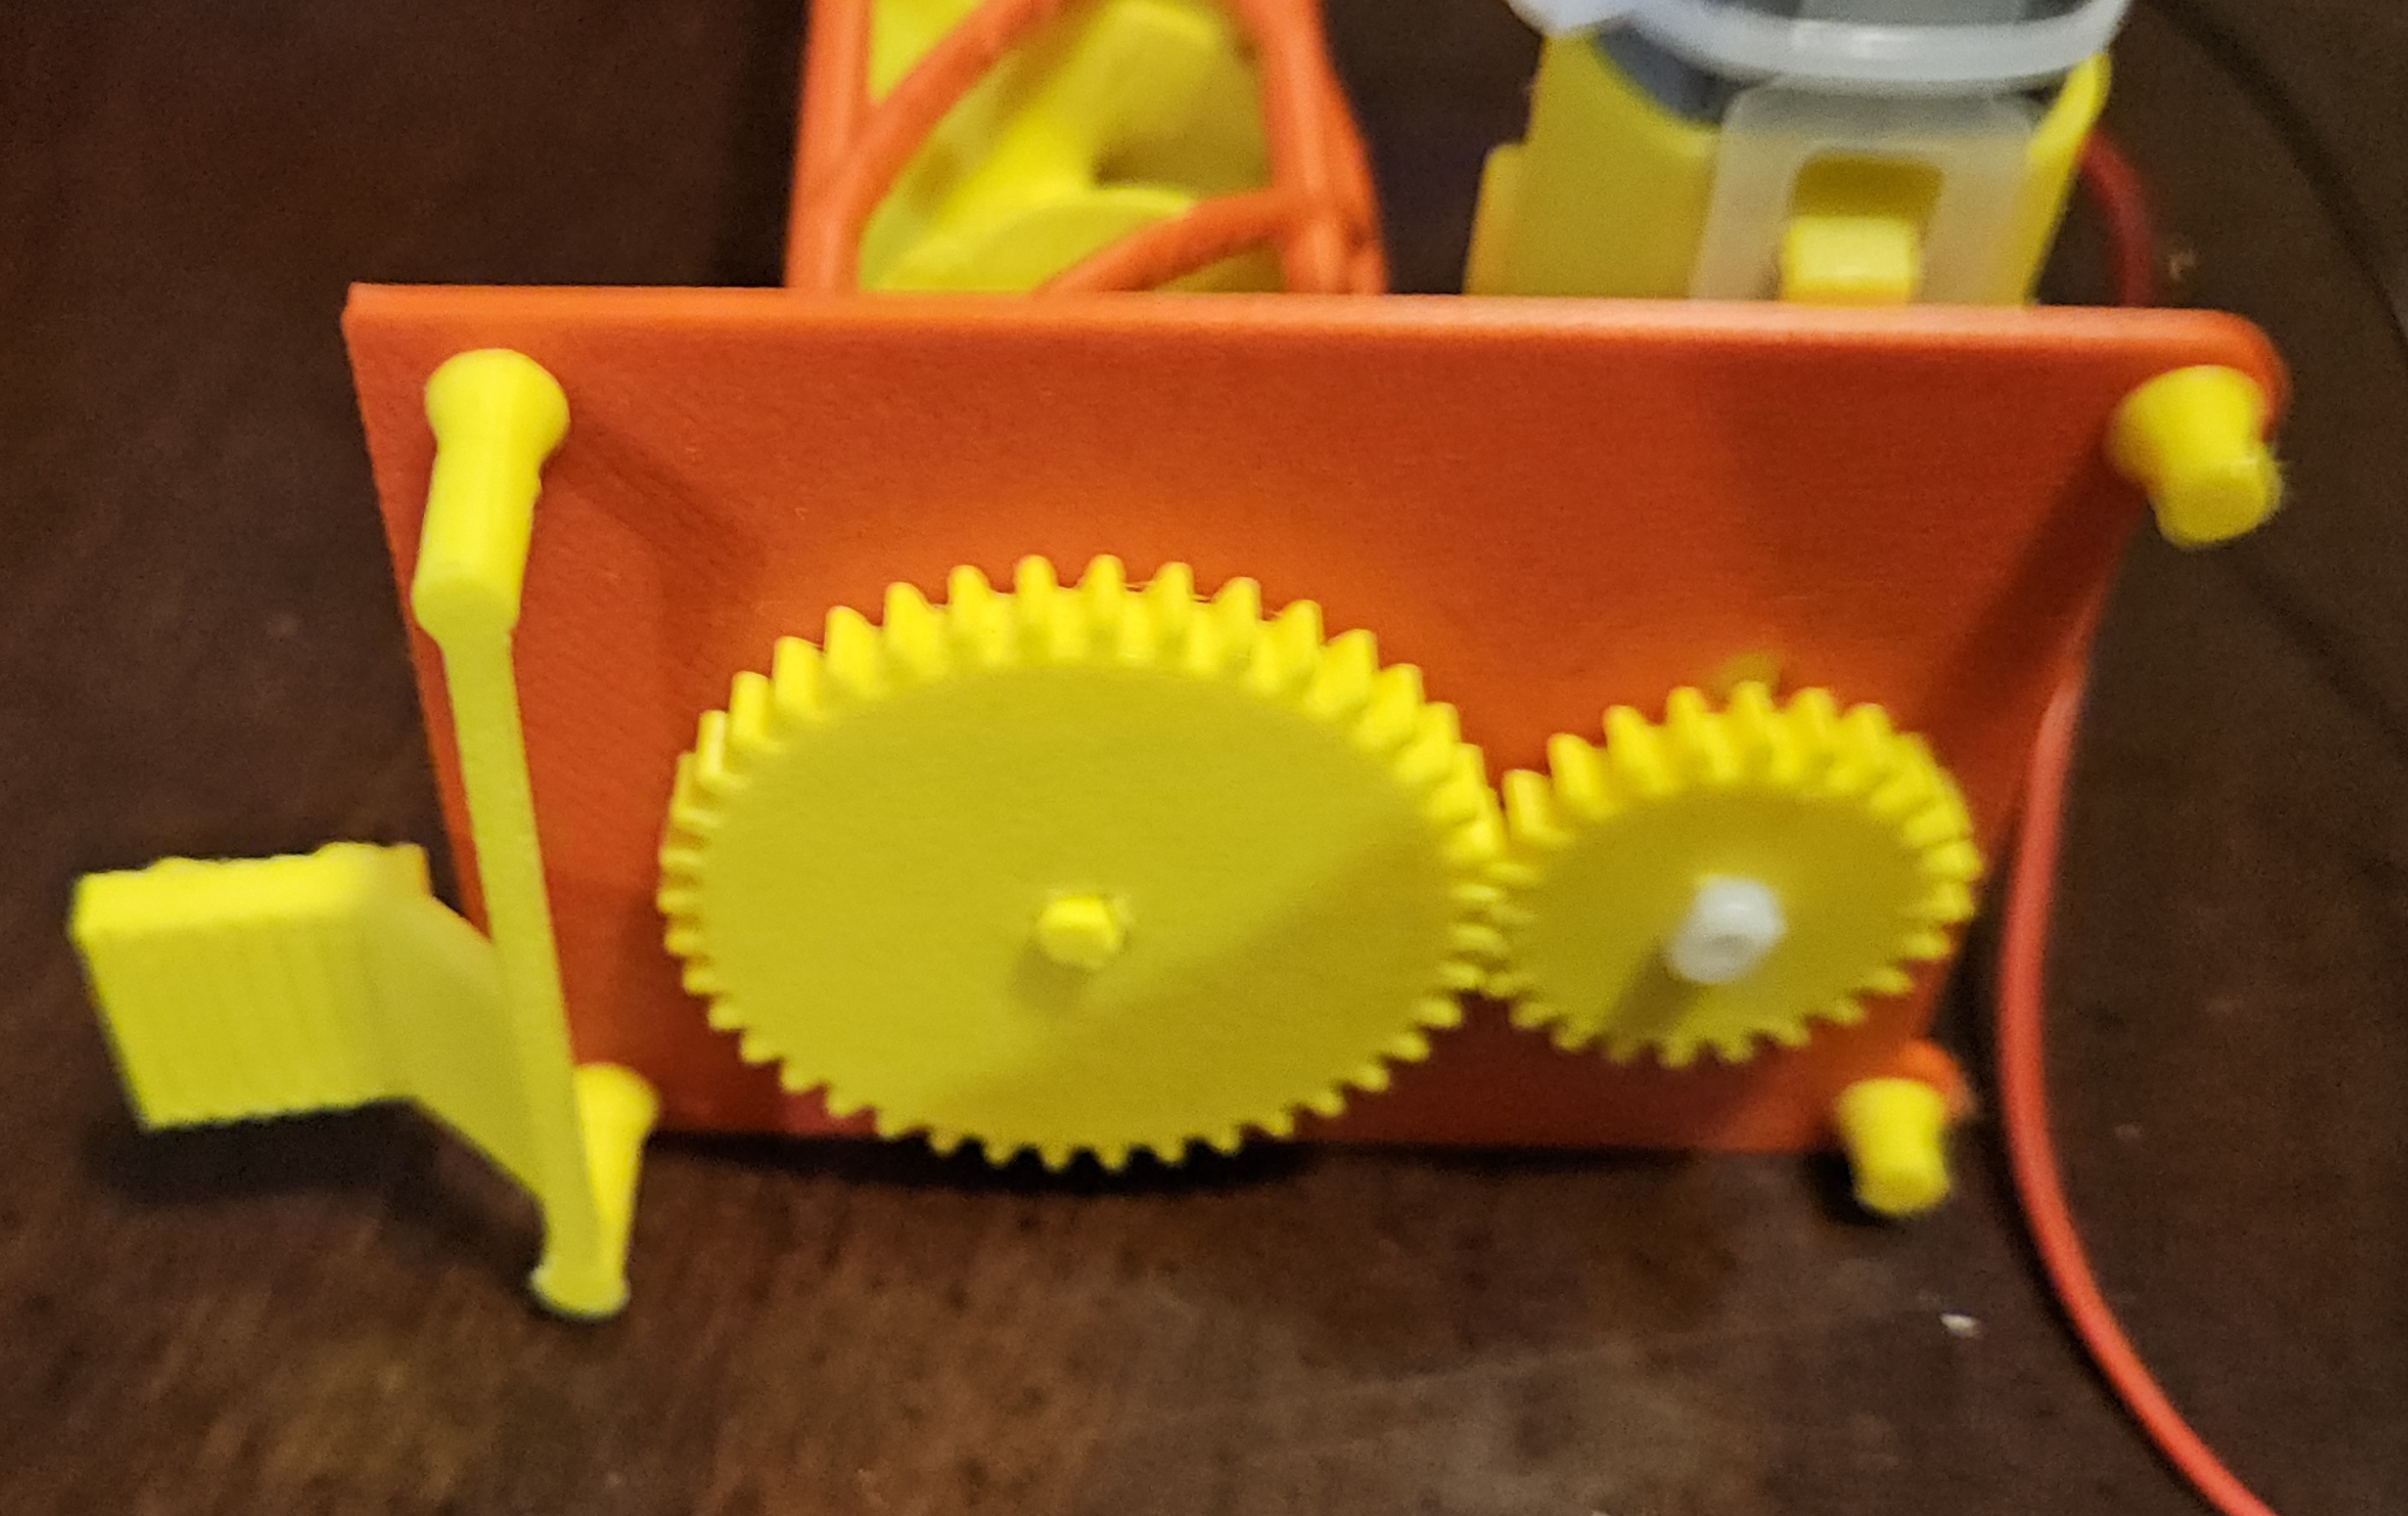
Prepare the screw for installation. The screw has a hex on one end. It will be distorted a little bit from the supports needed for printing. You'll need to shave away the remaining support material, so that the hex looks like a hex again. Test fix the screw with spur gear (large one) and ensure it can be inserted, relatively easily. Next insert the screw into the lift base with the hex facing down and press on the spur gear.
Now fit the top carefully lining up the top shaft of the screw. Make sure it is fully seated once everything is lined up.
Important: Now spin the spur gear by hand and make sure the screw turns true. Make sure the screw doesn't move while spinning. If the screw moves around while spinning the lift won't work. If it is moving, you need to figure out why. Defects on the sides of base or screw, or the lift exit or top not seated properly).
Test fit the pinion gear with the TT motor to insure it fits. If it's too tight you can shave a little elephant foot away from the inside of the pinion gear. Now add the TT motor with the little peg facing down and attach the gear. Insert the gears until they are 1 mm away from the base.
The lift is complete!
The order of the track follows the order on the build plates (from top left to bottom right). If a 2x4 plate is between 2 pieces they are connected with that plate. If there is nothing between the pieces they are connected with a column. The columns are printed in order like the other pieces.
Please note: the motor may need to be wired in reverse in order for the lift to function.
Loop One
Order of the pieces for loop one:
Build plate 1:
Down ramp, 2x4 plate, straight, column (13 bricks high - 6 col + 5 col + 2 cap), down ramp, plate, left 180 turn, plate, down ramp w/ flag,
column 11, right 90 turn, plate, straight, plate, down ramp, column 10, left 180 turn, plate, down ramp, column 9, straight x2,
plate, straight.
Build plate 2:
Column 9, right 90 turn, plate, down ramp, plate, straight, plate, right 90 turn, column 8, straight x2, column 8,
down ramp, plate, straight, plate, right 90 turn, 7 column, down ramp, plate, right 90 turn, 6 column, straight x2,
6 column
Build plate 3:
right 90 turn, plate, down ramp, column 5, straight x2, column 5, left 180 turn, column 5, steps, column 2, straight, column 2,
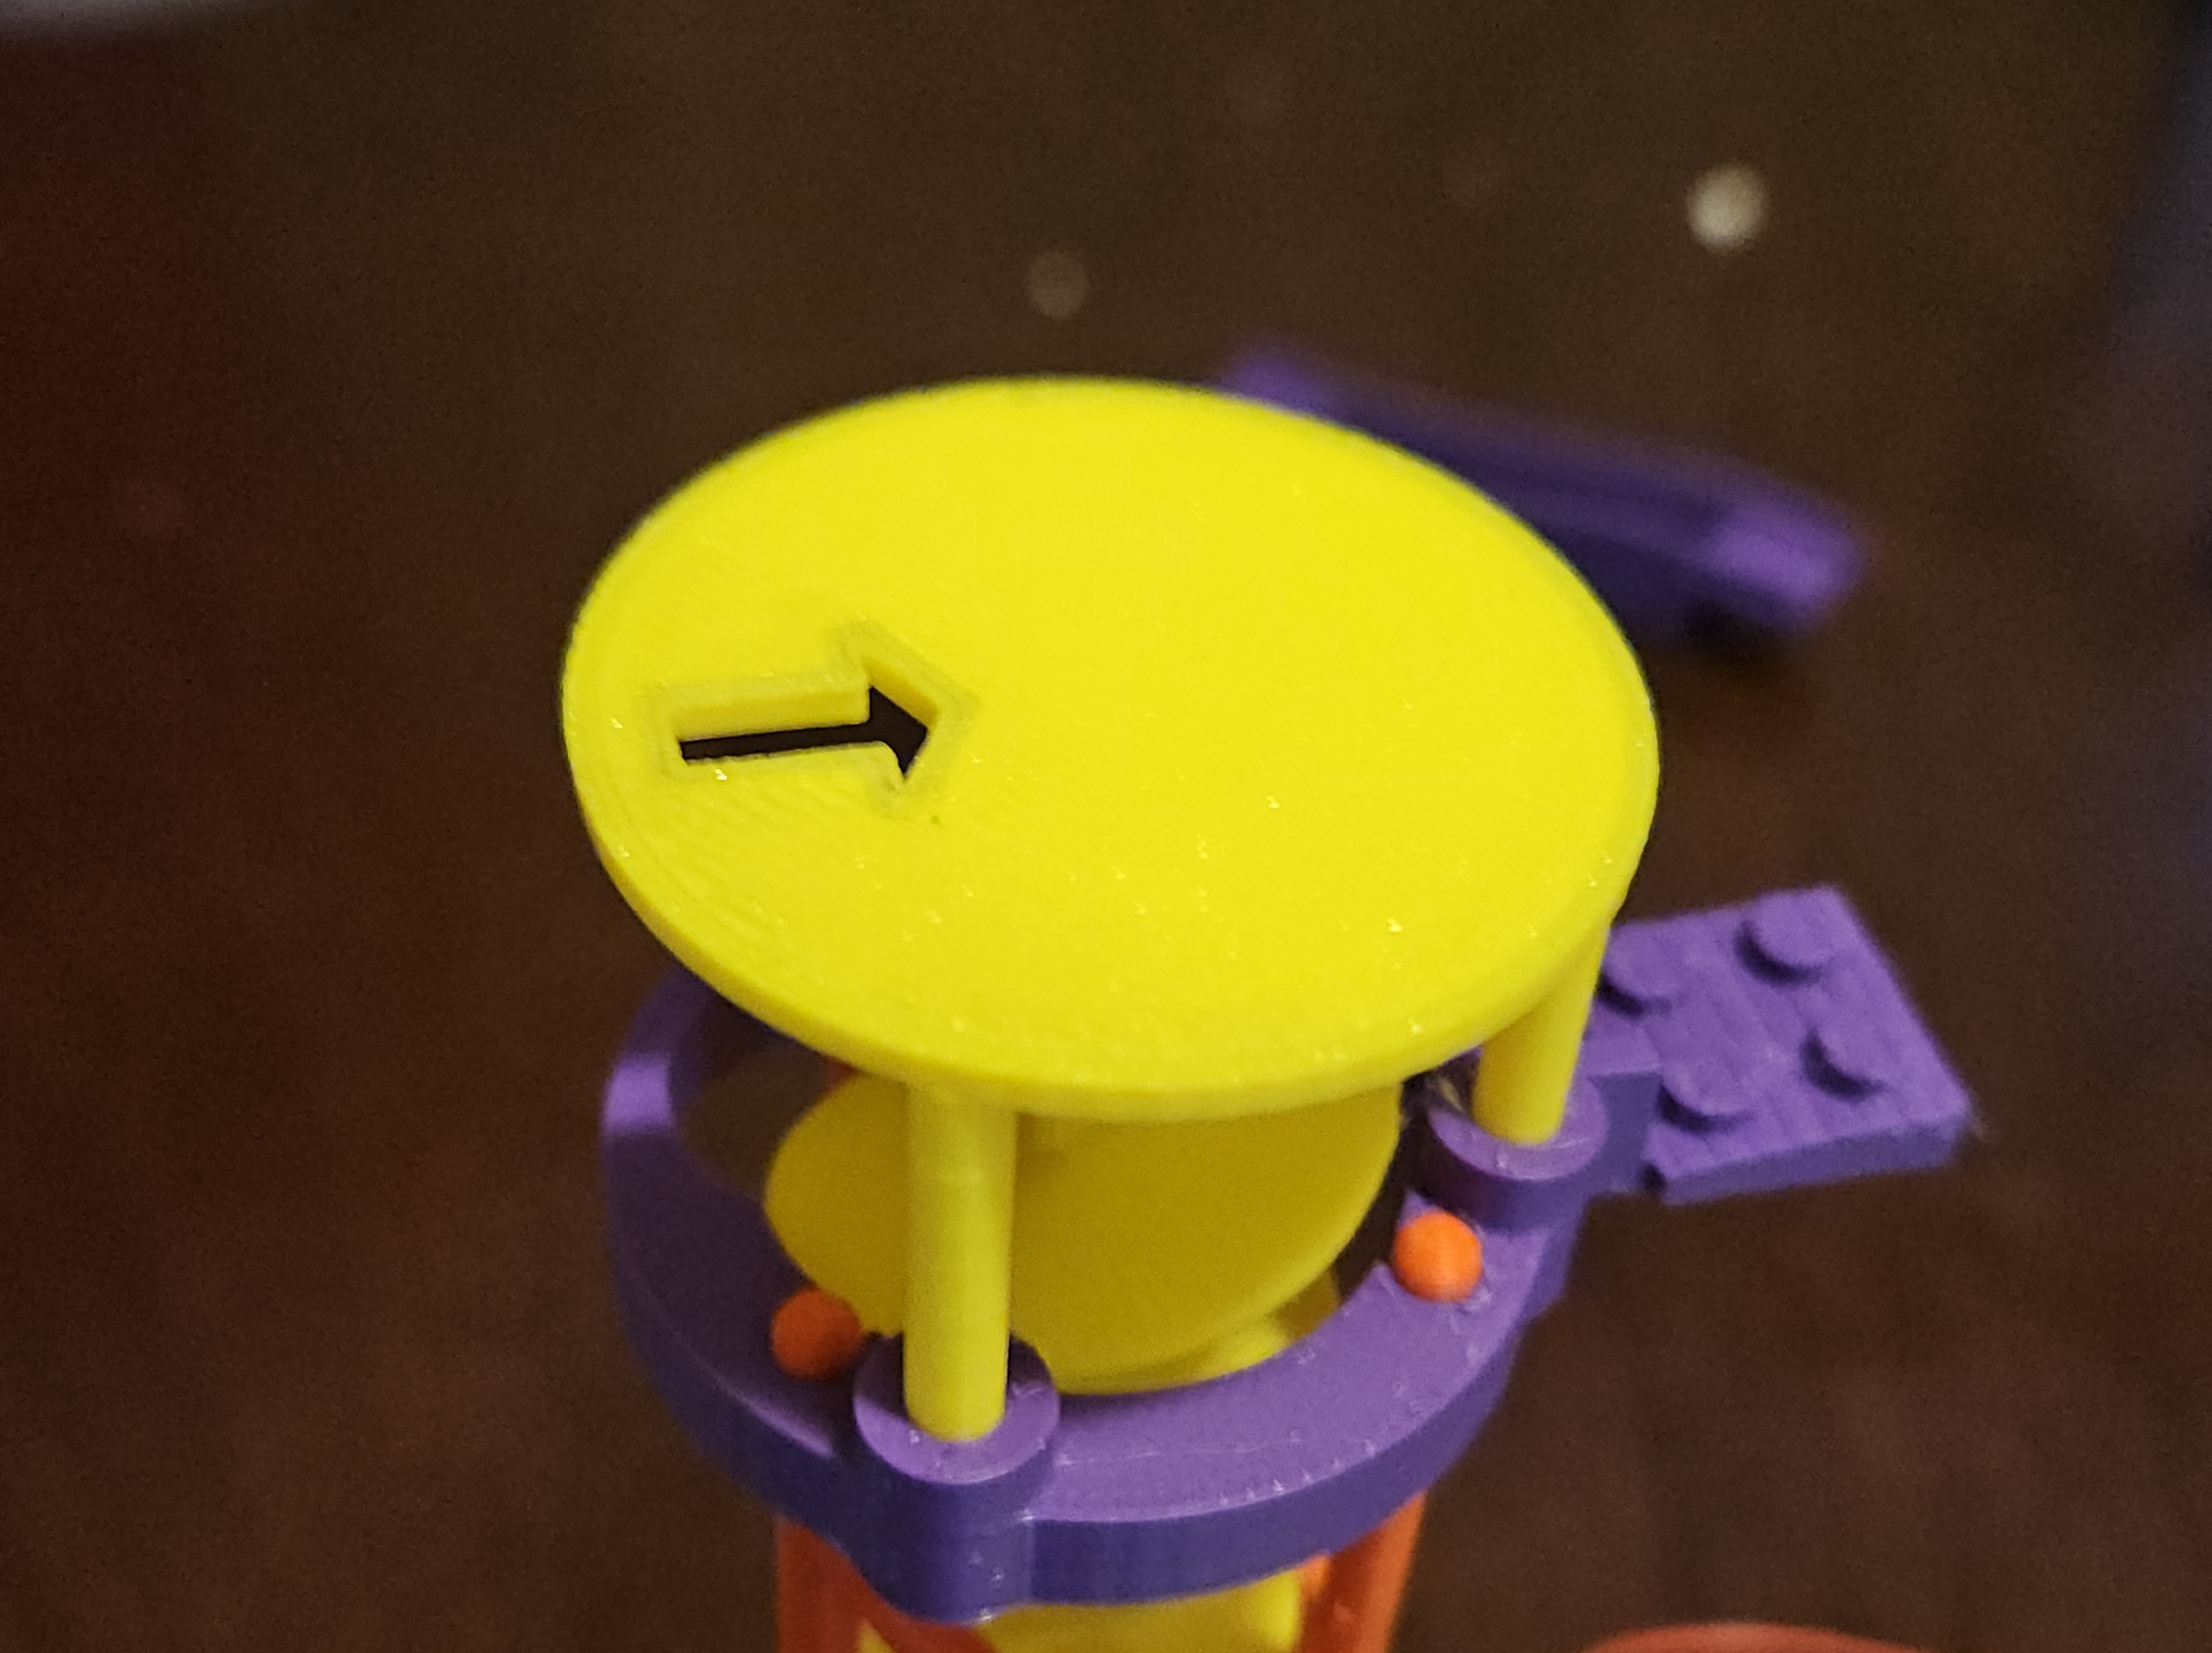
lift entrance (this piece is part of the lift build plate and it has Lift → written on the side of it)
Loop Two
Loop two uses all the pieces from loop one except for the steps. Loop two is in a separate 3mf file.
Order of the pieces for loop two:
Build plate 1:
Remove the first straight (2nd piece after lift) and replace that with: splitter (install the switch blade and insure easy movement),
2x4 plate, down ramp, plate, right 180 turn, plate, ramp, column 11 ( 6 col + 3 col + 2 cap), left 90 turn, plate, straight, plate, down ramp, 10 column, right 180 turn, 9 col, down ramp (with flag), plate, left 180 turn
Build plate 2:
Column 8, straight, col 7, down ramp, plate, right 180 turn, col 6, straight, plate, down ramp w/flat, plate, left 180 turn, column 5,
straight, plate, down ramp w/flat, plate, right 180 turn
Build plate 3:
Plate, straight x2, plate, down ramp, plate, left 90 turn, plate, straight, plate, right 180 turn, plate, steps
