Você está no 3DFinder
Buscamos em Thingiverse, MakerWorld e Printables ao mesmo tempo para te dar o melhor de cada uma.
Descrição
An all-in-one 3D printed clock that displays the hours of the day, day of the week and the cycle of the moon.
Clock Assembly
1. Parts to 3D Print. The 3MF file will have all the correct quantities. The colors are also set in the 3MF file, however, you can create your own color scheme.
(x1) 303100 Clock Frame
(x2) 303102 Spur Gear, Week, 24/12 teeth
(x1) 303103 Final Gear, Week, 42 teeth
(x2) 303104 Spur Gear, Moon, 48/12 teeth
(x1) 303105 Final Gear, Moon, 44 teeth
(x1) 303106 Clock Face, Week, w/words
(x1) 303107 Clock Face, Weeks, w/symbols (this is optional)
(x1) 303108 Clock Face, Moon
(x1) 303109 Clock Face, Roman numerals
(x1) 303110 Needle, Weeks
(x1) 303111 Needle, Hours
(x1) 303112 Needle, Moon.
(x1) 303113 Mount, Clock Frame
(x1) 303114 Support, LH
(x1) 303115 Support, RH
(X3) 303116 Mount, Hours Clock Face. (These mounts are the shorter than the rest)
(x3) 303117 Mount, Week Clock Face. (there is a “W” at the base of this mount)
(x3) 303118 Mount, Moon Clock Face.
(x6) 303119 Washers
(x2) 303120 Needle Cap
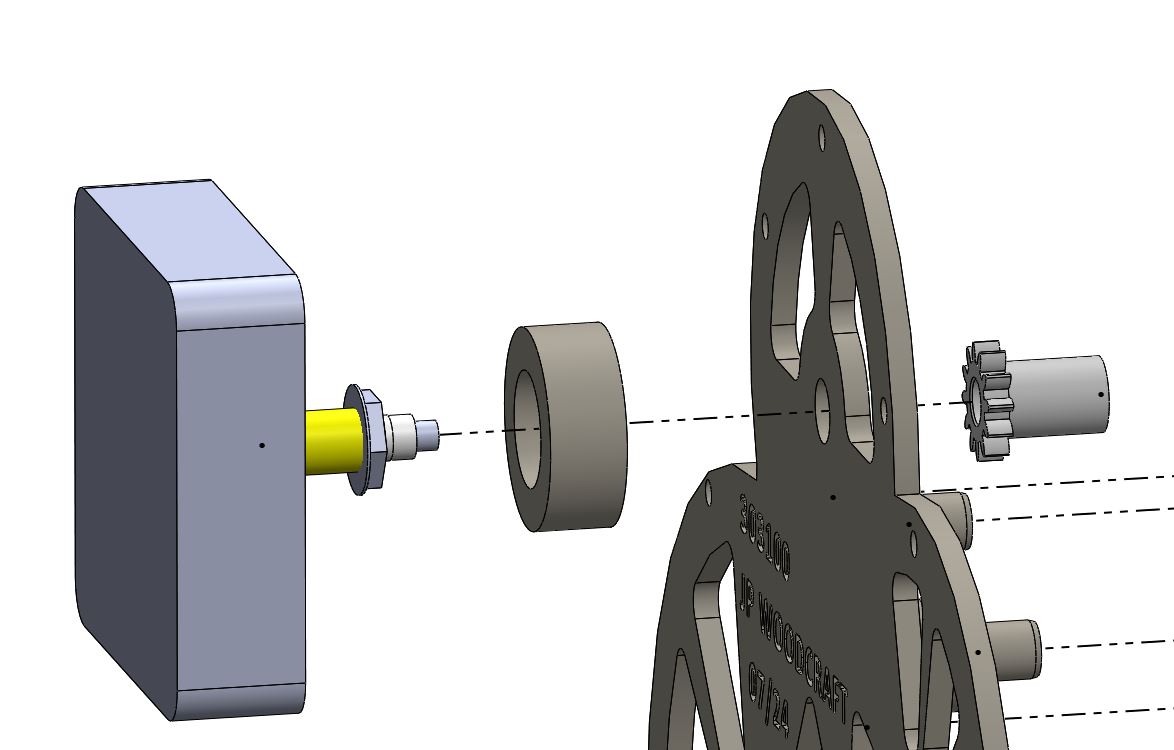
(x1) 302122 Spacer. This is optional depending on which clock movement you get.
(x1) 303123 Pinion
2. This is the movement I used.
[https://a.co/d/bkEVGIc](https://a.co/d/bkEVGIc)
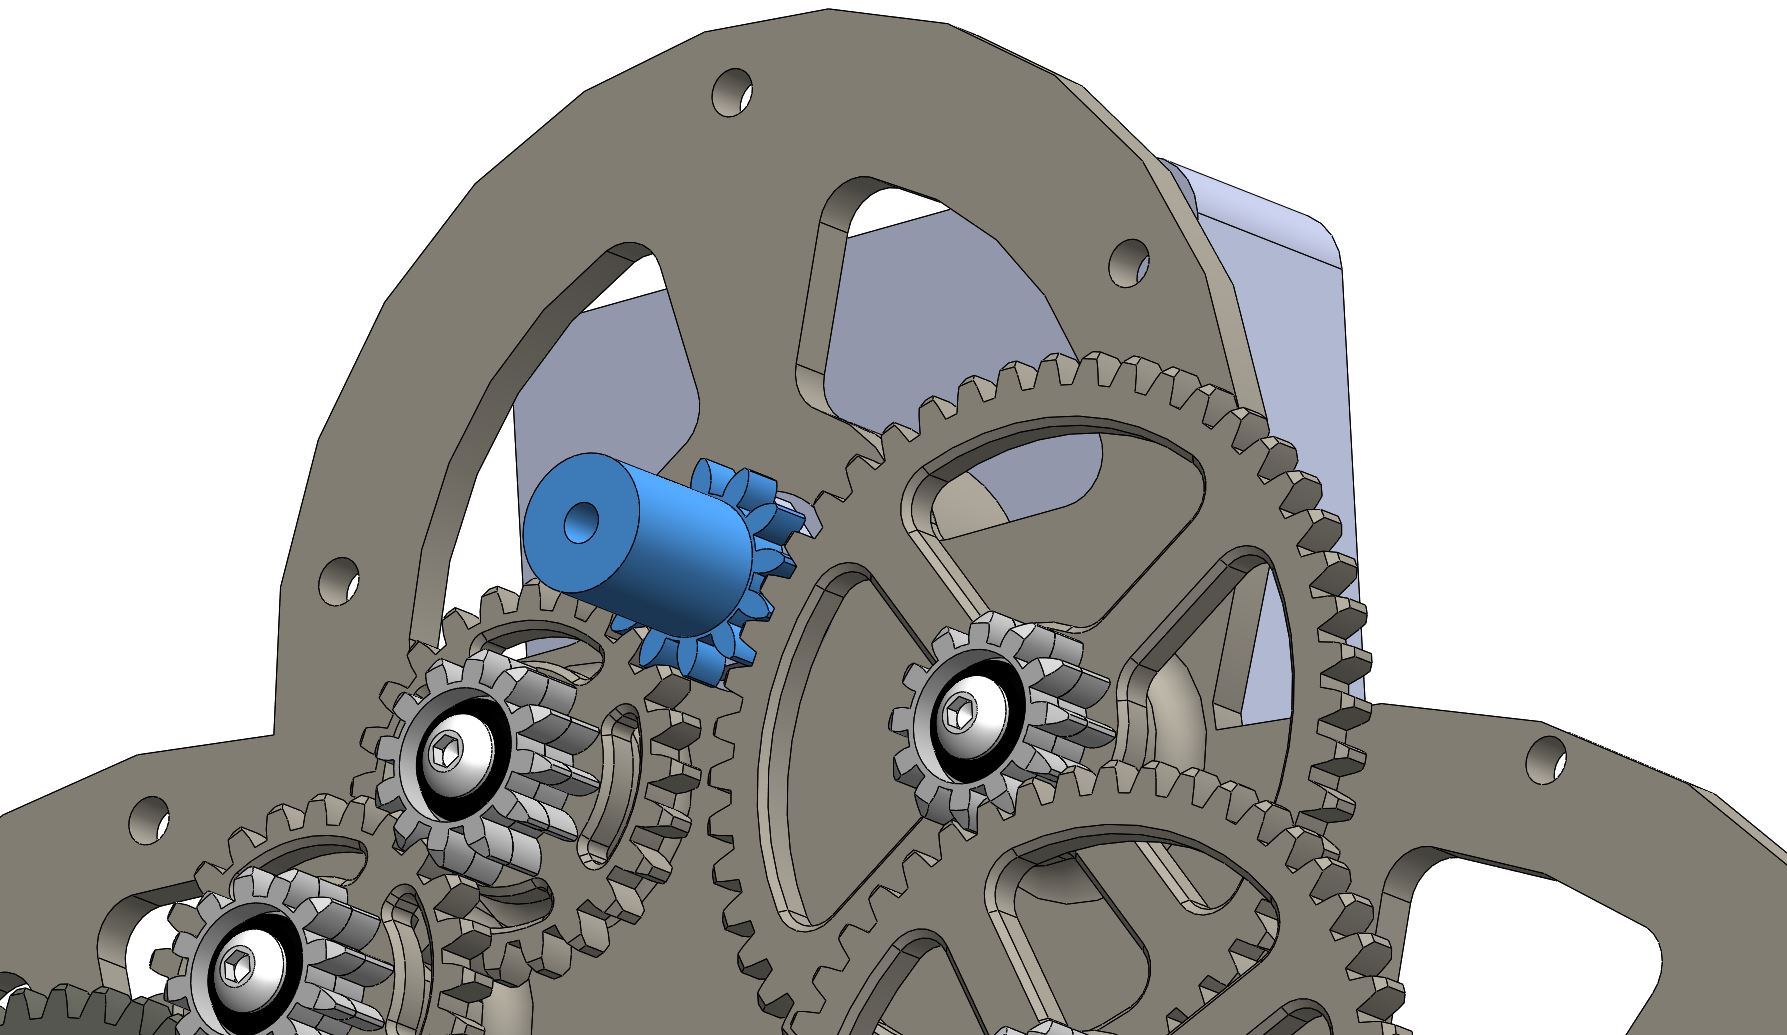
It is very important that the clock movement’s shaft length is correct in order to locate the pinion gear as to mesh with the spur gears and that the hour clock needle does not interfere with the clock face. This particular clock movement I link uses the 303122 spacer. If your clock movement has a different shaft length, you may need to print a custom length spacer. The spacer is 1” outside diameter by 0.580” inside diameter.
Pinion gear (in blue) alignment with spur gears.
Clock Movement Spacer
3. You will also need (x10) M3 x 10mm, (x12) M3 x 8mm, (x9) M3 x 6mm and (x4) M3 x 16mm long button head screws.
4. Using a M3 tap, cut threads in the following parts….
-303100 Clock Face Mount. Cut thread in all 6 gear mount posts.
-303103 Spur Gear, Final, Weeks. Cut threads in the two holes on the top side.
-303105 Gear, Final, Moon. Cut threads in the two holes on the top side.
-303106 (303107 optional) Weeks Clock Face. Caution to not cut threads too deep. Only a few threads are required.
-303108 Moon Clock Face. Caution to not cut threads too deep. Only a few threads are required.
-303109 Hours Clock Face. Caution to not cut threads too deep. Only a few threads are required.
-303110 Needle, weeks. Add threads to the center hole.
-303112 Needle, Moon. Add threads to the center hole.
-303114 Mount, LH. Cut threads in the two holes
-303115 Mount, RH. Cut threads in the two holes.
-303116 Mount. Bottom side only.
-303117 Mount. Bottom side only.
-303118 Mount. Bottom side only.
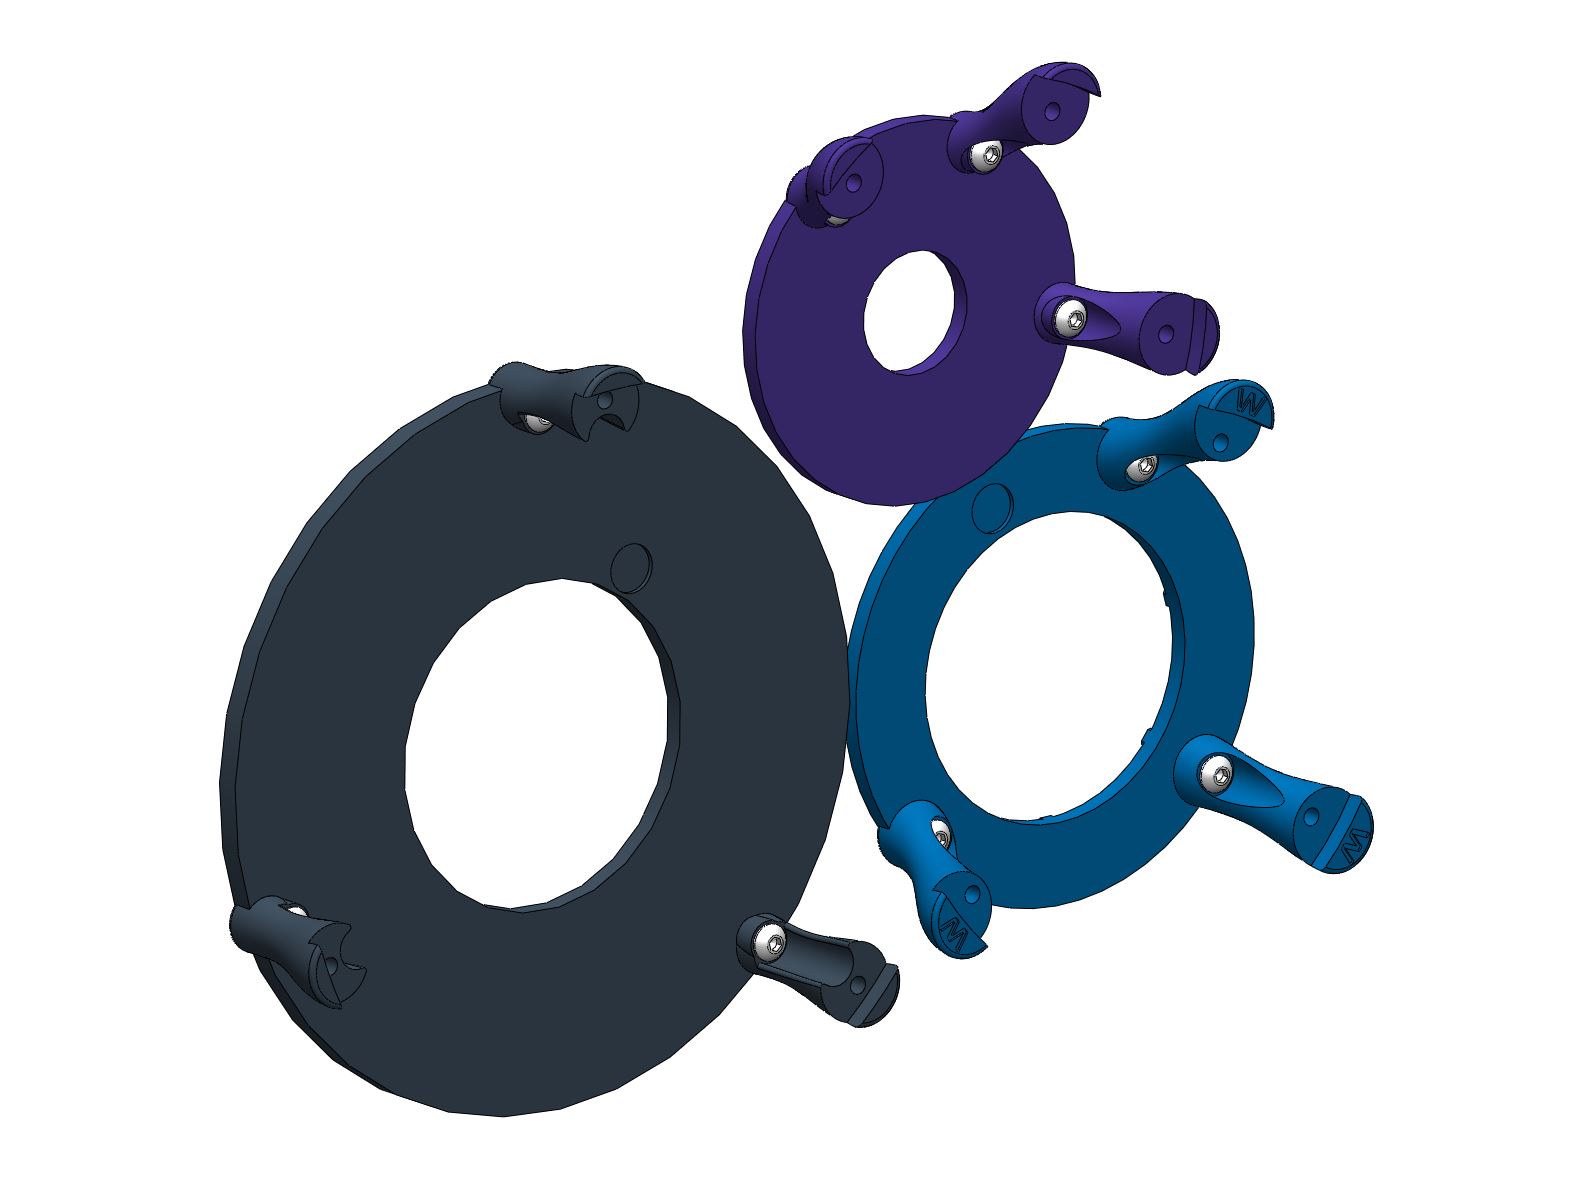
5. Screw 303118 Mount (x3) to 303108 Moon clock face. Use (x3) M3 x 6mm long screw. Do not screw too tight, as there are very little threads to bite into. If the threads strip, you can use a drop of glue here.
6. Screw 303116 Mount (x3) to 303100 Hours clock face. Use (x3) M3 x 6mm long screw. Do not screw too tight, as there are very little threads to bite into. If the threads strip, you can use a drop of glue here.
7. Screw 303117 Mount (x3) to 303106 Weeks clock face (303107 optional). Use (x3) M3 x 6mm long screw. Do not screw too tight, as there are very little threads to bite into. If the threads strip, you can use a drop of glue here.
Pic of pre-assembled clock faces. (Step 5, 6, and 7)
8. Install the clock movement to the 303100 Clock Face Mount. Depending on the clock movement you purchased, you may need to use the 303112 spacer. Or make a custom length spacer as noted in step 2.
9. Press the 303112 pinion gear on the clock movement hours spigot. This pinion gear should press onto the section that turns the hour hand.
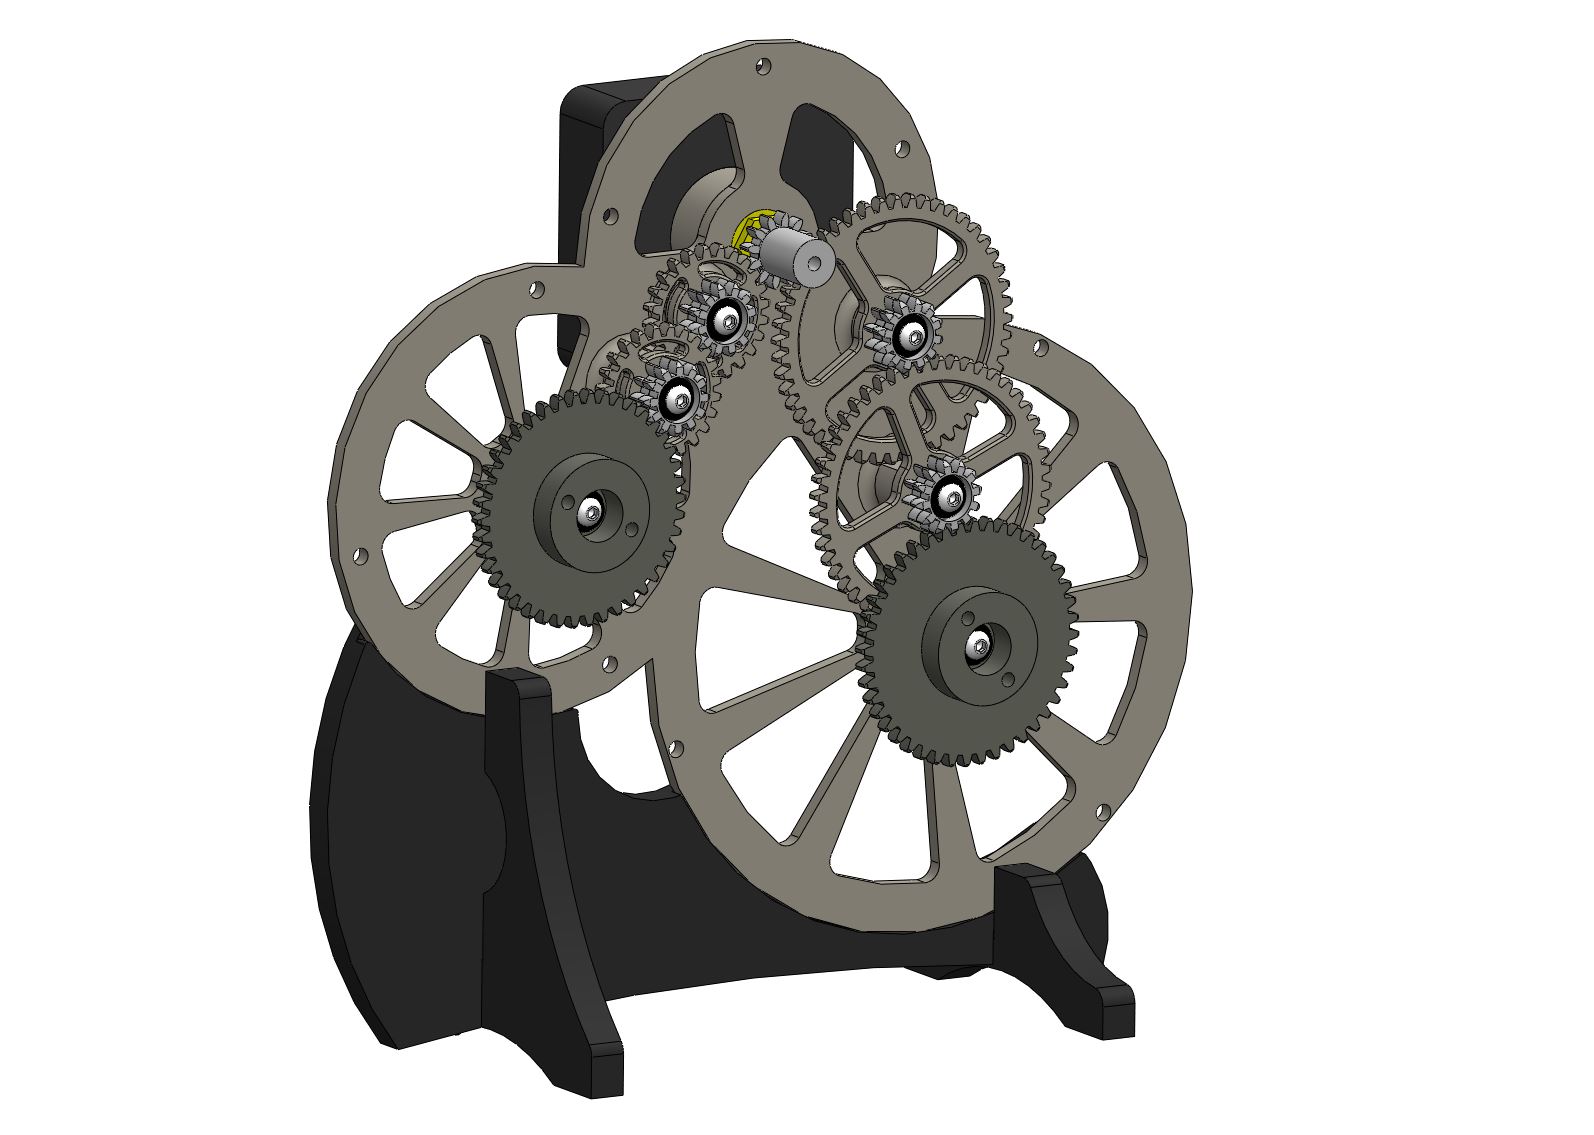
10. Install the (x1) 303102 and (x1) 303104 Spur gears on the two upper must gear posts on the 303100 Clock Face Mount. These gears must align with the 303112 pinion gear. Use 303119 Washers and M3 x 10mm screws. Do not tighten the M3 screws too much, make sure the gears spin freely.
11. Continue to install the rest of the gears. 303102, 303103 gears are installed on the left of the clock. 303104, 303105 gears are installed on the right side. Use 303119 Washers and M3 x 10mm screws. Make sure the gears spin freely.
Pic of gears installed. (Step 9, 10, and 11)
12. Install the three clock faces that were pre-assembled in steps 5, 6, and 7. The Hour face at the top, the Weeks face on the left and the Moon face on the right. They only go in one position, so it’s hard to install them incorrectly. Use (X9) M3 x 8mm screws.
13. Install the 303111 Hours Needle. Point the needle to the correct time and tighten the M3 x 8mm screw.
14. Install the 303110 Weeks Needle. Point the needle to the correct day and approx. time of day and tighten the (x2) M3 x 8mm screw when located. The 303103 Week spur gear may need to be re-positioned for the needle to align with the correct day.
15. Install the 303112 Moon Needle. Point it to the correct noon phase and tighten the (x2) M3 x 8mm screw when located. There are many sites on the internet that list the current moon phase. The 303105 Moon spur gear may need to be re-positioned for the needle to align with the correct moon phase.
Pic of needles installed. (Step 13, 14, and 15)
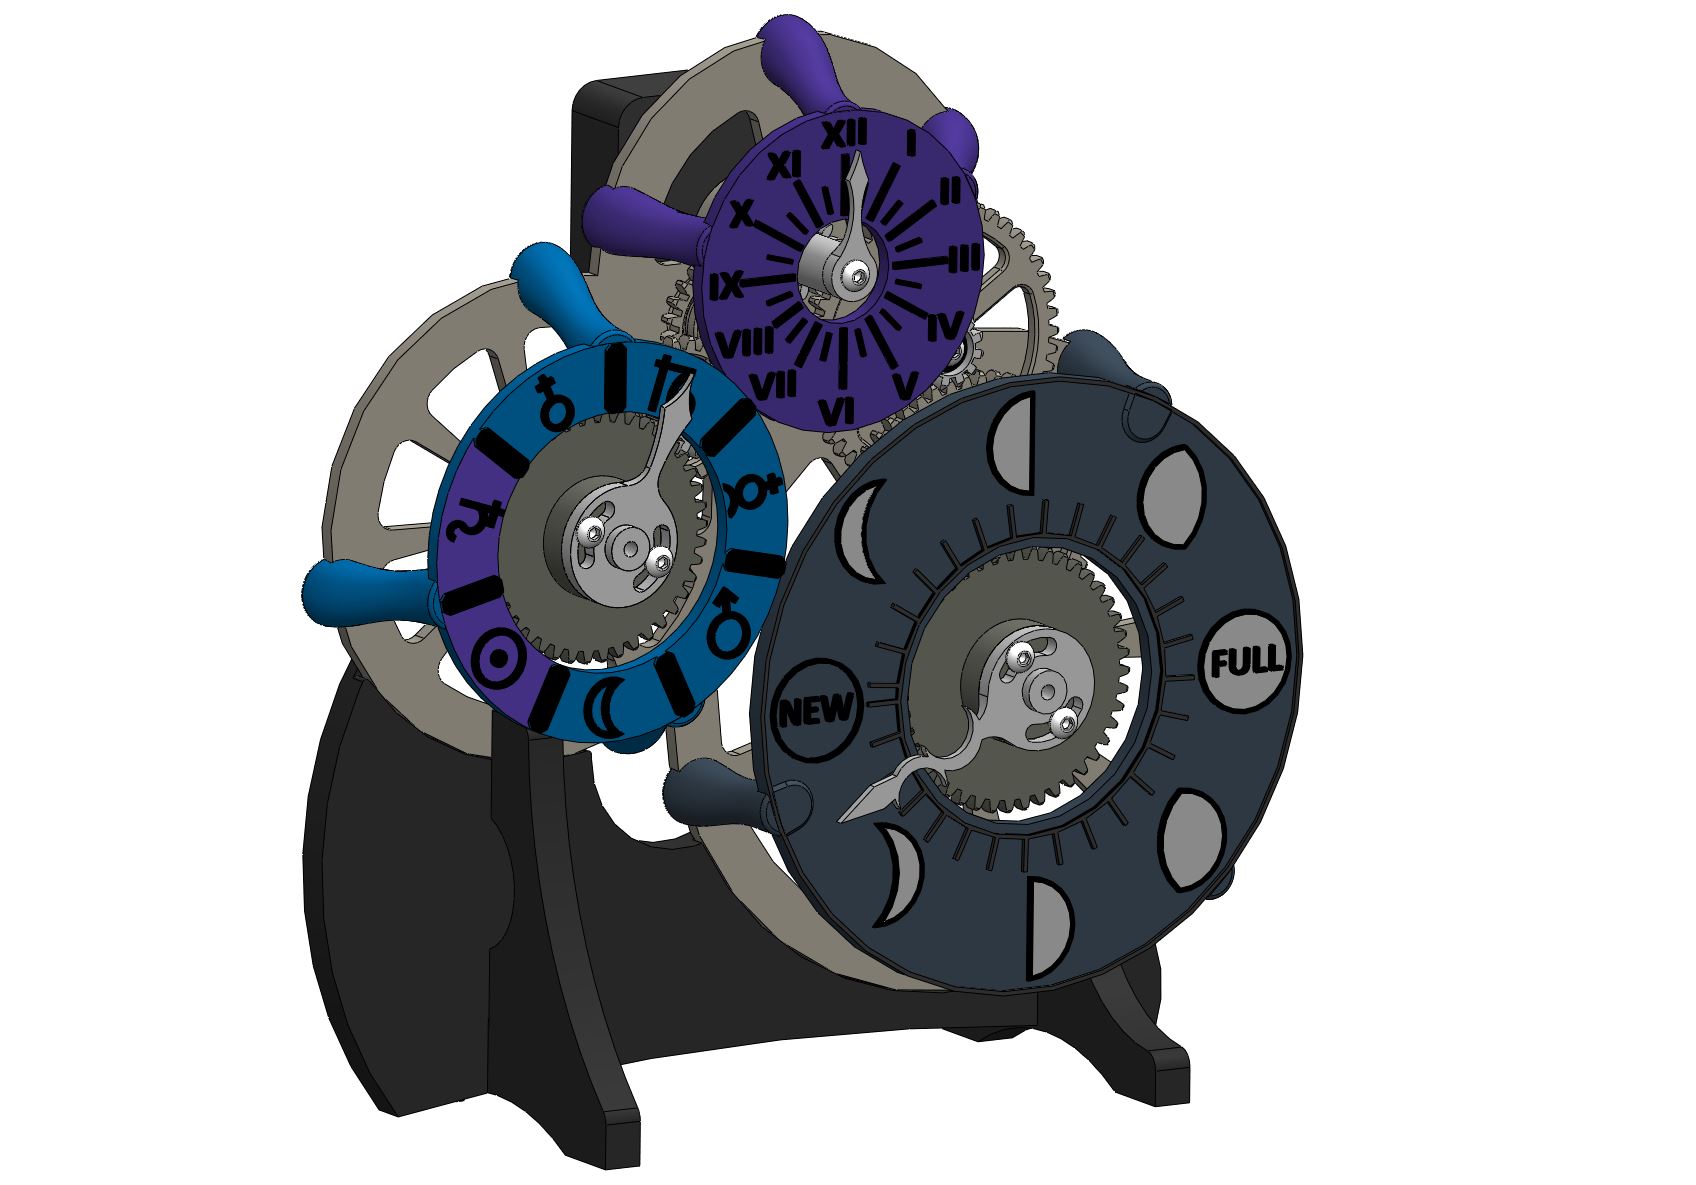
16. Install the two 303120 Needle Caps using M3 x 8mm screws. Needle caps are installed over the Weeks and Moon needles.
17. Install the 303114 and 303115 Support mounts onto the 303113 Frame Base. Use (x2) M3 x 16mm long screws, only install the two bottom screws for now. Don’t tighten all the way just yet.
17. Install the whole clock onto the frame base. Insert (x2) M3 x 16mm long screws at the base of the clock. These screws go through the base, clock frame and support. Now tighten the rest of base frame screws.
Base installation.
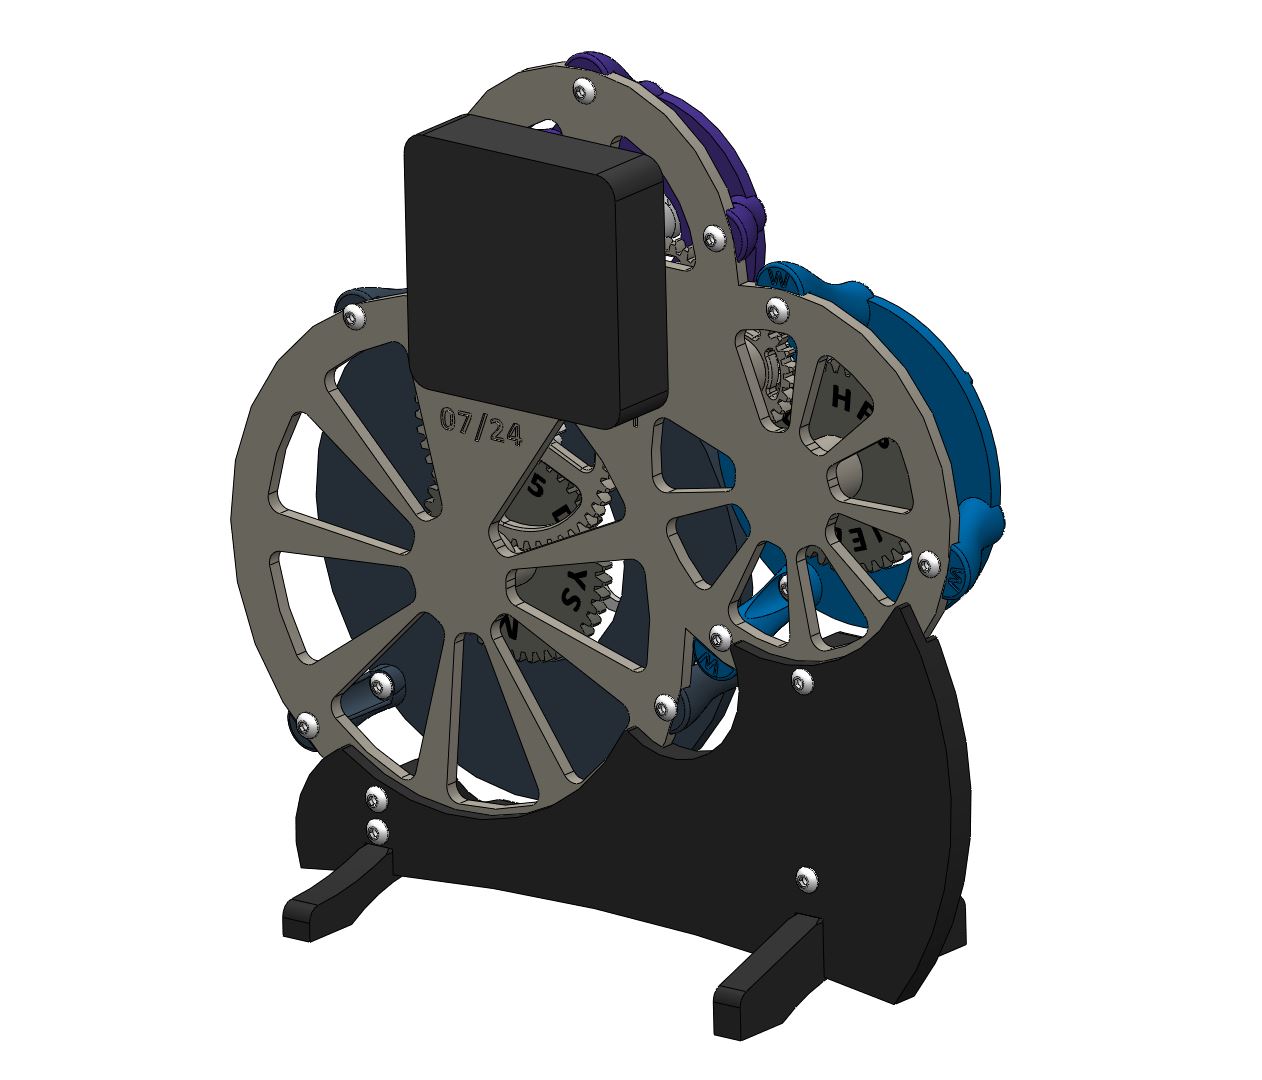
18. Enjoy!!
Gostou deste modelo? Crie uma conta grátis para salvar seus favoritos e voltar a eles depois.
Criar conta