Você está no 3DFinder
Buscamos em Thingiverse, MakerWorld e Printables ao mesmo tempo para te dar o melhor de cada uma.
Descrição
Magnetic Levitating Lithophane Moon
Caveats
- This is a somewhat advanced print and build. If you're new to 3D printing, you may want to start with something a little simpler like the (non-levitating) Lit Fractal Tree or the Moon Lamp.
- Getting the float to levitate on the base takes a bit of practice and finesse to properly work.
- Not recommended for children. If the float is jostled enough off center, it can fall and then it will slam into the base with a great deal of force (MAGNETS!) - possibly damaging both the base and the float.
- Not recommended in “unstable” places. Again, jostling the surface it rests on will cause the float to fall. Also, any power loss to the base will cause the float to fall with a great deal of force.
- Keep the base (it is a powerful electromagnet) away from pacemakers and other items susceptible to strong magnetic fields like old hard drives and magnetic media.
Assembly
Instructions for assembling the base (as well as an alternate base model with a top switch) can be found here:
[https://makerworld.com/en/models/759193?from=search#profileId-693685](https://makerworld.com/en/models/759193?from=search#profileId-693685)
Another base model (square) shown in the pictures above can be found here:
After selecting a base you like, I'd recommend practicing making just the unmodified float or the bottom levitate in the magnetic field. Verify that you can get it to float by itself before committing to printing the whole moon. From personal experience, it can be frustrating not being able to get the finished moon to float. You could spend HOURS trying to do it the first time if you don't start out simple. See "Getting the Float to Levitate" for more detailed instructions.


Once you get a feel for how to find the sweet spot that the float needs to be in and when it's out of alignment- you can construct the rest of the moon.
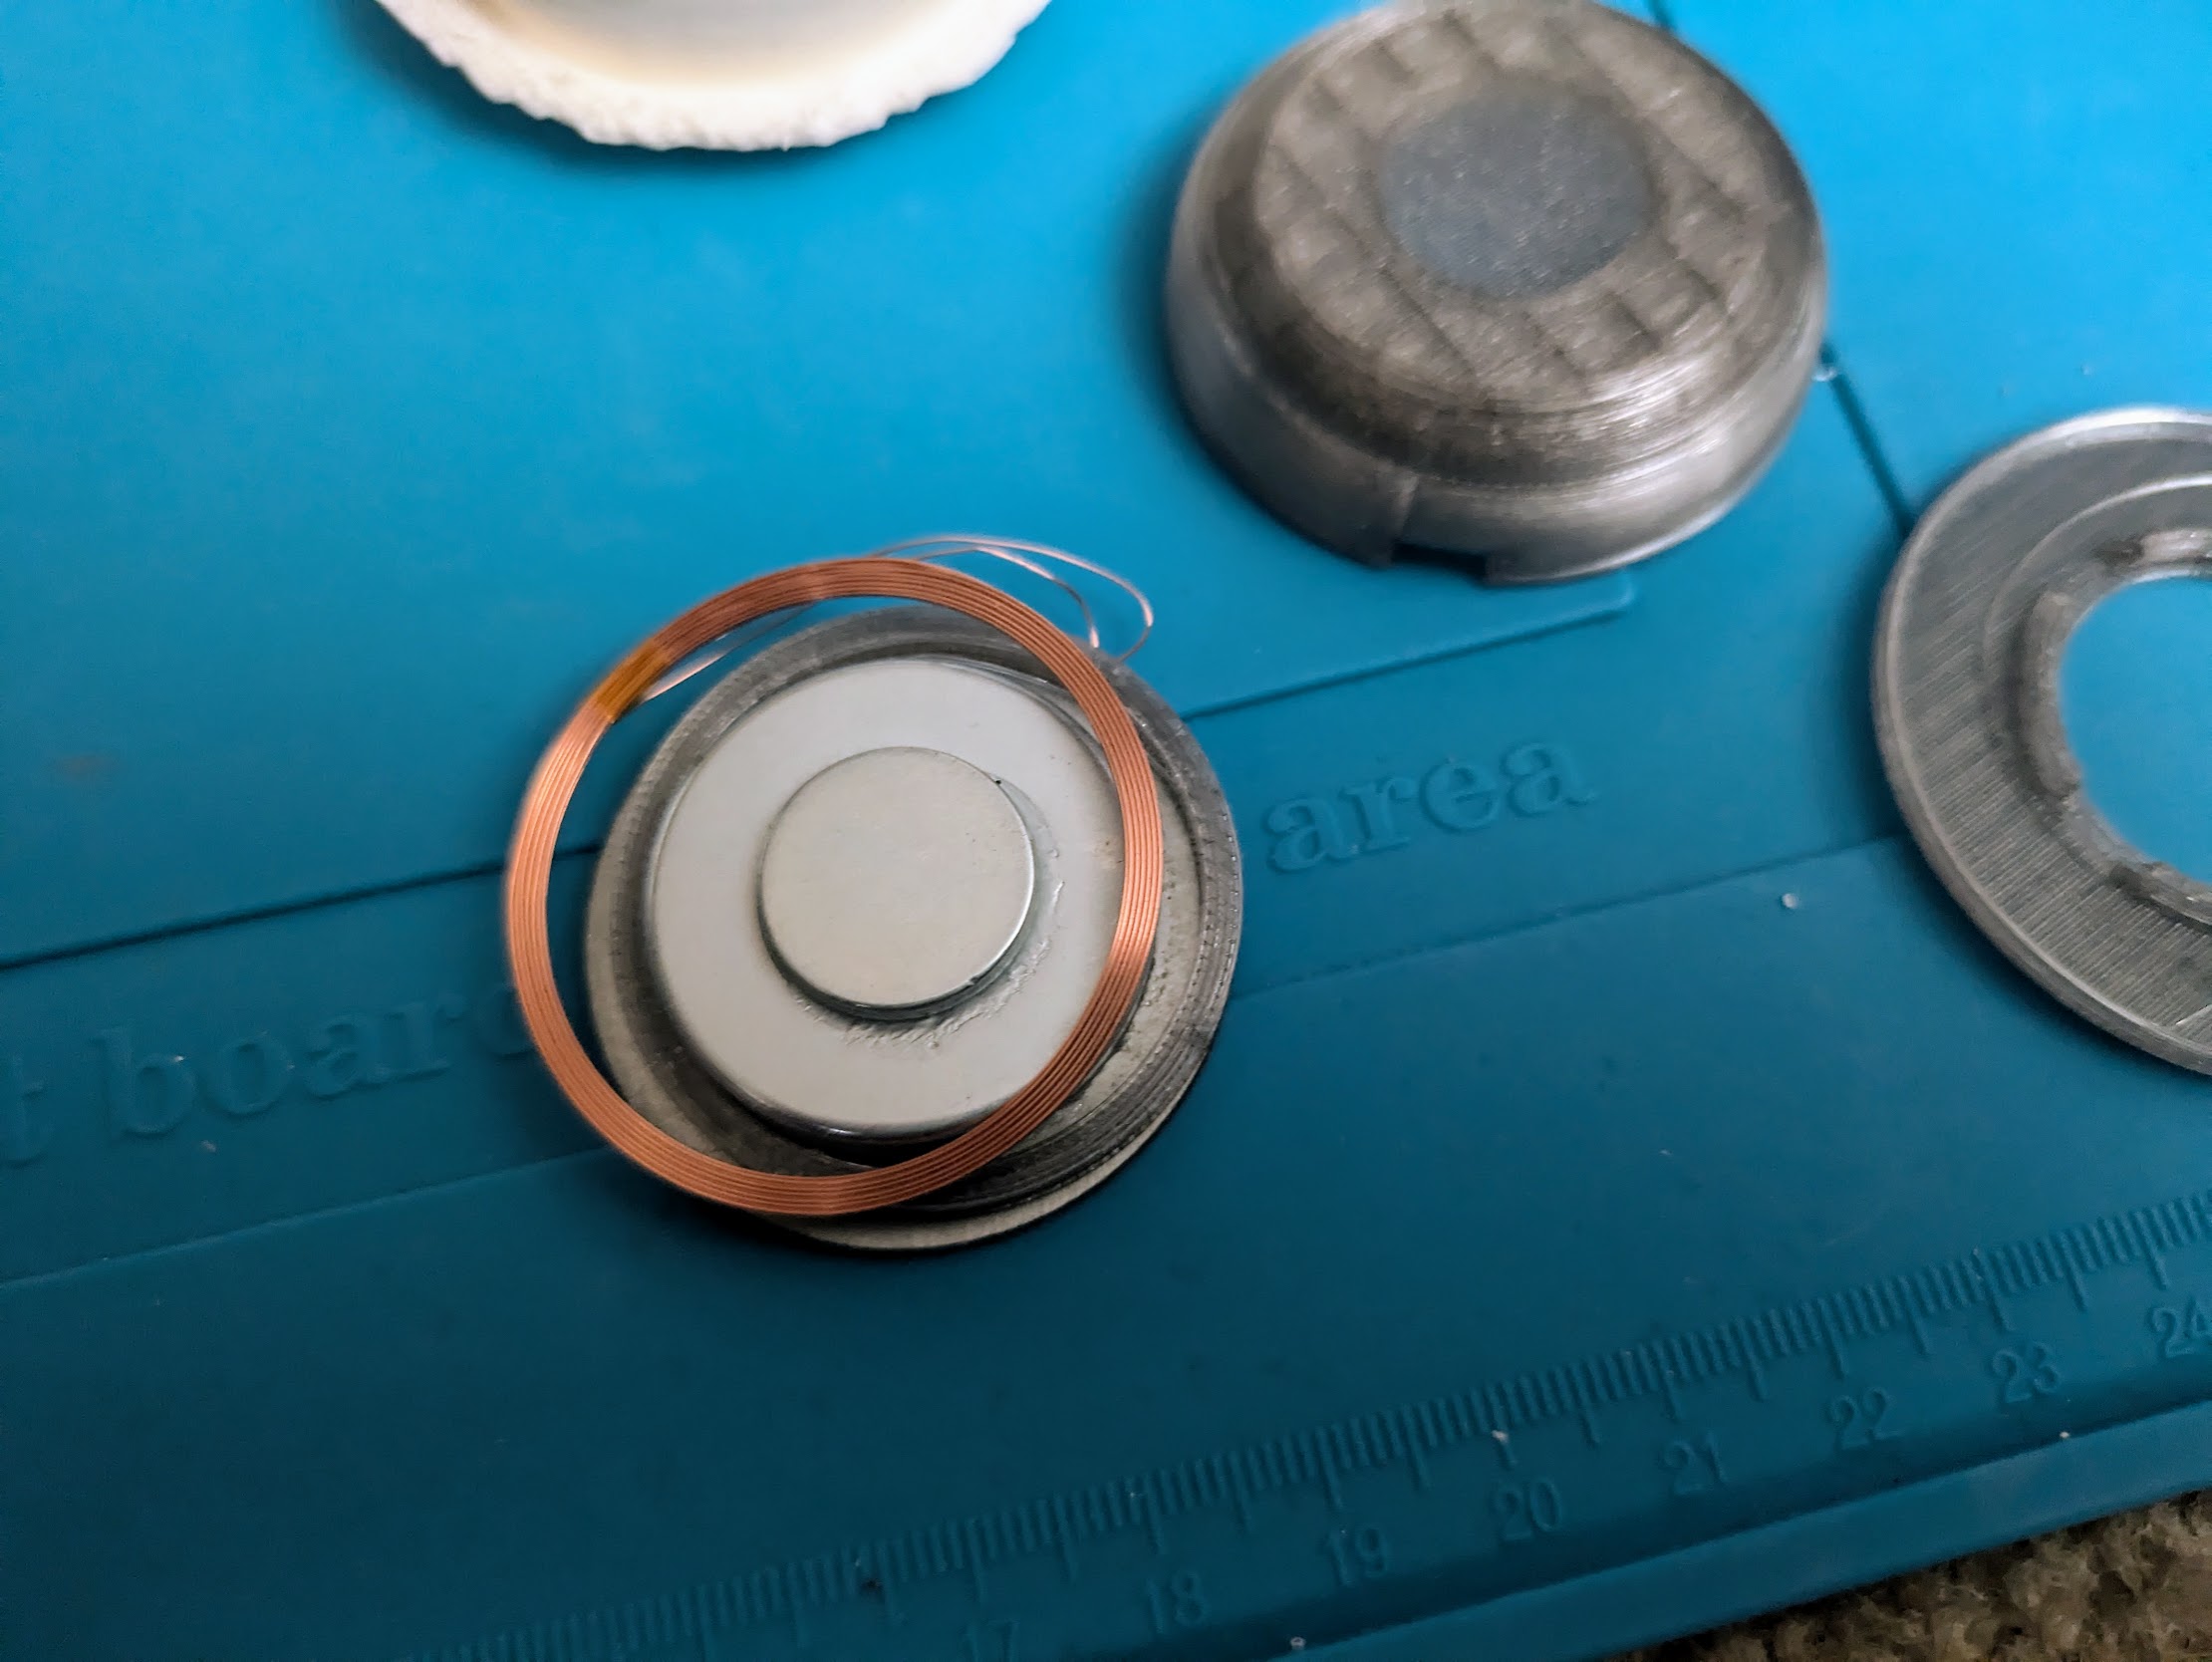
Print the bottom piece first, remove its supports, and assemble the float inside.
The magnetic float needs to be removed from the protective plastic shell it comes packaged in. Carefully pry it open. The raised disc fits into the indentation in the bottom moon piece. Fit the raised disc into the indentation, being careful to keep the coil of wire on the outer ring (don't let it get pinched by the raised disc. Make sure the float fits into securely into the printed piece and is level. If it sits in the bottom piece at an angle, it will cause the moon to wobble and be unstable as it spins (and eventually fall). Also be careful not to pinch the wires that connect to the LED board. Secure the LED board to the top center of the float with some tape or BuildTak on the underside.


Give the assembled float piece one more test to make sure everything is secure. If the bottom piece doesn't stay stable while levitating for many minutes, the finished moon won't either. The extra mass plus the higher center of gravity will amplify any instability.
If the bottom piece is stable and levitating, you're ready for the large time commitment of printing the big top piece. If you use brims (for this print you won't need a brim for most filaments if your build plate is clean and your filament settings are dialed in), clean up the edges-preferably with a de-burring tool- before trying to line up and fit the bottom piece. Line up the notch in the top with the tab in the bottom, and then gently but firmly insert the bottom into the top. If it feels like the bottom is not going to fit, pull it back out (before it gets stuck) and shave off a small amount of filament around the hole.


Getting the Float to Levitate
After plugging the power into the base, hold the float cradled in your hands level and slowly lower it dead center onto the base.
The LEDs on the float will light up when the float is in range of the magnetic field. Supporting the float from the bottom (in case the float is off-center and is drawn to one side) with your hands, lower it and feel for the center spot where it isn't being pulled in any direction. Note: the magnetic pull is STRONG, and if you don't support it with your hands from the bottom, the float will SNAP to the base with enough force to potentially damage both. It's difficult to describe, but when you reach the correct height and the float is centered, it won't be pulled in any direction, and as it is lowered it will feel weightless. If you can't find a spot where the float isn't being pulled to one side after about 15 seconds of trying, rotate the float 30-45 degrees and try again.
Warning: it takes a bit of practice the first time, and if you take too long (like more than a minute or two) while the float is misaligned in the magnetic field, the base will get warm and shut itself off (to prevent overheating). You will know when this happens because the LEDs will turn off. At that point you must unplug the base and let it cool down for about five minutes. This is why this print is not recommended for beginners or children. It can be frustrating getting a feel for how the float is supposed to…float. If you find Jenga too stressful, this may not be the print for you.
