Você está no 3DFinder
Buscamos em Thingiverse, MakerWorld e Printables ao mesmo tempo para te dar o melhor de cada uma.
Descrição
I'm working on a couple of projects that require heat set inserts. I needed some way to keep the insert straight, so I needed a press. I didn't want to spend $50 on one, and every one I could seem to find required a metal rail. I just needed something quick and simple. This is what I came up with.
Non-Printed Required Items:
*2 M2 screws (length around 6 - 10 mm is fine)
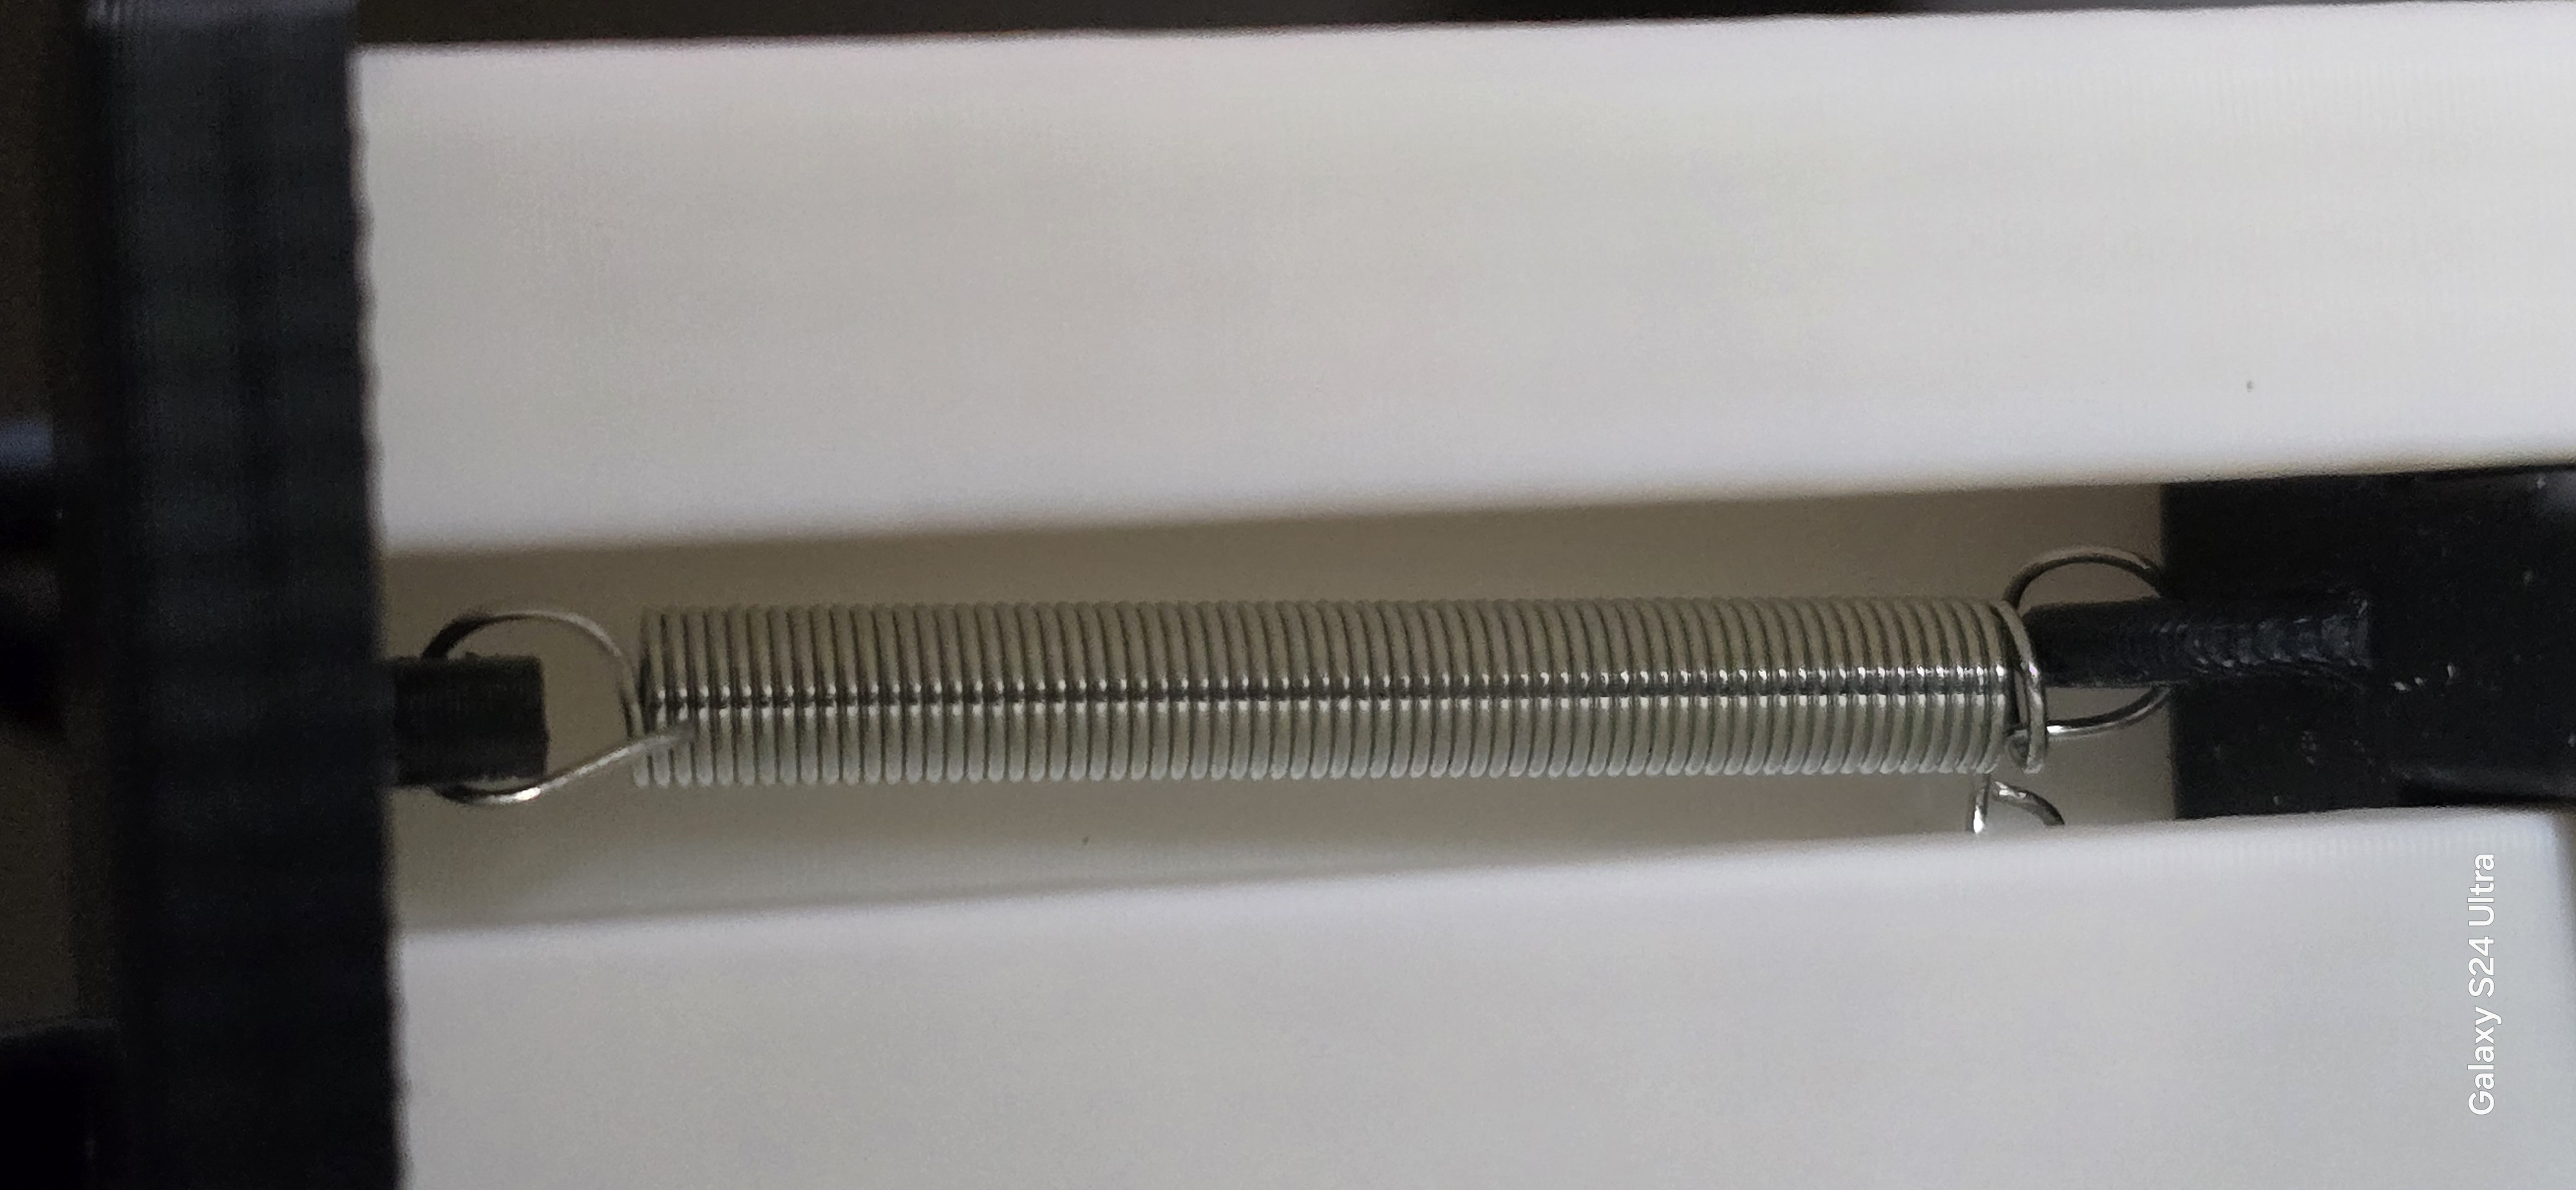
*2 Extension Springs (I used a 3/16" x 1 ¾")
– the size of spring used is up to you, and you can use a shorter or longer spring to change the rest height of the solder iron tip.
- Amazon link to a kit of assorted sizes extension & compression springs (same I have)
Used to attach and use the mount:
*2 M3 screws (6 - 10mm)
*4 M3 screws (length depends on thickness of iron; I used 25mm)
*4 M3 nuts
Print Settings:
The models should be oriented as I printed them in the files. I used Elegoo Rapid PLA+ on a Bambu P1P 0.4 nozzle. It's an easy print, but here are my settings:
(Orcaslicer)
0.2 layer height (all)
Arm:
-Tree supports on
-4 walls / 20% cubic
Base:
-4 walls / 15% cubic
-Manual supports for the base (only use supports for the ‘X’ on the bottom side)
-Ironing ON: All top surfaces / Rectilinear / 80mm/s / 24% flow / 0.15 spacing
Top Plate:
-3 walls / 20% cubic
-No supports
If you want an upgraded arm, use something with a higher temperature resistance. The heat from the iron will eventually get to it I think. I'm going to try a PC Blend.
Assembly:
After everything is printed. Use a Xacto or utility blade to trim the edges of the arm that slides inside the base. This will make it slide a bit more free. When you first put the handle into the base, it will be tight and you have to slide it a few times to grind some plastic down.
Use some needle nose pliers to bend out the ends of the extension springs and attach one side of each spring to the arm of the press, and the other end of each spring to the top plate. It's best to do this with the arm and top plate not attached to the base yet. The top plate is not symmetrical. The space between the screw hole and edge is wider on the front. Make sure your springs are attached to allow the arm to face the right direction or you'll have to reattach the springs.
After the springs are attached, slide the arm into the base and put the top plate into place. Screw in the two M2 screws, and you're done with the press.
I used this mount. I only use the top and bottom hole to attach the mount to the press arm (M3 6 - 10mm). Then 4 M3 25mm & 4 M3 nuts to secure my iron. **--Update: Suggest a higher temp resistant material that PLA+. I'm using Overture PC Blend. PLA+ will work but won't last long due to the heat. The mount will loosen & slip after some time.**
The soldering iron I used (Amazon link)
-I rolled back the rubber grip so the mount could grasp the iron better. I think the mount should probably fit a lot of the cheaper irons.
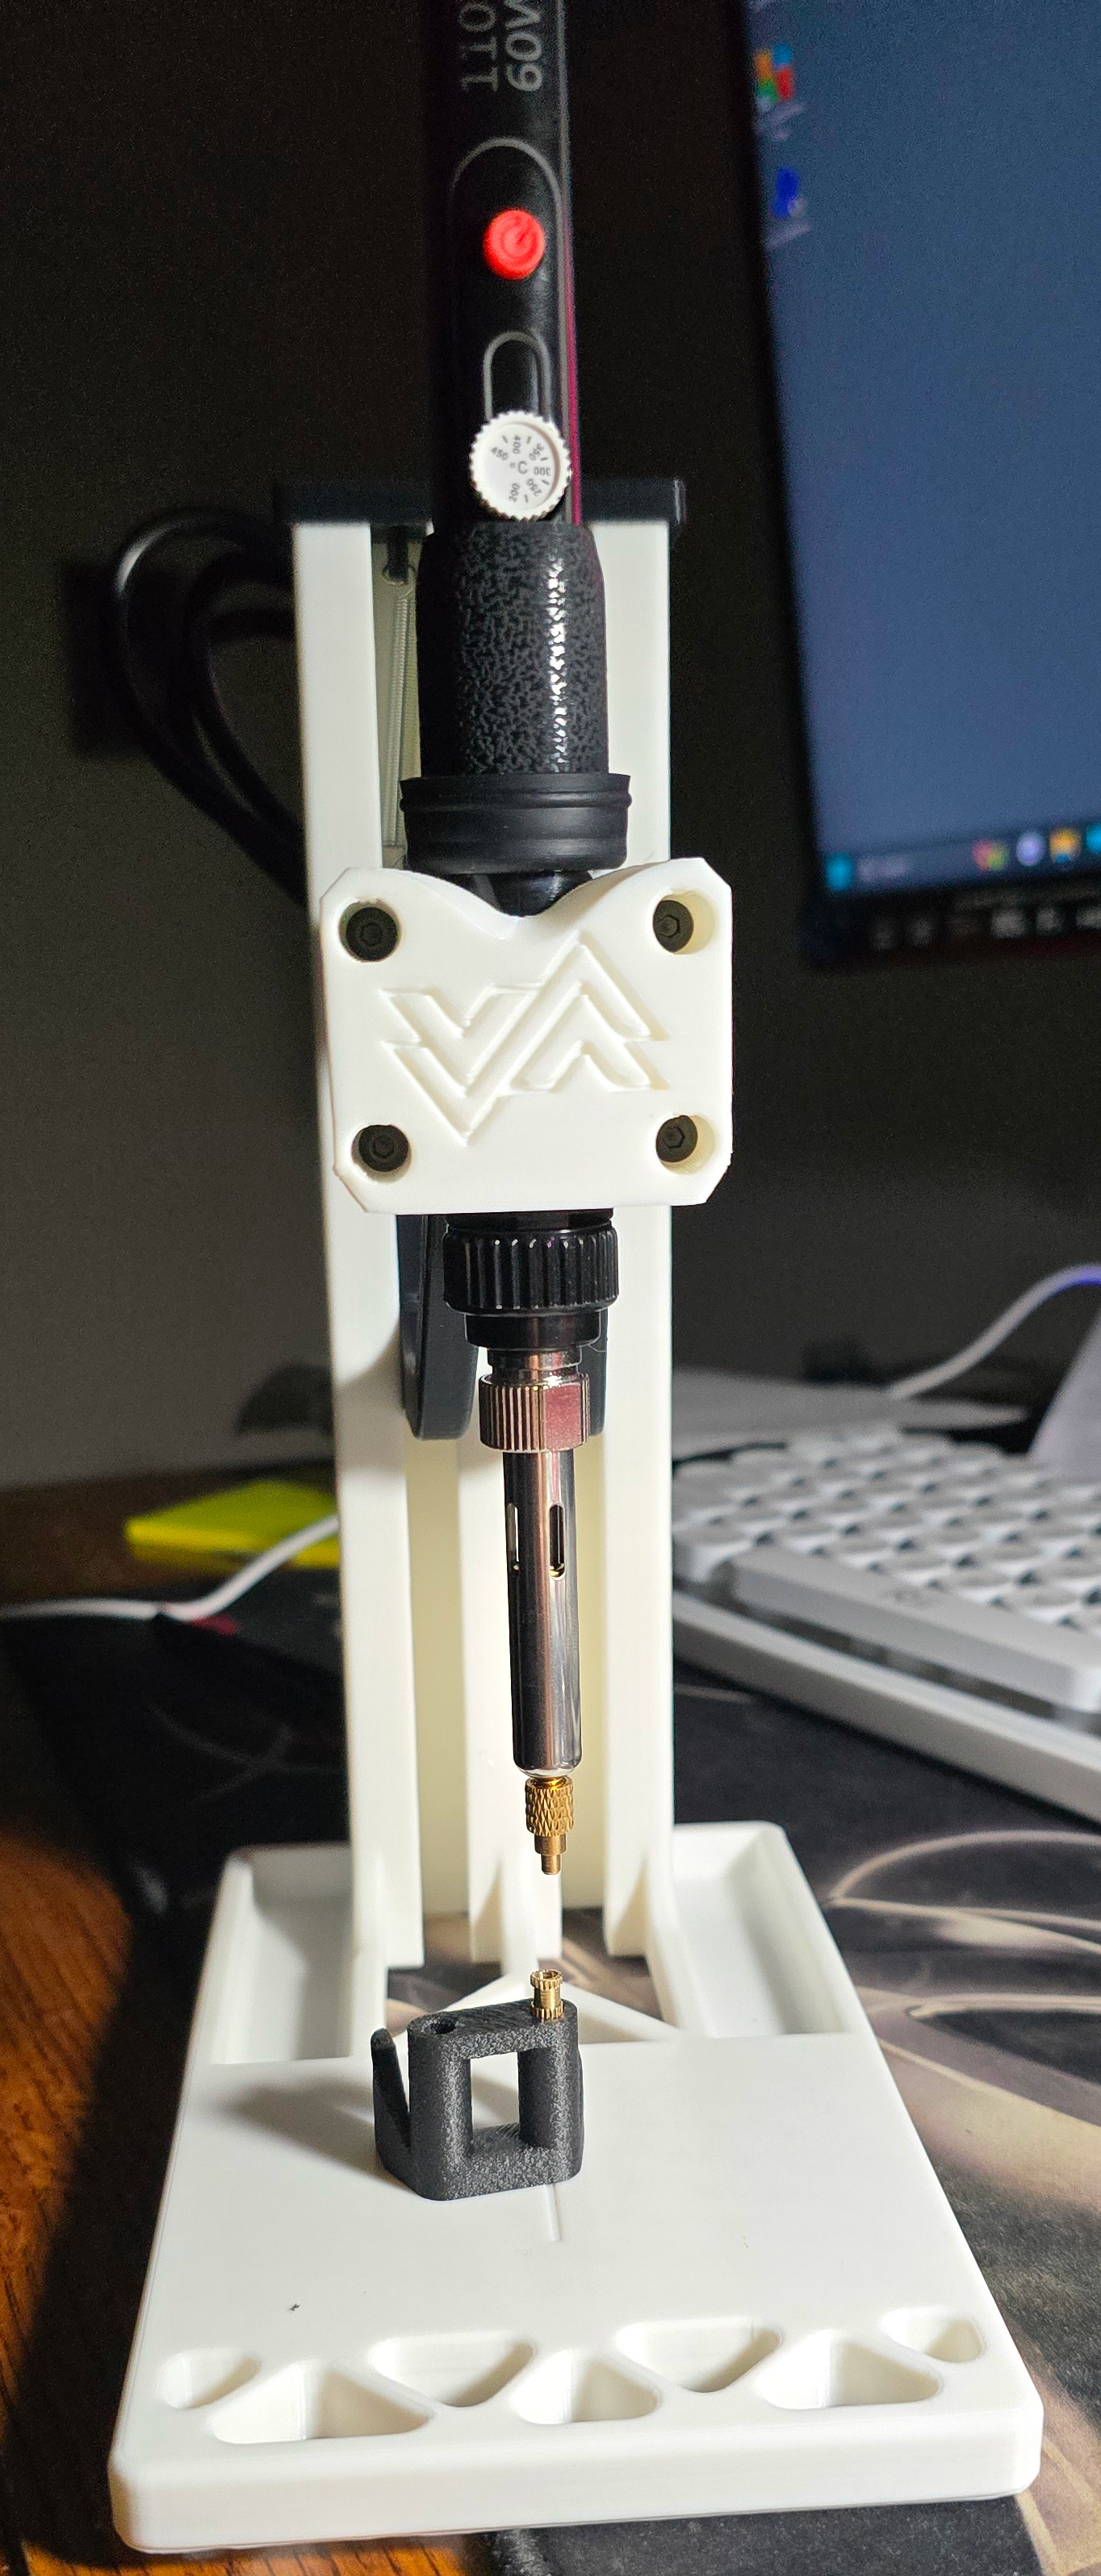
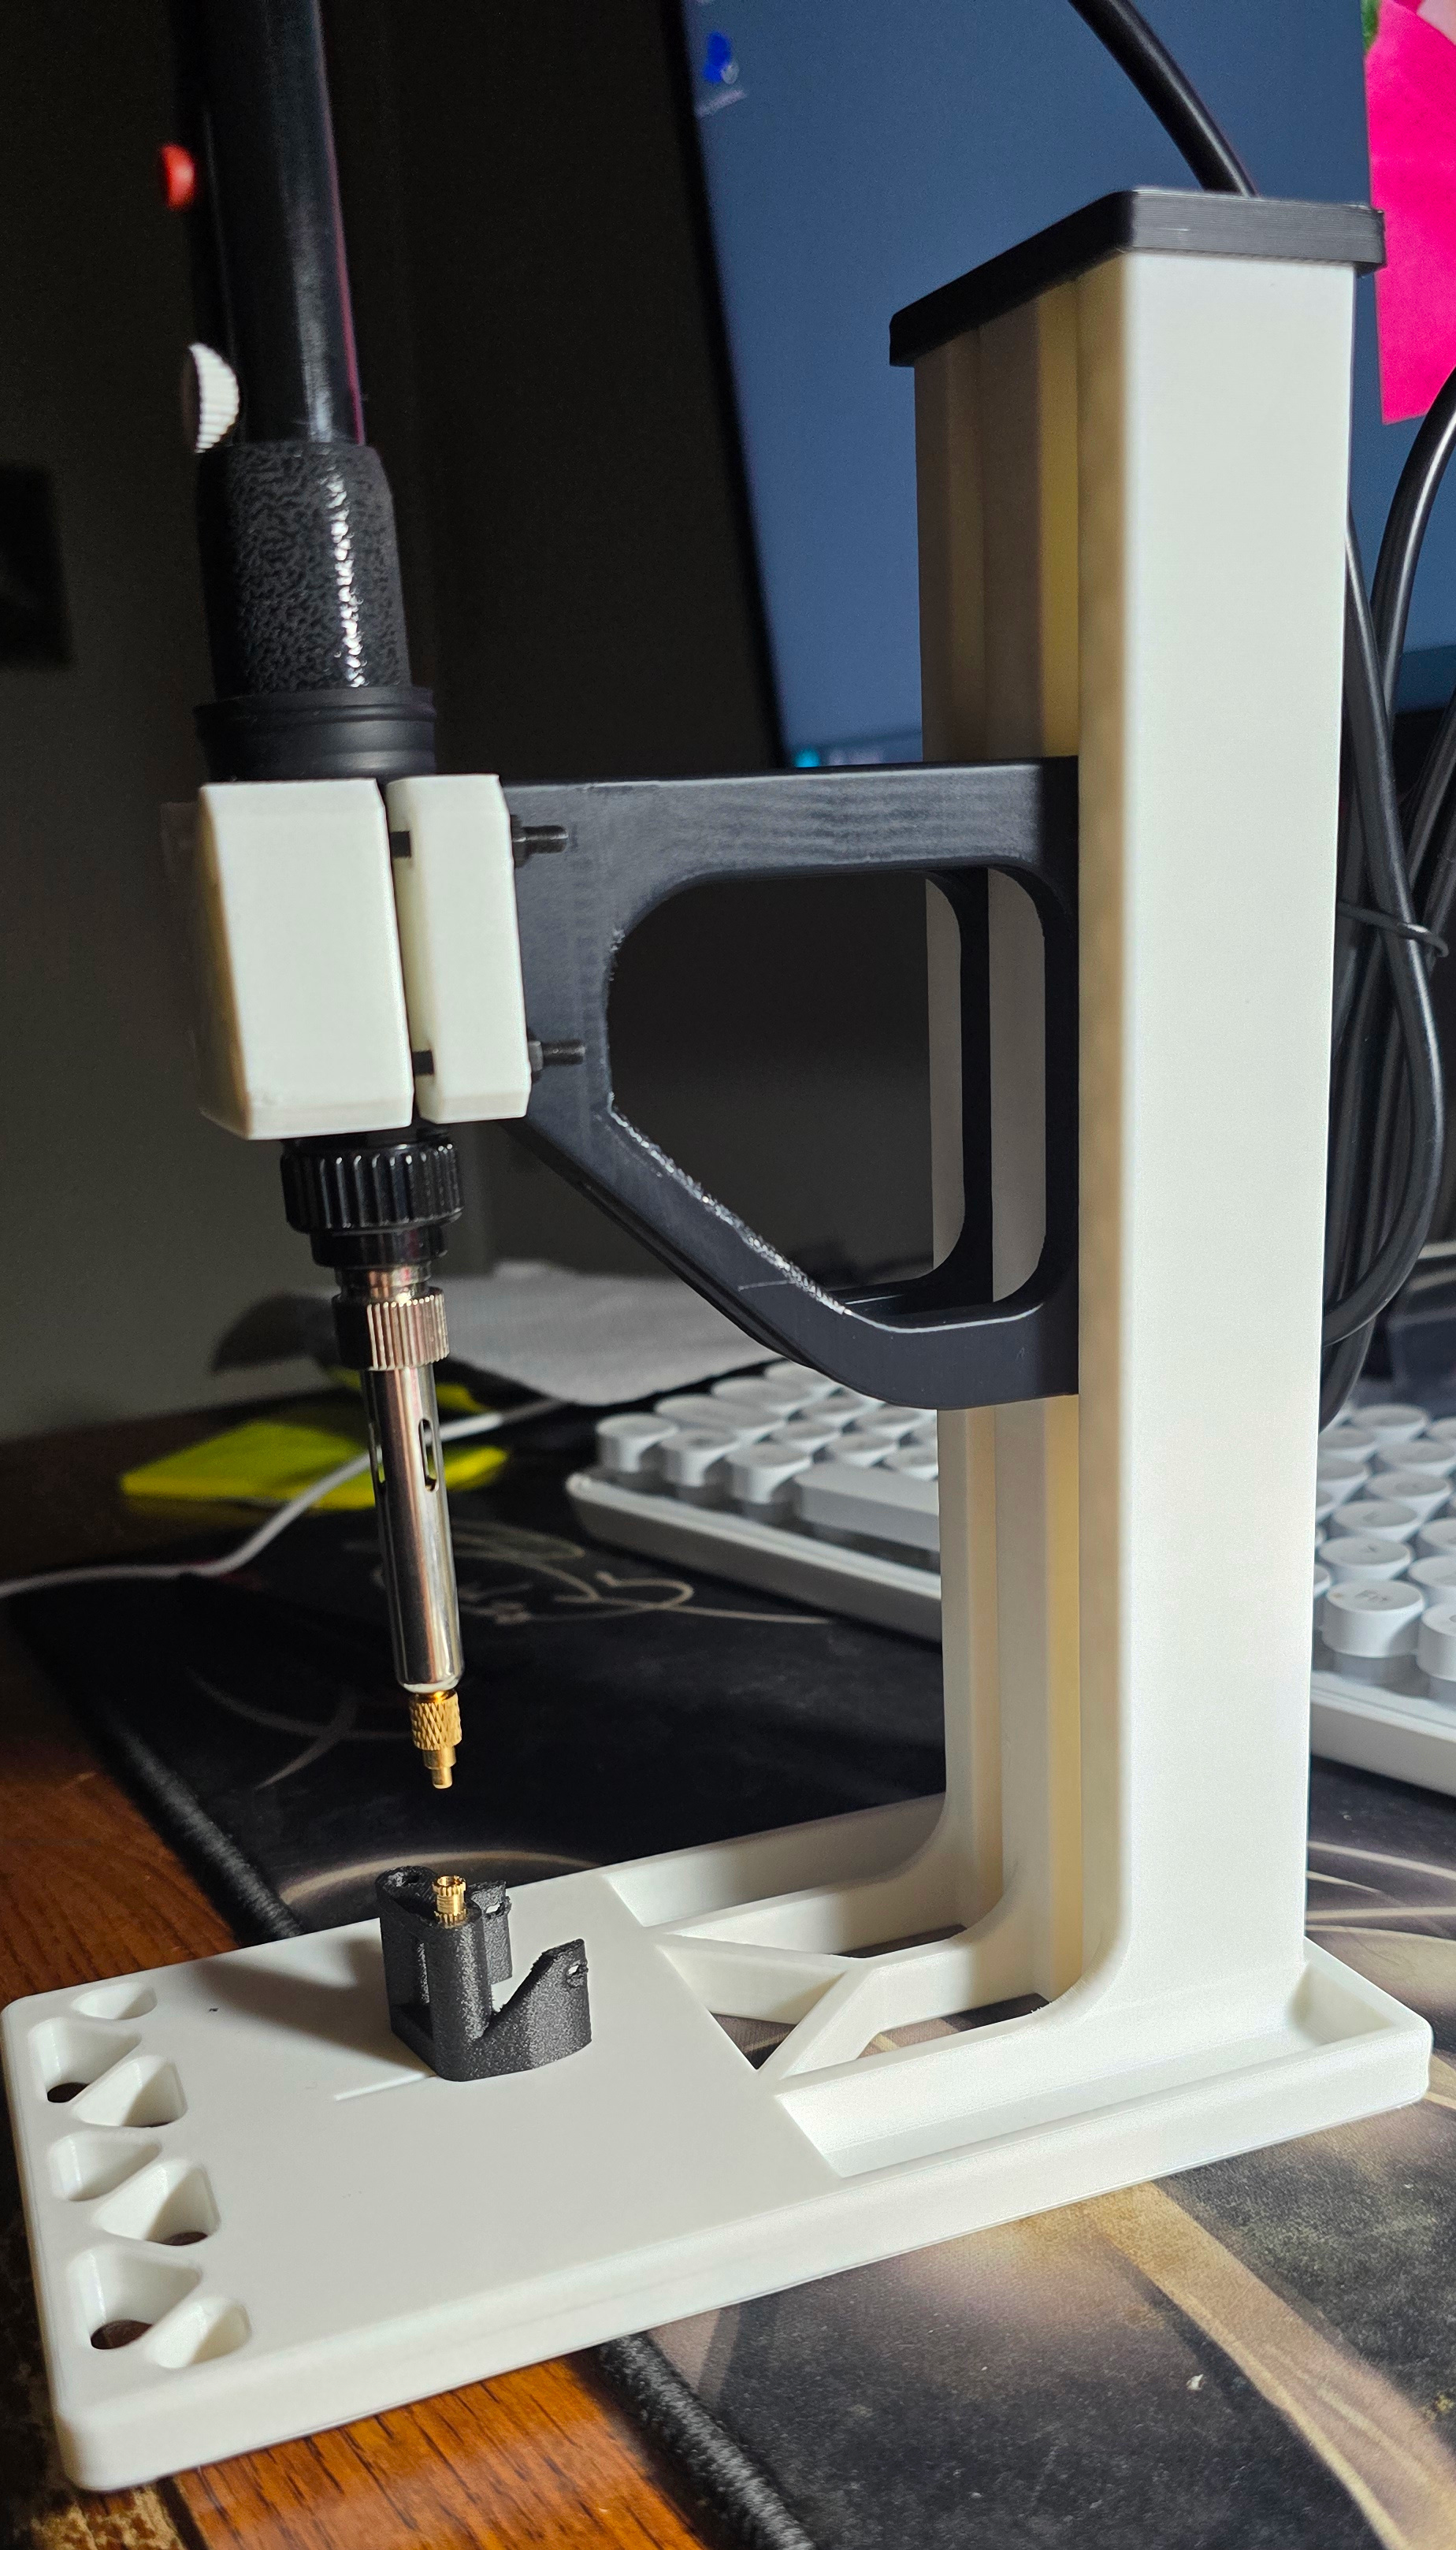
I plan on updating this and making it better over time and as I use it more. In the next update, I think I will make attachment points for addons like a vise to help secure and stabilize the object. A different mount maybe.. More upcoming tho… !
Hopefully it works as well for you as it has me in it's limited use thus far.
Thanks!
Fully Printed Heat Set Insert Press
Publicado em 7 de dez de 2024
Gostou deste modelo? Crie uma conta grátis para salvar seus favoritos e voltar a eles depois.
Criar conta