Você está no 3DFinder
Buscamos em Thingiverse, MakerWorld e Printables ao mesmo tempo para te dar o melhor de cada uma.
Descrição
Levitating Fractal Tree
Caveats
- This is a somewhat advanced print and build. If you're new to 3D printing, you may want to start with something a little simpler like the (non-levitating) Lit Fractal Tree or the Moon Lamp.
- Getting the float to levitate on the base takes a bit of practice and finesse to properly work. See the Getting the Tray to Float section below
- Not recommended for children. If the float is jostled enough off center, it can fall and then it will slam into the base with a great deal of force (MAGNETS!) - possibly damaging both the base and the float.
- Not recommended in “unstable” places. Again, jostling the surface it rests on will cause the float to fall. Also, any power loss to the base will cause the float to fall with a great deal of force.
- Keep the base ( it is a powerful electromagnet) away from pacemakers and other items susceptible to strong magnetic fields like old hard drives and magnetic media.
Assembly
Instructions for assembling the base (as well as an alternate base model with a top switch) can be found here:
[https://makerworld.com/en/models/759193?from=search#profileId-693685](https://makerworld.com/en/models/759193?from=search#profileId-693685)
Another base model (square) shown in the pictures above can be found here:
Print out the tray that matches the size of pyramid you printed (or already have). Remove the supports in the bottom indentation. Tweezers are good for getting the removal started. Then you should be able to cleanly pull away the rest of the support material like peeling an orange.
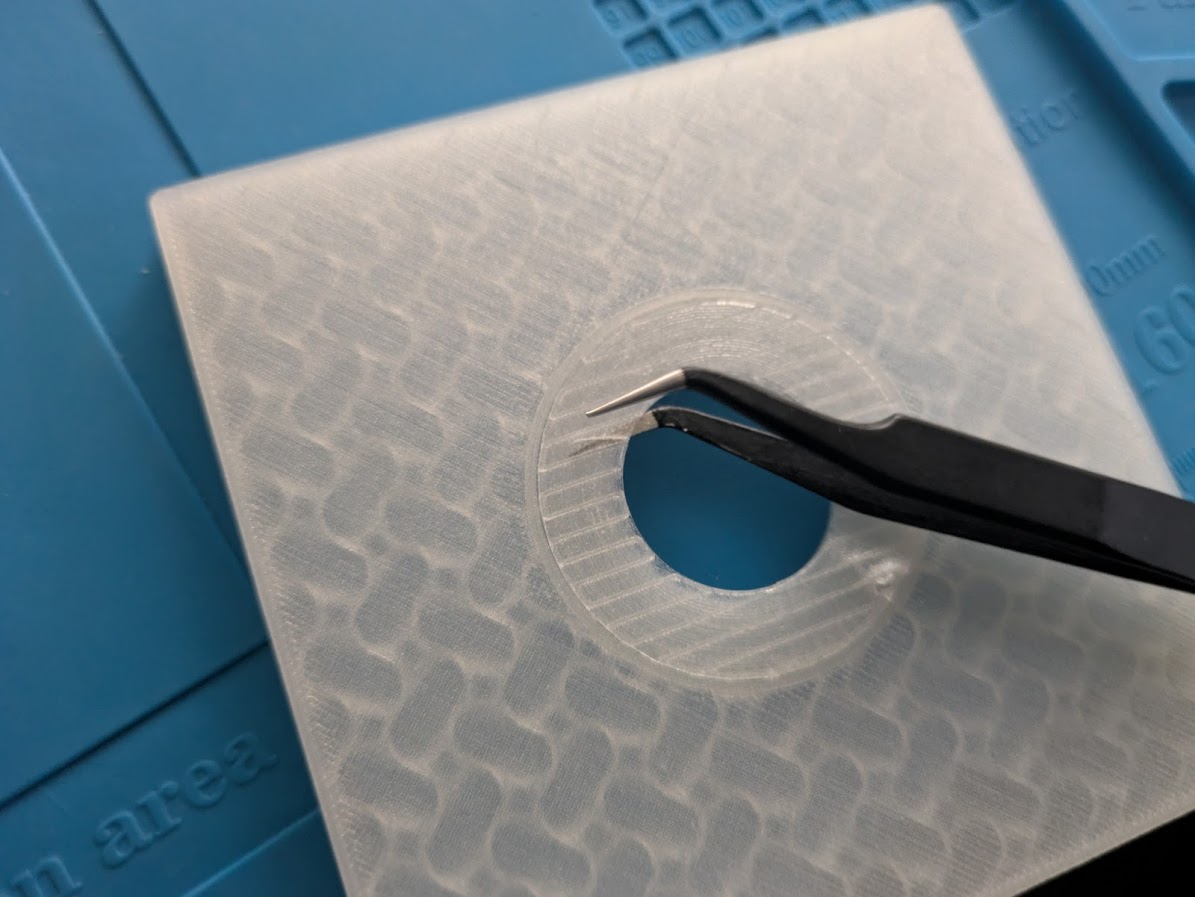
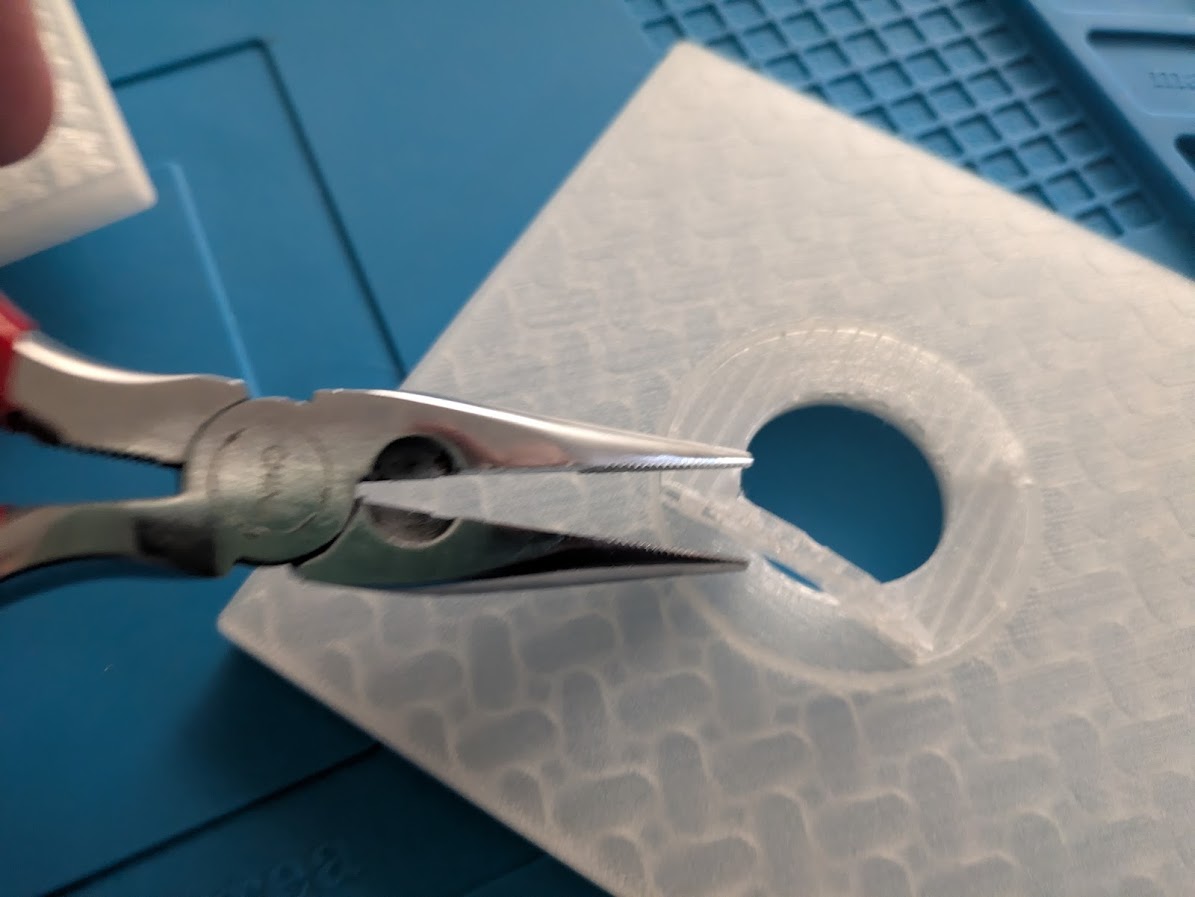
Use the tweezers to remove any stray bits, particularly around the outer edge. The magnet fits very snugly in the indentation in the bottom, so having a clean edge is important.
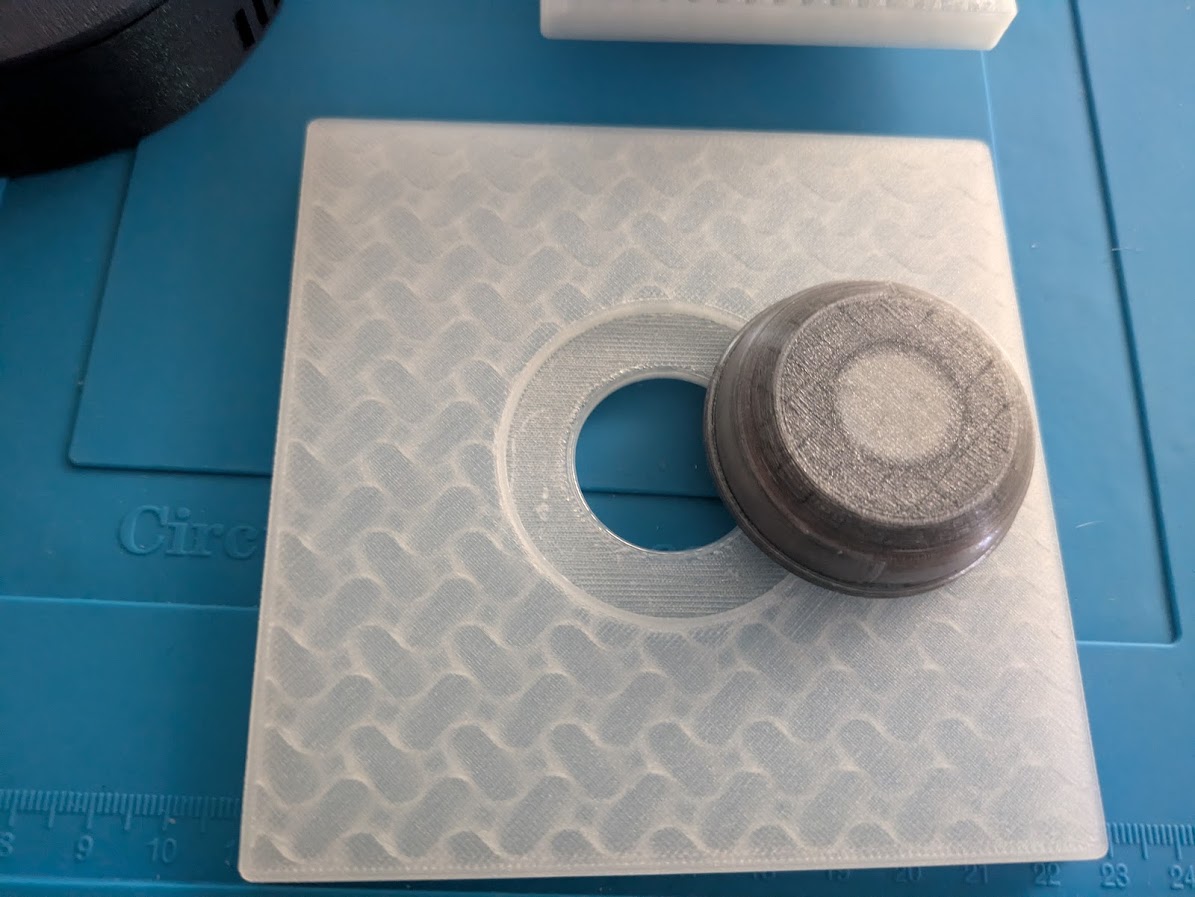
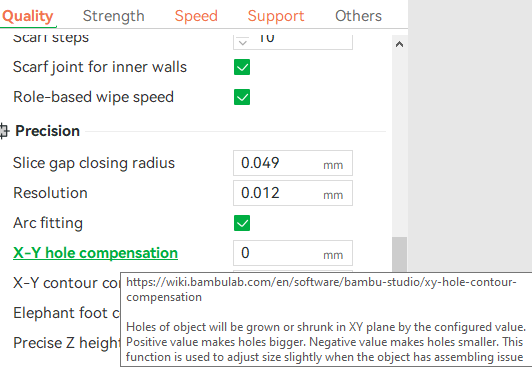
If the float won't fit (either if the hole is too small) or if too big (and the float just falls out) you can scale the size of the Outer Hole in the Profile ( +/- 0.1mm should do it for reasonably calibrated filaments). Alternatively, you can adjust the “X-Y hole compensation setting” in the slicer (again +/- 0.1 mm should be enough in most cases)
With the hole the correct size, the float should snap firmly into place and stay put.
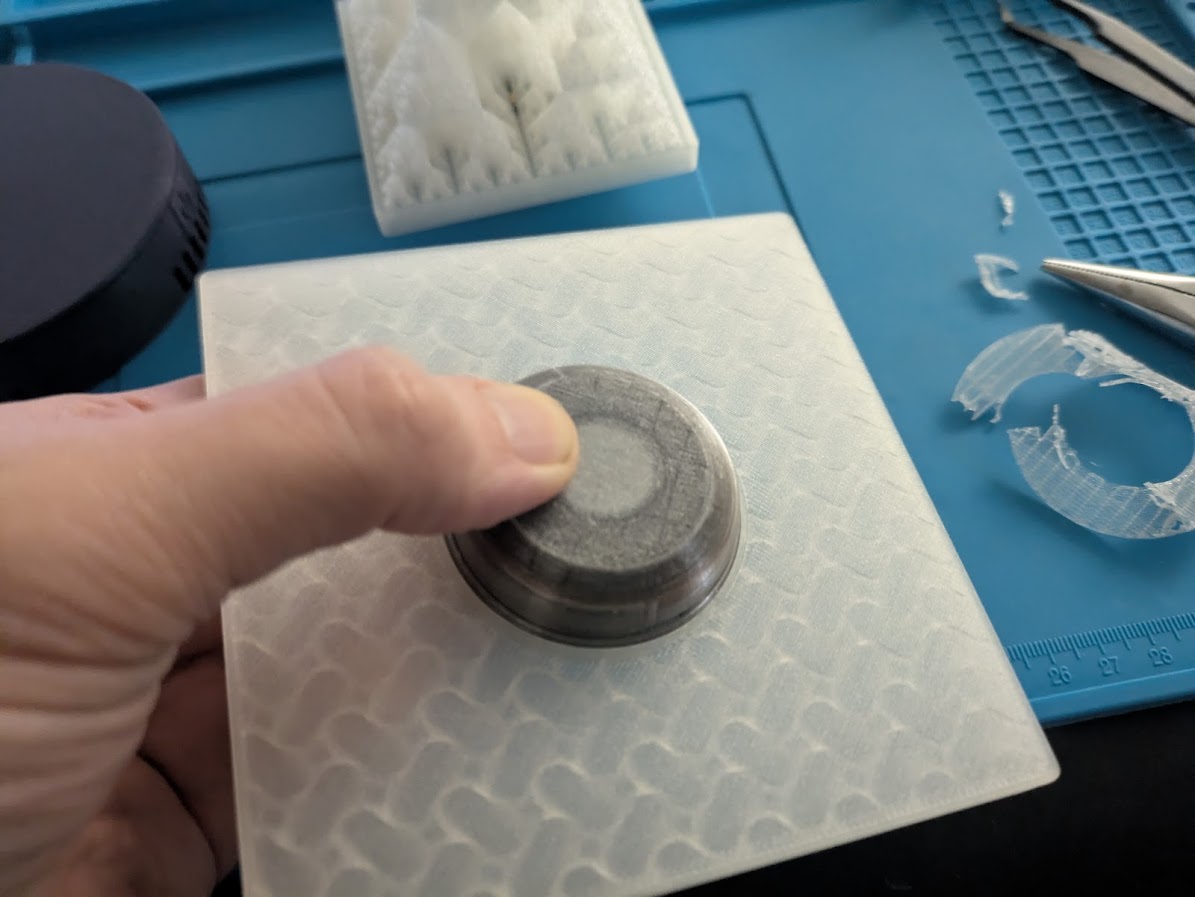
Now it's the fun part-
Getting the Tray to Float
After plugging the power into the base, hold the tray (don't bother with the pyramid just yet) level and slowly lower it dead center onto the base.
The LEDs on the float will light up when the float is in range of the magnetic field. Supporting the tray from the bottom (in case the float is off-center and is drawn to the one side) with your hands, lower it and feel for the center spot where it isn't being pulled in any direction. Note: the magnetic pull is STRONG, and if you don't support it with your hands from the bottom, the float will SNAP to the base with enough for to potentially damage both. It's difficult to describe, but when you reach the correct height and the float is centered, it won't be pulled in any direction, and as it is lowered it will feel weightless. If you can't find a spot where the float isn't being pulled to one side after about 15 seconds of trying, rotate the tray 45 degrees and try again.
Warning: it takes a bit of practice the first time, and if you take too long (like more than a minute or two) while the float is misaligned in the magnetic field, the base will get warm and shut itself off (to prevent overheating). You will know when this happens because the LEDs will turn off. At that point you must unplug the base and let it cool down for about five minutes. This is why this print is not recommended for beginners or children. It can be frustrating getting a feel for how the float is supposed to…float. If you find Jenga too stressful, this may not be the print for you.
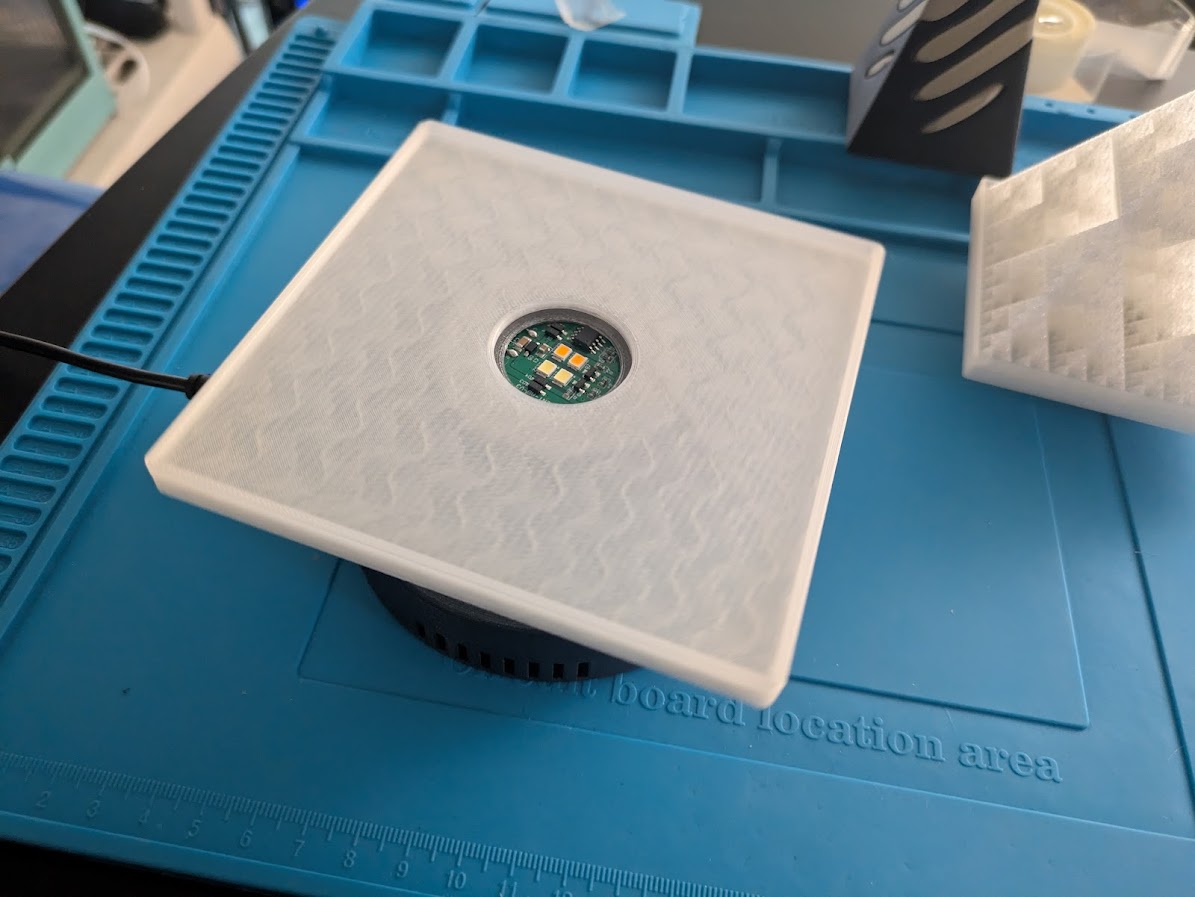
Once you have the tray floating, you can (carefully) place the pyramid on top. And once you have a feel for how to get the tray to float, you can place the tray with the pyramid at the same time.
Pyramid
The decoration is a Level 6 Sierpinski Fractal Pyramid. These can be a little tricky to print initially, but once you have your printer and filament settings dialed-in, they're fairly straightforward to print though they take a long time (about 4-7 hours).
Since the float has colored LEDs, translucent filaments are recommended. The light from the LED is either white or a warm yellow. Consider that when picking a color. Clear PETG and translucent PLA look ice crystals because of the high-frequency pattern. They also cast interesting shadows in a darkened room.
Note that the large base will fit the pyramid used in the Decorative Lit Fractal Tree, so you if you already printed one of those, you can save time.
The smaller pyramid is actually a little more difficult to print due to the very small size of the pattern on the first layer. Layer adhesion can be difficult if the filament isn't tuned (dried, flow calibration, temperature calibration, etc). The good thing is, once you have good adhesion on the first two layers, the print will likely succeed. In other words, failure will almost always happen right away.
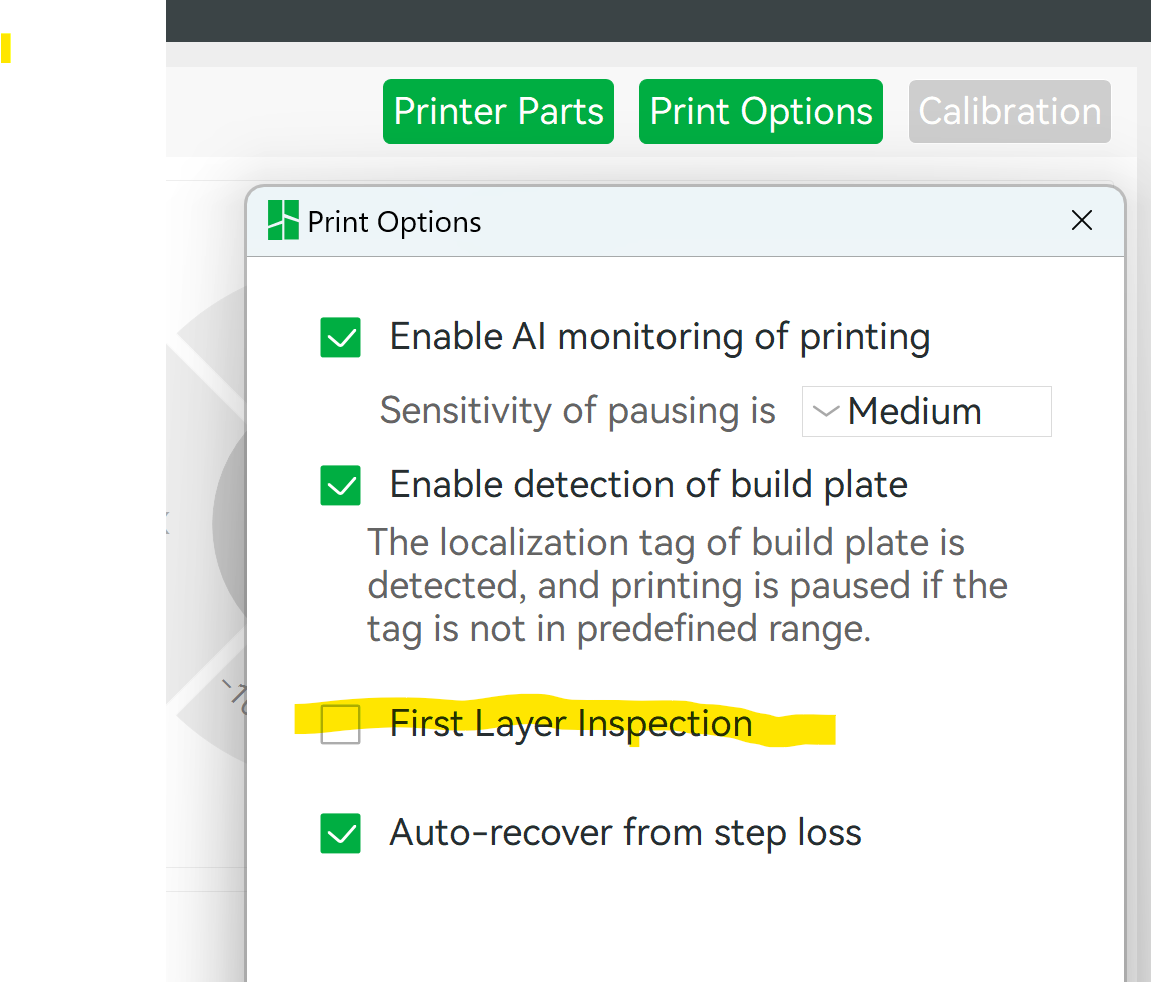
The print uses a couple of extra wall loops to help take care of any oozing of filament that might catch the on the first layer pattern. Since this is a vase mode print, it is also recommended to turn of the first layer camera check as I found it's more likely to mess up the pattern with a stray bit of filament on the tip than if you let the print proceed uninterrupted. You'll want to check if everything is going fine on the second or third layer as that is when lifting is most likely to occur.
If you're having difficulties with the first layer sticking, I recommend 1) Washing the build plate twice with warm soapy water 2) Remove any remaining water with some 99% Isopropyl Alcohol. If your filament still won't stick, try increasing the build plate temp by 5 degrees. If that still doesn't work and this is a texture plate, consider using some liquid glue. I find glue stick on such a fine pattern usually causes more problems than good unless you manually “water it down”. You want the interface layer as thin as possible (ideally a few molecules thick).

Gostou deste modelo? Crie uma conta grátis para salvar seus favoritos e voltar a eles depois.
Criar conta