Você está no 3DFinder
Buscamos em Thingiverse, MakerWorld e Printables ao mesmo tempo para te dar o melhor de cada uma.
Descrição
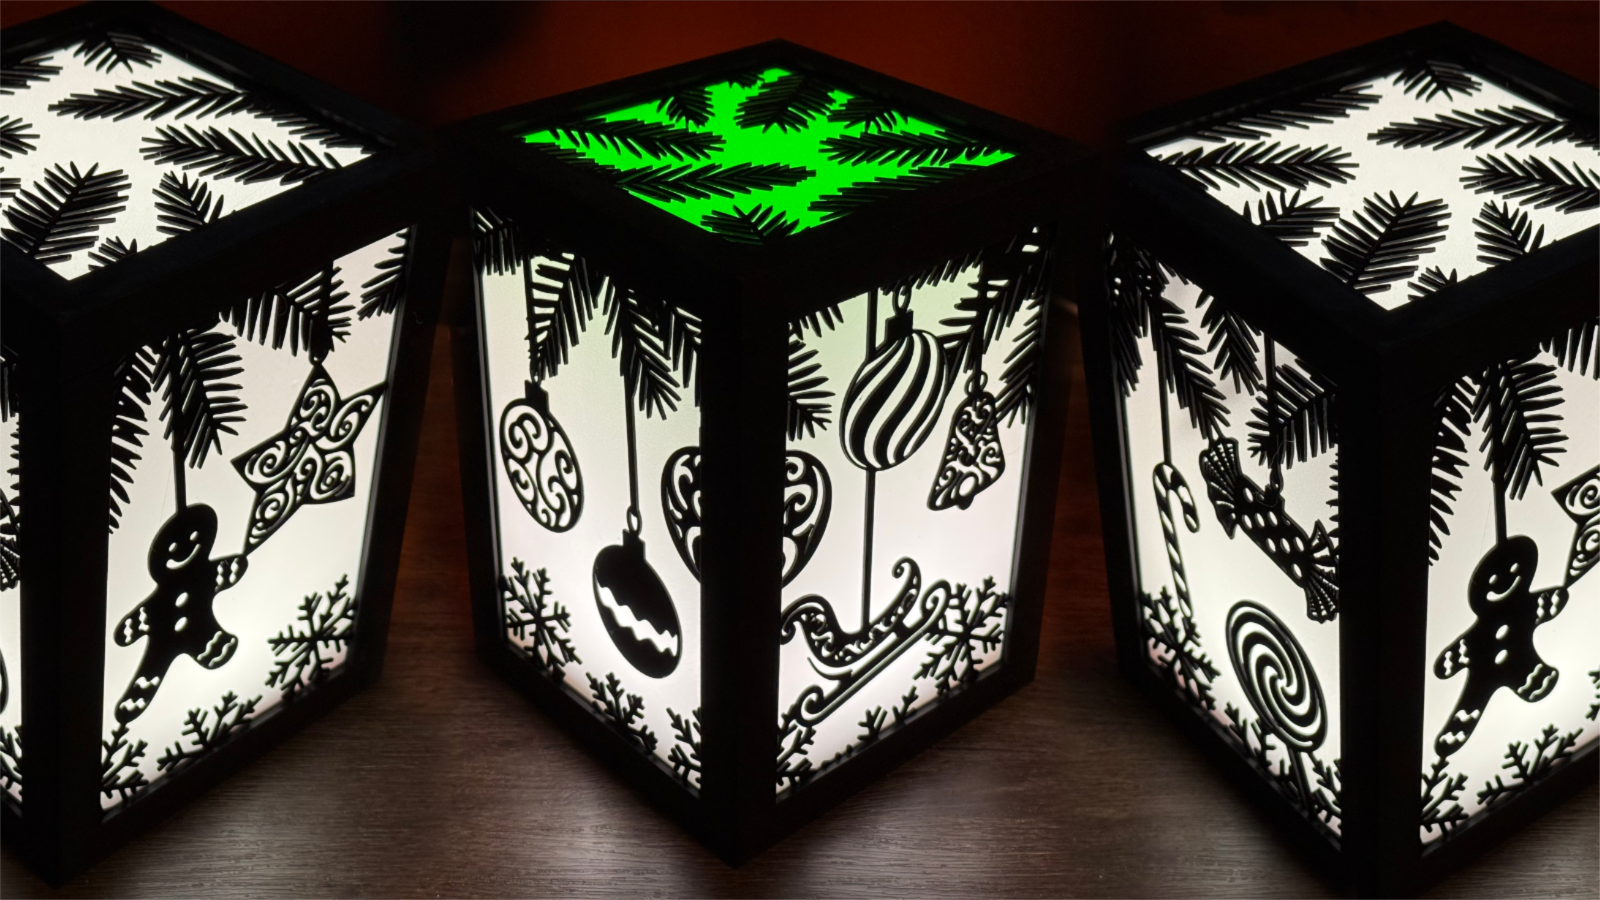
The Modular Lantern can be changed to suite your mood and time of year with many cross compatible parts and inserts, it's quick and easy to experiment with due to the stencil design being separate to the solid colour panel allowing quick experimentation to find your style.
The main profile here is a brand new top that accepts inserts for more customization! It also can take a tea light (in the top) for more light.
You will need the core of the modular lantern and the relevant LED holder which can be downloaded from maker world here (https://makerworld.com/en/models/642231-the-modular-lantern-mk3#profileId-568157):

Then there is a main profile here which is the lantern top:

To assemble insert a stencil, solid panel and spacer (optional). Then push the clip in, take note of the orientation in the photo:

Correct orientation, gives a slight indent visible once inserted which can be used to remove using a flat head screwdriver or similar or just push down on the panels.

You can pop a Bambu Tea light (37mm diameter) straight into the top upside down should you wish. If you have one with a smaller diameter then use the provided optional holder:


There is also a new ‘Light Spacer’ this is designed to use less filament and let more light up into the top from down below. The original spacer can cast a shadow on the top inserts. Note that we lose the ability for the spacer to have a base inserted but that's not important in this use case.

Now print off some inserts and solid panels and experiment. There are optional spacers (Just a rectangular frame) to make up for the extra space in the slots should you feel you need them. I do not bother.

Creating your own Inserts
You can download an insert mask and frame in svg format in the attached files:

You can use any vector art package but I'll walk you through using Affinity Studio which is now free!
Download the StraightTopInsert.af file and open in Affinity. Create your design using vectors or for this example some quick text:

If you are going for a traditional insert then we need to ensure there are no parts that are disconnected, so the text here overlaps the frame but look at the dot on the i. I use the rectangle tool to connect such areas and while I was at it added a star using the shape tool:

Now select the text, right click and pick ‘Convert to Curves’

Next we want to join all the curves together (excluding the mask). Select them all and hit the Add button:

Now select Export from the File menu. pick svg and save:

Drag the SVG into your slicer and select the scale tool, untick uniform scale and set the size to 108x50x1mm:

Now before printing slice and chevck the preview window. You are looking for any disconnected or really thin connections:

We could probably do with making the s of Christmas overlap the frame a bit more.
There you have it your own insert :-) Remember the Add button you used, next to it there are several other really useful tools. For example instead of the frame you could start with the mask and use the subtract to cut the text out of a solid panel. Thus designing for the light to shine through the word. Then you need to connect any islands produced such as in the a and p letters and loops.
No stencil option
If you do not mind the colour panel being connected to the design then you can afford yourself much more creative freedom as you no longer need to worry about everything being connected. Do the same as above but also load a panel into the slicer, set the filament colours for each in object view, then select both models at once and select Merge:

Now use the position tool with just one sub model selected at once and set the Panel to have a Z of -0.3mm (Half it's 0.6mm thickness) and the insert design to 0.5mm half of it's 1mm thickness.

Warning though the model is partially below the build plate at this stage. So select the Assembly (Parent of the two parts) and drag it up off the plate and let go it will land flat on the plate or use the Auto Orient tool.

Bingo! You have yourself a new insert without the complexities of connecting everything.

You do not even need an AMS to print it if you set both parts to the same colour, slice and then in the slice preview drag the layer height vertical bar down to layer 4. Then right click on it and select ‘Add pause’. Now the printer will pause after printing the solid colour part and you can use it's menus to change the filament to a different colour.


Amazing
You've got to the end, I hope you really like the lantern. Follow me on Makerworld to find out when I release further inserts and also head over to my Patreon for additional ones. For example:


By Trusted Developments and available on MakerWorld:
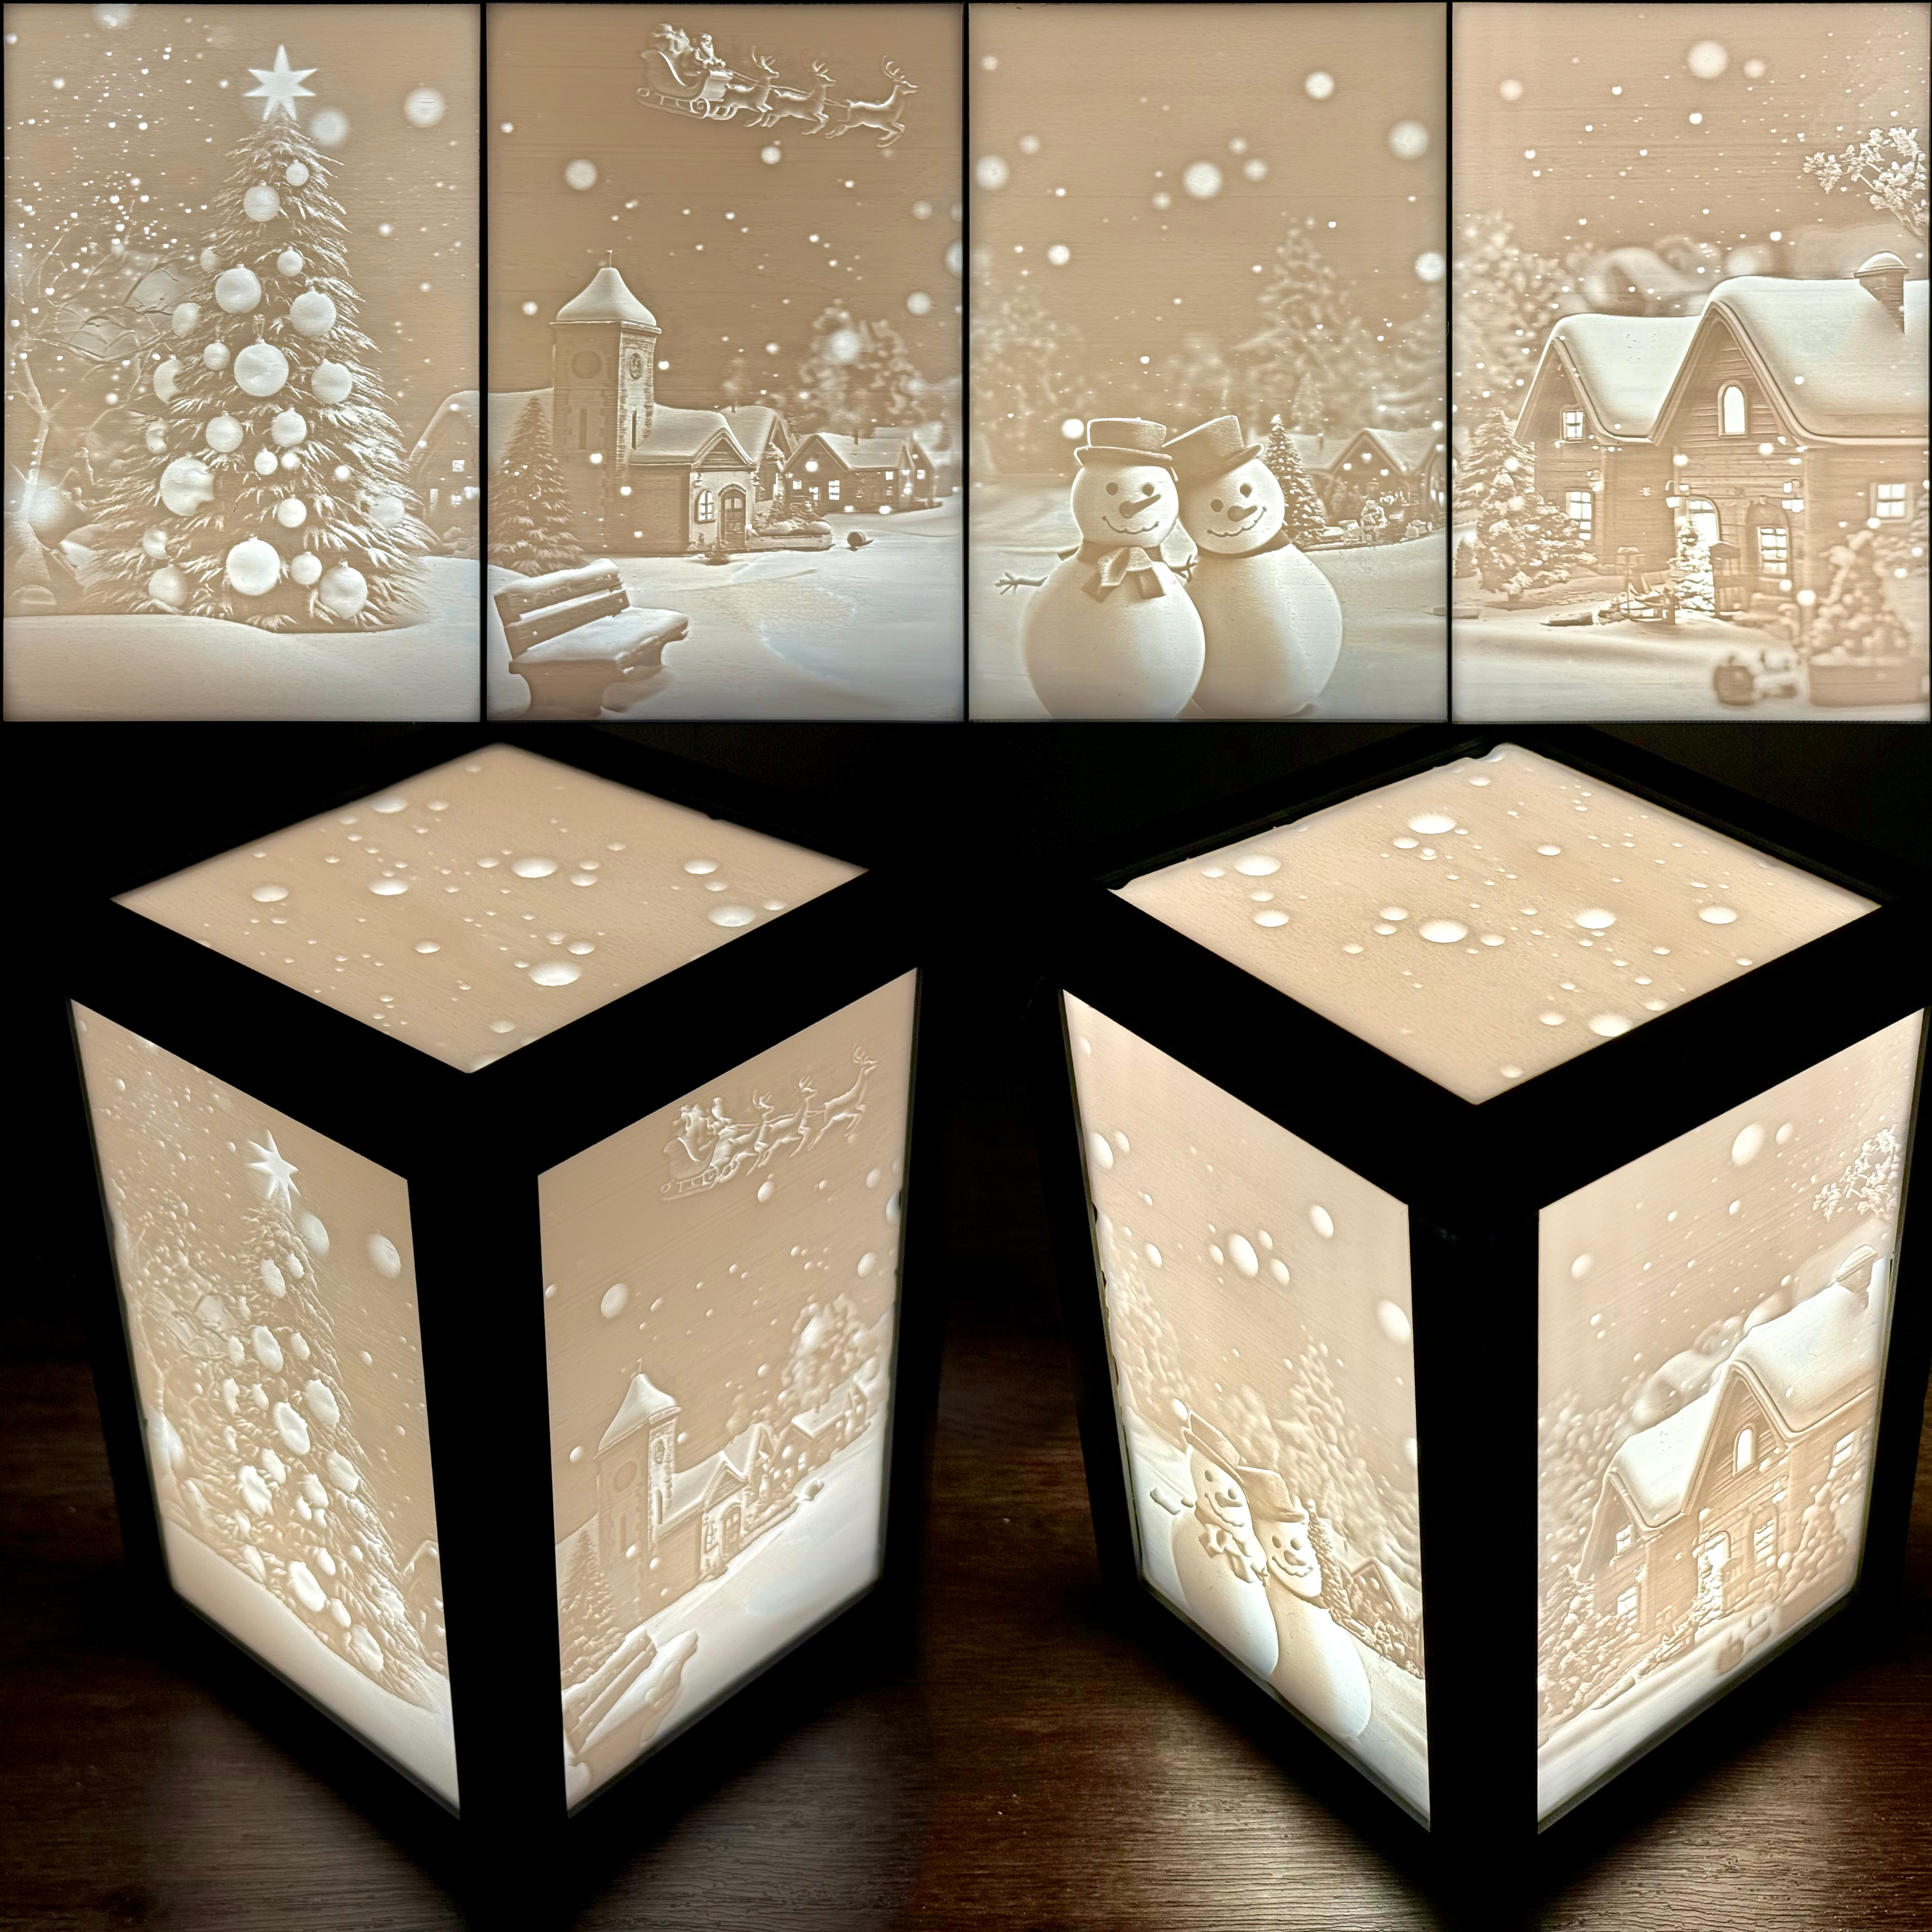
Christmas Town Tiling Lithophane (https://makerworld.com/en/models/682683#profileId-728735)

Also checkout some creations by the community:

Modular Lantern - Straight top with inserts

Publicado em 9 de nov de 2024