Você está no 3DFinder
Buscamos em Thingiverse, MakerWorld e Printables ao mesmo tempo para te dar o melhor de cada uma.
Descrição
MORE UPDATES! (20240513)
I've uploaded a v9 design to both it's own folder in the raw files as well as a print profile, which is ~8.5"x7.5" (224x199mm) in outer dimensions and uses the tried-n-true stand-offs that for a D1 Mini v3 and AOD4184, the same as I embed in other designs and document in the Light Box Upgrade.
UPDATED DESIGNS! (20231123)
I've added new STEP, 3MF, and Profiles for the A1 Mini! The original GeneriBox measures 224x130mm and would not fit on the A1 Mini, so I've made a new version that is a 45mm tall by 174mm square, snugly fitting on the entirety of the A1 Mini build plate. Included is the SP110E hole, a snap-in USB-C insert, and a blank base. Faces include a Bambu Lab logo and a blank plate. My example Mechanicus logo was printed with an SVG and made entirely in Studio.
We now return to our regular description 😁
I'm happy to share the star of my latest tutorial video, the GeneriBox!
I started this project with the goal of making a moderately sized universal light box body that could easily change faces without the need for screws, adhesives, or other such things.
Key Features
- One corner of the box has been recessed to provide an area to hide power cables. It allows cables to be bent out of the way and the box is able to be used either upright or on it's side, hanging on a wall from the integrated keyholes or free-standing on a desk/table.
- An included (optional) light reflector. Simply print “base-reflector” in a light or shiny material (I really like silk silver for this) to help fully illuminate the entire box.
- Easy to remove faces use a small lip with retention bars to snap the face plate in and out. I've printed several in PLA+ and they not only work perfectly but hold up to repeated changes without issue.
- I've created several templates for the most common power and controller combinations I use. STEP files are included to make your own.
- A faux-bias light effect from a translucent element in wall.
Included Profiles
GeneriBox Face has a blank template as well as a Bambu Lab face, a FETH IT face, as well as a Wumpscut face.
GeneriBox Base includes multiple choices for power how you want to power your light box (detailed below).
I suggest PLA Tough for these boxes (I print all mine in eSun PLA+). You only need black and white, however other colors come in handy. I strongly suggest a translucent/transparent material for the base accent wall, even better if it's a glow-in-the-dark (I've always used Hatchbox GitD Green).
Customization
All you need to do is edit the face blank to have whatever designs you'd like on it. You can do this in your favorite CAD application (and we'll see about sign maker) by cutting out your artwork from the face and extruding a 0.6mm replacement in whatever translucent material (usually white PLA) that you'd like! I've included a few basic examples in the print profile.
I really like using Glow in the Dark PLA for the translucent accent wall, however this is not mandatory. It can be printed with translucent or “natural” PLA to the same effect (I used ‘transparent’ PLA in my Fifth Element box). You can also print it with the same material as the rest of your walls if you do not desire this effect at all.
Construction
Constructing the completed box itself is not a particularly involved task. I've provided four different base templates:
- SP110E - for this box, tear the shell off an SP110E ARGB controller and use some good double-sided tape to stick it down inside the provided alignment pegs. No soldering required with this version! Works great with 5mm WS2812B LED strips.
- 5.5x2.1 Only - this version has a simple 7.8mm hole to mount a standard 5.5x2.1 DC jack. Solder the jack to your strip and you're done.
- 5.5x2.1 + Switch - uses the same 5521 DC jack but also includes a cutout for a micro SPST power switch. One extra step involved running +DC through the switch before connecting to your strip.
- USB-C + Switch - this version includes a cutout for a USB-C female breakout board and a SPST switch. Same as the 5521, just soldering wires to a PCB instead of leads, but with a cleaner more professional look, I think.
- I'm personally fond of COB LEDs for mono lighting, but 5mm WS2812B LED strips work great as well. As the goal of this box is easily changeable faces, I'd encourage the ARGB kit so the lighting can be dynamically changed to whatever face you may install.
WARNING: check the width of your LED strips! While every COB LED I have fits fine, many SMD strips (like WS2812B or RGB 5050's) might be too wide. There is 8.6mm clearance between the top of the alcove and bottom of the accent wall. If you choose to print the accent wall in opaque then this restriction doesn't apply.
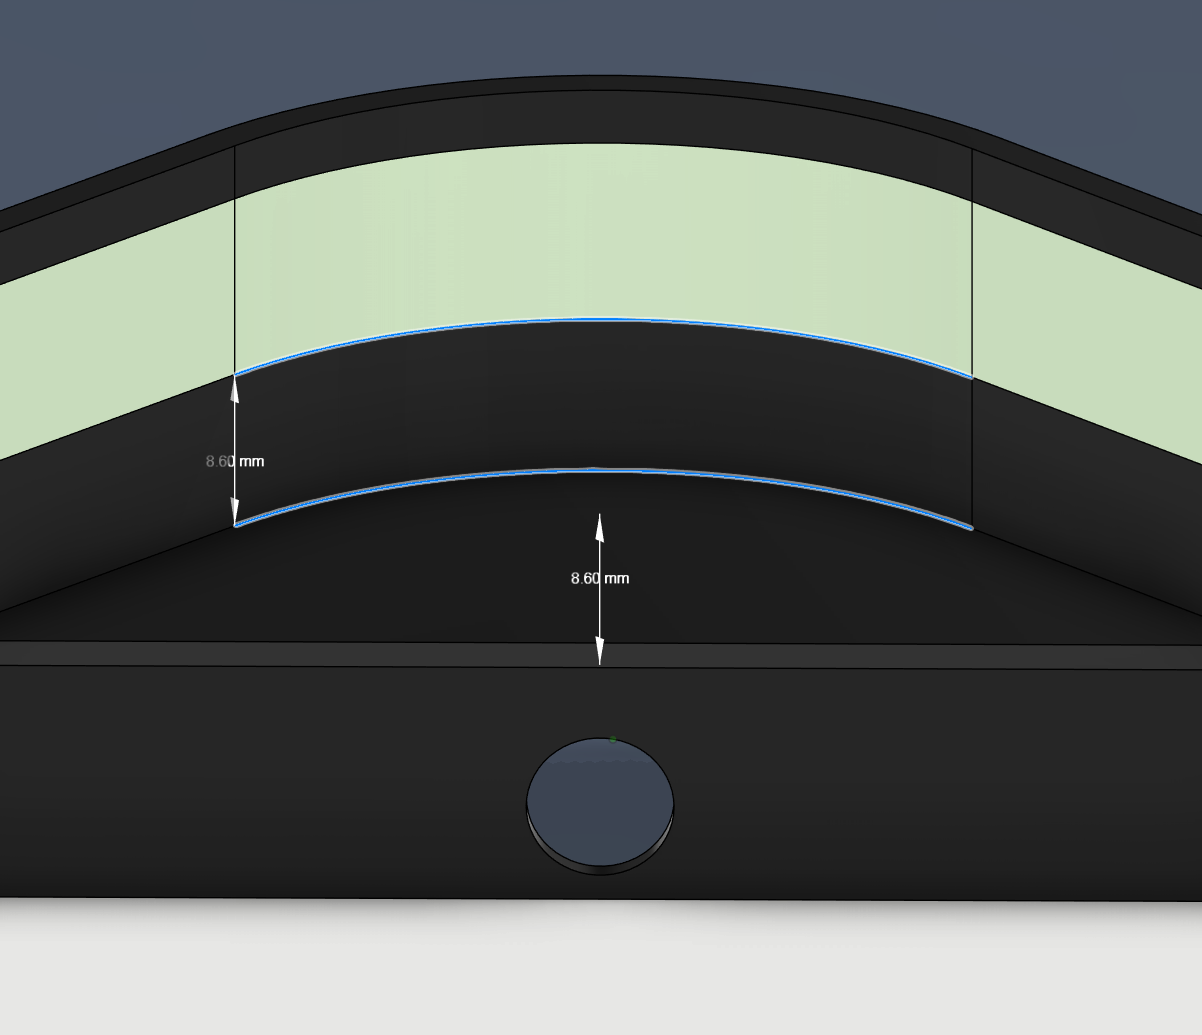
UPDATE: I've added a 45mm tall base that has a clearance of 13.6mm for RGB FCOB LEDs. The STEP is in the files section.
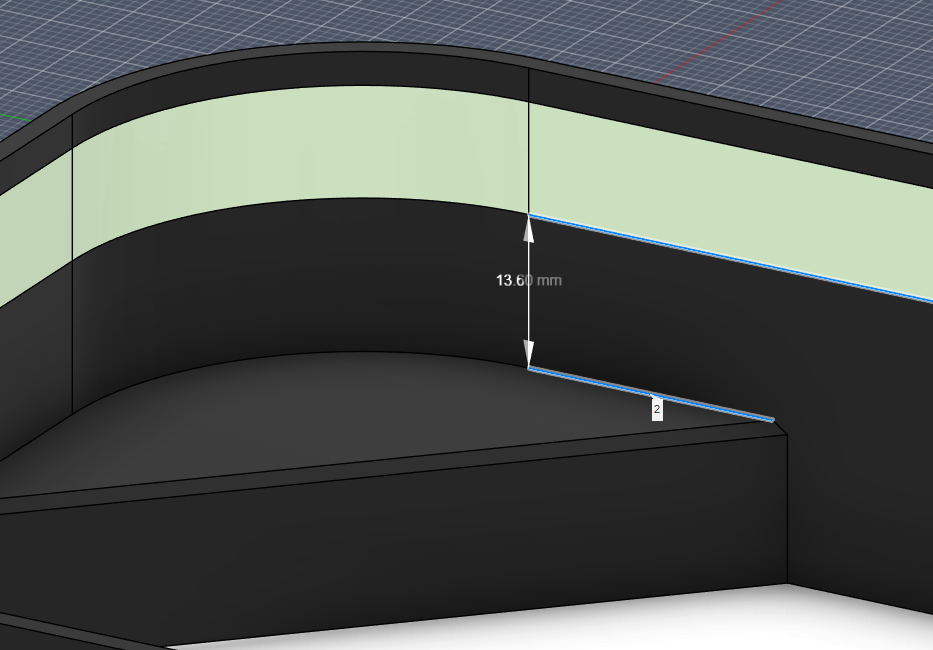
Also as a follow-up, a quick video on how to customize your own faces.
The GeneriBox - A Customizable Lightbox

Publicado em 21 de nov de 2023
Gostou deste modelo? Crie uma conta grátis para salvar seus favoritos e voltar a eles depois.
Criar conta