Você está no 3DFinder
Buscamos em Thingiverse, MakerWorld e Printables ao mesmo tempo para te dar o melhor de cada uma.
Descrição
Materials Needed:
- 3D-printed lamp parts (2 parts per lamp)
- Strong adhesive (preferably suitable for plastic)
- Small brush or glue applicator (optional)
- sandpaper (optional)
Assembly Steps:
- Preparation:
- Ensure all 3D-printed parts are clean and dry.
optional use fine sandpaper to smooth the surfaces where the parts will be glued for better adhesion.
- Apply Glue:
Apply a thin layer of glue to the surfaces where the lamp parts will connect. These are likely the areas where the lamp head attaches to the arm.
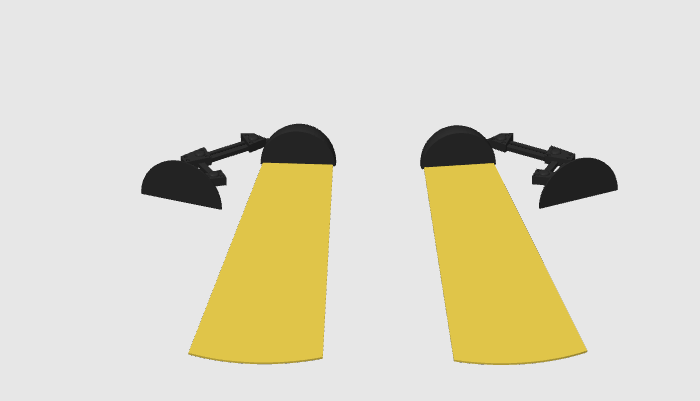
- Join the Parts:
- Carefully align the lamp head with the arm as shown in the image.
Press the parts together firmly, ensuring they are properly aligned.
- Drying Time:
- Allow the glued parts to dry according to the adhesive manufacturer’s instructions, ensuring they are held in place if needed.
Once dry, your 3D-printed lamp should be securely assembled! This one is now ready for use :)
Also check out our entire collection of book marks: collection

1,773
Curtidas
3,952
Downloads
5,249
Coleções
2,716
Impressões
Categoria
Other Education Models
Tags
bookmark
bookmark amor
bookmark 2d art
bookmark animal
bookmark arsenal
book marks
book marker
book mark minecraft
book mark animal
book mark
bookmarks
bookmarkset
bookmarkstarwars
book accesories
book
book 8088
book 1
books
books mark
books made into movies
books tool
bookself
mark
mark 42
mark 4
mark 1
mark 3
marks
marks places
marksmanship
book accessory
book accessories
book art
read
reader
reading accessory
reading accessories
reading a book creative model
reading a book
reading
readingaccessories
readingaccessory
readability
lamp accessory
lamp
lamp 001
lamp adapter
lampshade
lampshadeholder
lamps
Licença
Standard Digital File License