Você está no 3DFinder
Buscamos em Thingiverse, MakerWorld e Printables ao mesmo tempo para te dar o melhor de cada uma.
Descrição
The Shadow Caster - Alien Edition!
Designed to have interchangeable scenes!
(Blank plate provided for easy remixes)
The fully 3D-printed Shadow Caster adds a spooky vibe to your space. This Halloween edition features an alien abduction scene. Place your favorite action figure or trinket in the light, and make it look like it's about to get beamed up!
Roughly 5"X6"x6".
The Shadow Caster offers the flexibility of interchangeable "scene" plates, held in place with a turning lock mechanism. Whether you want to showcase eerie alien abductions or experiment with creating your own themes, swapping out scenes is a breeze.
No screws or glue are needed.
It’s made using readily available Bambu Lab Maker Supply parts, including:
Features
- Adjustable brightness
- On/off button
- Battery powered
- LED sits on a sliding track, allowing you to adjust the light’s position for varying shadow effects depending on the scene.
- The design is nearly support-free and optimized for easy FDM printing.
- Integrated wiring clips keep everything neat, giving it a polished look without the clutter.
- Assembly is completed with a clever slide-in wedge that snugly holds the power button and brightness knob while hiding the internal wiring for a cleaner finish.
Assembly
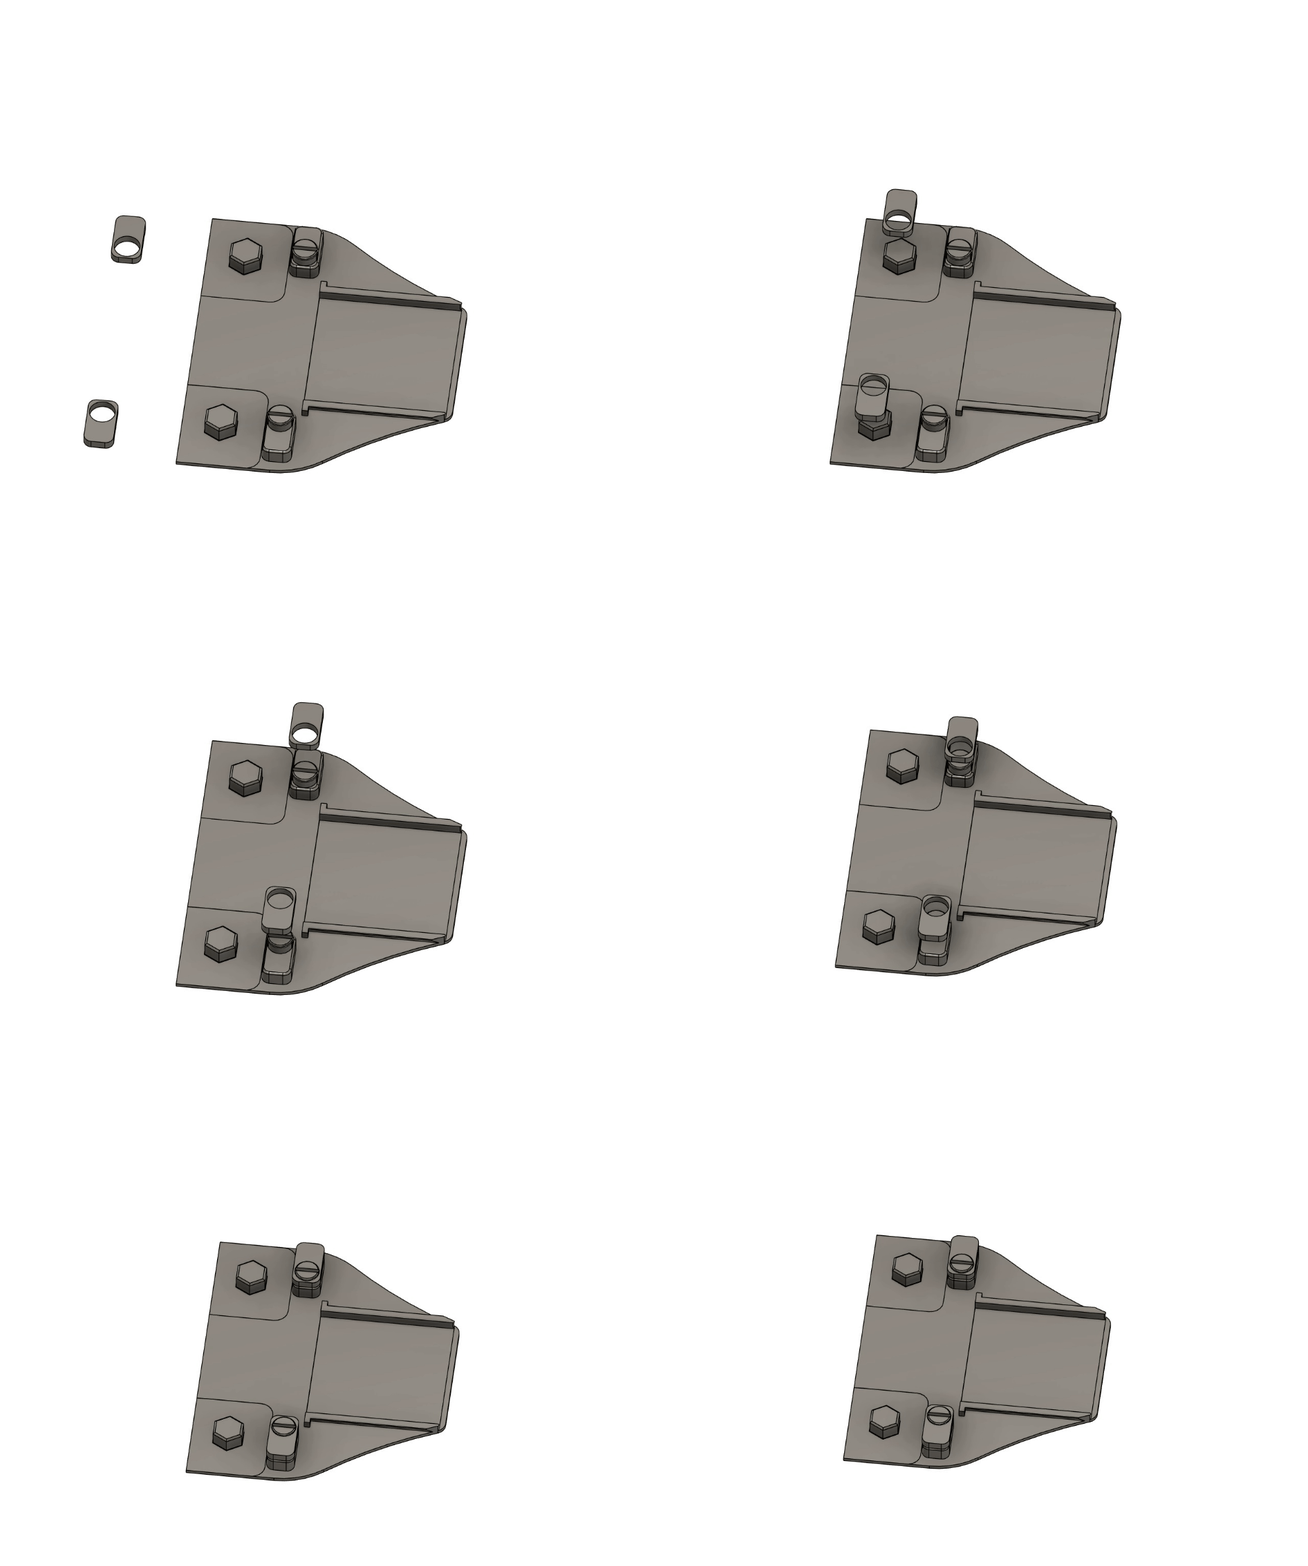
Step 1:
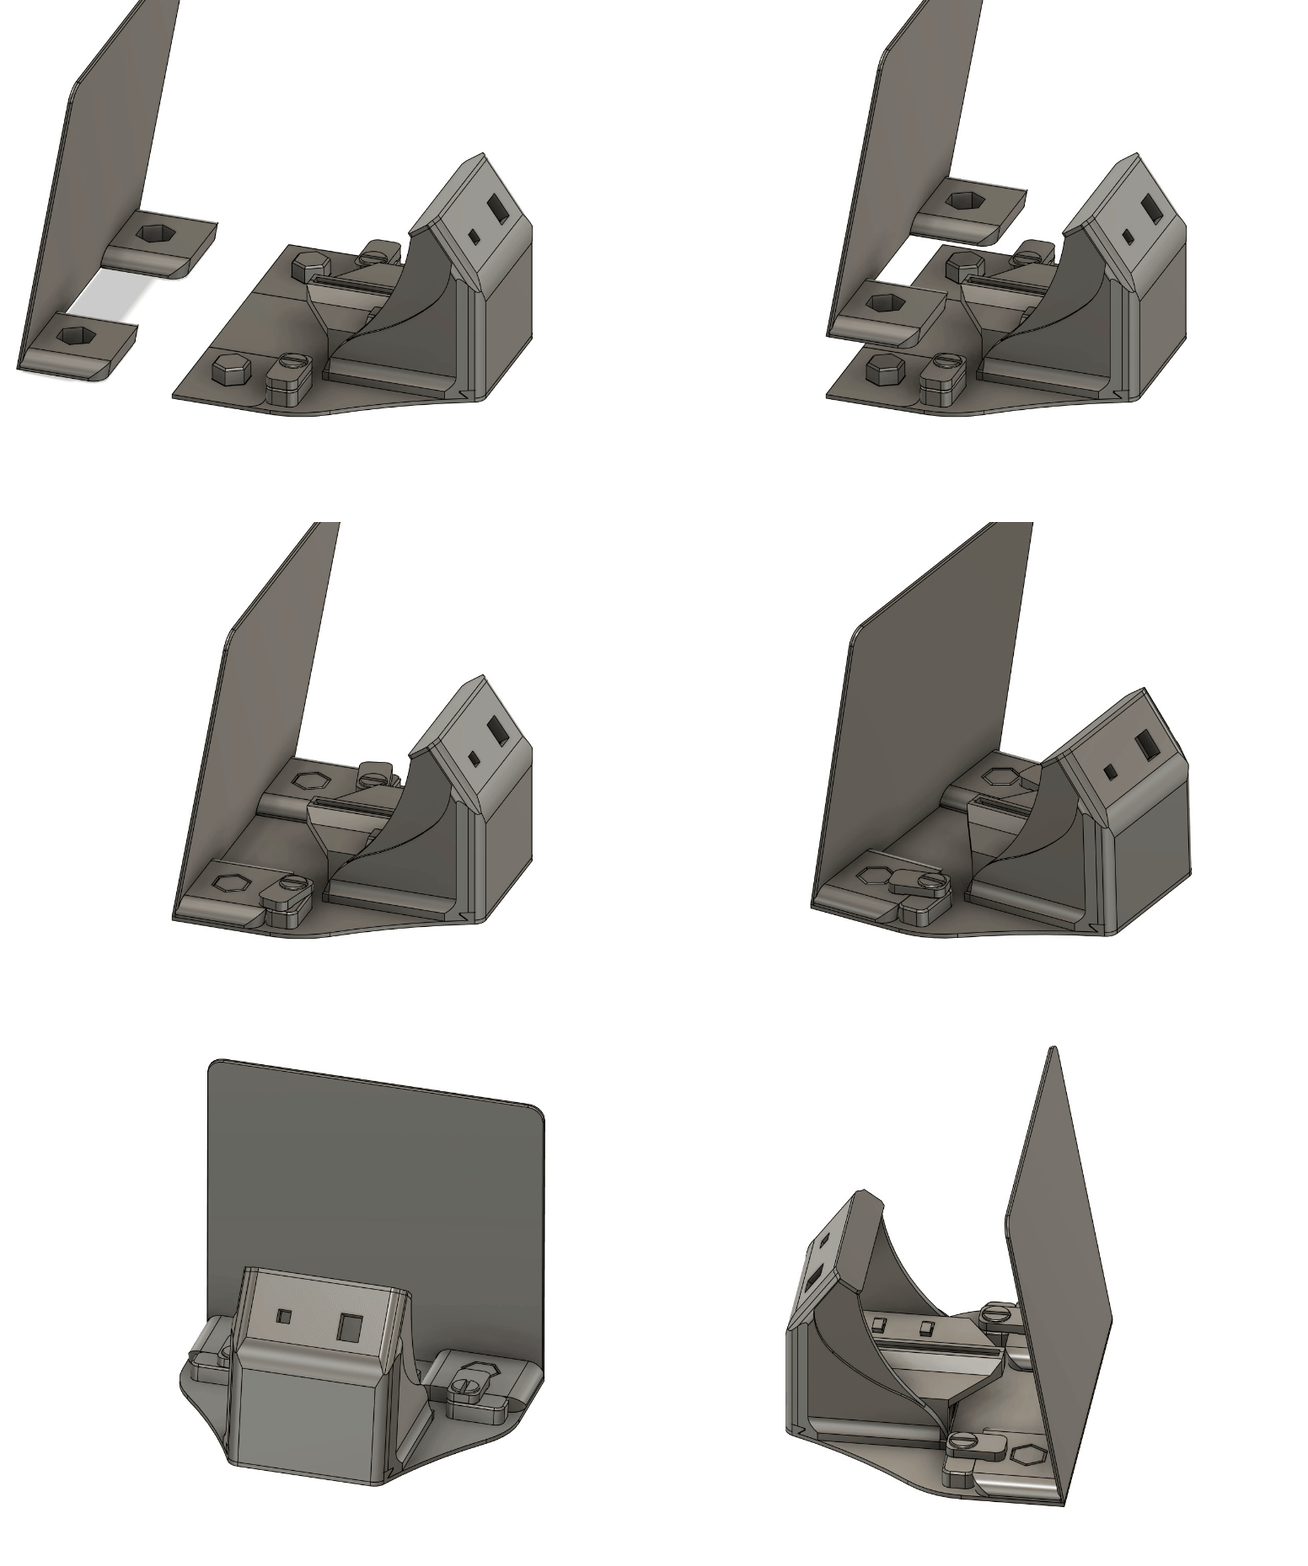
Start with the base and push the turning tabs into place. These will be used to hold the scene in place.
Step 2:
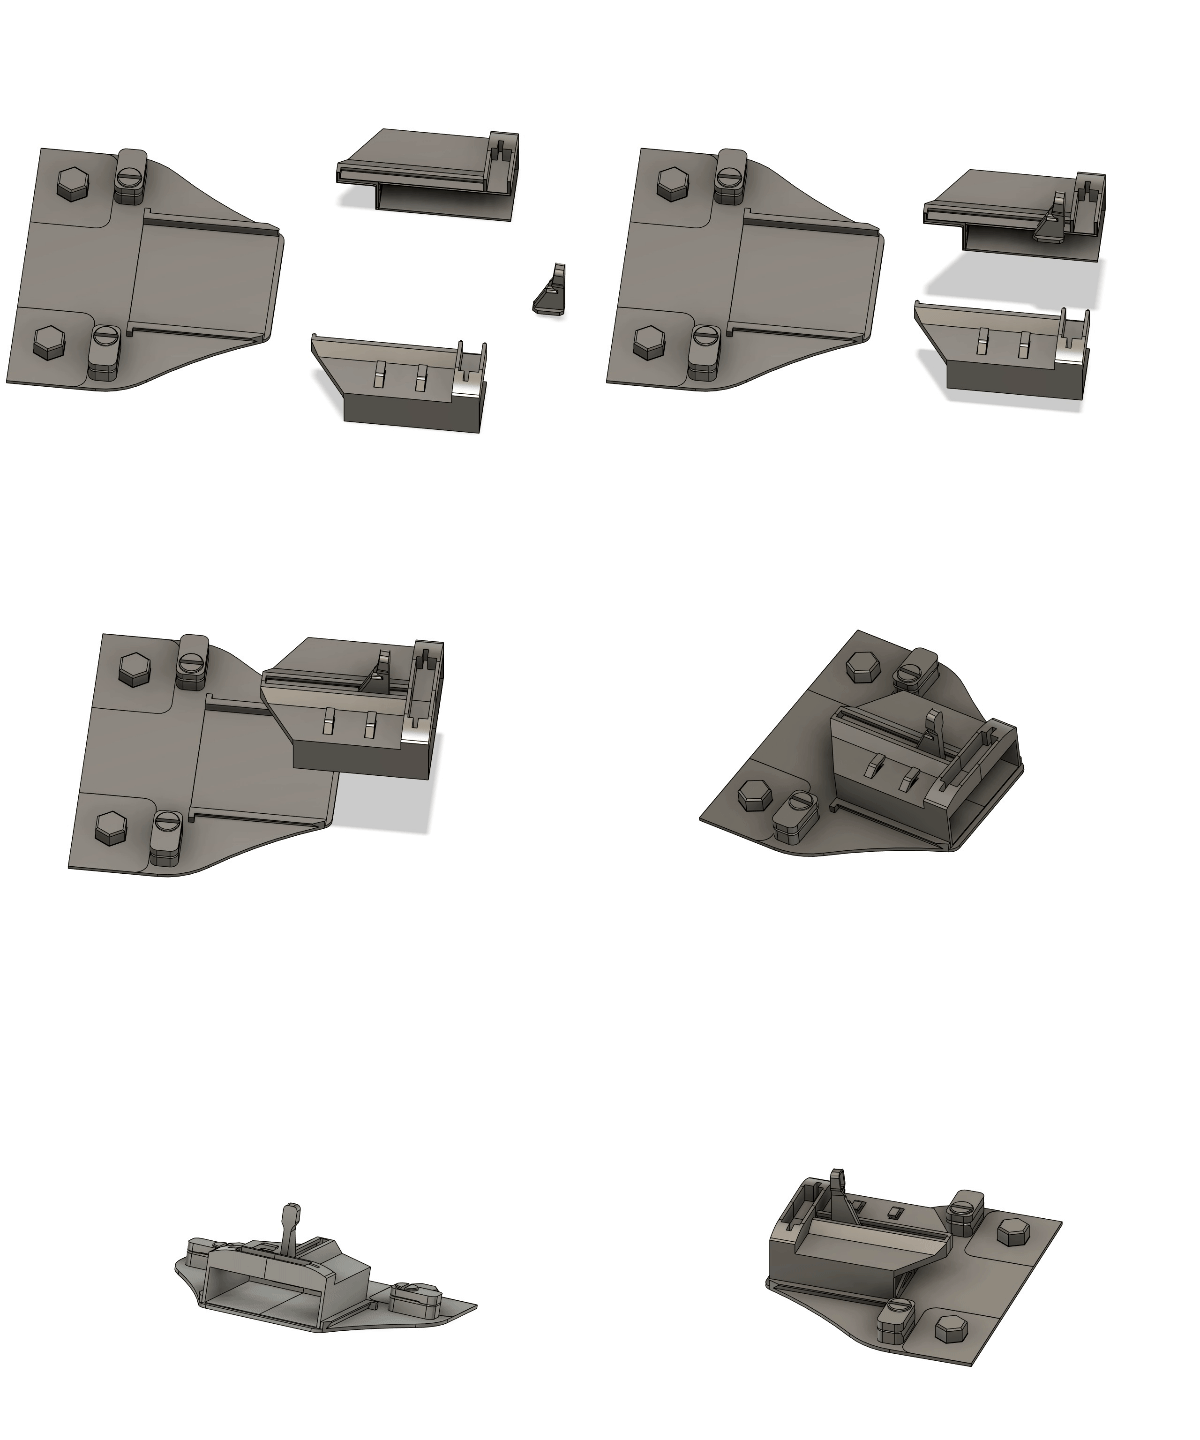
Take the two halves of the battery pack holder, making sure to include the LED slider in-between the two halves. *This doesn't require glue, as later parts will hold it together snuggly.
While holding the halves together, push the 4 AA battery pack into place (make sure it has batteries in it!) and connect the Power distribution board (PDB). Don't worry about the PDB fitting into it's slot on top of the battery holder case yet, further assembly will move it around a bit.
Put the battery holder case into the base. There's a small rectangular indent and two rails to guide it into place.
Step 3:
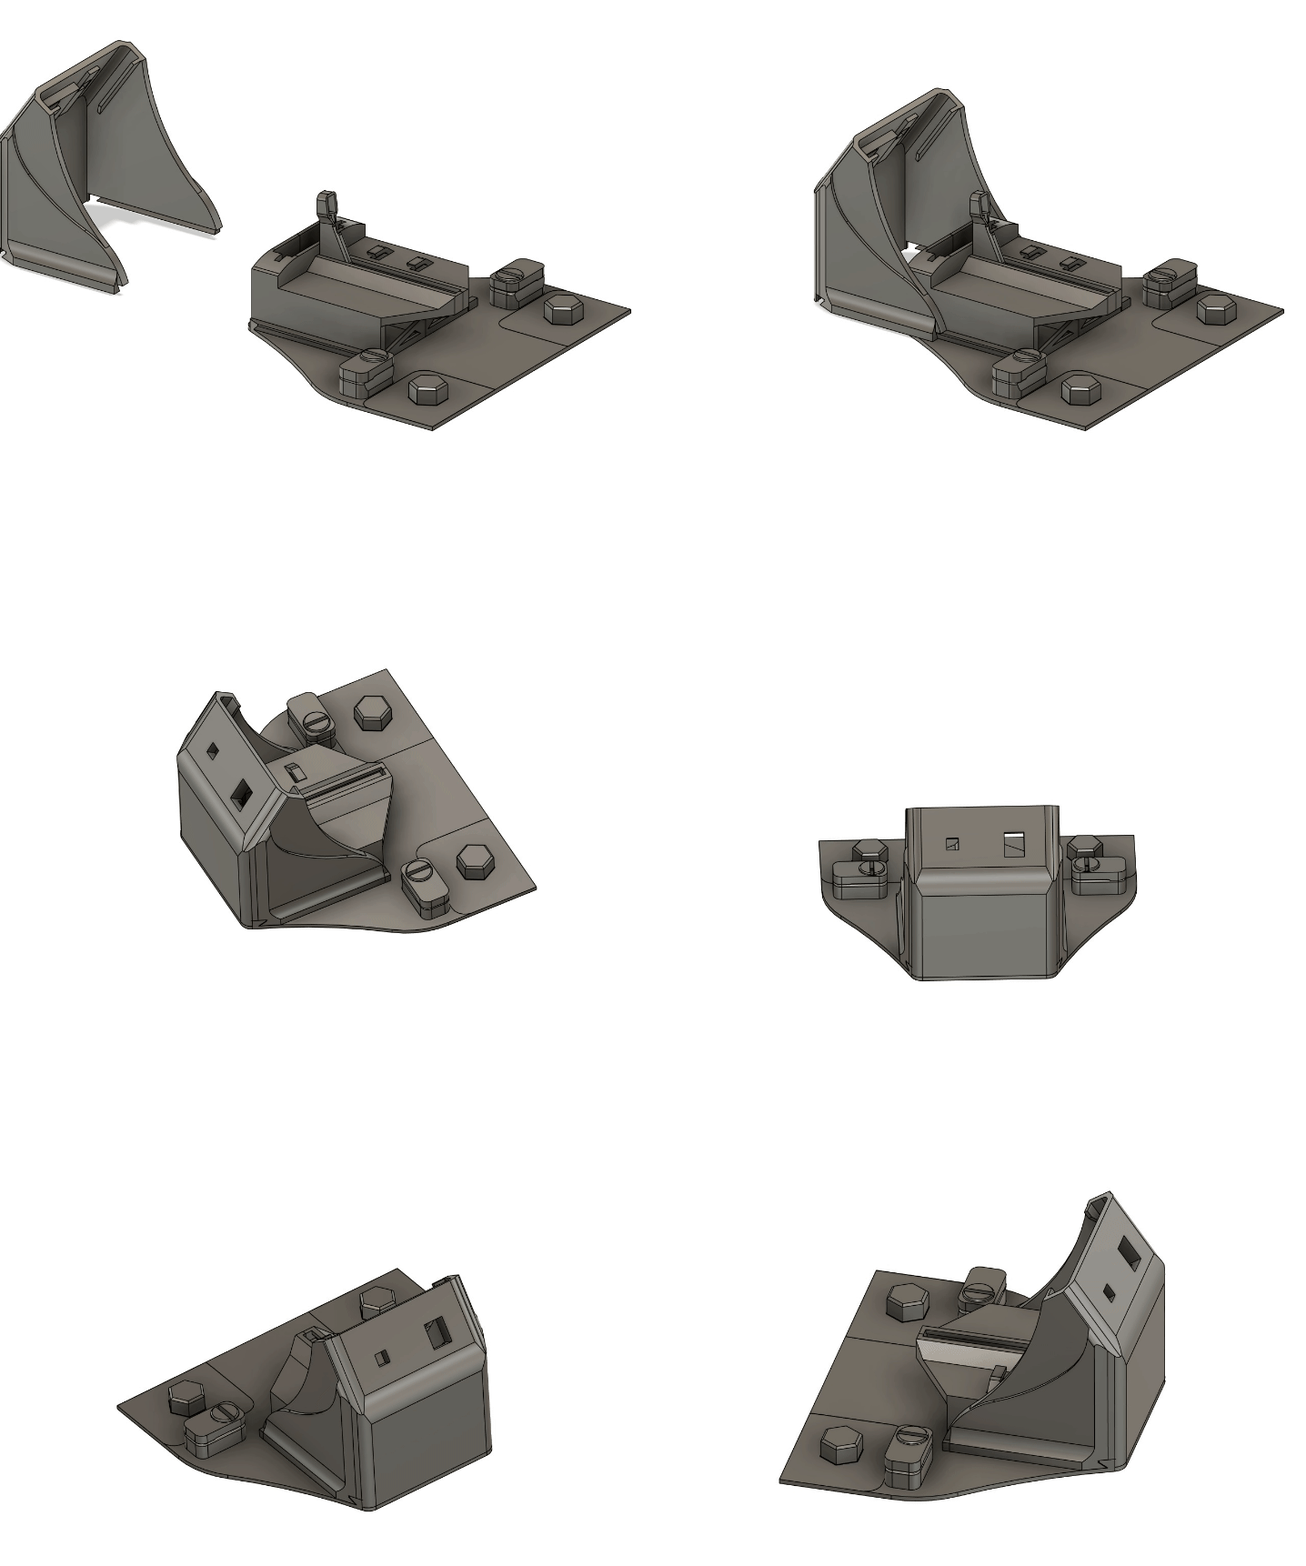
Slide the shell into place. During this step, you should push the On/off push button, Brightness control knob, Power distribution board, and 5V LED into place. The button and potentiometer may be loose fitting at this point, if so hold them in place and continue to step 4.
Step 4:
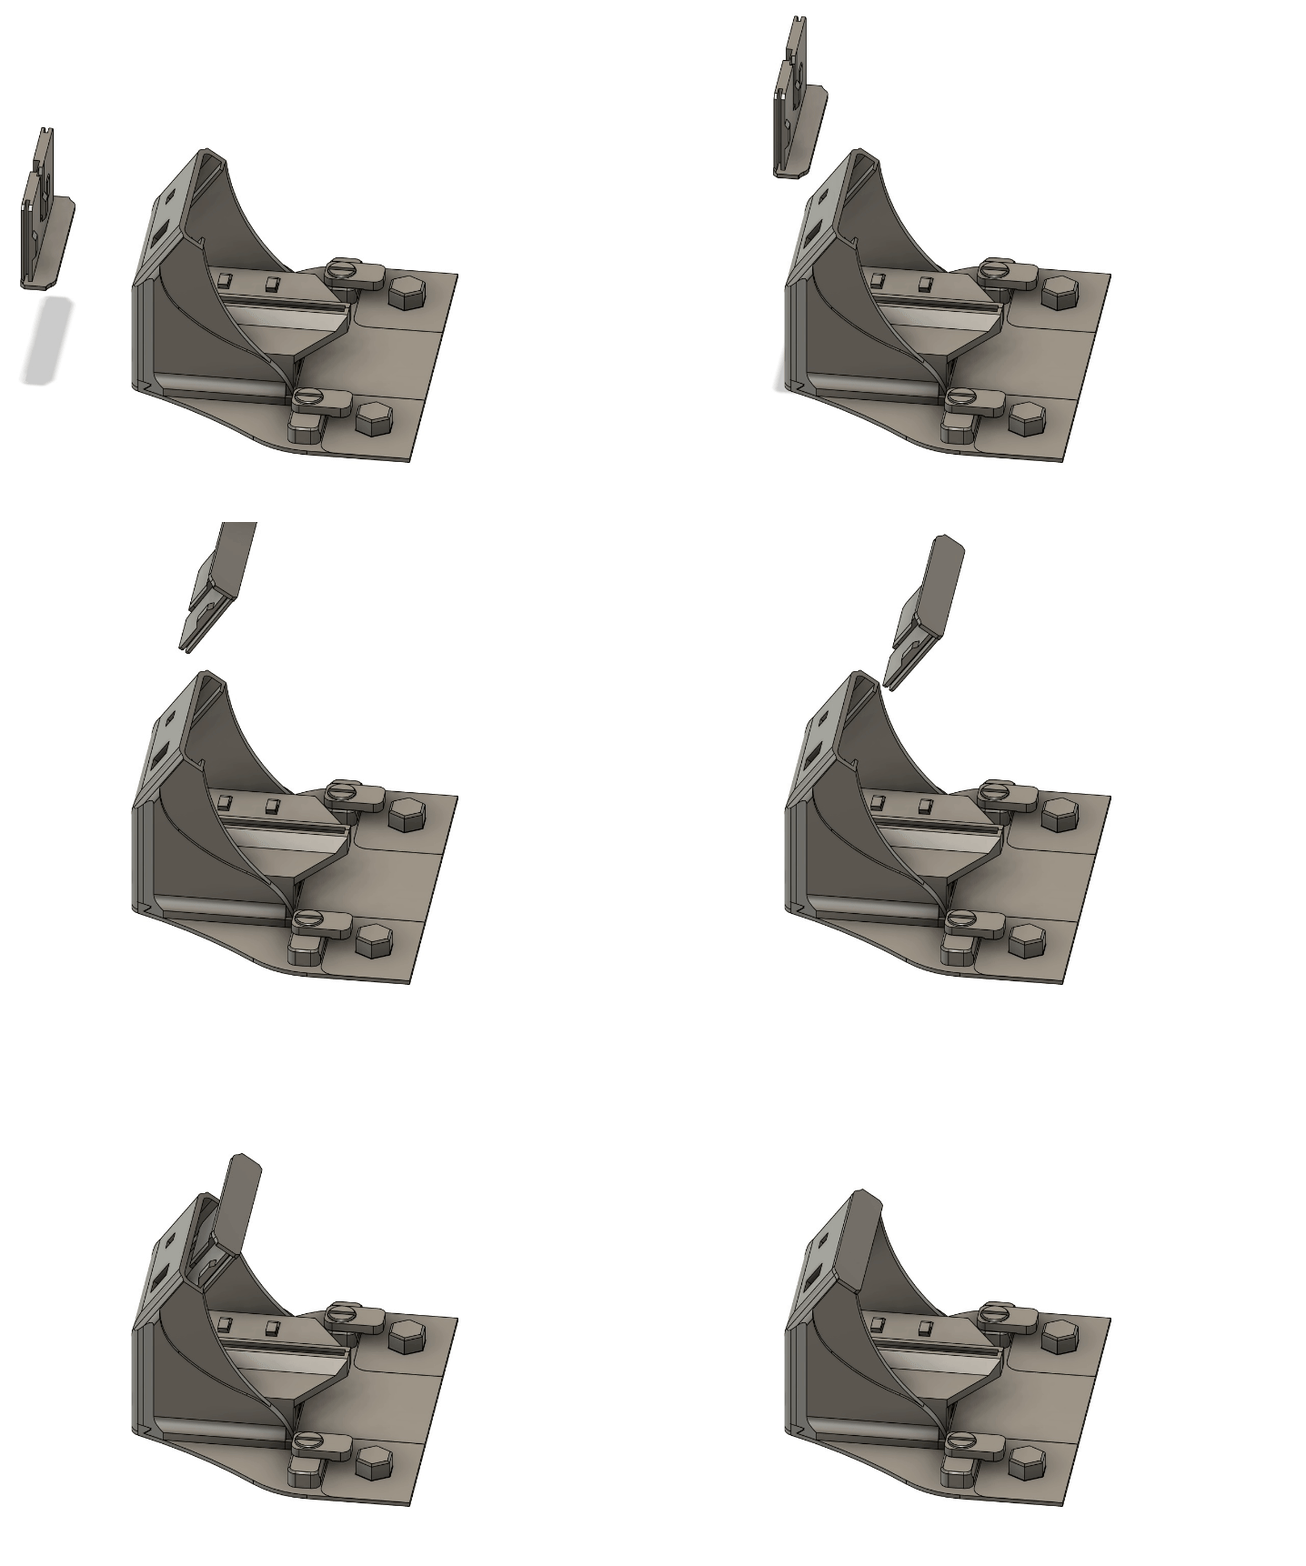
Push in the wedge lid that will securely hold the On/off push button and Brightness control knob in place.
Step 5:
Attach the Shadow Caster plate and lock it in place.
Step 6:
Push the button and knob into place.
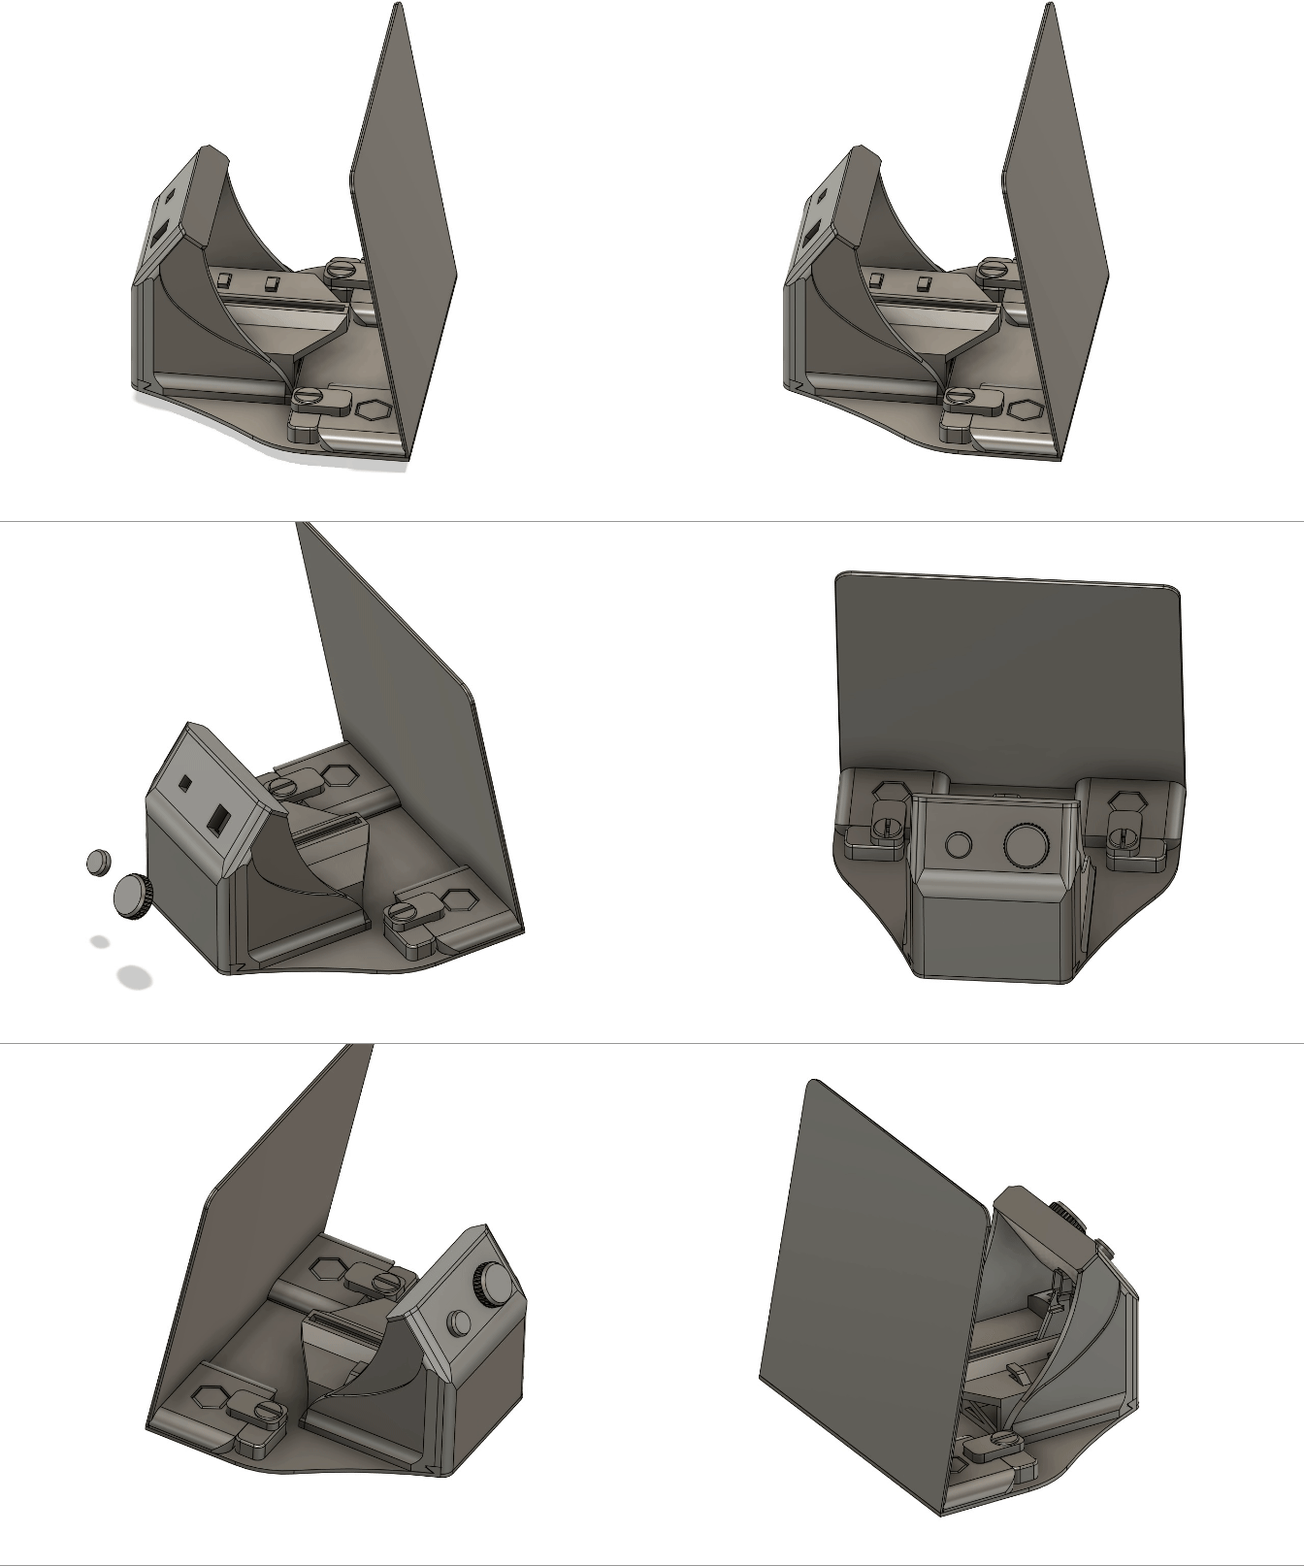
That's it! Make sure your battery pack has 4 AAs in it and turn it on!
I hope you enjoy this as much as I have!
---
Have fun and keep printing. :)
-tuny
Gostou deste modelo? Crie uma conta grátis para salvar seus favoritos e voltar a eles depois.
Criar conta