Você está no 3DFinder
Buscamos em Thingiverse, MakerWorld e Printables ao mesmo tempo para te dar o melhor de cada uma.
Descrição

It may happen that the printer does not respect and does not maintain perpendicularity and encounters an inclination in the print.
Result: the dimensions are not respected and, especially in the case of technical prints, this could be the basis of the possible failure.
There is therefore a method that allows us to adjust the inclination angle and (almost) cancel it.
Many of the simple models that are printed for measuring the skew in themselves do not always allow us to make a grip of the correct size as the first to be inclined will be us and our caliper
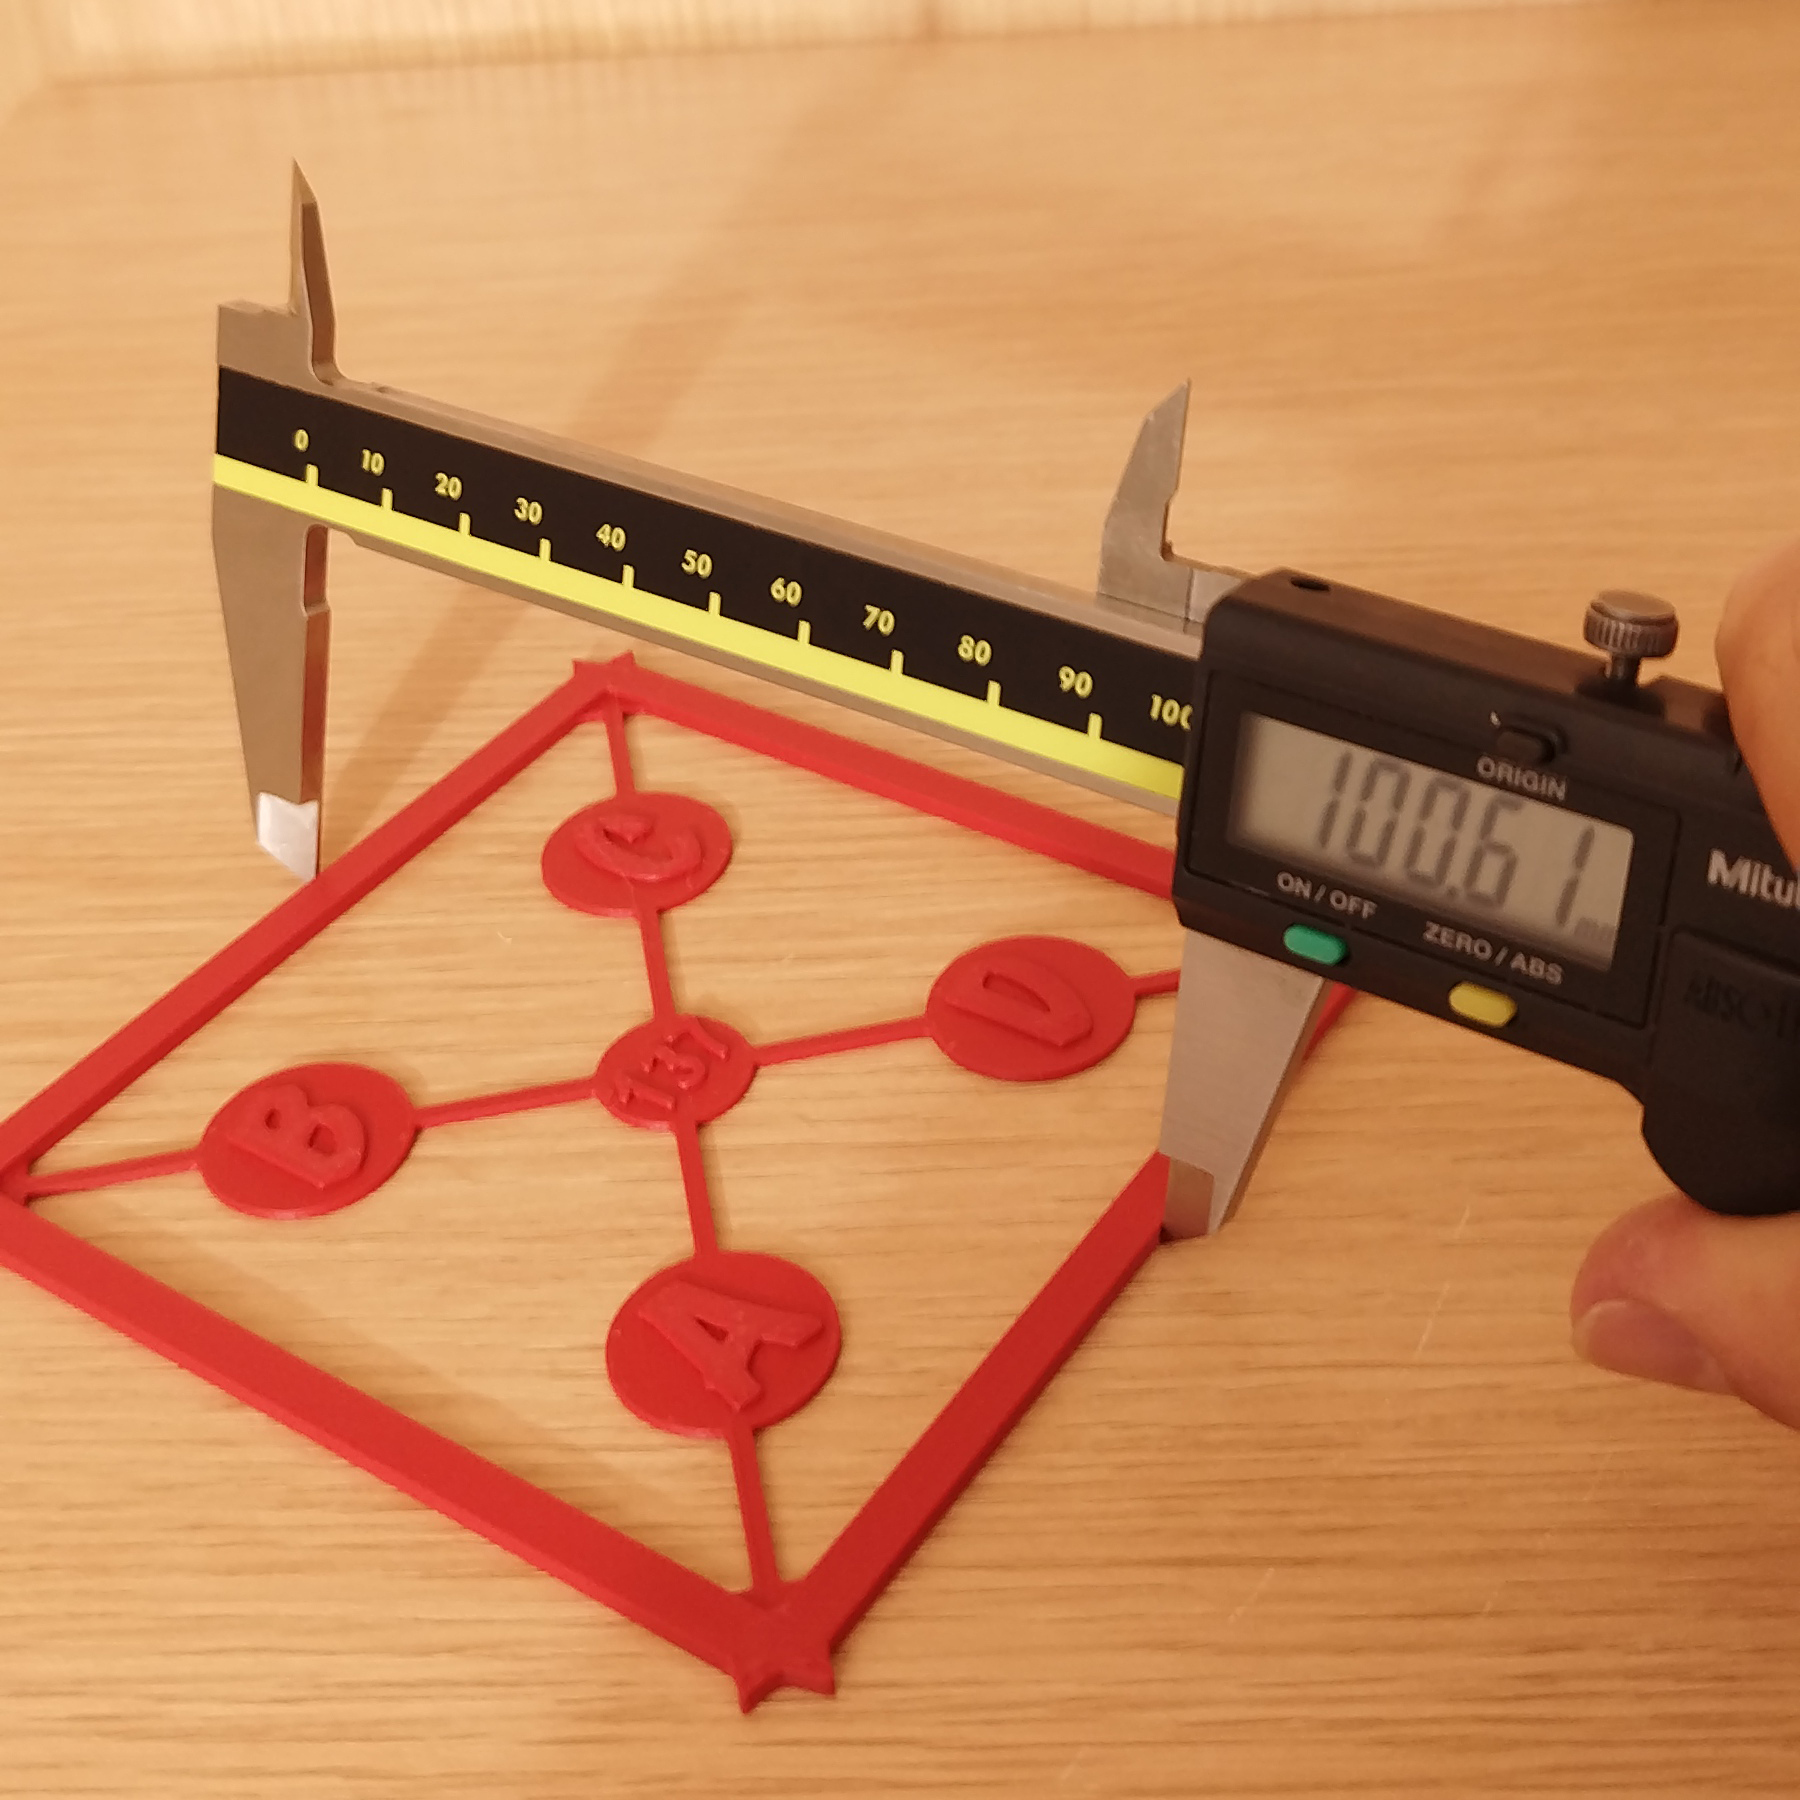 | 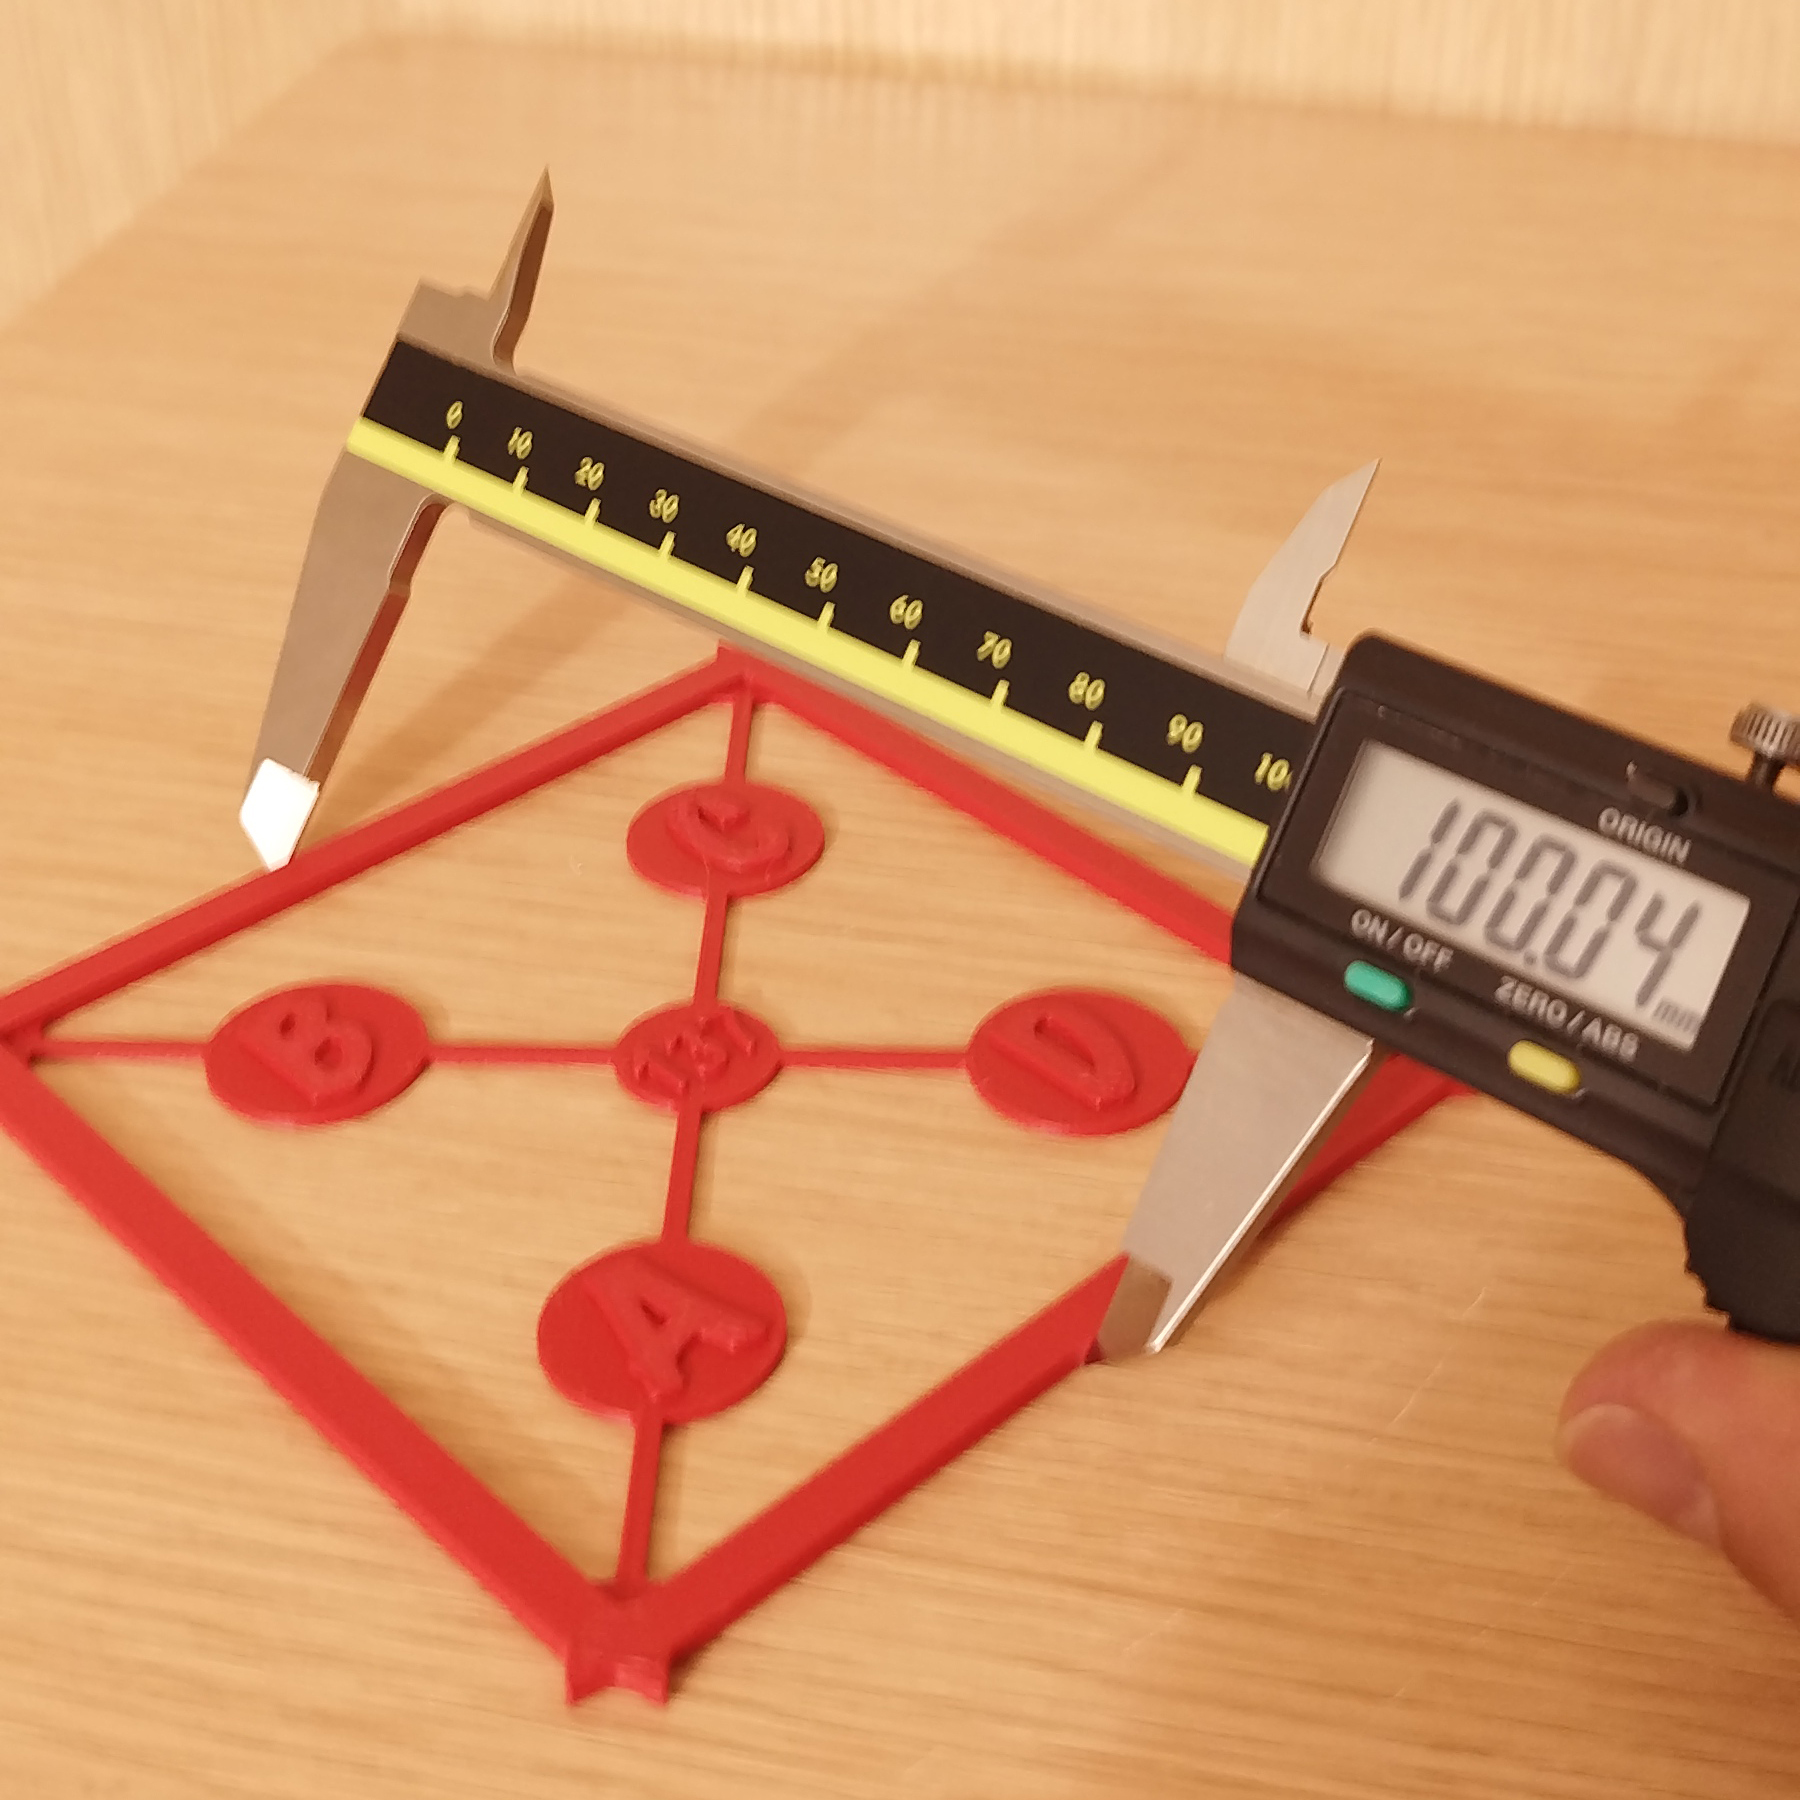 |
| ( Using linear surfaces can produce high differences in measurements ) | |
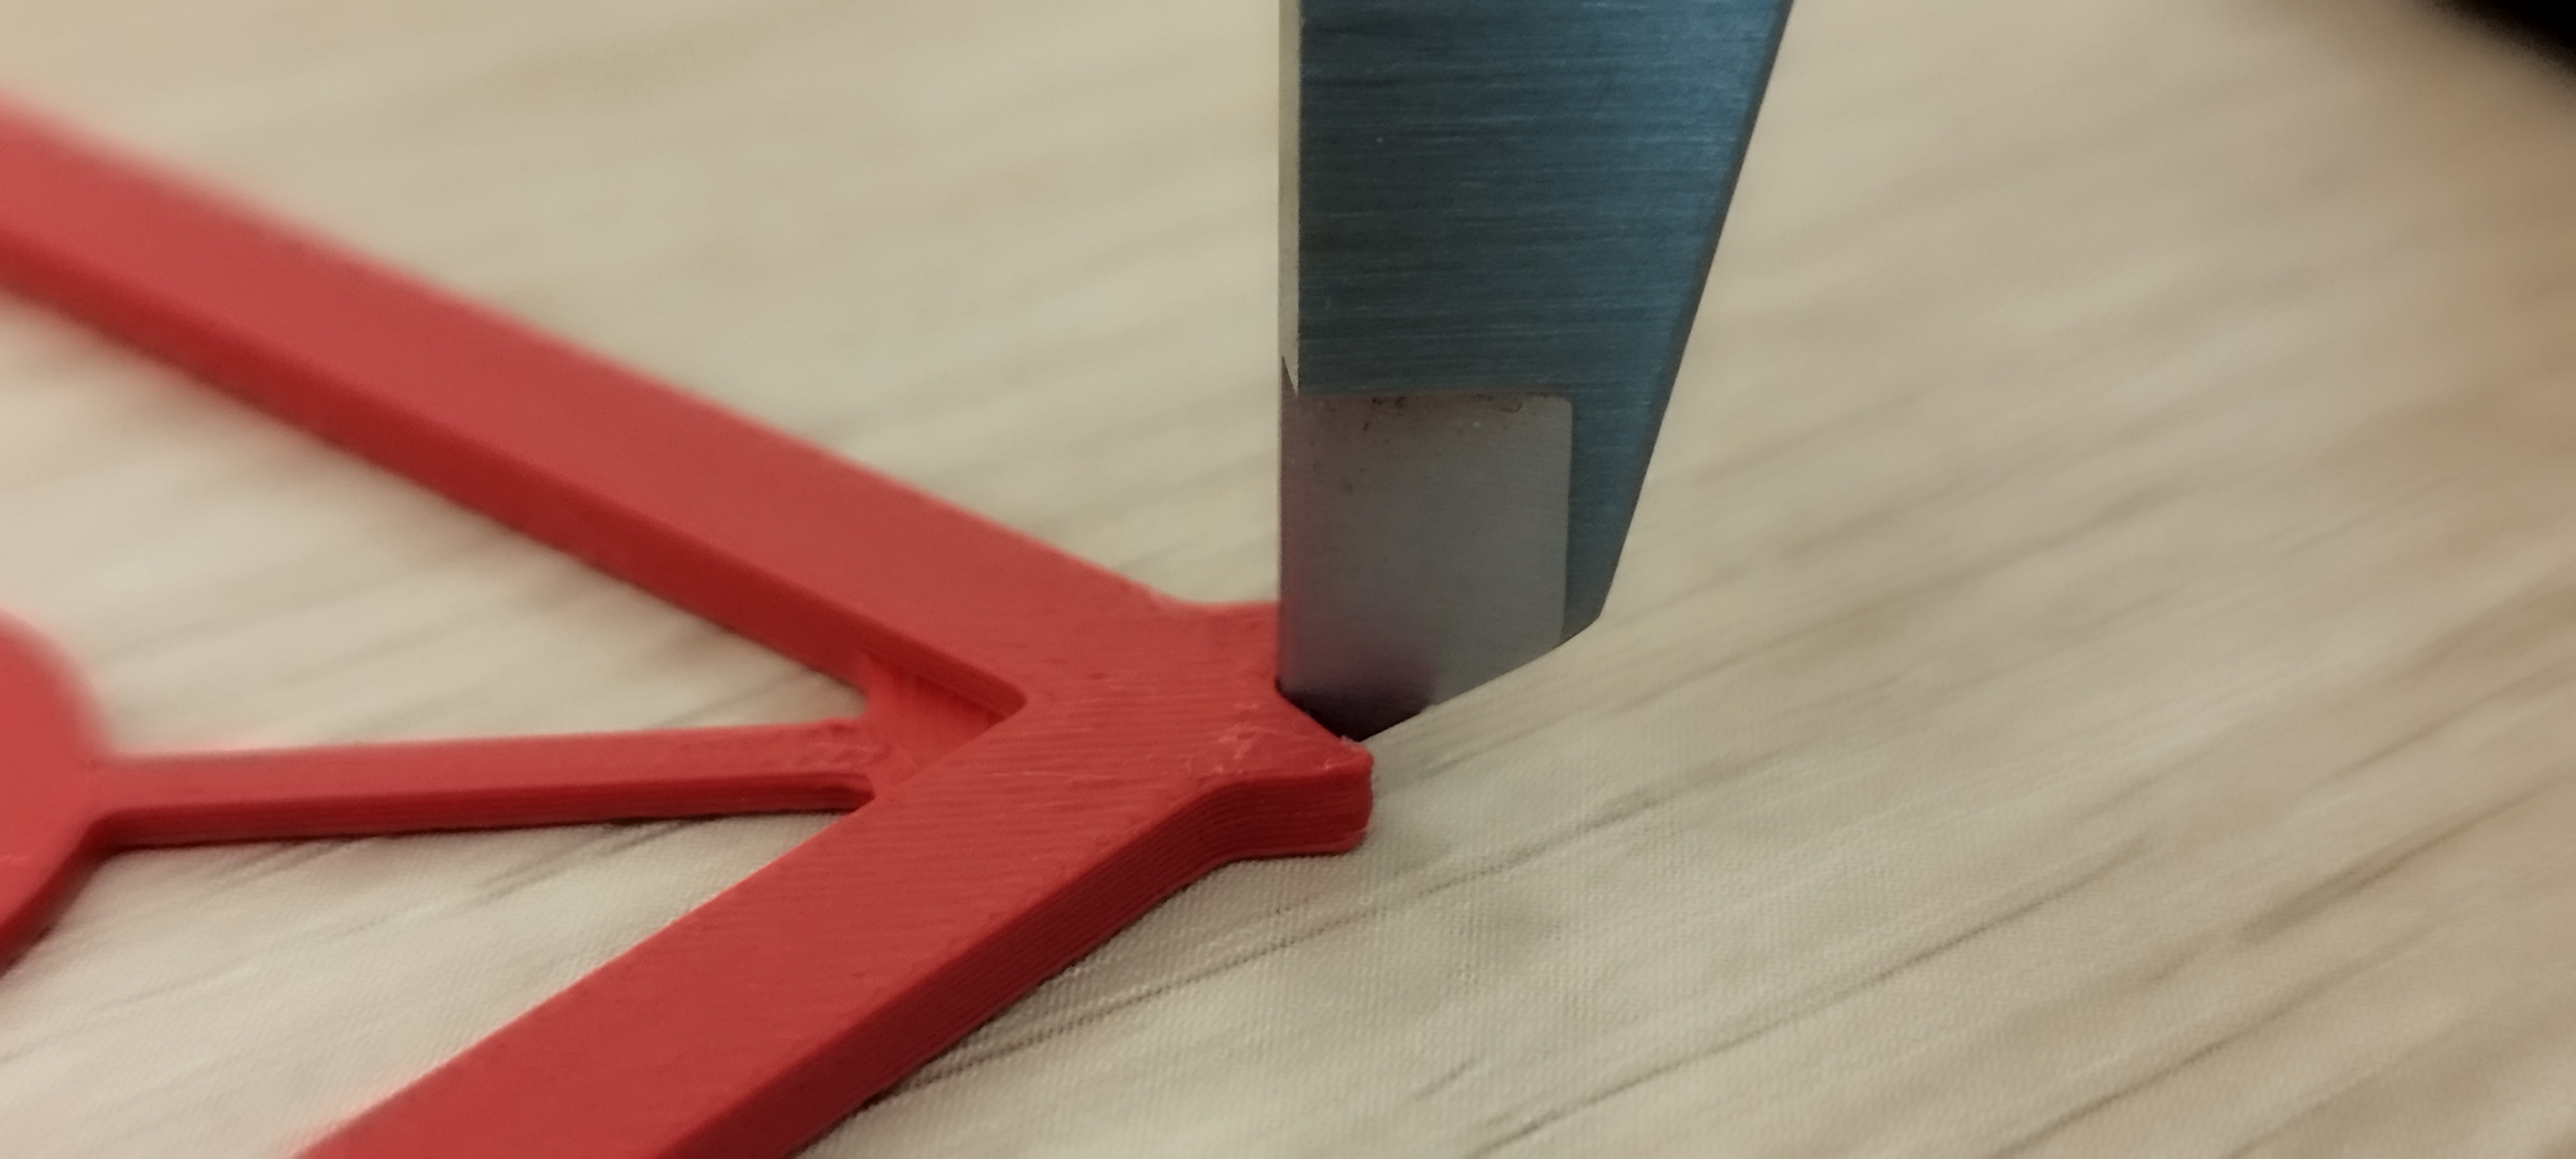
We must therefore "force" the tip of the caliper to follow a direction perfectly perpendicular to the plane and perfectly parallel to the diagonals.
Here is the "little big" difference that this model introduces thanks to the angles that fall on the diagonals to be measured.
 | 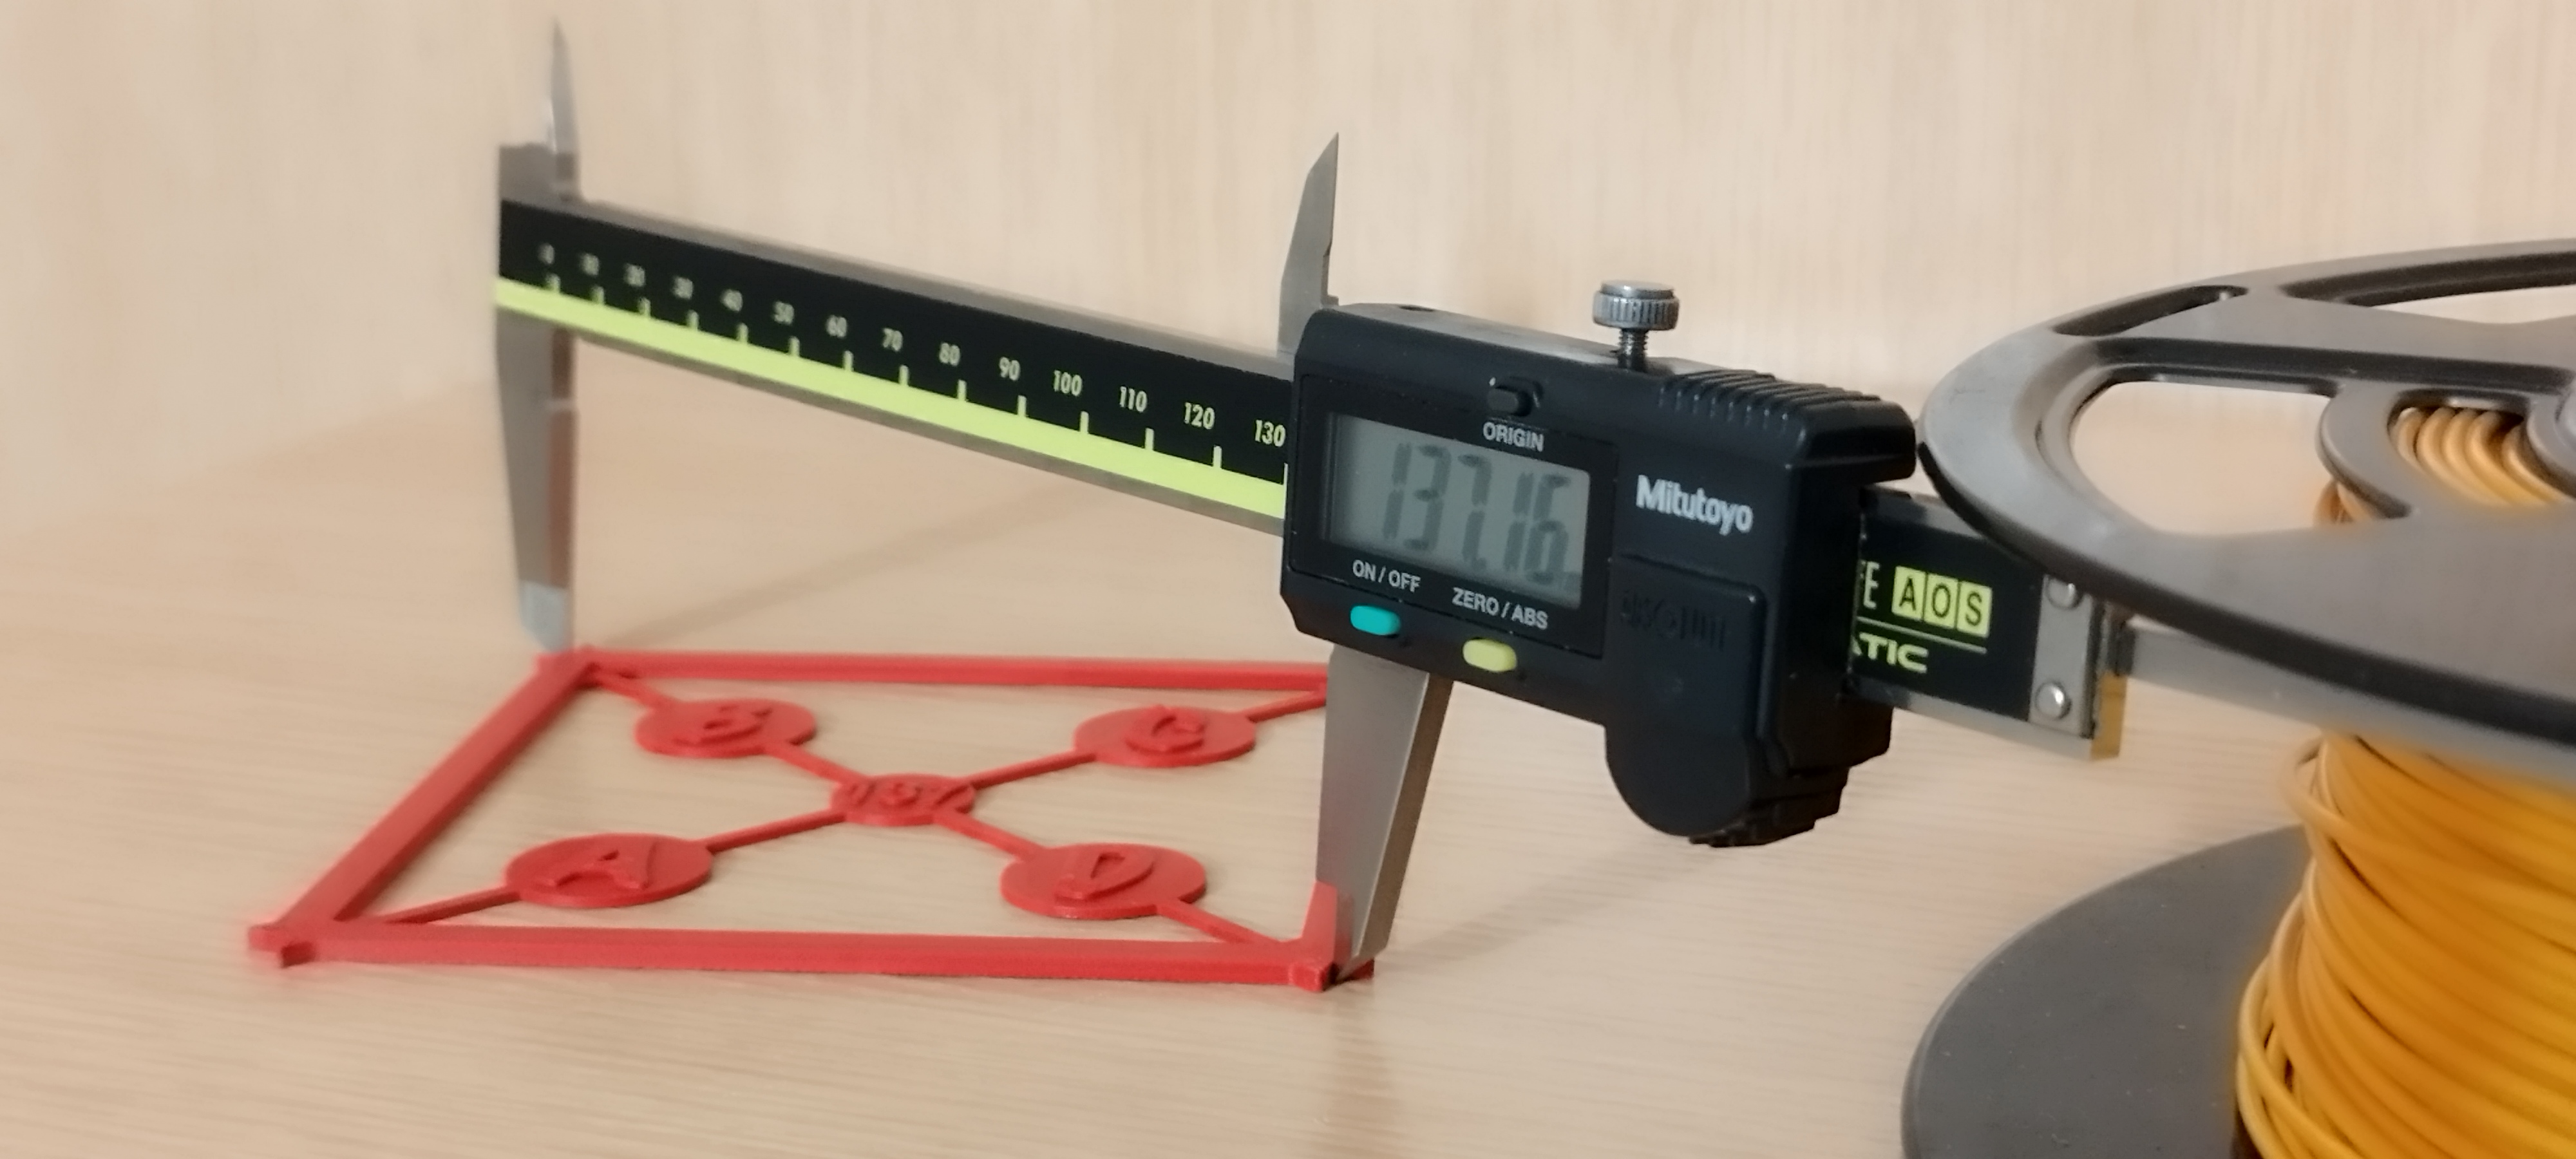 |
It will also be important to work on a plan to further refine the measurement (see photo).
The exact size of the diagonal, in the digital model, is 137mm (as indicated in the center).
This doesn't mean that you need a perfect 137.00 diagonal printed model to proceed…
TWO-MEASUREMENTS METHOD ( not very accurate):
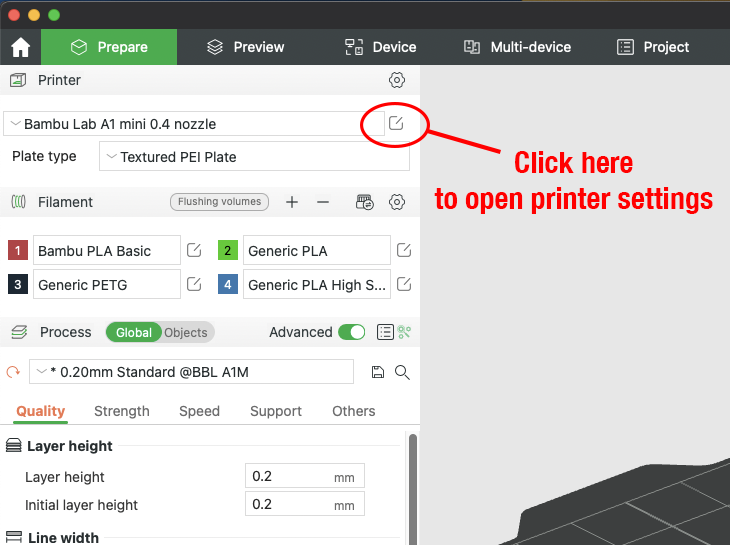
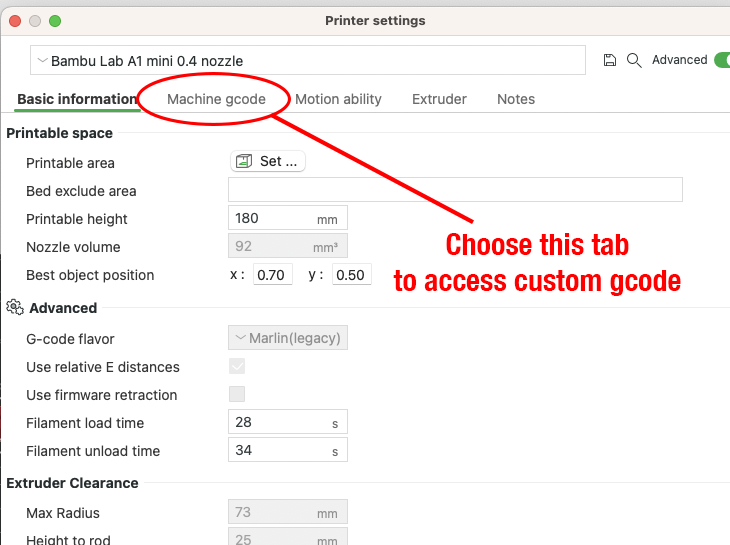
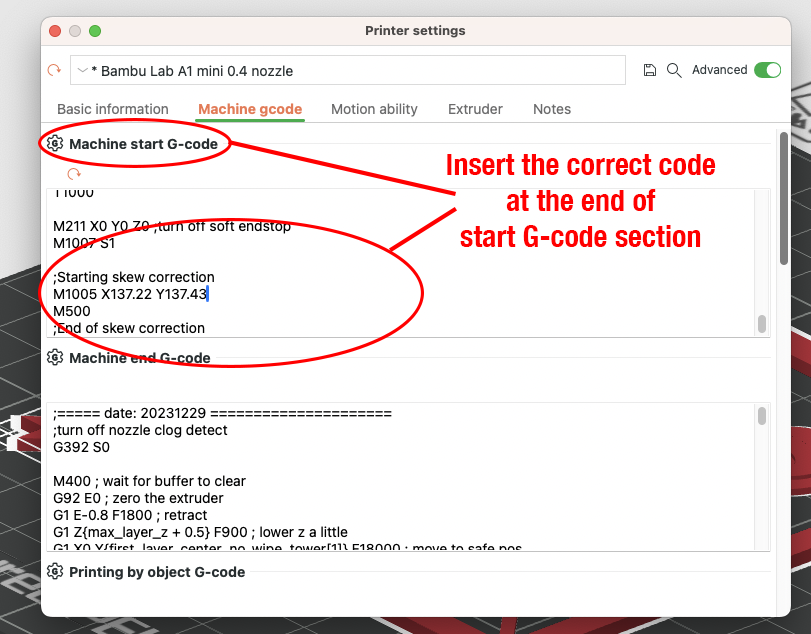
Once the measurements have been wrote down (or memorized lol), a few lines must be added to the end of the start code in the custom gcode section of the selected printer:
| GCode to add to Start Code |
;Starting skew correction M1005 X(measured length AC) Y(measured length BD) M500 ;End of skew correction |
| (change the values with the ones you measured) |
Below are the images to guide you through the procedure
 |  |
 | |
Remember: once you have obtained the correct value and zeroed the deviation you will have to delete the added correction code from the start Gcode.
Attention: it has been reported that on some printers the code for storing the changes made (M500) does not work if the printer is turned off and on again.
I could confirm that what has been reported correspond to the truth. So You'll be better using the second, following method.
RADIANS CALCULATED CALIBRATION METHOD (More accurate)
Use the caliper to measure the segments AC, BD and AD.
Once wrote the dimensions down, please click on this link (safe link on my server) to calculate and obtain the GCODE to insert:
LINK TO SKEW RADIANS CALCULATION
copy the GCODE (in the format M1005 Ixxxxxx) and paste it at the beginning of your printer Start G-Code:
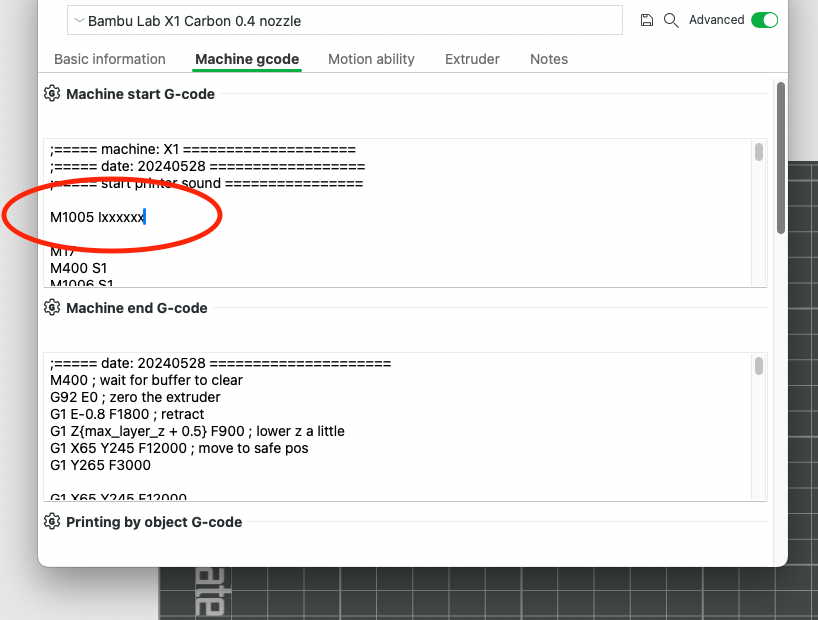
Print again the model and check the result. If needed repeat the steps until zeroing the skew.
WITH THIS METHOD YOU MUST NOT DELETE THE ADDED GCODE .
RESULT OF A ZEROING
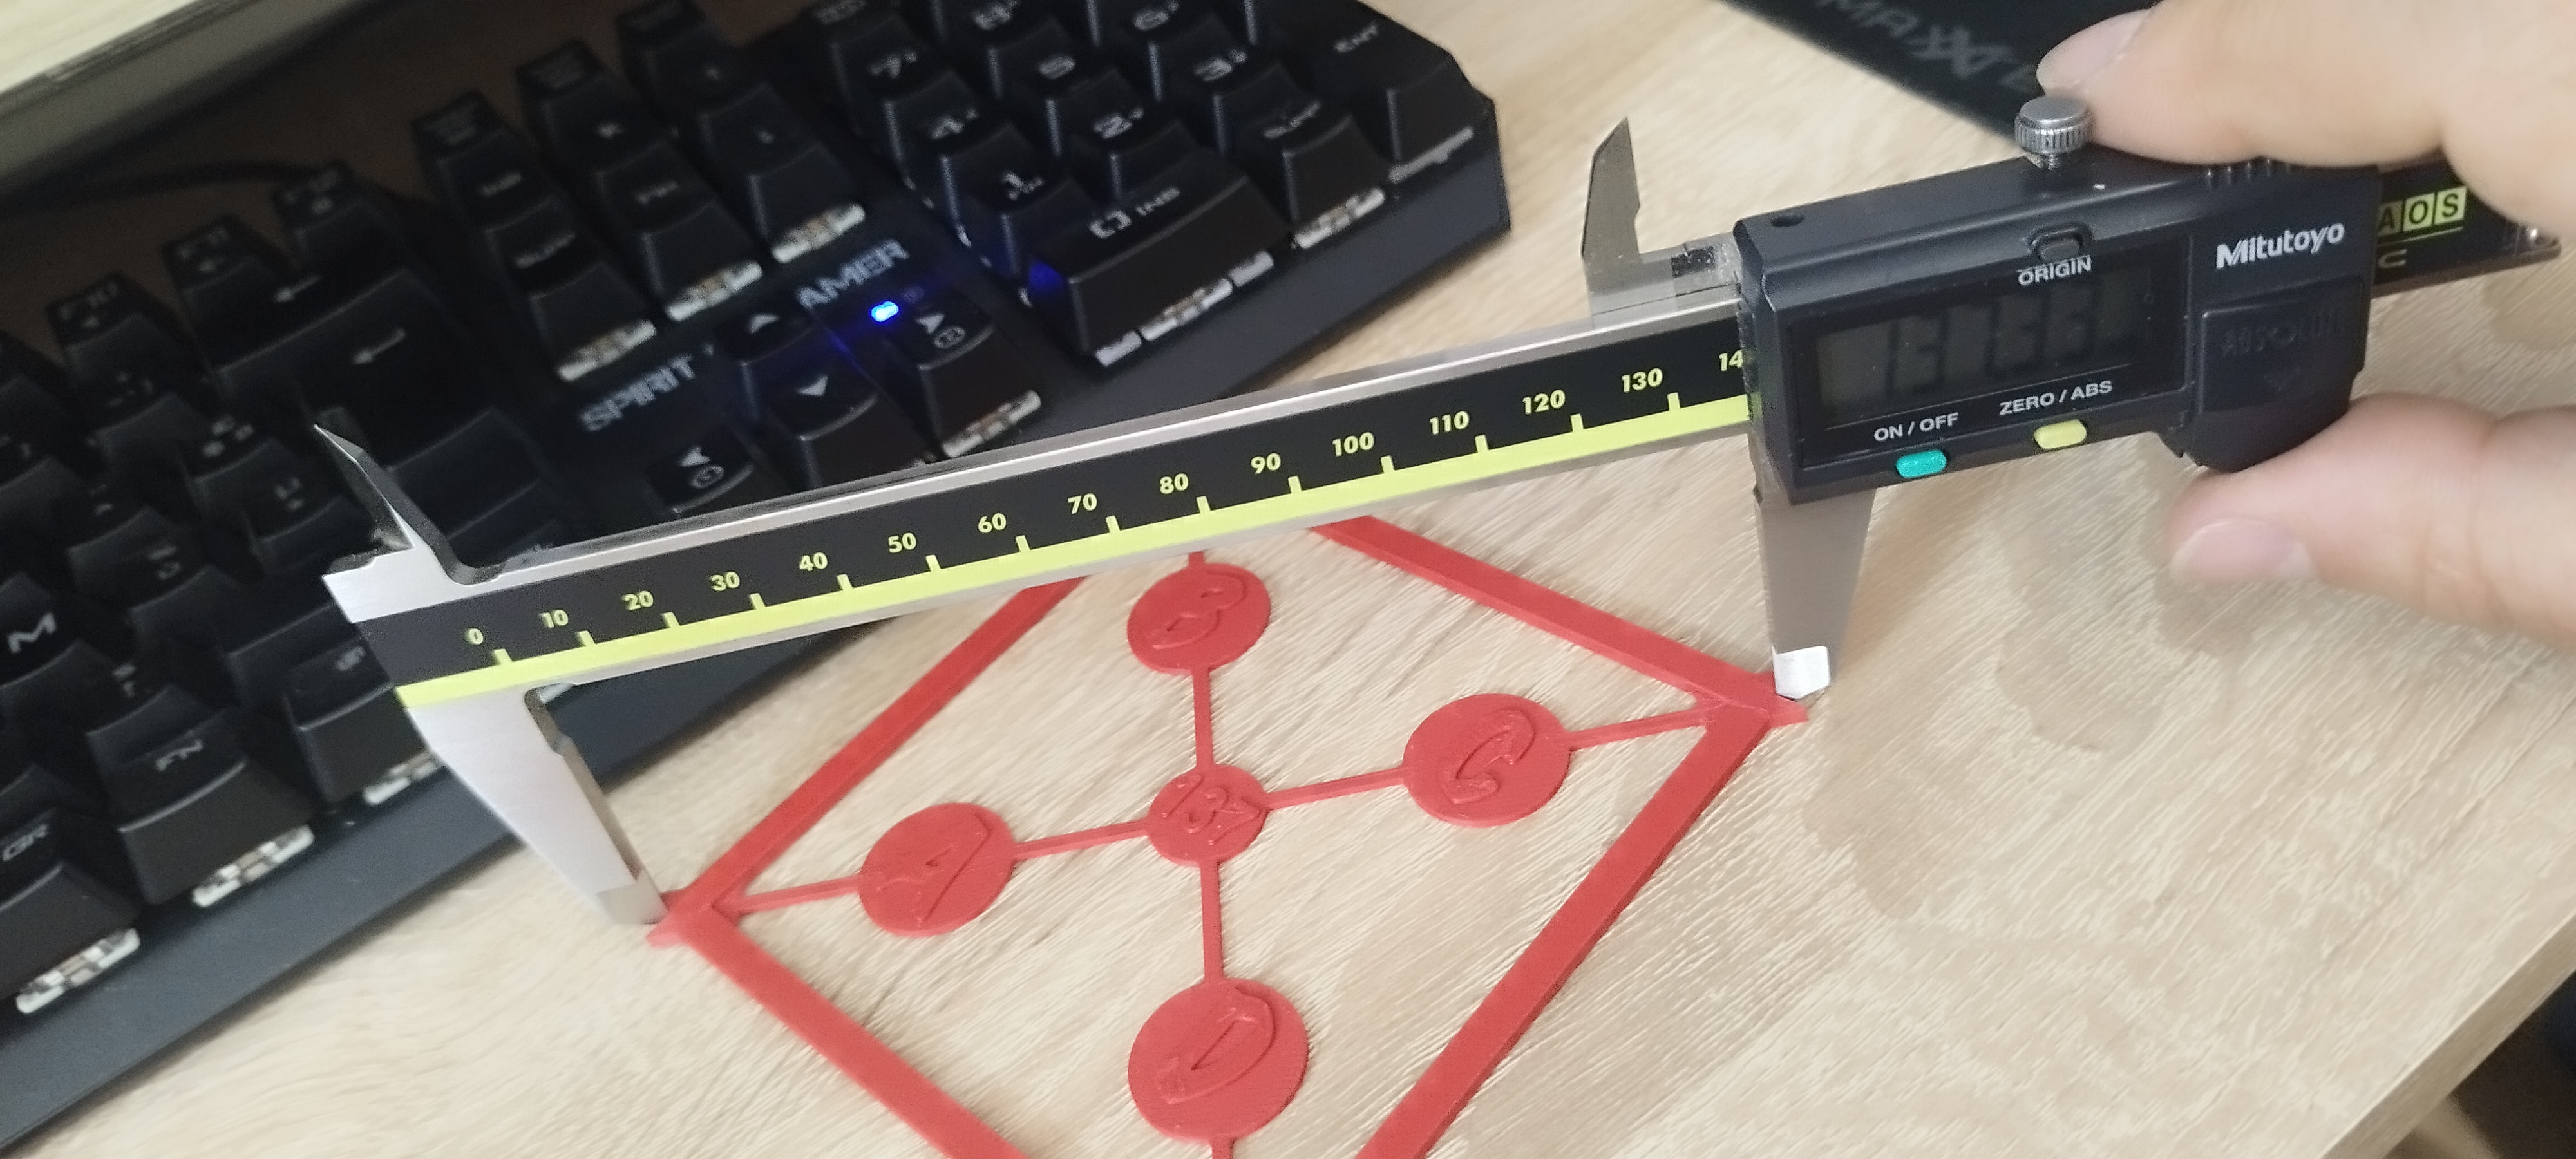 | 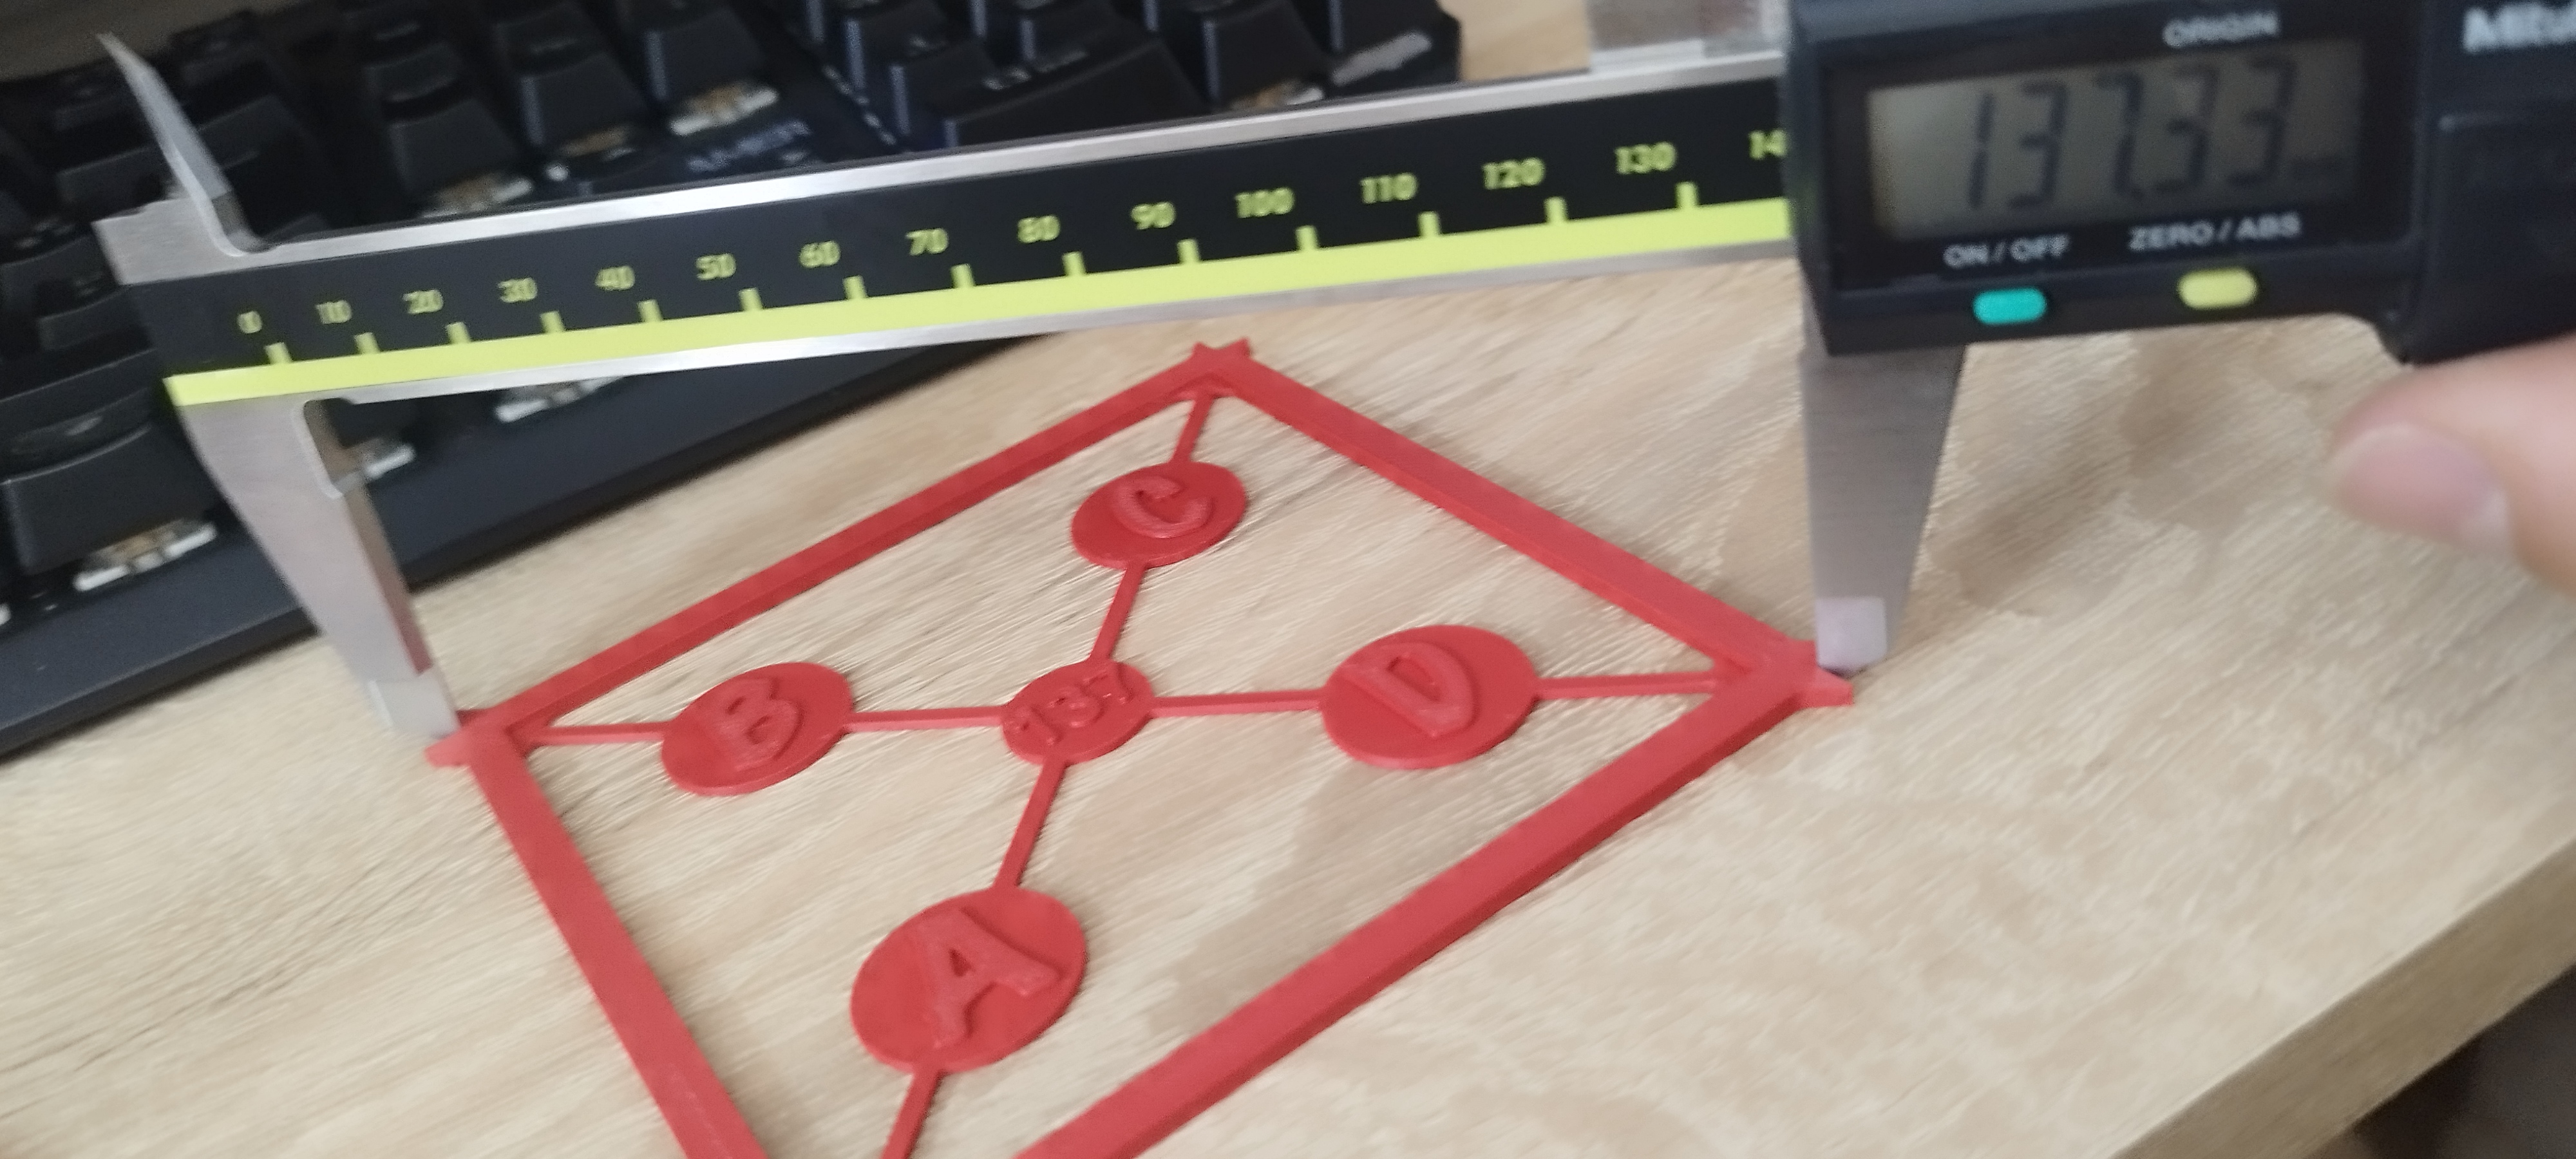 |
This is the resulting zeroing at the 3rd calibration on an A1mini. Remember: only 1 pass could not cancel the skew. | |
Hugs and happy printing, pals!!
What about offering me a coffee ?
[https://buymeacoffee.com/menkheperra](https://buymeacoffee.com/menkheperra)
Don't hesitate to subscribe to my patreon ...
[https://www.patreon.com/claudiogirolami](https://www.patreon.com/claudiogirolami)
…Take a look at my other models…
 |  |  |  |
 |  |  |  |
 |  |  |  |

Gostou deste modelo? Crie uma conta grátis para salvar seus favoritos e voltar a eles depois.
Criar conta