Você está no 3DFinder
Buscamos em Thingiverse, MakerWorld e Printables ao mesmo tempo para te dar o melhor de cada uma.
Descrição
Rotating Driver Stand
Easy to grab, easy to put back.
(suitable for all Drivers with a 12mm shaft).
------------------------------
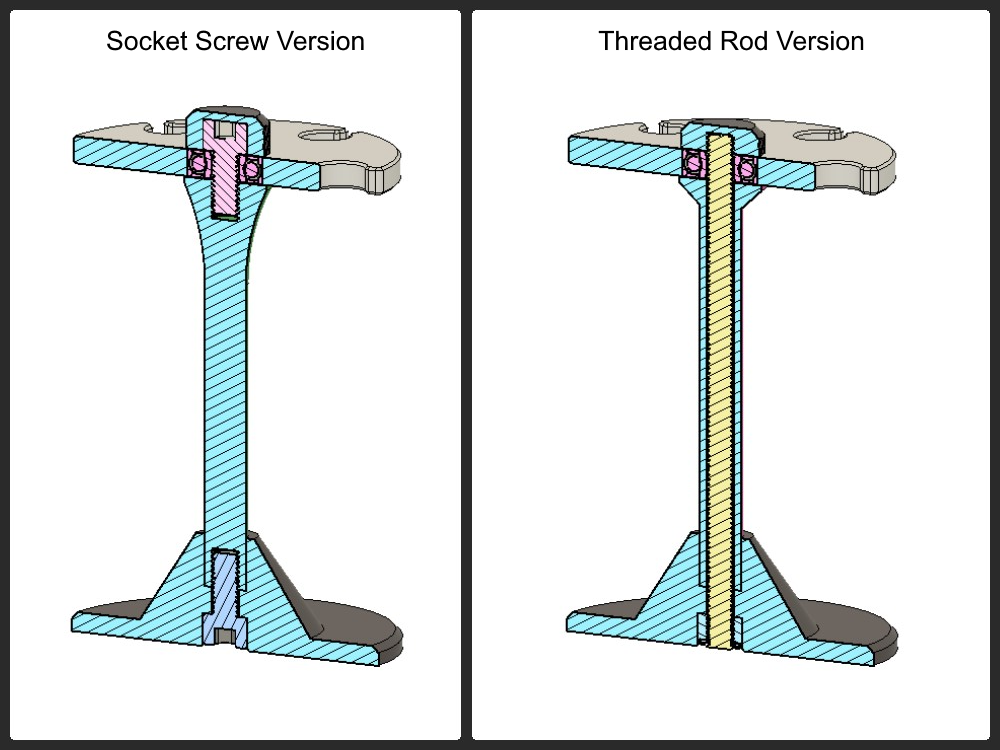
Socket Screw Version:
What you need:
- 1x 608 Ball-bearing
- 2x (8x16mm) Hex Screws - nothing more - nothing less ;)
Preparation:
Insert the 608 Ball-bearing into the “Rotating plate”.
To do so, place the bearing on a flat and hard surface and locate the “Rotating plate” on to the bearing and give it a good push until its level.
⚠ Don't do this on a wooden or delicate desk! The bearing could leave a dent or imprint.
Assembly:
- Push the “Pole” into the “Base” and screw the Socket Screw into place until sitting flush.
- Press the Socket Screw Head into the “Cap”.
- Drop the 0.2mm Spacer on the “Caps” Screw.
- Locate the “Rotating plate” on the “Caps” Screw
- Now Screw both assemblies together and adjust the play of the “Rotating plate” by tightening or loosening the Cap.

Threaded Rod Version:
What you need:
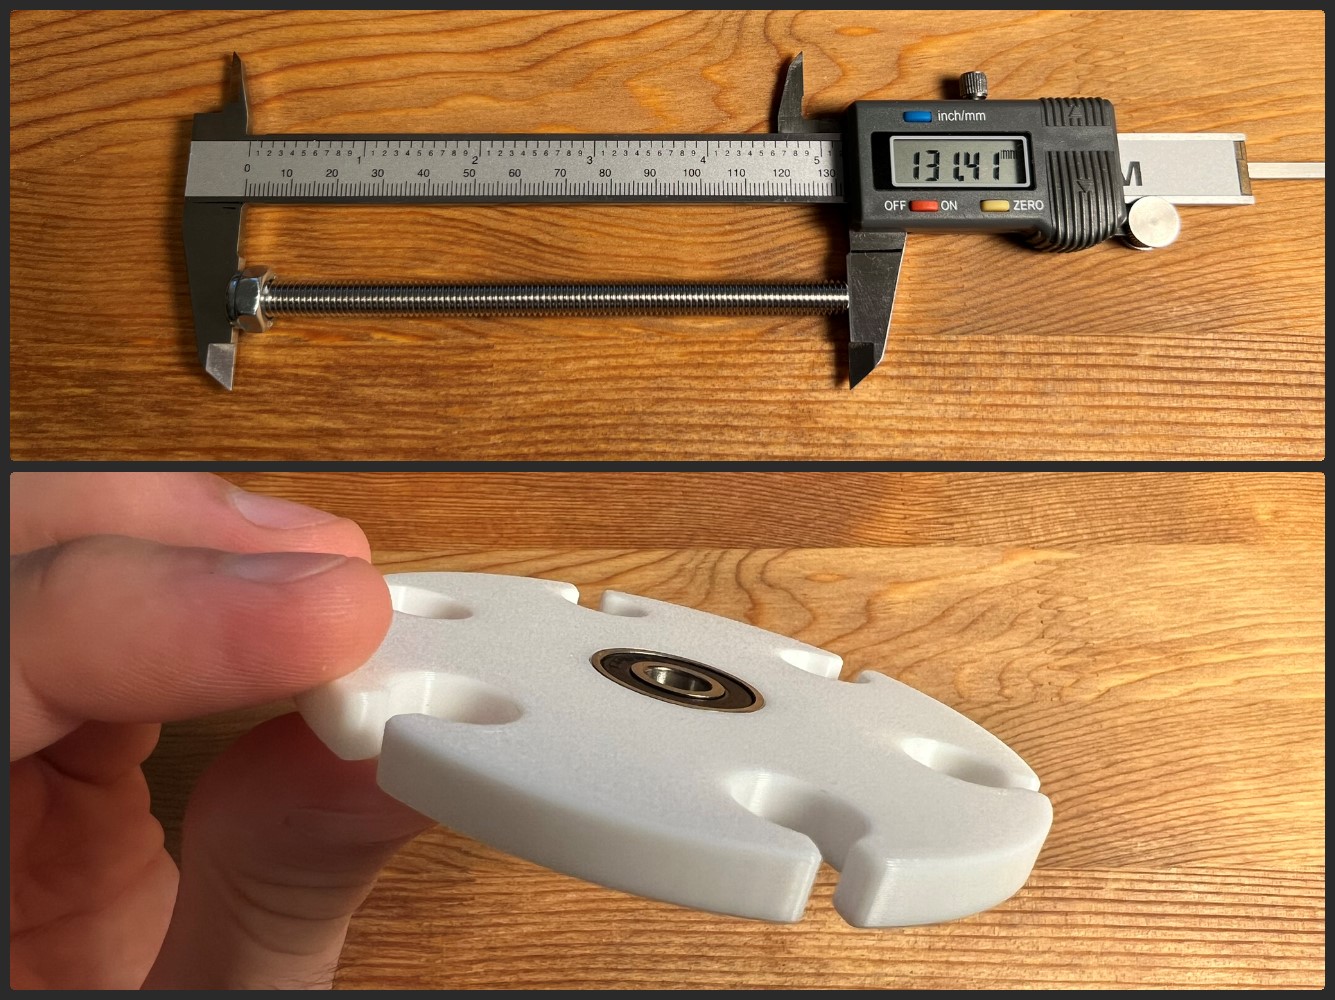
- 1x 608 Ball-bearing
- 1x 8mm Threaded Rod
- 1x 8mm Nylon-Hex-nut
Preparation:
Cut the threaded rod to length (131 - 132mm)
⚠ To avoid cutting yourself further down the build, please file down the sharp edge.
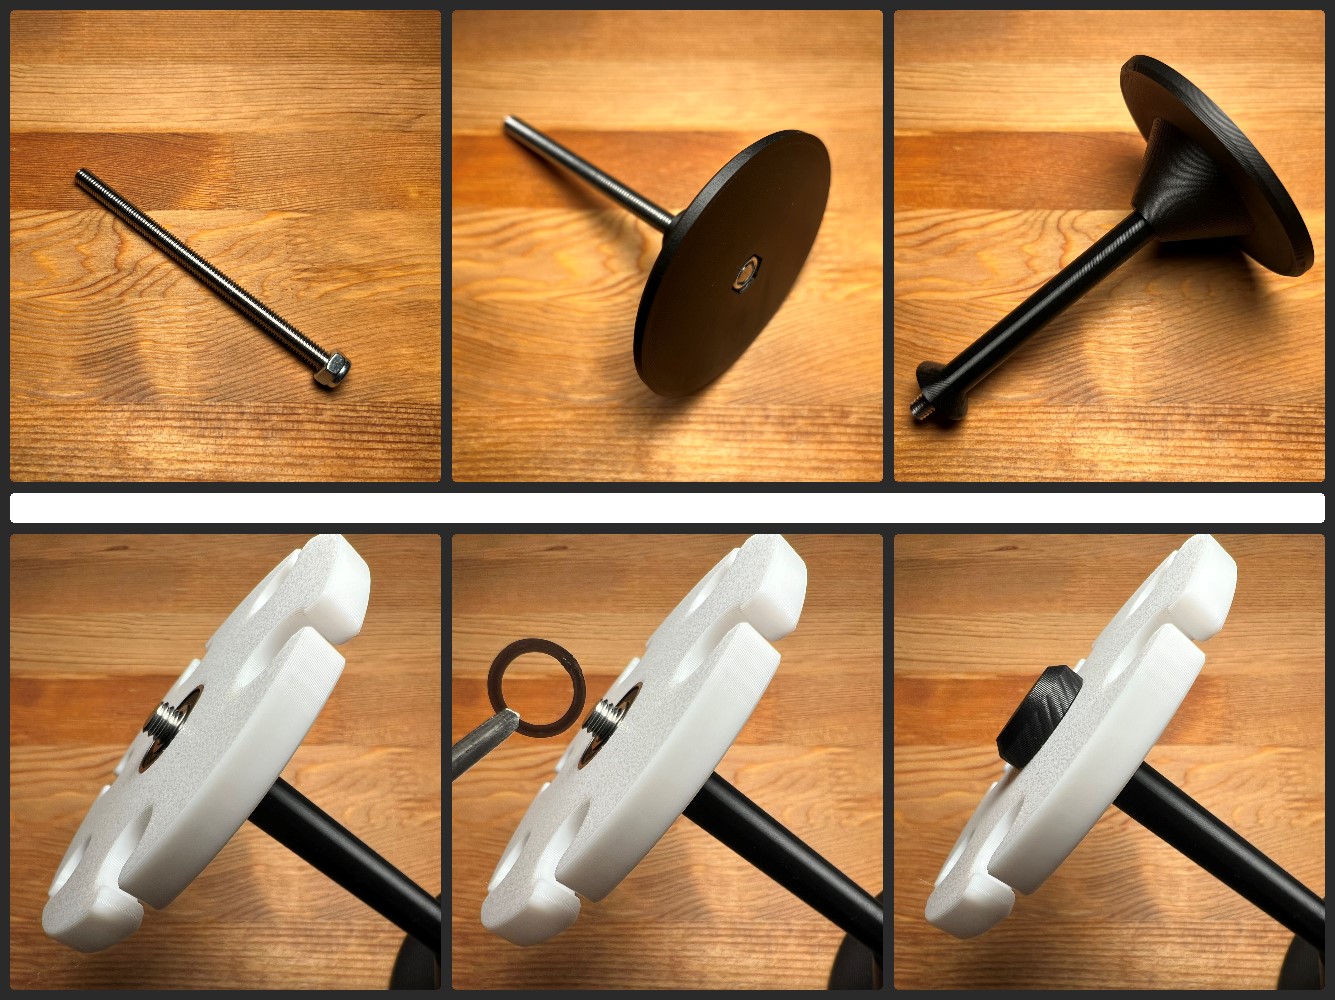
Screw the 8mm Hex-nut on the Threaded Rods end until it sits flush.
⚠ You might need a vise to hold the Threaded Rod or use the Double-nut-trick ;)
Insert the 608 Ball-bearing into the “Rotating plate”.
To do so, place the bearing on a flat and hard surface and locate the “Rotating plate” on to the bearing and give it a good push until its level.
⚠ Don't do this on a wooden or delicate desk! The bearing could leave a dent or imprint.
Assembly:
- Slide the “Base” over the Threaded Rod (..and align the seam as you're at it)
- Slide the “Pole” over the Threaded Rod too and push it into the “Base”.
- Now locate the “Rotating plate”.
- Drop the 0.2mm “Spacer” on top of the Ball-bearing.
- Screw the “Cap” into place and adjust the play of the “Rotating plate” by tightening or loosening.
Note:
If printed in matte PETG tolerances are tighter than with normal PETG or PLA.
"Cap 0.1" will be too tight!! - Print “Cap 0.2” instead. (0.2mm tolerance)
* My offer to you:
If you like the design, but would like a version with different sized holes to fit your Drivers or wish a “Rotating plate” with more holes, please let me know in the comments or via DM and I'll see what I can do.
Happy printing and mounting everyone!!
------------------------------
If you like my designs, I’d really appreciate your feedback!
It would mean the woooorld to me. 😎
