Ir para conteúdo
3DFinder
Entrar

Você está no 3DFinder

Buscamos em Thingiverse, MakerWorld e Printables ao mesmo tempo para te dar o melhor de cada uma.

Buscar mais como este
Modelo 3D Pixel Sword Wall Sconce por MaKim no MakerWorld

Descrição

This wall sconce is fairly large (78cm) and puts off a good amount of light but can be printed on an A1 Mini.

  • Easy assembly with no soldering!
  • Wall mount is included.
  • Customize your backlight color using 3D printed ‘gels’
  • Only a few non-printed parts are needed:
    • LED Strip: flexible, 12v, 8mm - here's the one used in these photos along with this power cord.
    • Glue: only a little is needed - I use 9001 but your favorite should work too.

Printed Parts
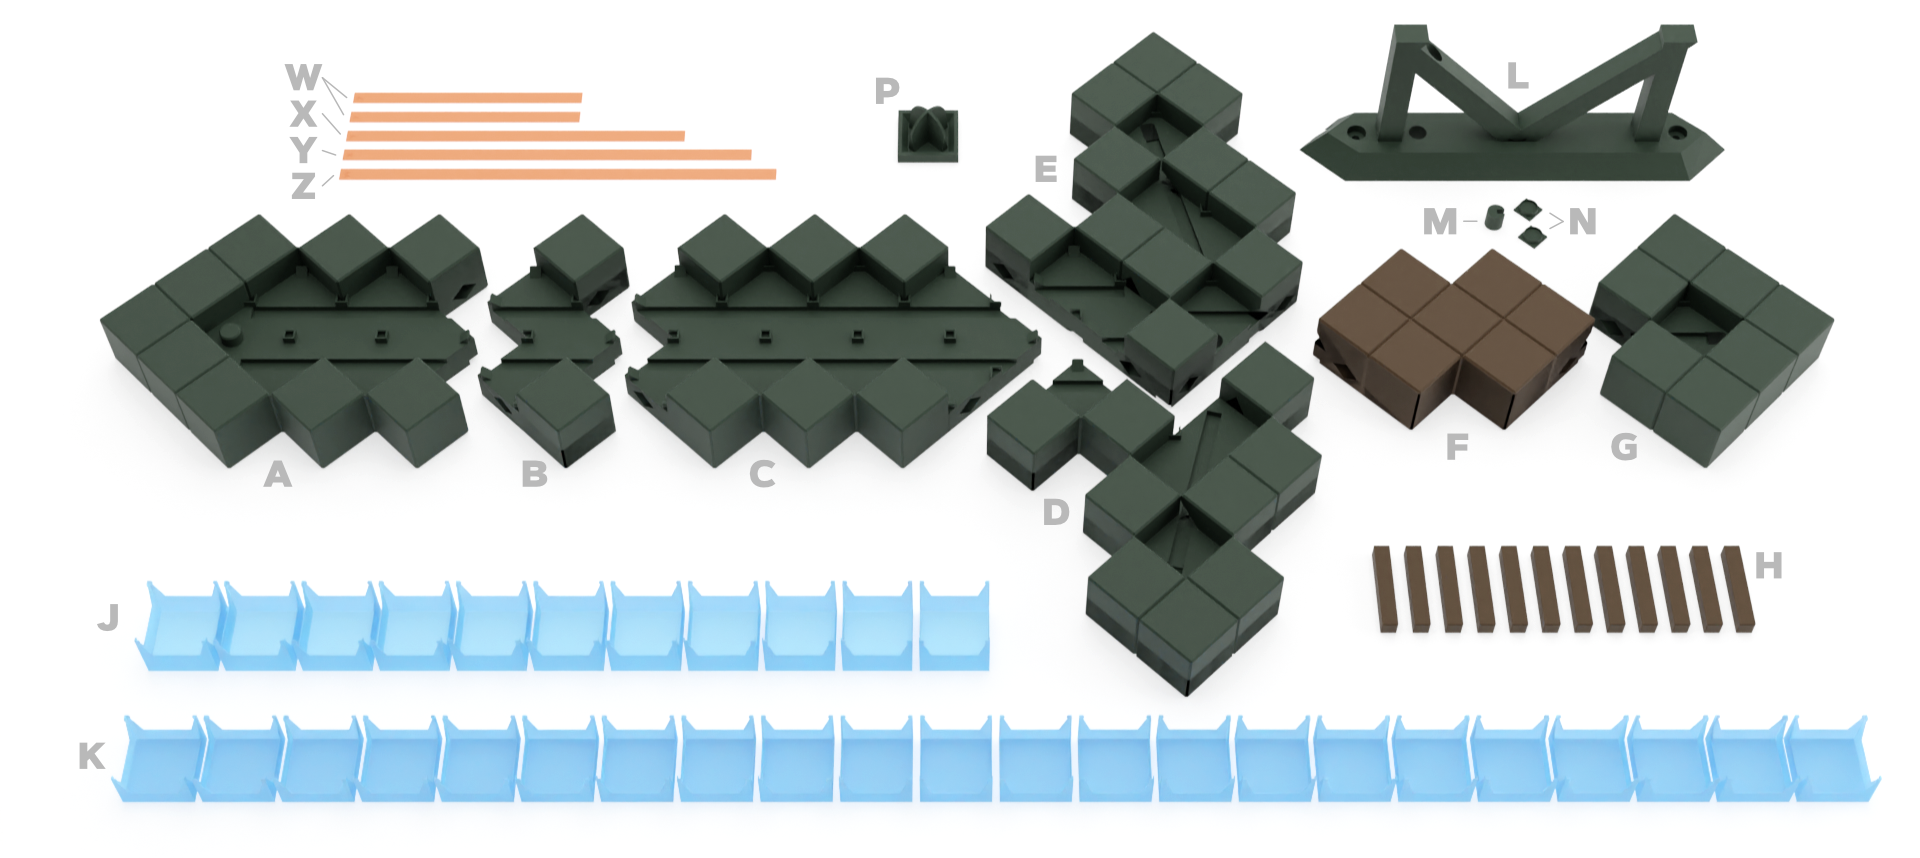
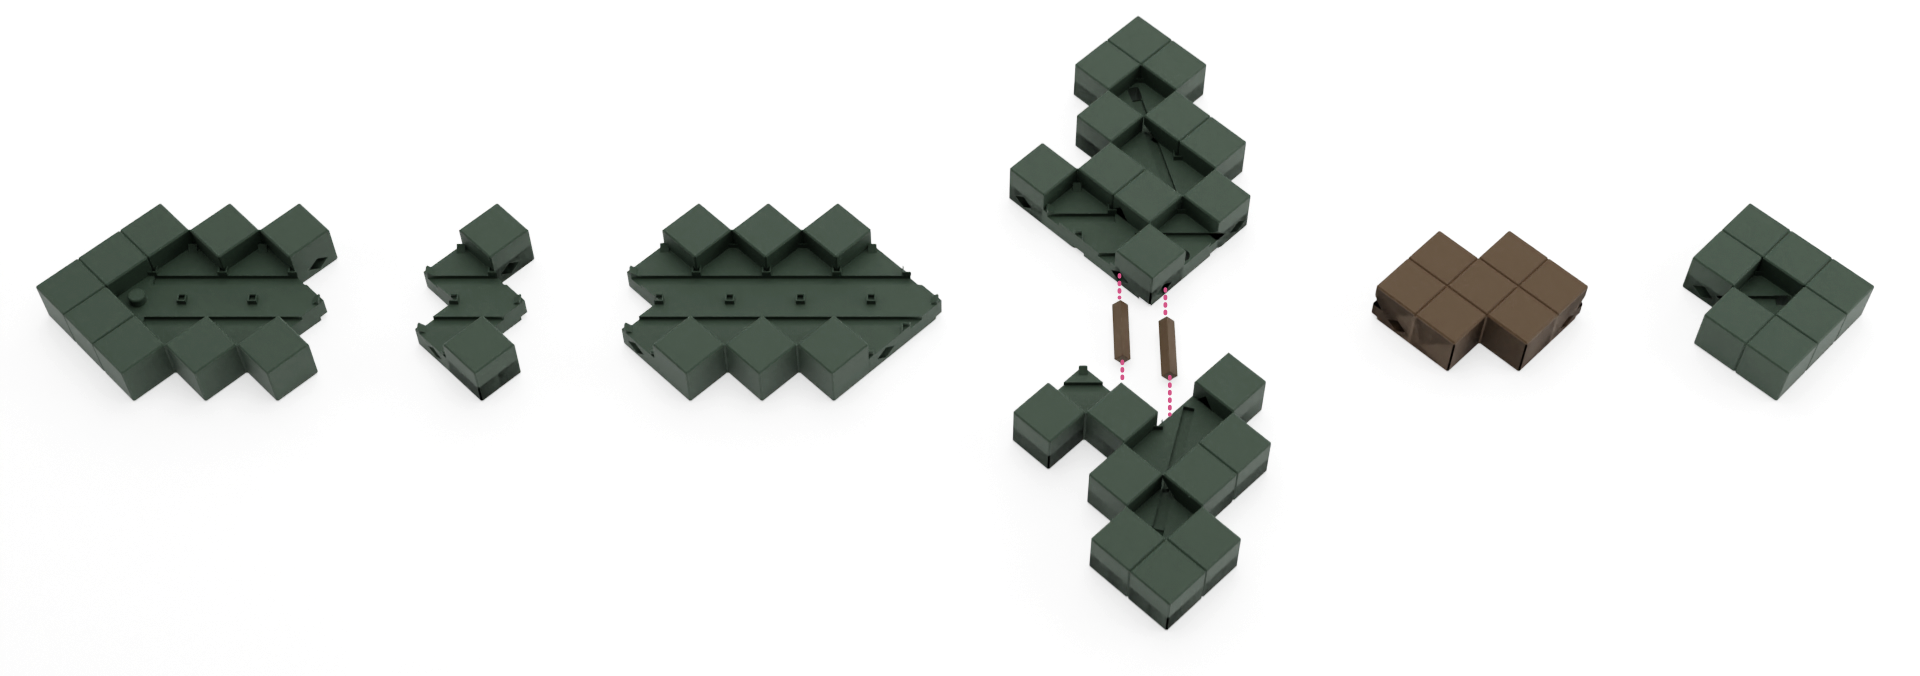
  • A-G: based parts of the sword
  • H: pegs used to attach the sword parts
  • J & K: ‘pixels’ that cover and diffuse the front lights
  • L-N: wall mount and covers for power and screw holes
  • P: optional tool for installing pixels
  • W-Z: thin strips used to change the color of the back light


Assembly Instructions

In addition to the step-by-step instructions below, you can view each step in the video below.

Step 1

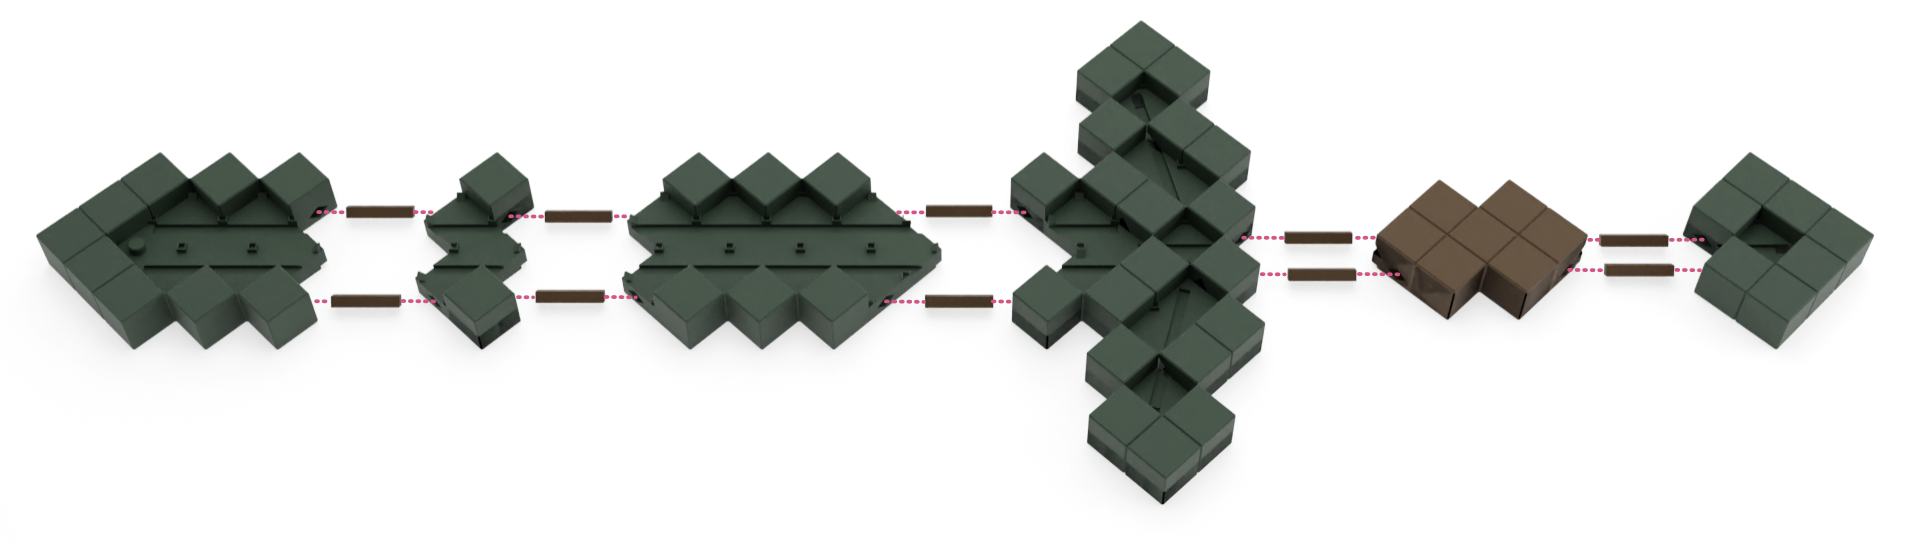
  • Use two pegs and a small amount of glue, attach the two prices of the guard.
  • It can be helpful to place the pieces on a flat surface so that they're easier to align.
  • The pegs will be snug - you may want to test the fit an alignment before applying glue.

Step 2:

  • Use the remaining pegs to connect the remaining sword pieces as shown.
  • The spacing of the pegs should only allow for parts to be connected in the correct orientation. If the pegs aren't lining up, try rotating the piece 180˚.

Step 3:

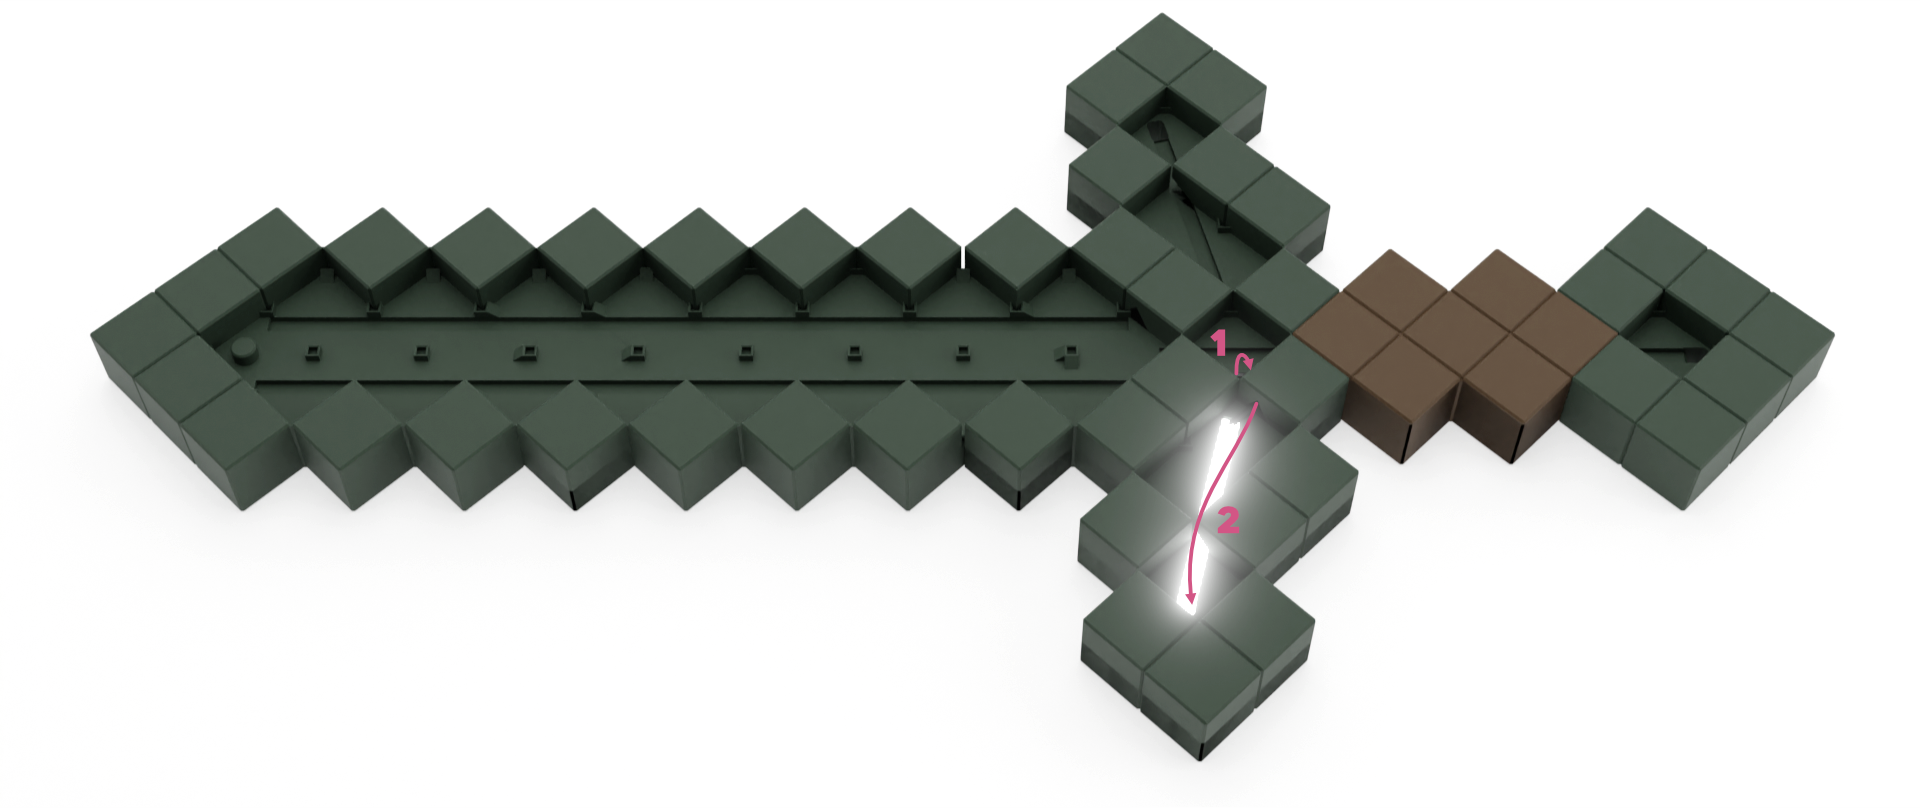
  • Begin placing the LED strip while ensuring that the power plug extends through the back of the sword through the hole at location #1 in the image above.
  • Snap the LED strip into the channel & feed it through to the back of the sword.

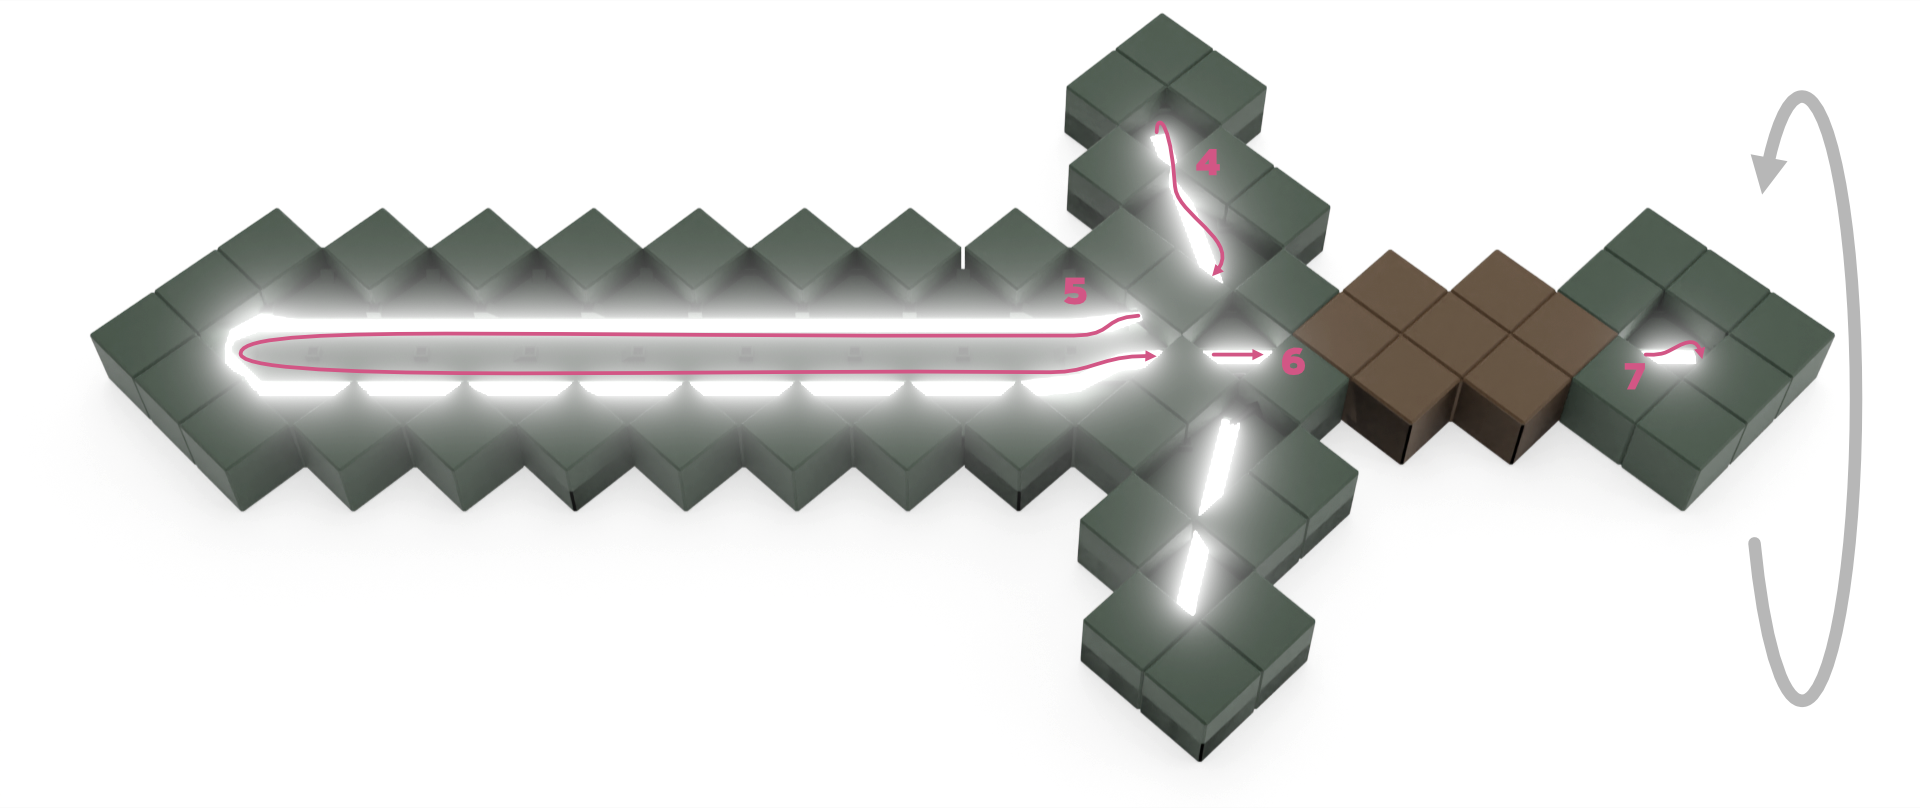
Step 4:

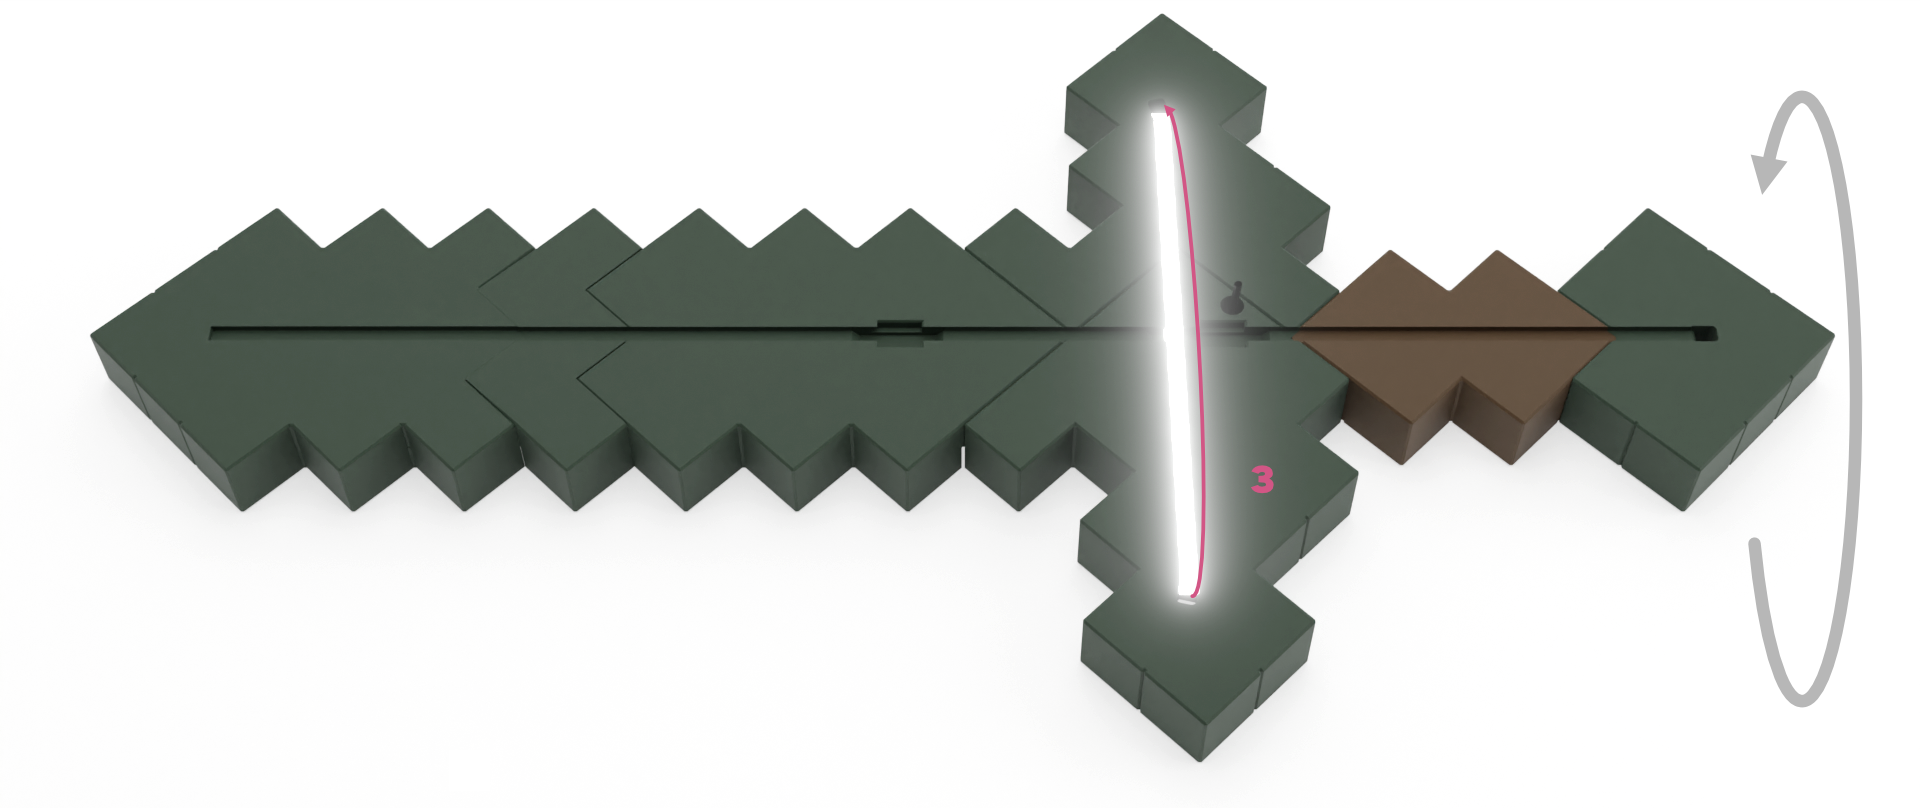
  • Flip the sword over and run the LED through the channel as shown.
  • Press down a little in the middle to leave room for the overlapping LED in step 6.
  • Pass the strip back through to the front side.

Step 5:

  • Feed the LED through the openings and click it into the channels in the order shown above.
  • After reaching the pommel, pass the LED through to the back of the sword as shown at point 7.

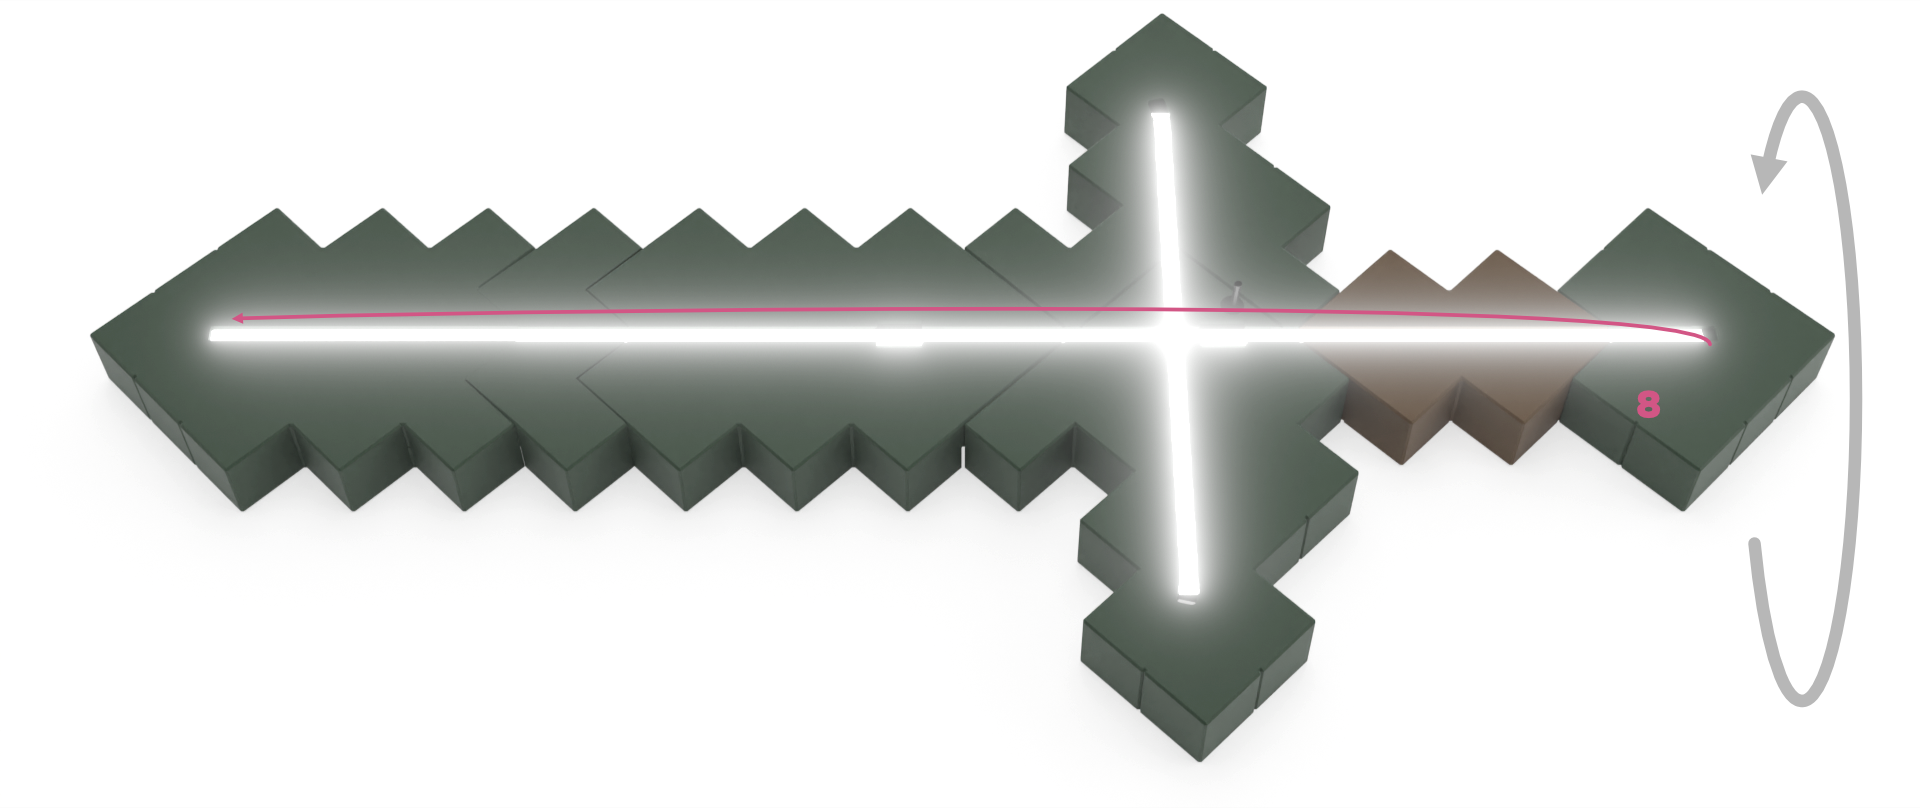
Step 6:

  • Flip the sword over & run the LED to the tip of the sword.
  • Leave a little extra room in the two areas where the sword will connect to the wall mount.

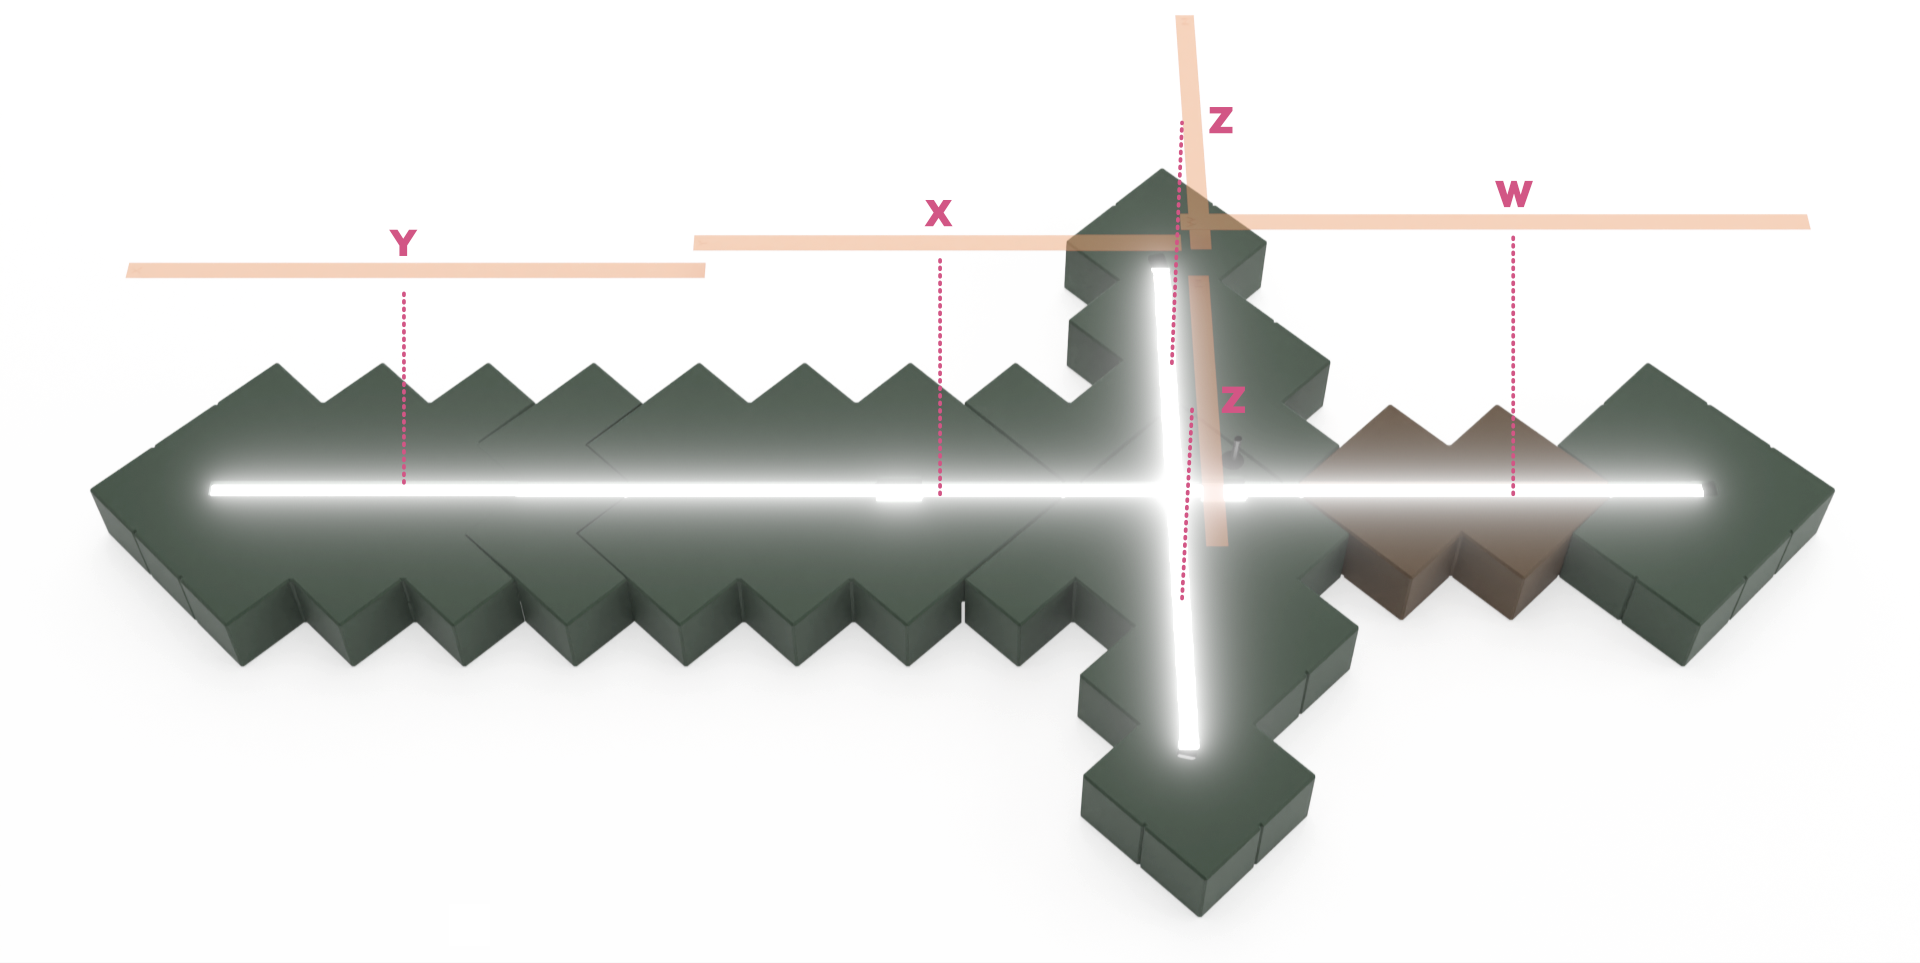
Step 7 (optional):

  • If you'd like to change the color of the backlight on your wall, you can print pieces W, X, Y & Z in light, opaque PLA.
  • These strips are sized to snap into the LED channels directly on top of the LEDs - the can also function to make the backlight somewhat less bright.

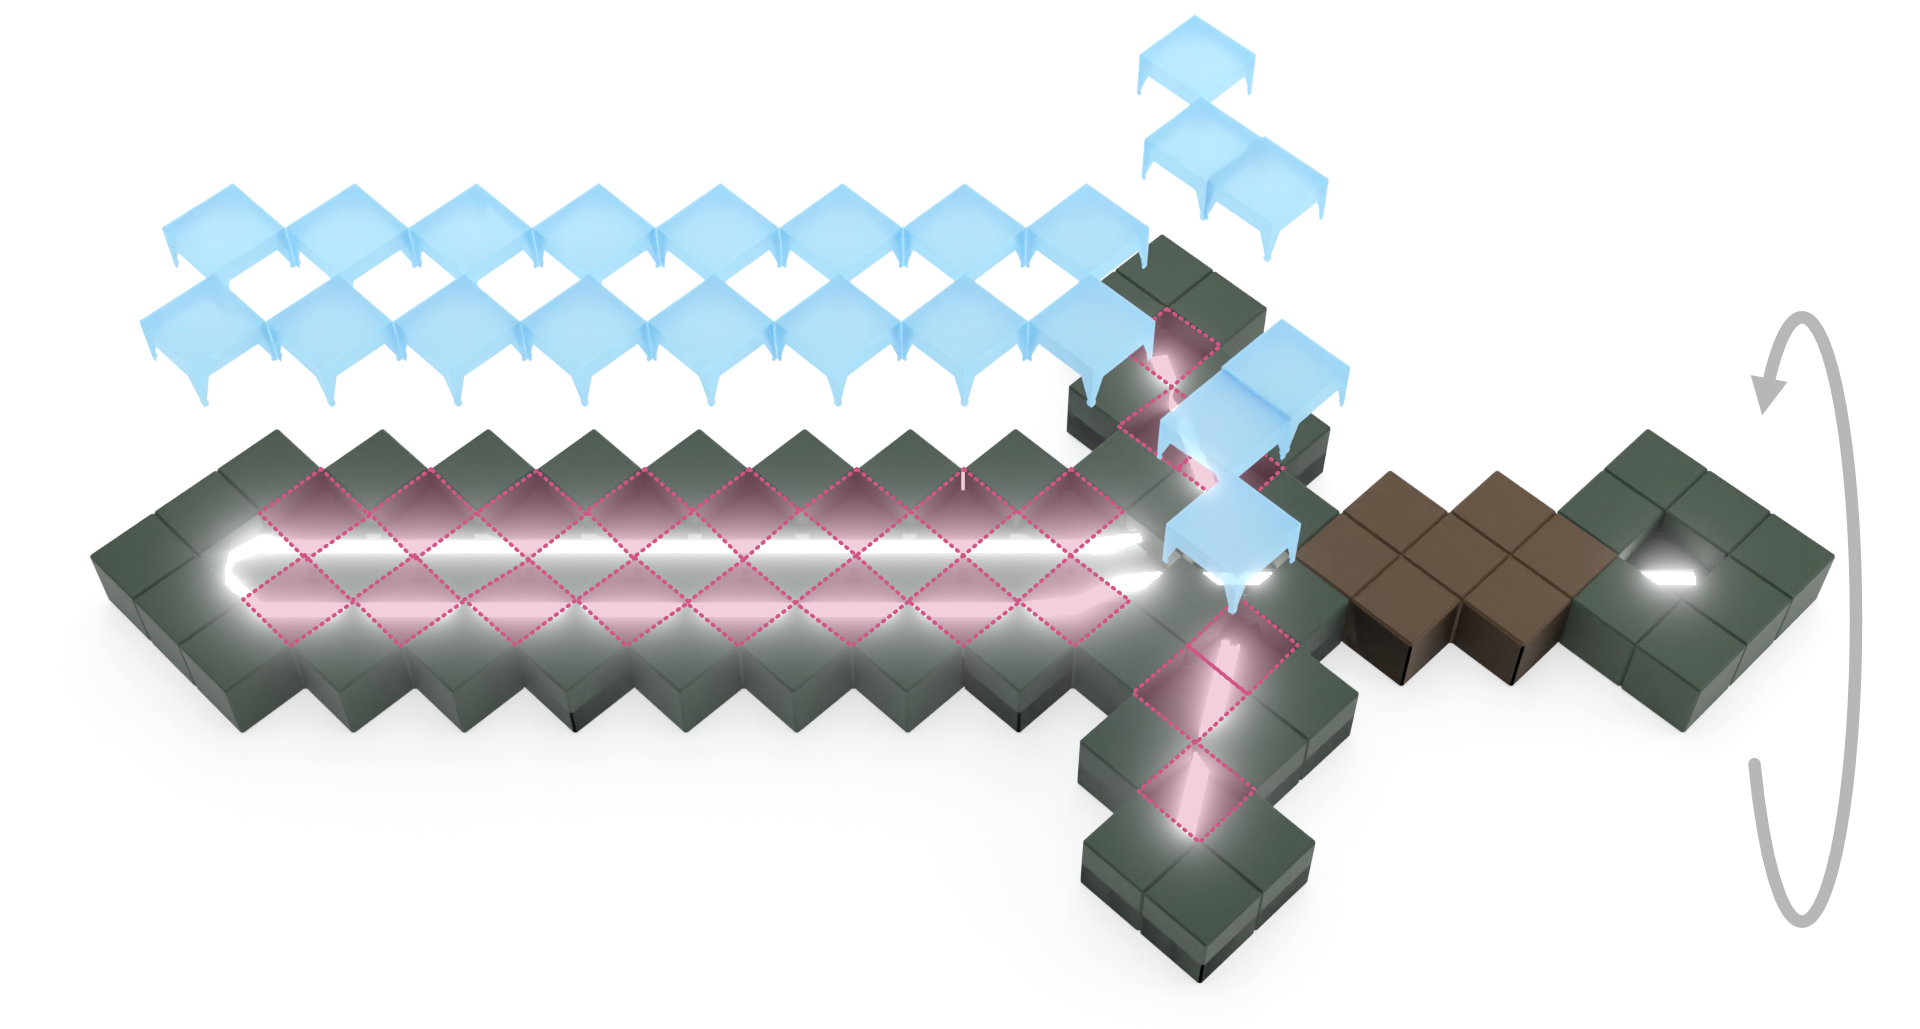
Step 8:

  • Flip the sword back to the front
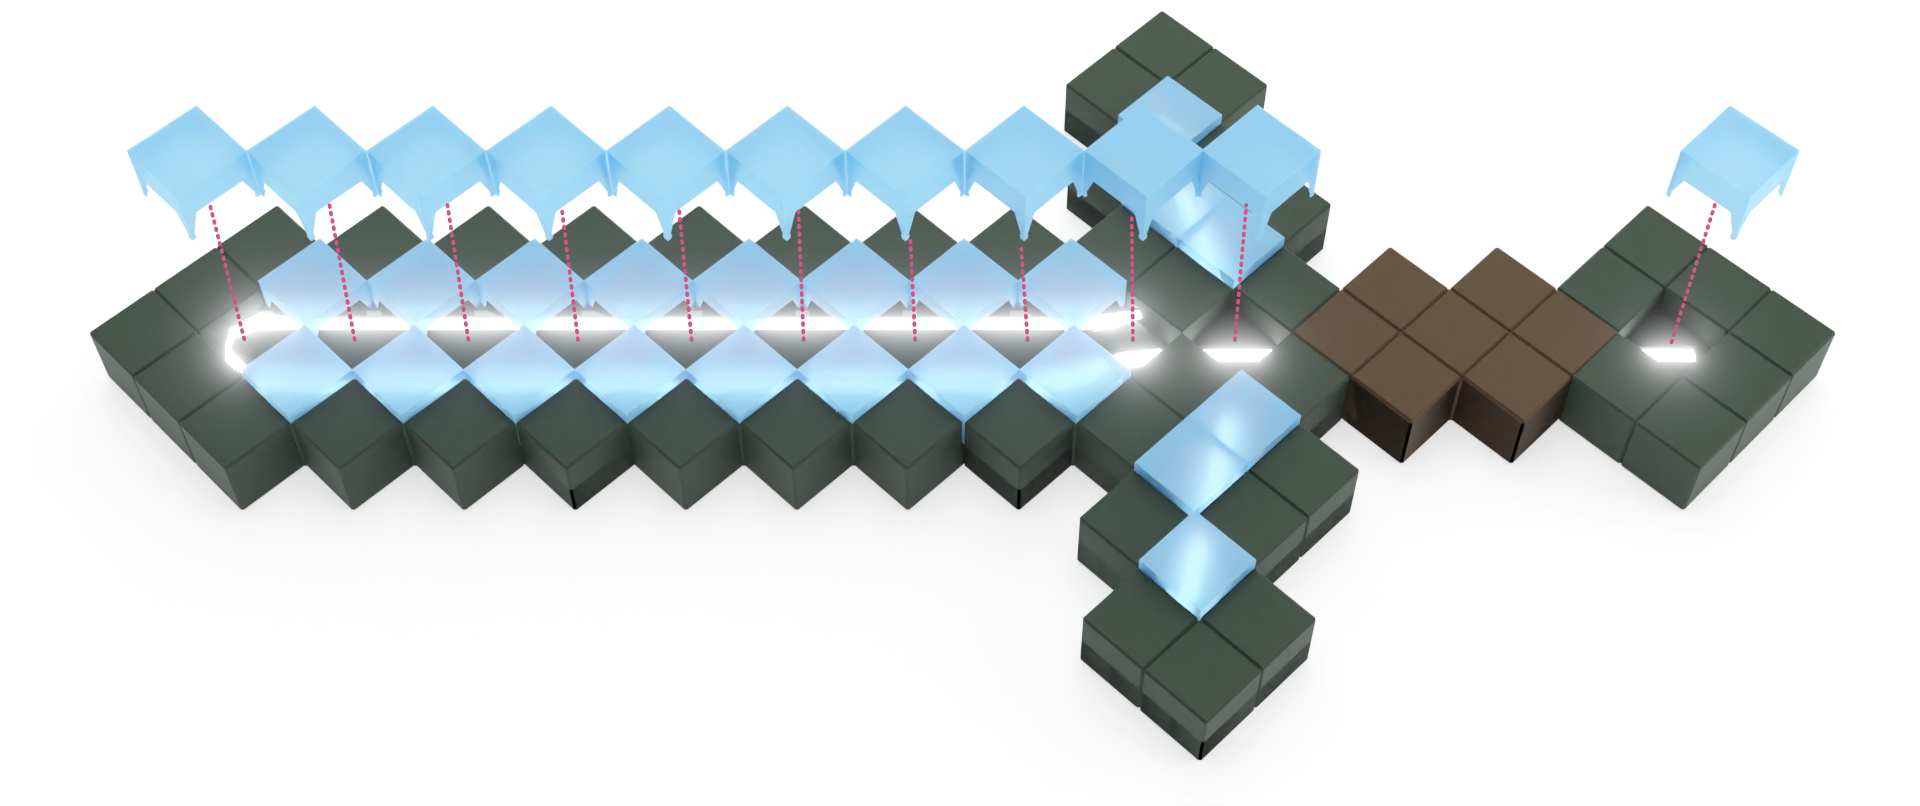
  • Using the 22 short pixels, click them into all but the center row.
  • The feet of the pixels should alight and snap into the slots in the surface.
  • Because the pixels are printed thin, you can use the optional tool (P) to press evenly on the top surface with less likelihood of breaking.

Step 9:

  • Using the tall pixels, click them into place in the center of the sword in the remaining slots.
  • The fit for these pixels may be tight - it's ok if they warp slightly at the sides.

Step 10 & 11:

  • Thread the power cord through the back of the wall mount. Leave a small amount of slack.
  • Attach the wall mount with two screws and cover the screw hole with plugs.
  • Attach the power to the sword.
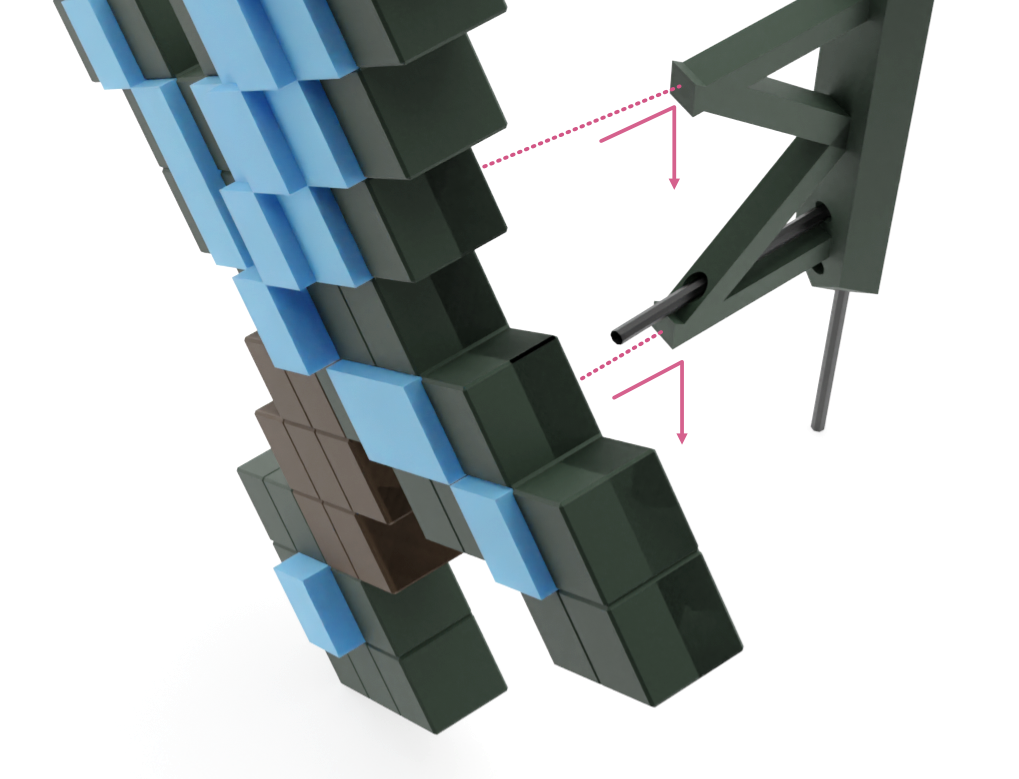
  • Attach the sword to the mount by pushing in toward the wall and then down to lock in place.


Printing Tips

  • No supports should be required for any of the parts.
  • Both the blue pixels and the orange LED covers use opaque, light-colored PLA to diffuse light.
  • The blue pixels are intentionally very thin and can be susceptible to stringing and rough edges. However, some the issues shown in the photo below should not stop the part from working. Because only the top of the pixels are visible, you should still be able to click them into place
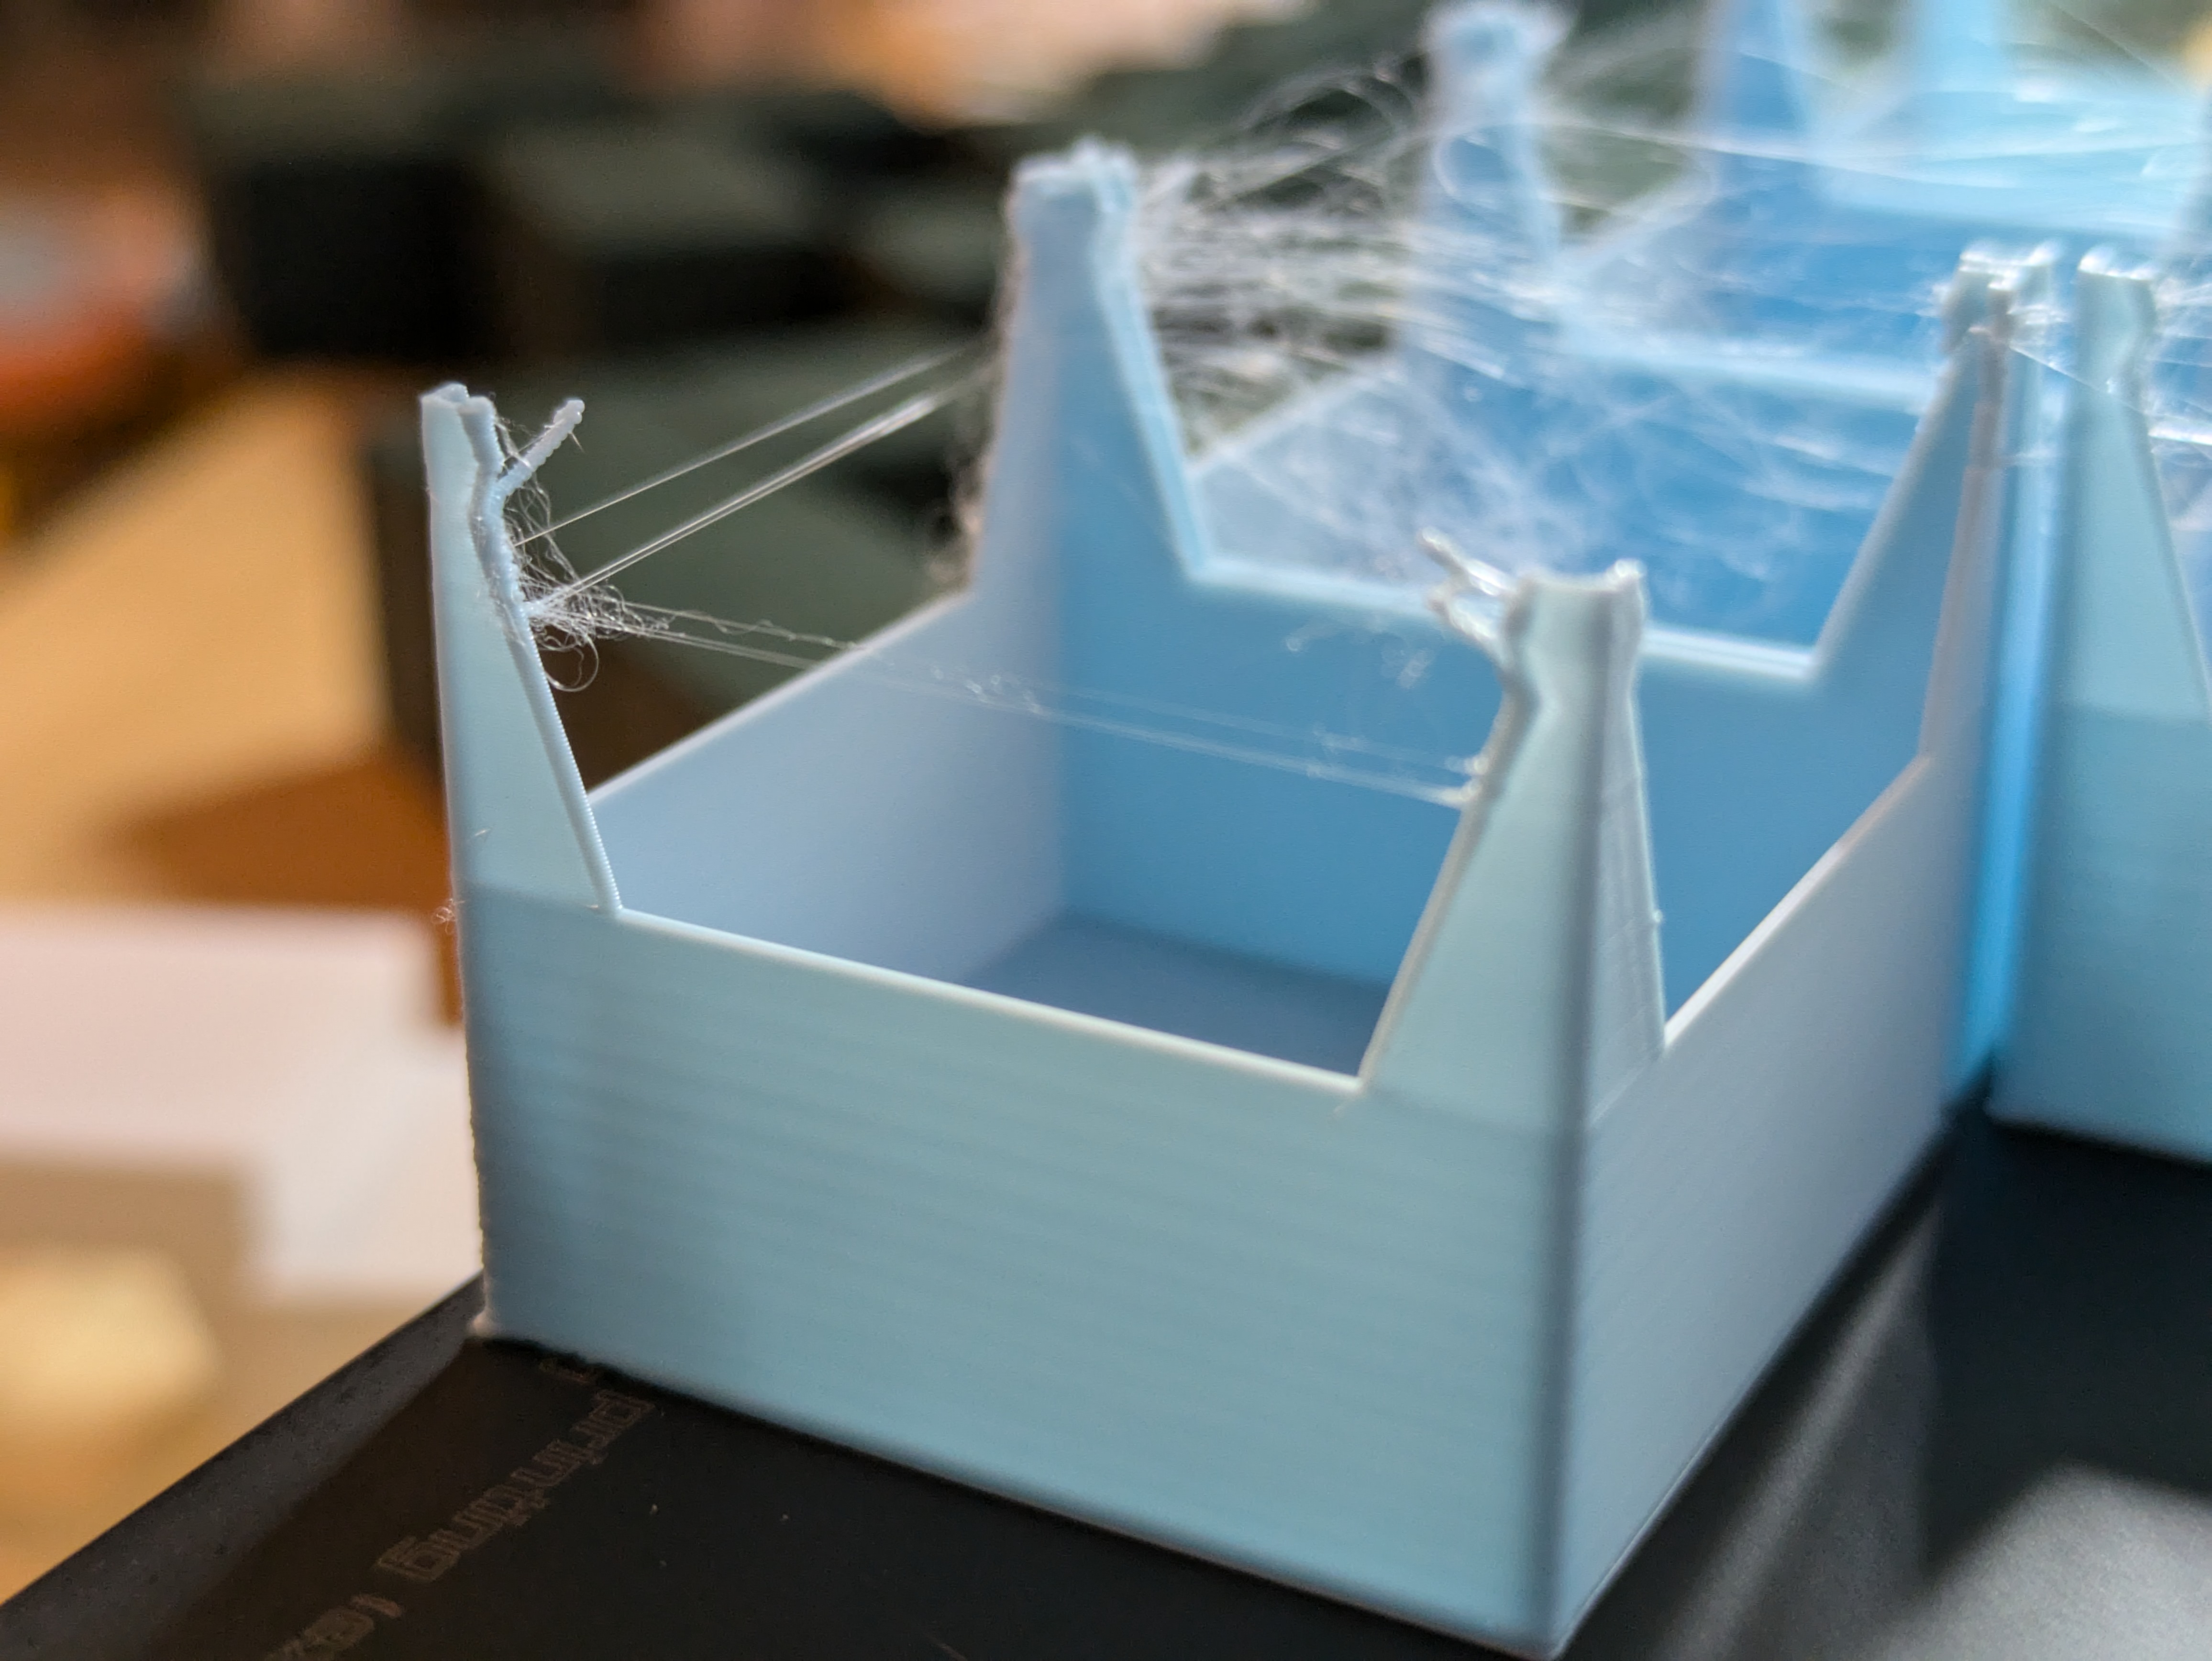
    • Wet PLA with stringing - note that these will still work!
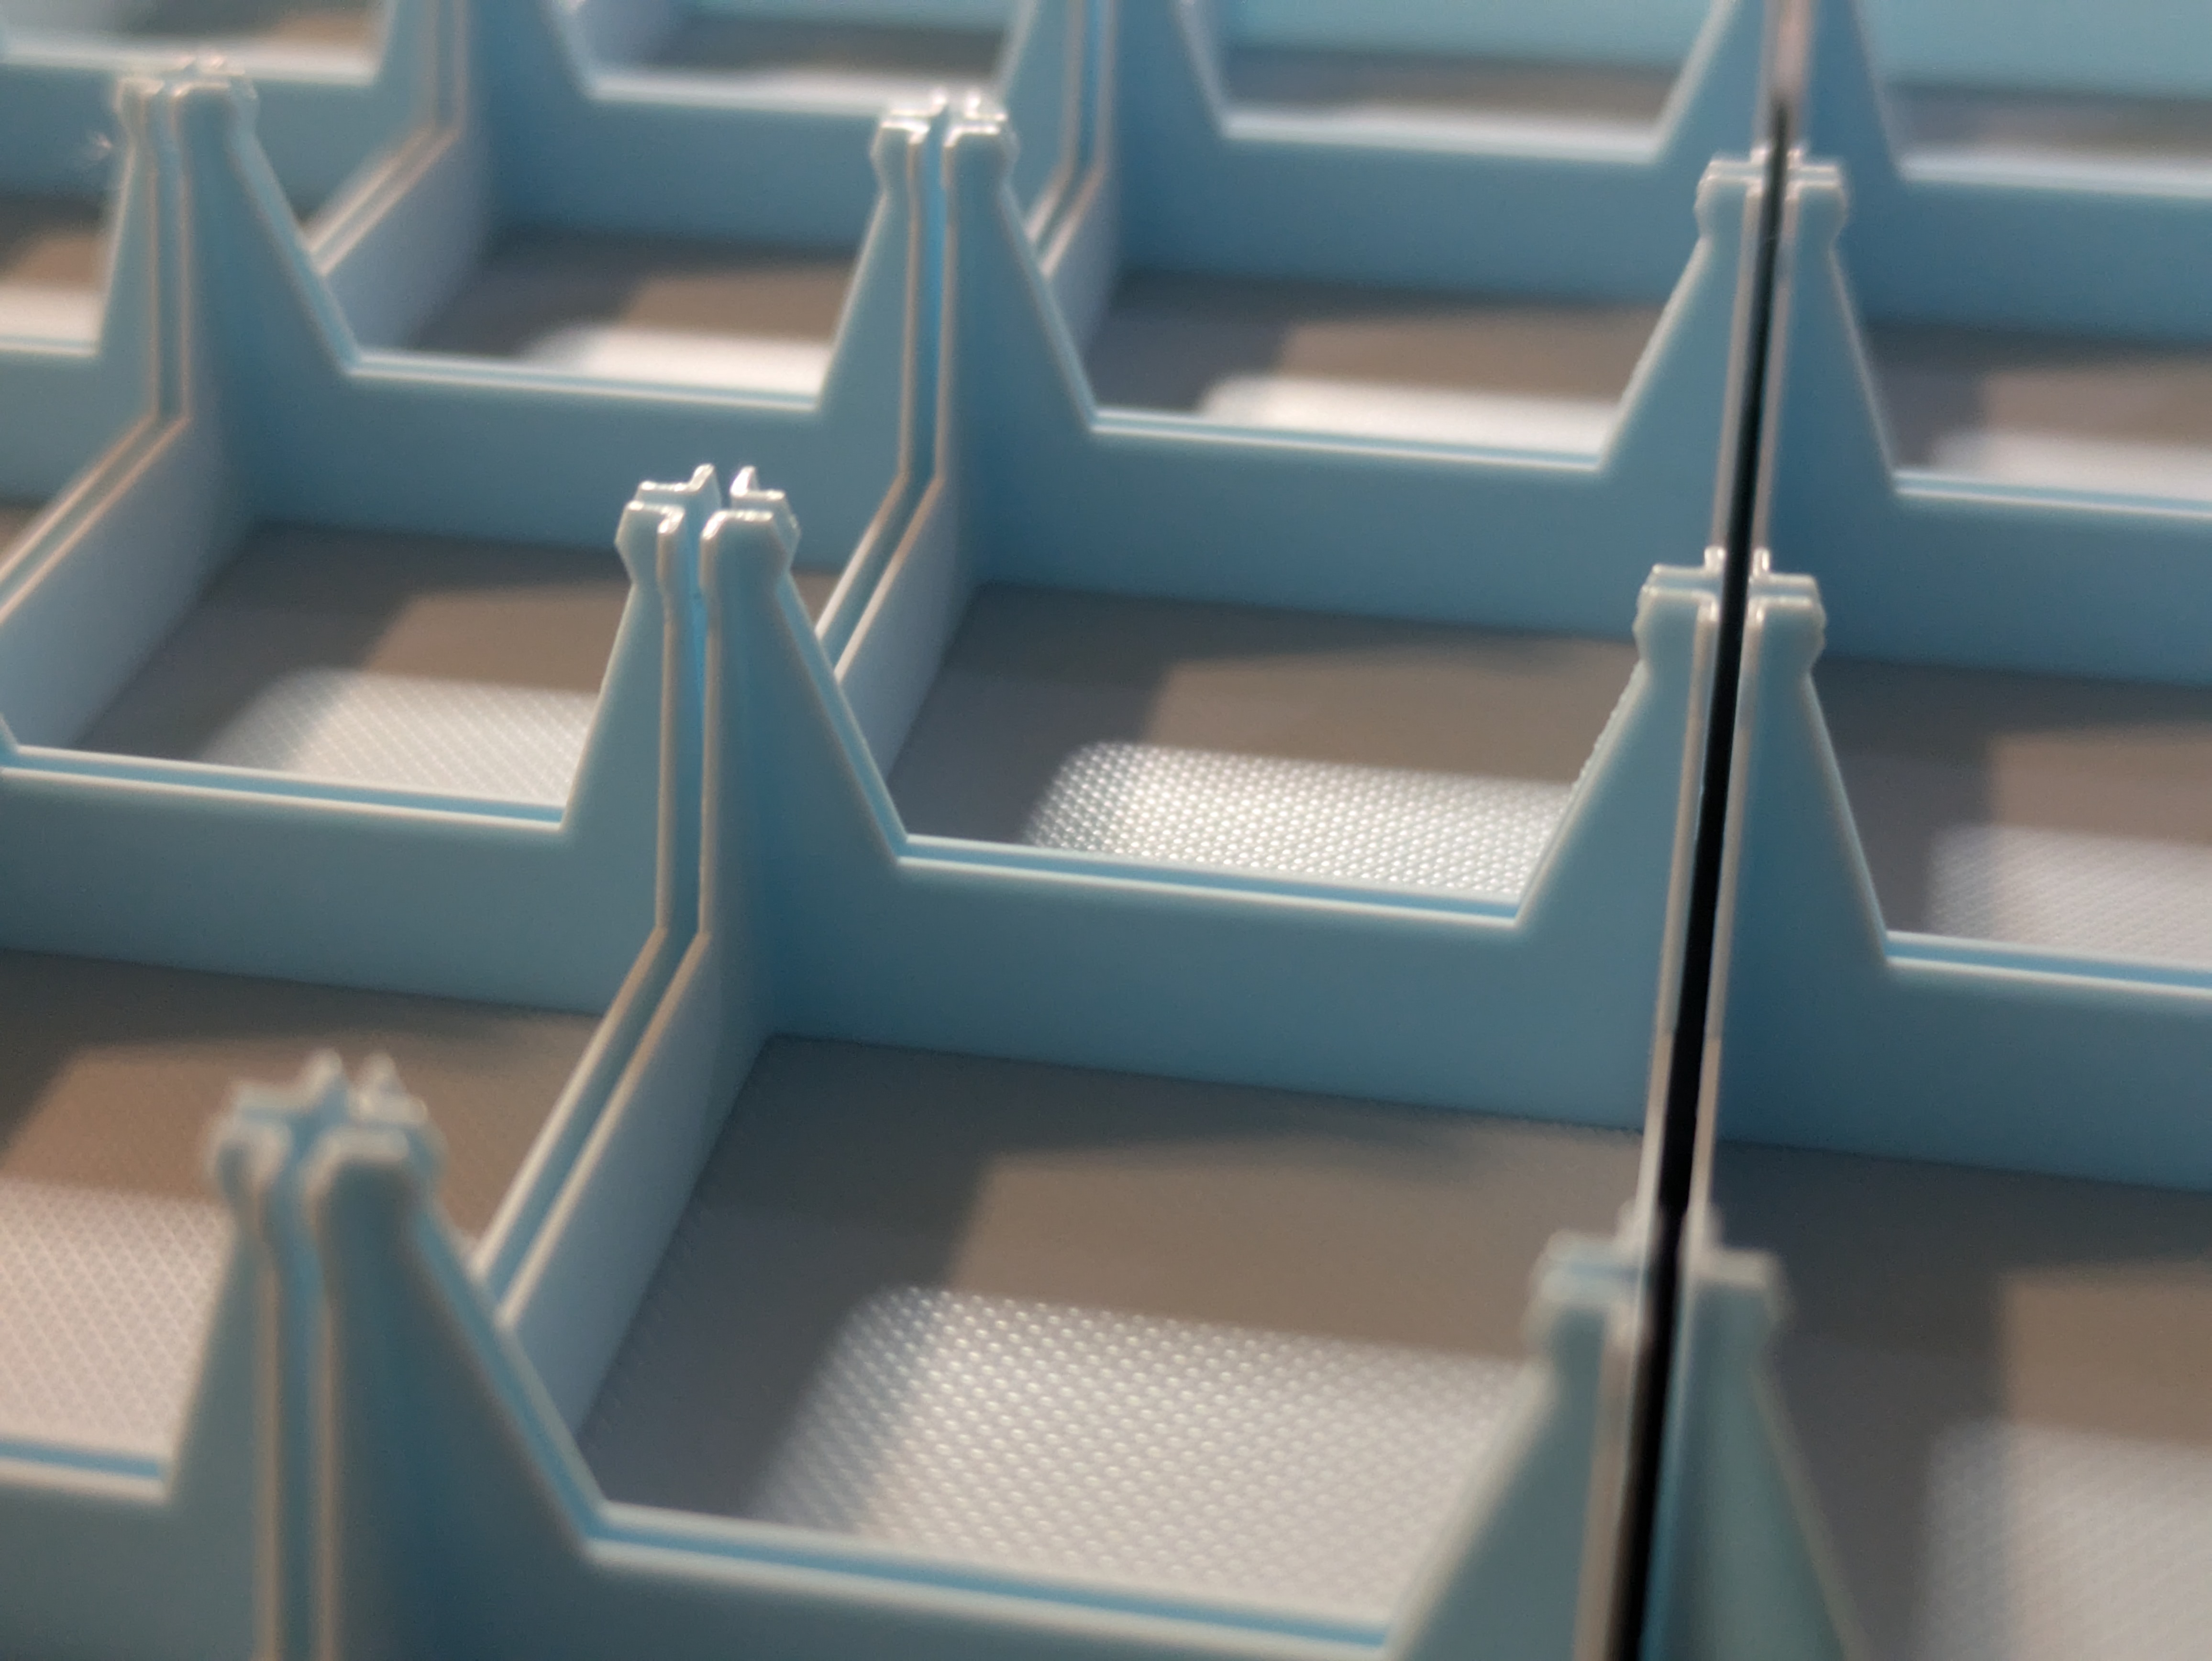
      Dry PLA printing with no issues.
  • For the blue pixels, a smooth PEI plate is recommended to match the smooth front surface of the sword.
  • Brims are included in the profile for the main sword pieces to reduce the likelihood of warping at some of the sharp angles.

This model is excluded from my commercial license given that it is a fan project.

MakerWorld

Pixel Sword Wall Sconce

Publicado em 4 de ago de 2024

1,751
Curtidas
1,417
Downloads
3,747
Coleções
451
Impressões
Categoria Decor
Tags
sword light lighting wall room easy kid customizable mini large videogame prop led game pixel
Licença Standard Digital File License
Ver no MakerWorld (abre em nova aba)

Gostou deste modelo? Crie uma conta grátis para salvar seus favoritos e voltar a eles depois.

Criar conta