Você está no 3DFinder
Buscamos em Thingiverse, MakerWorld e Printables ao mesmo tempo para te dar o melhor de cada uma.
Descrição
Hex Spool Box
Table of Contents
- Change Tracking
- Intro
- Hex Spool Box Notes
- Dimensions
- Printing Profile Notes
- Insert Notes
- Intro
- Cautions
- Dimensions
- Printing Profile Notes
- Naming Convention
- Bambu Studio and Coloring Workflows
- Importing [Inserts Combined.3mf]
- Importing [Hex Spool Box Inserts.step]
- Bambu Studio Text Shape Tool Workflow
- Adding Text and Graphics to an Insert in Fusion360
Change Tracking
| Note | Date |
| Initial upload | 10/30/23 |
| Modified Inserts Combined print profile to include two additional plates with extra descriptors and a swatches plate. | 11/7/23 |
| Matching Bambu Spool coming very soon, will be compatible with the inserts! |
Intro
This project started out as an endeavor to learn Fusion 360. Previously I had mostly used Solidworks at the hobby/maker level but wanted to learn Fusion 360 as most parametric uploads were saved in f3d files. At first I wanted to use snap fits to create a box that snapped together with panels to mostly print the box in one plate. I did not have much experience with snap fits and figured it would be a good project to get some exposure on designing snap fits. This quickly led to a design that created a box with larger dimensions than I hoped for as I am storing my filament in cubby style furniture. I needed the box to be as small as possible, preferably to match the size of standard filament boxes provided by filament manufacturers. I moved on to designing a standard box and lid configuration. I always wanted the box to incorporate both honeycomb pattern and rounded corners. This proved rather difficult in Fusion 360 which led to another “learning” issue. Went with the “sheet metal” technique to wrap patterns around cylindrical and flat surfaces. This unfortunately made the design somewhat non-parametric. Technically it is parametric in that the pattern is equation driven but there are some parameters that rely on dimensions I could not parameterize due to the “sheet metal” technique.
The box was originally designed around Bambu sized spools with just enough clearance to store the spool along with a vacuum sealed bag. The next step in the project was labeling. I landed on using inserts to label the boxes after some inspiration from the Honeycomb Storage Wall. The idea of using modular inserts was more of a happy accident than design intent. Once the insert snaps were designed and working, I modeled a multitude of inserts to allow for coloring and labeling in endless configurations. I have included inserts both with text and without text. I designed the inserts around the idea of using blank inserts as filament swatches and keeping the labeled inserts white with black text. I also designed a stacking insert to be used for those storing filament in the XY plane. The stacking inserts do work for the YZ plane as well, but it is nowhere near as stable as stacking in the XY plane.
Hex Spool Box Notes
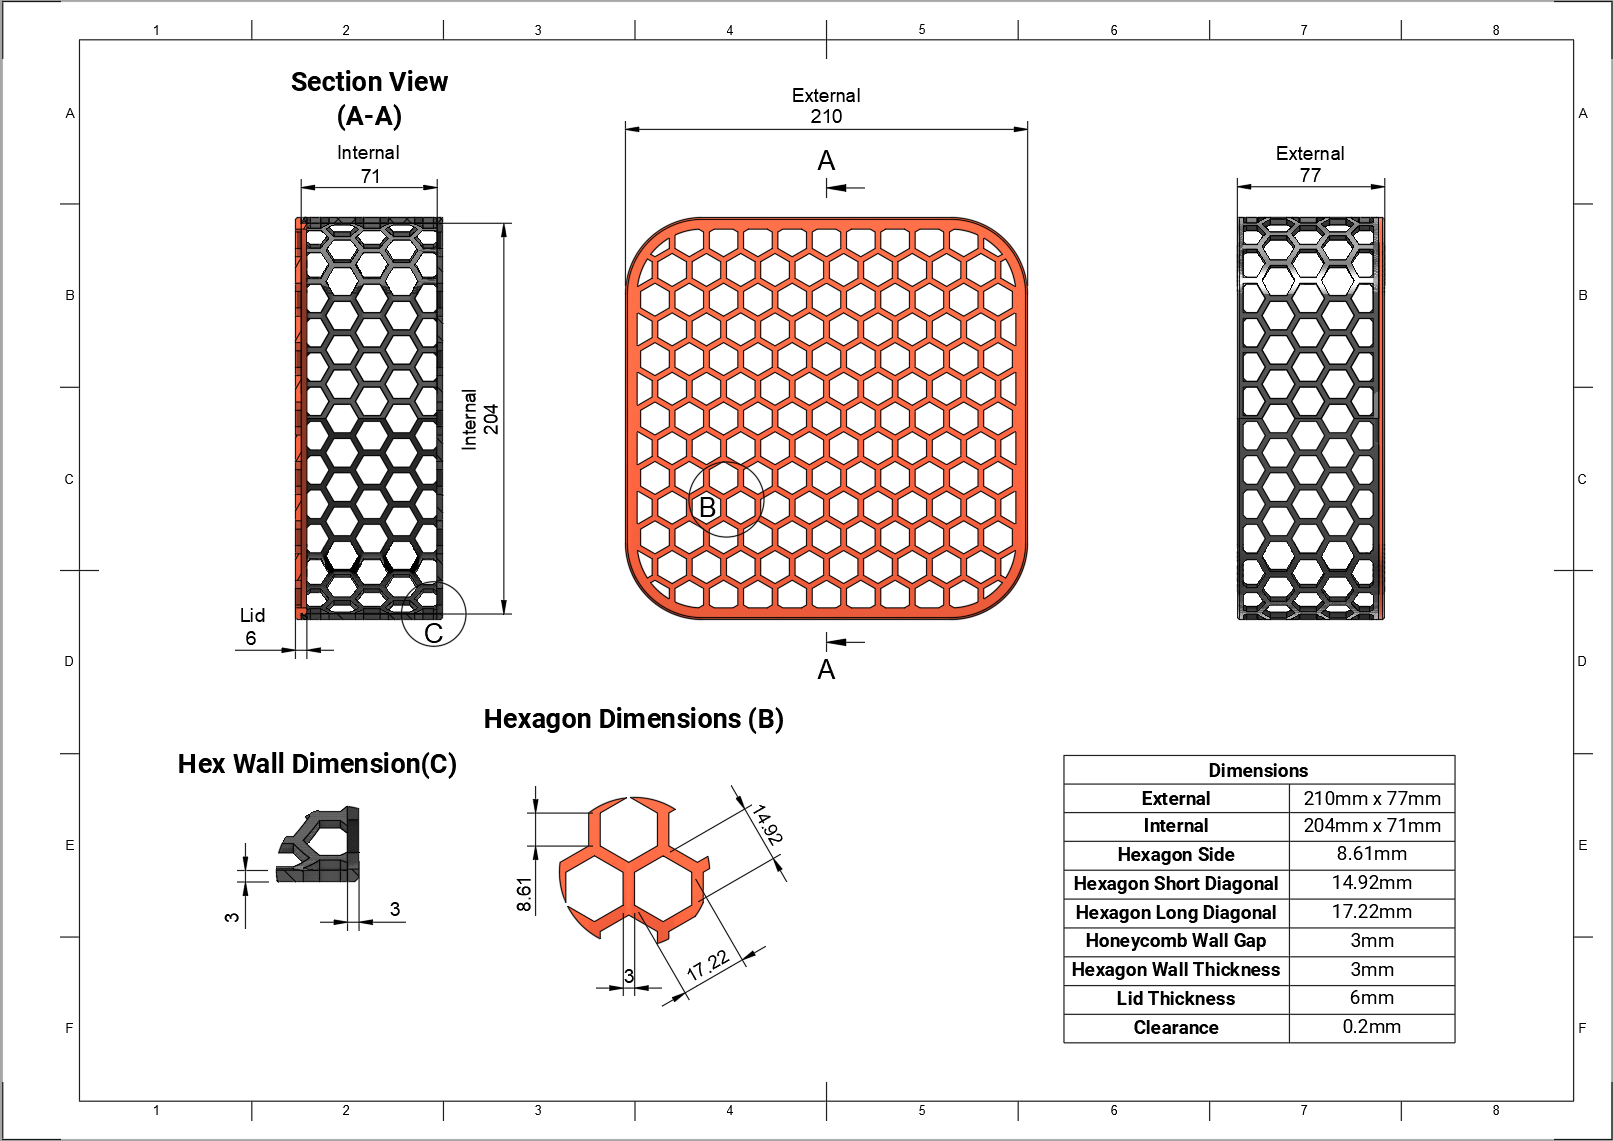
Dimensions
Printing Profile Notes
I have included two printing profiles for the Hex Spool Box: [Hex Spool Box.3mf] and [Box with PLA Inserts Example.3mf]. The former is only the Box and the Lid. The latter includes a PLA insert, Bambu logo Insert and some blank inserts as swatches for identifying the color. This profile is set to be printed by object where filament 3 would be the color of the filament being stored. This profile is simply an example of what a complete box would look like.
- Layer Height: 0.2
- If the layer height is set higher than 0.2, the 30 degree overhangs on the Z axis honeycombs become bridges causing bad surface detail and low layer adhesion. Prints will fail if printed higher and unsupported, print at your own risk when chasing speed.
- Support: Tree(auto), Support critical regions only, on build plate only.
- Top Surface Pattern: Monotonic
- Default Monotonic Line creates a large number of tiny gaps that need to be filled, this slows the print and degrades the surface quality of the upper surface of the bottom.
- Bottom Surface Pattern: Concentric
- Speeds up the print, looks better as well if printed on a surface where layers are visible. (Optional)
- Wall Generator: Arachne
- Only changes layer width in a few layers, classic could be used if desired. (Optional)
- Infill: 15%
- Infill Pattern: Gyroid
Insert Notes
Intro
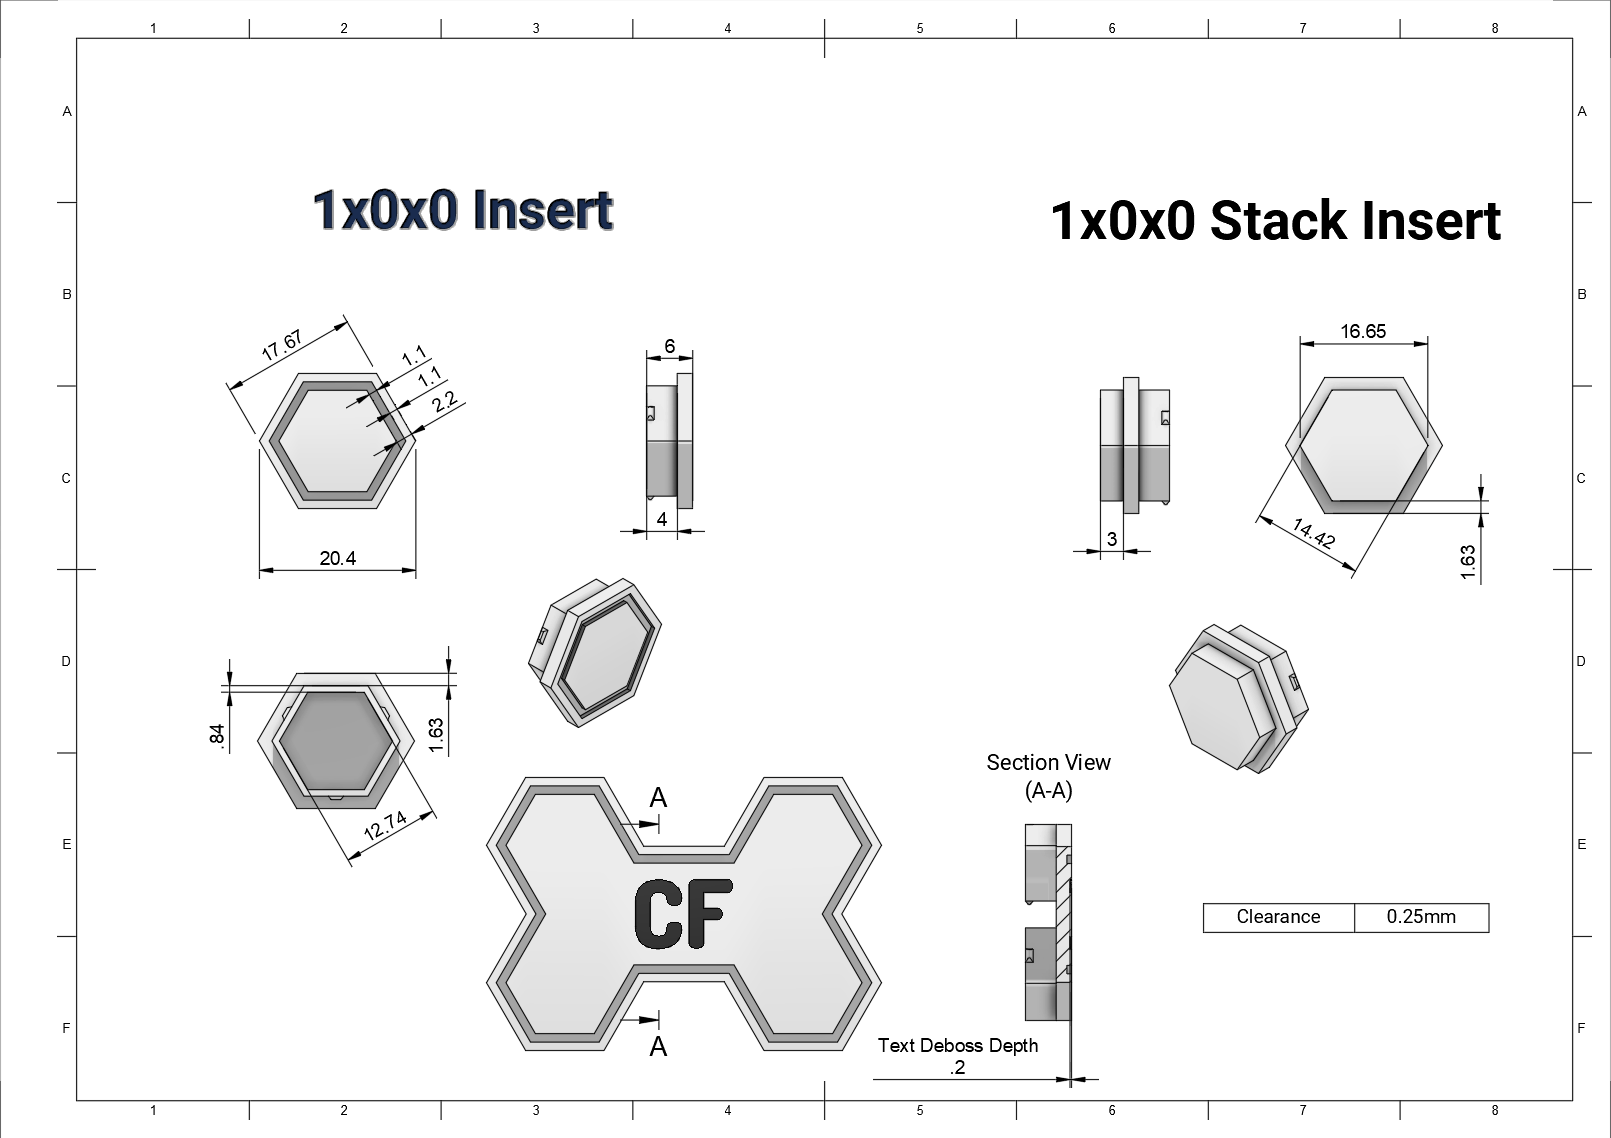
Inserts can be used to label the box, colorize/decorate, and to add stacking to the boxes. The text and graphics inserts were designed to have only one filament change, the text/graphics is only one layer high and is printed first to minimize filament changes. Due to this design, printing the inserts at 0.2mm layer height is a must. The [SOLID] or blank inserts are provided to use as filament color swatches or simply to add your own text or graphics using built in Bambu Studio tools or a CAD application.
Cautions
When inserting the inserts into the honeycomb, support the back side of the wall. When the inserts are fresh off the plate, the snap is a bit tight. This can be an issue when first inserting the inserts into the hexagons, especially on the hexagons in the Z axis as those tend to be the weakest due to their print orientation. This becomes less of an issue once the snaps on the inserts are worn in a bit from inserting and removing.
Dimensions
Printing Profile Notes
- Layer Height: 0.2
- Wall Generator: Arachne
- Helps fill in the text and graphics a bit better.
- Infill: 15%
- Infill Pattern: Gyroid
- Support: Normal(auto)
- Required only for the Stack Inserts, default settings work fine here.
Naming Convention
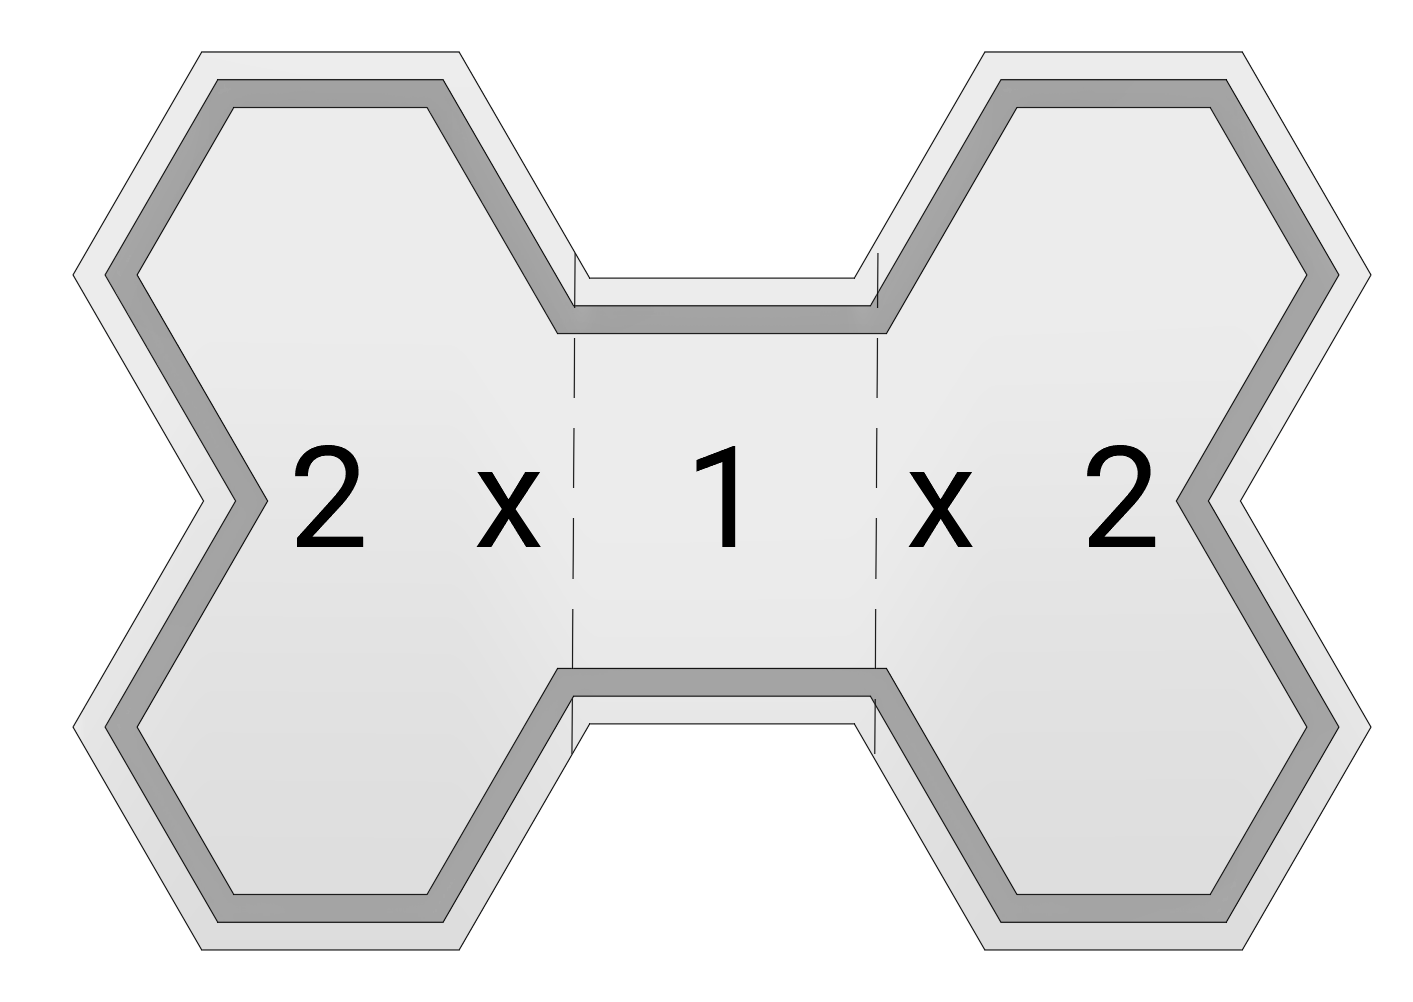
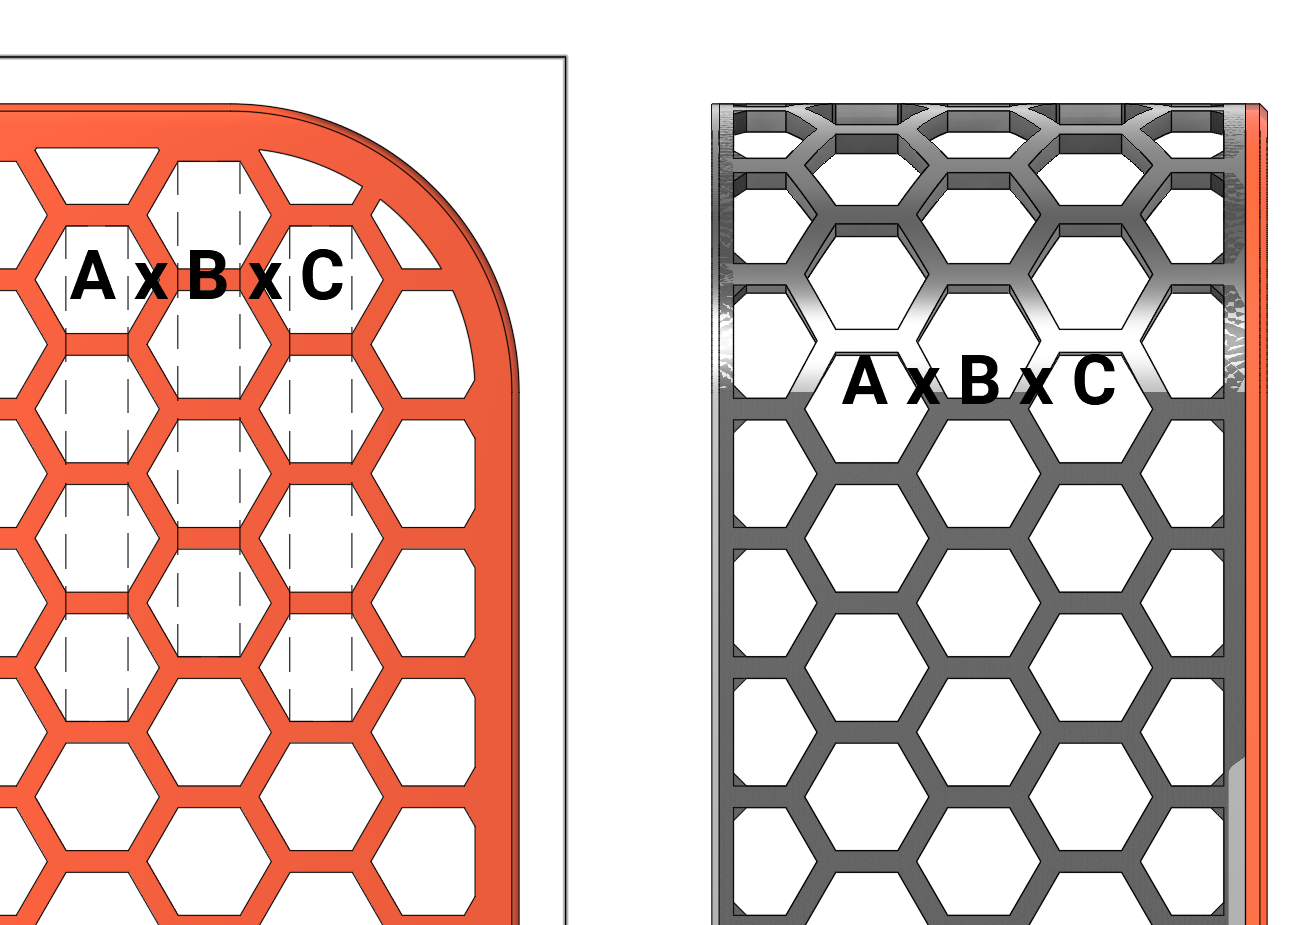
Each insert has a sequence of numbers: A x B x C. ABC can be seen as columns, the number will represent the number of hexagons occupied in that given column. See reference images.
Bambu Studio Import and Coloring Workflows
Importing [Inserts Combinedv2.3mf]
No additional steps needed, all coloring and arrangements complete. There are 5 plates: Text and Graphics Inserts, Blank Inserts, Stack Inserts, Material Color Inserts, and Additional Descriptors.
Importing [Hex Spool Box Inserts.step]
| 1. Open Bambu Studio, import [Hex Spool Box Inserts.step]. | |
| 2. Split the [Hex Spool Box Inserts.step] object to objects. | 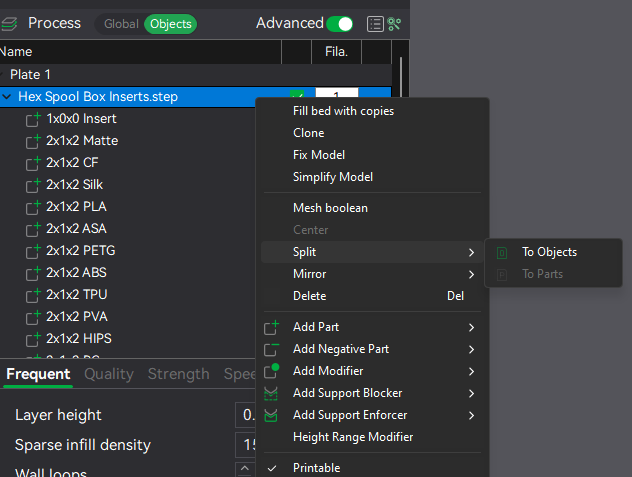 |
| 3. Each insert will now be contained in an object. Objects listed as [SOLID] are inserts that do not have text or graphics that necessitate multi material. These objects can be modified with the Text shape tool, see notes below these instructions on how to add Text shape objects to [SOLID] objects. | |
| 4. Arrange all objects and split each named insert to parts. | 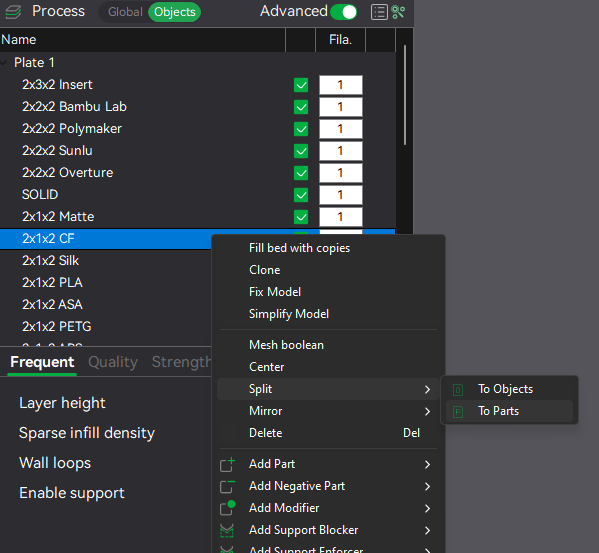 |
| 5. Once split, multiple parts will be listed under the object. The first part(*_1) is the main insert body, the remaining parts constitute the text or graphics bodies, change these part's filament for coloring. | 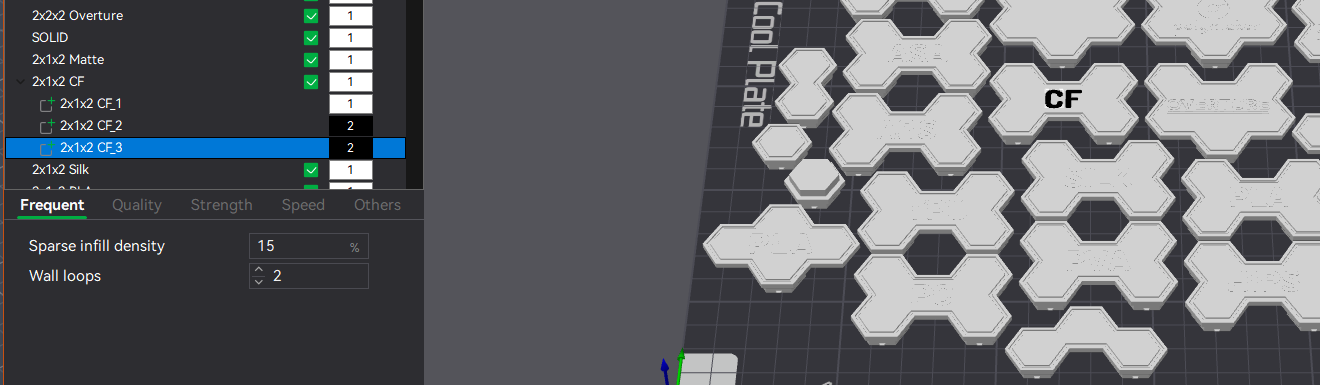 |
| 6. Repeat process for all inserts with text or graphics. | |
| 7. Once complete, CTRL+A to select all objects, select Rotate (r) in the toolbar and set Y to 180 degrees to lay all objects flat on the plate. |
Bambu Studio Text Shape Tool Workflow
The steps outlined below are to create exactly one layer high (printed @ 0.2) text that sits flush with the insert. If emboss or deboss is desired, change the embedded and thickness values and move the text_shape accordingly.
- Select a [SOLID] object to add text to.
- Create a text object with the Text shape tool, ensure the Thickness is set to 0.20 and Embedded is set to 0.00.
- Select the text_shape object then select the move tool. Subtract the current Z position value by 0.20 (3.10 - 0.20 = 2.90).
- Set the text_shape object filament.
- Rotate insert (assembly of insert object and text_shape object) 180 degrees to lay it flat on the plate.
Adding Text and Graphics to an Insert in Fusion360
Here is a quick rundown on adding custom text and graphics in Fusion360.
- Create a sketch on the top surface of an insert.
- Add text or graphics sketch.
- The font I used for text is Dosis ExtraBold, height is 9mm, and character spacing 10.00.
- For logos, I typically find svgs or images and convert them to svg and import the svg. Once imported, scale the sketch and position it, some guide lines before importing really help to position the sketch paths.
- Extrude sketch path to a distance of 0.2mm down into the insert body. Set the operation to New Body, NOT Cut.
- Use the Combine tool. Select the insert body as the Target Body, select the rest of the bodies that encompass the text or graphics as the Tool Bodies. Set Operation to Cut, lastly tick the Keep Tools option. This will create a cut in the insert matching the text/graphics and keep the bodies to easily set the filament in Bambu Studio.
- Export the component as a step file and follow the instructions above for splitting objects and setting the filament for the text/graphics in Bambu Studio.