Você está no 3DFinder
Buscamos em Thingiverse, MakerWorld e Printables ao mesmo tempo para te dar o melhor de cada uma.
Descrição
The maths behind the golden spiral give it a satisfying appearance often found in nature. This clock uses it as an hour hand which spirals outwards between the hours marked vertically on the face. It's surprisingly easy to read, and a bit different! The minutes are shown traditionally on the inner markings.
Additional versions of this are available over on my Patreon. You can request custom versions and other models, and lock in a special ‘Early Supporter’ membership that will cover all future models (including any premium ones) . Take a look :-)
This uses the clock mechanism available from Bambu, if you buy one for this model please use the Bill Of Materials link at the bottom of this description, I think I may get a small commission. It has the following dimensions. If you have a different one let me know the dimensions, along with a pic and dimensions of the nut and I'll see if I can upload something to match. For more detail on dimensions scroll to the bottom.

Like the design and would like a mod, or a larger version that fills the larger printer plates? Comment bellow, if there is demand I'll look into it.

Printing
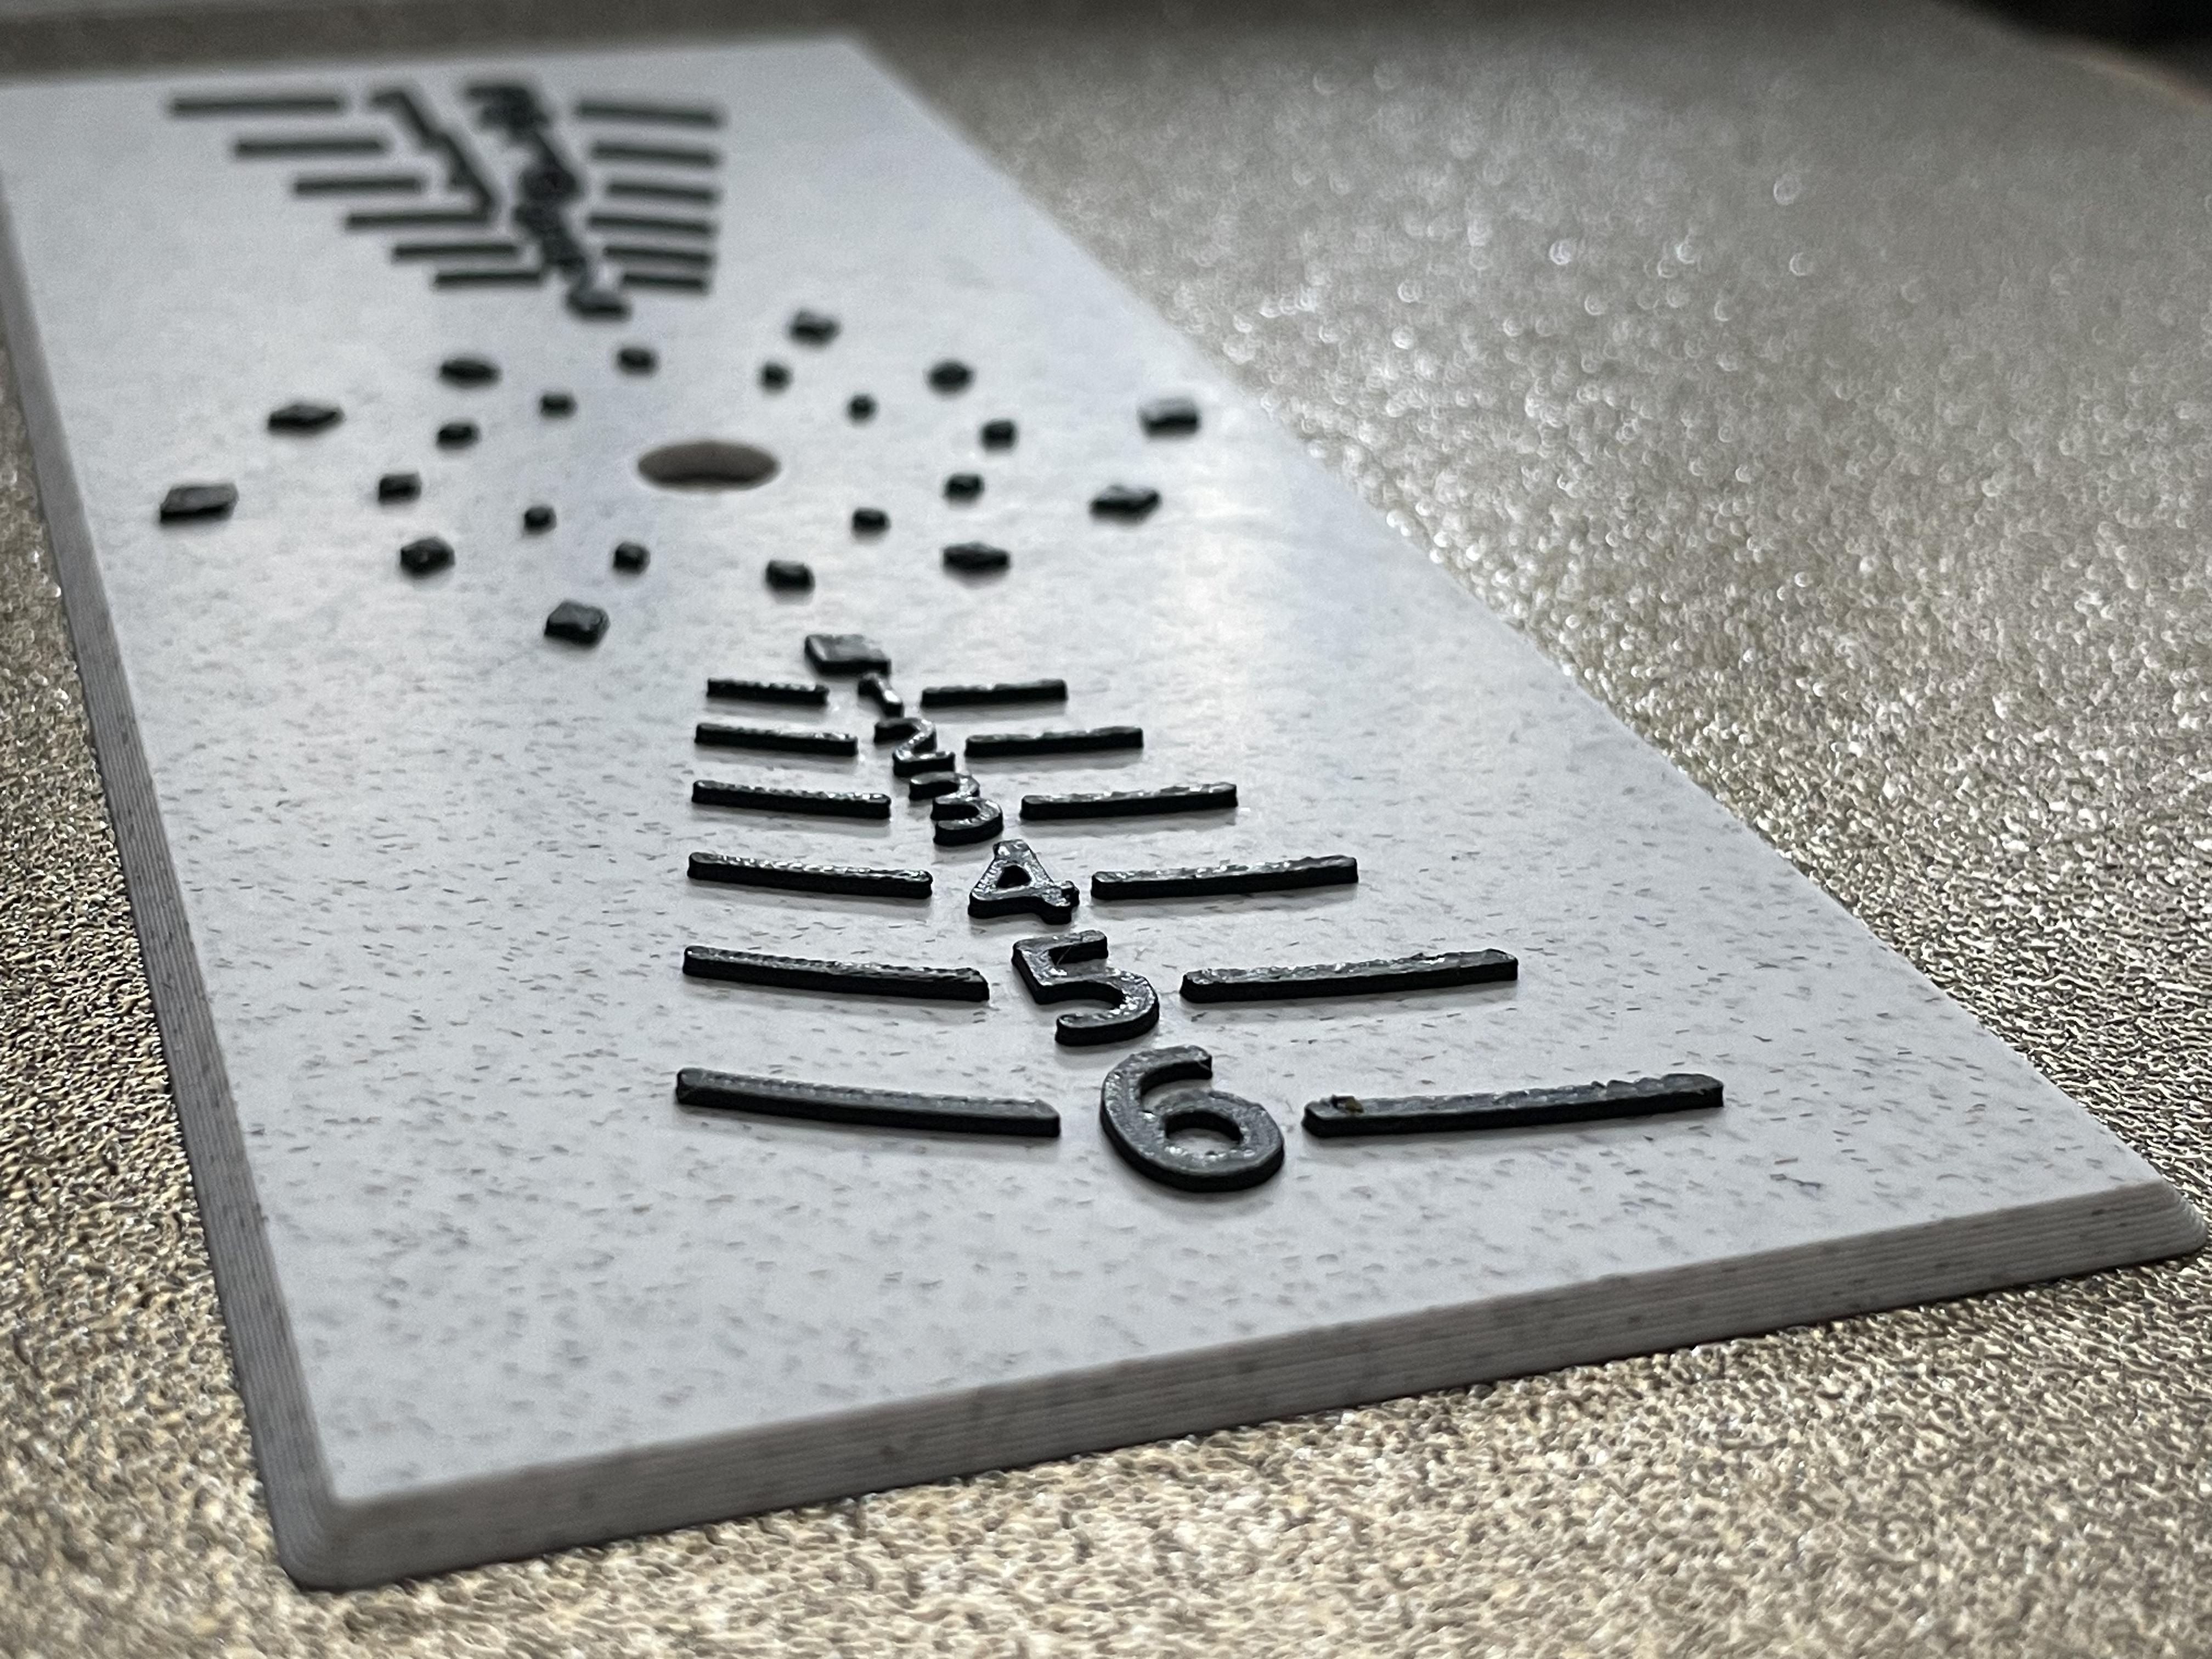
There are two options, raised face markings and numbers (No AMS needed, but can be used) or flat (AMS required).
The print flat face already has the clock face coloured ready for an AMS, you can pick your colours on the print dialog after slicing which allows you to select which spools on the AMS map to the colours in the print profile.
The raised face profile has a pause just before it prints the face, navigate to the filament menu and unload / load to change colour then resume printing. If you wish to print this with an AMS go to the preview tab and change the pause on the right to a filament change.
Nut Size
A couple of people out of a few hundred have commented that their nuts were larger! The nut on my kit is 10.3mm but 10.59mm has been reported. Thus I've updated the profile to suite up to 11.1 mm nuts. If your nut is 10.3mm then you may wish to use the original model for a tighter fit. (Don't worry though it still works fine in the now default 11mm nut spacer) But if you want the original it's still in the profile:

IMPORTANT: When printing the flat face if you adjust filaments you should ensure the body colour is printed before the numbers to give best results, this can be done by clicking the plate options button (to the side of the plate) and then customising the 1st layer filament order. The print profile has this set up but if you modify the filament list it forgets it so you would need to check:

My examples were printed in Bambu filaments: Basic Black PLA, Silk Gold and Bambu Marble
The stand and back cover are optional.
0.8mm Layer Hands
I have gone for quality rather than print times so for example the hands use variable layer height to bring the layer height down to 0.08, you can reset this back to 0.2mm if you wish. When printing at 0.08 I had a couple of occurrences where the print head knocked off the minute hand and spacer so I've added a brim to these which solved the issue for me, it's slightly further away from the part than normal to make removing it much easier. You can gamble if you wish and switch the brim off :-)
Ironing
The raised face has the flat face ironed (Which takes a while) and a modifier to avoid ironing the top of the numbers etc. You can switch ironing off if you want but I think it's worth it, my Marble face came out really well.
It takes time though and depends on the filament so you should probably print a test rectangle with the ironing settings first as while the default settings worked for me with Bambu filament they may differ depending on the exact filament choice. Here are the docs on ironing.
Assembly
It's pretty straight forward but here are the steps:
If you've printed the AMS flat face version you can skip to step 4.
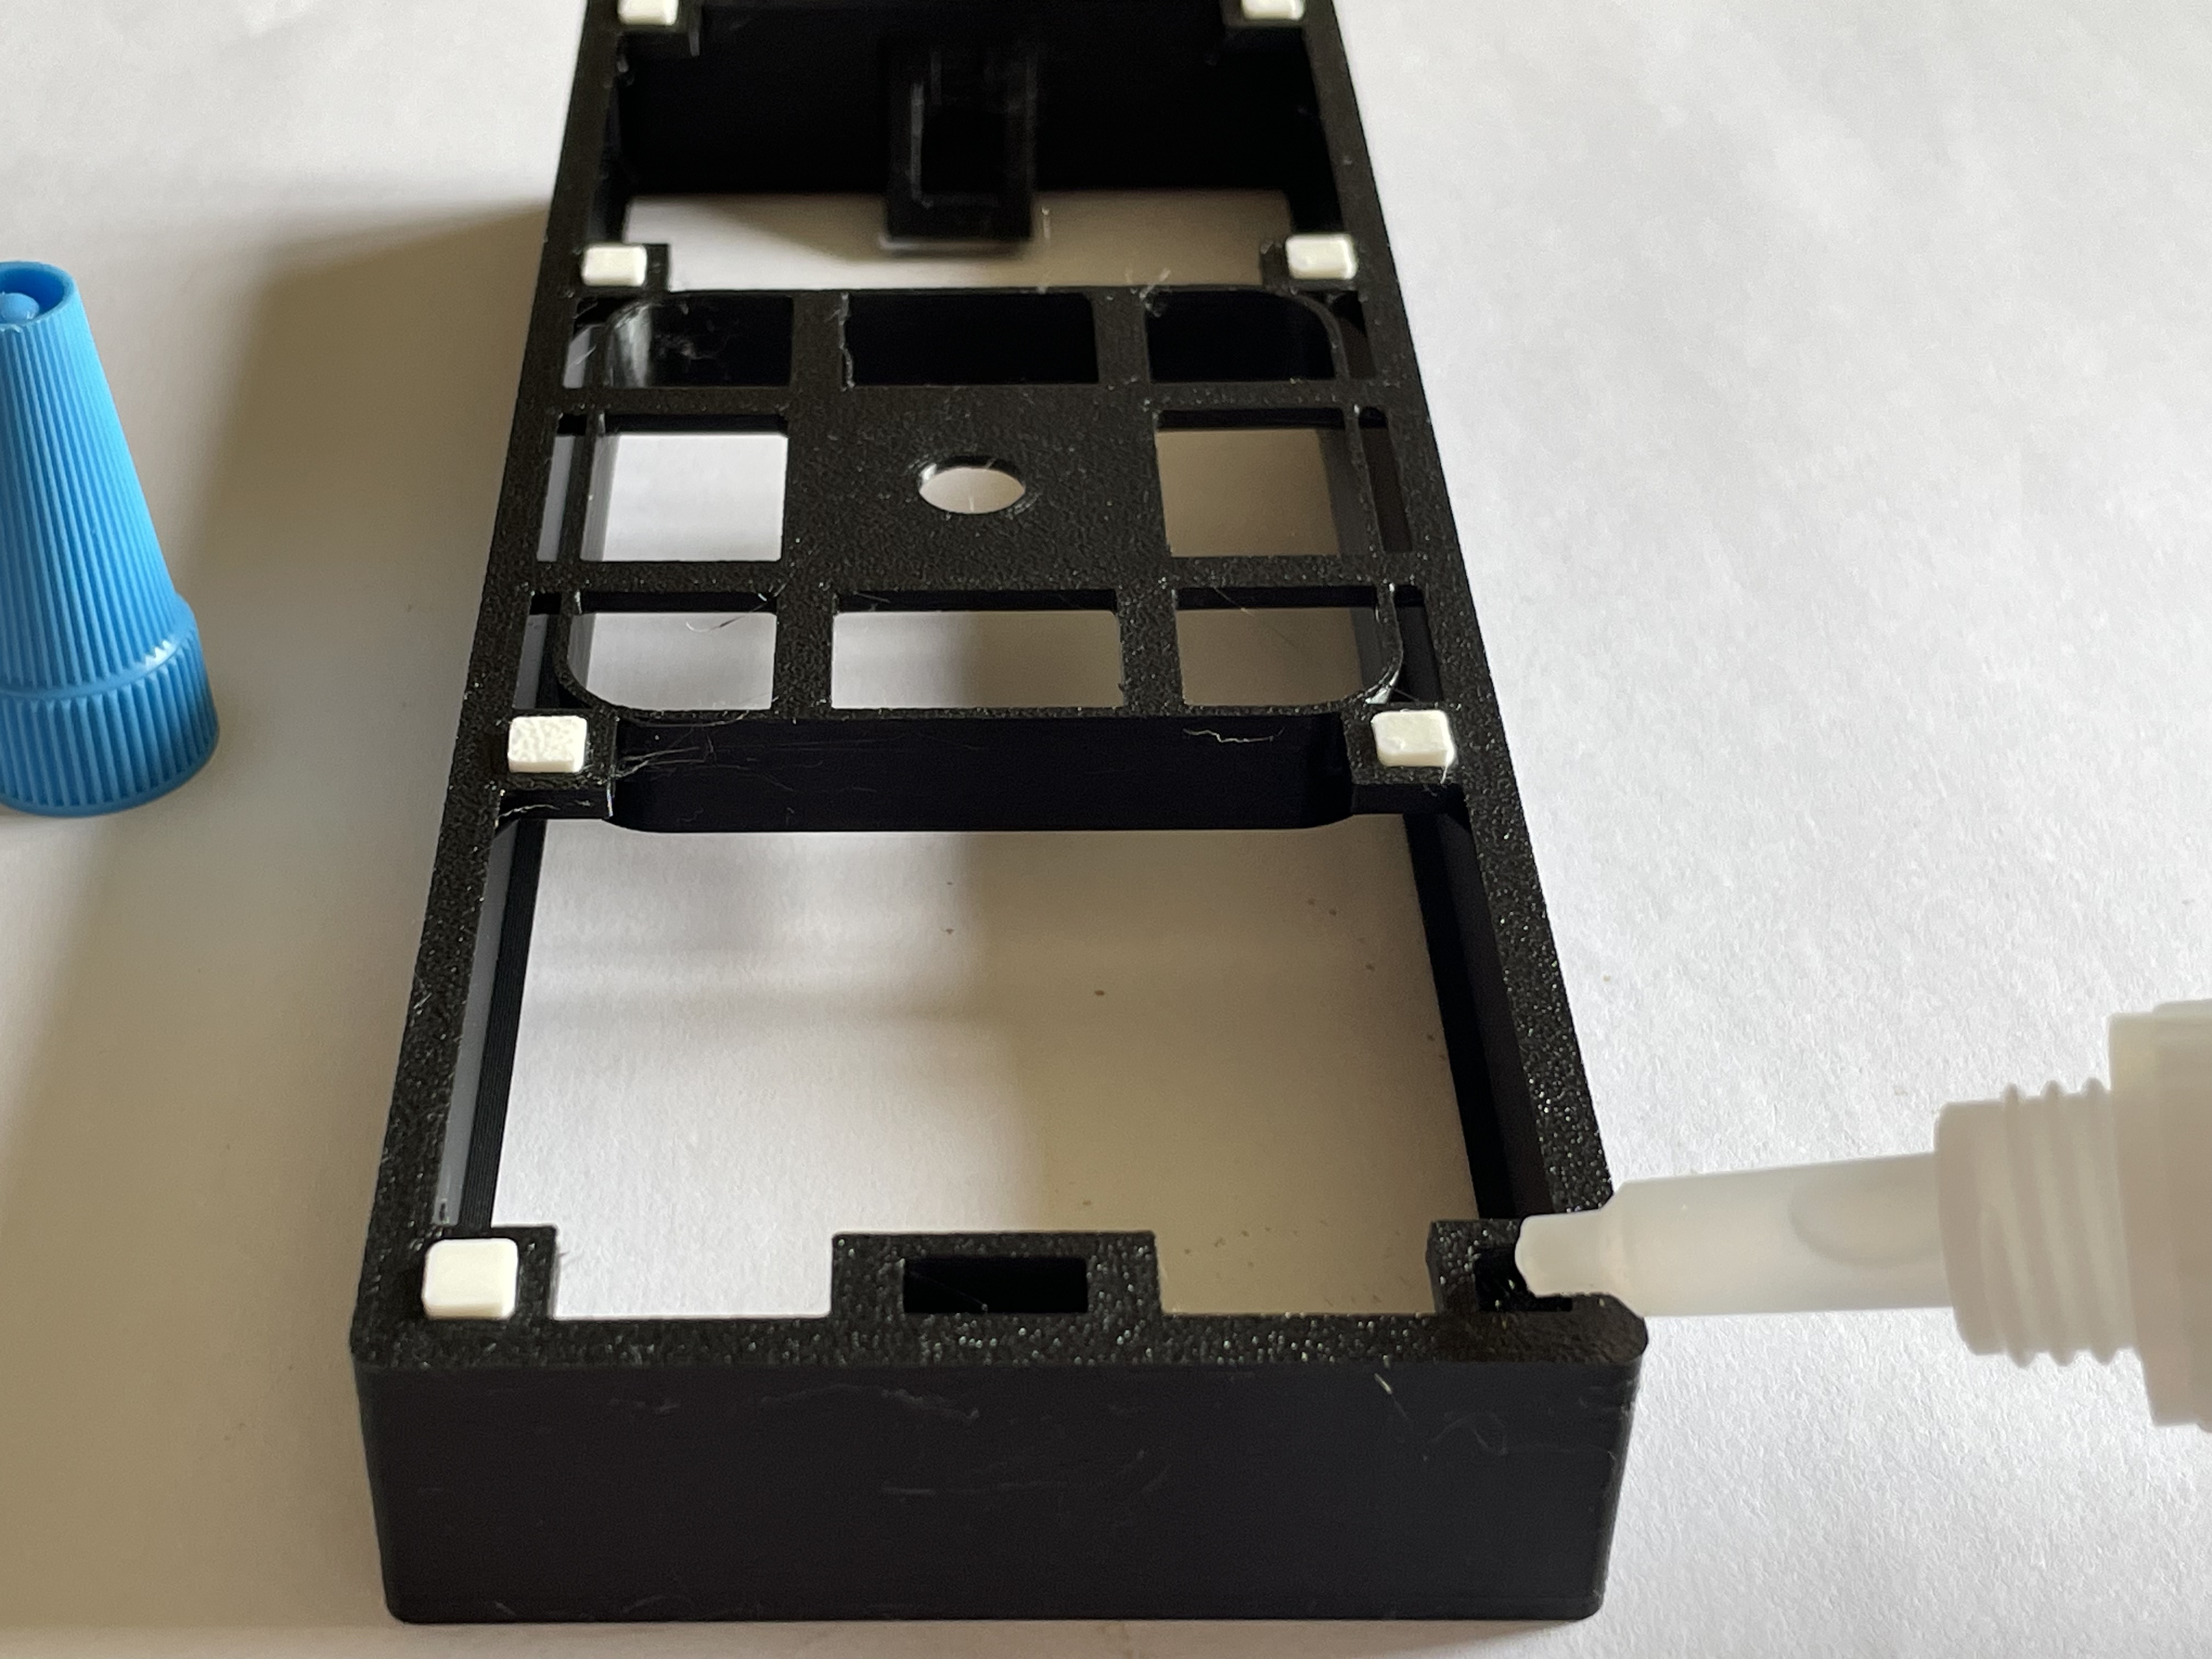
1) Glue the 8 locating squares into the body
2) Apply glue to the squares on the back of the face
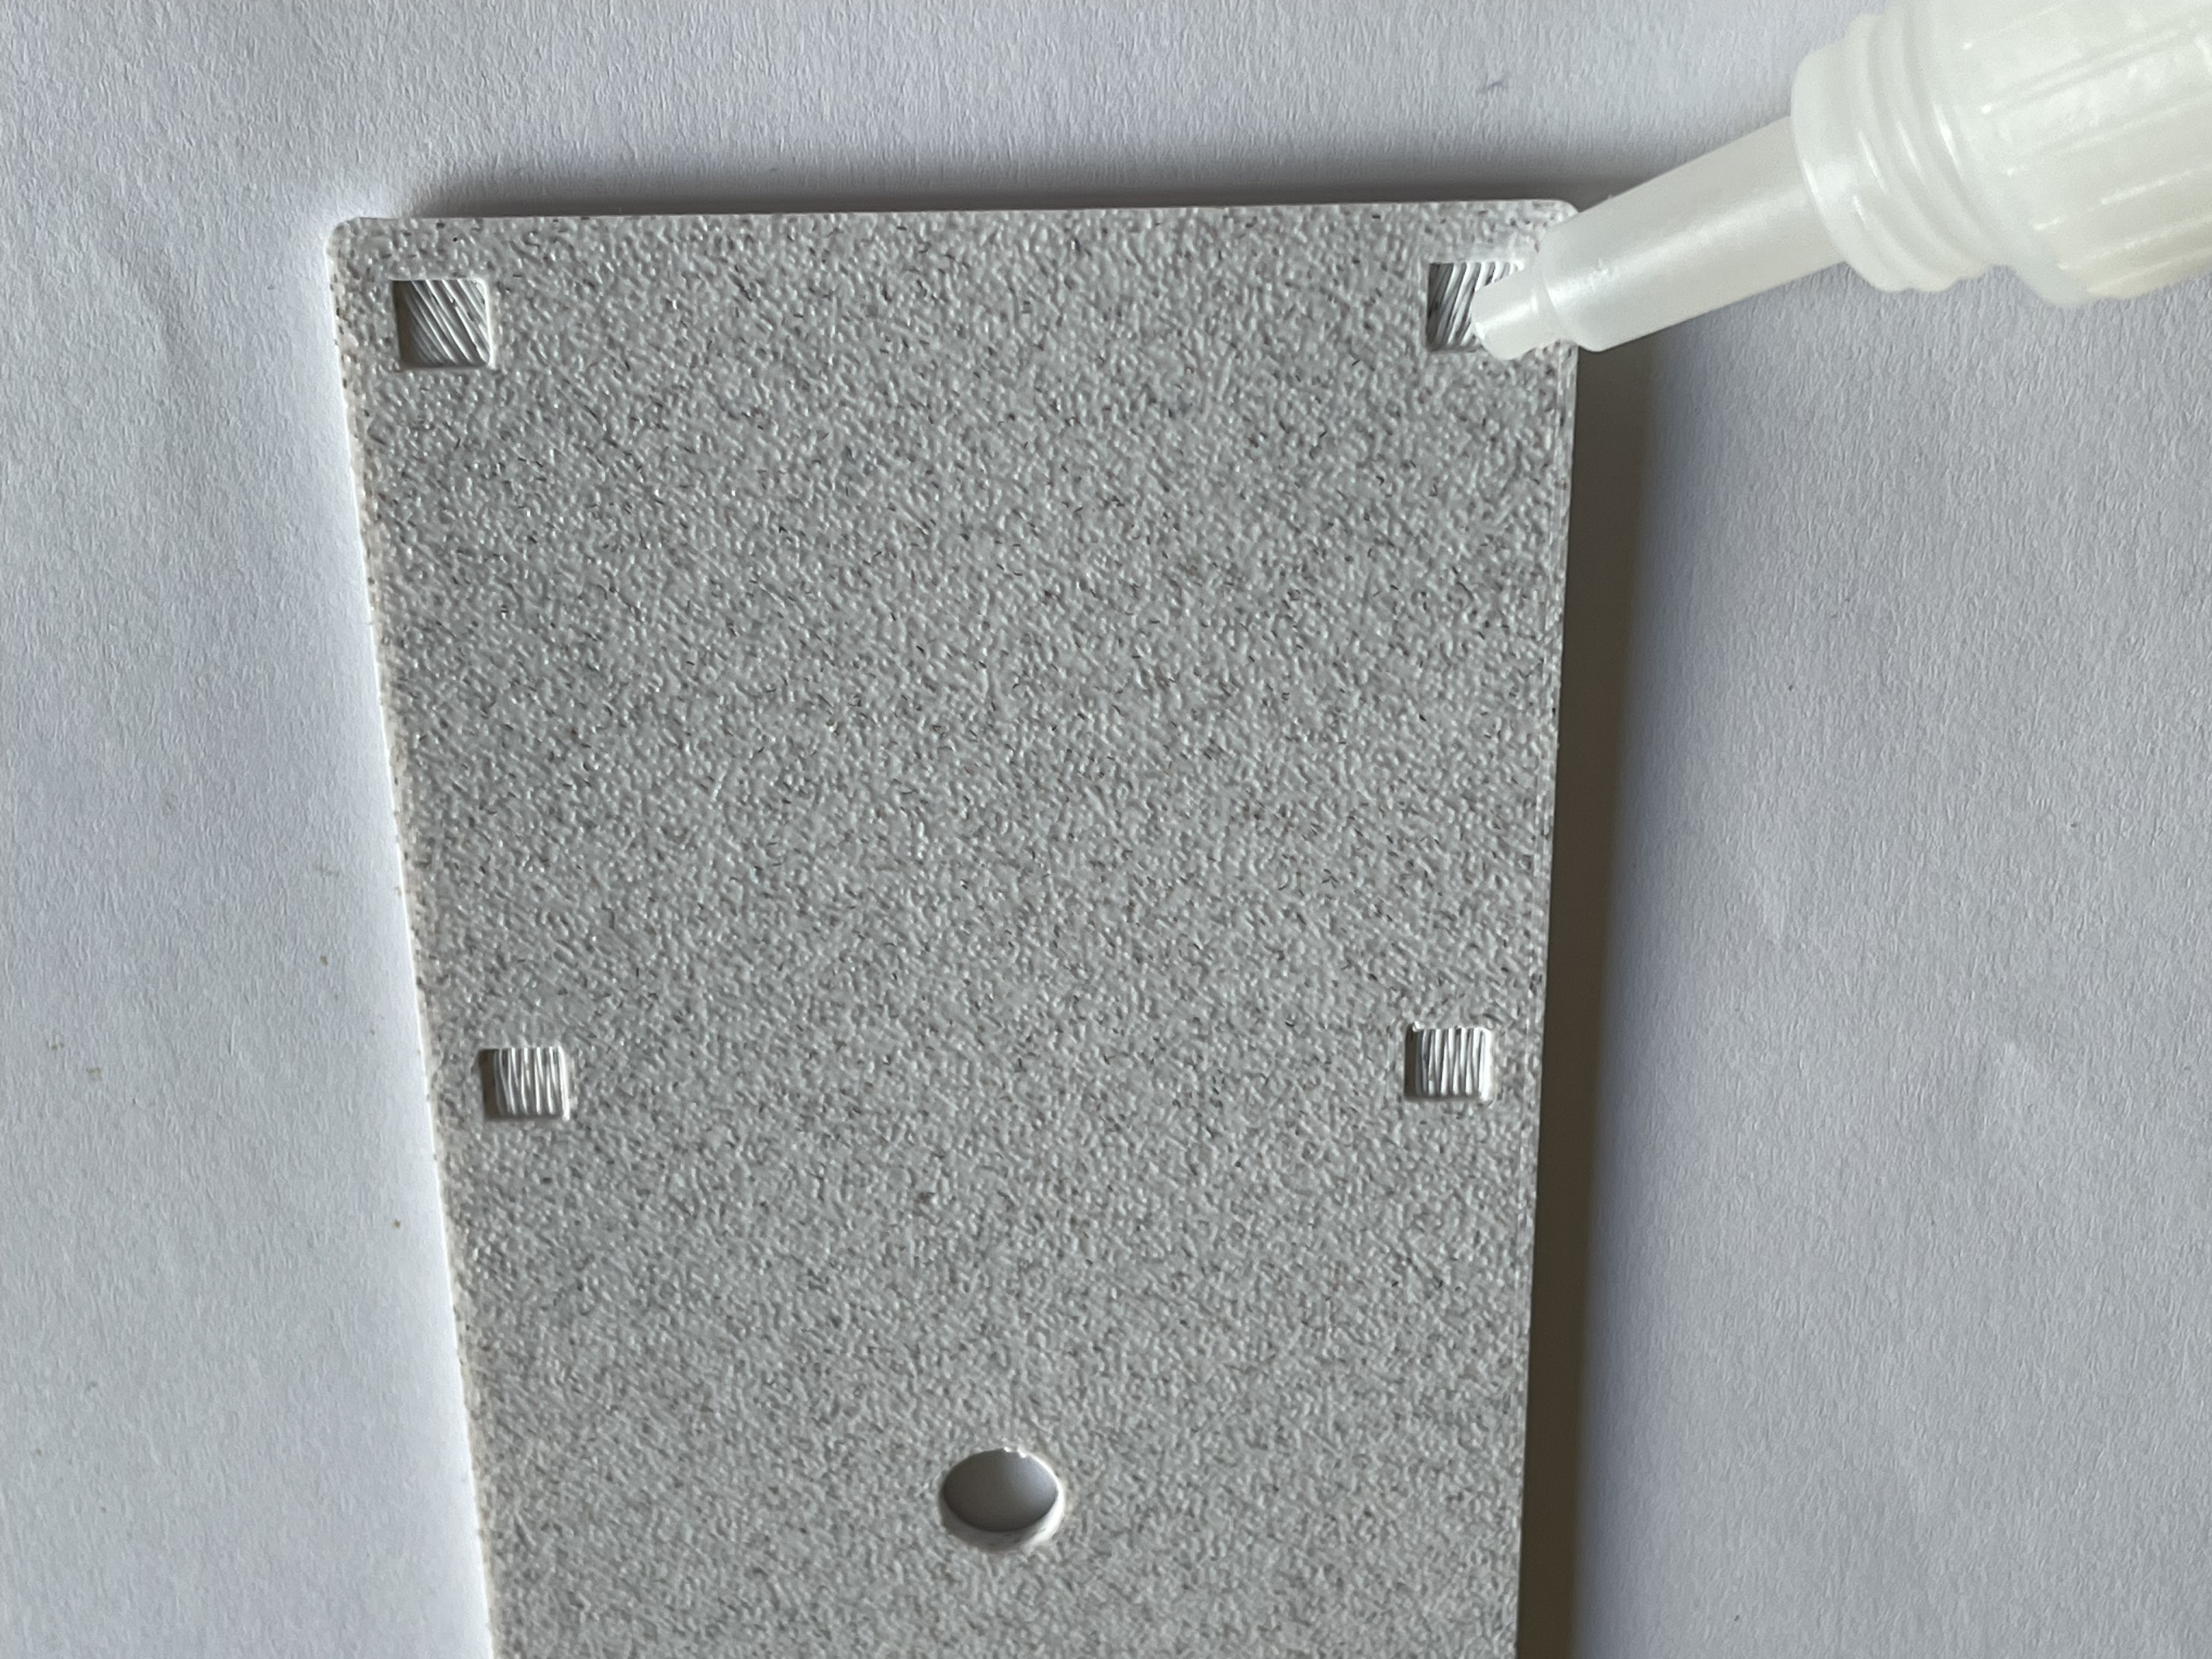
3) Place the face on the body and let it dry. (Maybe weigh it down with a book)

Note the 12 should be next to the square on the back which is used to hang the clock. The thin slot for the stand should be at the bottom near the 6.
4) Pop the mechanism in with the battery towards the bottom

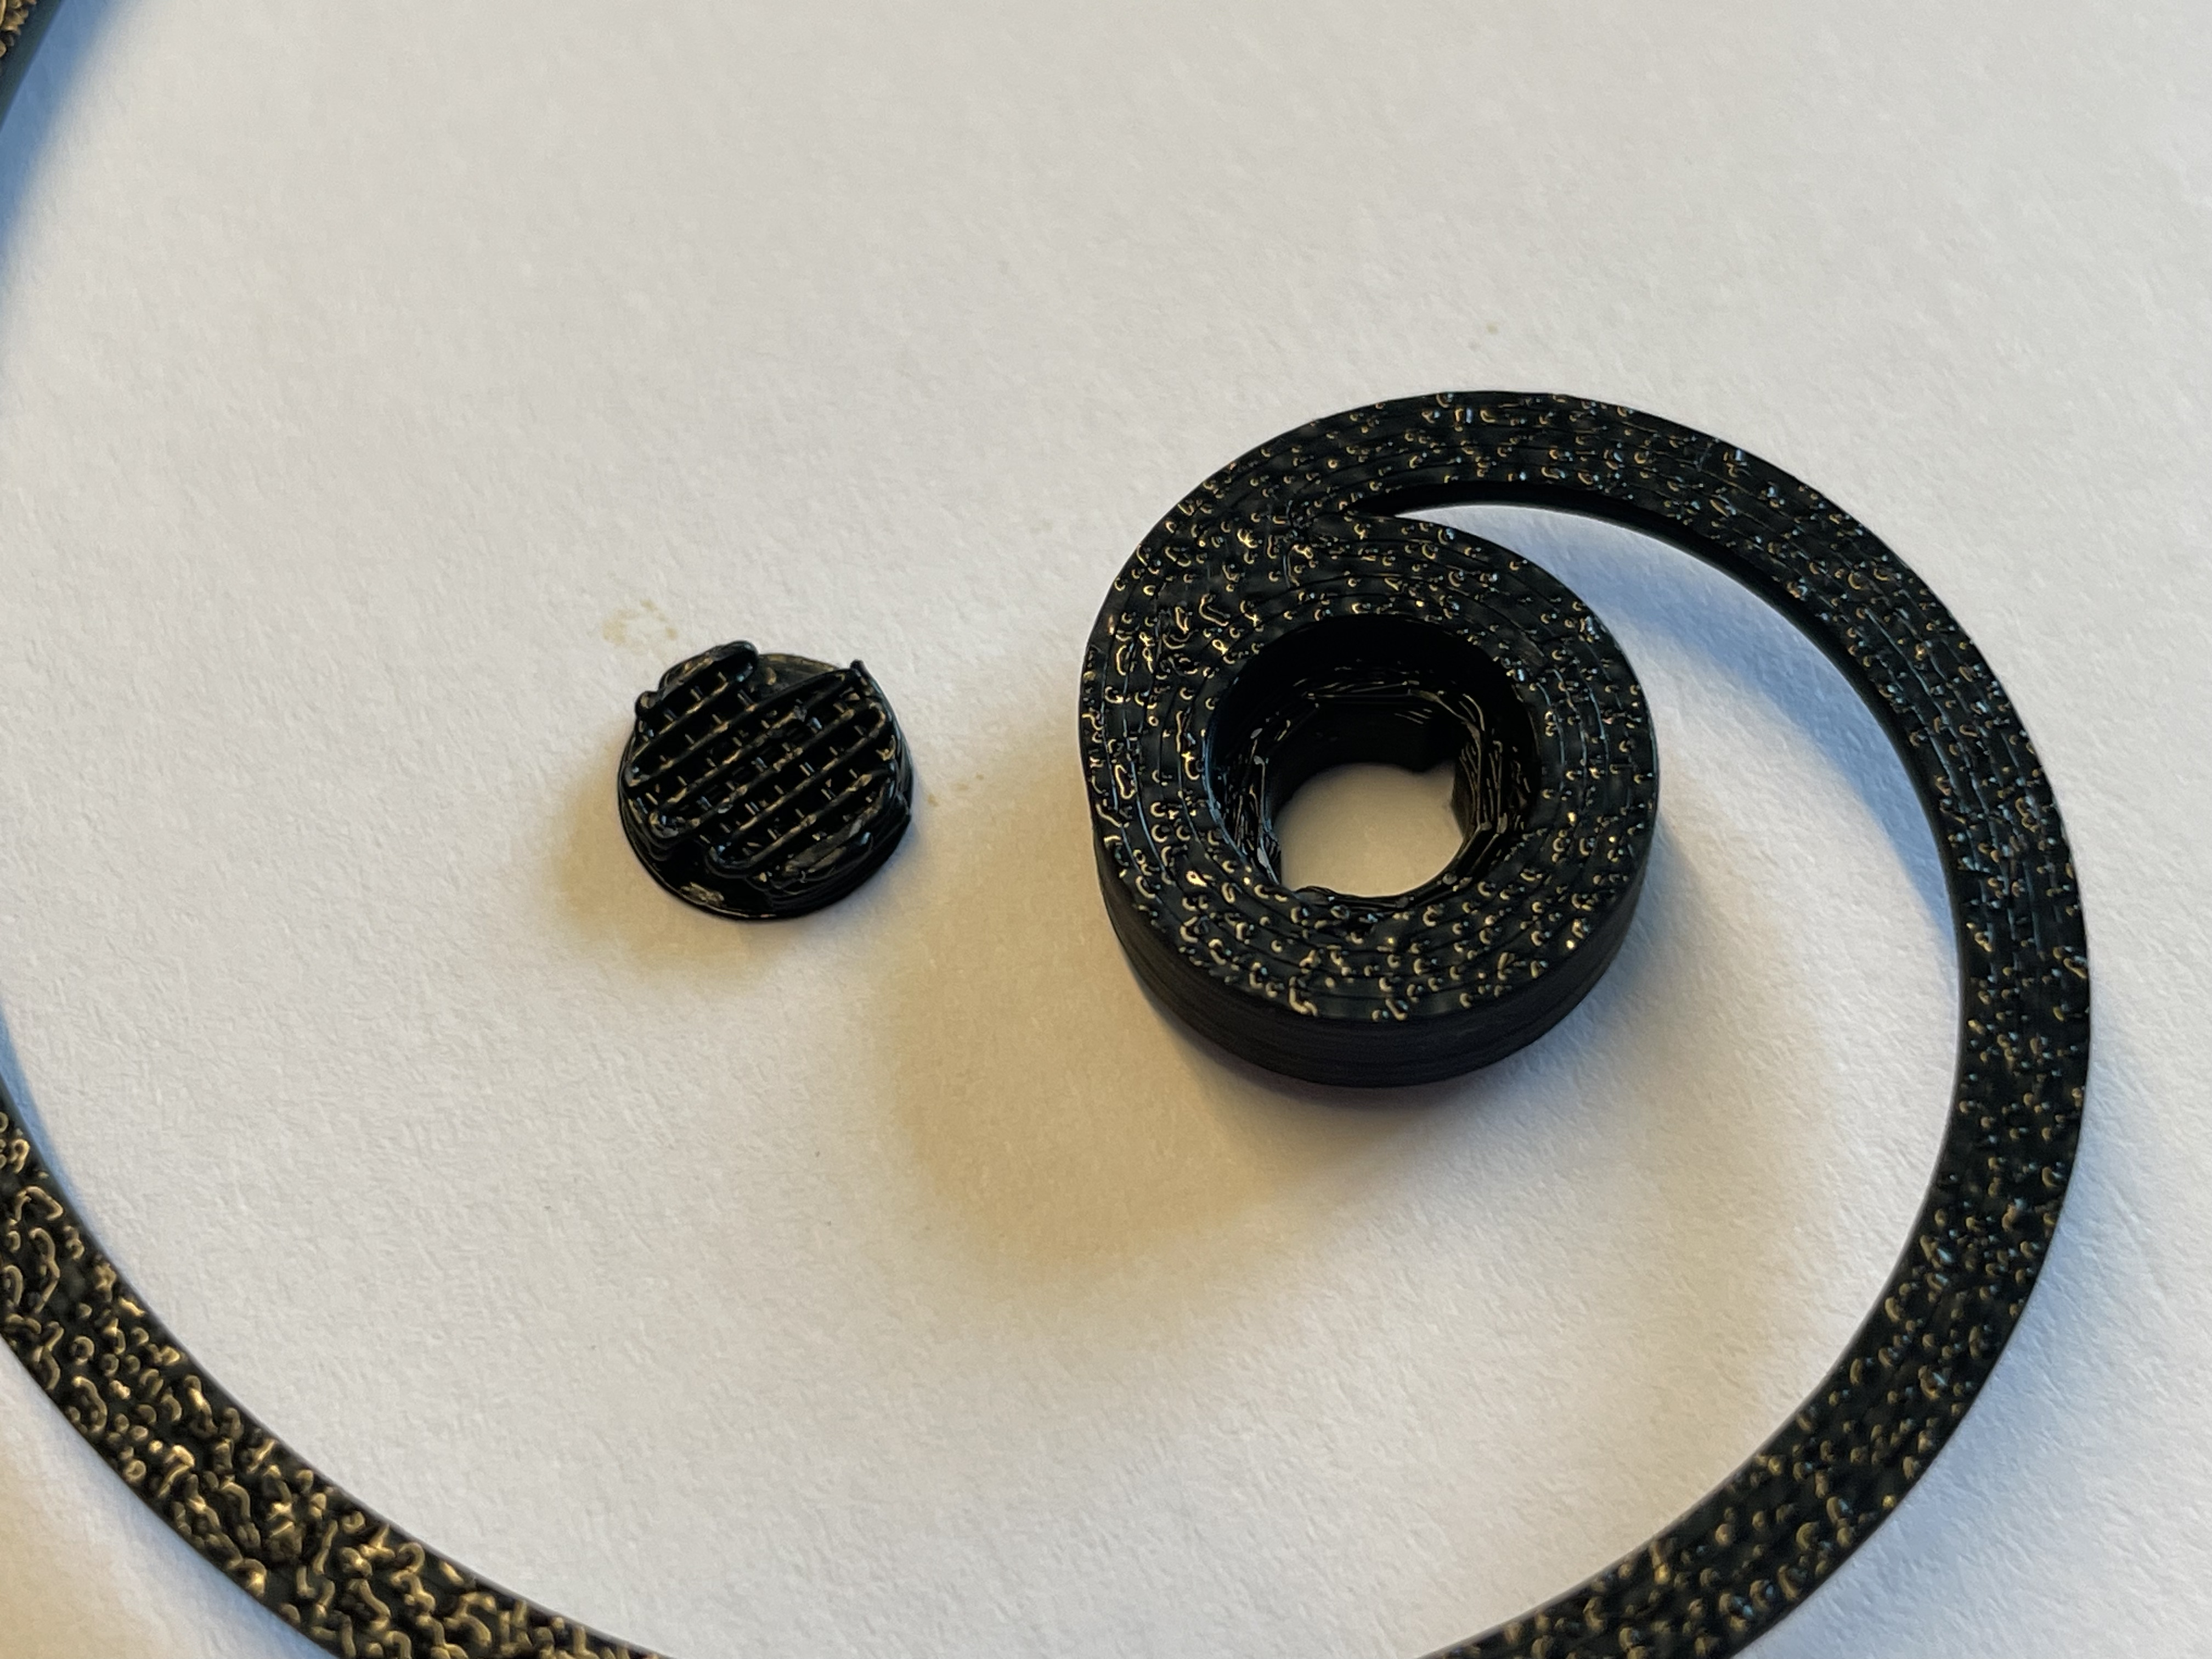
5) Place the nut from the kit into the spacer

6) Use the spacer to rotate the nut and secure the mechanism in the body
A light touch is needed to avoid pushing the nut out of the spacer, usually works quickly.

7) Remove the supports from the centre of the hour hand
I use something to push them out from the other side.
8) Push the hour spiral on so that the tip of it ends at the end of the line to the left of the 12

9) Now place the minute hand on pointing upwards.

10) Set the time using the wheel on the back of the mechanism.
11) Optionally add the back cover
Put the short ends in first and then push the left and right walls of the body out a bit to clip in the sides.

12) Hang on wall or push in the optional stand


13) Enjoy your new clock

14) Boost, rate or comment?
Please consider boosting my models and rating my print profiles, they take significant time to create and test. Feeling even more generous? You could buy me a coffee.
For those interested, here are some of the prints during development, lot's of adjustments in models and print profiles:

Feedback
If you have ideas how to improve, the model, profile, descriptions/instructions etc or had a problem message me or comment below. We can make stuff better together :-)
Commercial License?
A commercial license is available at my Patreon [https://www.patreon.com/TrustedDevelopments](https://www.patreon.com/TrustedDevelopments)
Dimensions
Just in case you're trying to use a different mechanism here are the dimensions of the 3d printed parts, these could be adjusted by adding cylinder modifiers to the parts if needed and scaling in z for thickness, or sinking into the print bed in the slicer.

Golden Spiral Clock

Publicado em 5 de jul de 2024