Você está no 3DFinder
Buscamos em Thingiverse, MakerWorld e Printables ao mesmo tempo para te dar o melhor de cada uma.
Descrição
Another birthday, another light box!
My buddy Skip and I play a lot of Helldivers 2, and with his birthday coming up his wife told me “You should make one of those boxes out of the Helldive difficulty icon since that's what you guys do.” So… I did! I actually drew this one entirely by hand since the only iconography I could find were abysmally tiny graphics. I think it's a faithful representation!
Finally edited and uploaded the videos! If you've got four hours to spare (lol), check 'em out 😁
What you'll need
- Black, Warm White, and Red PLA for the face
- Black PLA for the base
- Optional but highly recommended to also have Silk Silver and Natural/Glow in the Dark for the base
- A Wemos D1 Mini v3 (the V3 part is very important!)
- Some WS2812B LEDs (60/m is fine)
- A USB-C Snap-in
- 2x M2.3x5 self-tapping screws for the D1
- Optionally instead of WS2812B LEDs you could add an AOD4184 driver and use COB LEDs. 4000-6000k white looks great!
- The AOD mounts with 2x M1.7x5 screws
Buildin' it
This one's an easy project. Print the base and the face. If you choose to use WS2812B LEDs, wire them up to the D1 Mini and you're done. If you want to use COB LEDs, add in the AOD4184 driver. Or skip all of that and just connect the COB LEDs directly to the power jack. Plenty of options - there are standoffs in the print to accommodate mounting both the D1 and the AOD if you choose to go that route like I did.
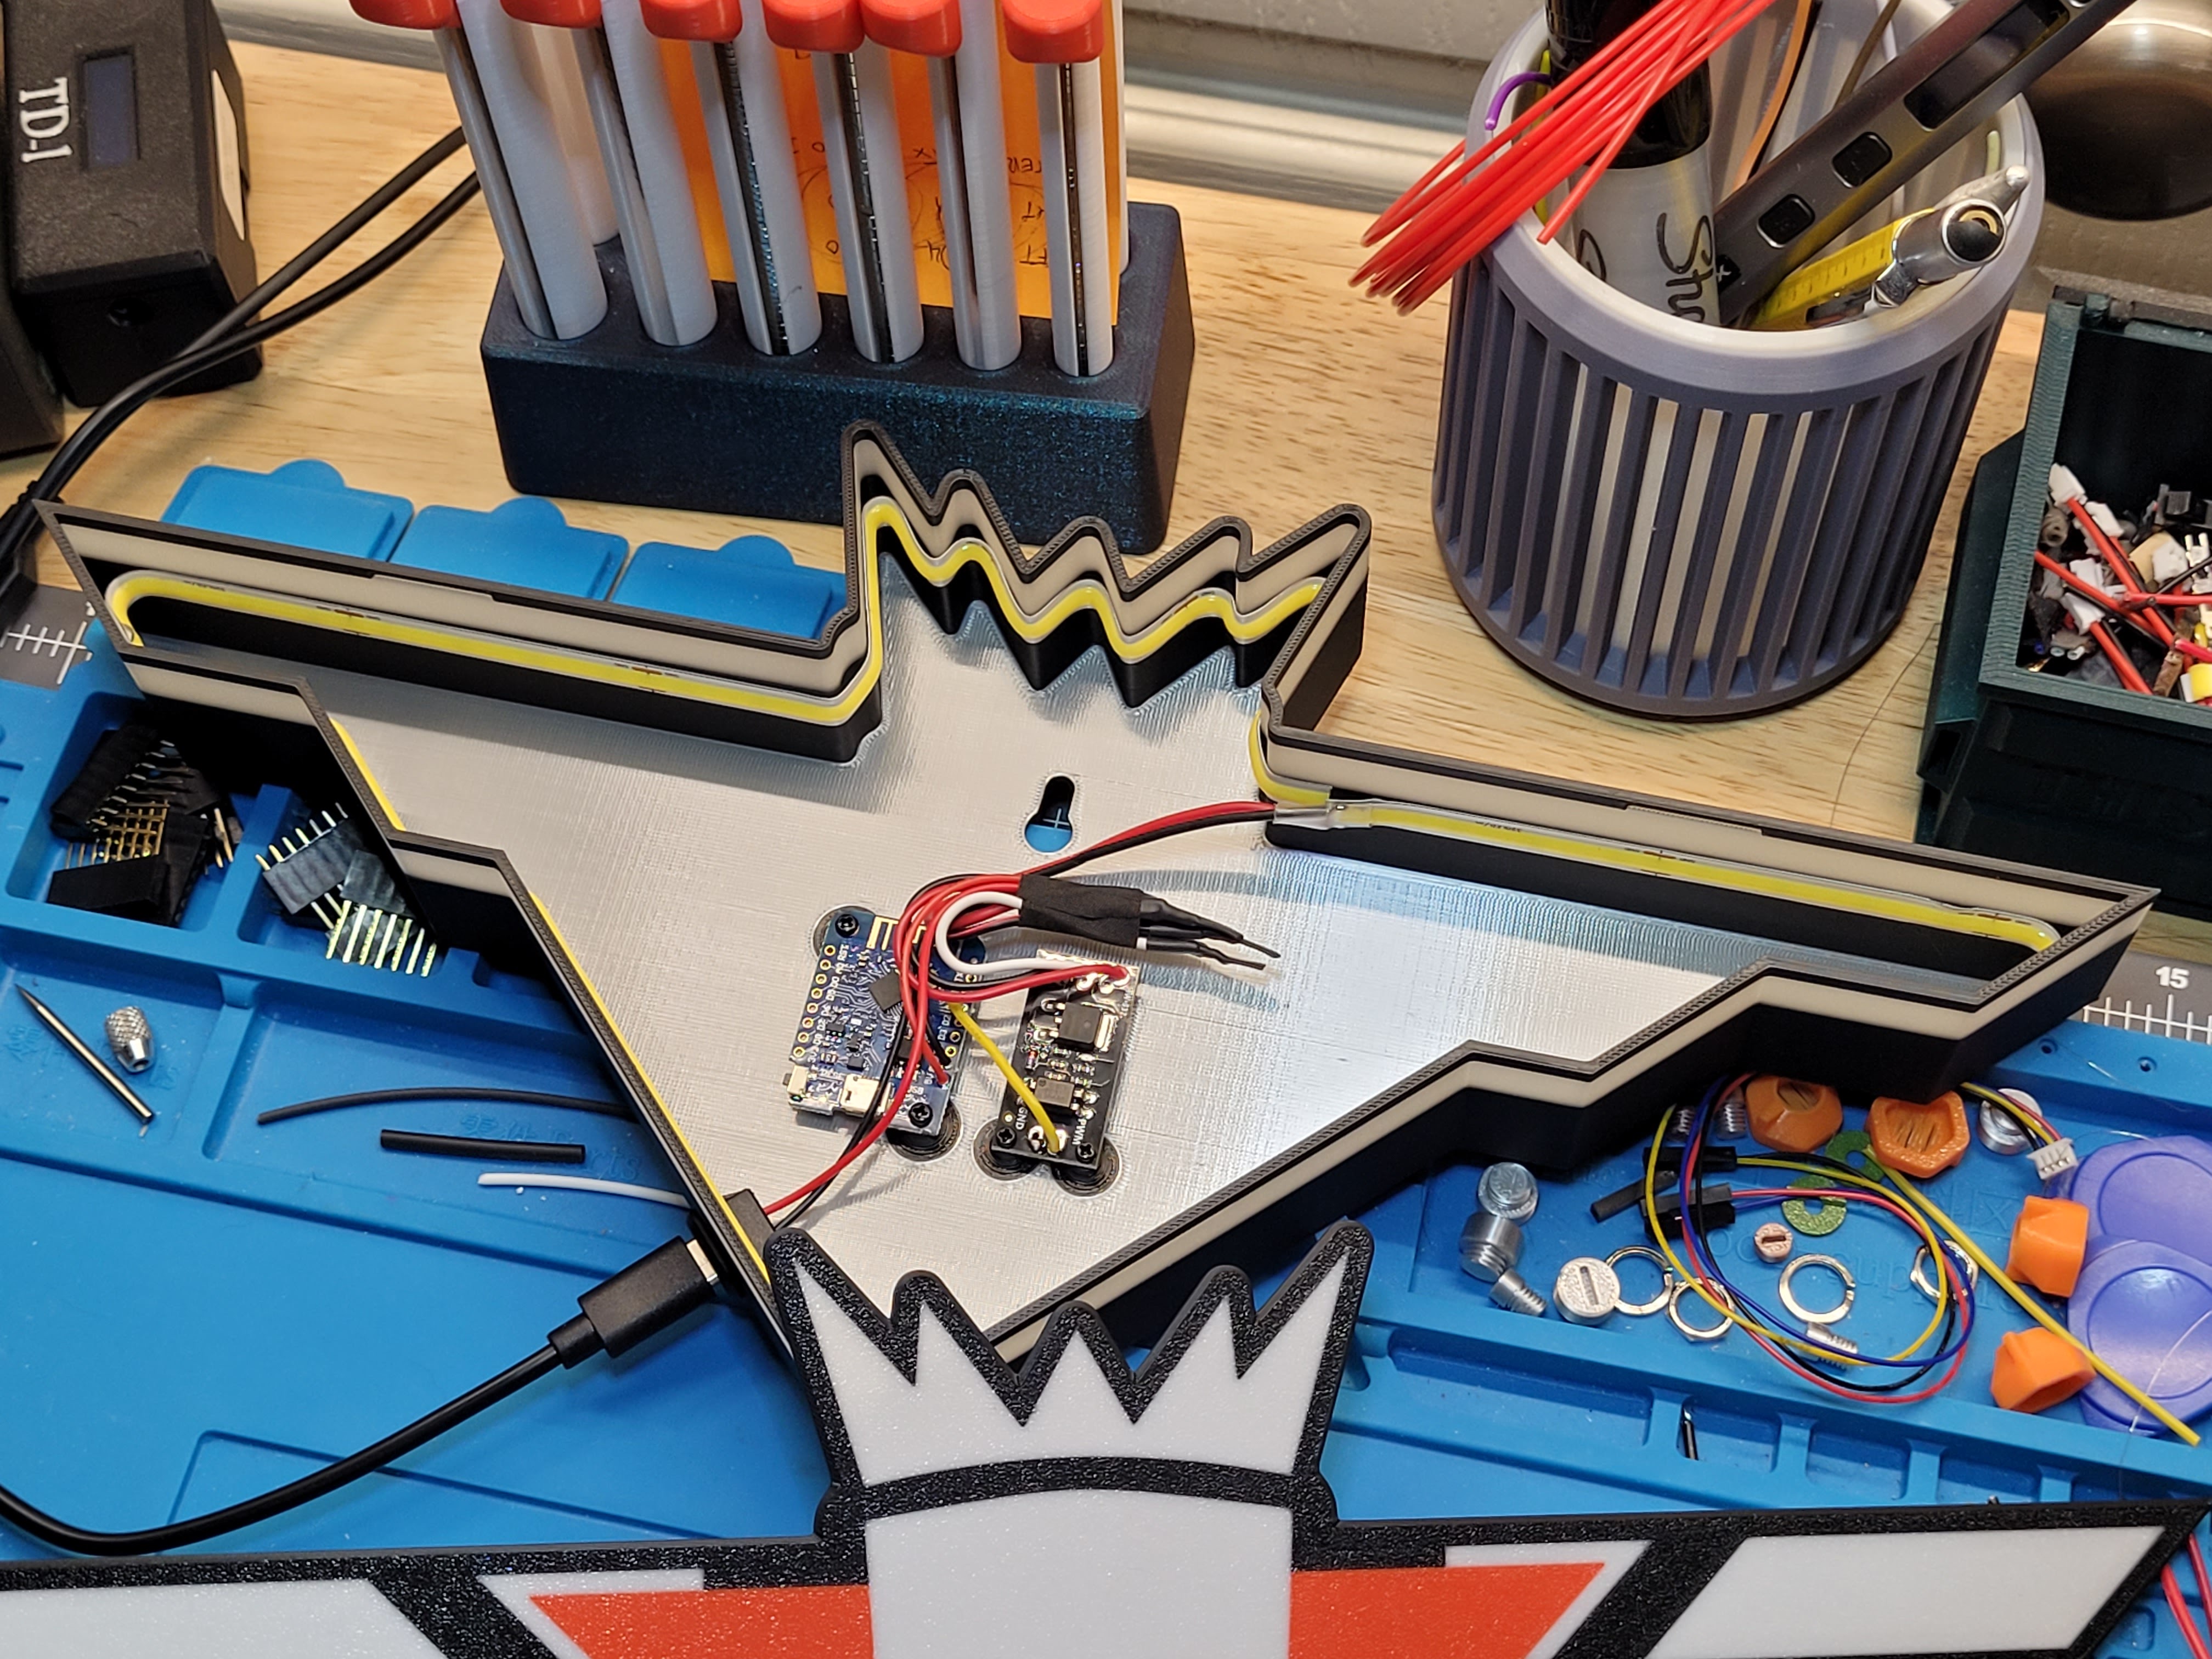
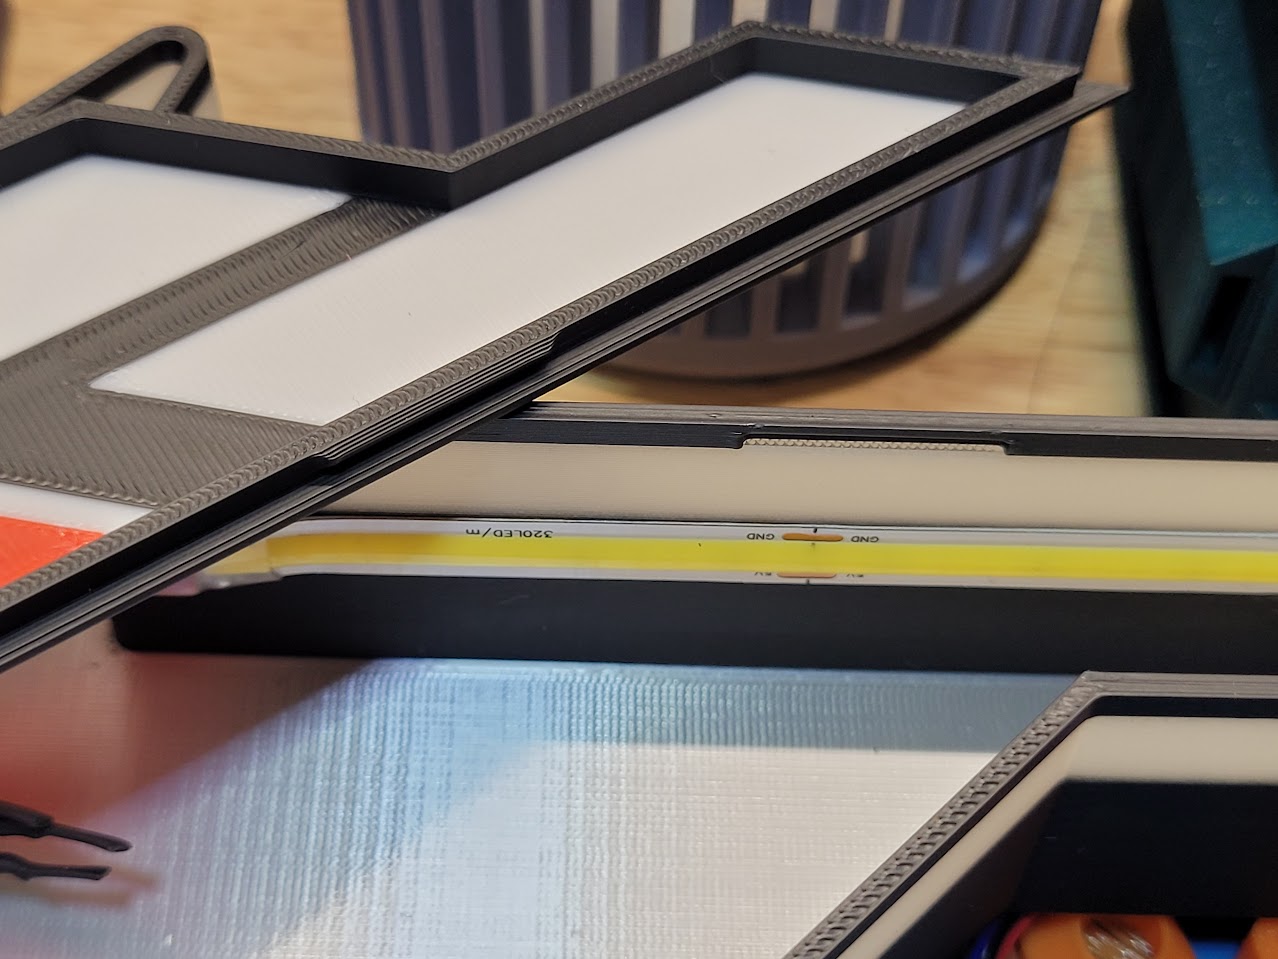
The model features four integrated snap connections for the face and the base - no glue or screws required. Line it up and gently push it together for a snap fit. Take it apart by wedging your fingernail in between the face and base and sliding it along those areas to pull them apart.
Printing Considerations
This is nearly a full-plate print, so take care to clean your textured PEI plate and throttle your AUX fan to prevent warping and plate adhesion issues. I do not allow my AUX or CHA fans over 40% and leave my door propped open.
The face may be prone to whispies if you do not have well-tuned filament profiles. Flow Ratio and Pressure Advance ("Flow Dynamics") calibrations for each filament are absolutely necessary for best results!
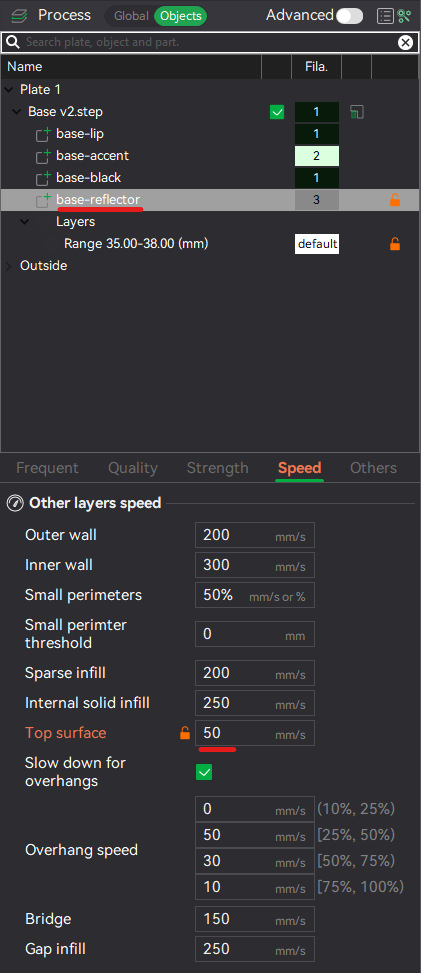
The base has a single color swap for two layers of silk silver, of which the top layer prints slowly for maximum shine. If you are not doing this, you can navigate to the “base-reflector” object and restore it's Top Surface speed to normal and regain some print time.
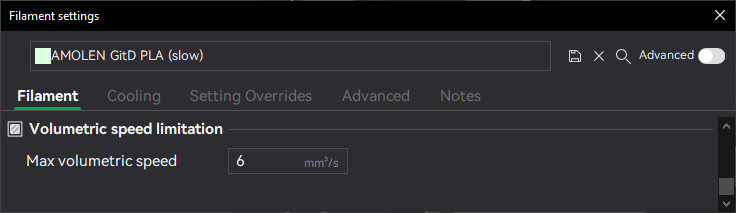
The accent walls on the base do not have speed controls set in the object process settings. This means if you are using a clear/natural material and do not have a “slow” profile for it, it may print fast and thus be less translucent than you would like. I strongly encourage making a duplicate of your material profile and throttling it's MVS down to like 5-6mm³/s to force it to print slowly for the best clarity. I did this so if you want to print a solid wall without a clear portion you can simply assign your black material to it as well and it will print quickly.
Helldive Difficulty Light Box
Publicado em 27 de jun de 2024
Gostou deste modelo? Crie uma conta grátis para salvar seus favoritos e voltar a eles depois.
Criar conta