Você está no 3DFinder
Buscamos em Thingiverse, MakerWorld e Printables ao mesmo tempo para te dar o melhor de cada uma.
Descrição
There are a lot of desiccant drying models out there, but I wanted something with a friction fit lid and a pour spout to easily dispense the refreshed desiccant back into their vessels, so I designed this.
I designed the spout to work nicely with the small AMS dry pods I printed from Trey's Designs. but it works well with all other models out there. If the beds get stuck while pouring, a quick shake will free them up and and they will begin pouring again.
The print is designed to not need supports for the pour spout and prints well with PETG. There should be 0 top and bottom layers and 40% infill to allow air gaps to aid with drying of the desiccant beads.
**Please do not adjust the print settings, they are optimized for the model. If you must, please pay attention that you set the TOP AND BOTTOM LAYERS back to 0 or the print will not come out as intended.**
**If you plan on drying your filament in your machine, you must print this in a high temp compatible filament like PETG, ABS, ASA, etc. If you print in PLA, you will risk warping the box severely. Please also understand that if you use the High Speed PETG, you max experience warping as well because the glass transition of HS PETG is not much better than PLA**
X1 and P1/P2 Series Drying:
I dried a half tray at 70C for about 6 hours with the Auxiliary and Chamber fans at 50% and the beads were back to bright orange. If you put the lid on, and plug the spout, you can gently shake the tray a few time during drying to mix them up to speed drying.
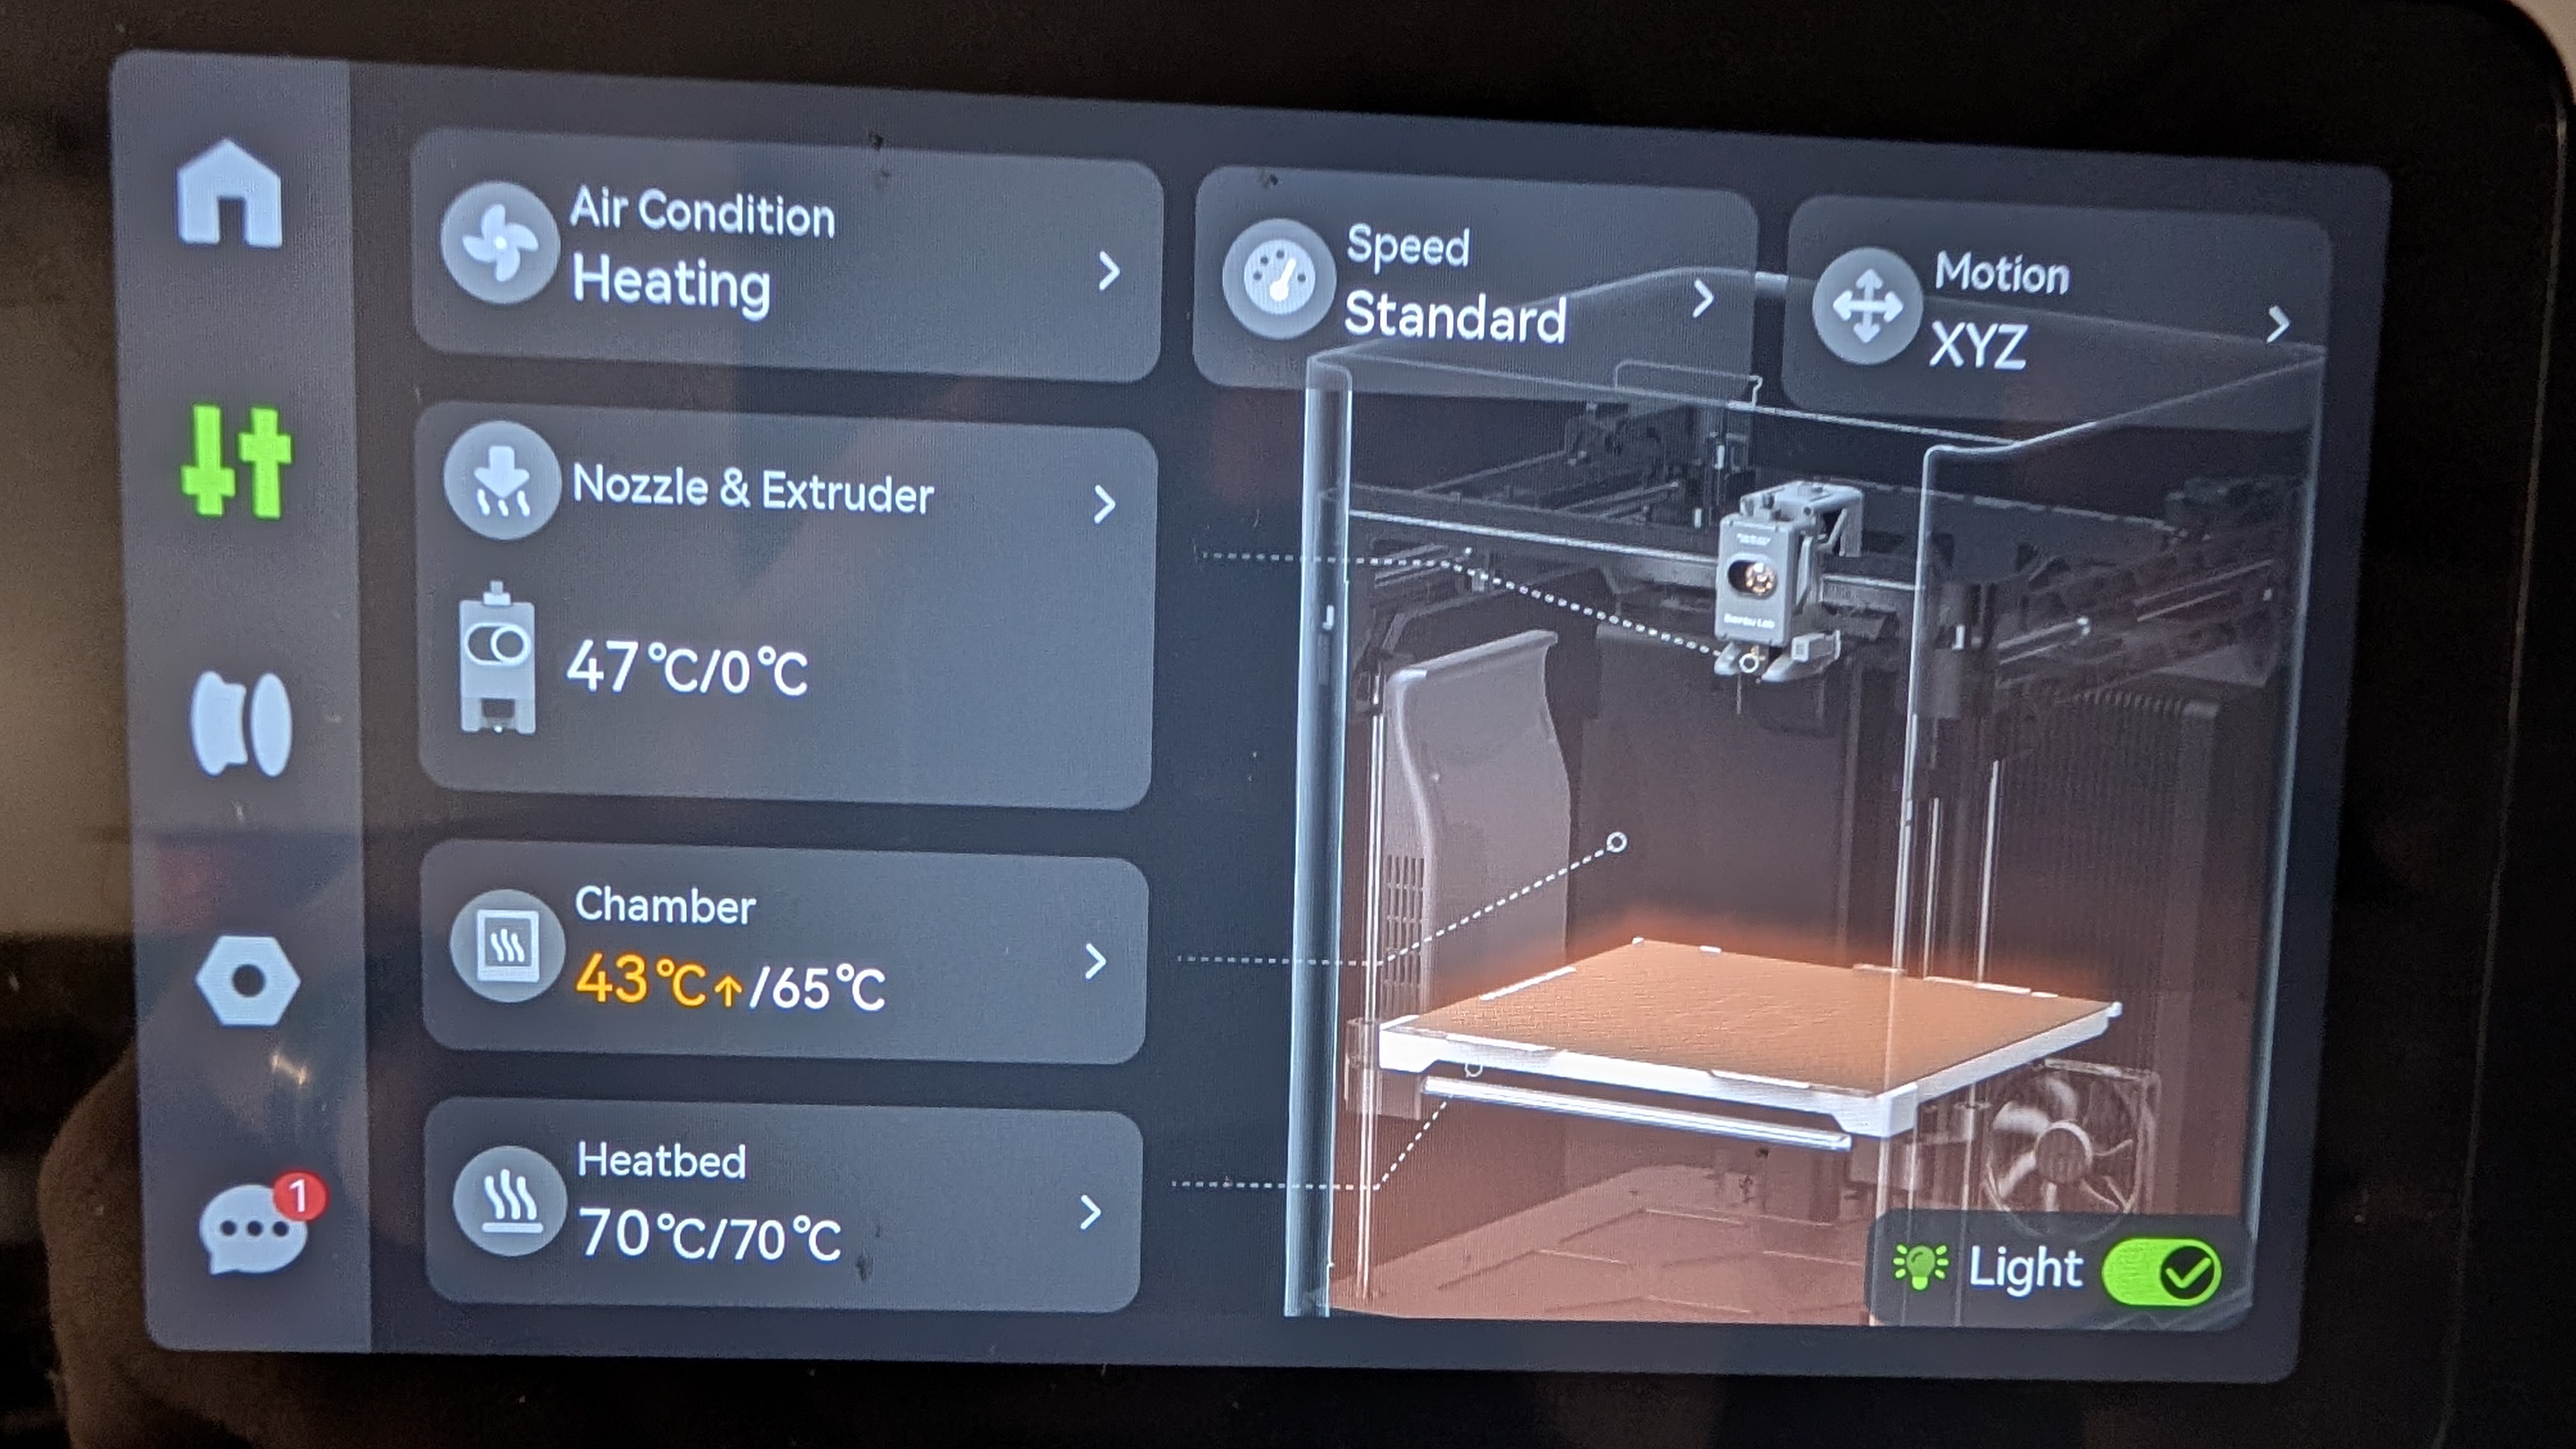
H2 Series Drying:
This dries the filament much faster than the X1, P1/P2 models. In order to dry your desiccant with the H2 series printers, manually set the print bed to 70C, then turn on the chamber heater to 65C. This will put the machine into the Air Condition - Heating mode. This closes the vents, turns on the fans and heats the chamber. Make sure you close the door securely. In my experience, you can dry a tray of desiccant beads to fully recharged within a few hours. Please note that if you aren't using a really high temperature plastic and you leave the lid on, it may slightly loosen the lid, so it's best to leave the lid off during drying.
** Do not attempt to use this tray in a device other than a 3D printer to dry your desiccant beads. This was not designed to be used in a microwave, oven, toaster oven, high temp dehydrator, solar heater, etc. This was desgined and should be used with an enclosed 3d printer following the suggestions I've added to the description. If you use another device or method beyond the reccomended methods, melting, warping, fire, or toxic off gassing of the tray is your responsibility **
Changelog |
|
Desiccant Drying Tray w/ Lid & EZ Pour Spout + Cap

Publicado em 4 de jun de 2024