Você está no 3DFinder
Buscamos em Thingiverse, MakerWorld e Printables ao mesmo tempo para te dar o melhor de cada uma.
Descrição
Horizontal, Vertical, Stacked or fully enclosed - It's up to you!
I designed this holder as a modular system so it can be stacked, fully enclosed, or combined.
The space between each plate is big enough, so one can easily grab the desired plate without having to fiddle around
I’m a huge fan of industrial furniture and appreciate the look of exposed screws.
While looking for inspiration, this design by SimplyModels caught my attention and influenced my design.
The design is easy to print: Front & Rear facing down, and Sides on their sides.
The holes are suited for 3x20mm hex-screws, but you can easily use shorter ones.
------------------------------
Classic = Capacity up to 5 plates
- V2 (Classic):
1.2mm spacing for each plate.
Fits all Standard (Engineering, Smooth, Textured, Cool) plates
- V2 (Classic) Extended:
1.6mm spacing for each plate.
Fits Standard & Bambus new 3D Effect Plates.
- V2 (Classic) Xtreme:
2.0mm spacing for each plate.
Should fit any plate, even the thickest.
Mammoth = Capacity up to 6 plates
- V3 (Mammoth):
1.2mm spacing for each plate.
Fits all Standard (Engineering, Smooth, Textured, Cool) plates
- V3 (Mammoth) Extended:
1.6mm spacing for each plate.
Fits Standard & Bambus new 3D Effect Plates.
- V3 (Mammoth) Xtreme:
2.0mm spacing for each plate.
Should fit any plate, even the thickest.
------- Full Enclosure ------- Only 3 steps away to dust-proof your plates!


(1 of 3) Closed Rear Panel:
Your first step to fully enclose your build-plates and have them free of dust.

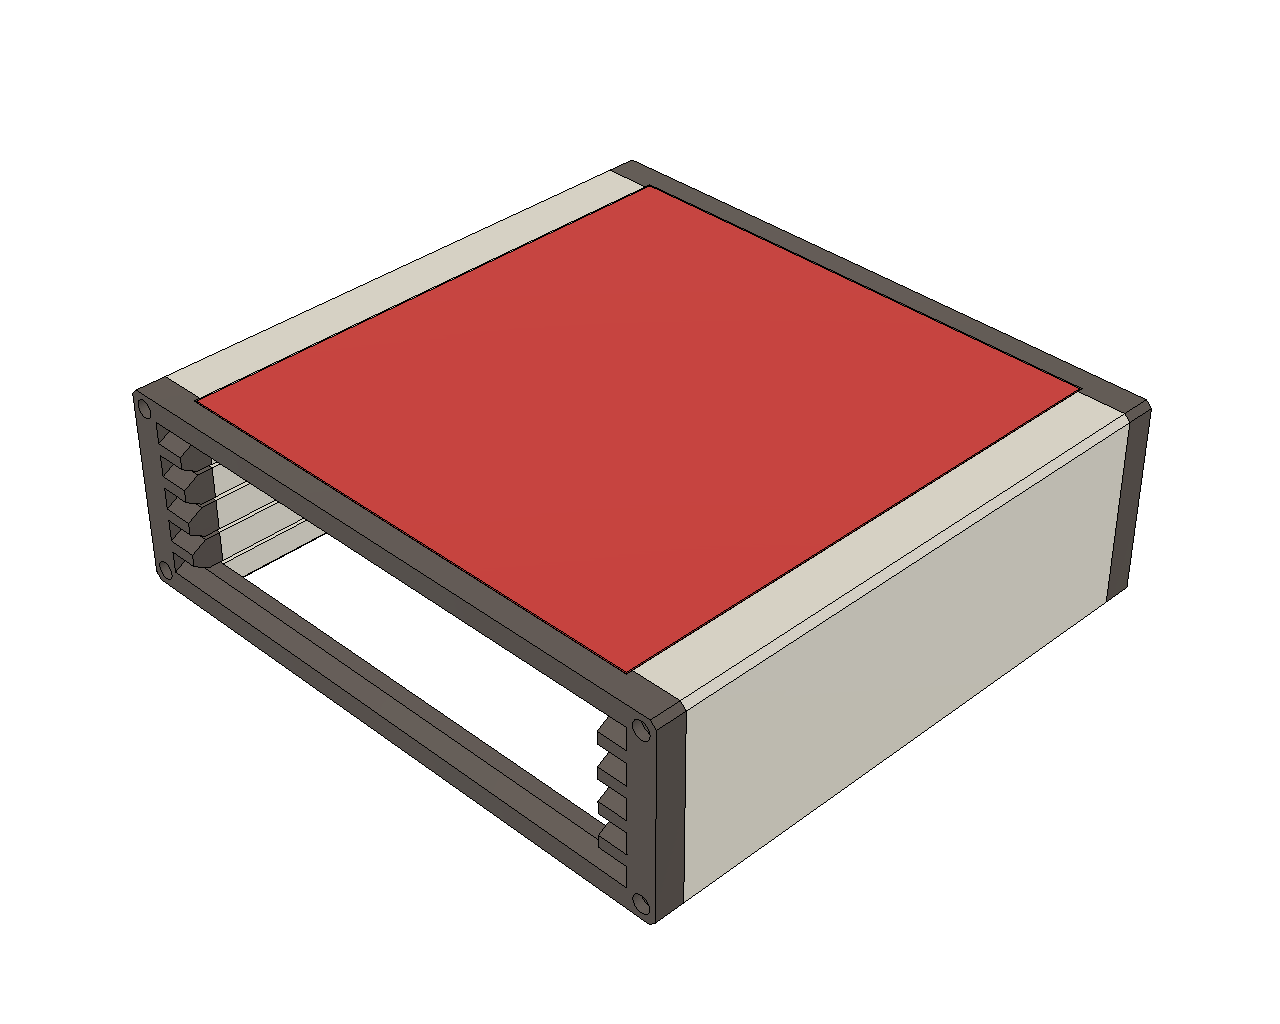
(2 of 3) Closed Top Cover:
A simple top cover to further prevent dust collection.
⚠ Requires disabling the “Bed exclude area” (more info down below)

(3 of 3) Closed Front Panel: Choose the right one: V2 (Classic) or V3 (Mammoth).
The final step to fully enclose your plates and put an end to dust plates


⚠ Instructions: The Closed Front Panel is mounted on top of the already existing front (the print will automatically stop at layer 32 to insert the magnets)
You need:
2x Ø6x3mm magnets (I)
2x M3x14 - 18mm hex screws (II)
4x M3x20 - 25mm hex screws (of which 2 should be of steel so that the magnets have something to attach on) (III)
*In case you don't want to use, or don't have magnets on hand, just resume the print after being paused or delete the pause before printing and tighten the side-screws (II) a little more to create slight friction.
------- Tool -------
Clearance Test:
If unsure which spacing best suits your plates,
please print the "Clearance Test" first and select depending on your preference or need.

------- Add-Ons -------
P1S Stacker:
To easily stack your P1 Build plate holder.
⚠ Requires disabling the “Bed exclude area” (more info down below)

Closed Top Tray:
Simple Top cover (to avoid dust collecting on plates)
⚠ Requires disabling the “Bed exclude area” (more info down below)

Closed Top Comp. Tray:
Various flat compartments and a rounded one for your Glue-stick (measurements in mm)
⚠ Requires disabling the “Bed exclude area” (more info down below)


A1M to P1S Stacker:
To easily stack the “A1M Build Plate Holder” on top of your "P1S Build plate holder”
⚠ Requires disabling the “Bed exclude area” (more info down below)


To disable the “Bed exclude area”, please follow the Bambu Lab Wiki or directly download this tool.

------------------------------
If you like my design, I’d really appreciate your feedback!
It would mean the world to me. Thank you! 😊
Build Plate Holder (stackable & dustproof)

Publicado em 29 de mai de 2024