Você está no 3DFinder
Buscamos em Thingiverse, MakerWorld e Printables ao mesmo tempo para te dar o melhor de cada uma.
Descrição
This is a compact heat insert press that utilizes the affordable and readily available 150mm linear rail with MGN7H block.
Instead of the adopted used return with a counterweight found in many designs, a printed spring takes its place, contributing to the reduction of parts count and simplification of assembly.
Notes:
- The first step is to print test pieces to confirm compatibility with your soldering iron.
- The spring is PETG, while the HolderArm, which comes in contact with the soldering iron, can be printed in PETG, ABS, or ASA. Other parts can be printed in PLA.
- Springs should be printed with 100% fill rate.
- I anticipate the use of soldering irons with a handle diameter of around 20mm. Please verify compatibility with your soldering iron using the test parts. Additionally, customization for your specific soldering iron can be achieved using the step file.
- Precision relies on minimizing the play of the nut bar. Please start by printing Body.stl and then try Nutbar_Tolerance_Test to select the tolerance for printing the nut bar.
- Special thanks to TheSnootch and Pluck3r!
Required other than printed parts:

- 1x Soldering iron
- 1x 150mm rail with mgn7h block
- 7x M3x5x4mm heat-set Inserts
- 6x M2 nuts
- 10x M2x6mm screws
- 1x M3x6mm screw
- 4x M3x10mm screws
- 2x M3x12mm screws
- 3x zip ties
Assembly:
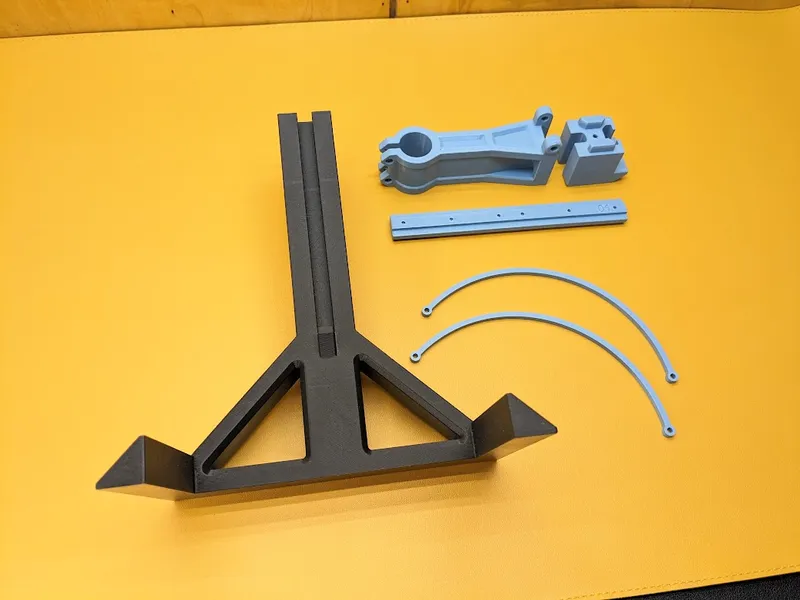
0. Print a total of 6 parts ‘Body’, 'HolderArm', ‘NutBar’, ‘Top’ and 2x'Spring'.
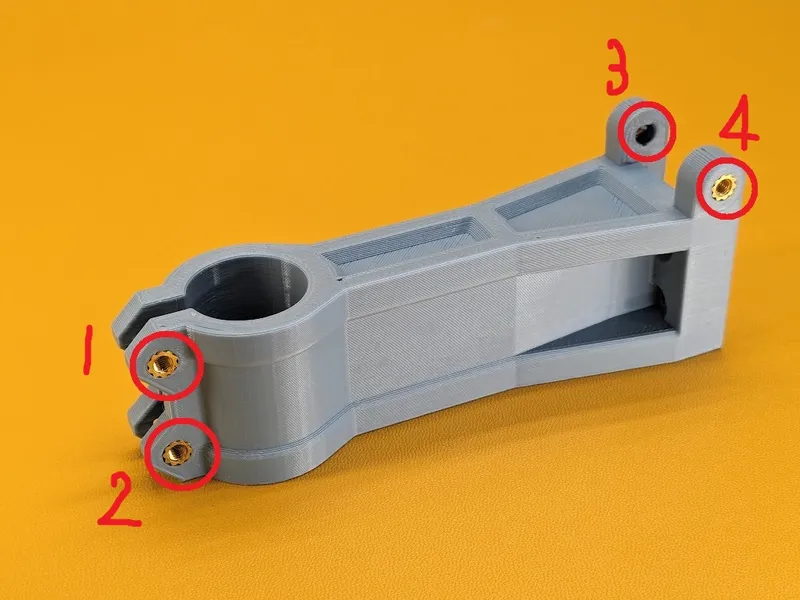
1. Installing M3x5x4mm heat-set Inserts on HolderArm at 4 points
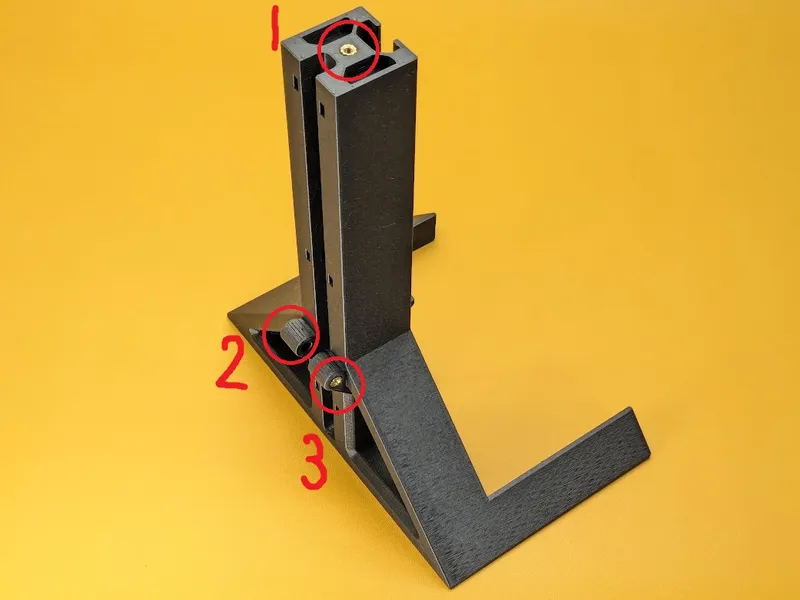
2. Installing M3x5x4mm heat-set Inserts on Body at 3 points
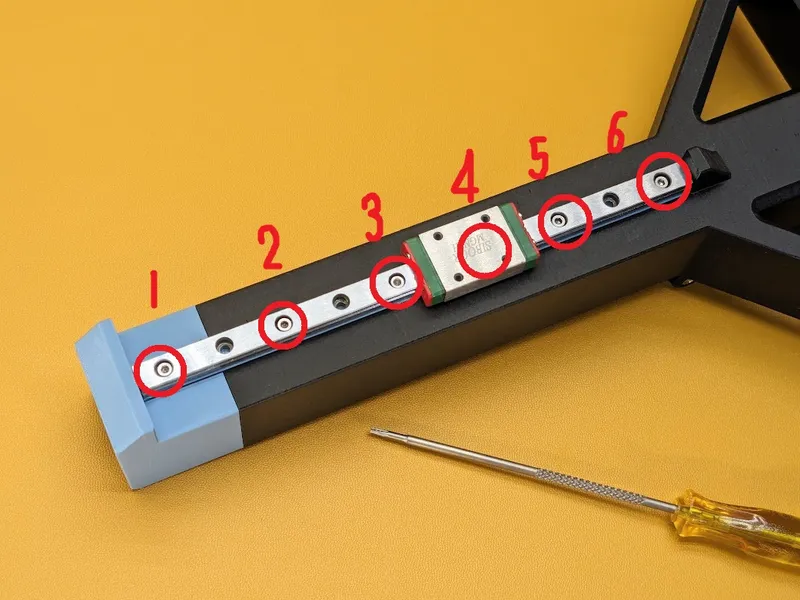
3. Installing M2 nuts on NutBar at 6points. Push the nut all the way in, otherwise the screw won't reach when installing the rail.

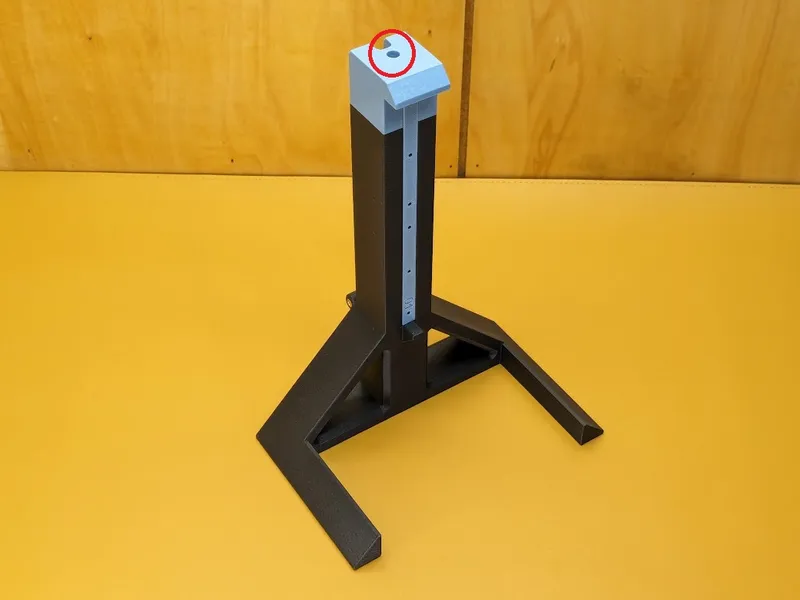
4. Insert the NutBar into the body and secure the top part with M3x6mm screws.
5. Secure the linear rail to the NutBar with M2x6mm screws at 6 points.
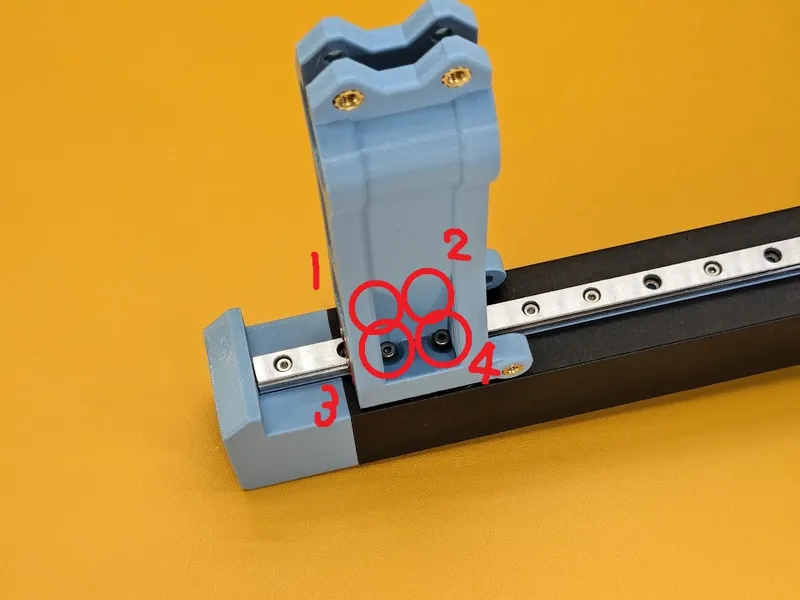
6. Secure the HolderArm to the linear guide block with M2x6mm screws at 4 points.
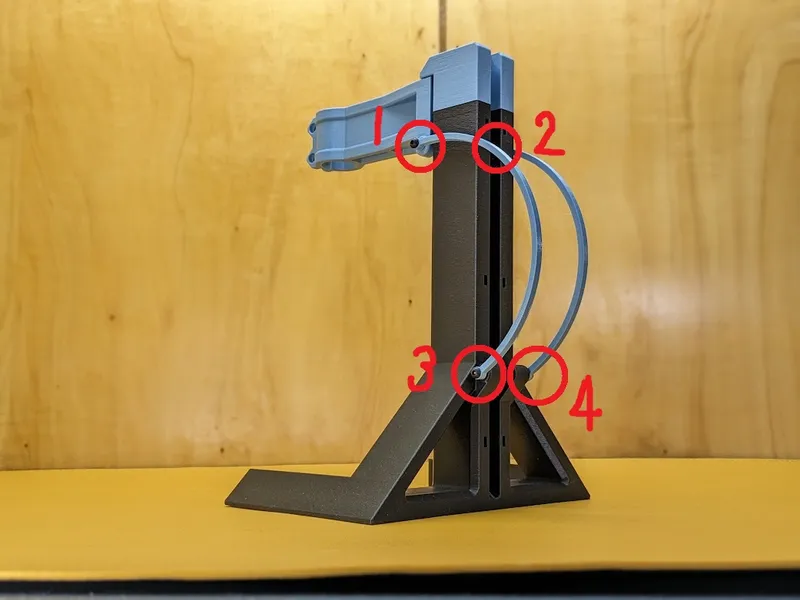
7. Attach two springs using M3x10mm screws, being careful not to tighten the screws too much. The springs need to have enough space to rotate freely.
be careful not to remove the top part while the springs are attached, as the linear guide block pop out.
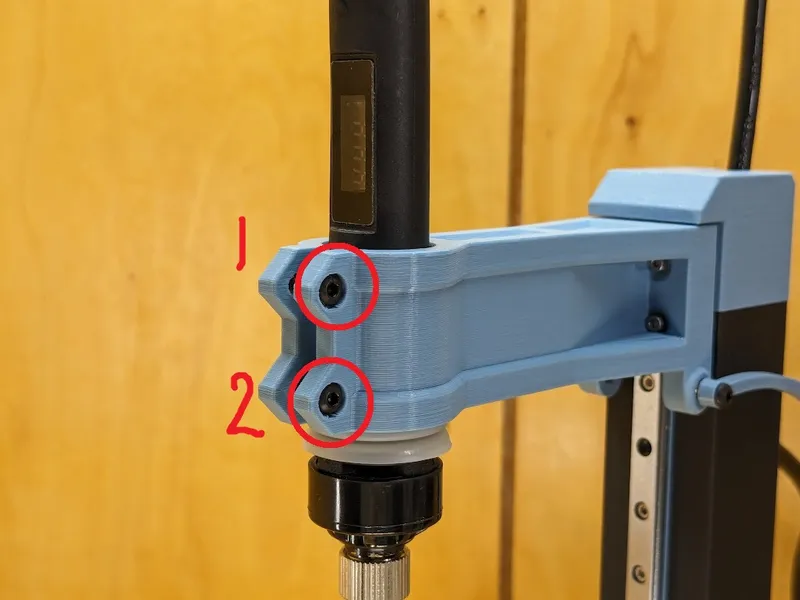
8. Secure the soldering iron to the holder using M3x12 screws.
9. Hold the wire in place with zip ties at three points to prevent it from protruding out .