Você está no 3DFinder
Buscamos em Thingiverse, MakerWorld e Printables ao mesmo tempo para te dar o melhor de cada uma.
Descrição
I wasn't a fan of the desktop clock linked from the Clock Components Kit 011 (alternative clock movement) as I wanted something larger that I could hang on the wall. While designing the model I couldn't make up my mind on the final style so I mocked up multiple options. Feel free to print one of my preset profiles or continue reading for more details on customizing your own style.
Printing instructions
You'll need to print the “Back and Components” profile as well as one of the Front and Inset profiles
Front Presets and Customization
Front - Customizable: Included all marker types so you can create your own style (see below)
Front - Dashes: Large hours rectangle markers with smaller minute rectangles
Front - Dots: Large hours circle markers with smaller minute circles.
Front - Numbers: Text based hour markers
Front customization:
Using the “Front - Customizable” profile you can remove markers you don't want to create your preferred style. All of the hour markers are grouped into “Primary” (3, 6, 9, and 12) and “Secondary” (1, 2, 4, 5, 7, 8, 10, 11) groups.
Step 1 - Open the “Front - Customizable” profile and switch to the Objects tab
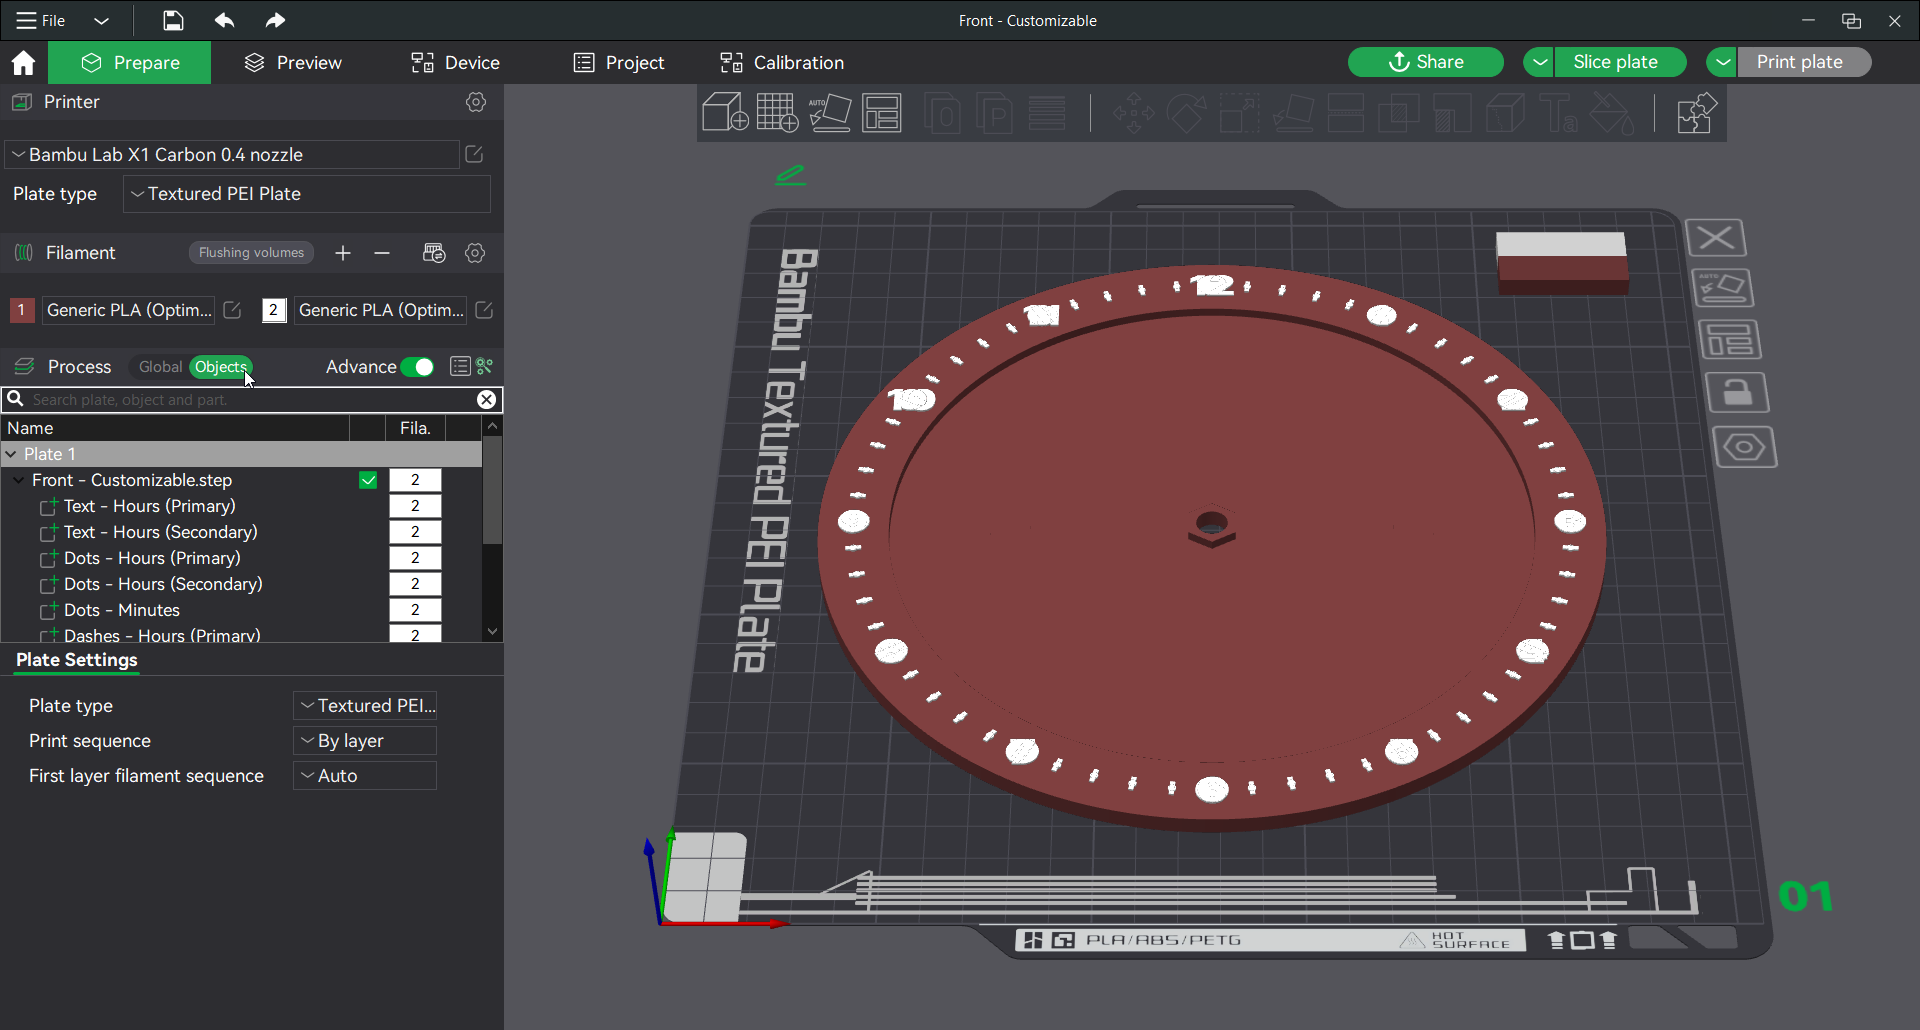
Step 2 - Right click on the objects you do not want and select delete.
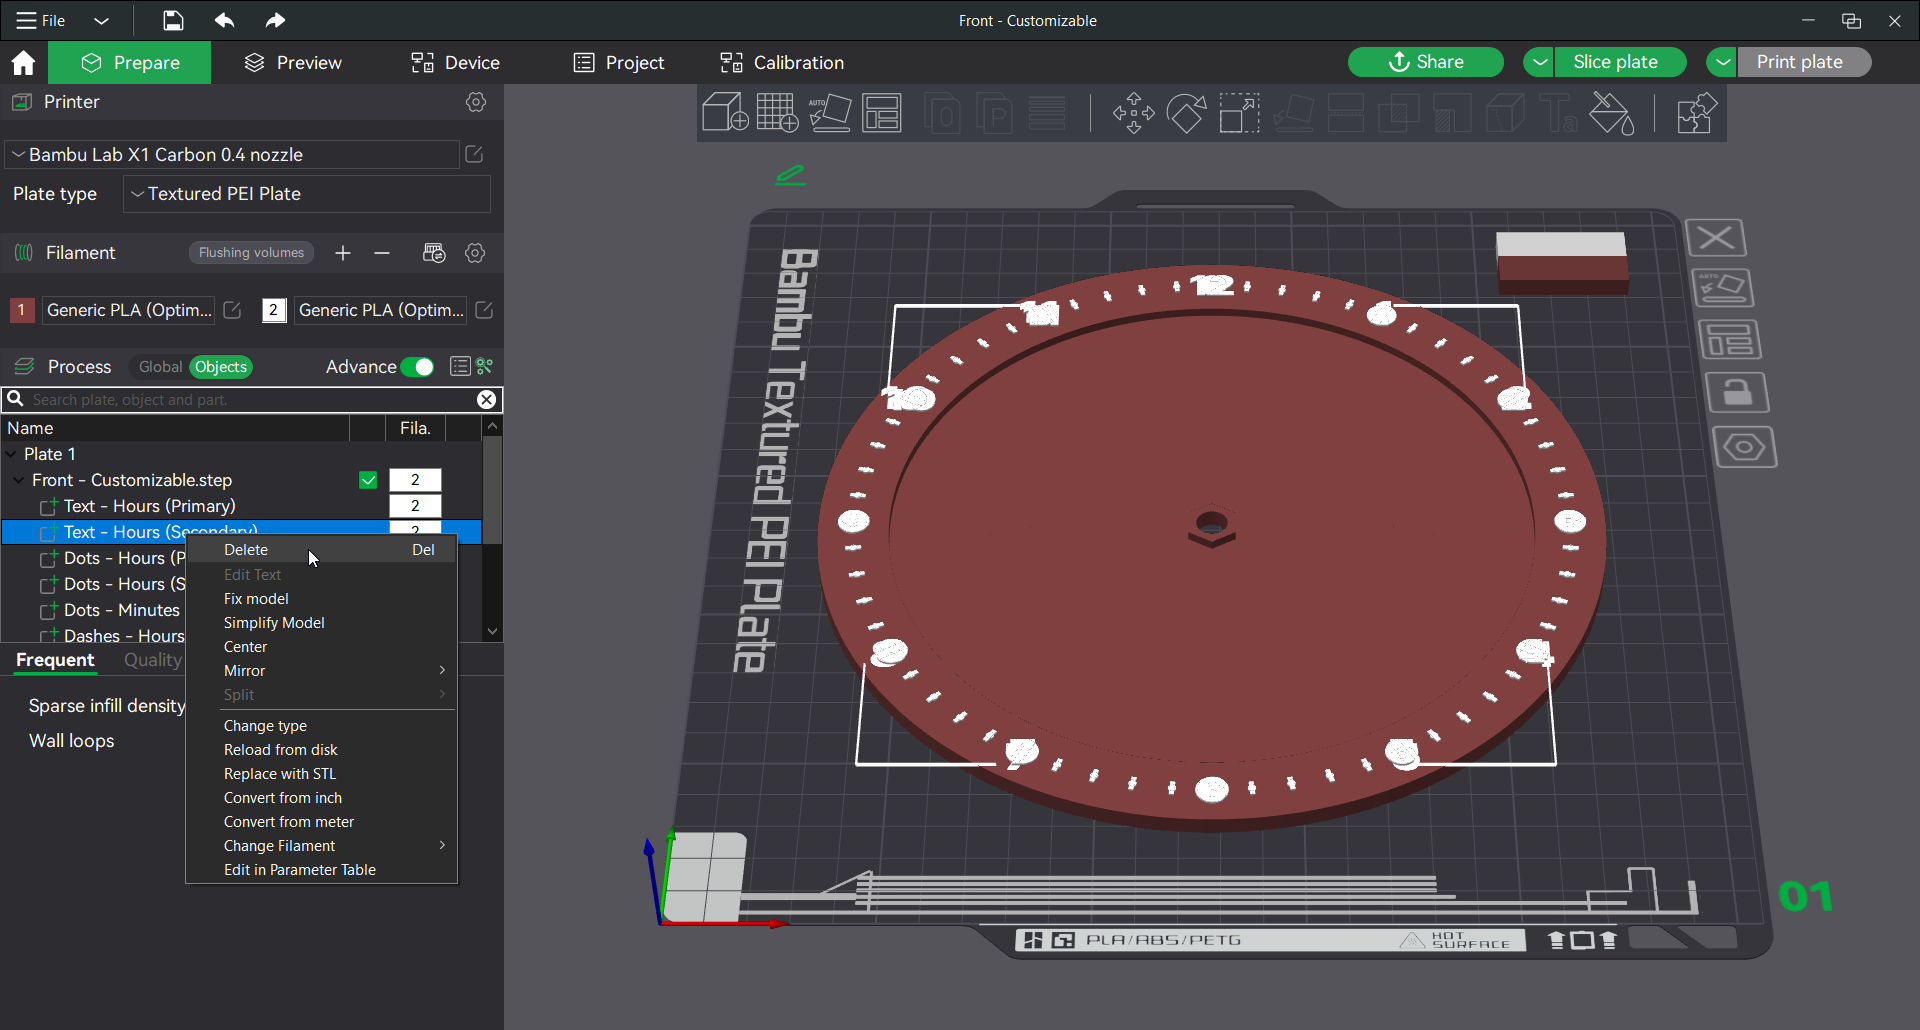
Step 3 - Ensure that you do not have multiple “Hours (Primary)”, “Hours (Secondary)”, or “Minutes” object types selected.
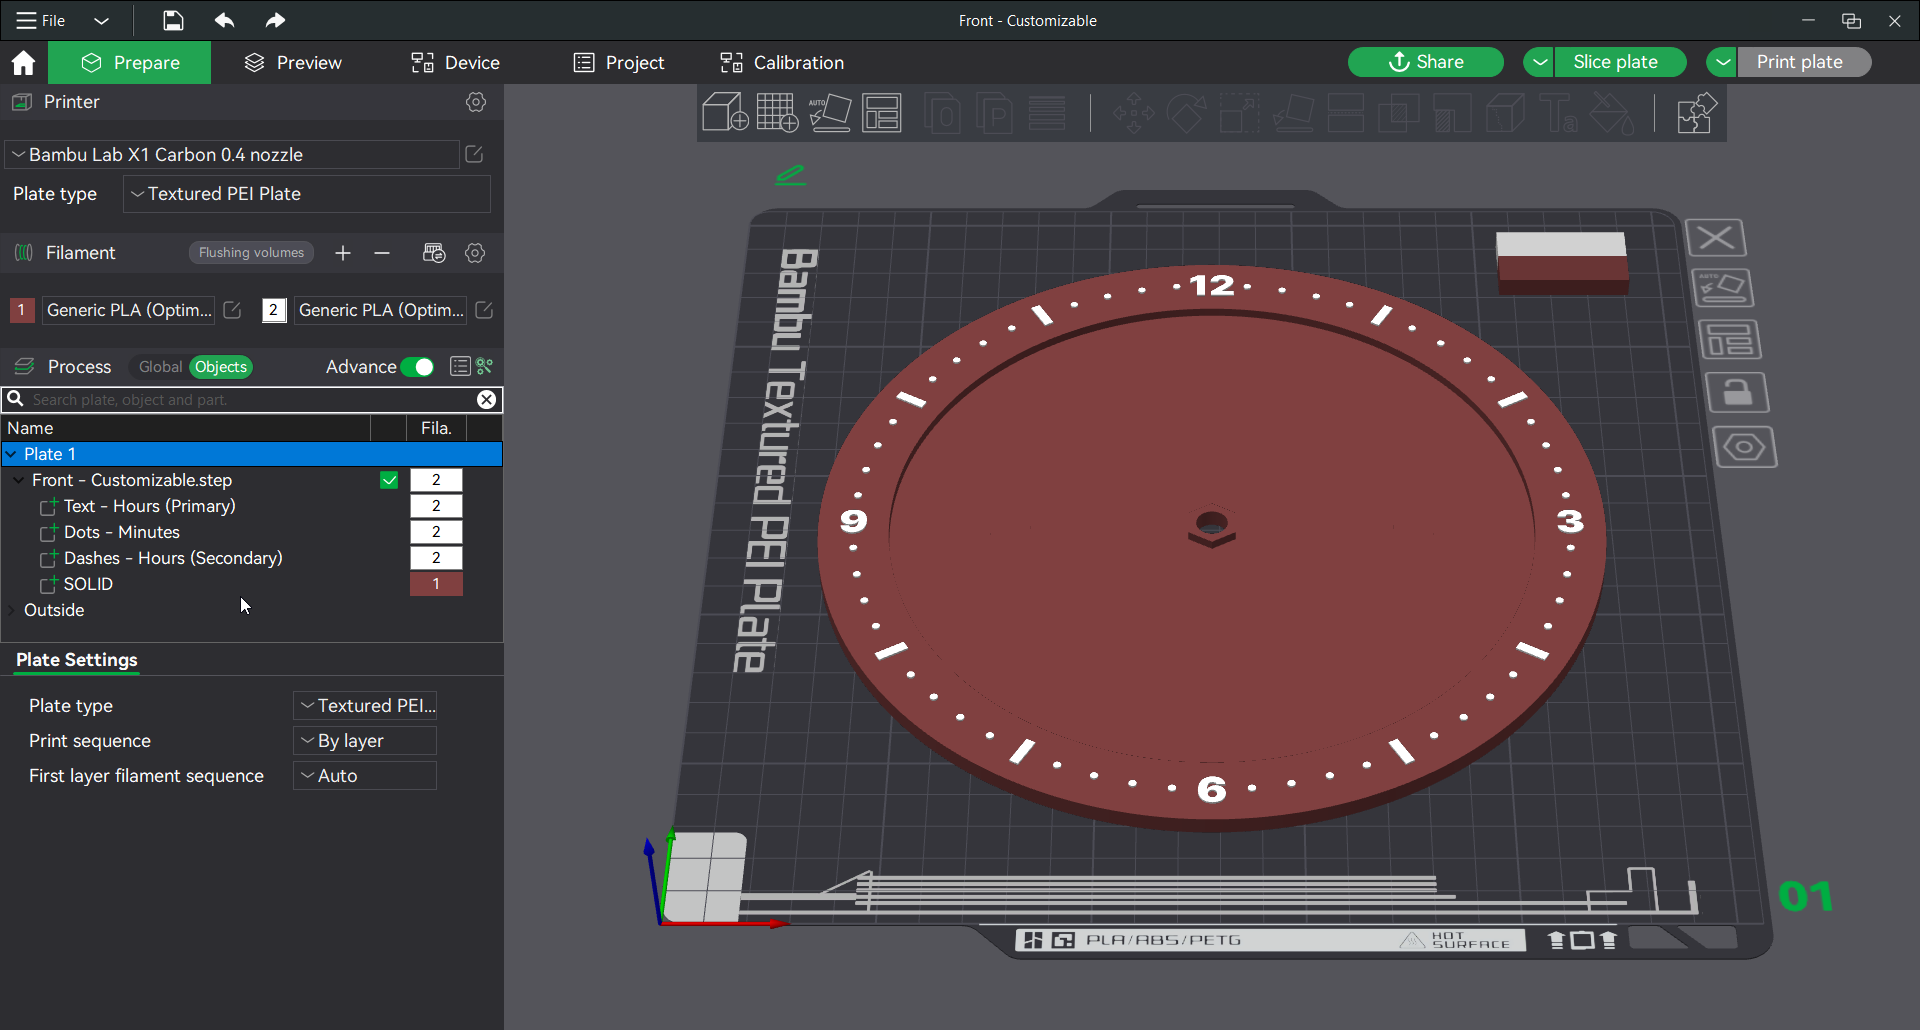
None of the objects are required. The following image shows a clock face with primary hour numbers, secondary dash markers, and dot minute markers.
Inset Presets and Customization
I've included two simple inset models (“Inset - Hexagon” and "Inset - Solid") as well as an example HueForge inset. I've included the “Solid Inset.step” file for the solid inset to use as a starting point for designing your own inset.
HueForge inset
If you want to print the supplied “Inset - HueForge” profile as it is I recommend using the Polymaker Blue Starter Pack.
You can use your own HueForge STL to create a custom inset. The STL should be less than 2.5mm tall and at least 164mm square.
I recommend starting with the “Inset - HueForge” profile but I have also included the “Negative Inset.step” that you can use to add your own negative part if you know what you are doing.
Step 1 - Open the Inset - HueForge profile and switch to the Objects tab.
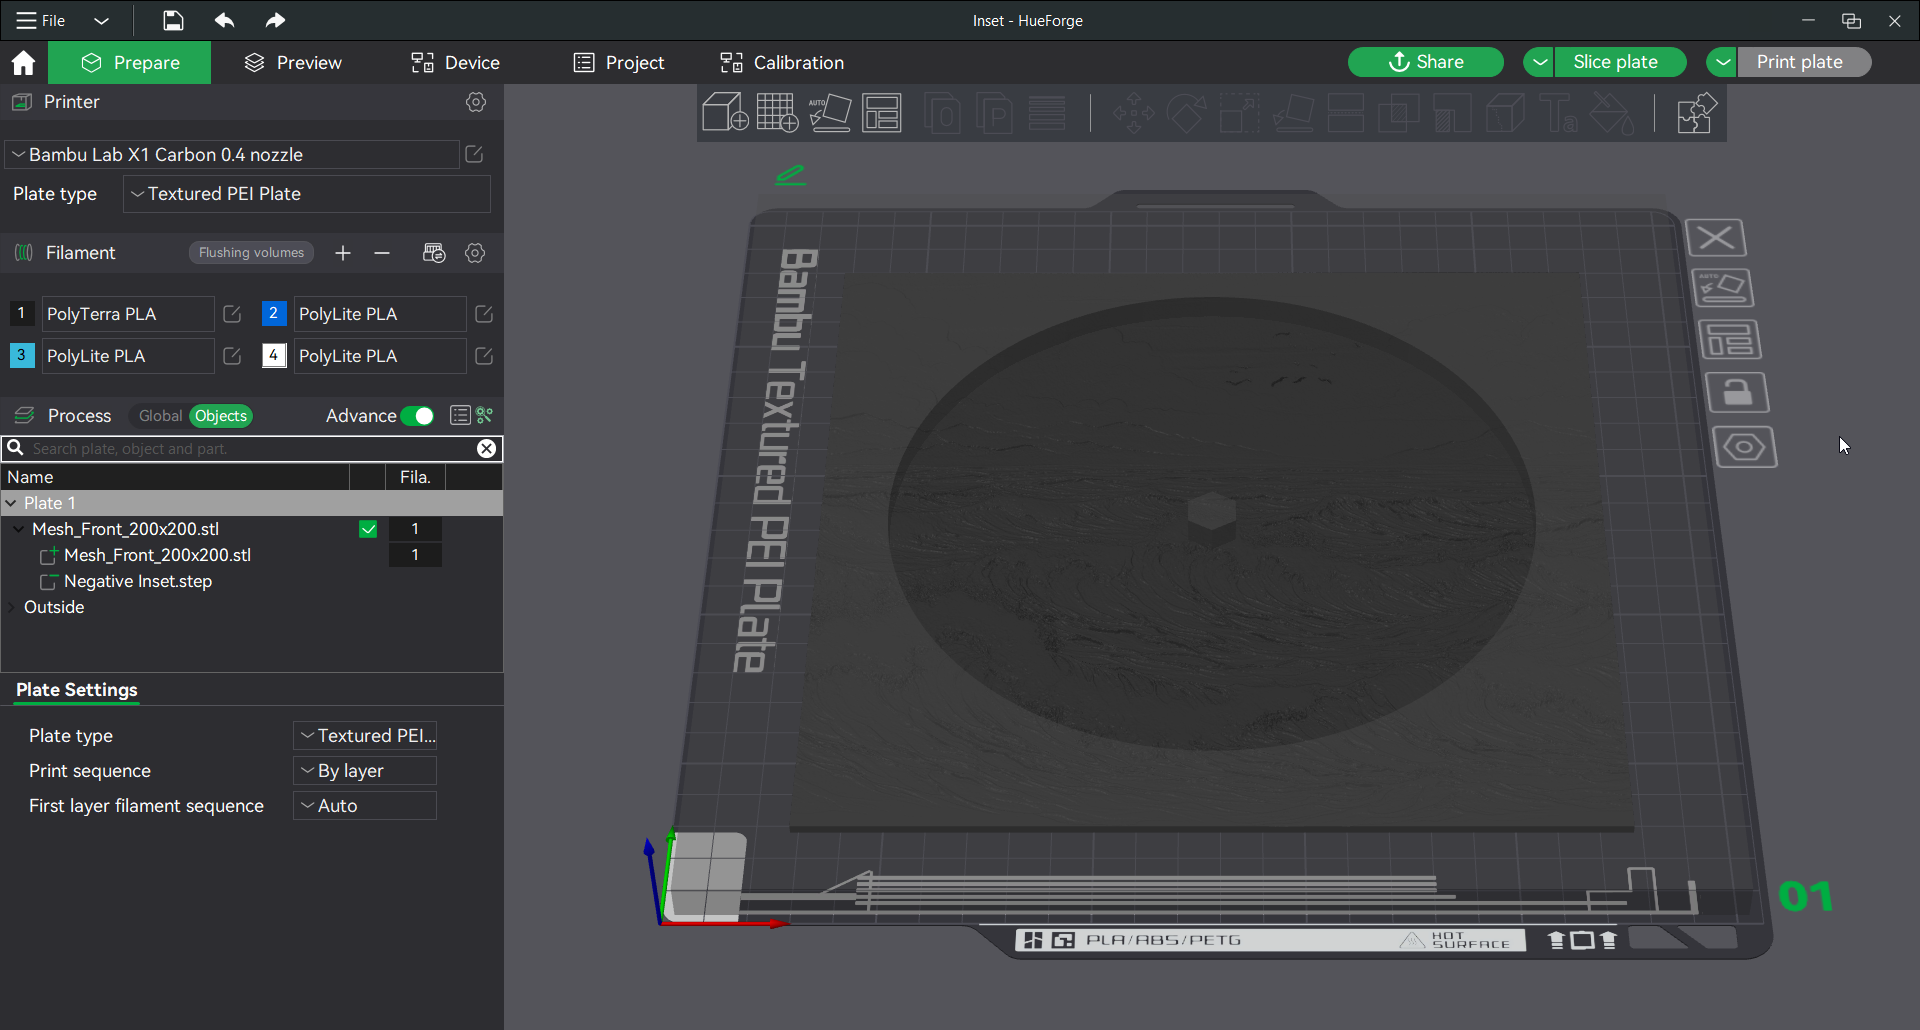
Step 2 - Right click on “Mesh_Front_200x200.stl” and select “Replace with STL” to load your HueForge STL.
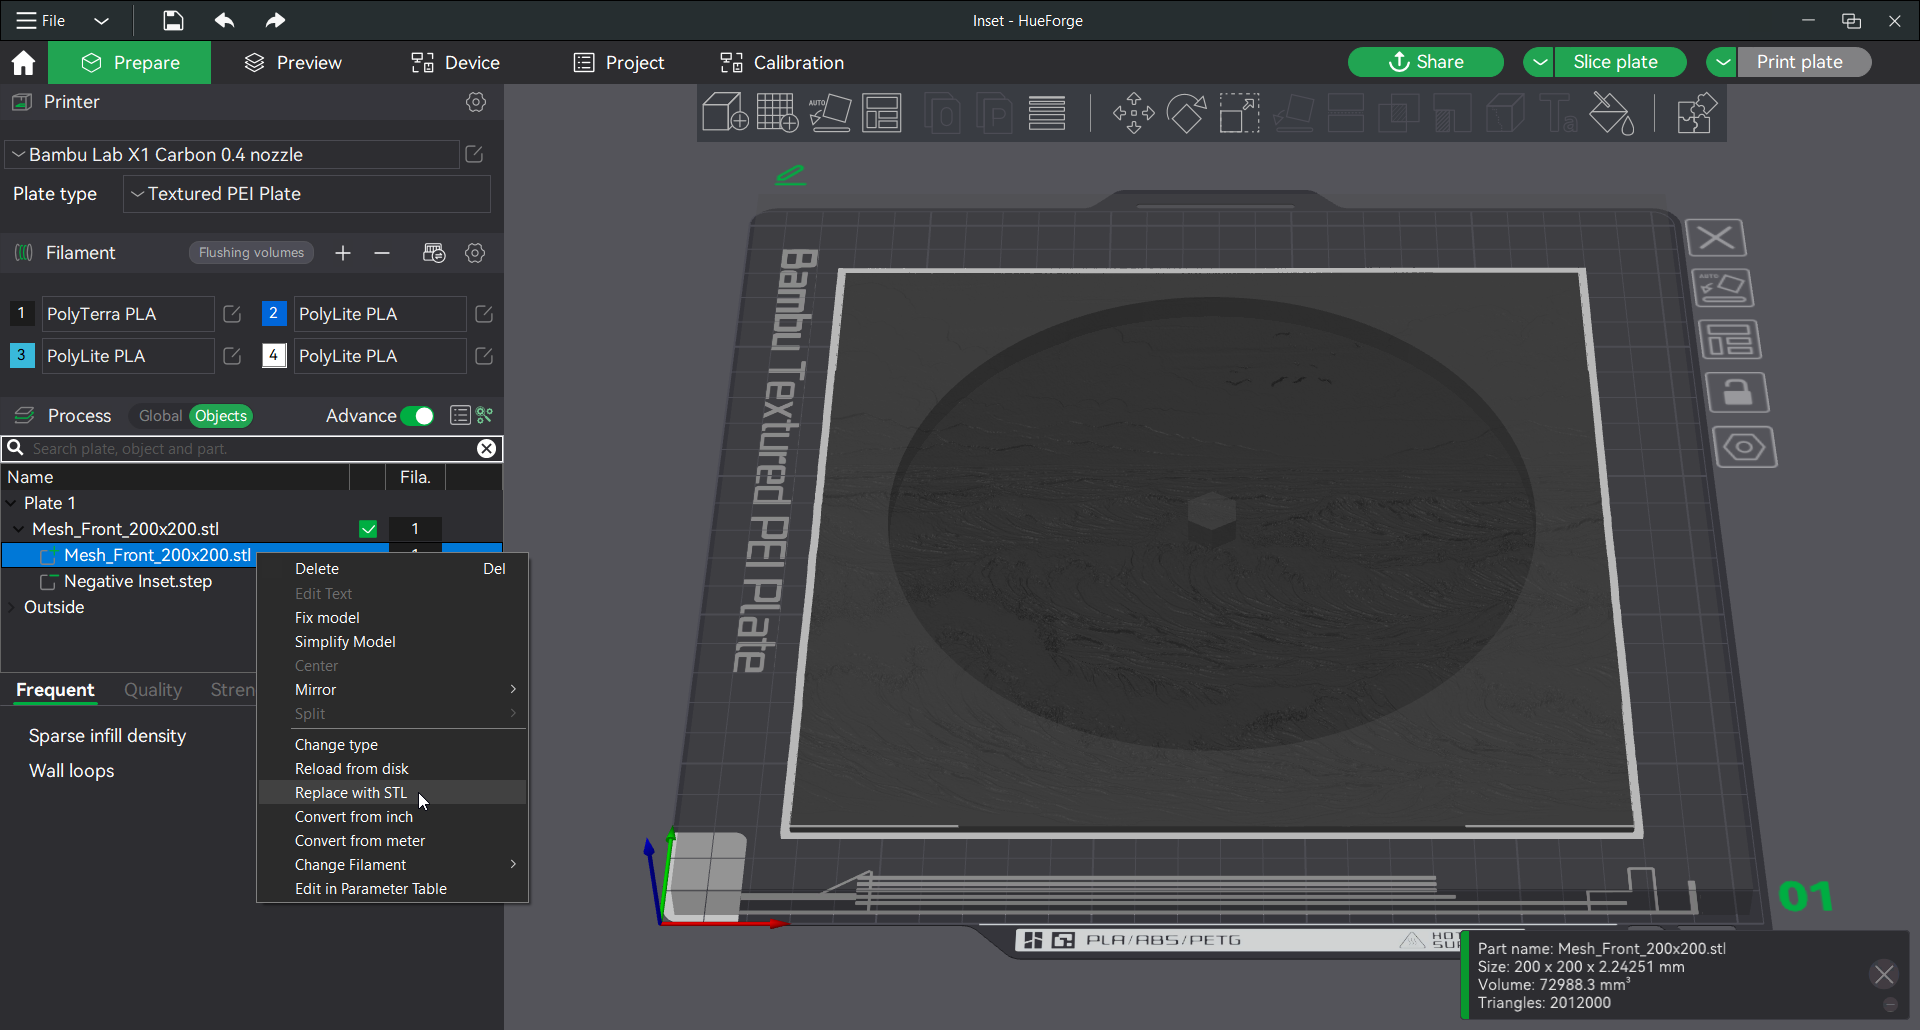
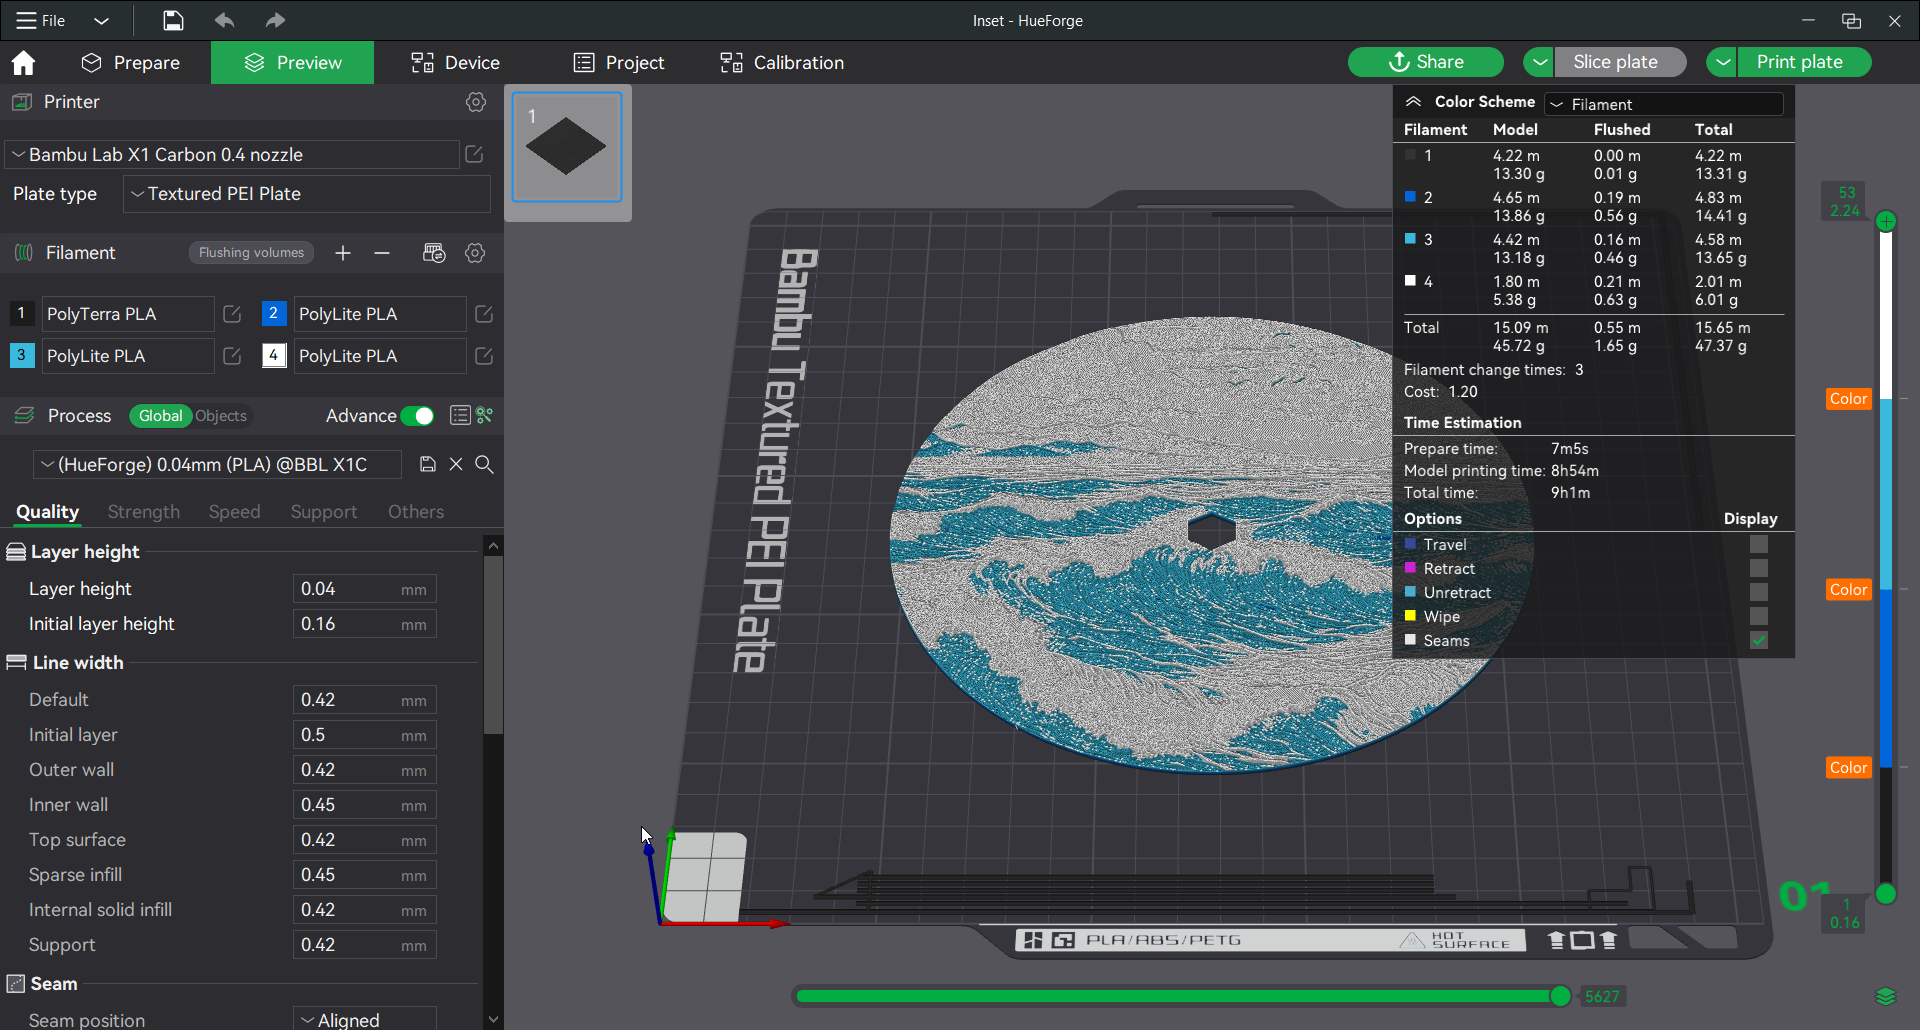
Step 3 - Adjust your colors and global printing process according to your HueForge settings.
Step 4 - Slice the plate and ensure that the shape is correct.
Updates
2024-04-07 - Added a looser “nut cap” that will work for the 11mm nut included in the alternative clock movement I have used.
2024-04-15 - Added longer hour hand and minute hand.
Customizable Wall Clock (Clock Components Kit 011)

Publicado em 21 de mar de 2024
Gostou deste modelo? Crie uma conta grátis para salvar seus favoritos e voltar a eles depois.
Criar conta