Você está no 3DFinder
Buscamos em Thingiverse, MakerWorld e Printables ao mesmo tempo para te dar o melhor de cada uma.
Descrição
This model is intended for continual development, fostering openness. If you have suggestions or requests, please share them in the comments or via direct message. Please do not upload different sizes as remixes, add it as a profile instead here - better ask for it and I will do it for you and also maintain the profile. If you like it, press the button!
Display Case (Fully Parameterized)
In the process of reorganizing my assortment of Designer Toys, Transformers, and various Collectibles, I sought out a display solution that offered both illumination and versatility. Opting to craft my own, I present to you my interpretation of a display case. While it may not redefine the landscape of display cases, it effectively addresses my needs – and perhaps it could serve yours as well.
Design Decisions
In my quest for the ideal display case, I outlined several key requirements to ensure functionality and practicality:
- Printability: The design should facilitate efficient printing within a reasonable timeframe, ensuring convenience and accessibility.
- Ease of Assembly: Simple construction and assembly procedures are essential for a hassle-free experience, allowing for quick setup and utilization.
- Utilization of Plexiglass/Acrylic Sheets: Taking advantage of readily available Plexiglass/Acrylic sheets found on platforms like Amazon, the case design accommodates common materials for widespread accessibility.
- Illumination Capability: Incorporating provisions for illumination, the case enhances the presentation of collectibles, offering optimal visibility and aesthetic appeal.
- Customizability: Designed with scalability in mind, the case offers flexibility for future expansion or modifications, enabling personalized adjustments as collections evolve.
- Aesthetic Appeal: With a focus on visual appeal, the design ensures that the display case complements its surroundings, appealing to both practical and aesthetic sensibilities – ensuring the approval of discerning partners like my wife.
- Light Blocking Connections: To maintain the integrity of the display, the connections should effectively prevent light from passing through, ensuring minimal interference with the presentation of collectibles.
By adhering to these criteria, the resulting display case not only fulfills my specific requirements but also provides a practical solution adaptable to diverse needs and preferences.
Avoid using images featuring Transformers or similar collectibles to seek your wife's approval, as it may not resonate positively with all tastes. In my experience, approval was granted only after removing the Transformer from the display case. 🤣
Printing
Each component is meticulously designed to be printed without the need for support structures. While certain sections, such as the bars and corners, may exhibit slight imperfections due to overhangs, it's important to note that these imperfections are not visible upon assembly. Additionally, these minor irregularities enhance the grip and friction of the connectors.
Example: This part is not visible after assembly.
It's essential to consider that the name of the print profile corresponds to the specific sheets required for assembly. Each profile includes a complete set of components, and the estimated print time provided is realistic.
Example:
20 x 15 cm x 2-3mm - Sheet Size
Will require 4 sheets sized 20 x15 cm x 2mm to a max of 3mm ( If you plan to add sheets )
Like: [https://amzn.eu/d/aHx4c2u](https://amzn.eu/d/aHx4c2u)
The provided profiles have the max value set, supporting more variants to avoid spamming profiles.
Please let me know if you would like to see additional sizes.
Led Cable Guide
It depends on how and if you want to add illumination. I opted not to provide any preset holes to guide the cable through.
Instead please add them directly in the slicer to match your needs.


Model
The model offers full customization to accommodate diverse needs and various sheet sizes available in the market. If you believe a different sheet size could benefit others, I'm happy to extend the provided profiles and handle the adjustments using Fusion Sources. While some parameters are marked as favorites for easier adjustment, every aspect of the model is parameter-based and can be fine-tuned according to your requirements.
- glass_face_width: glass panel width on the front
- glass_side_width: glass panel width on the side
- glass_height: general glass panel height
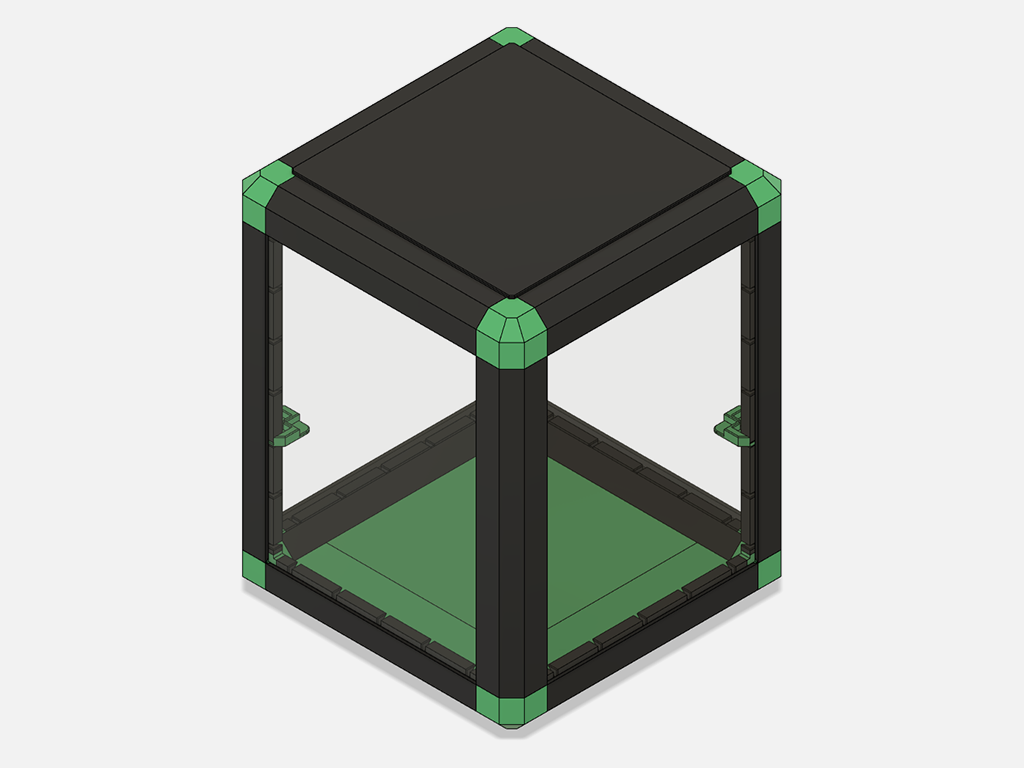 Assembled View |  Explosion View |


Components
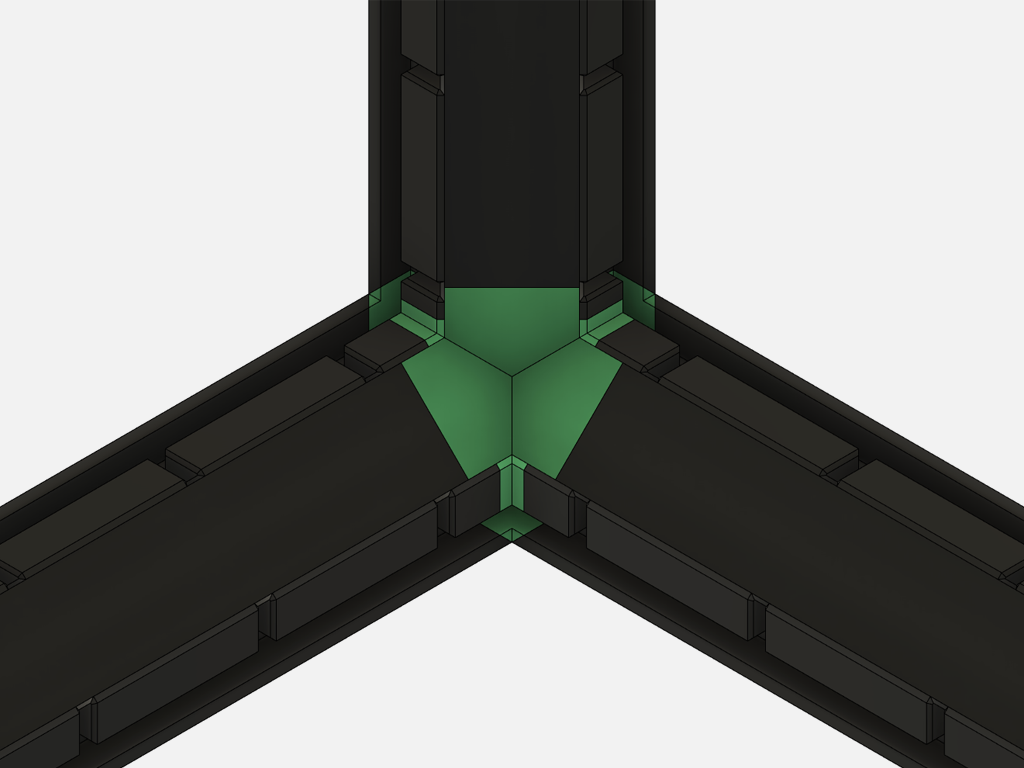
Bars and Corners
The bars and corners are thoughtfully designed with chamfered edges, effectively preventing light from passing through. They fit together seamlessly, creating a cohesive structure. Additionally, they incorporate a channel specifically for LED strips, accommodating widths of up to 14mm with a +2mm tolerance.
The bars feature slots, allowing you to customize your display case. You can either use the included inlay holders or get creative and craft your own. Whether it’s hanging decorations or any other imaginative idea, the choice is yours!


Connectors
The connectors join the corners with the bars, designed for a press-fit assembly that securely holds them in place without the need for glue.
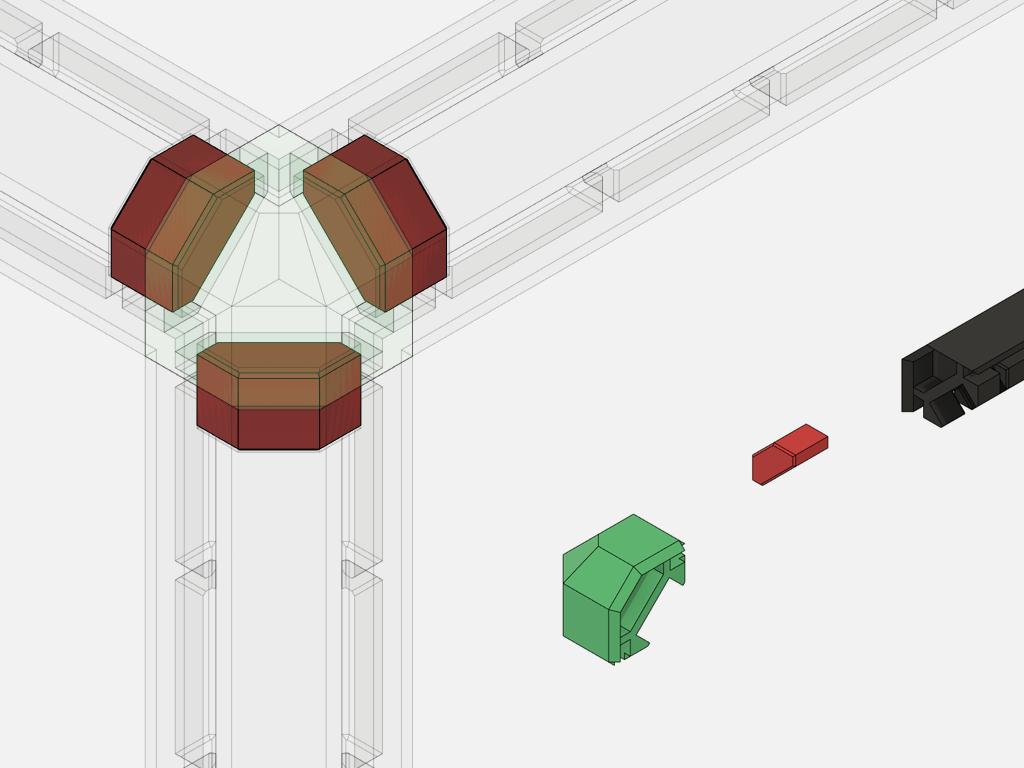
Inlay Holder
The inlay holders can be positioned freely within the case, effortlessly sliding into the slots on the bars. These holders have a compact surface area that aligns with the glass plate either above or below, securely keeping it in place. It’s important to note that the glass plate should have a specific thickness to prevent bending. Additionally, these holders can serve as guards for LED strips or be utilized for hanging objects.

Cover
The top cover can be effortlessly removed, providing convenient access to the object while also safeguarding it from dust.

Riser
The riser is positioned at the base of the display case. Its purpose is to align the object with the height of the frame bars. Additionally, it is chamfered to prevent any obstruction of light from the LED strip when applied from the sides.

Assembly
 Insert the connectors into the bars. Two connectors are provided: ideally, utilize the first with a 0mm tolerance for a precise fit. If insertion is impossible, indicating tight tolerances, opt for the second connector with a 0.2mm tolerance. If any connector feels excessively loose and lacks the necessary resistance for secure assembly, consider applying adhesive for added stability. |  Repeat this step until no connectors are left, ensuring each bar has two connectors inserted. |
 Now, we are beginning to construct the base. Take a bar intended for facing the front along with two corners. |  Now, connect the two corners with a bar. Repeat this 4 times. |
 Next, add two bars for the sides and close the frame. Repeat this step 2 times. |  Please confirm that you now have two bars intended for vertical use and two closed top frames. |
 If you have chosen to use the riser on the base, please have them available. |  The riser clips onto one of your closed frames. It features four connectors on the underside that need to align with one of your closed frames. Some force is required to put it in place. This frame will now serve as the base for the display case. |
 Now it's time to insert the remaining four bars. |  Next, simply slide the acrylic glass sheets into the slots. |
 Add the remaining frame to the top.
|  Attach the cover to the top, and you're done! Congratulations! |
