Você está no 3DFinder
Buscamos em Thingiverse, MakerWorld e Printables ao mesmo tempo para te dar o melhor de cada uma.
Descrição
模型简介:
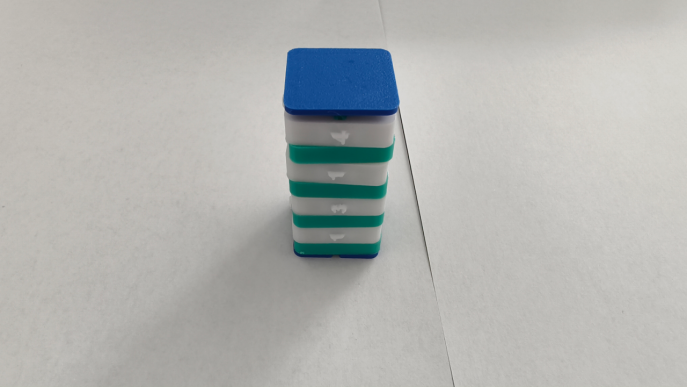
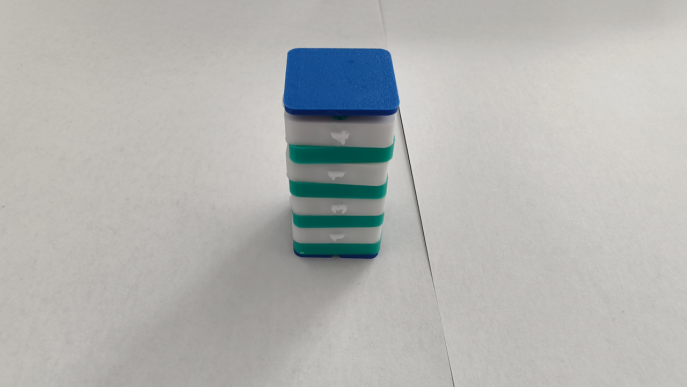
可藏纸条的机械密码锁,无需额外五金配件,一体打印拼装即可正常使用。
内部预留专属收纳仓可以容纳便签小纸条,可用来藏悄悄话、传递加密留言等。
欢迎打印使用!
提示:套筒底部凹槽具有防呆设计,解锁时,转动零件,使密码展示在底部凹槽对应一侧即可解锁。
您的点赞、收藏与助力对我持续更新模型至关重要,感谢支持!
安装步骤:
一、中文注释
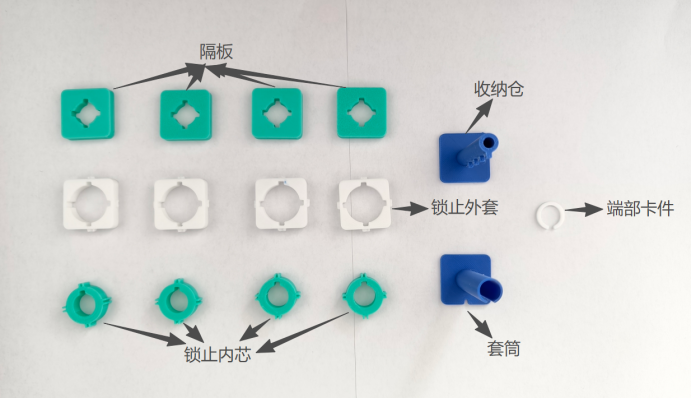
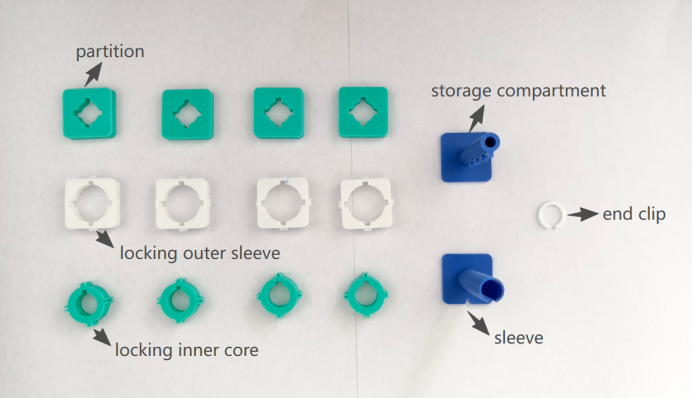
本模型共包含6种零件,分别为4个“隔板”、1个“端部卡件”、4个“锁止外套”、4个“锁止内芯”、1个“收纳仓”、1个“套筒”,名称见下图。
具体步骤:
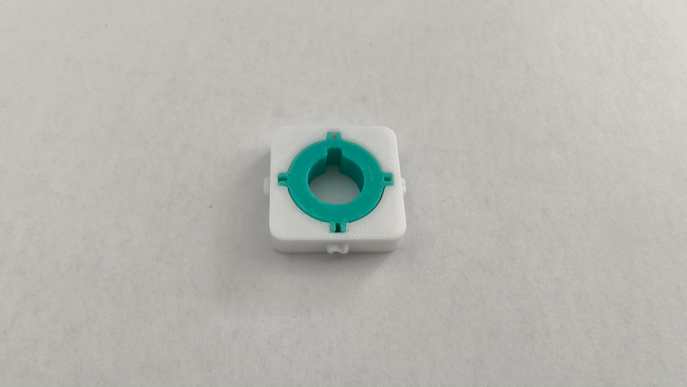
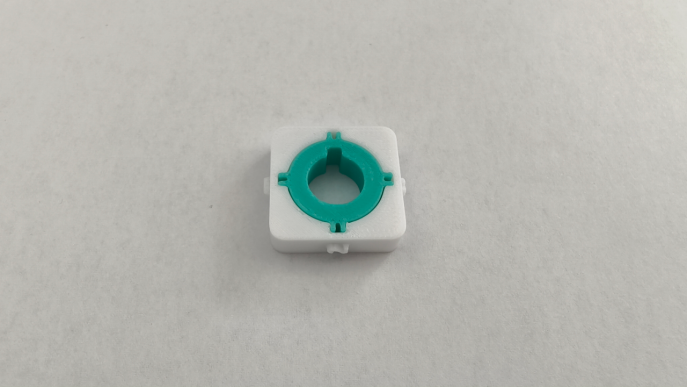
1.想一个四位数的密码,将“锁止内芯”塞入“锁止外套”内,“锁止内芯”的凹口对准“锁止外套”上的数字即为密码,如图所示。
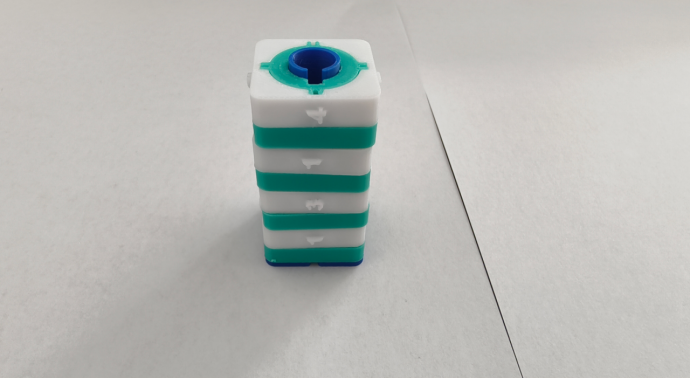
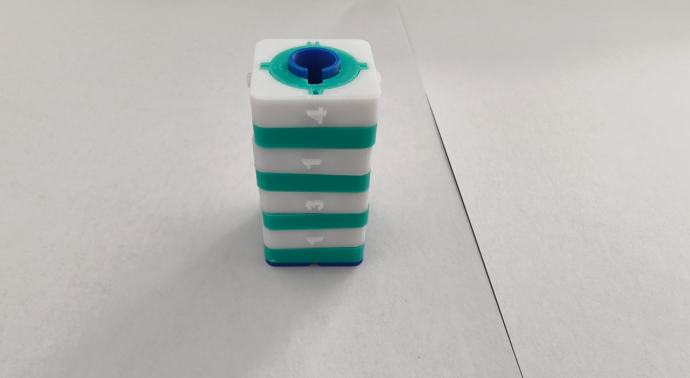
2.将4个“隔板”和4个步骤1中安装好的零件依次交叉套入“套筒”上,零件上的凹槽与“套筒”底部的凹槽相对应,先套“隔板”,再套零件,如图所示。
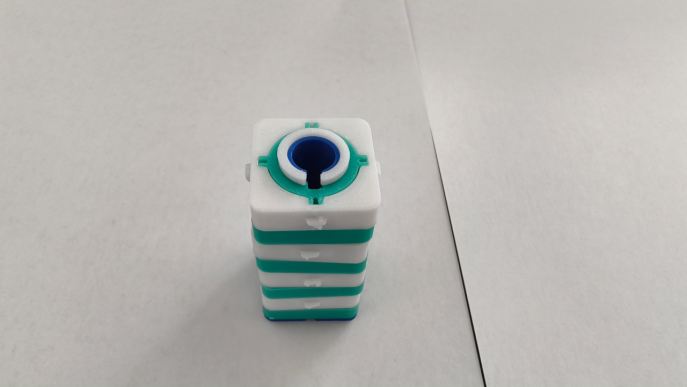
3.在顶部套入“端部卡件”,“端部卡件”的缺口应与“套筒”上的缺口对应,并用胶水将“端部卡件”与“套筒”粘合,如图所示。
4.转动到正确的密码,对准凹口插入收纳仓,将密码打乱,收纳仓即可被锁止住,如图所示。
二、English notes:
This model consists of six types of parts, including four partitions, one end clip, four locking outer sleeves, four locking inner cores, one storage compartment and one sleeve. See the figure below for part names.
Assembly Steps:
1.Create a four-digit password. Insert each locking inner core into its corresponding locking outer sleeve. The number on the locking outer sleeve aligned with the notch of the locking inner core forms your password, as shown in the figure.
2.Alternately slide the four partitions and the four pre-assembled components from Step 1 onto the sleeve in sequence: fit a partition first, then one assembled component, as illustrated.
3.Attach the end clip to the top end. Align the notch of the end clip with the notch on the sleeve, then glue the end clip to the sleeve firmly (see figure).
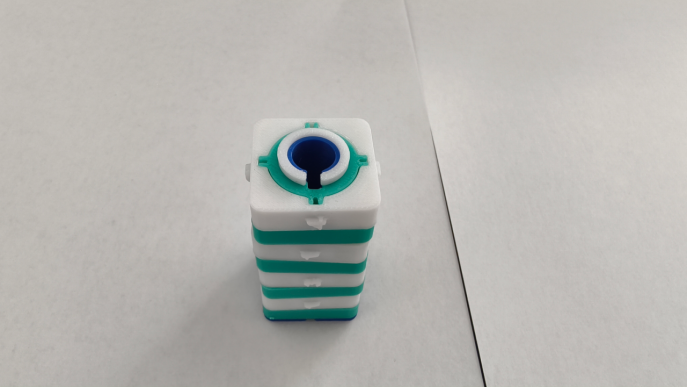
4.Rotate the assembly to the correct password position, insert the storage compartment by aligning the notches, then scramble the password to lock the storage compartment in place, as demonstrated in the figure.
欢迎您来:
PS:常来我的主页逛逛呀,一定有您需要的东西呢 (●'◡'●)
主页链接为:[https://makerworld.com.cn/@Pbreak](https://makerworld.com.cn/@Pbreak)

Gostou deste modelo? Crie uma conta grátis para salvar seus favoritos e voltar a eles depois.
Criar conta