Você está no 3DFinder
Buscamos em Thingiverse, MakerWorld e Printables ao mesmo tempo para te dar o melhor de cada uma.
Descrição
Parametric Floating Frame for Canvas
This OpenSCAD project generates a custom decorative frame for stretched canvases.
Simply enter the dimensions of your canvas and the script automatically creates a frame sized to fit. Large frames are split into printable sections connected with printed alignment pegs, allowing users with smaller print beds to create frames for much larger artwork.
This model is work in progress. Any suggestions are greatly appreciated!
Features
- Fully parametric OpenSCAD design
- Supports custom canvas sizes
- Automatic frame segmentation
- Printed connector pegs included
- Customizable nail holes for securing the frame
- Adjustable frame depth and profile
- Printable on small build plates
- Optional single-piece mode for small canvases
Recommended Printing Settings
- Layer Height: 0.20 mm
- Walls: 4
- Top/Bottom Layers: 5
- Infill: 15–25%
- Material: PLA, PETG, or ASA
Supports: Not Required
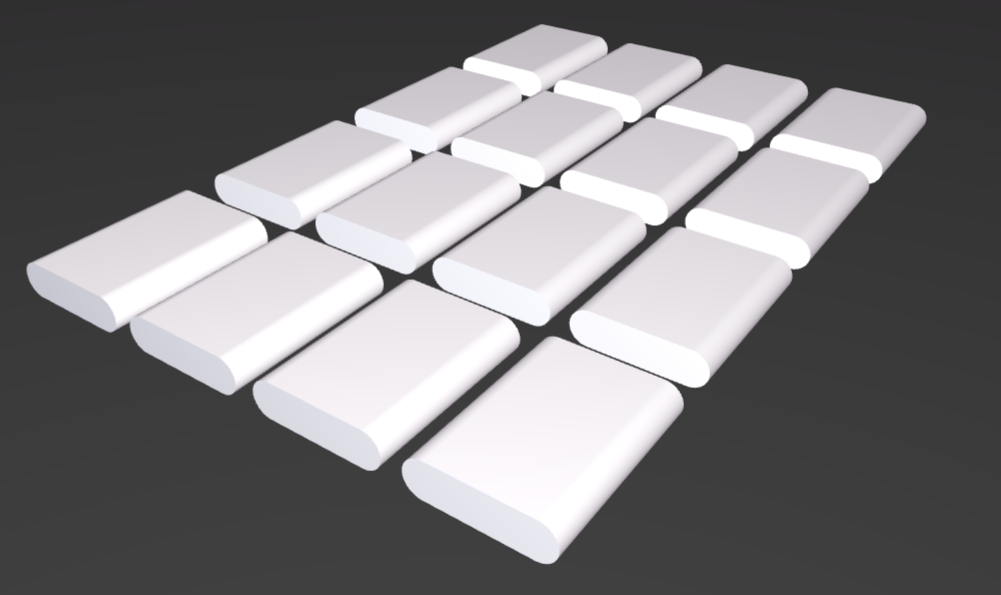
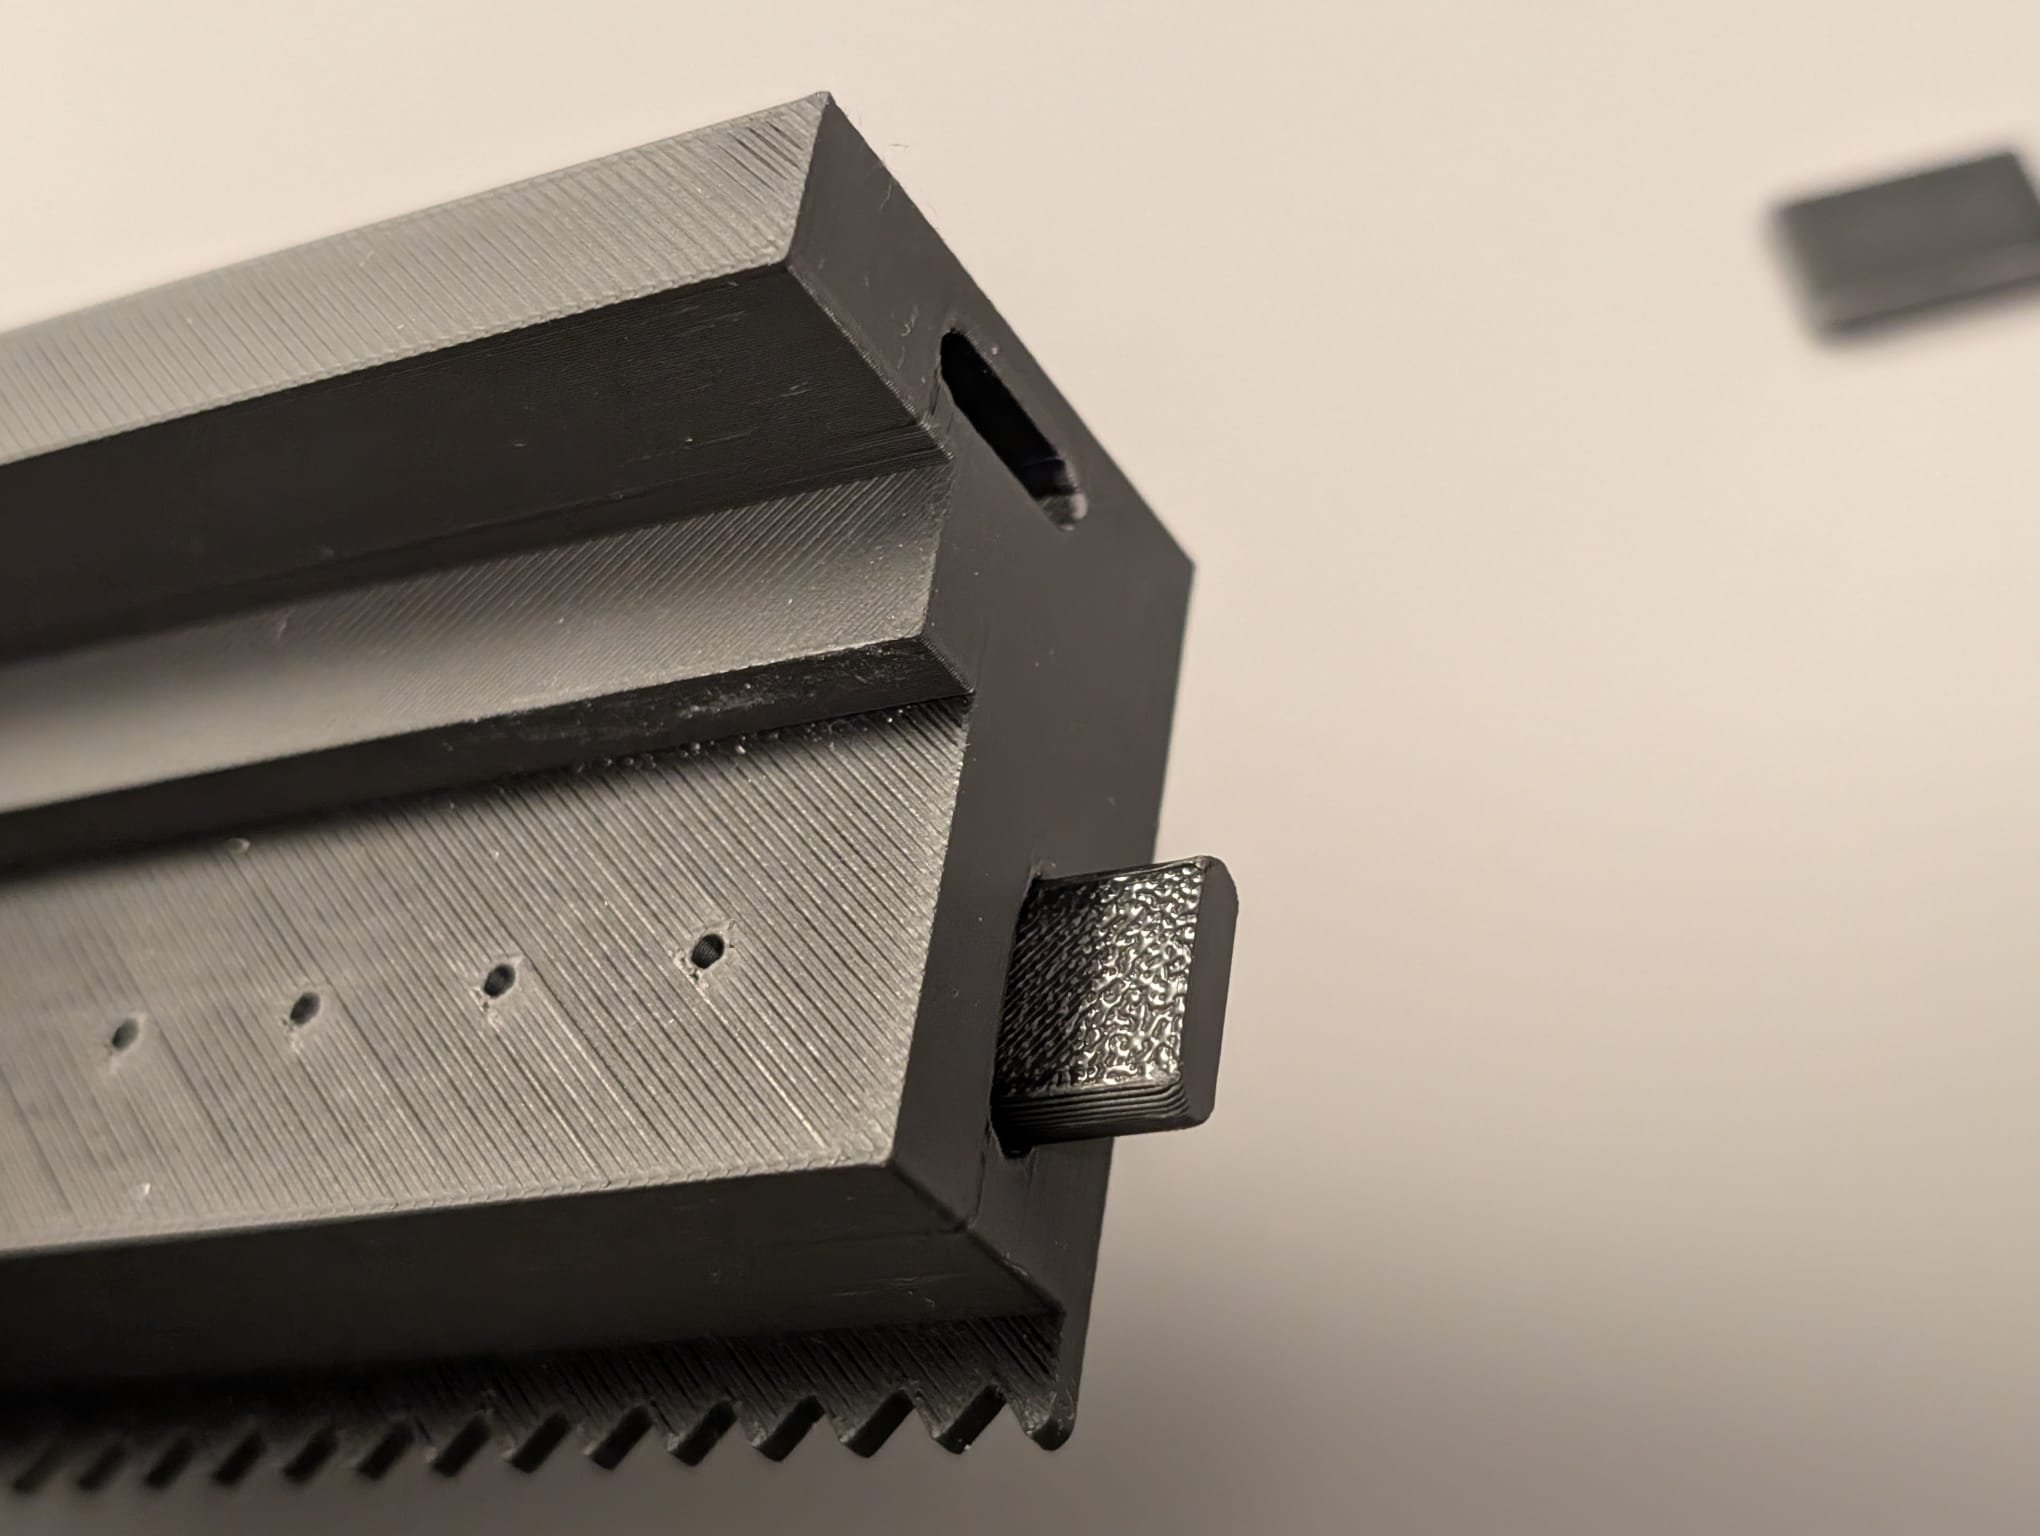
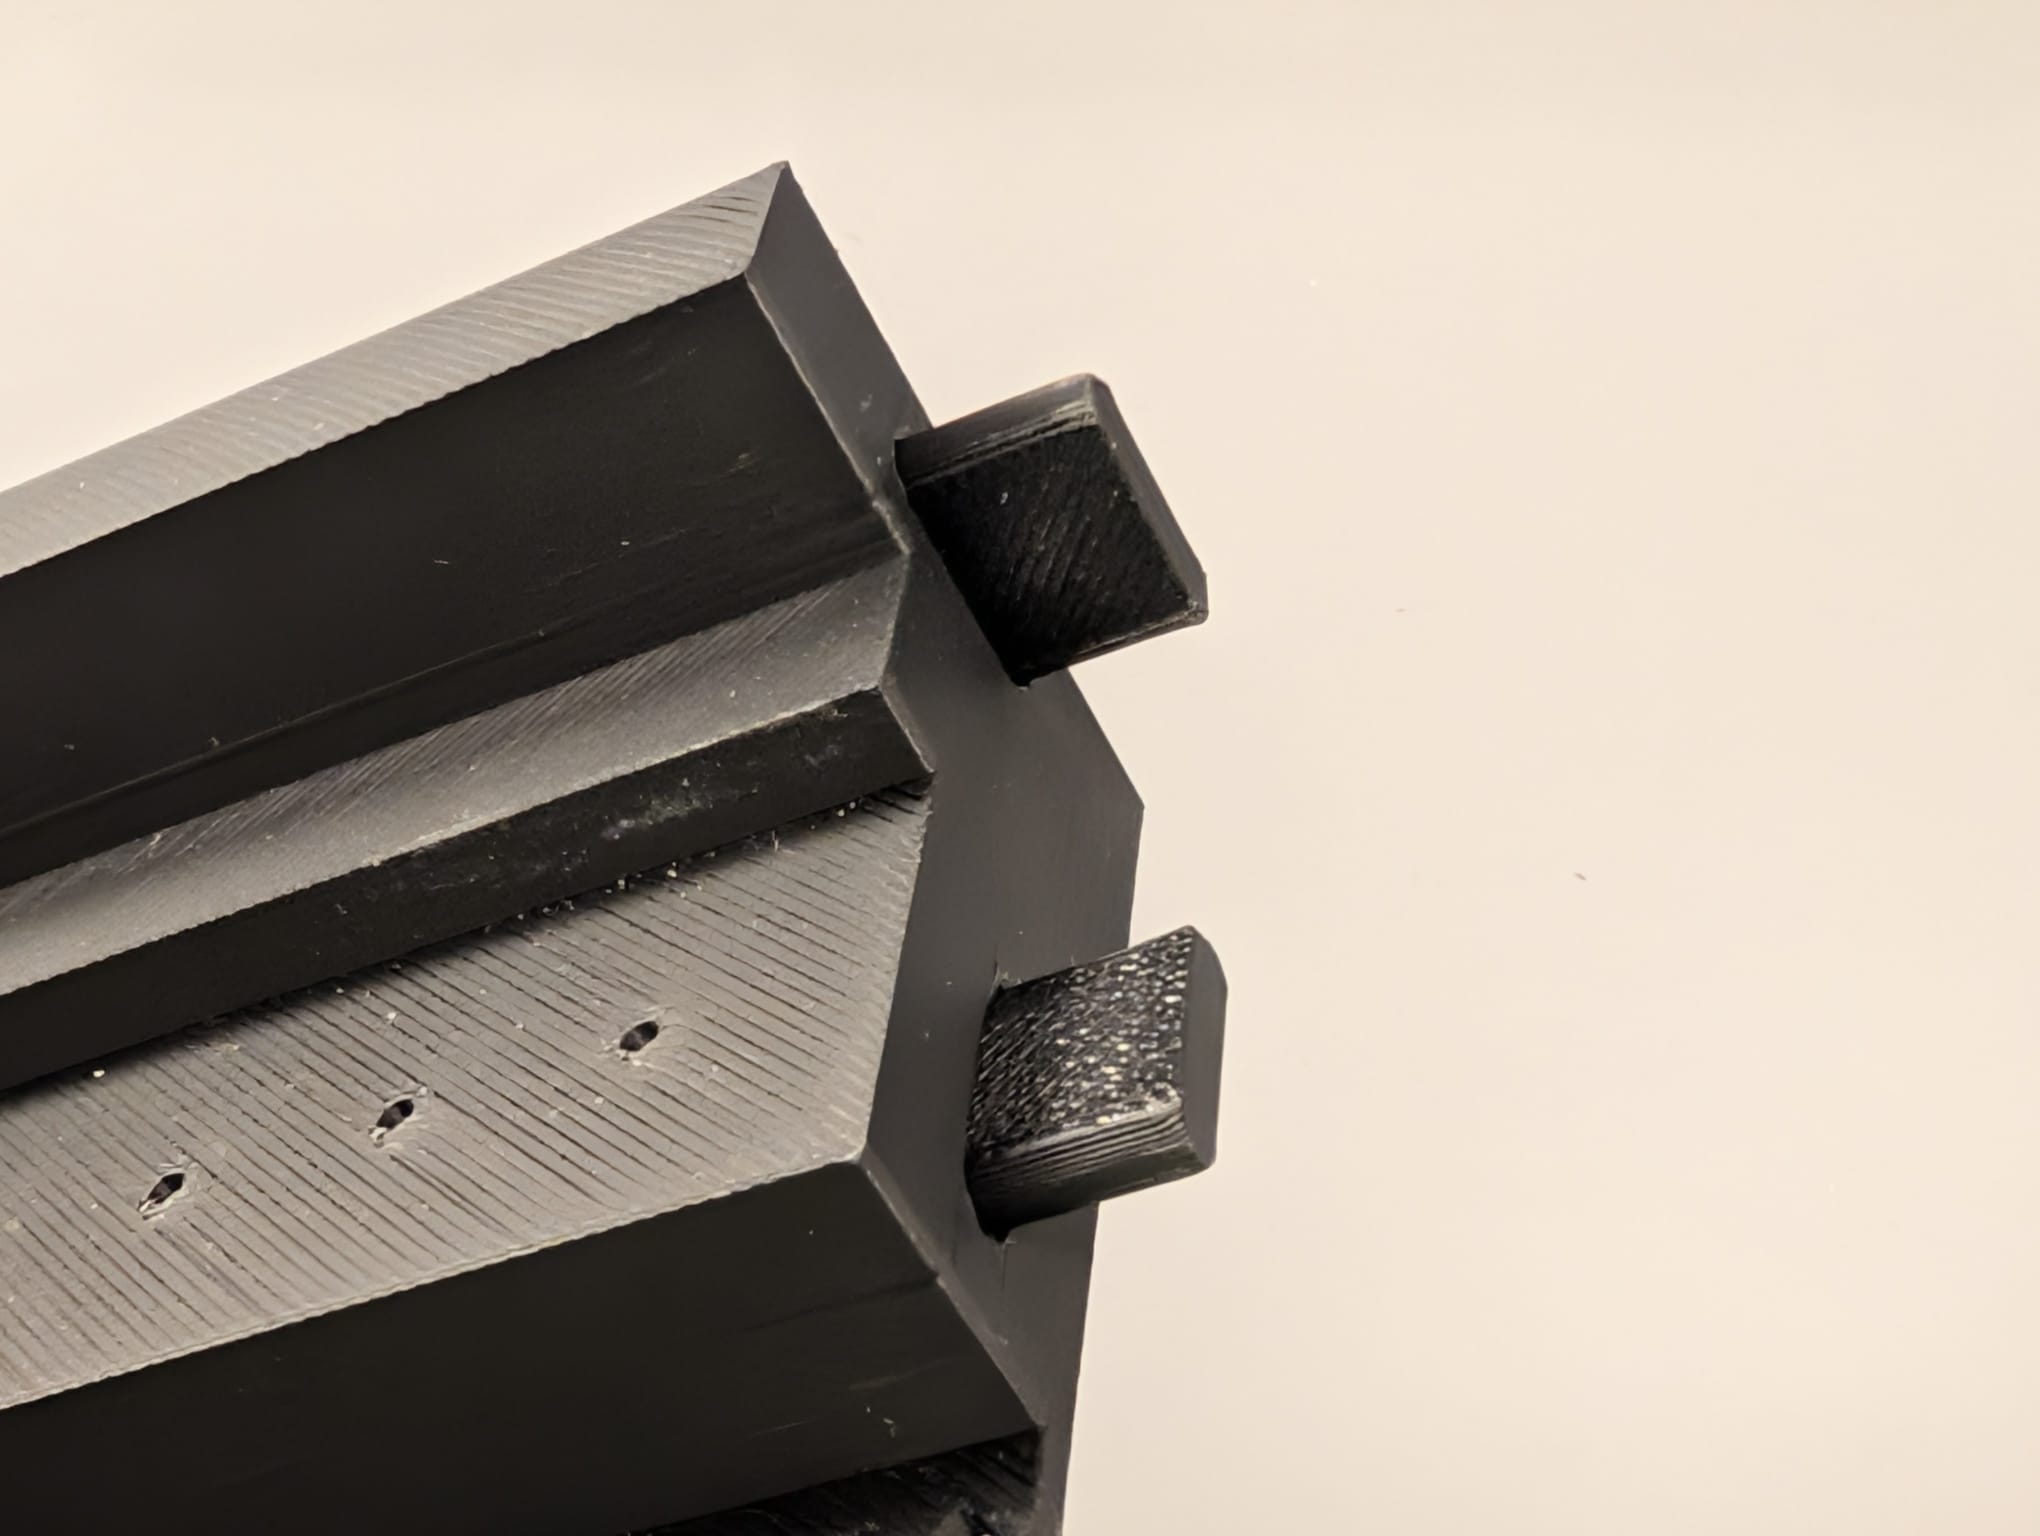
VERY IMPORTANT: In order for the pegs to be stronger please do not change the orientation of them on the print bed. Print them oriented like this
Parameter Catalogue
All the dimensions presented below are in millimeters (mm).
Canvas
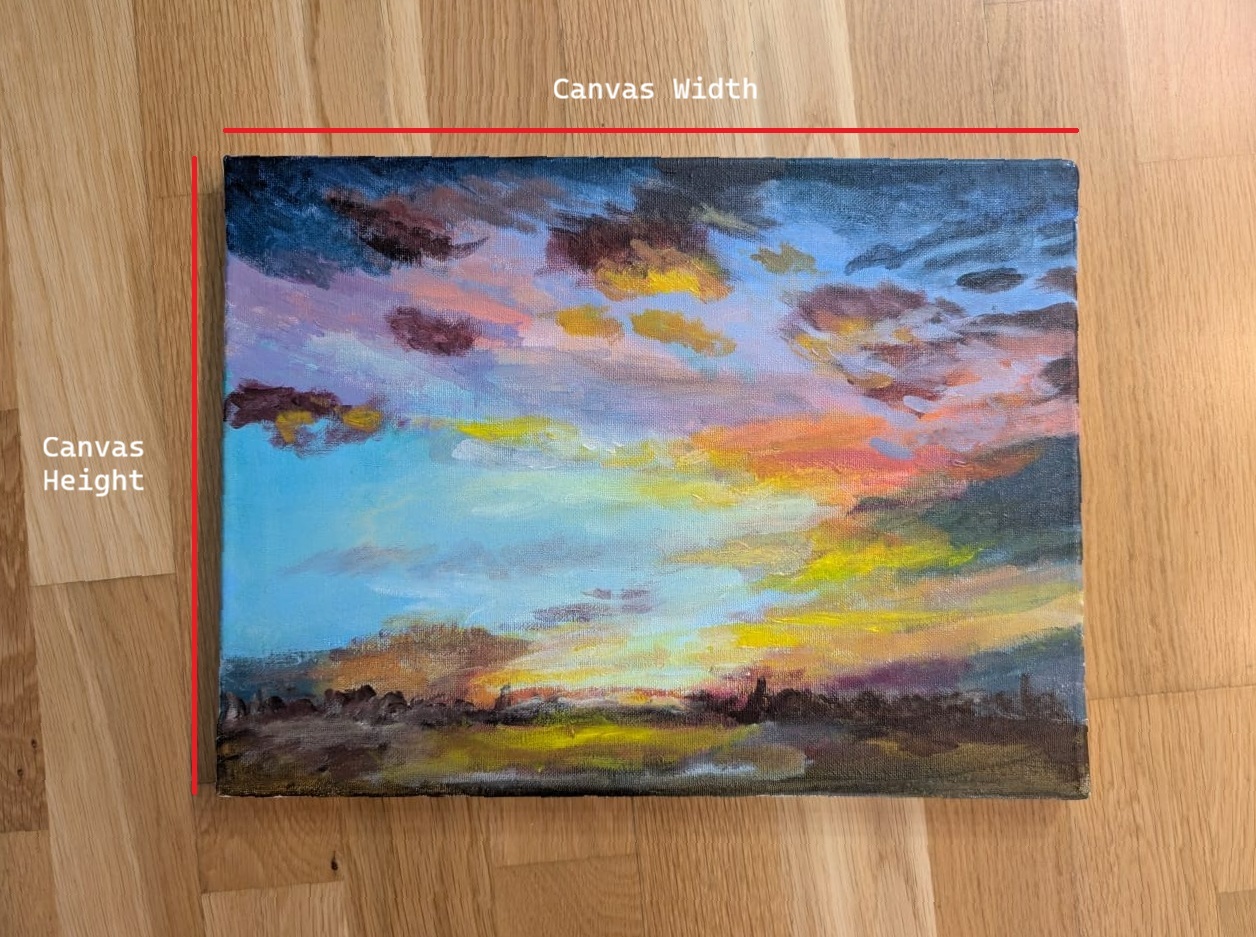
Canvas Width and Canvas Height
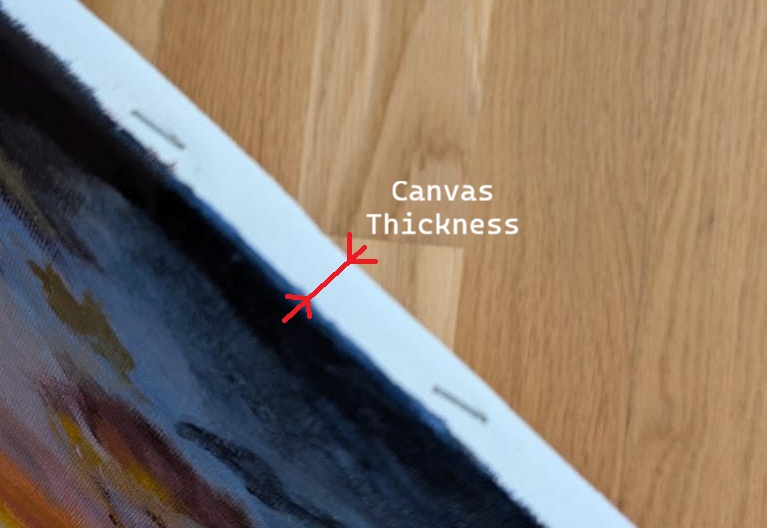
Canvas Thickness
Back Wooden Frame Width
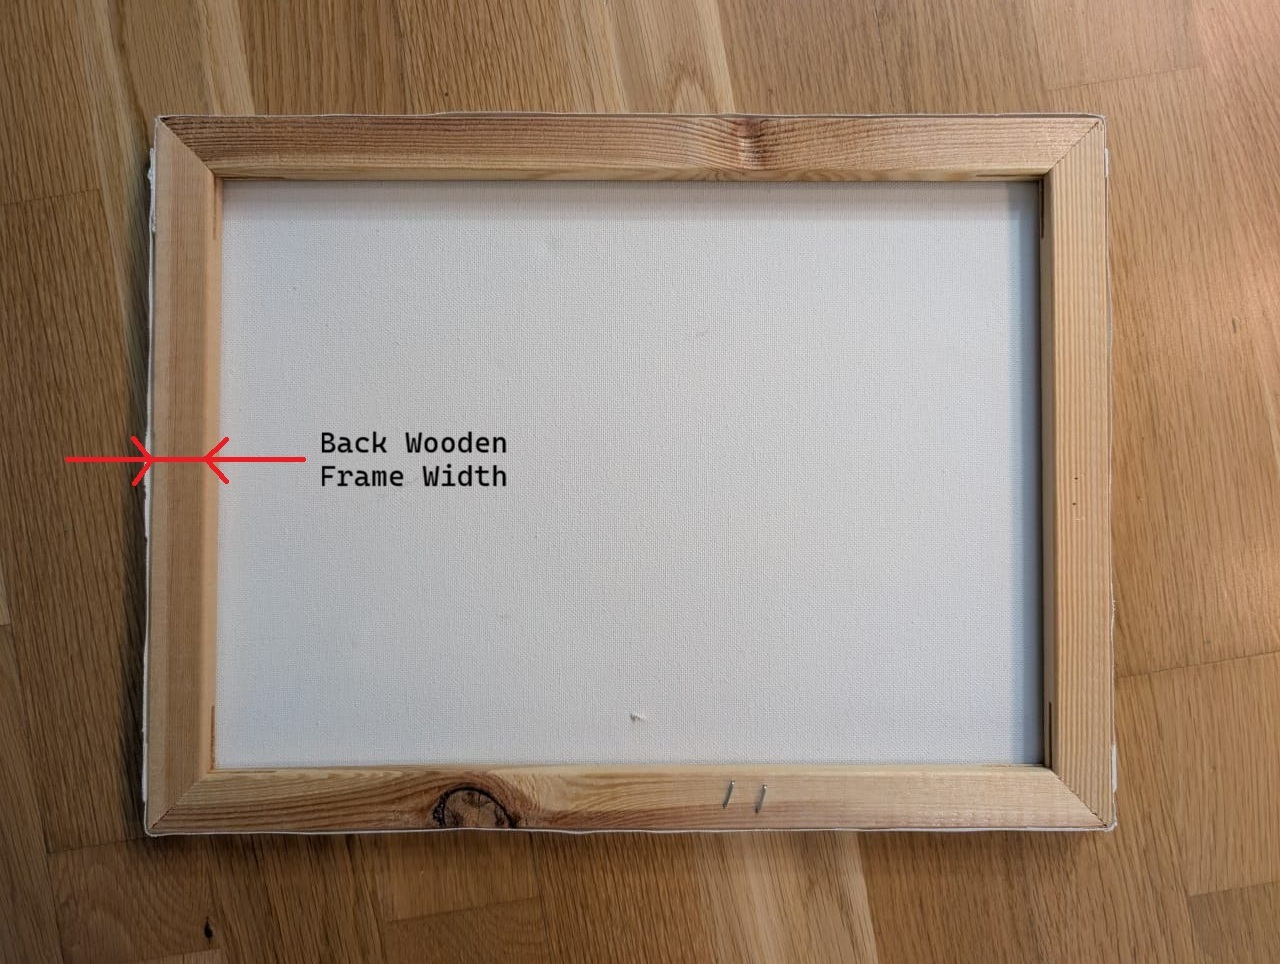
The Back Wooden Frame Width parameter controlls the width of the section marked with red below:
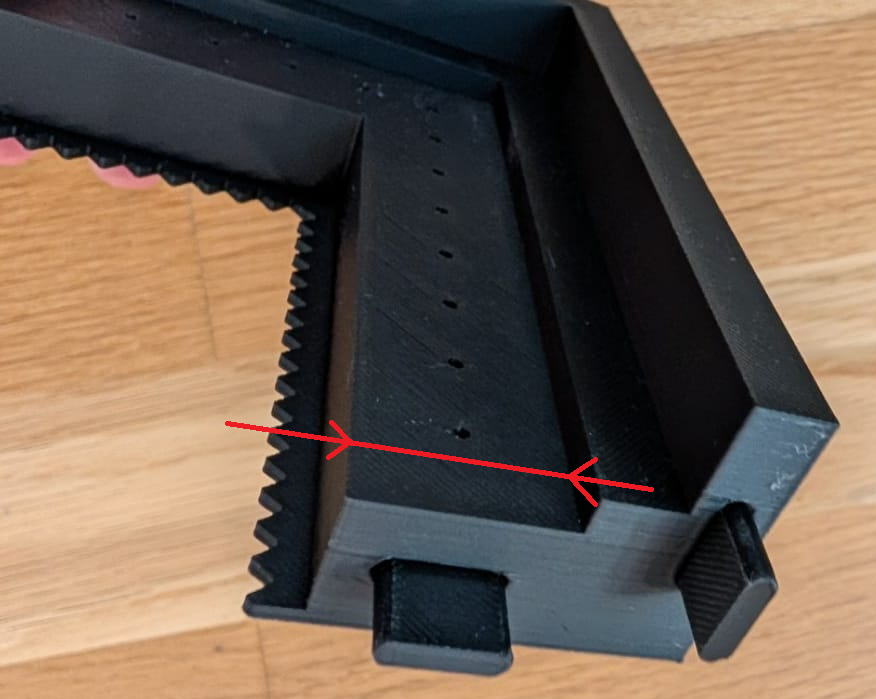
Make sure that the dimension is as accurate as possible because if you want to nail the frame to the canvas the nail holes are in the middle of this section.
Frame
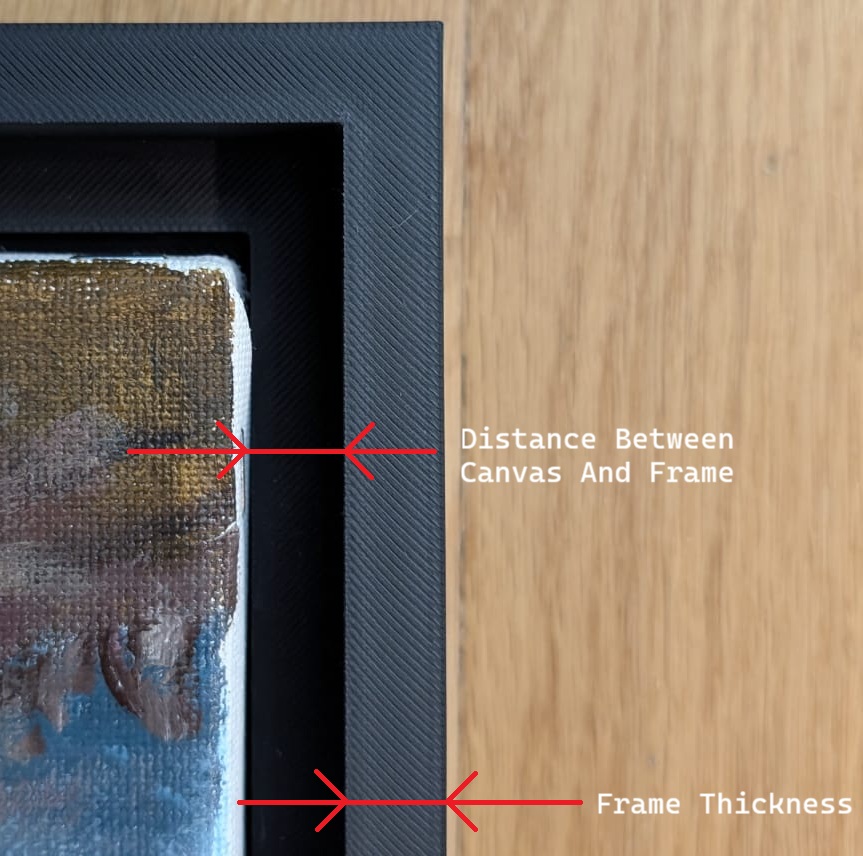
Frame Thickness and Distance Between Canvas And Frame
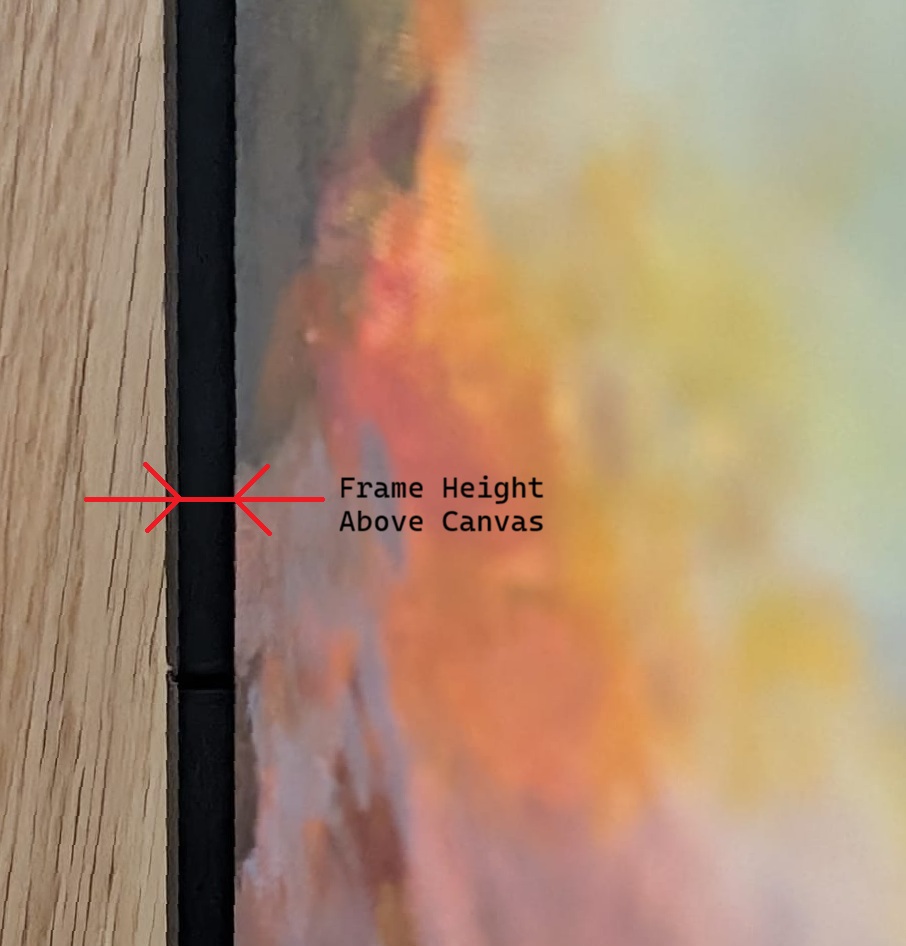
Frame Height Above Canvas
This parameter defines the height by which the frame protrudes above the canvas surface. A value of 0 mm means the frame is level with the canvas, while higher values cause the frame to extend above it.
Additional Customizable Dimensions
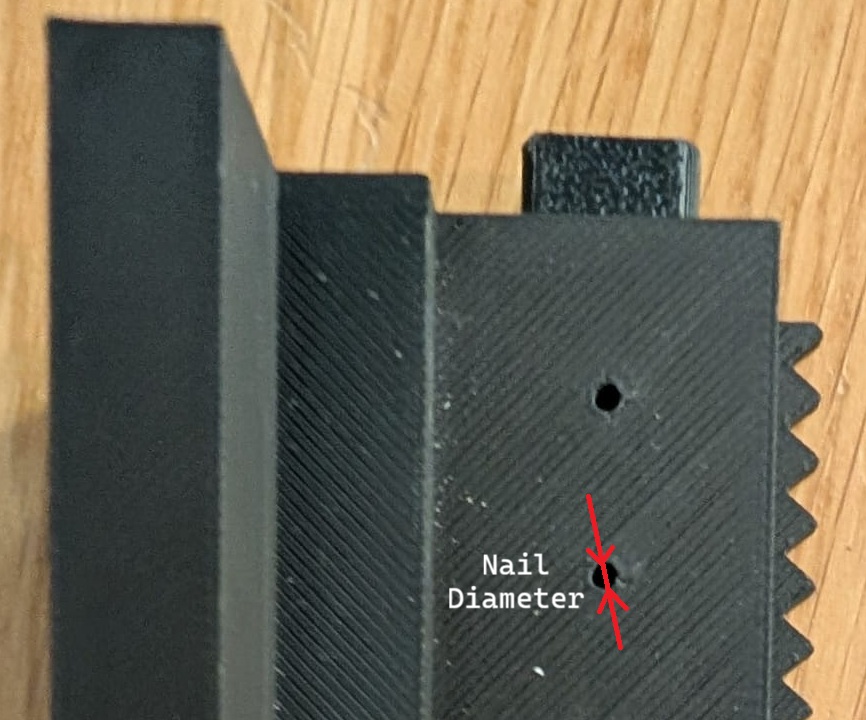
Nail Diameter
Enter the nominal diameter of the nail without any additional tolerance. A 0.3 mm tolerance has already been added to compensate.
Nail Length
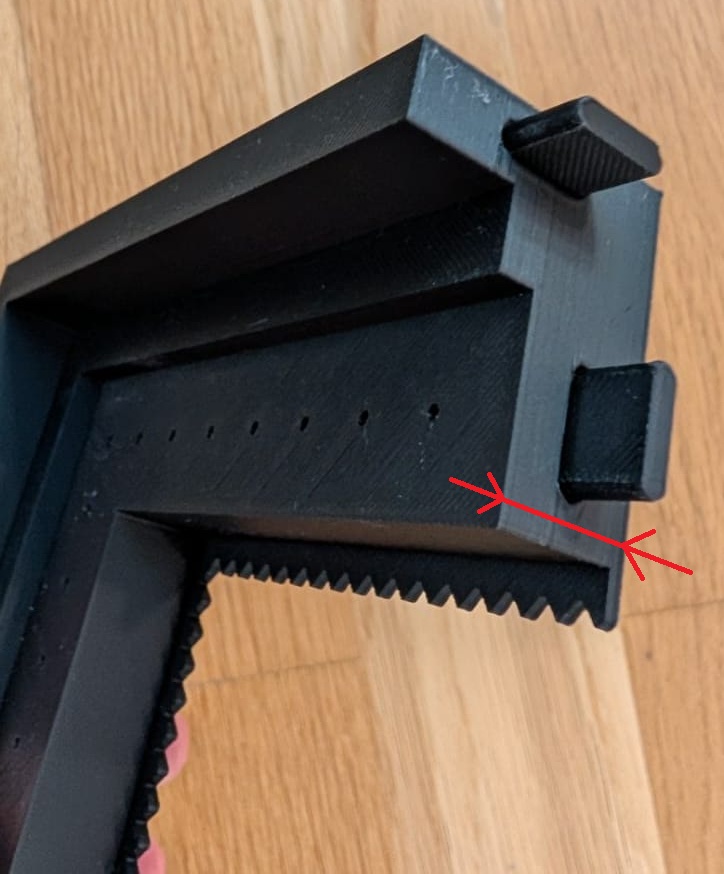
This parameter defines the thickness of the section highlighted in red in the image below. The value is calculated to ensure a minimum thickness of 7 mm. Otherwise, it is increased so that the nail extends 3 mm into the canvas's wooden frame, taking the Canvas Thickness into account.
Advanced Customizable Dimensions
Max Middle Piece Size and Min Middle Piece Size
These parameters control the size of the intermidiary pieces (depending on the size of the frame it can be more than one).
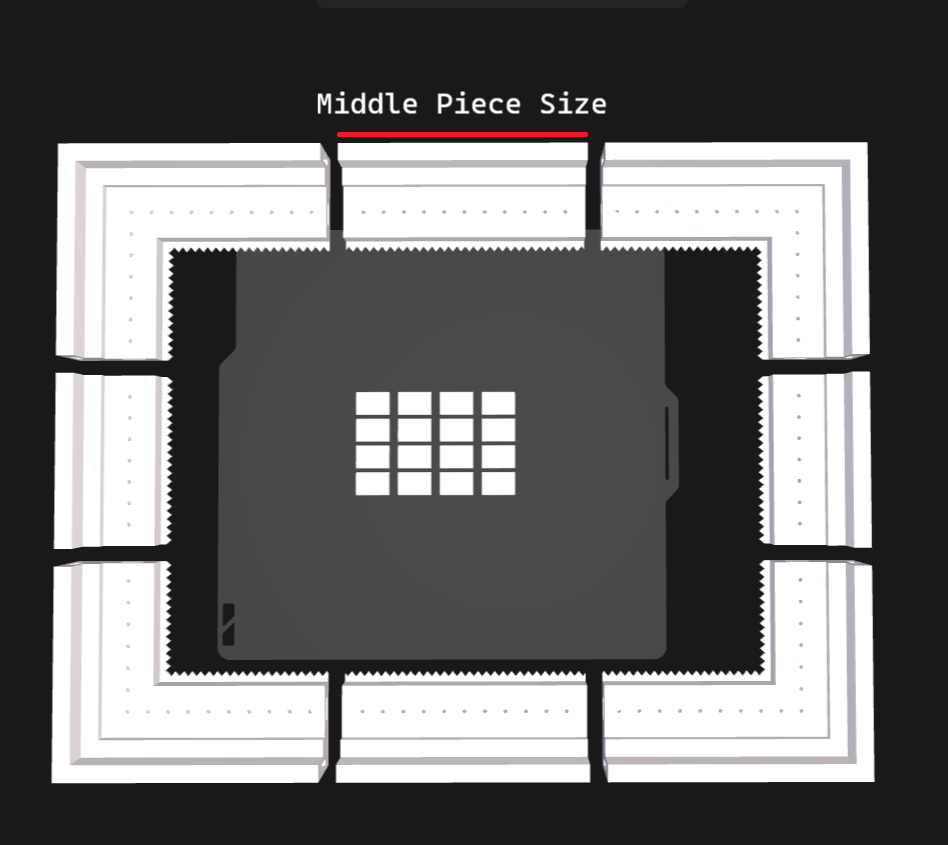
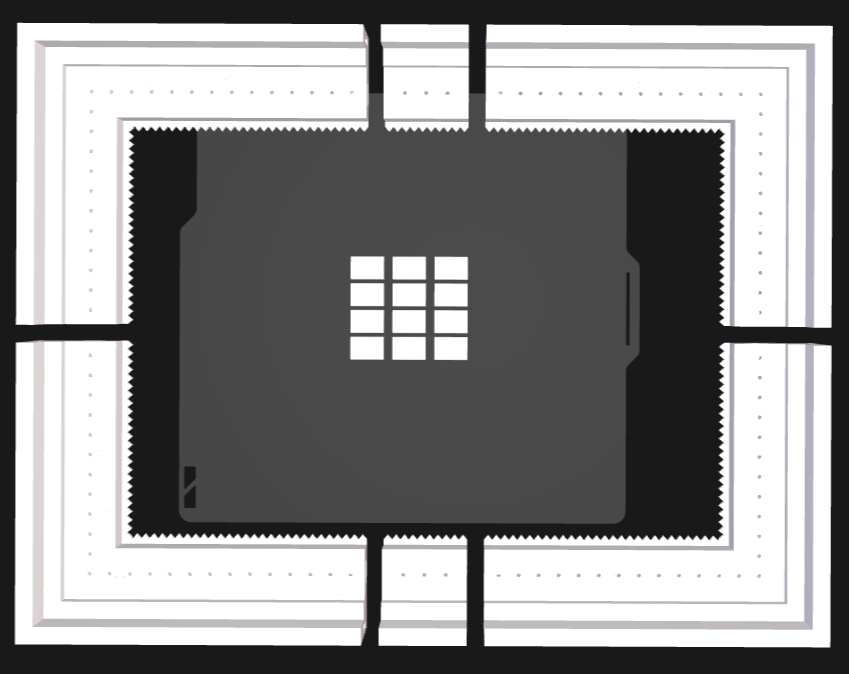
If the generated middle piece is smaller than desired (see the example below), increase the Min Middle Piece Size parameter to produce a larger middle piece, similar to the example shown above.
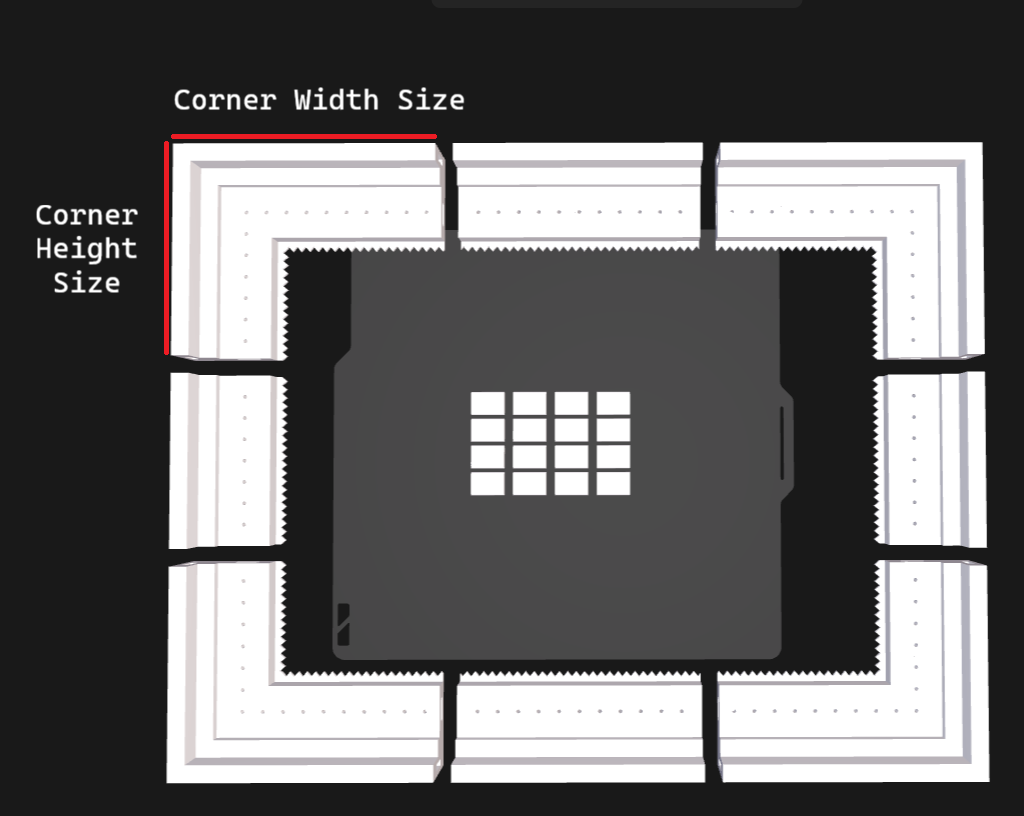
Max Corner Size
This parameter defines the maximum dimensions of the corner in both the width and height directions.
Important: Depending on the canvas dimensions and the values of other parameters, the generated corner may not be symmetrical. As a result, the Corner Width Size and Corner Height Size may differ.
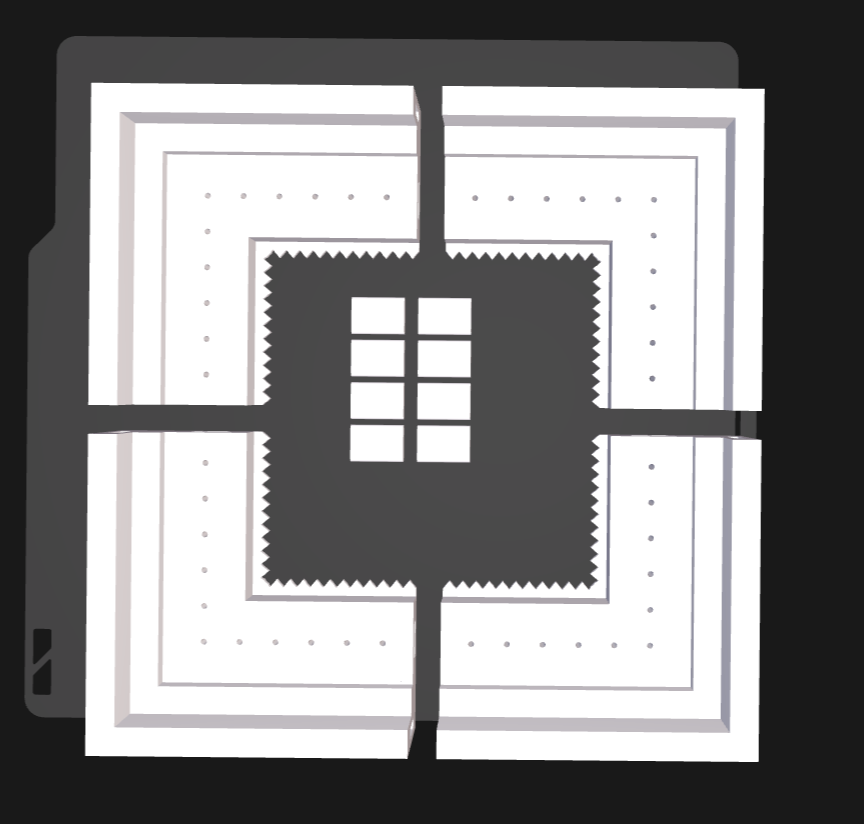
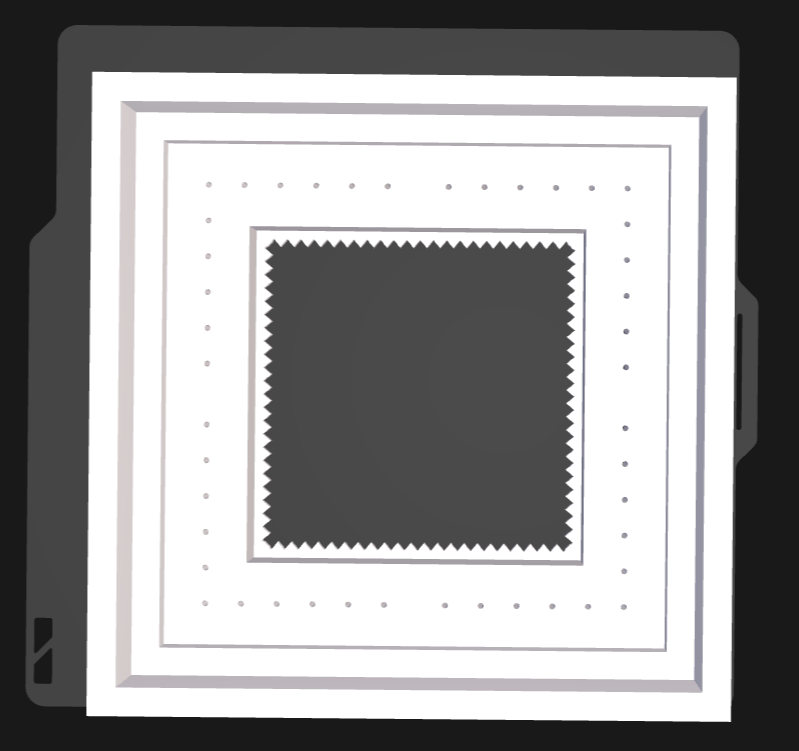
Print In One Piece
This boolean parameter determines whether the entire frame is generated as a single piece. Enable it for smaller canvases or when your printer's build plate is large enough to accommodate the complete model.
OFF
ON
Printing instructions
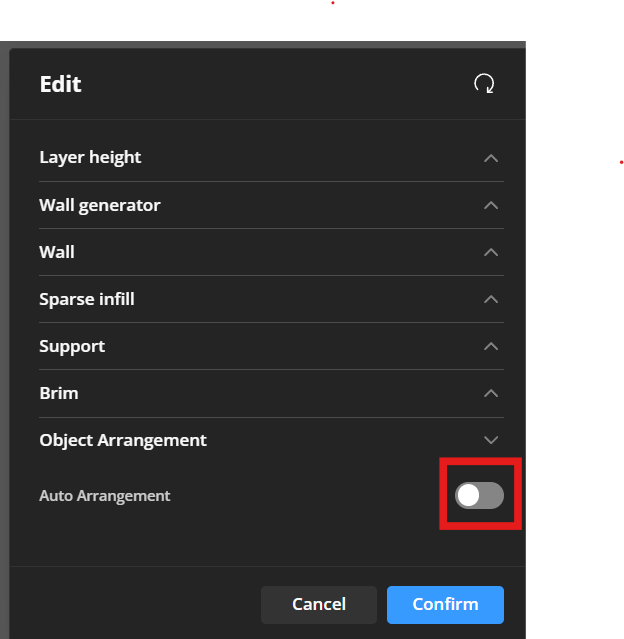
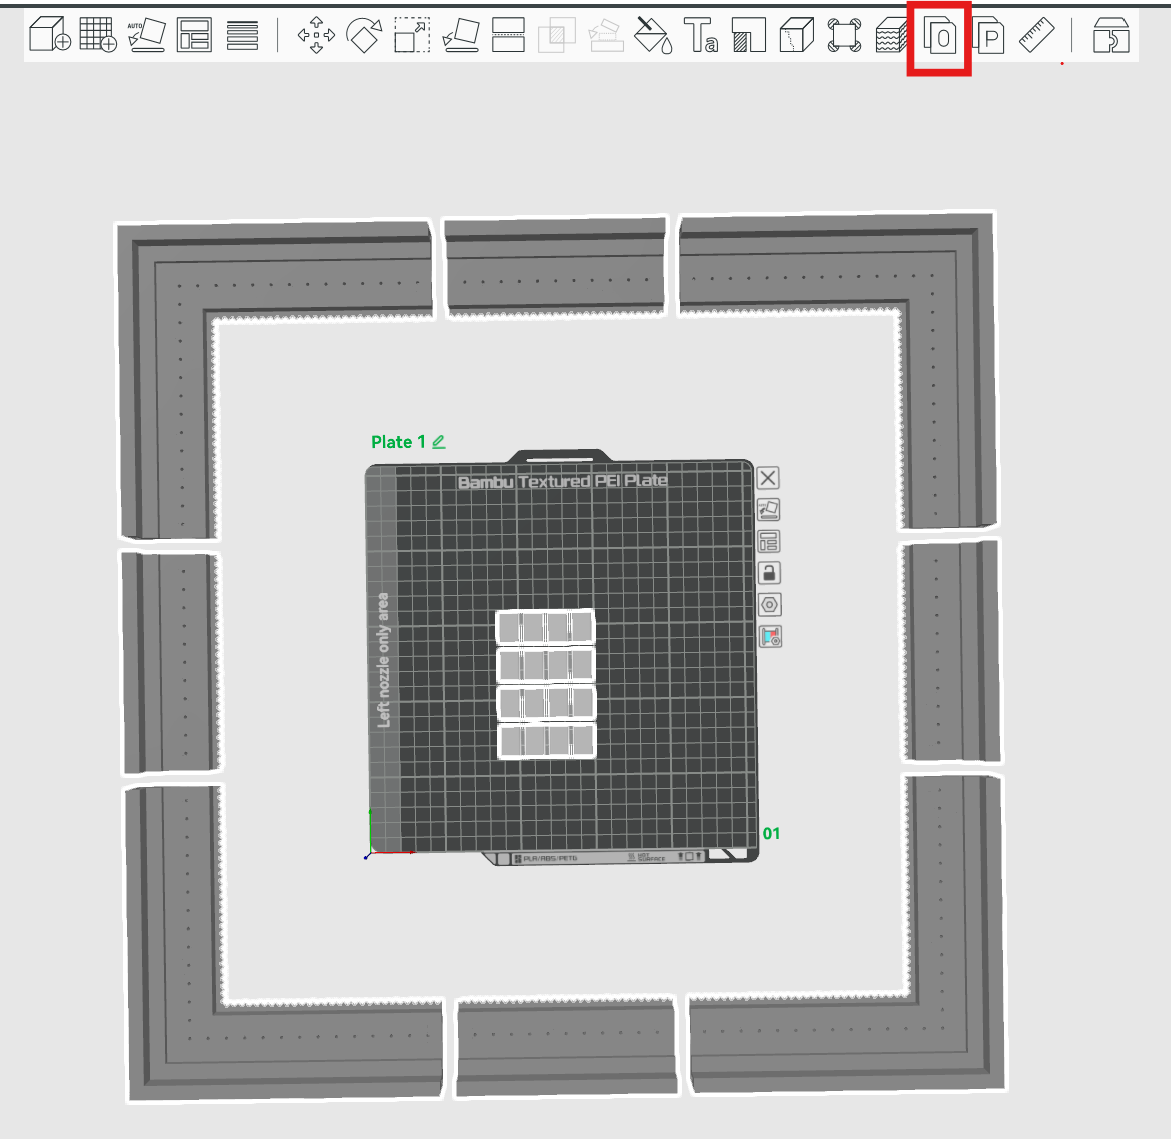
1. After generating the 3mf file from the MakerWorld Parametric model please make sure to turn off Auto Arrangement for the plate.
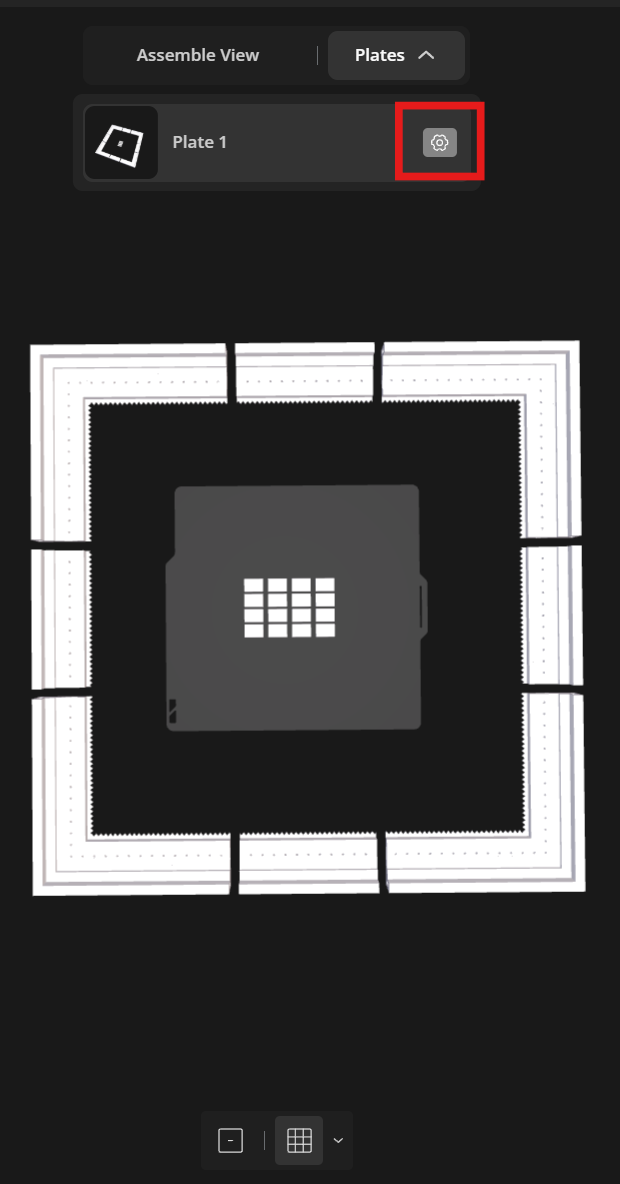
2. Open the 3mf file in your slicer and make sure you split it into objects. The generator will create an ansamble with them all. Now you can freely organize the frame segments as you wish on your print plates.
Assembly Instructions
Once all parts have been printed (including the pegs), assemble the frame before mounting the canvas. Insert the supplied pegs without using glue. They may be a tight fit and require some force to install, but they should lock firmly into place and hold the frame together securely.
Put together the entire canvas:
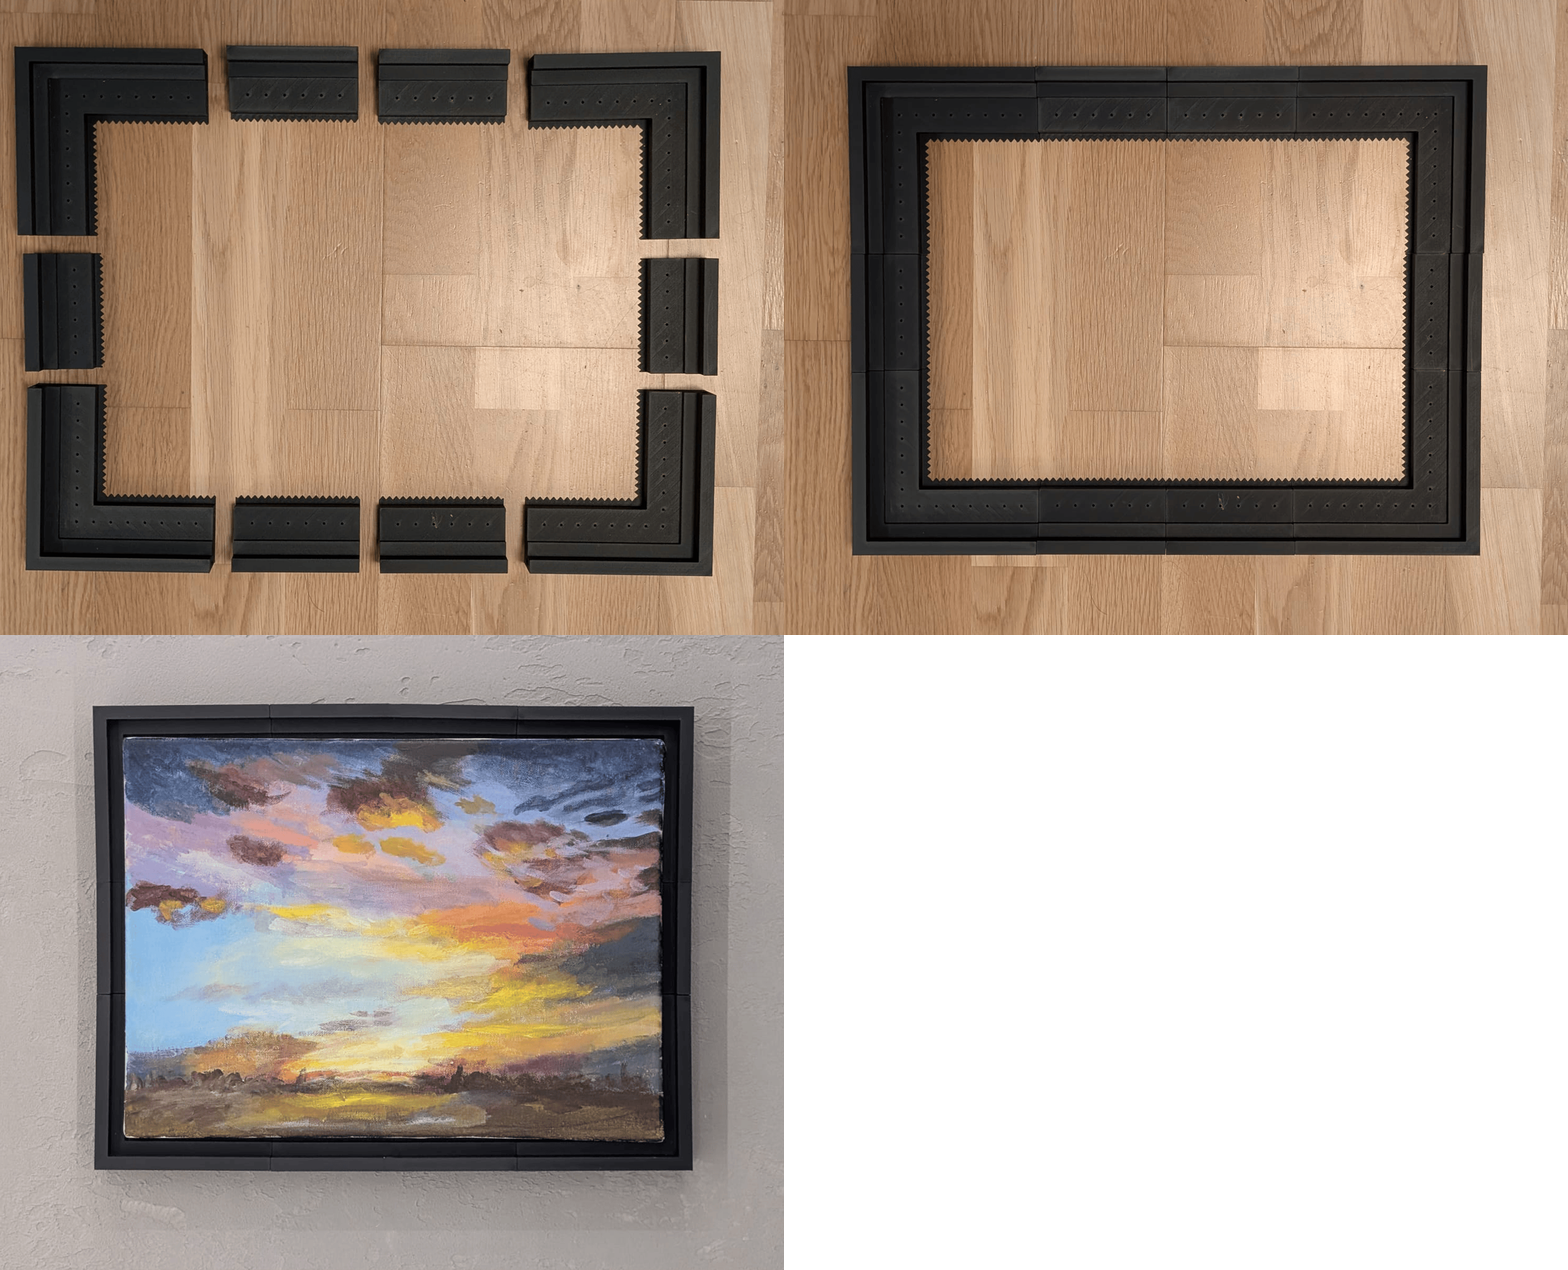
Important: The middle sections (the pieces between the corners) are not always the same for the width and height of the frame. Depending on the canvas size, some edge sections may also be omitted. Make sure to match identical sections on opposite sides of the frame—there should be an even number of each type.
Before applying any glue, perform a dry fit of all the parts to ensure everything aligns correctly and the frame is assembled as intended.
If desired, you can glue the frame pieces together for added rigidity and a cleaner fit. However, since the frame will ultimately be attached to the canvas with nails, this step is optional and can be skipped if you prefer a simpler assembly process.
The frame can be hung immediately using the integrated nail supports on the back (the small triangular hangers).
Thank you for checking out this project. If you build a frame using this generator, please share a photo and leave a rating—it helps other makers and provides valuable feedback for future improvements. Suggestions, remixes, and feature requests are always appreciated.
Parametric Floating Frame for Canvas
Publicado em 24 de jun de 2026
Gostou deste modelo? Crie uma conta grátis para salvar seus favoritos e voltar a eles depois.
Criar conta