Você está no 3DFinder
Buscamos em Thingiverse, MakerWorld e Printables ao mesmo tempo para te dar o melhor de cada uma.
Descrição
Desk Control Panel Redesign
This project redesigns the plastic housing of an electric standing desk controller with an industrial / military-inspired aesthetic. No soldering, wiring, or electronic modifications are required: only the original plastic enclosure is replaced while keeping the factory electronics unchanged.
I purchased the desk on AliExpress and was pleasantly surprised by both the delivery time and the overall value for money. At the time of purchase, after comparing several alternatives, it was the most affordable option available. Since I wasn't completely satisfied with the appearance of the original controller, I decided to redesign it from scratch.
Recommended Material
For the best visual result, I strongly recommend PLA-CF. Its matte finish perfectly matches the industrial and tactical design language of this project. Standard PLA is also fully supported, and dedicated print profiles for both materials are included.
Assembly
- Remove the controller from the desk and disconnect all cables.
- Open the original housing by removing the four rear screws.
- Carefully remove the PCB, handling it only by its edges. Avoid touching any components, solder joints, or PCB traces.
- Remove all supports from the printed parts.
- Glue the rectangular frame to the rear side of the front cover.
- Insert all six buttons following the order shown in the model photos.
Position the PCB by fitting the display into the previously installed frame.
Important: do not push the PCB completely into position. Leave a small visible gap around the display, as shown in the photos, to prevent the buttons from binding during operation.
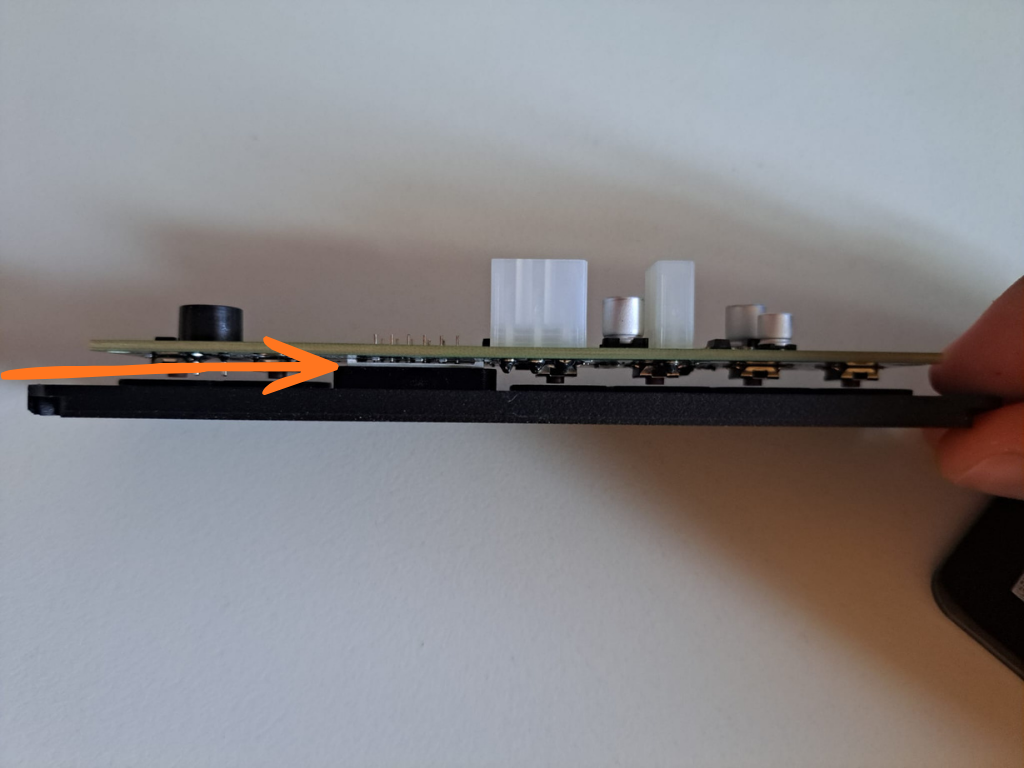
- Secure the front panel using four M3x10 screws. For the best visual result, I recommend using black screws.
- Reconnect the cables while applying light pressure to the display from the front side to prevent the PCB from being pushed forward and causing interference with the buttons.
Tolerances
As with any 3D printed project, tolerances may vary depending on printer calibration, material condition, and print quality.
The included PLA and PLA-CF profiles have been tested successfully, but variations between machines can still occur. For best results, ensure your filament is dry and your printer is properly calibrated.
If a tighter or looser fit is required, I recommend adjusting only the buttons and the display frame using your slicer's scaling tools. Small adjustments of 0.1–0.2 mm at a time are usually sufficient. Bambu Studio's measurement tools can be used to verify the final dimensions before printing.

Gostou deste modelo? Crie uma conta grátis para salvar seus favoritos e voltar a eles depois.
Criar conta