Você está no 3DFinder
Buscamos em Thingiverse, MakerWorld e Printables ao mesmo tempo para te dar o melhor de cada uma.
Descrição
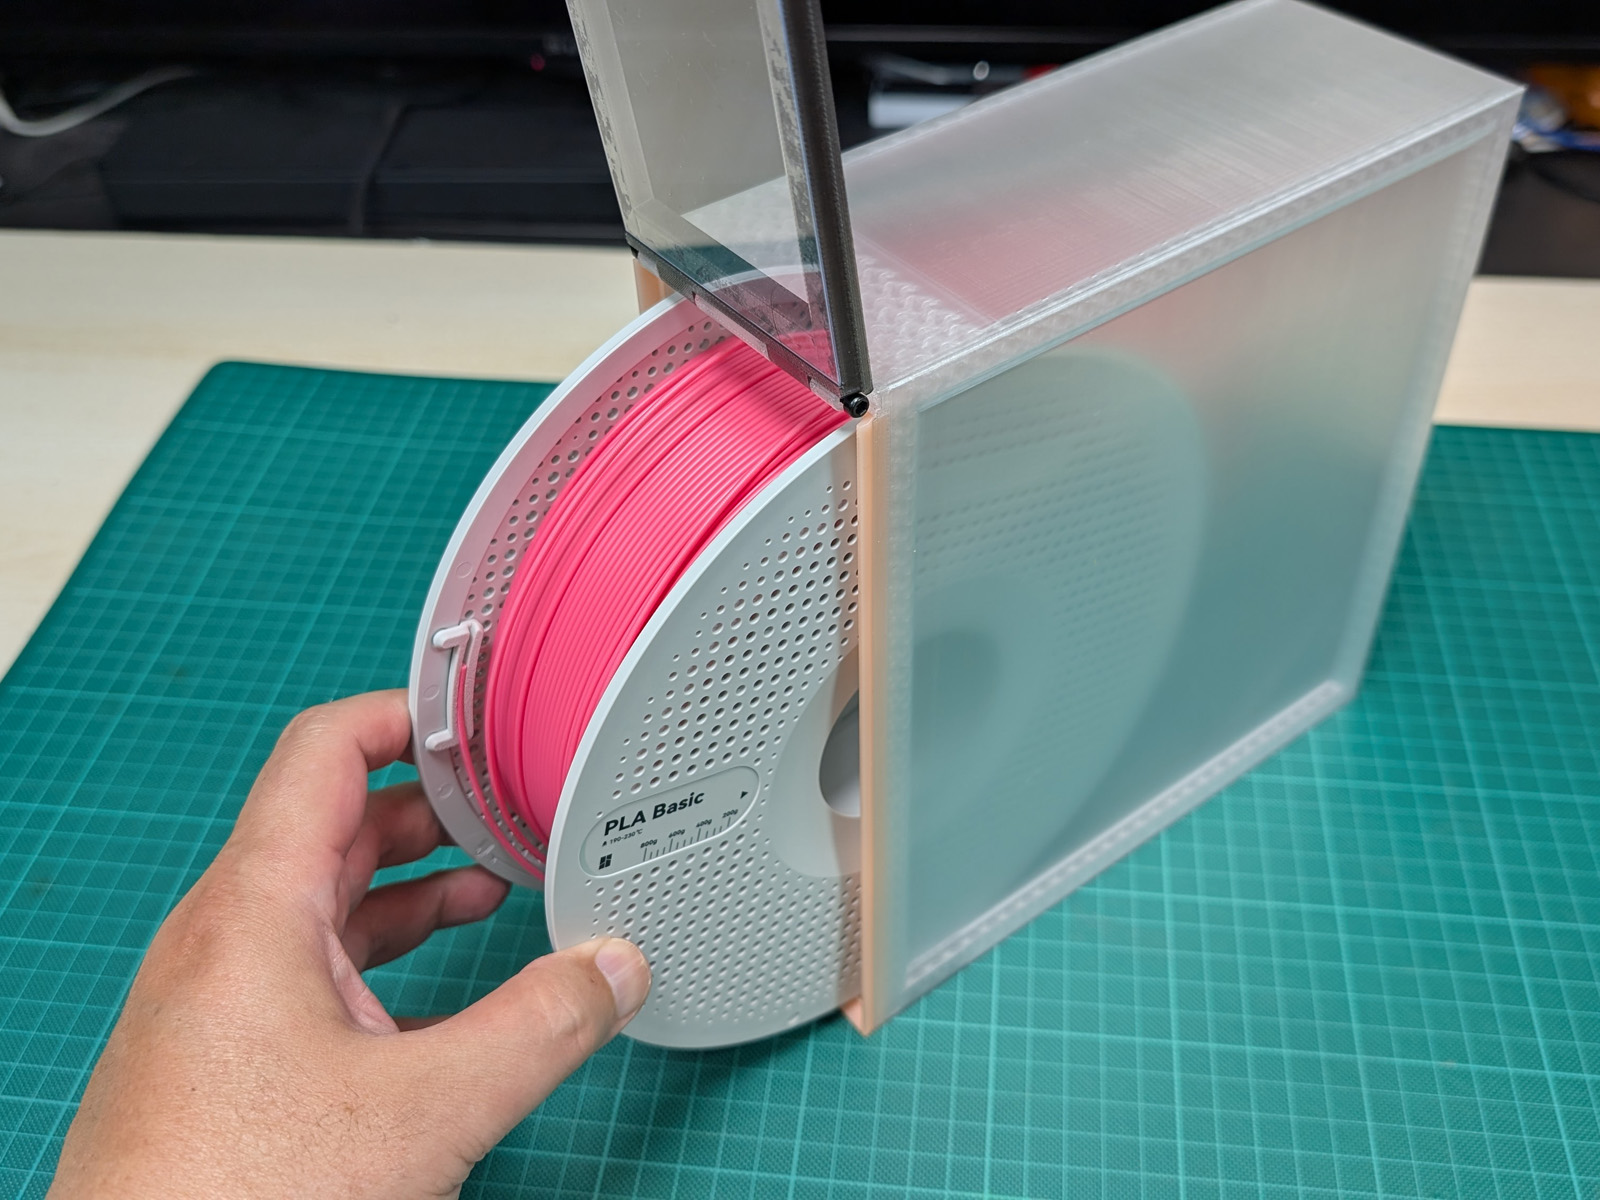
I designed this filament storage case to organize a large number of filament spools and make them quick and easy to access.
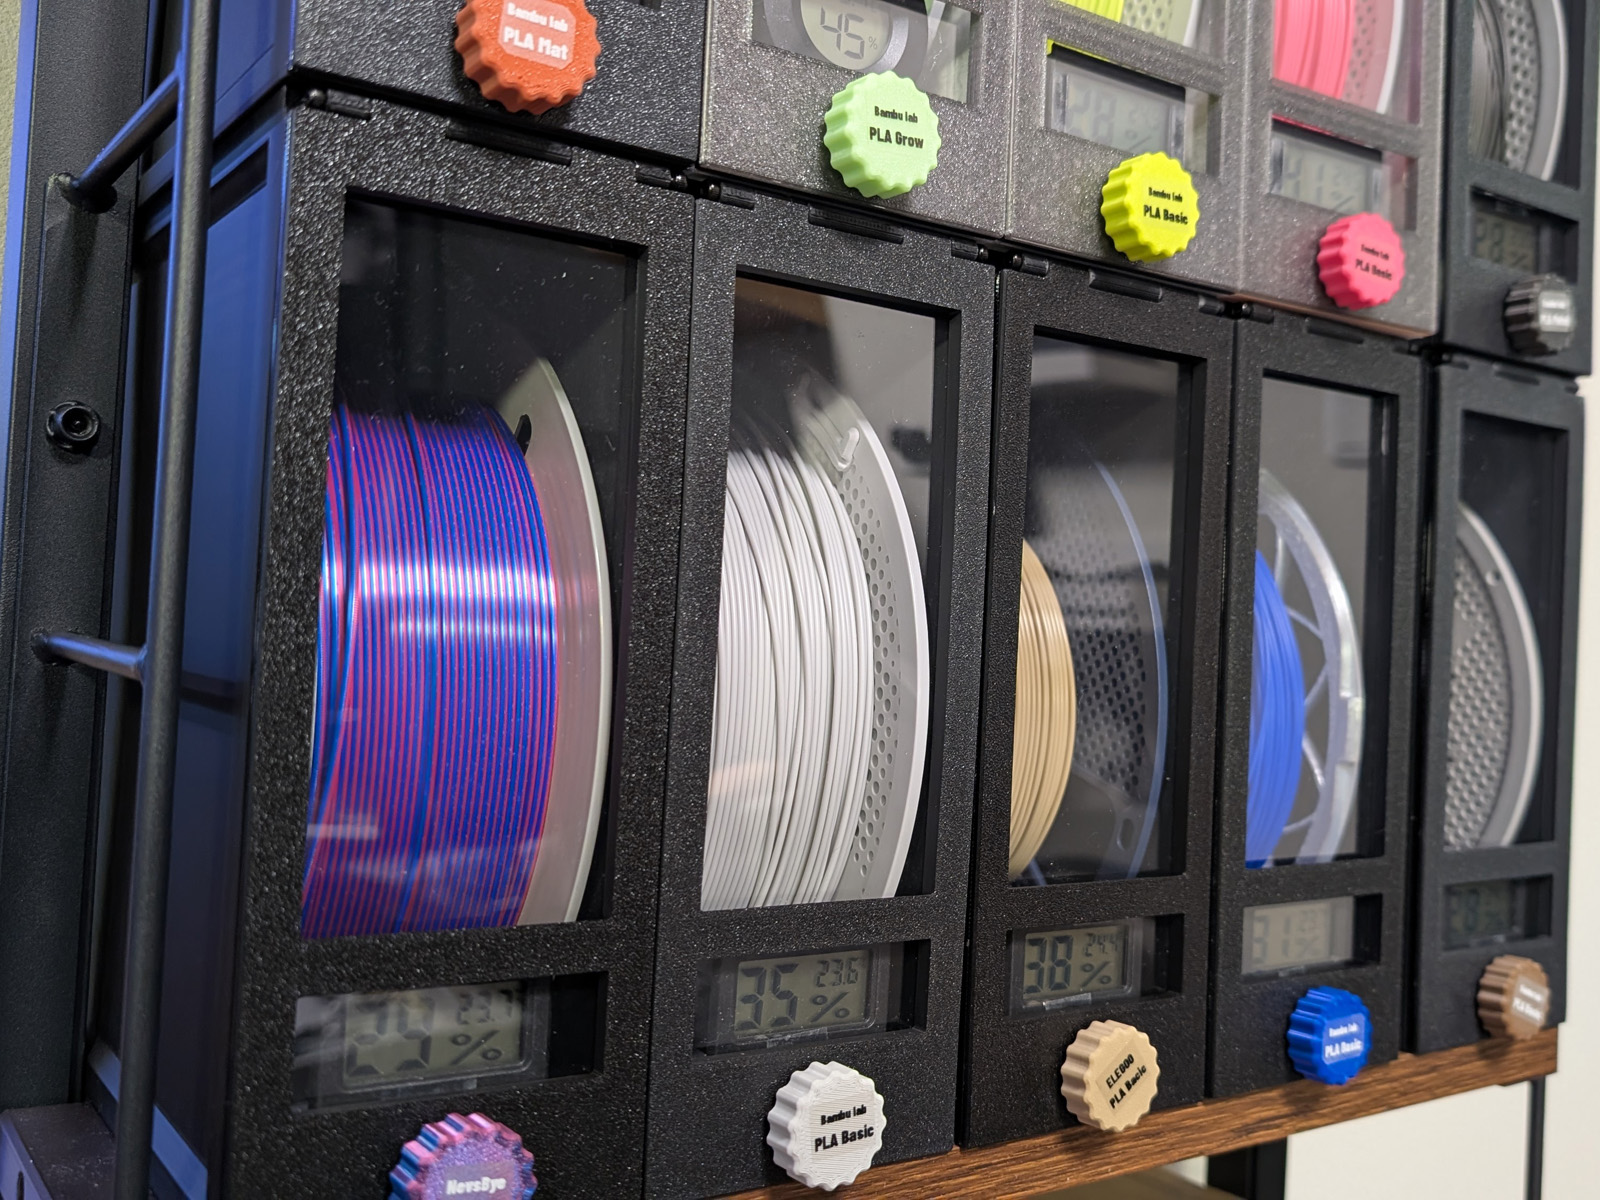
The cases can be stacked vertically and arranged side by side.
Because the lid opens from the front, you can remove the filament you need without moving the other cases.
The case includes a large clear window, a hygrometer mount, a desiccant compartment, and a TPU gasket. These features make your filament easier to identify, access, and store.
I hope this design helps you keep your 3D printing workspace organized and easy to use.
I have uploaded a video explaining this model on YouTube:
[https://youtu.be/SJGec_SRGWo](https://youtu.be/SJGec_SRGWo)
Main Features
Access Your Spool Without Moving the Stack
The lid opens from the front.
Even when several cases are stacked vertically or placed side by side, you can open each case individually without removing the cases above it.
This is especially useful when storing a large number of filament spools in a limited space.
Large Clear Window
The lid has a large clear window.
By using a transparent acrylic or PVC sheet, you can check the filament color, remaining amount, and surface texture without opening the case.
The lid locking nut can be printed with the same filament stored inside the case. This allows it to be used as a color sample.
If you have a label printer, adding labels such as PLA, PETG, ABS, or TPU will make your filament collection even easier to organize.
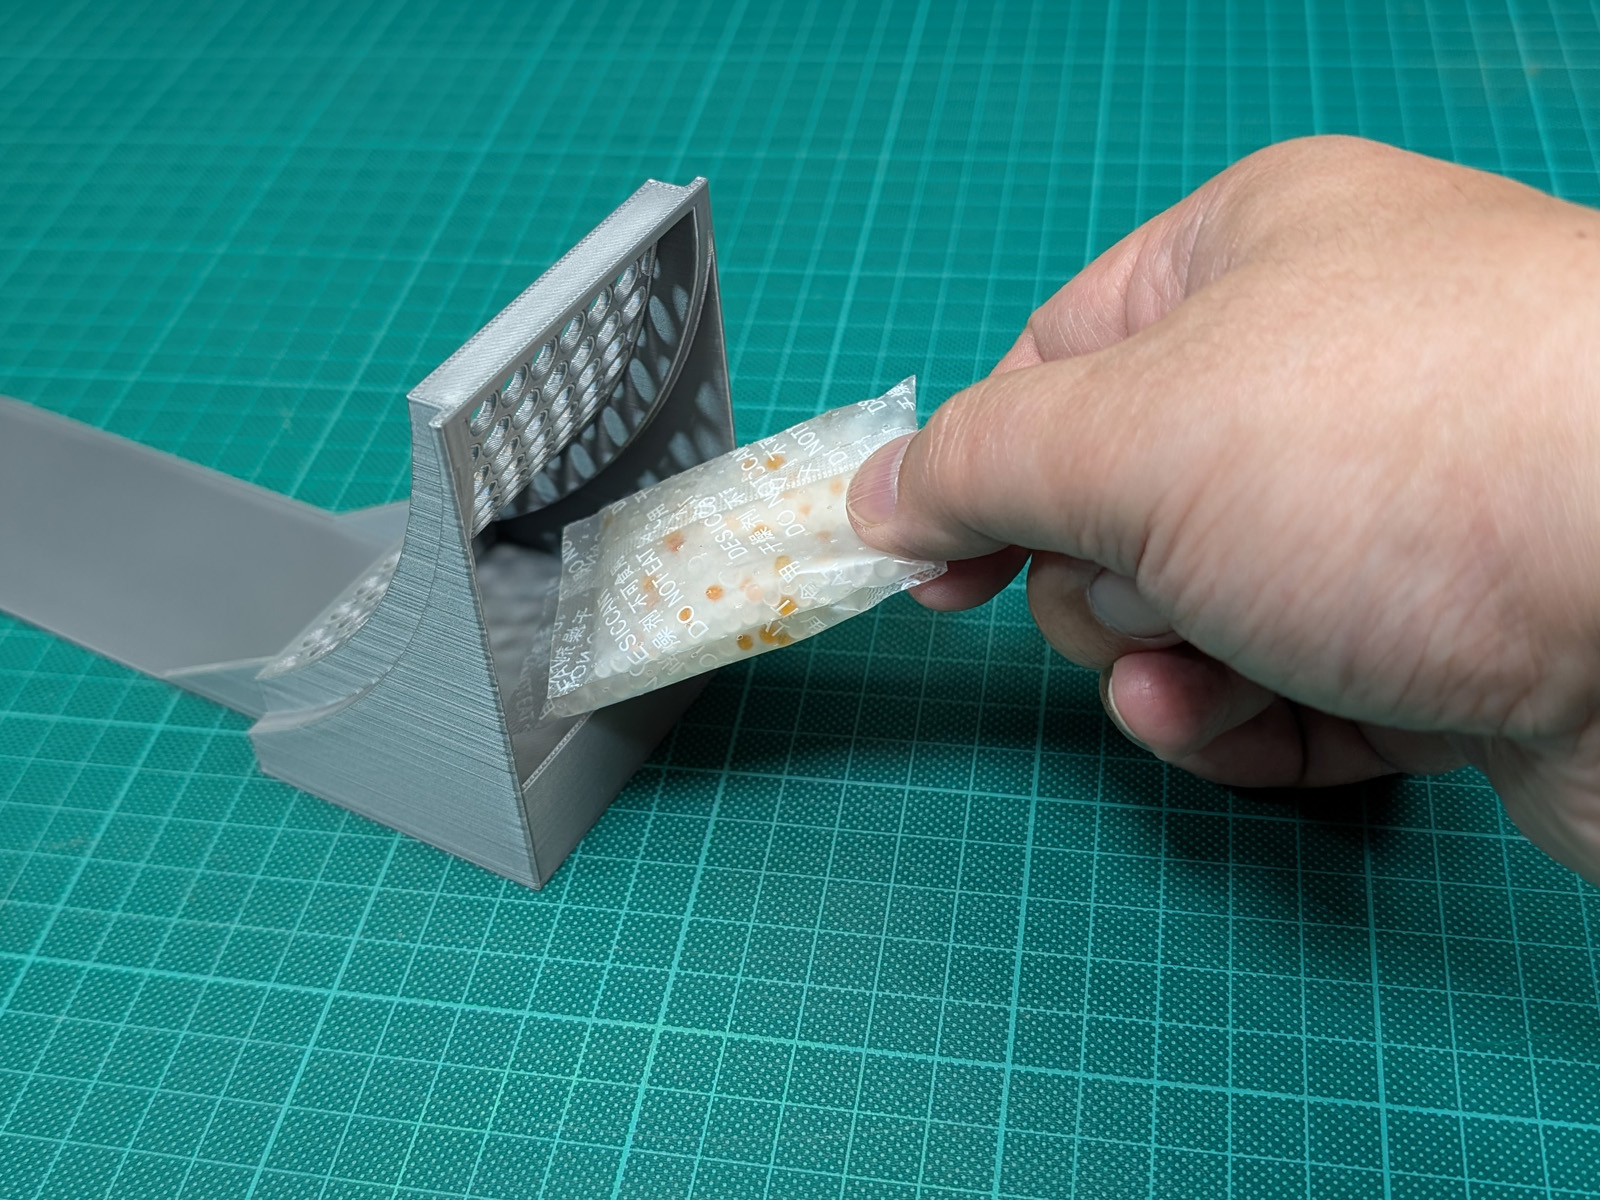
Spool Pull-Out Part
In most cases, you can simply open the lid and remove the spool by hand.
If the spool is difficult to reach, use the included filament pull-out part.
Pulling this part forward makes it easier to bring the spool toward the front of the case.
The rear section of the pull-out part also includes a compartment for silica gel or another desiccant.
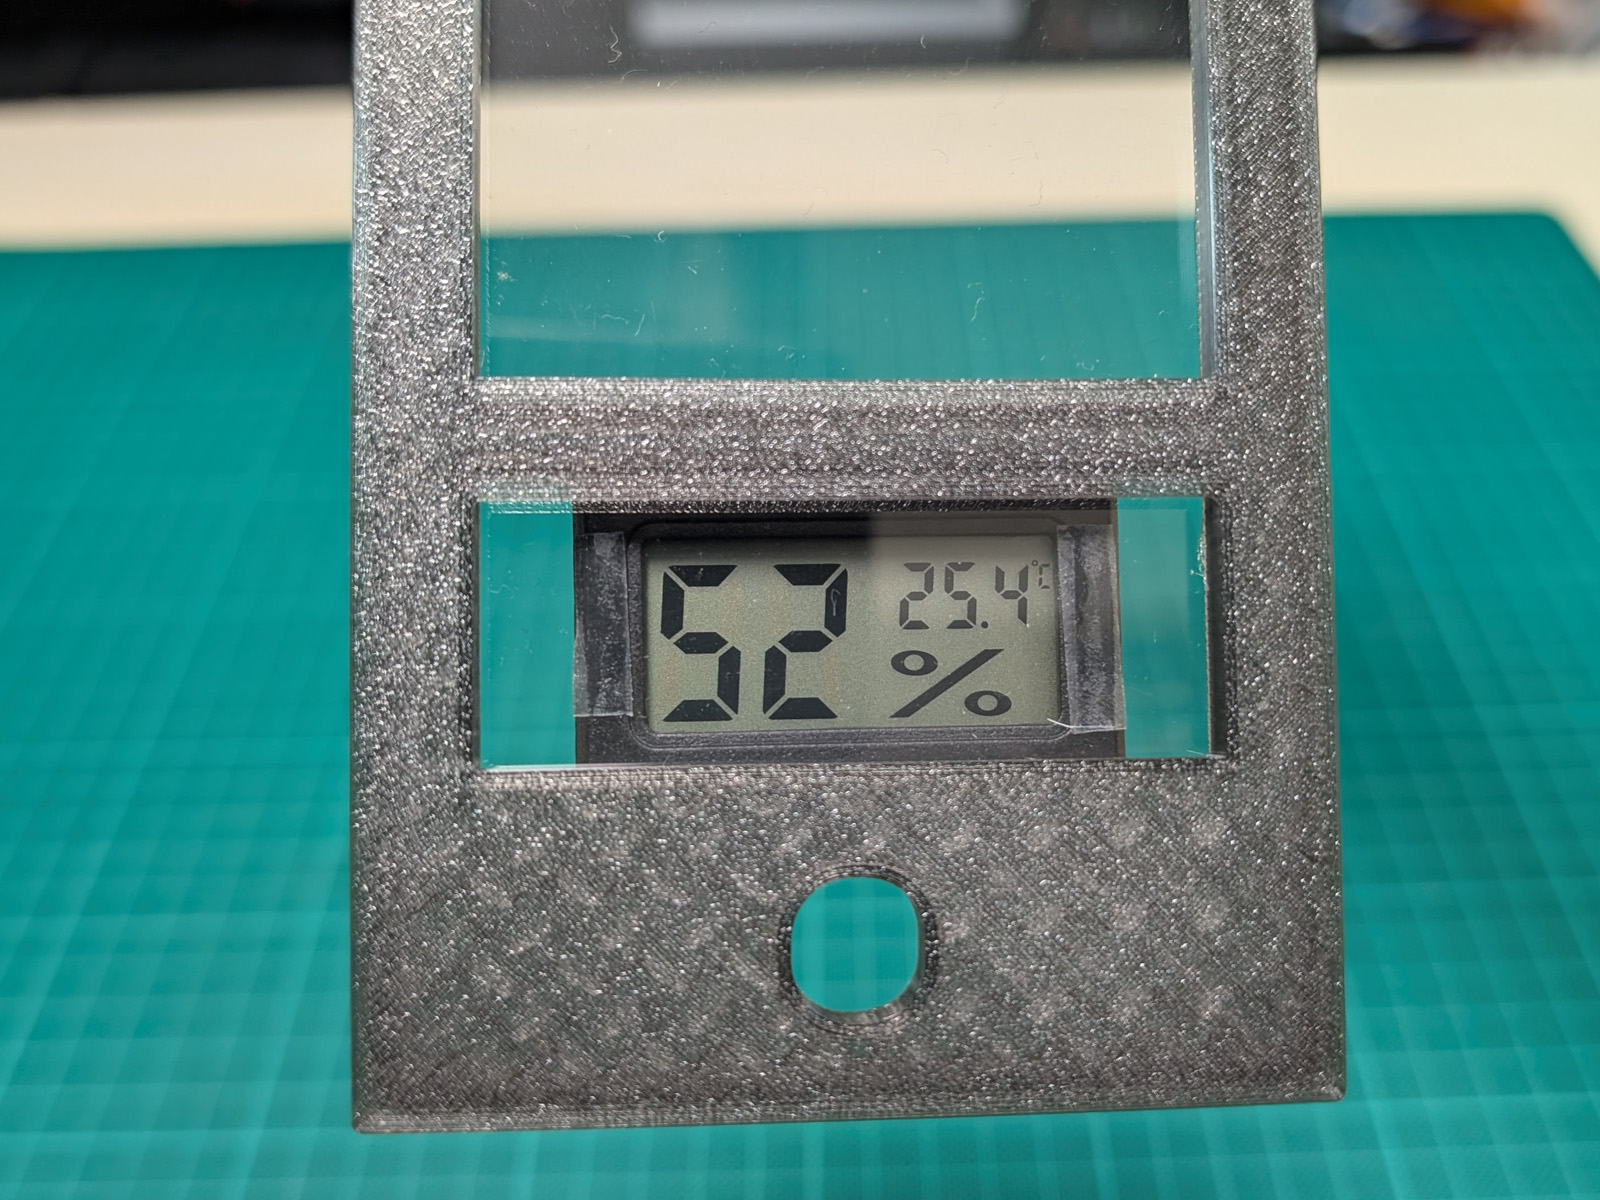
Check the Humidity Without Opening the Case
A small hygrometer can be installed in the lid.
This allows you to check the internal humidity at any time without opening the case.
A TPU gasket is installed between the lid and the case body.
Double-sided tape is also used around the clear window to help reduce air leakage and maintain a stable internal humidity.
This case does not include an active heating or drying function.
It is designed to store filament that has already been dried and to help protect it from moisture when used together with desiccant.
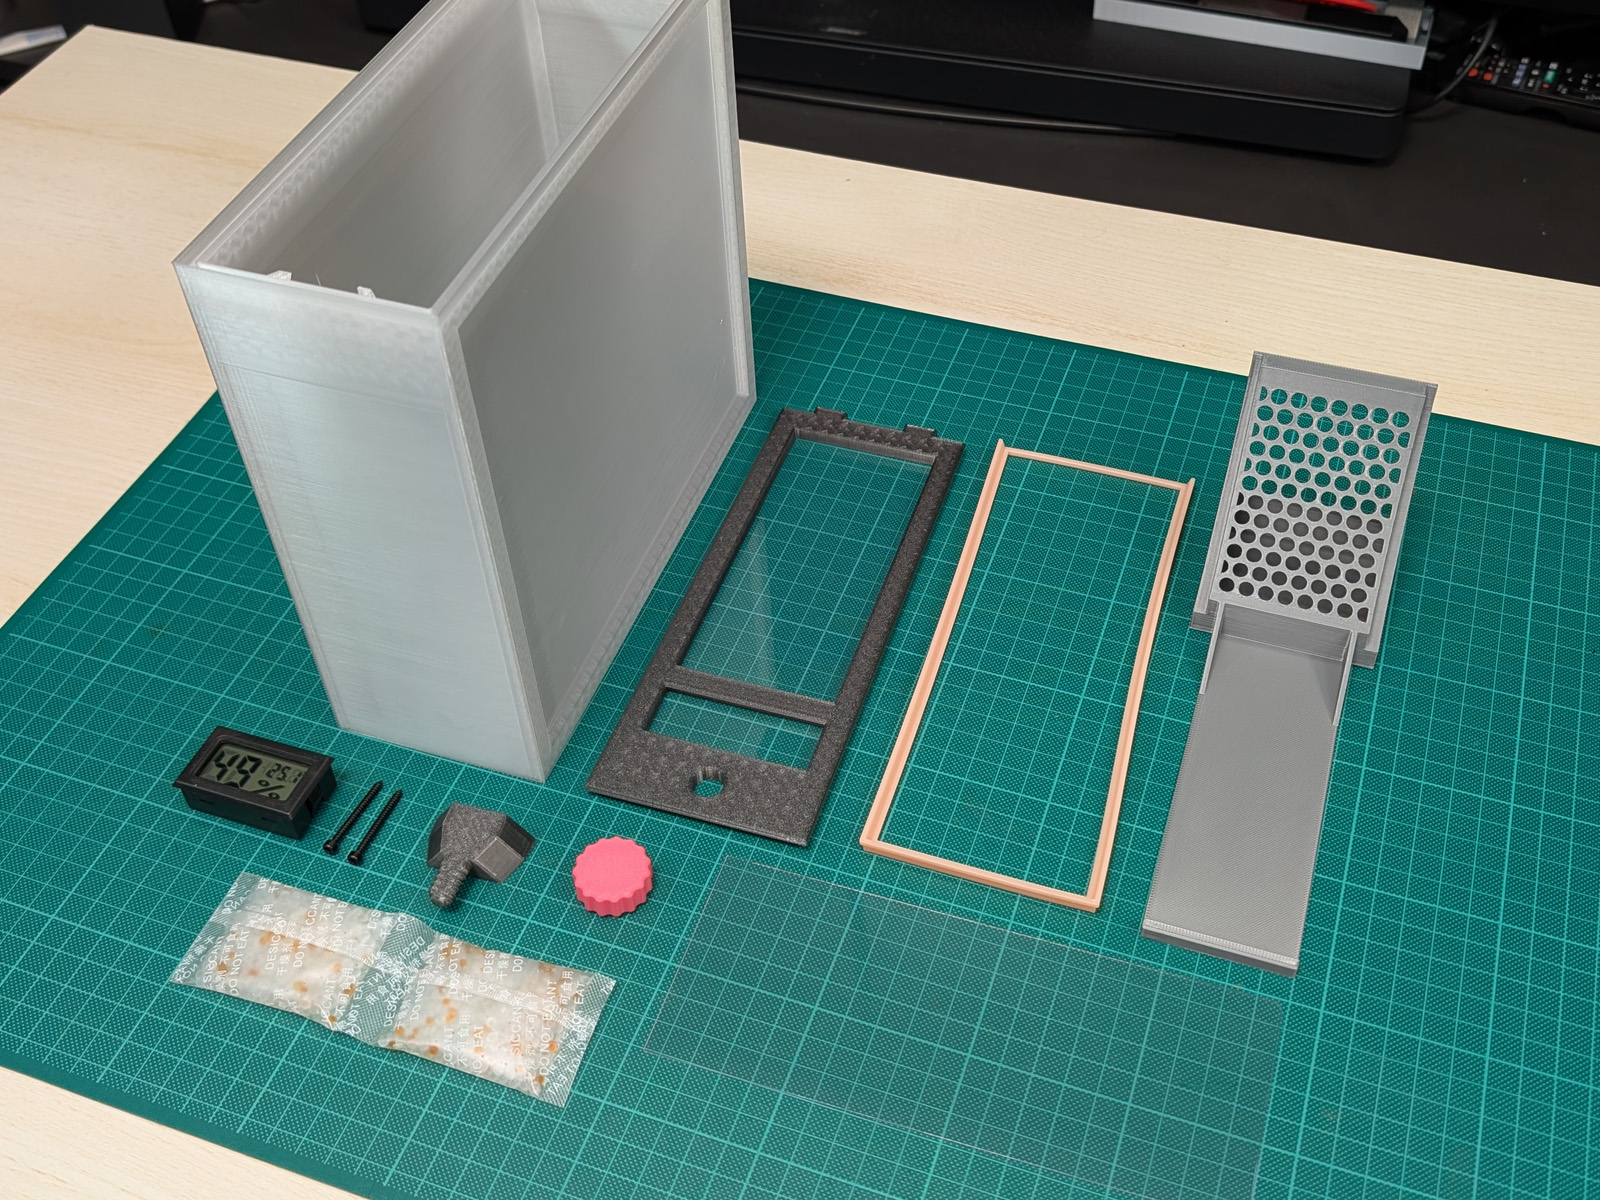
Required Parts
3D-Printed Parts
- Case body
- Lid
- TPU gasket
- Spool pull-out part
- Lid-locking bolt
- Lid-locking nut
Printing the lid-locking nut with the same filament stored inside the case allows it to be used as a color sample.
Additional Parts
Small Hygrometer ×1
A small rectangular hygrometer is recommended.
Desiccant
Silica gel or a similar desiccant can be used.
Clear Sheet ×1
Acrylic, PVC, or another transparent sheet can be used.
- Size: 74 × 185 mm
- Thickness supported by the standard model: 0.5–0.6 mm
The thickness of commonly available clear sheets may vary depending on your region or supplier.
If you would like to use a different thickness, such as a 1 mm sheet, please leave a comment with the required thickness.
Even if there is only one request, I plan to prepare a lid file that supports that thickness.
M3 Socket Head Cap Screws ×2
- Length: 25~30 mm
These screws are used as hinge pins on the left and right sides of the lid.
No nuts are used with these M4 screws.
They are simply inserted from both sides.
Double-Sided Tape
- Width: 5 mm
This is used to attach the clear sheet and the hygrometer.
Assembly Instructions
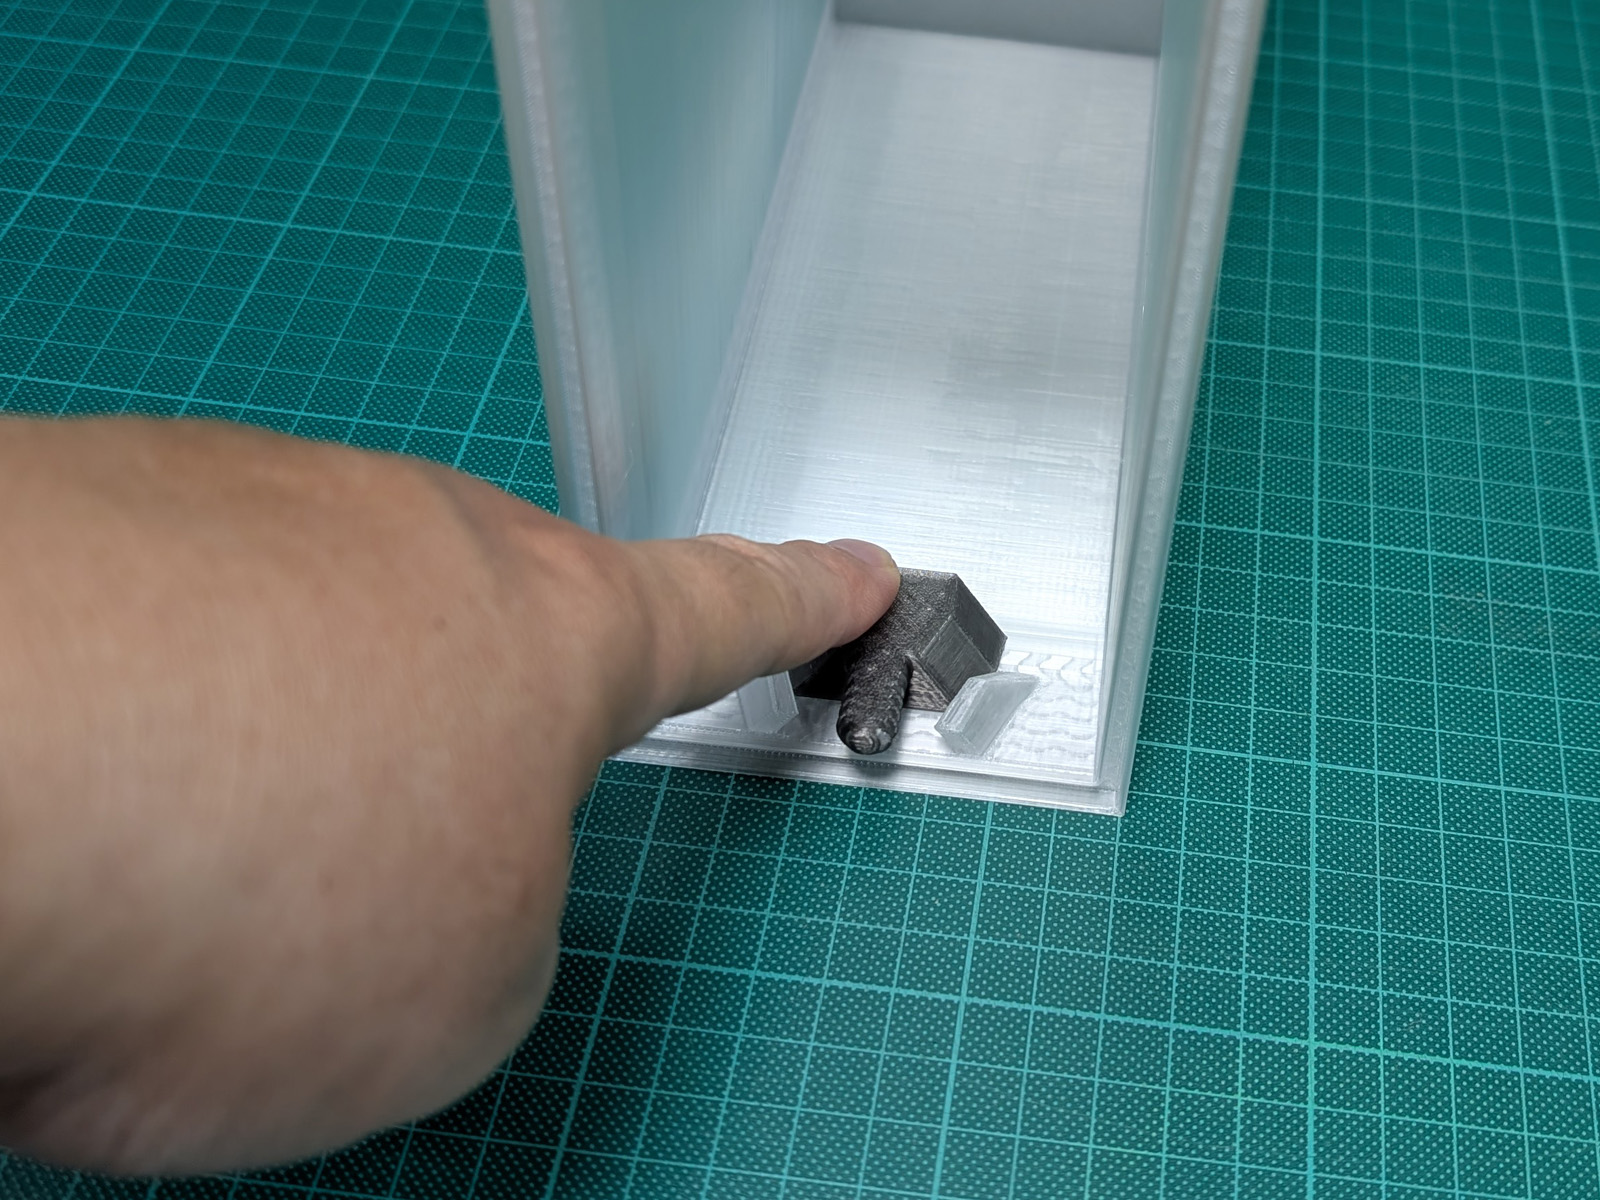
1. Install the Printed Lid-Locking Bolt
Install the 3D-printed lid-locking bolt into the hook on the inside of the case body.
Insert the part from inside the case, then slide it sideways along the hook until it is secured.
Check the photos for the correct position and orientation.
The part used in this step is the 3D-printed lid-locking bolt.
It is not one of the metal M4 screws.
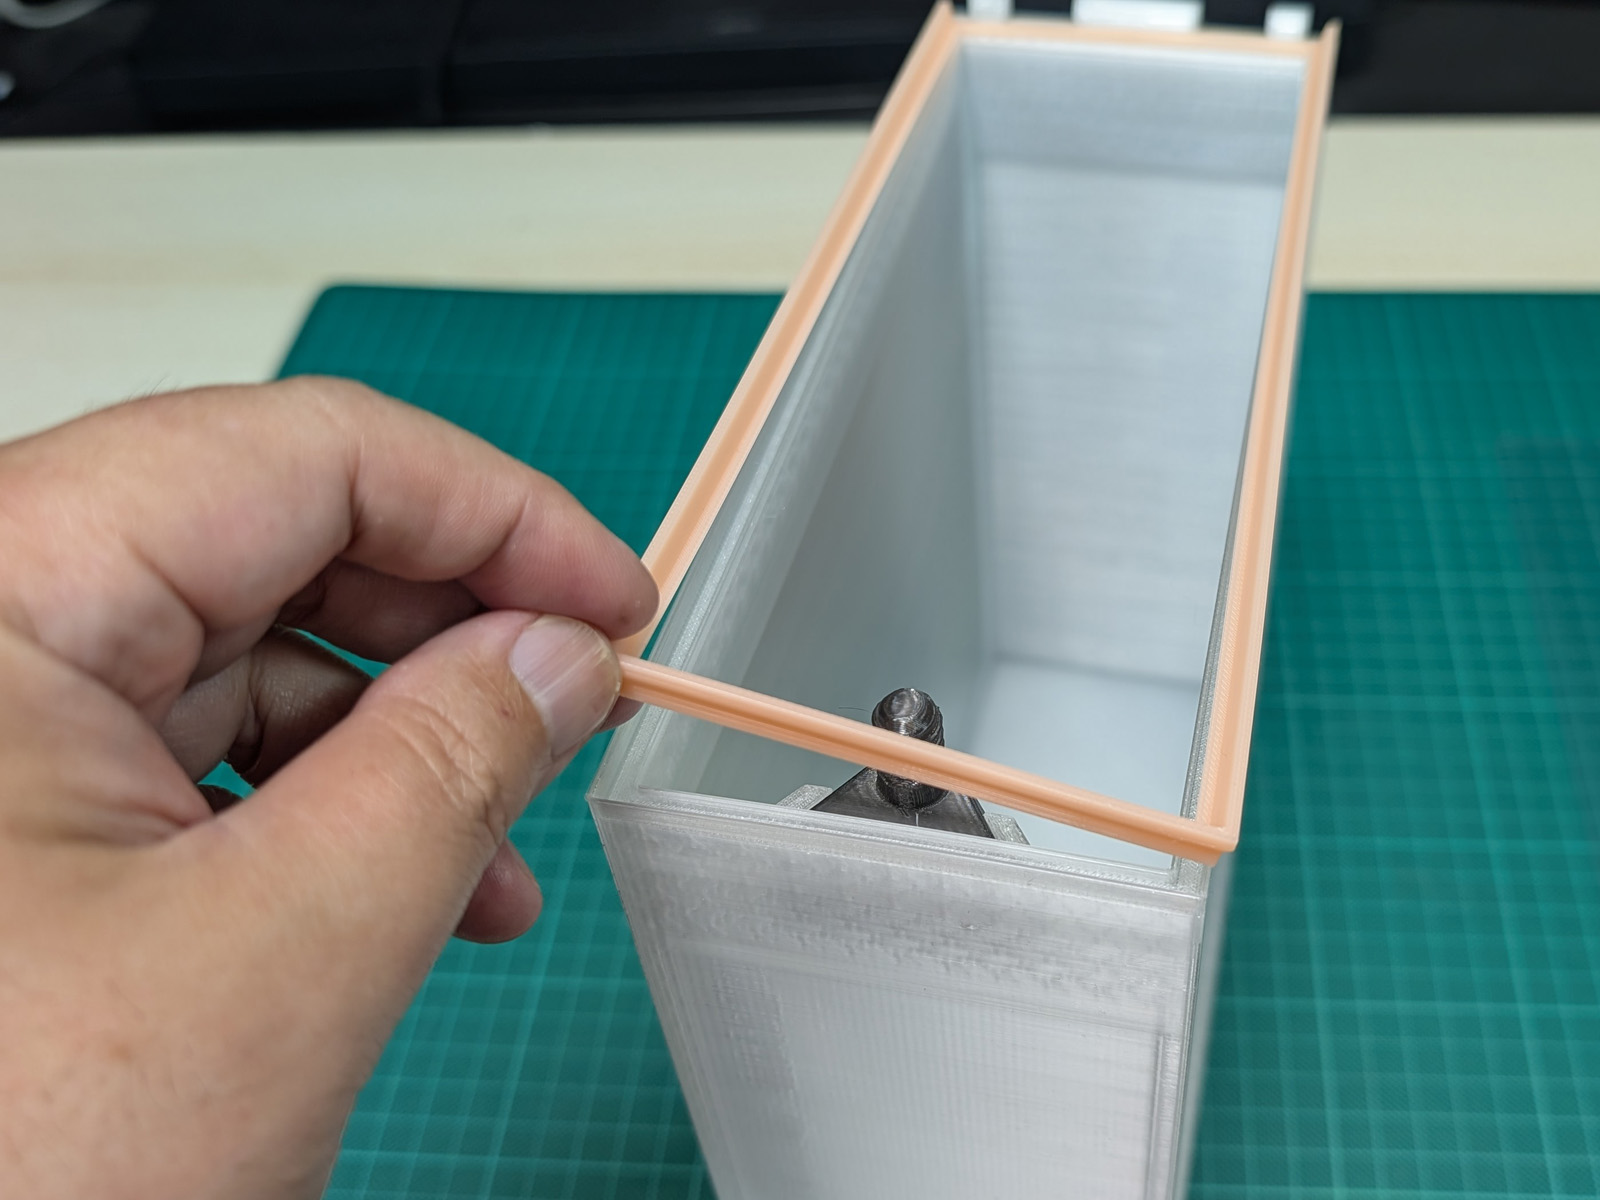
2. Install the TPU Gasket
Fit the TPU gasket around the front opening of the case body.
Make sure the gasket is installed evenly and is not twisted or lifted away from the surface.
Any twisting or lifting may affect how well the lid seals against the case.
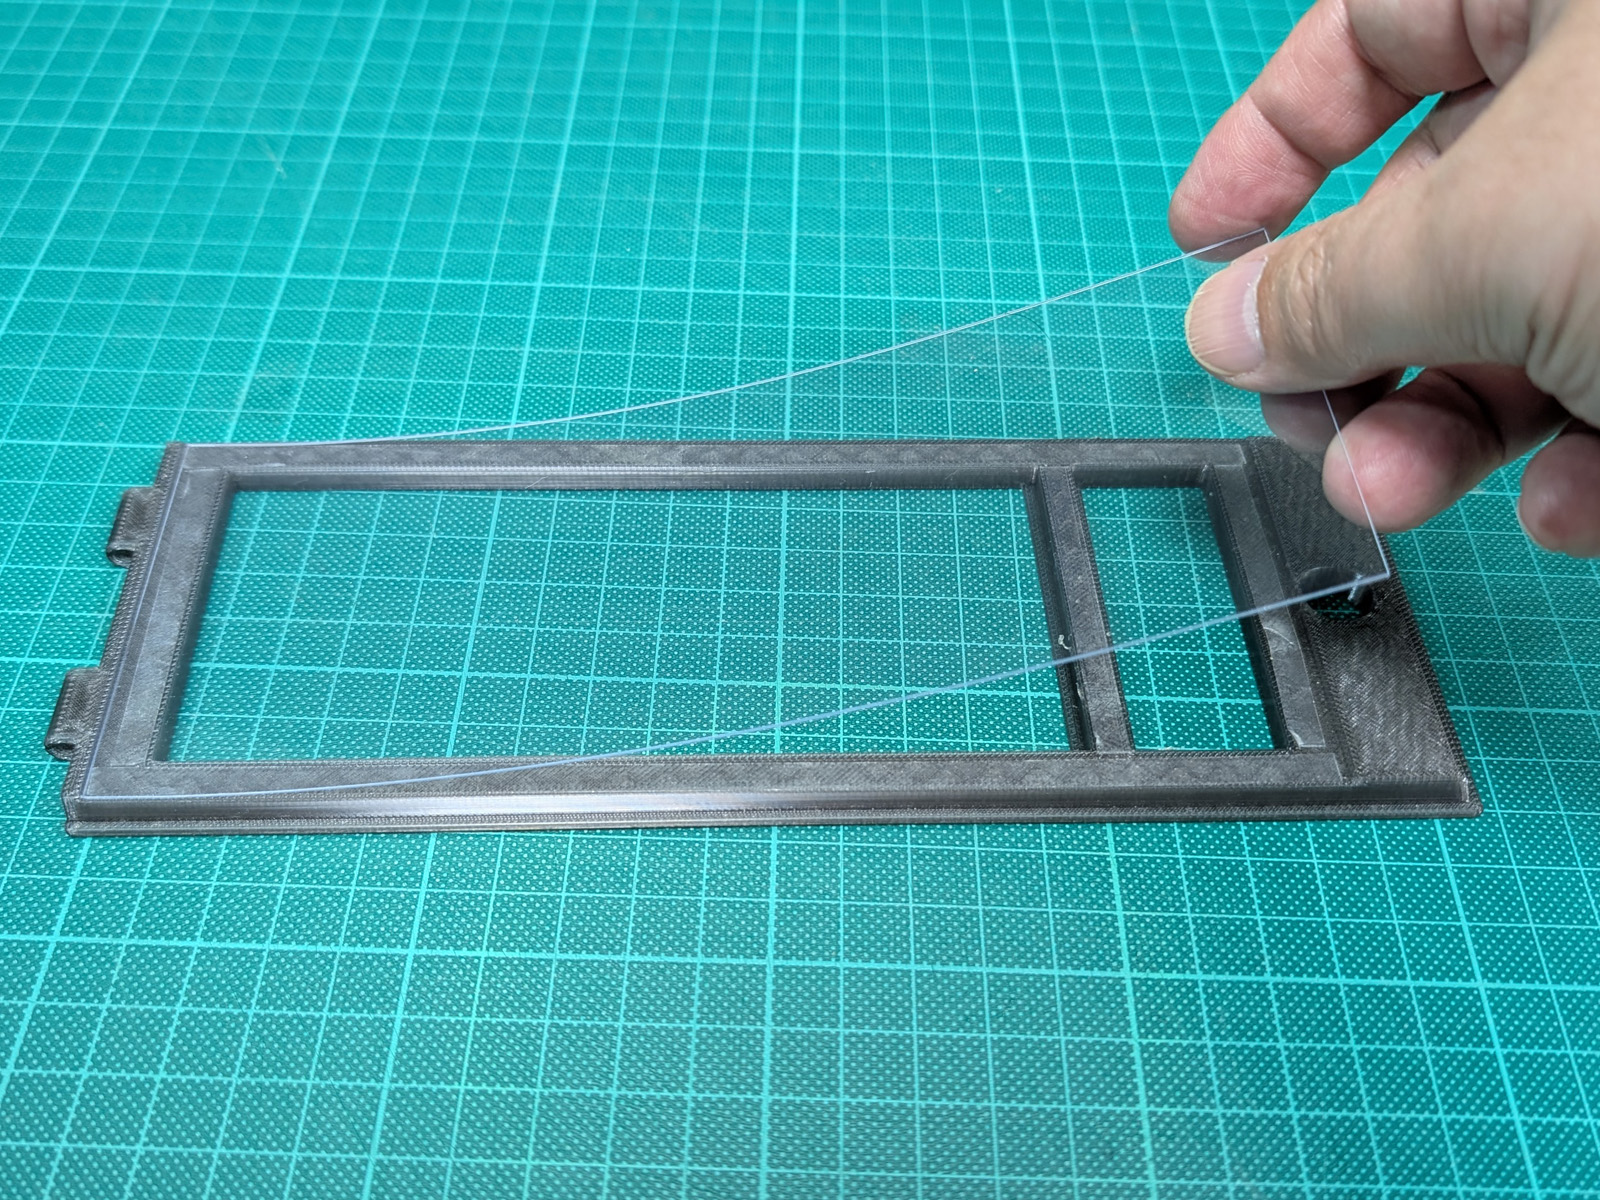
3. Attach the Clear Sheet to the Lid
The rear side of the lid has a recessed area for attaching the clear sheet.
Apply 5 mm-wide double-sided tape around this recessed area.
The tape should form a continuous loop around the window without any gaps. Gaps may allow air to enter the case and reduce the effectiveness of the seal.
Remove the protective backing from the tape and attach the clear sheet, cut to 74 × 185 mm.
Align the clear sheet carefully.
If the sheet is misaligned, it may interfere with the TPU gasket and reduce the effectiveness of the seal.
Before permanently attaching it, confirm that the sheet fits correctly in the intended position.
4. Install the Hygrometer
Attach the small hygrometer to the smaller window in the lid.
Secure it directly with a small amount of double-sided tape.
Use only the minimum amount of tape needed to hold the hygrometer in place.
If it is attached too firmly, it may be difficult to remove when replacing the hygrometer or disposing of the case.
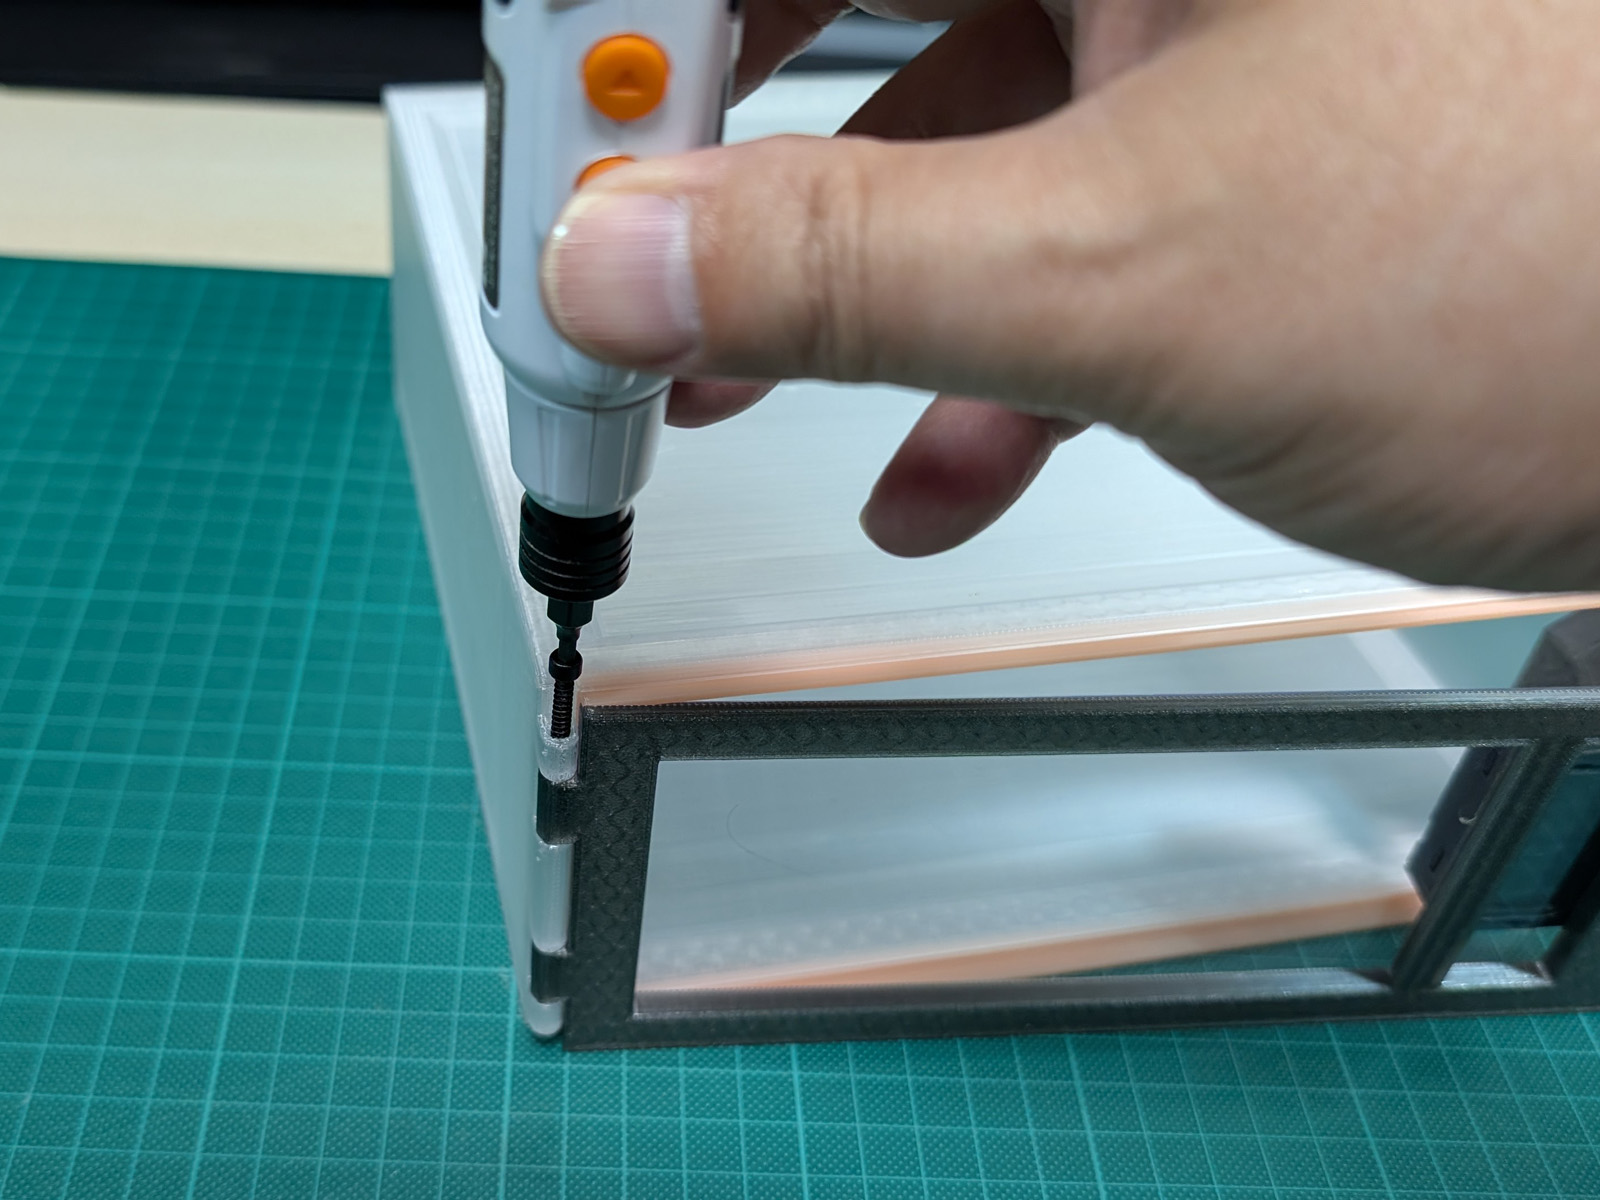
5. Attach the Lid to the Case Body
Align the hinge sections on both sides of the lid with the holes in the case body.
Insert one M4 socket head cap screw from each side.
Do not tighten the M3 screws.
Simply insert them from the left and right sides.
No nuts are used in this step.
Insert each screw only far enough that it does not significantly protrude from the side of the case.
After installation, check that the lid opens and closes smoothly.
6. Insert the Spool Pull-Out Part
If you are using desiccant, place it in the compartment at the rear of the filament pull-out part.
Insert the pull-out part into the rear of the case body.
Place the filament spool on top of it.
7. Install the Lid-Locking Nut
Close the lid and attach the 3D-printed lid-locking nut from the front.
Printing this nut with the same filament stored inside the case allows it to be used as a color sample for identifying the contents.
You can also add a label showing the material type, such as PLA, PETG, ABS, or TPU.
How to Use
Remove the lid-locking nut and open the lid toward the front.
Remove the filament spool directly by hand.
If the spool is difficult to reach, pull the filament pull-out part toward the front of the case.
Each case can be opened individually while the cases remain stacked vertically or arranged side by side.
Important Notes
This case is designed to store already-dried filament and help reduce moisture absorption during storage.
It does not actively dry filament that has already absorbed a large amount of moisture.
When necessary, dry the filament with a filament dryer before placing it in the case.
The position of the clear sheet, gaps in the double-sided tape, and the condition of the TPU gasket will affect the quality of the seal.
After assembly, check the following:
- The clear sheet is correctly aligned and is not lifting away from the lid.
- There are no gaps in the double-sided tape.
- The TPU gasket is not twisted or lifted.
- The lid opens and closes smoothly.
- The M3 screws do not significantly protrude from the sides of the case.
- The hygrometer is securely attached.
Check the hygrometer regularly and replace or regenerate the desiccant when necessary.
Stackable Filament Case with Clear Window

Publicado em 22 de jun de 2026