Você está no 3DFinder
Buscamos em Thingiverse, MakerWorld e Printables ao mesmo tempo para te dar o melhor de cada uma.
Descrição
Introduction
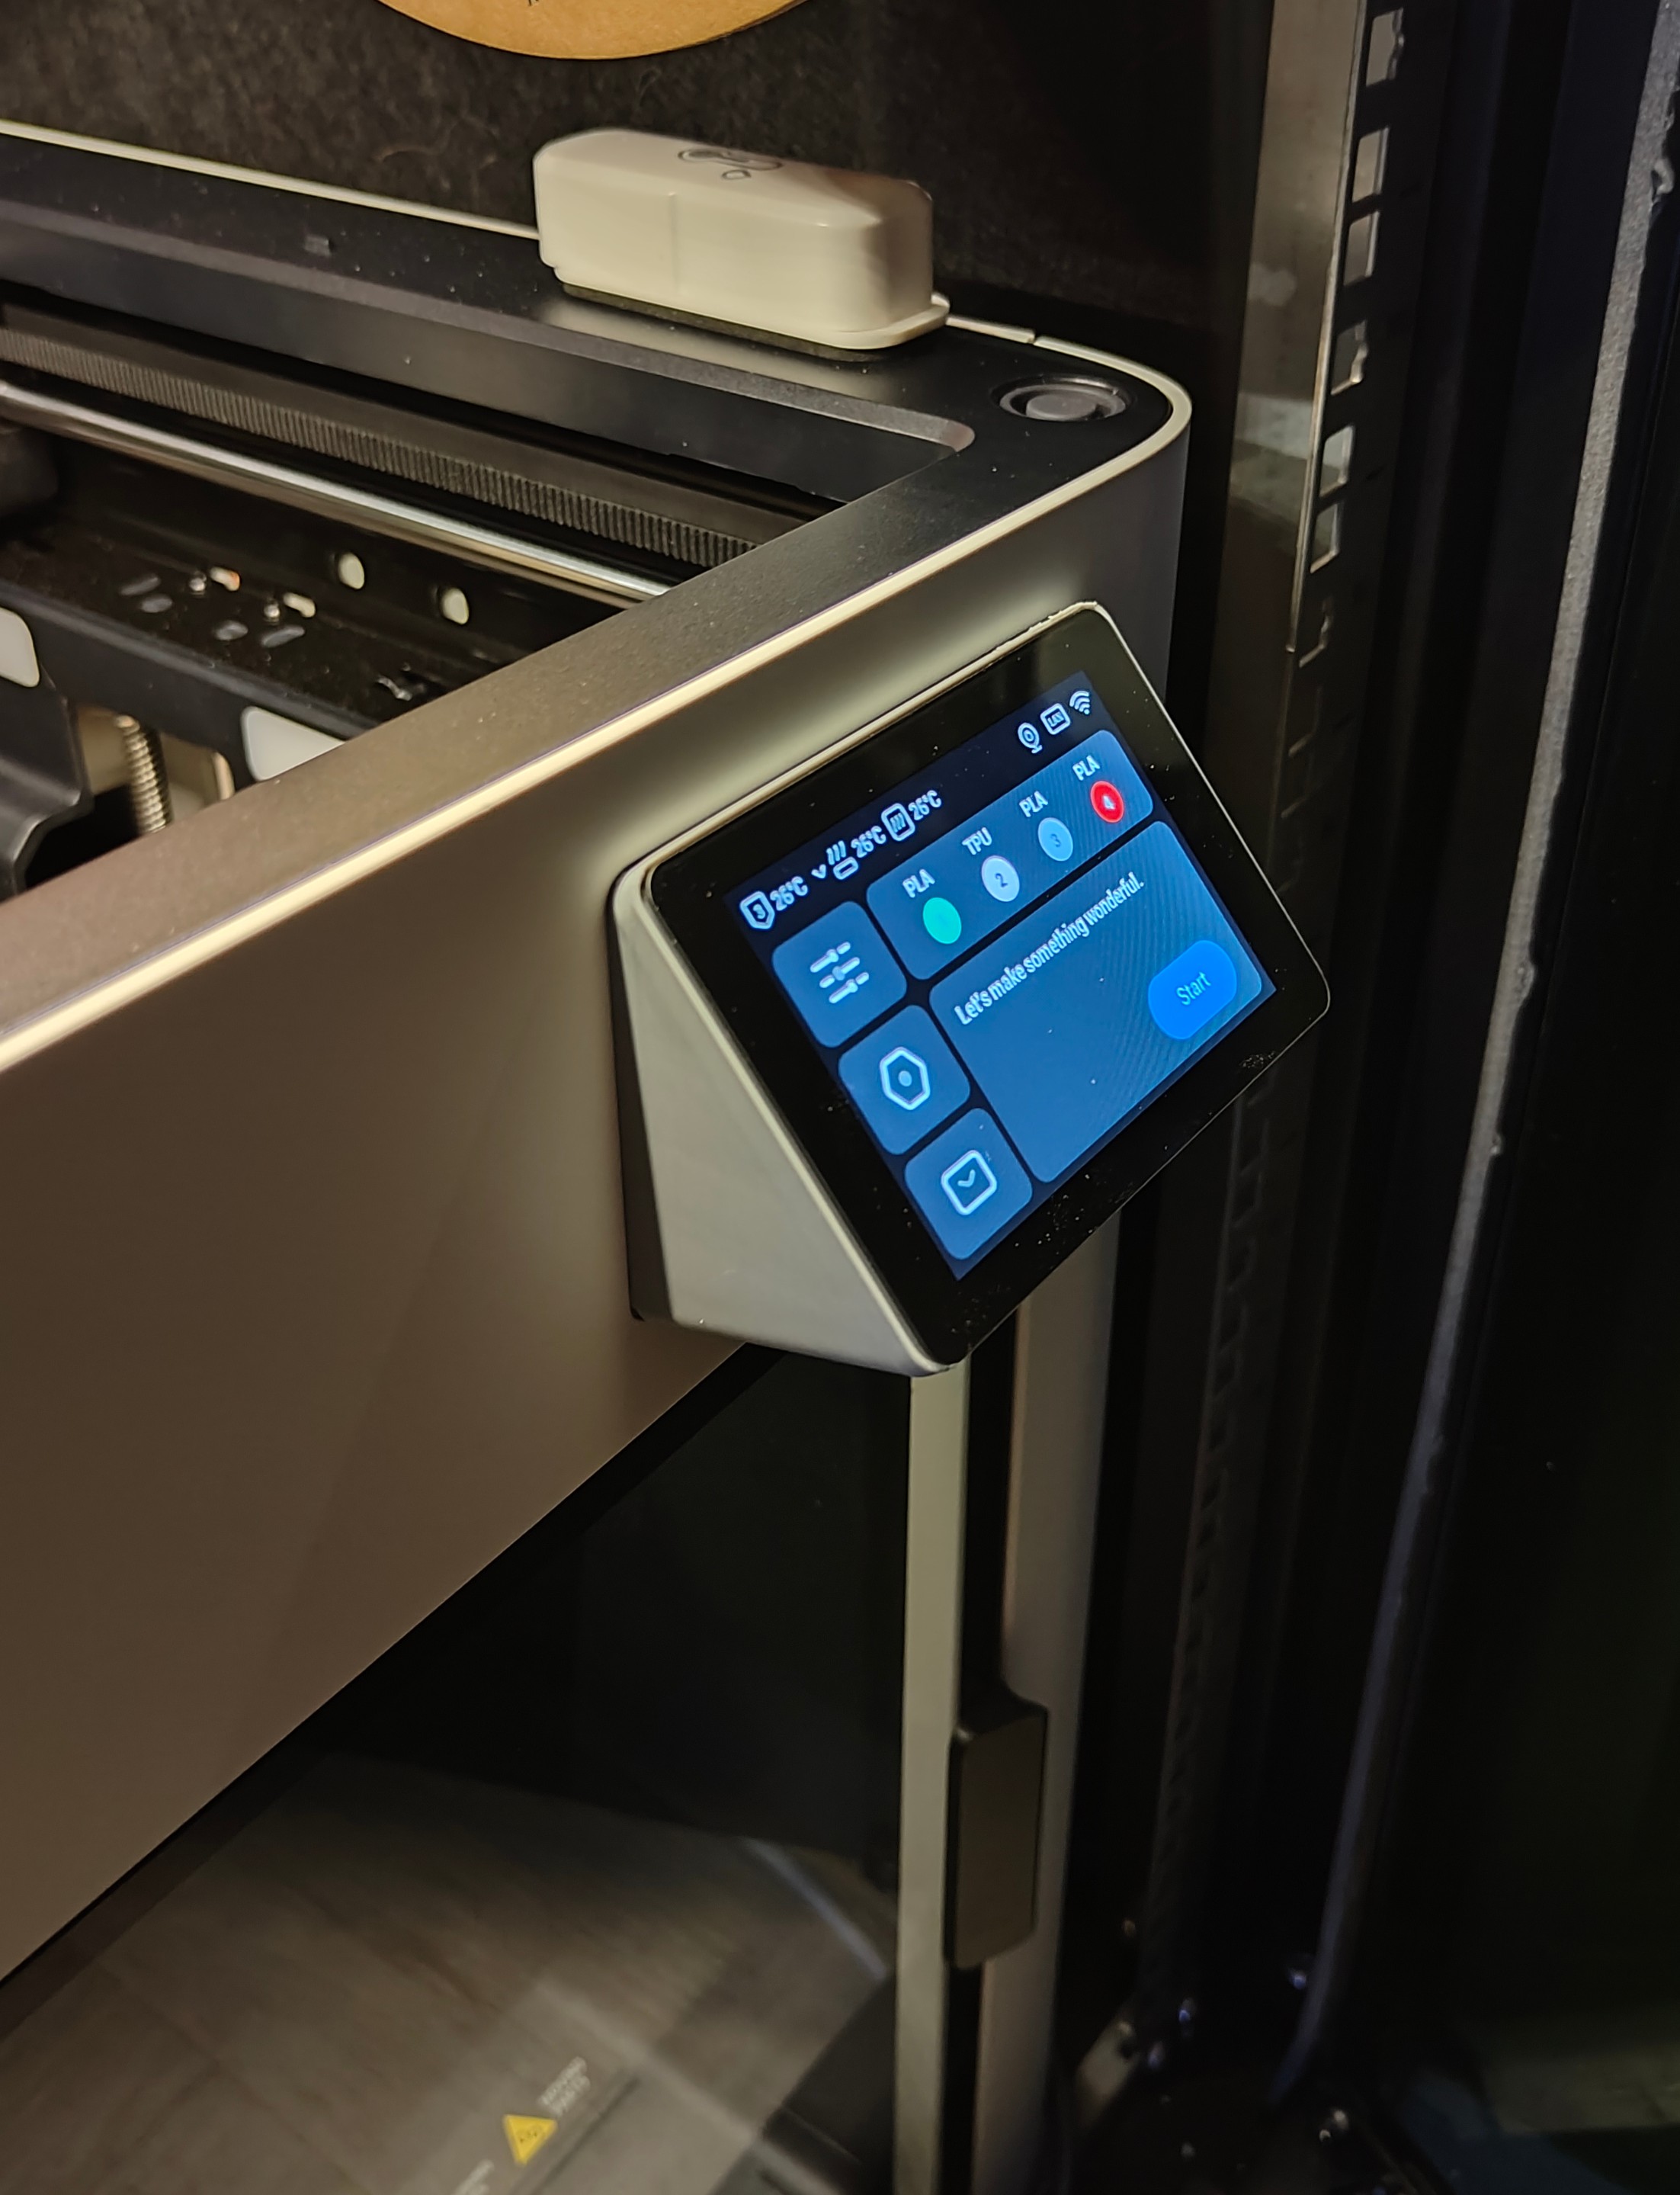
Quite a few people keep their Snapmaker U1 close to the floor which makes the touchscreen a bit harder to see and use.
This mount allows tilting the touchscreen upwards for better visibility and usability.
This is not an articulated mount; print the STEP file for the angle you want.
Alternatively, you can customize the angle using instructions from Customizing the angle section.
Usage
Slice the STEP files yourself. Do not print my 3mf file because it's optimized for my specific printer. Included STEP files can be opened in all slicers and if you need to re-export any of them there's my FcStd file which can be opened in FreeCAD or any other CAD software that is able to read FreeCAD files.
Multi-material supports recommendations
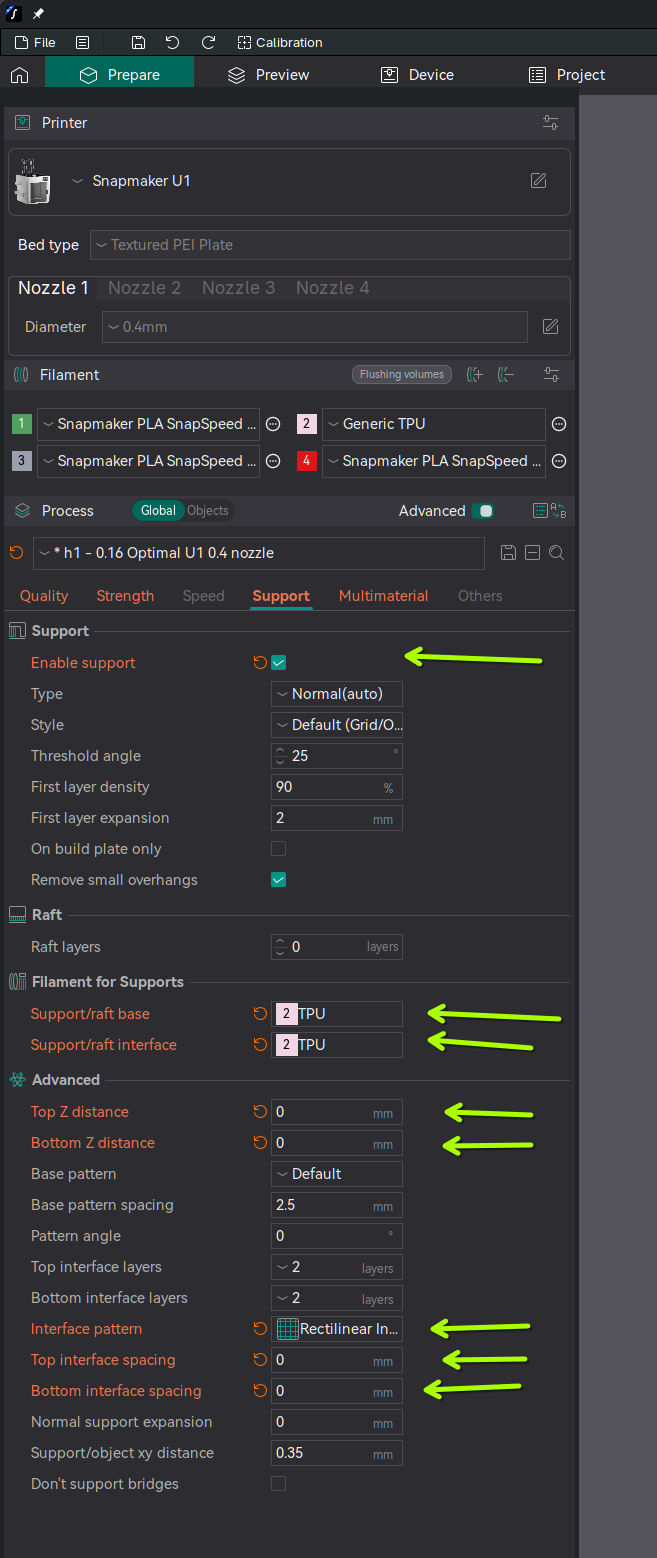
Model is optimized for multi-material supports. I like to print it out of PLA with TPU supports. To ensure nice quality, set support parameters to:
Filament: TPU or PETG
Top Z distance: 0mm
Bottom Z distance: 0mm
Interface pattern: Rectlinear Interlaced
Top interface spacing: 0
Bottom interface spacing: 0
Customizing the angle
You can customize the angle by opening the file u1-touchscreen-mount.FCStd using FreeCAD.
Open the file in FreeCAD
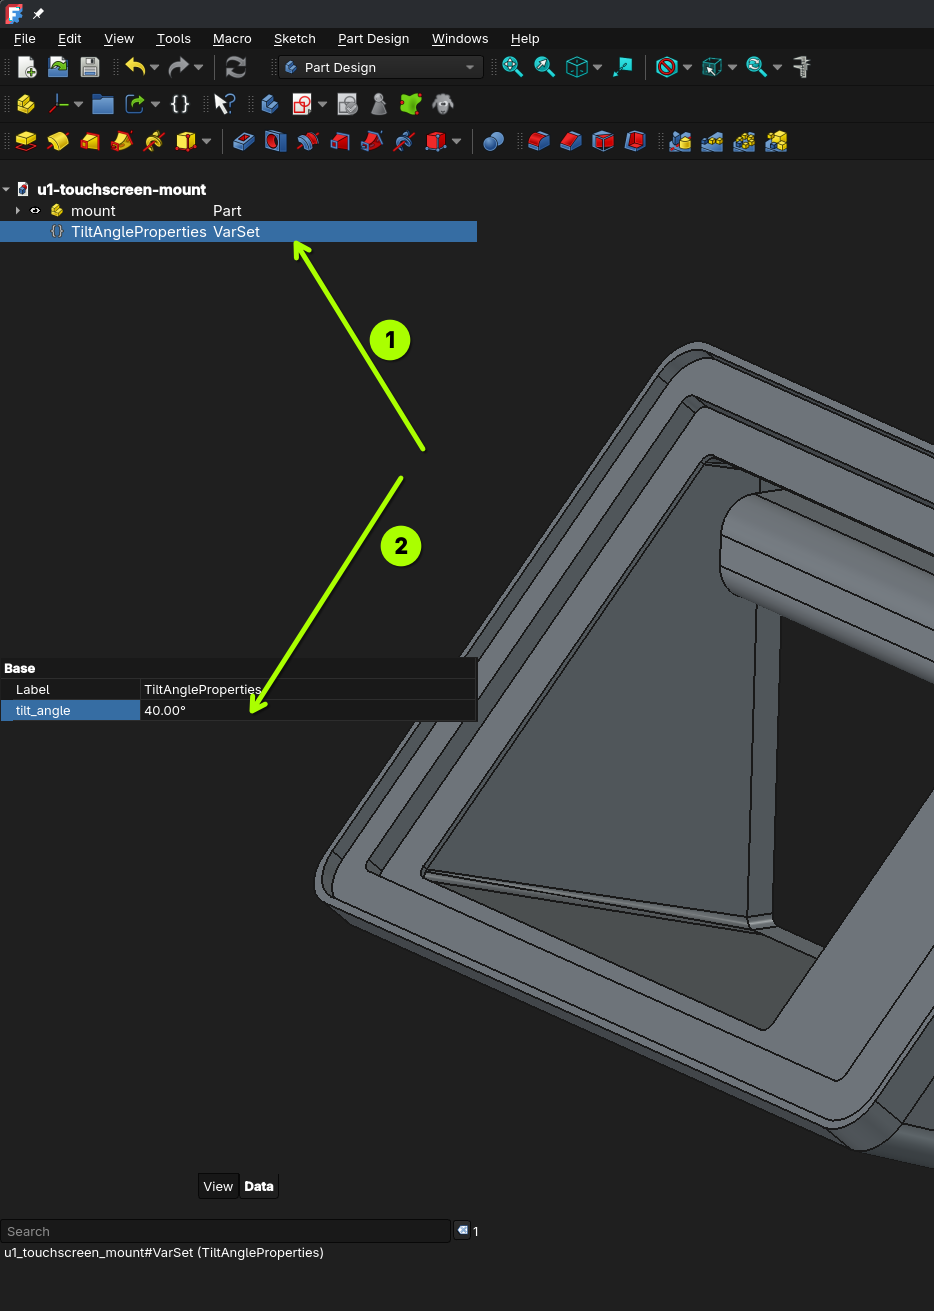
Once opened you'll see an element named "TiltAngleProperties" in the tree view on the left side.
Click
TiltAnglePropertiesand notice that you now see a property namedtilt_angleat the bottom of the tree menu.Set the
tilt_angleto your desired angle in degrees.In the tree select the main part to have it selected while exporting.
Go to File -> Export menu and select STEP format to export the customized mount.
Slice and print the exported STEP file.
Installation
To disassemble the touchscreen, follow Snapmaker Wiki for U1 touchscreen replacement
Taking off the plastic frame panel behind the screen was easy. Pressed upper frame towards front to get a bit of a gap between the outer frame and the panel, and then stuck a plastic spudger inbetween to pop it off.
For screen removal, notice that the wiki says to push the screen from the back but doesn't mention that the factory screen is glued around the edges, not just sticky taped in the middle.
To push the screen out, apply constant pressure to the bottom left corner of the screen to get the adhesive to start releasing. It's important to not apply too much force, but to apply it constantly because that's how adhesives work. It took me around 1 minute of constant force to get it started.
When unsticking and pulling flat cables, be very gentle. They are fragile.
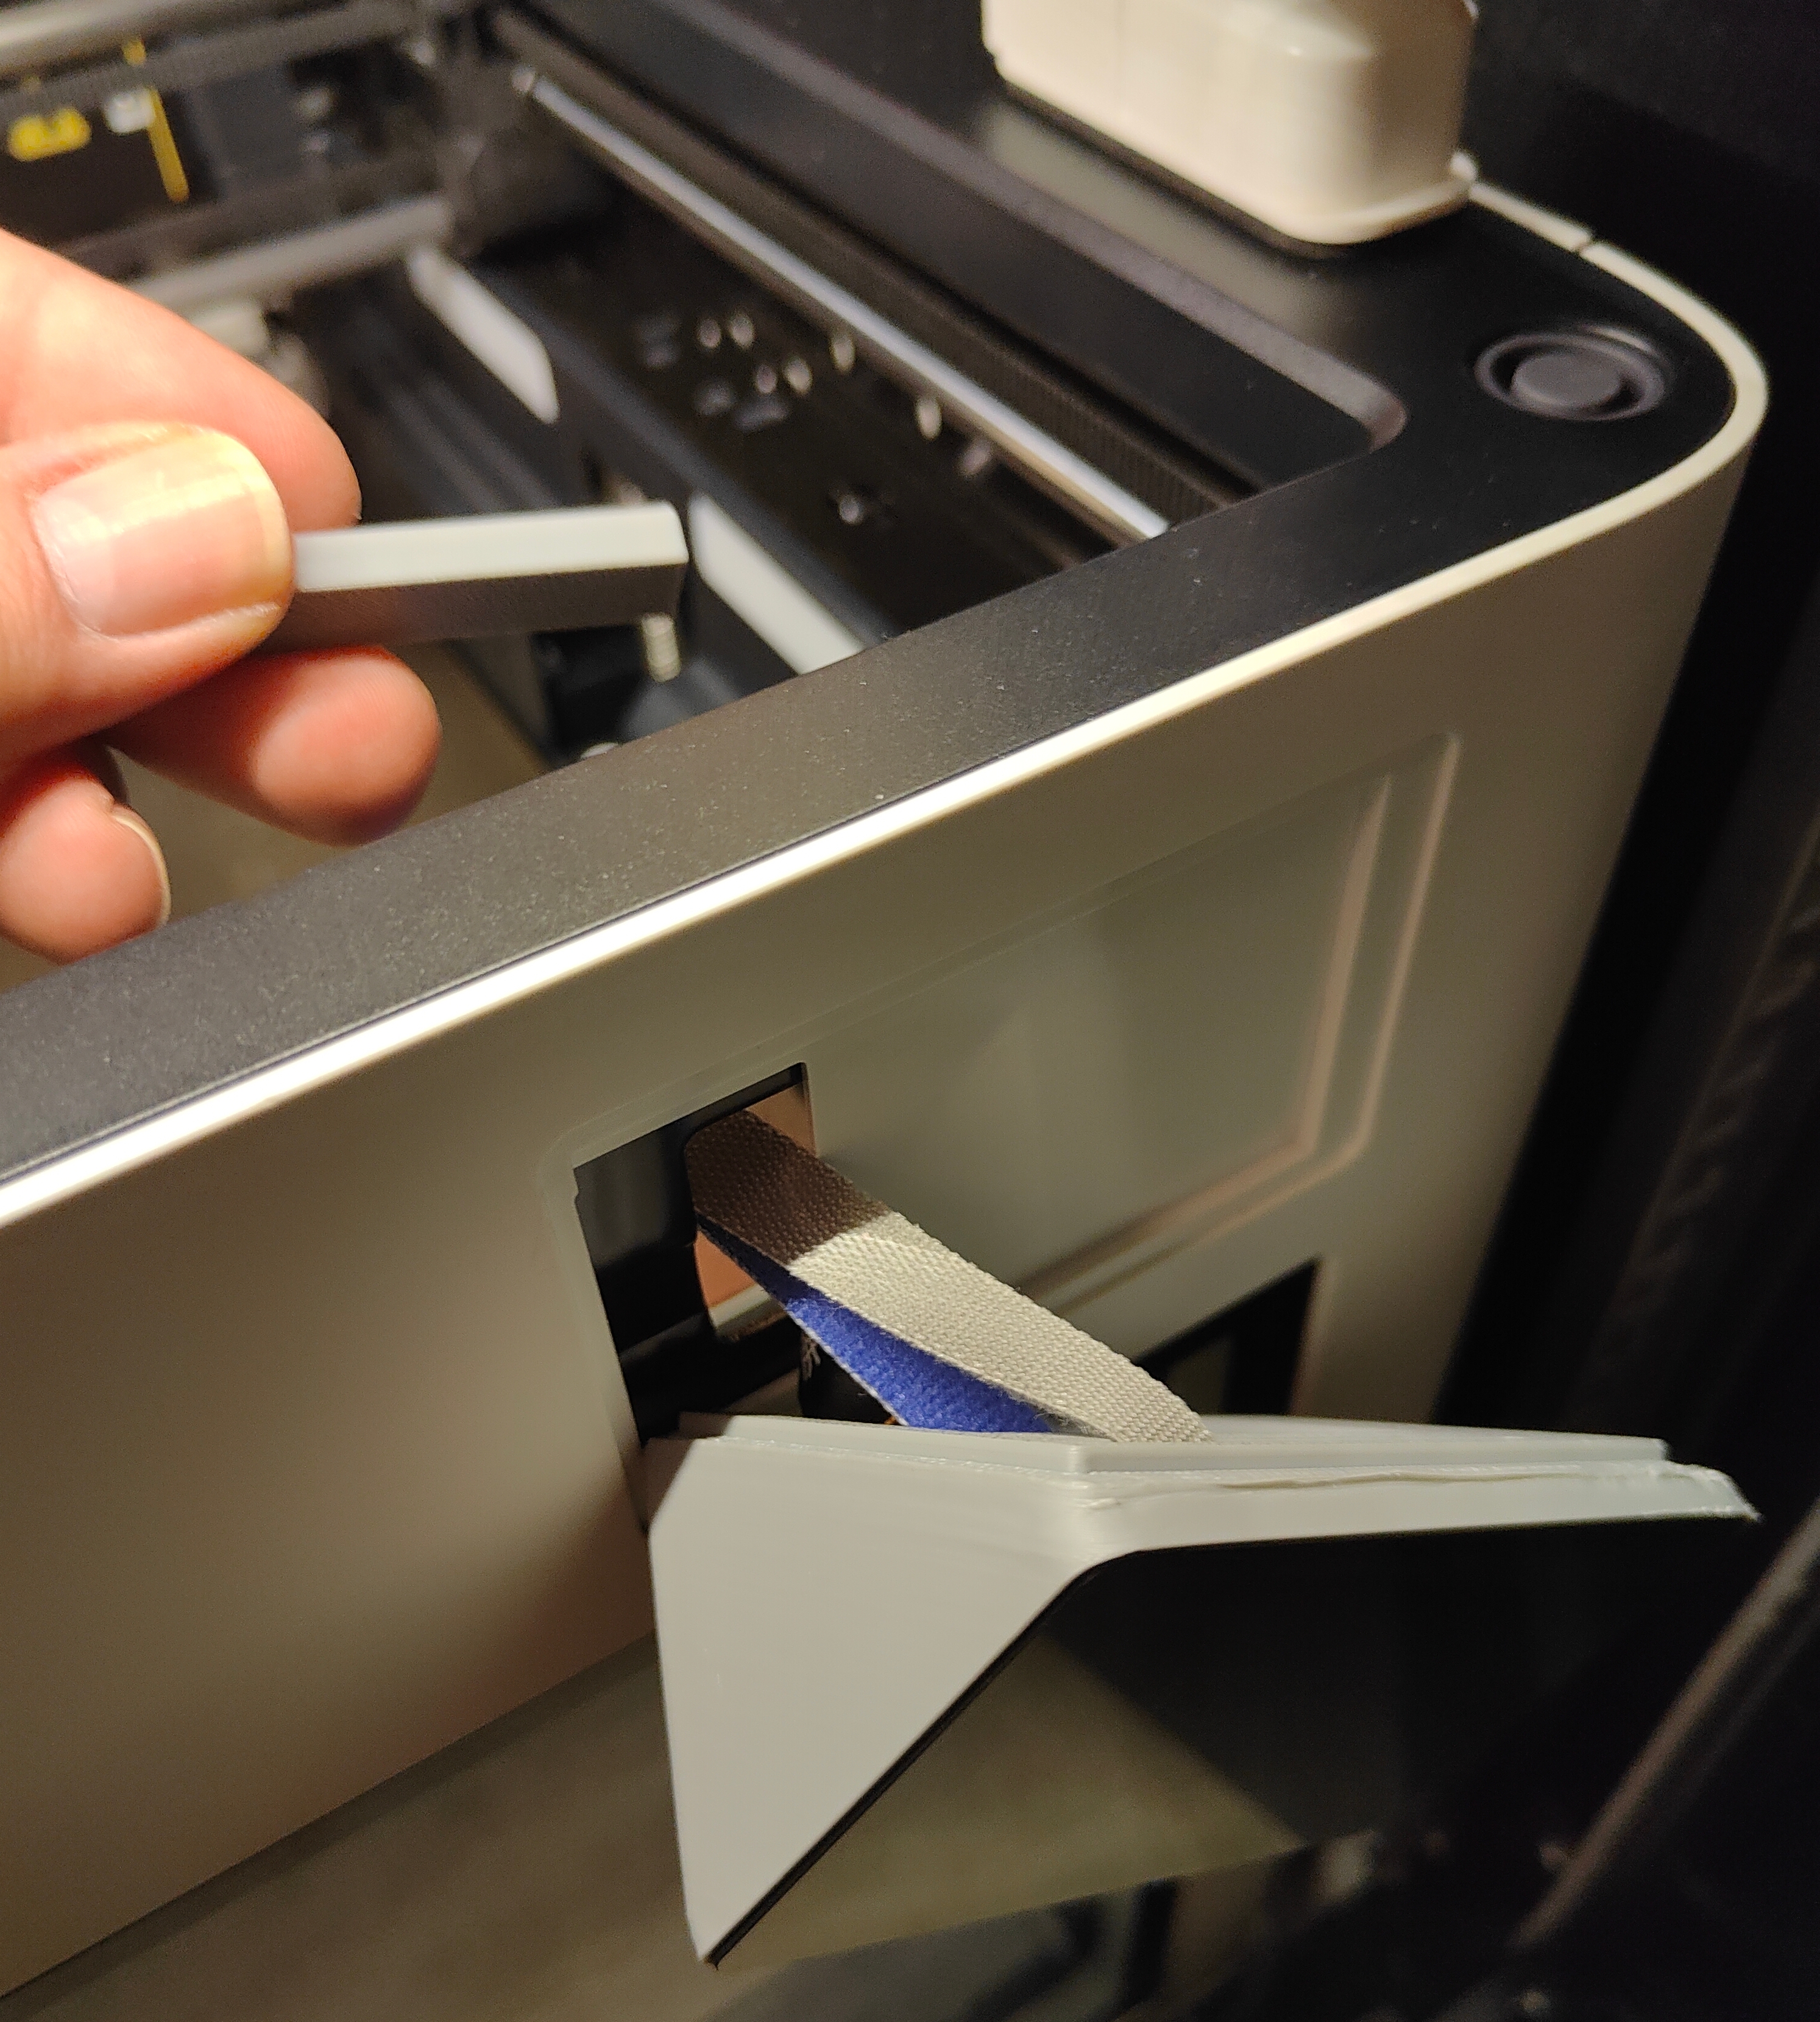
I had to unstick the black flat cable from the frame and pull it out from its hole. There's about 5cm of slack in the cable.
DO NOT PULL TOO HARD! Black cable is attached to the motherboard's connector and if you yank it out you'll have to disassemble the whole right side of the printer to reattach it.
Once the screen is unstuck from the frame, pull the screen through the mount without disconnecting it.
Put a bit of double-sided sticky tape on the back side of the screen to prevent it from vibrating out of the mount.
Don't put too much tape because you'll have a hard time getting it out later if needed. A bit is enough because the screen is snugly fit in the mount.
Pull a zip-tie through the mount's brace and into the frame's hole. Don't zip it yet.
I used some velcro instead of zip-tie because that's what I had at hand.
Pressure-fit the mount into the printer's frame. It should fit snugly and hold itself in place. If it's falling out, tune your printer because it's not printing accurately.
From inside the printer, put the brace over the hole and zip-tie it tightly to the frame.
No need to go crazy tight, but it should be tensioned enough to prevent the brace from vibrating out of place while printing.
Put printer's plastic panel back into place.


Pitfalls
I only tested this mount at a 30 and 40 angles. Screen's cable might not be long enough for 50 and 60 angles. Please check before printing.
Bill of Materials
A ziptie or velcro and a bit of double-sided sticky tape.
Changelog
2025-12-25: make the screen and mount flush and friction-fit everything
2025-12-25: replace sticky tape mounting mechanism with brace and ziptie
Support
This is provided as-is and there's no support. Instead, there is a FreeCAD source file and STP files to make it easy to modify.
Contributing
Merge requests are always welcome. The FreeCAD file is made with v1.2-dev. Please note that it is not backward compatible with older versions.
Authors and acknowledgment
Horza entirely original work.
License
This project is licensed under the terms of MIT license. No idea why Printables doesn't have this license available for selection.
Snapmaker U1 Touchscreen Tilt Mount

Publicado em 15 de jun de 2026
Gostou deste modelo? Crie uma conta grátis para salvar seus favoritos e voltar a eles depois.
Criar conta