Você está no 3DFinder
Buscamos em Thingiverse, MakerWorld e Printables ao mesmo tempo para te dar o melhor de cada uma.
Descrição
Modular Hex Wall Trellis
Build your wall. Grow your space.
The Modular Hex Wall Trellis is a customizable wall-mounted display system designed for plants, propagation stations, shelves, and decorative accessories. Expand vertically or horizontally to create a layout that perfectly fits your space.
Before You Begin
Recommended Tools
- Drill
- Pencil
- Level
- Screwdriver
- #6 Screws
- Drywall Anchors (for drywall installations)
Step 1 – Assemble Vertical Trellis Sections
Parts Required
- X Base × As Needed
Instructions
- Align the connector tabs between two X Bases.
- Press the pieces together until fully seated.
- Apply a small amount of super glue to each vertical connection.
- Continue adding X Bases until the desired height is reached.
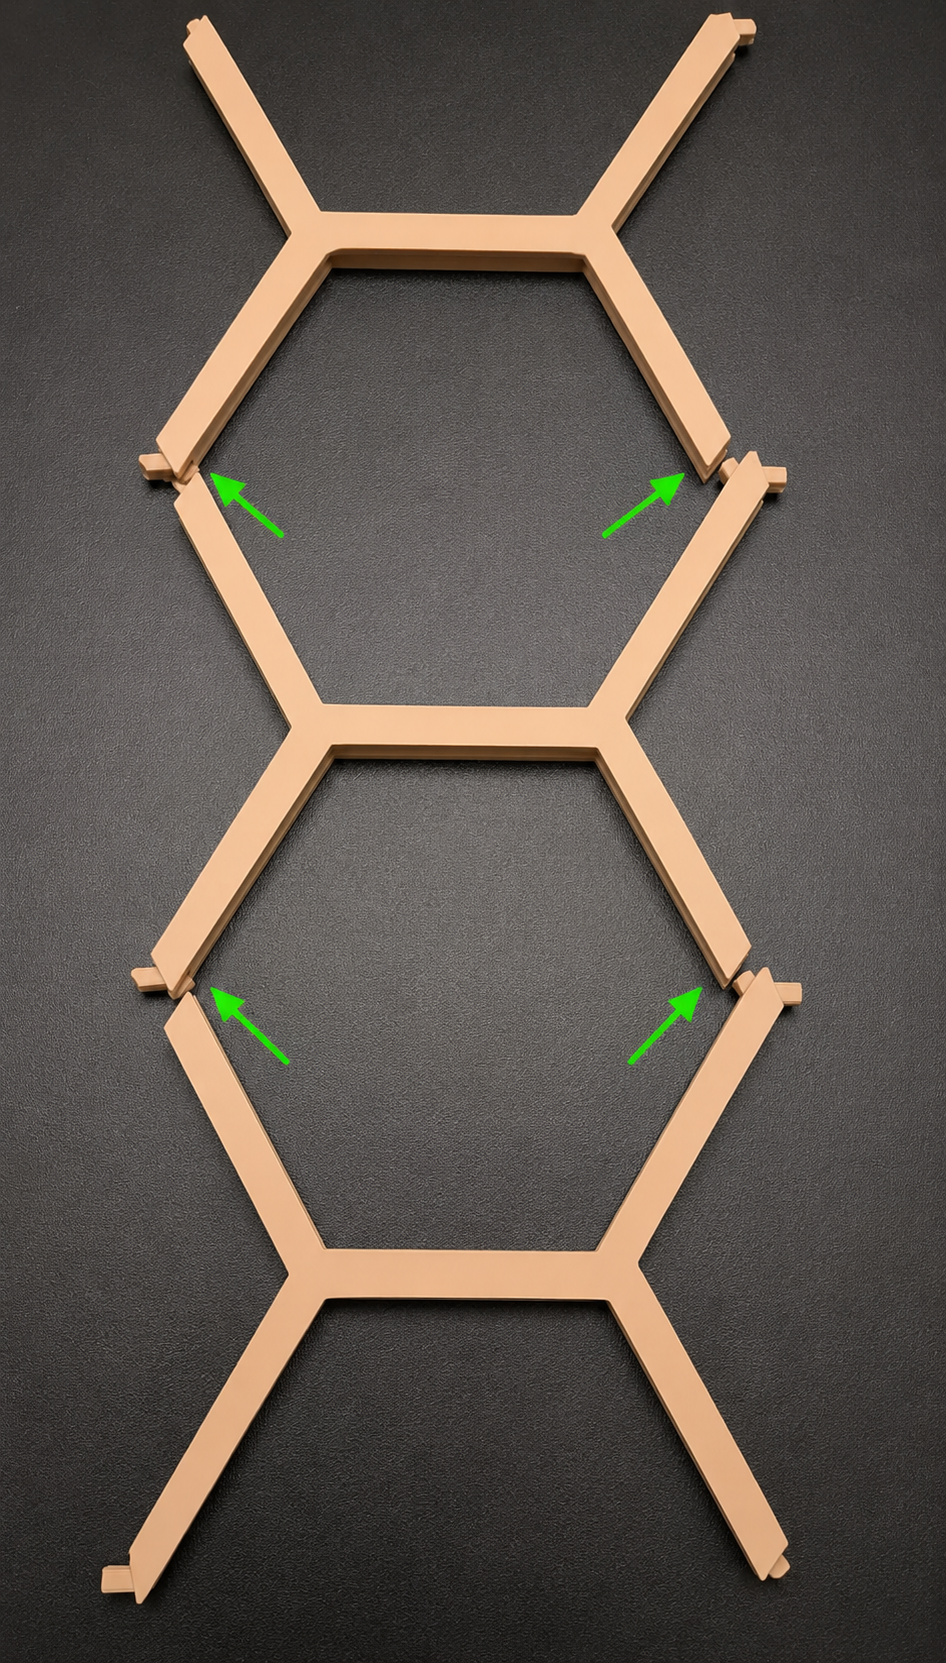
Recommended
Super glue is strongly recommended for all vertical X Base connections to maximize rigidity and long-term durability.
Step 2 – Connect Trellis Sections
Parts Required
- Horizontal Connector × As Needed
Instructions
- Position two assembled trellis sections side-by-side.
- Insert a Horizontal Connector between the matching connection points.
- Press firmly until fully seated.
- Repeat for all desired connection locations.
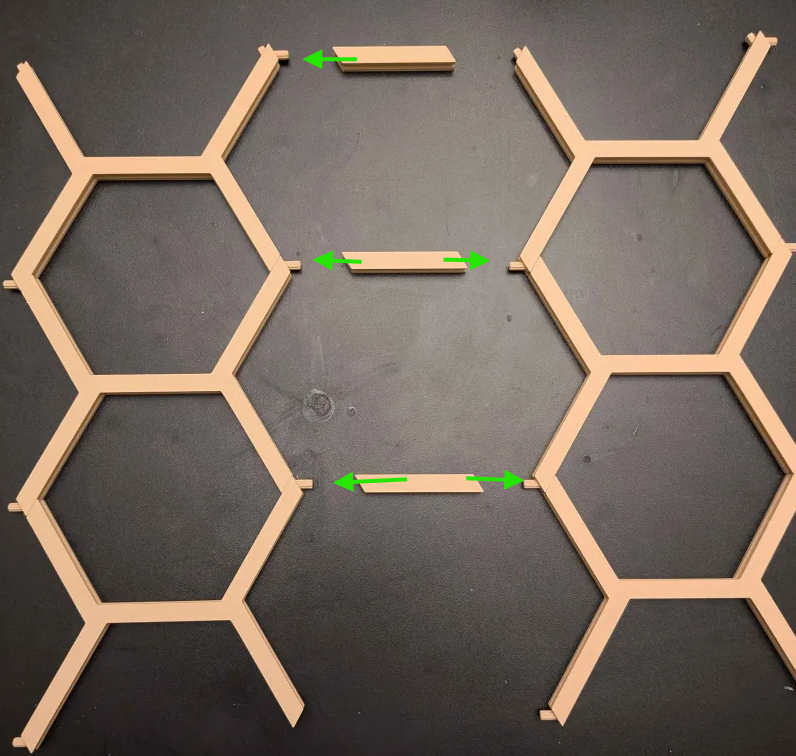
Optional
Horizontal Connectors may be glued for a permanent installation. Leave them unglued if you plan to experiment with different end-cap styles later.
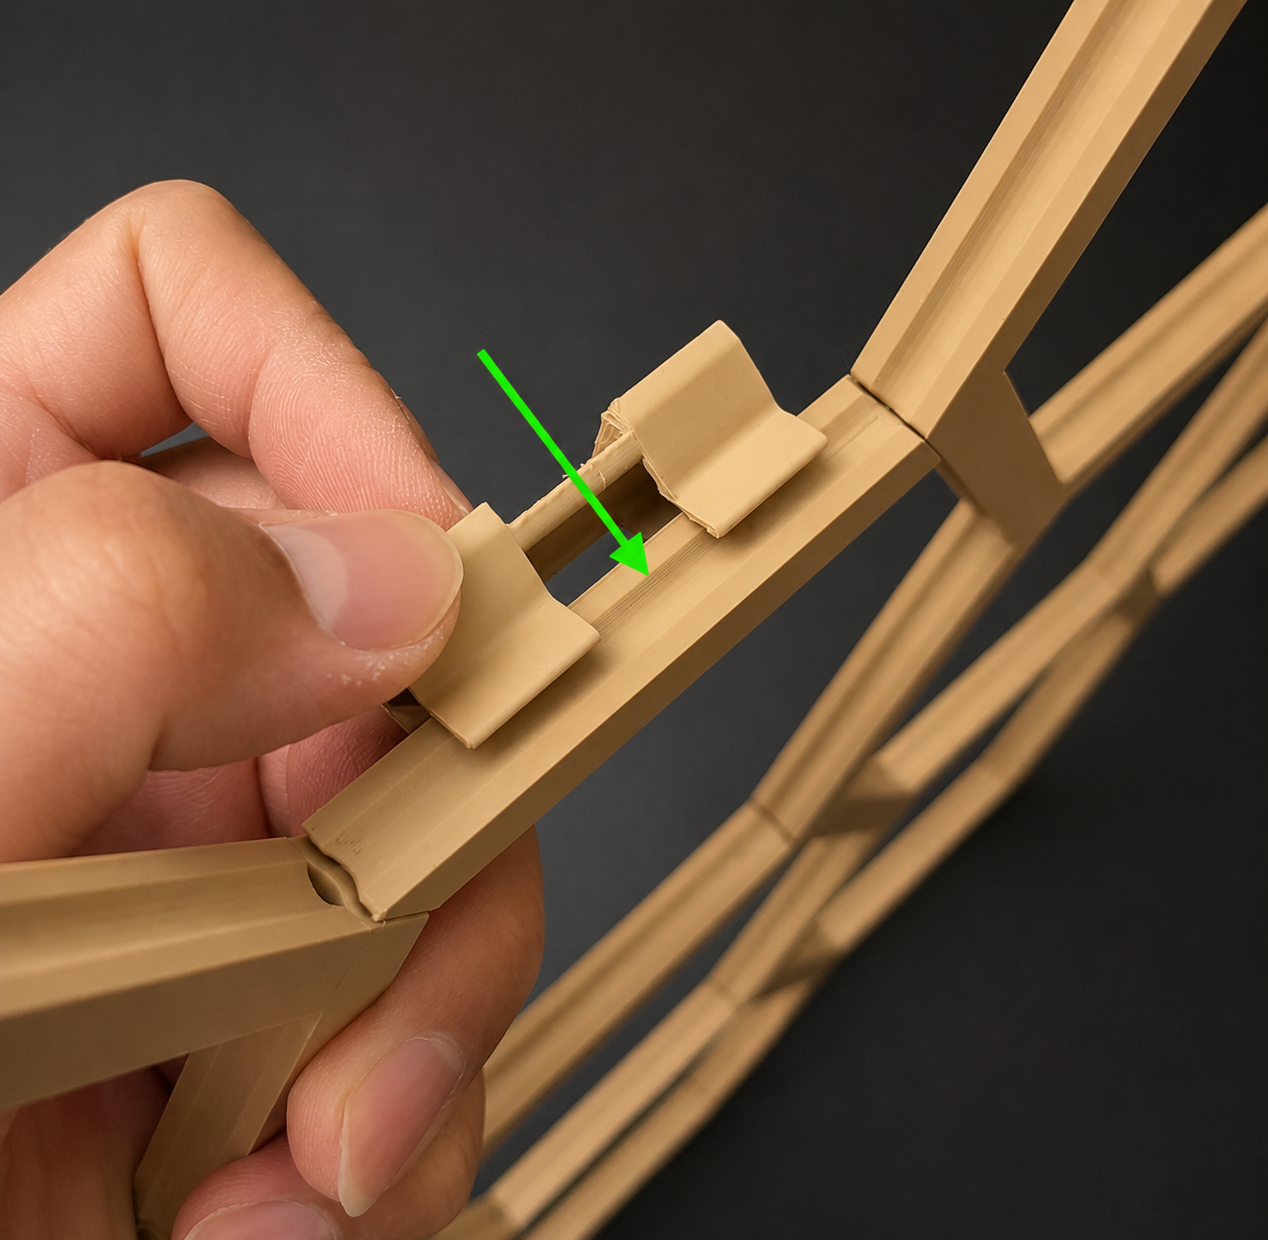
Step 3 – Install Top End Caps
Due to the modular design, a small opening remains at the top of each completed hexagon. This is intentional and allows the trellis to expand in multiple directions.
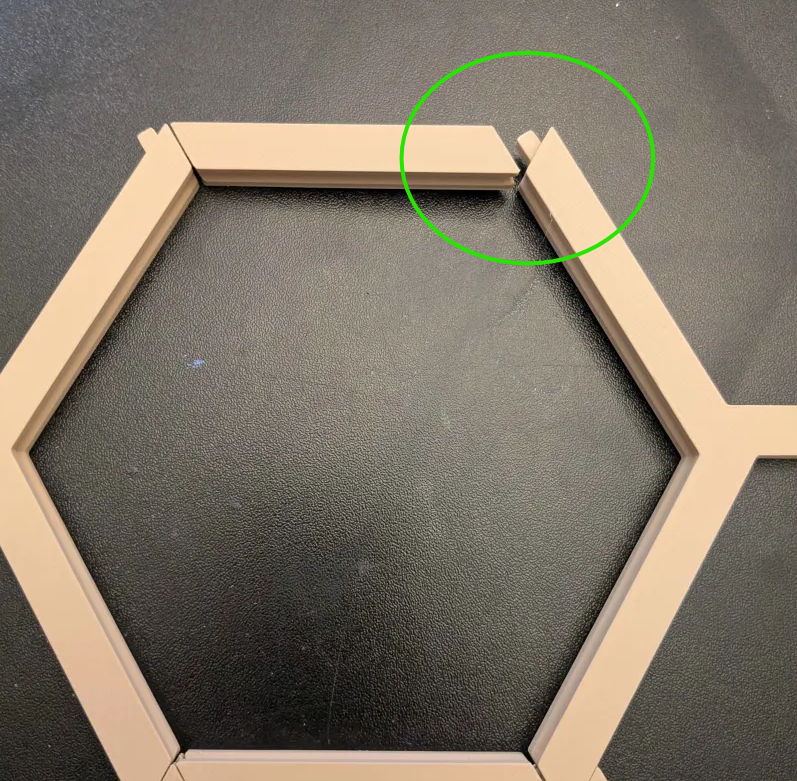
Choose one of the following finishing options.
Option A – Organic End Cap
- Locate the opening at the top of the hexagon.
- Insert the Organic End Cap into the exposed connector.
- Press firmly until seated.
This version creates a more natural, imperfect branch-like appearance.

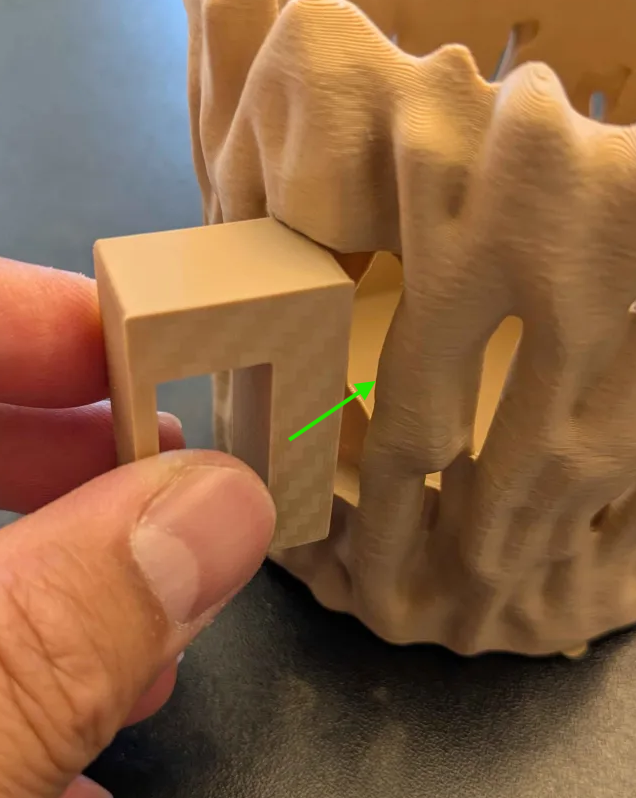
Option B – Full End Cap
- Remove the Horizontal Connector from the top opening.
- Replace it with the Full Top End Cap.
- Press firmly until seated.
This version creates a clean and symmetrical hexagon shape.
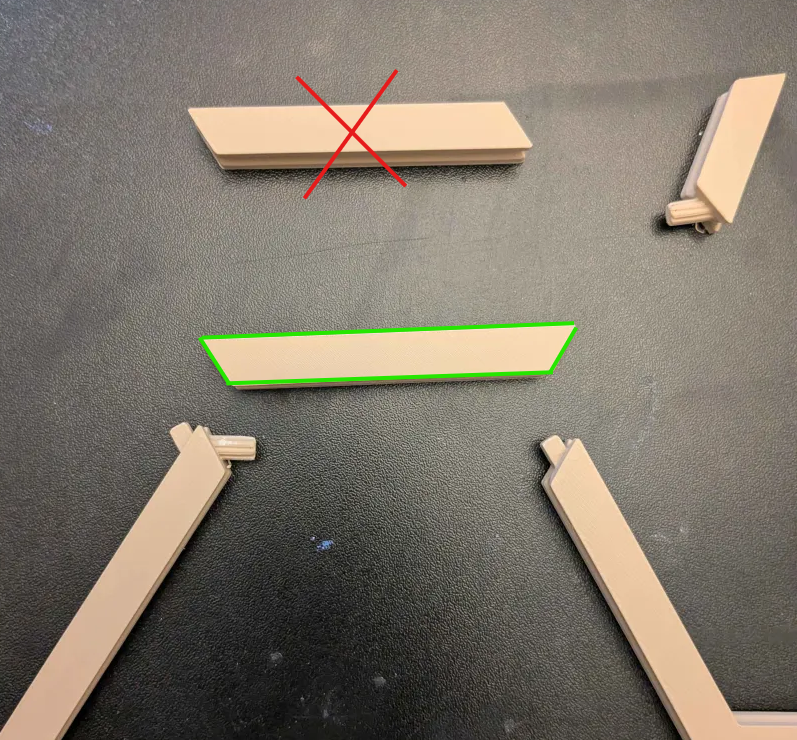
Additional End Caps
Optional long and horizontal end caps are included for users who want additional organic imperfections and custom styling. (included in the profile)
Step 4 – Mark Mounting Locations
Parts Required
- Wall Marker Template
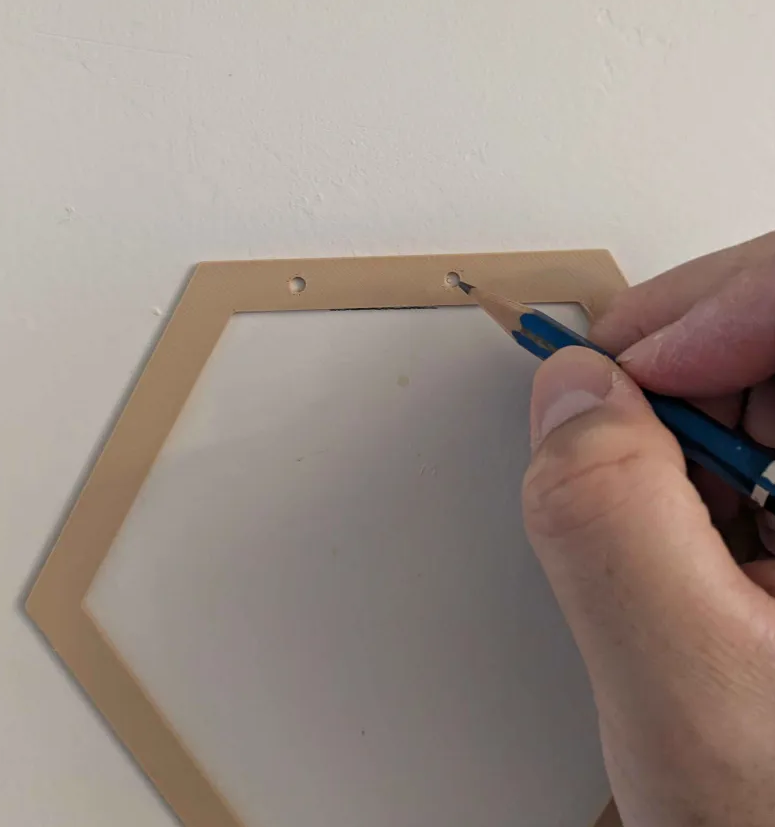
Instructions
- Determine the desired location for your trellis.
- Hold the Wall Marker Template against the wall.
- Use a pencil to mark the mounting hole locations.
- Repeat for all mounting positions required by your layout.
Tip
Use a level before marking to ensure the trellis will be installed straight.
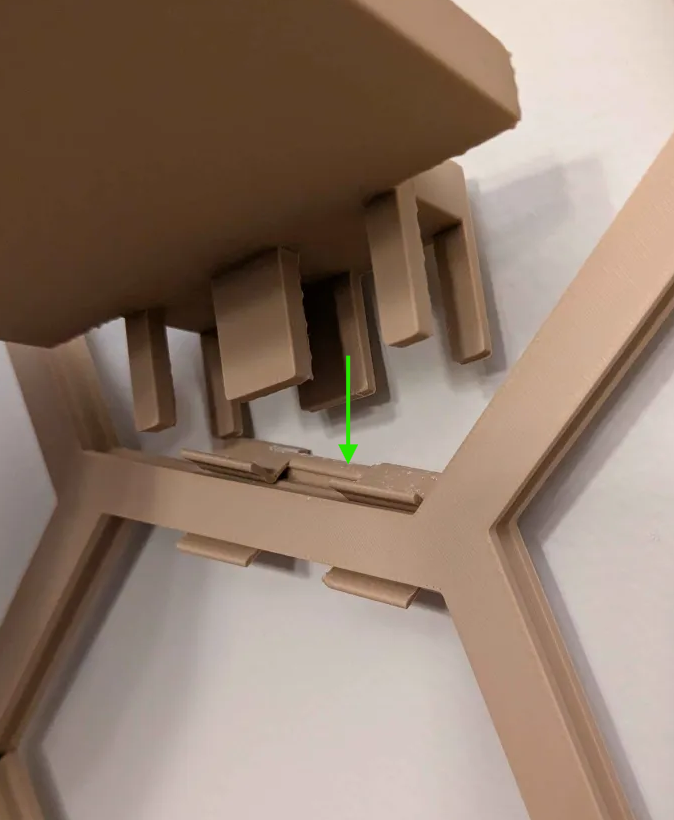
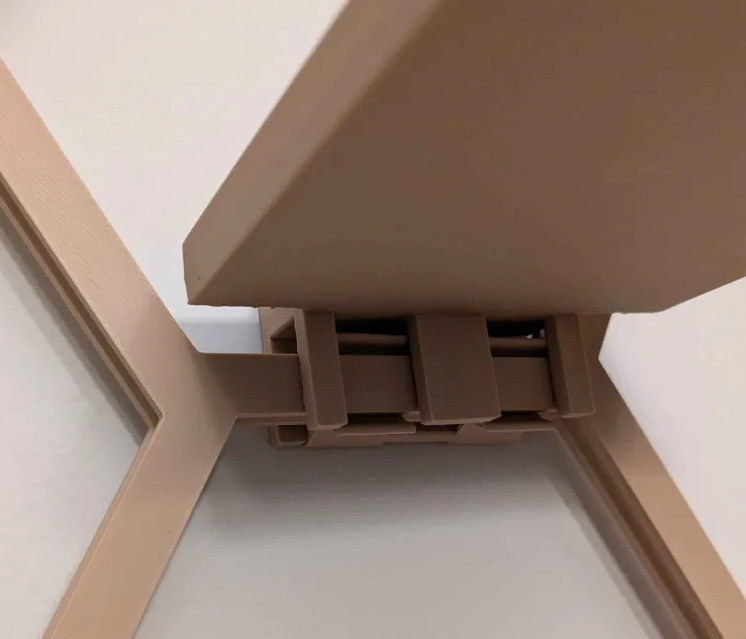
Step 5 – Install Wall Mounts
Parts Required
- Wall Mounts × As Needed
- #6 Screws
Instructions
- Drill pilot holes at the marked locations.
- If mounting into drywall, install drywall anchors.
- Position the Wall Mount over the drilled holes.
- Secure the Wall Mount using #6 screws.
- Repeat for all mounting locations.
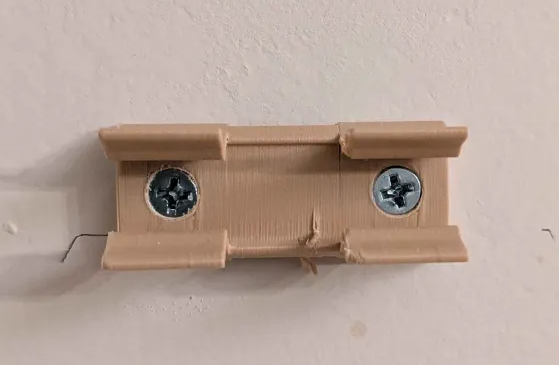
Important
Always verify alignment before fully tightening the screws.
Recommendation
Use drywall anchors whenever mounting directly into drywall without a stud.
Installation Tip – Installing Large Layouts Solo
Installing a large trellis by yourself can be challenging. The following method makes positioning additional wall mounts much easier.
Instructions
- Install wall mounts on one side of the trellis.
- Temporarily hang the trellis on those mounts.

- Hold the opposite side in the desired position.
- Mark the locations for the remaining wall mounts.
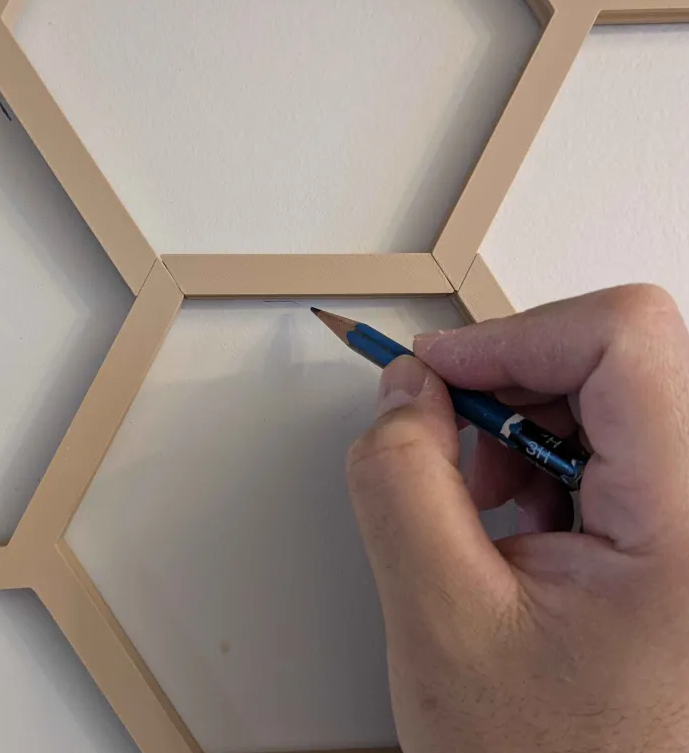
- Remove the trellis.
- Use the Wall Marker Template to mark the final screw locations.
- Install the remaining wall mounts.
Helpful Tip
This method allows a single person to install large trellis layouts without needing a second set of hands.
Mounting Recommendations
The number of wall mounts required depends on the size of your installation.
Small Trellis Layouts
For smaller layouts, mounting points at the outer corners are typically sufficient.
- Top Left
- Top Right
- Bottom Left
- Bottom Right
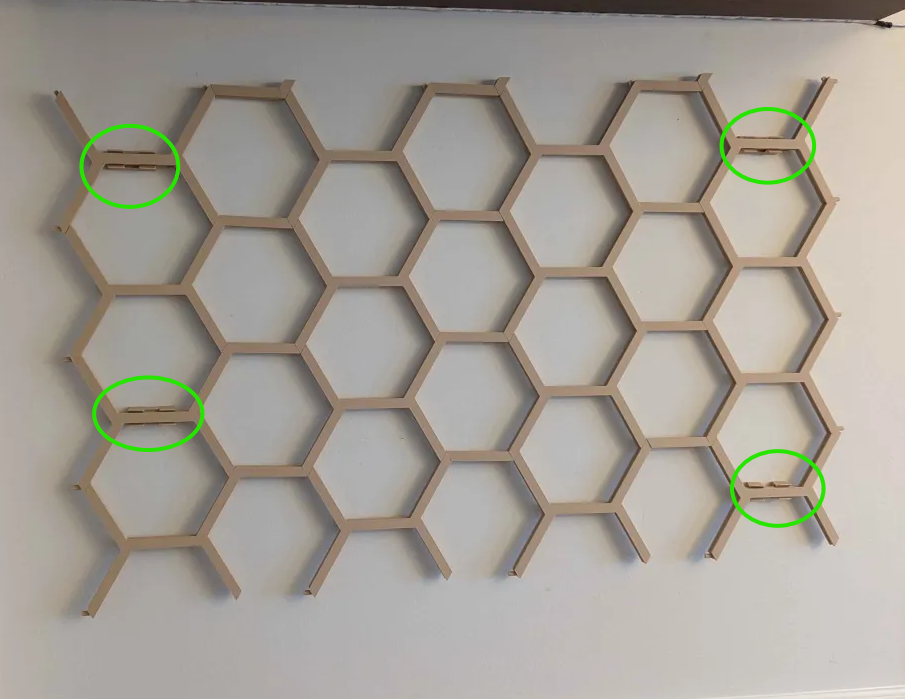
This approach minimizes wall holes while providing excellent support.
Large Trellis Layouts
For larger installations, additional wall mounts should be added throughout the center of the trellis.
Tip
Add wall mounts anywhere the trellis feels unsupported or flexible.
Accessories & Customization
The Modular Hex Wall Trellis includes several optional accessories that can be attached and repositioned at any time.
Mini Shelf Attachment
Perfect for small décor items and lightweight planters.
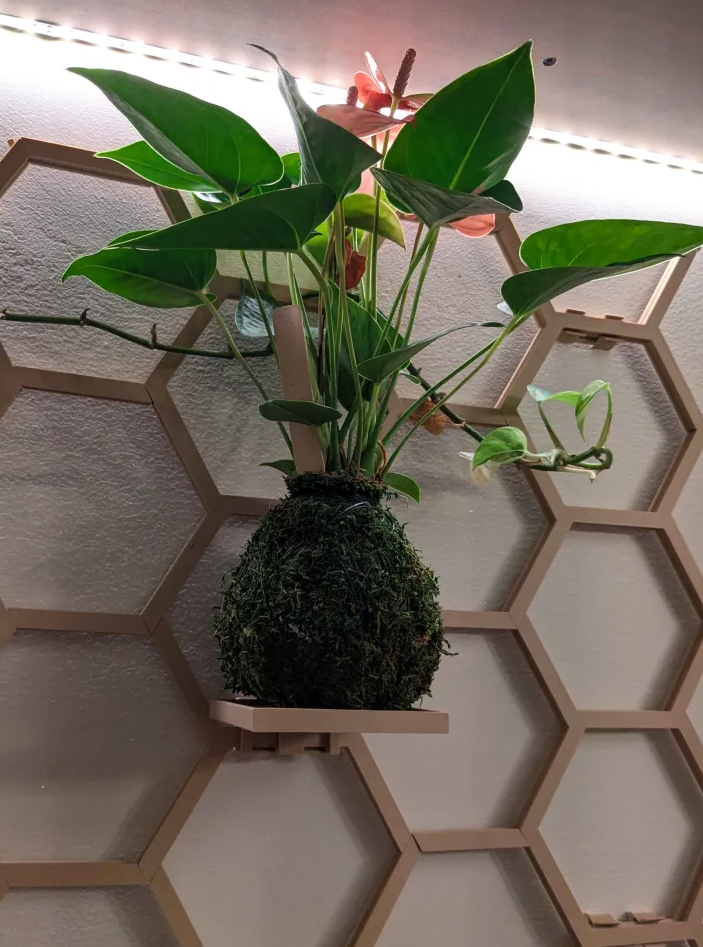
Installation
- Install a Wall Mount in the desired location.
Slide the Mini Shelf onto the Wall Mount until fully seated.
Important
The Mini Shelf should always be attached to a wall-mounted Wall Mount for maximum strength.
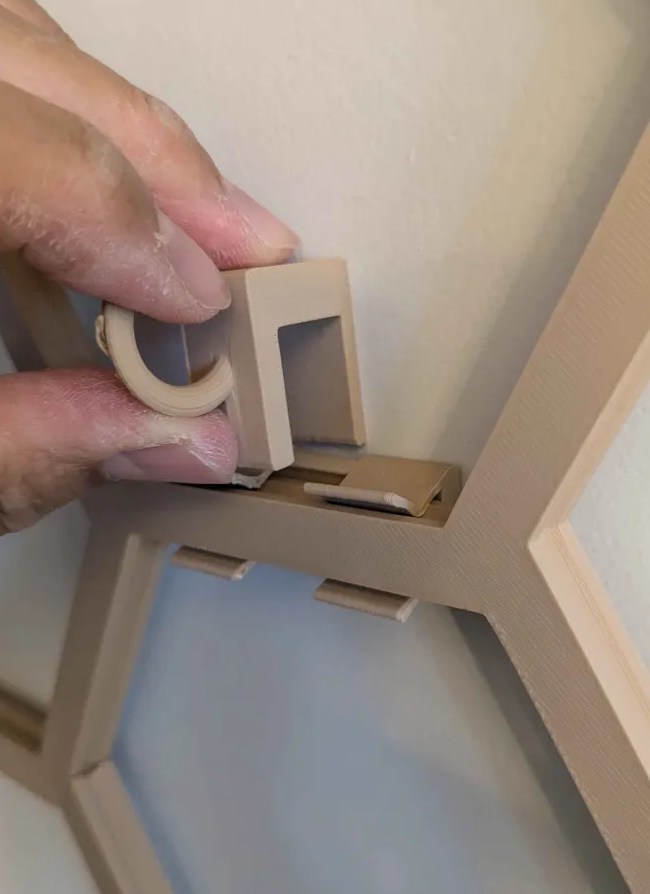
Pint Planter Holder
Designed to support small planters and decorative containers.
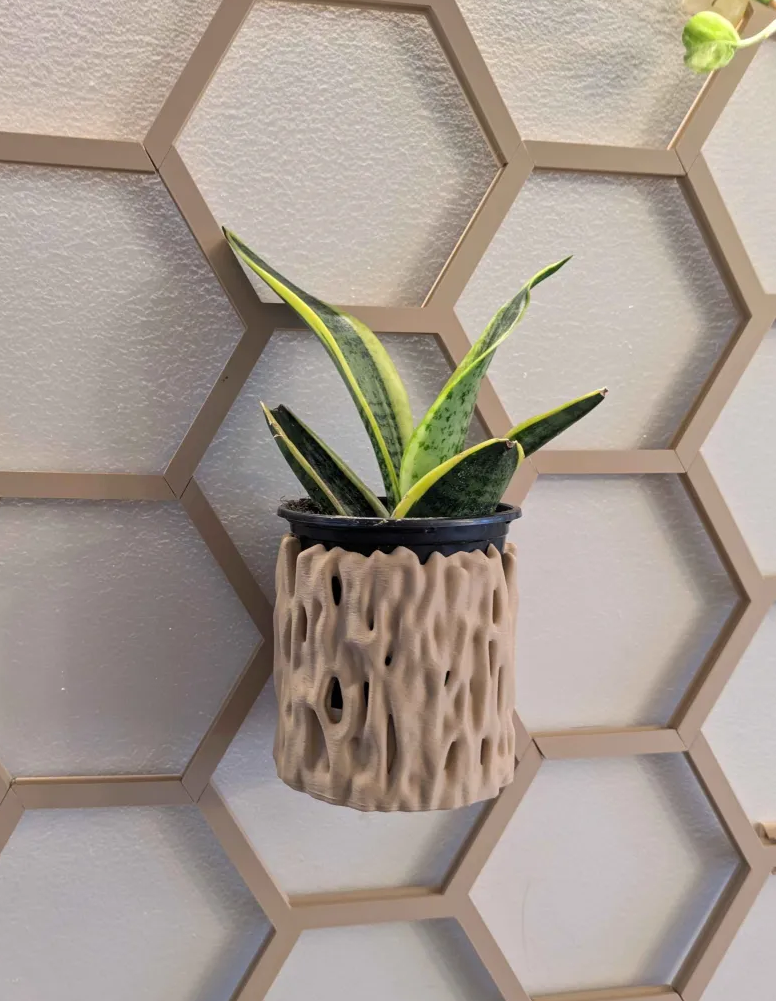
Installation
- Install a Wall Mount in the desired location.
- Attach the wall mount hook to the Pint holder. Use super glue for this.
(the reason why the wall mount adapter is separate. is because of the layer lines. this way, it has more strength) - Slide the Pint Planter Holder onto the Wall Mount (like the other ones).
- Place the planter into the holder.
Important
Always use a wall-mounted Wall Mount when supporting planters.
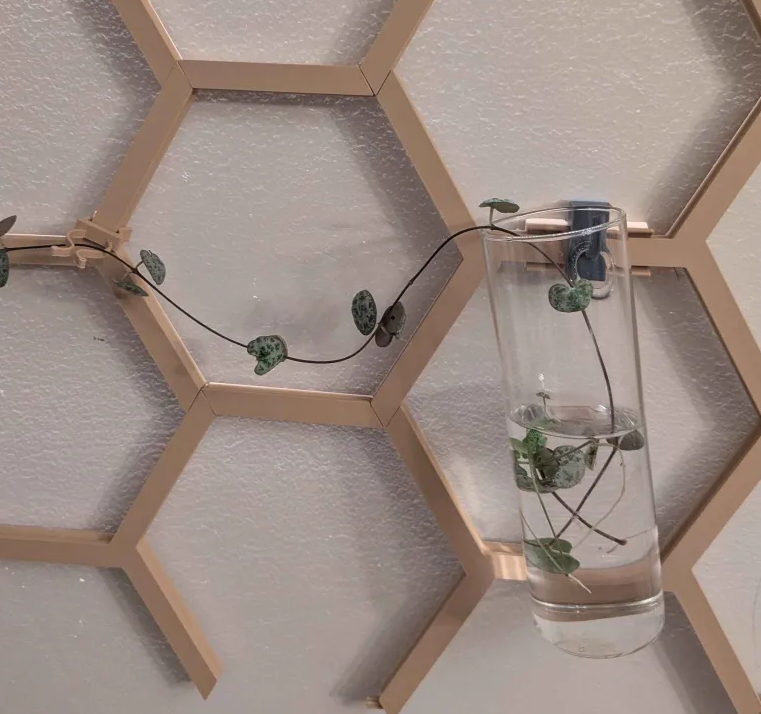
Plant Hook Attachment
Ideal for propagation tubes, lightweight hanging plants, and decorative items.
Option A – Wall Mounted
- Install a Wall Mount on the wall.
- Attach the Plant Hook to the Wall Mount.
Recommended for maximum strength.
Option B – Trellis Mounted
- Snap a Wall Mount directly onto the trellis.
- Attach the Plant Hook to the Wall Mount.
For lightweight accessories, the Wall Mount acts as a clamping point and does not require an additional screw.
Tip
This method works especially well for glass propagation tubes and other lightweight decorations.
You're All Set!
Your Modular Hex Wall Trellis is now ready for customization.
Mix and match:
- End Caps
- Shelves
- Hooks
- Planters
to create a unique display for plants, décor, propagation stations, and more.
Thank you for supporting my design. Happy printing and happy planting!